


1
Manual
picochet Reader/Writer
ME-P1000-U
1. Device Driver Installation
2. Re-Installation of the picochet device driver
3. Installation of the picochet Utility Software
4. Uninstallation of the picochet Utility Software
5. How to use the picochet utility software
6. Specification
Notice
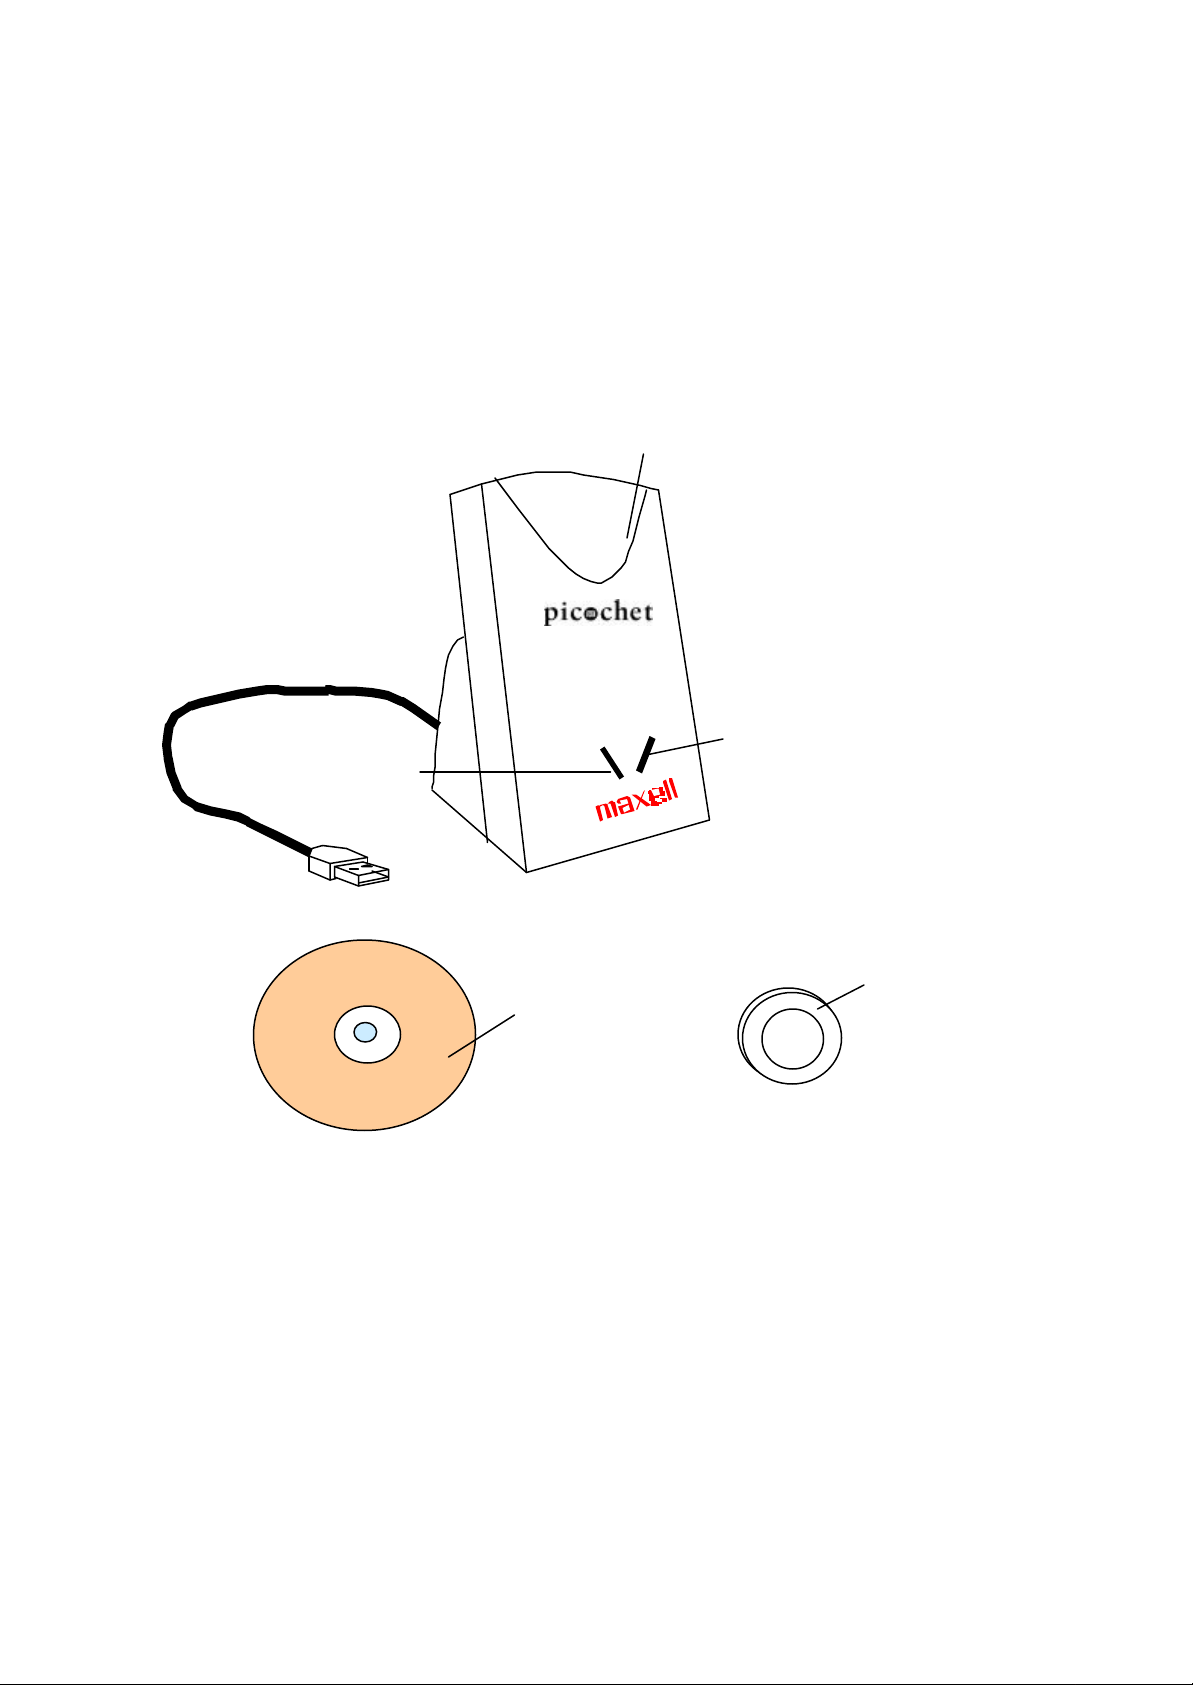
2
Slot for Token or Card
Access Lamp (red)
BUSY
1 CD-ROM
POWER
Power Lamp (green)
1 Token
3
1.Device Driver Installation
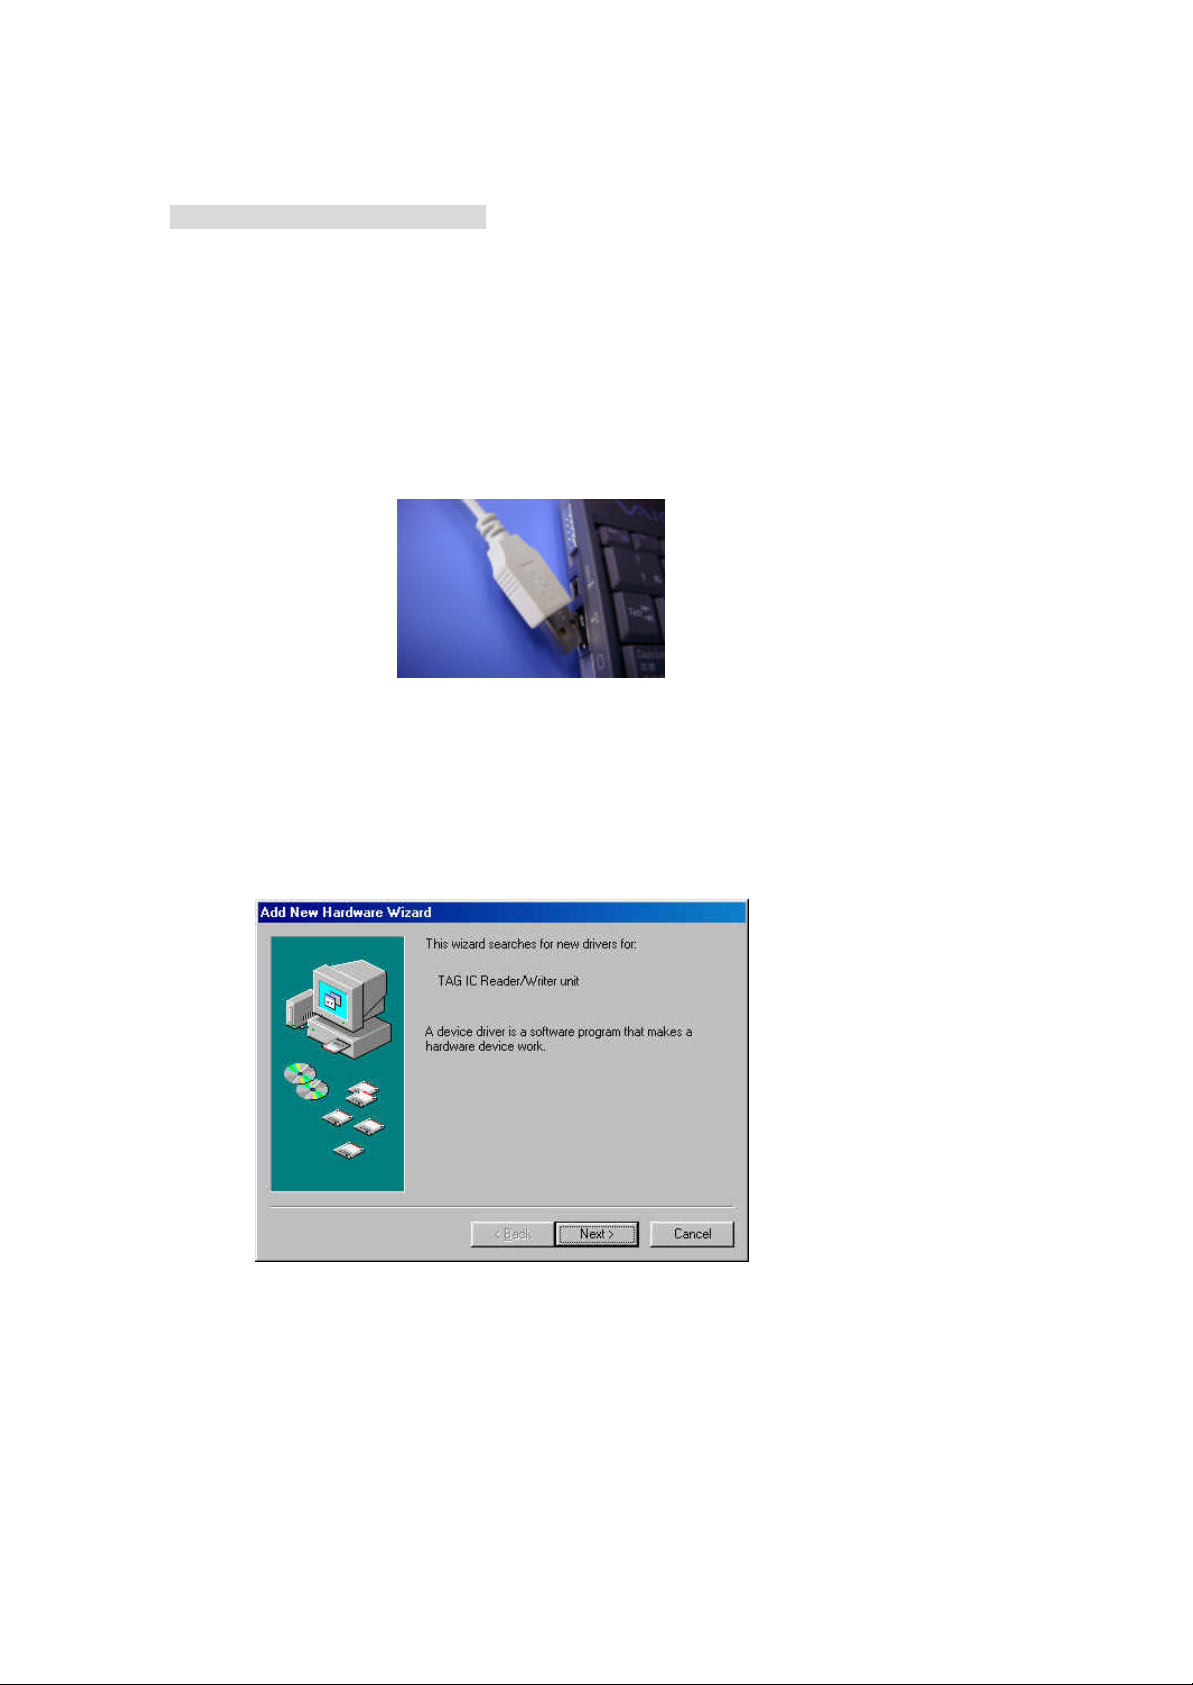
①Plug the picochet to USB port of PC. Due to some reason not known yet,
there are some cases where communication between the picochet and PC does
not work well when there is a hub placed between the picochet and the root hub.
So place the unit directly to the root hub that’s placed in the main case of PC.
Consult the PC manual for the location of USB root hub in your PC.
Once the picochet is plugged into USB port, follow the steps below to install the
appropriate device driver.
②In a short while, screen message claiming ‘New device is detected’ will be
displayed as shown below. Click on "Next" button.
4
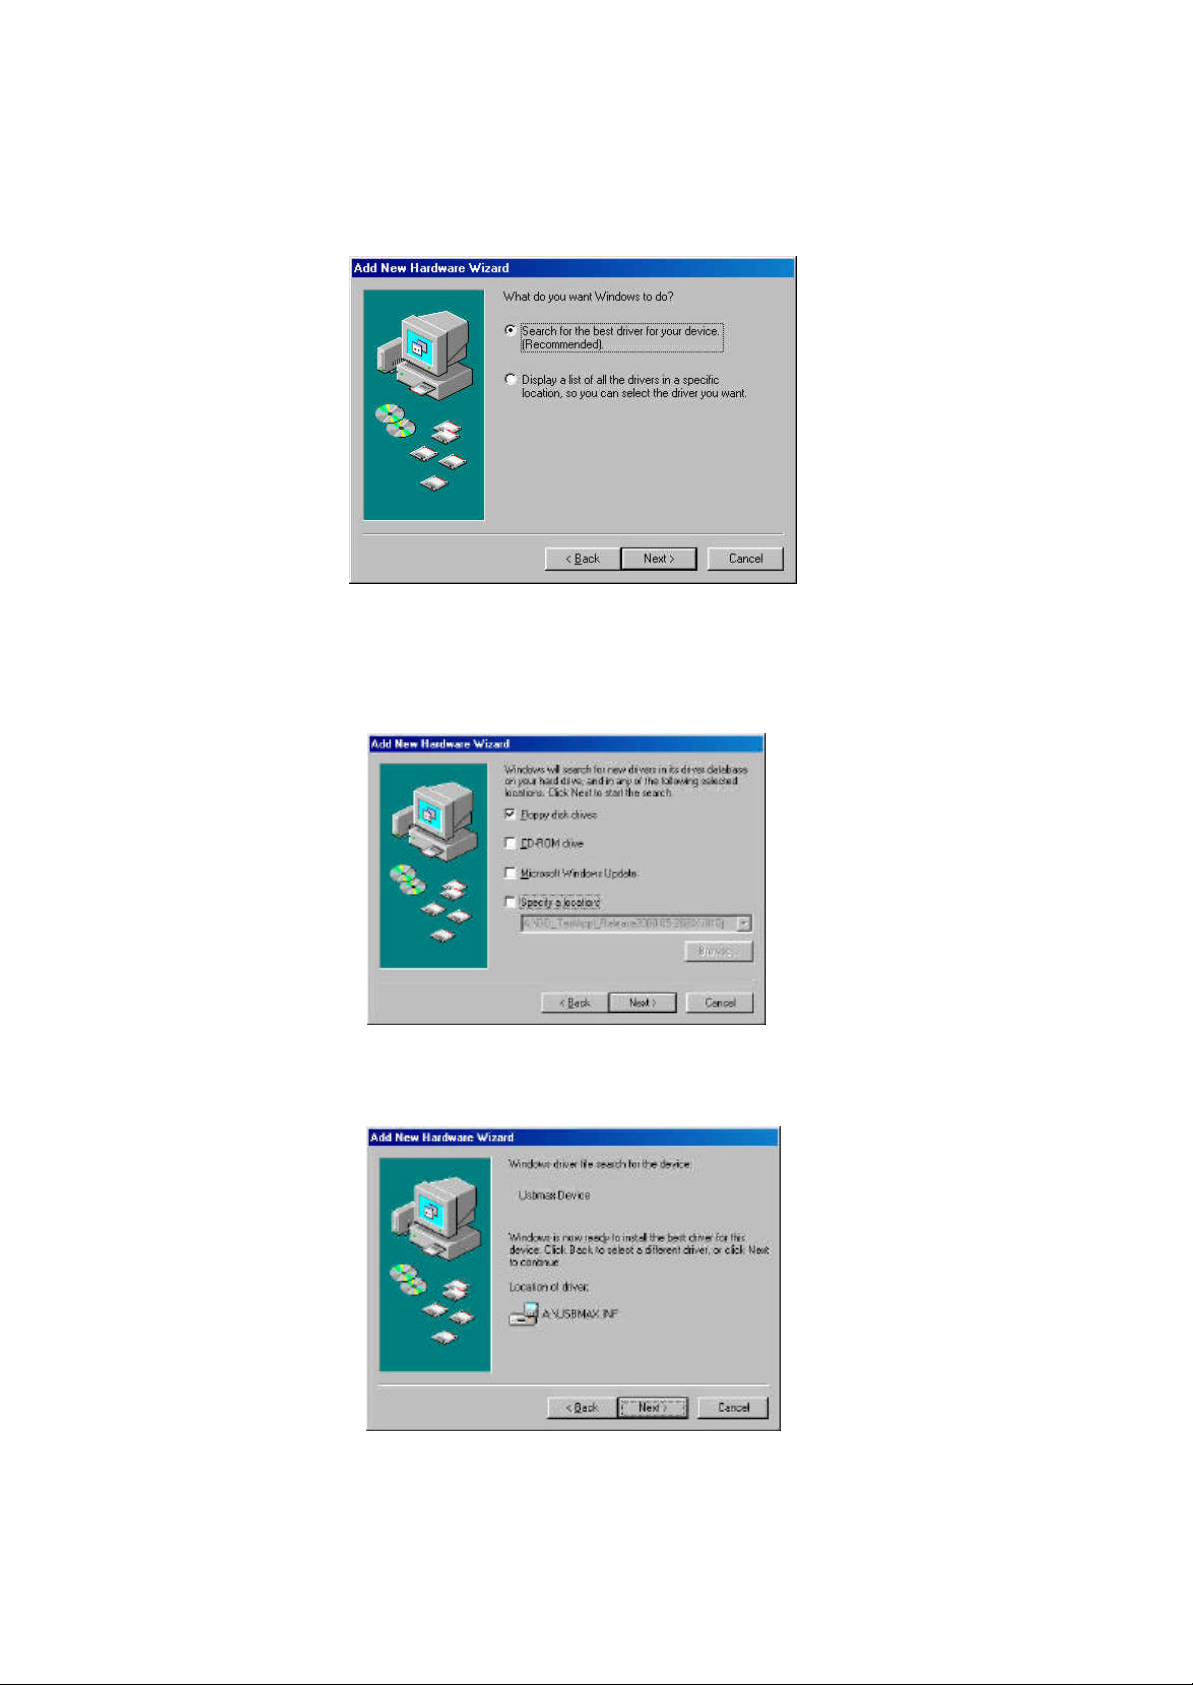
③Click on the "Next" button.
④ When a screen message shown below appears, insert the floppy
diskette(Disk1) containing USB Device Driver into the floppy disk drive, select
Floppy disk drives, and then click on the "Next" button.
⑥Click on the "Next" button, when another message shown below appears.
5
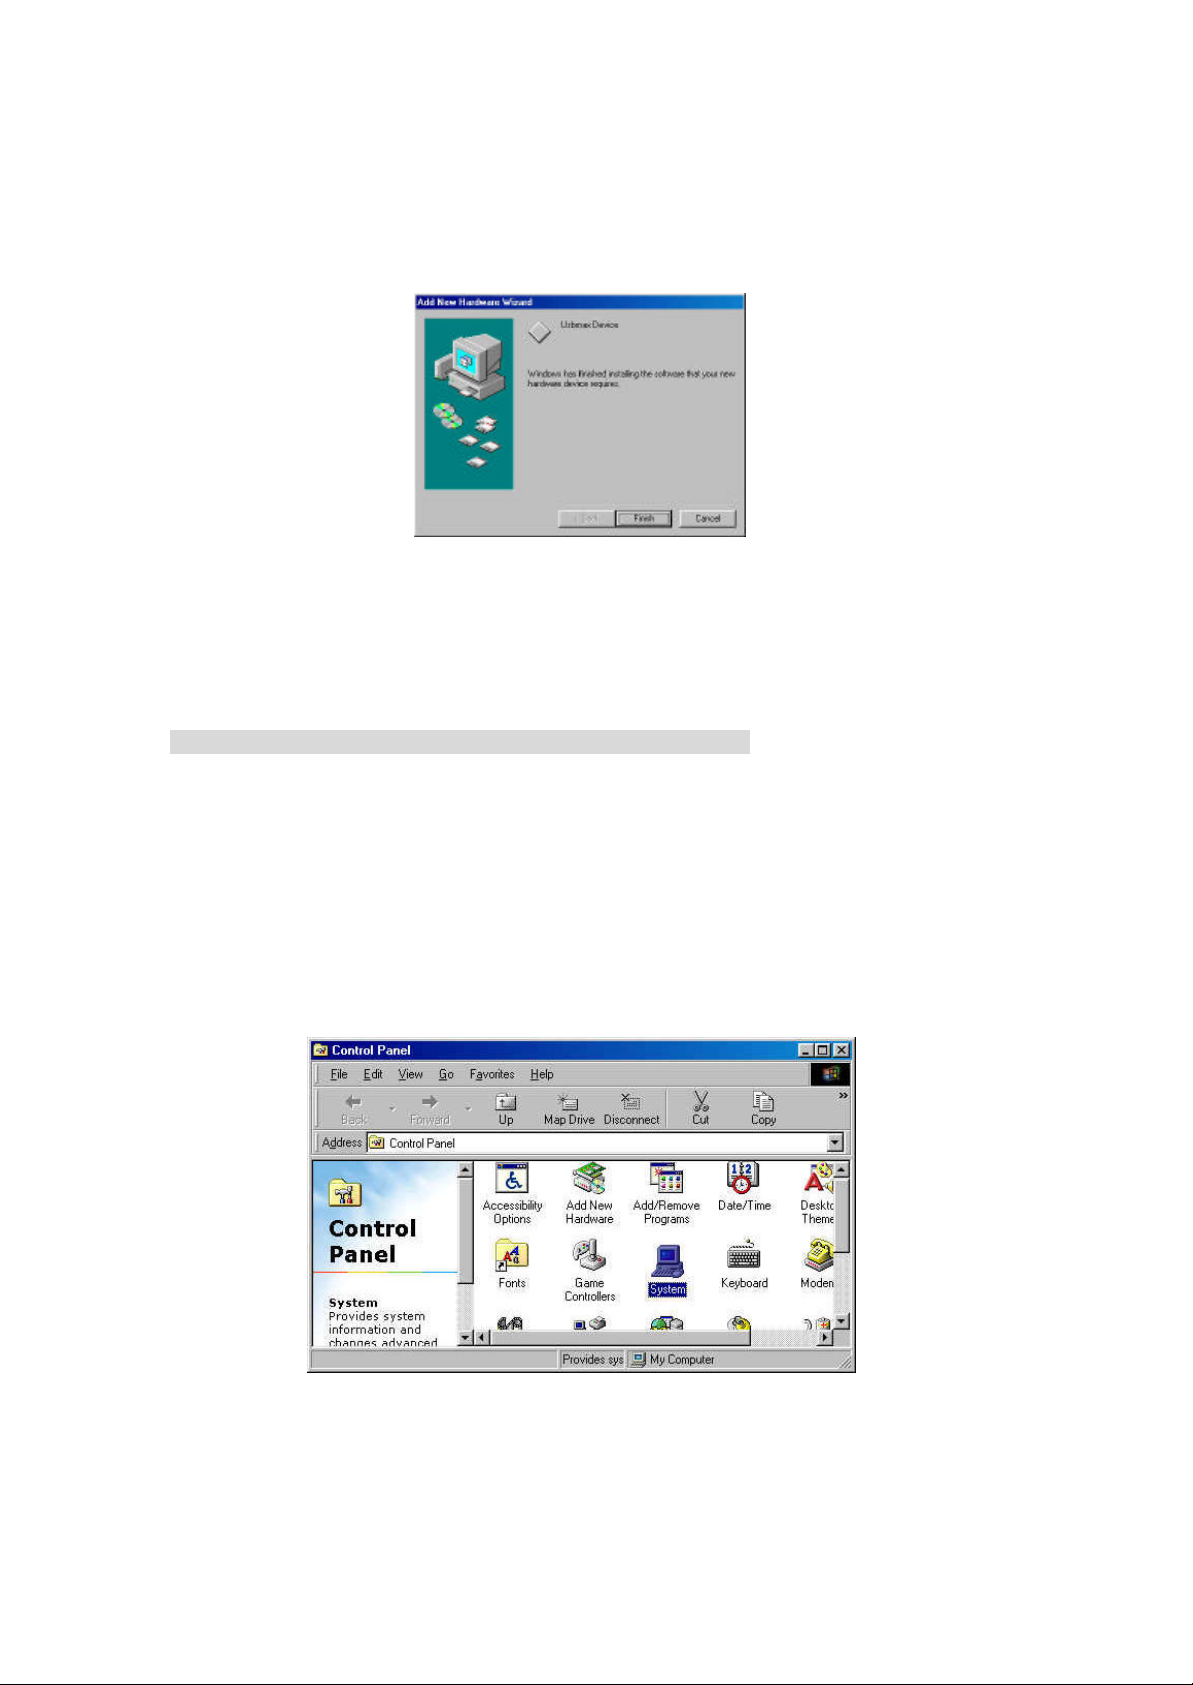
⑦Click on the "Finish" button, when another message shown below appears on
your PC monitor.
⑧At this time, if PC recognizes the picochet properly, green "Power" LED of
the picochet will be lit, and the device driver installation for the Reader/Writer
for the picochet is finished.
Cases where the picochet is not recognized by PC
Even if the picochet is properly connected to USB port of PC, the cases where
Add New Hardware Wizard does not get executed, are usually due to the fact
that USB port is not configured to be usable in PC configuration.
Follow the steps below to make USB port usable.
①Select Control Panel by selecting Settings from Start menu.
②Select System from Control Panel.
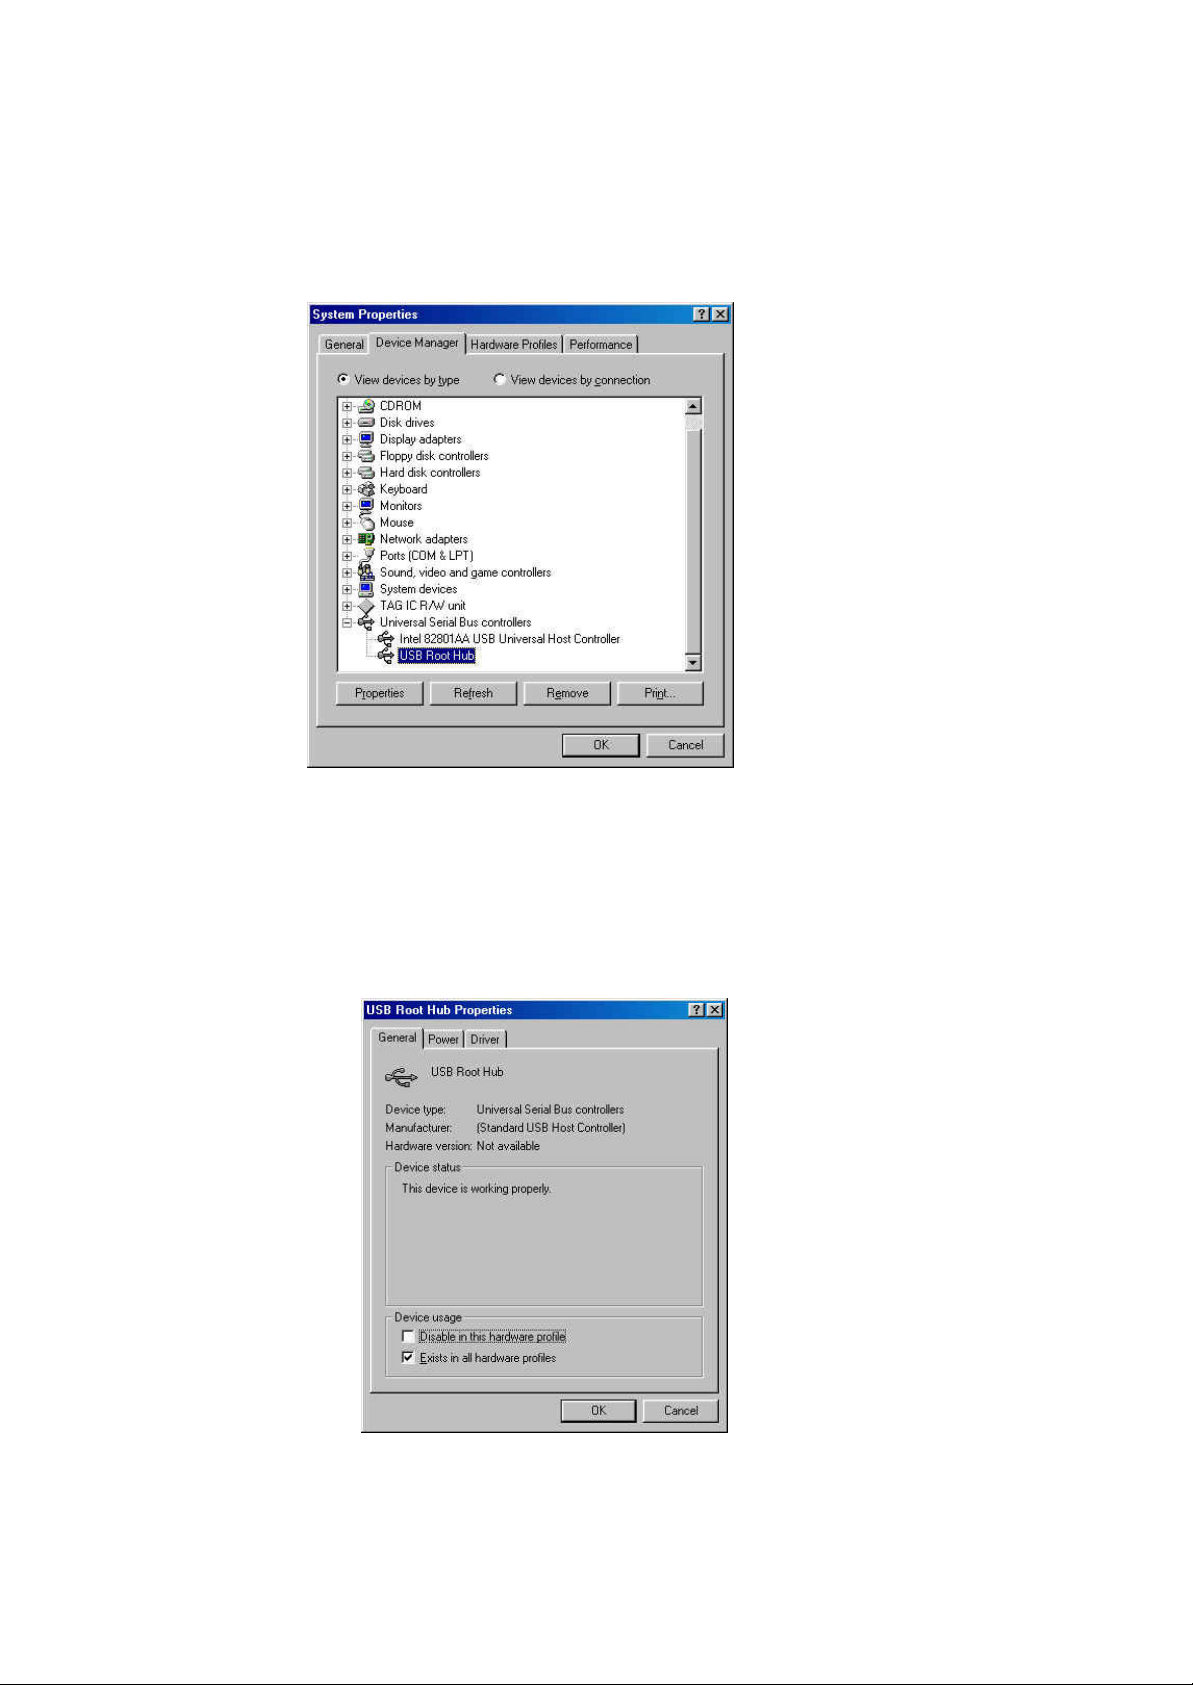
③As shown below, select Device Manager folder and click on "View by devices
type" which is just below folder names. And then, double-click on the item
6
called Universal Serial Bus Controllers. Below Universal Serial Bus Controllers,
USB Universal Host Controller and USB Root Hub will appear.
④Double-click on USB Universal Host Controller and another screen that is
shown below appears. Choose a general folder and there’ll be device usage at
the bottom. On the device usage, make certain that it’s left blank next to
‘Disable in this hardware profile’ and check the next to ‘Exists in all hardware
profiles’ as shown. And then select OK.
After PC is restarted, USB port becomes usable.

7
2.Re-Installation of the picochet device driver
Steps to re-install the picochet new device driver
①In case where the current version of driver is needed, save files that are
directed to delete, in some other folder, instead of just deleting them
②Delete C:¥Windows¥INF¥Other¥Hitachi Maxell, Ltd.Usbmax.inf
③Delete C:¥Windows¥SYSTEM32¥DRIVERS¥Usbmax.sys
④Select Run on the Start menu, and then enter ‘regedit’ to open registry editor.
⑤Delete HKEY_LOCAL_MACHINE¥Enum¥USB¥VID_0858&PID_1101
⑥Delete HKEY_LOCAL_MACHINE¥System¥CurrentControlSet¥Services
¥ Class¥Usbmax
⑦Empty out Recycle Bin
⑧Restart the PC
⑨Installation screen appears on PC monitor and if you select a folder where
the driver was installed previously, the installation of the driver is initiated.
Follow the instruction displayed on the PC monitor, while installing.
⑩If device manager in system folder from Control Panel displays Tag IC R/W
unit, device driver installation is completed without any errors. However, if Tag
IC R/W unit is not displayed, repeat the steps from the beginning until Tag IC
R/W unit is displayed.
This concludes installation of Device Driver.
3.Installation of the picochet Utility Software
①Insert a diskette labeled ‘Disk 1 ’ into floppy disk drive, and double-click on
‘setup.exe ’, wait a while. Click on "Next" button when screen shown below
appears.

8
②Click on "Yes(Y)" button when screen shown below appears.
③Select a folder to install the software, and click on "Next" button after making
the selection, when screen shown below appears on the monitor.
④Click on "Next" button when screen shown below appears.

9
⑤After a little while, a screen asking to insert Disk 2 appears, Insert the
diskette (Disk2) into floppy disk drive and click on "OK" button.
⑥Click on "Finish" button when screen shown below appears.
This concludes the installation of the picochet utility software.
⑦Remove diskette from floppy disk drive and restart the system. When the
system is restarted, an icon will be added in Task Bar as shown below.
Depending upon the state of picochet, shape of icon will change accordingly.
When the picochet is not connected to PC

10
When the picochet is connected to PC, however, any Token/Card is not placed
into the picochet
When the picochet is connected to PC, and tag is placed into the picochet
When the picochet is connected to PC, and Token/Card is in a edit state, or in a
state where PC just woke up from sleep mode
4.Uninstallation of the picochet Utility Software
①Select Control Panel by selecting Settings from Start menu.
②Once a screen shown below appeared, you double-click on ‘Add/Remove
Programs ’ from Control Panel.

11
③Select "picochet" by clicking on it and proceed to clicking on "Add/Remove"
button, and then uninstalling the software starts right away. After uninstalling
the software, press "OK" button to close "Add/Remove programs properties"
screen.
④ Restart the PC.
This concludes uninstalling the utility software.

12
5.How to use the picochet utility software
①Access the Internet
Insert the Token/Card that comes with the software into the picochet, and the
default Internet browser software is executed and automatically access the
home page for downloading software from Maxell.

13
http://www.maxell.co.jp/products/industrial/rfid/download.html
If you are a member of the Internet service where you have to use the Internet
browser software provided from them, such as AOL, insert the Token/Card after
you accessed the Internet.
②Detailed Information in the Token/card
Click on the icon in Task Bar and a screen shown below will appear on your
monitor.

14
Select "Edit window" to open detailed information in Token/Card.
Clicking on ‘Read’ button will display information stored in the Token/Card.
User can not write personal data into Token/Card with current version of the
software. The version that will allow it will be uploaded into the download site,
and the blank Token/Card that users are allowed to write into, will be marketed
around at the end of year 2000.
Notes: The edit screen that is shown above is standard fromat of Maxell’ s.
③Terminating the utility software for the picochet
To terminate the utility software for the picochet, click on the icon in Task Bar
and select Exit. A screen show below will appear, then select "OK" button.

15
Once "OK" button is clicked, icon in Task Bar will disappear, and even if you
insert a Token/Card into the picochet, nothing happens.
To re-initiate the utility software, start from Start menu, going from Start ->
Program -> picochet icon. If you follow the steps just mentioned, icon will reappear in Task Bar.

16
6.Specification
Host Interface USB
OS Window 98
Media Picochet Card
Picochet Token
(Memory 108 byte)
Power consumption Ap prox. 1.5W
(maximum current 500mA)
While read or write
Length of cable Approx. 2m
Size Approx. 6.5x6.5x10cm
Soft Ware USB Device Driver
Application soft
Working environment
Temperature:0〜40
℃
Humidity:20〜80%
Storage environment
Temperature:-10〜60
Humidity:20〜80
%
℃

17
Notice:
This equipment has been tested and found to comply with the
limits for a Class B digital device, pursuant to part 15 of the FCC
Rules. These limits are designed to provide reasonable protection
against harmful interference in a residential installation. This
equipment generates, uses and can radiate radio frequency
energy and, if not installed and used in accordance with the
instructions, may cause harmful interference to radio
communications. However, there is no guarantee that interference
will not occur in a particular installation.
If this equipment does cause harmful interference to radio or
television reception, which can be determined by turning the
equipment off and on, the user is encouraged to try to correct the
interference by one or more of the following measures:--Reorient
or relocate the receiving antenna.
-- Increase the separation between the equipment and receiver.
-- Connect the equipment into an outlet on a circuit different from
that to which the receiver is connected.
-- Consult the dealer or an experienced radio/TV technician for
help.
Operation is subject to the following two conditions;
(1) this device may not cause interference, and
(2) this device must accept any interference,
including interference that may cause undesired operation of the
device.
 Loading...