

Hitachi UR18DSAL operation manual
en
de
UR 18DSAL
fr
it
nl
es
pt
sv
da
no
fi
el
pl
hu
cs
tr
ro
sl
en
Handling instructions
de
Bedienungsanleitung
fr
Mode d’emploi
it
Istruzioni per l’uso
nl
Gebruiksaanwijzing
es
Instrucciones de manejo
pt
Instruções de uso
sv
Bruksanvisning
da
Brugsanvisning
no
Bruksanvisning
fi
Käyttöohjeet
el
Οδηγίες χειρισμού
pl
Instrukcja obsługi
hu
Kezelési utasítás
cs
Návod k obsluze
tr
Kullanım talimatları
ro
Instrucţiuni de utilizare
sl
Navodila za rokovanje
sk
Pokyny na manipuláciu
bg
Инструкция за експлоатация
sr
Uputstvo za rukovanje
hr
Upute za rukovanje
uk
Iнструкції щодо поводження з
пристроєм
ru
Инструкция по эксплуатации
sk
bg
sr
hr
uk
ru
5
9
2
6
3
1
4
!
@
$
^
*
0
#
%
&
(
Ⓚ
Ⓜ
Ⓛ
ⒶⒷⒸⒹⒺ ⒼⒻⒾⒽ
Ⓙ
Ⓝ
2

12
)
3
w
q
34
e
3
6
e
r
3
56
y
t
3
3
u
78
7
p
s
o
2
1
2
i
a
1
910
o
9
8
d
a
f
4
NAMES OF PARTS
(Original instructions)
English
FM antenna
1
Handle
2
Rear cover
3
Speaker
4
Storage case for external devices
5
AC adapter port
6
AUX input port
7
USB charging port
8
Cable access hole
9
Power button
0
Source select button
!
Menu button
@
Enter / Information button
#
Volume button (-)
$
Volume button (+)
%
Search button (-)
^
Search button (+)
&
Select button (-)
*
Select button (+)
(
Tab
)
AA Battery box
q
Lid
w
AC adapter
e
Rubber cover
r
Battery
t
Terminals
y
Front cover
u
Stereo mini plug connector cable
i
Smartphone
o
Audio output port
p
Recharge cable holder
a
Holder
s
USB charging cable
d
Rubber cap
f
CORDLESS RADIO SAFETY
WARNINGS
WARNING
Read all safety warnings and all instructions.
Failure to follow the warnings and instructions may result in
electric shock, fi re and/or serious injury.
Save all warnings and instructions for future reference.
1. Use only the specifi ed power supply voltage.
• Use of any other voltage may lead to fi re or electric
shock.
2. Avoid damaging the AC adapter cord.
• Do not modify, forcibly bend, twist or pull the cord,
place heavy objects on it or place it near heating
appliances.
• When not in use, remove the power plug (AC
adapter) from the electric socket and from the radio.
Failure to do so may lead to electric shock or fi re.
3. Do not touch the power plug (AC adapter) with wet
hands.
• Doing so may result in electric shock.
4. Do not use the radio in the bathroom or shower.
• Do not use the radio in wet or damp places or in the
rain.
• Doing so may result in electric shock, emission of
smoke or malfunction.
5. Do not touch the FM antenna or power plug (AC
adapter) during thunderstorms.
• Doing so may result in electric shock.
6. Do not disassemble or modify the radio.
• Doing so may result in electric shock or fi re.
Inspections and repairs should be performed by the
store where purchased or by a Hitachi power tool
service center.
7. Insert the power plug (AC adapter) securely as far
as it will go.
• Dust or dirt between the power plug and the electric
socket may lead to fi re. Remove the power plug
periodically and wipe off any dust or dirt with a dry
cloth.
AM broadcast indicator
Ⓐ
AUX indicator
Ⓑ
FM broadcast indicator
Ⓒ
RDS indicator
Ⓓ
Stereo indicator
Ⓔ
Alarm indicator
Ⓕ
Buzzer alarm indicator
Ⓖ
Radio ON alarm indicator
Ⓗ
Sleep timer indicator
Ⓘ
Battery exhausted indicator
Ⓙ
Information indicator
Ⓚ
Clock
Ⓛ
AM/PM indicator
Ⓜ
MHz / KHz indicator
Ⓝ
8. Do not let any unspecifi ed objects or water get
inside the radio body.
• With the exception of the AC adapter and the
rechargeable battery, if any metal or fl ammable
object or water gets inside the back door, it may lead
to electric shock or fi re.
• Take care to prevent iron powder from the bass
refl ex speakers, dust or water getting into the radio.
9. Do not sit or stand on the radio.
• Doing so may lead to accidents or malfunction.
10. Do not place the radio on an unstable surface or in
a high place. Do not hang the radio from the handle.
• The radio may fall and cause injury or malfunction.
11. When no slide battery is loaded, attach the slide
terminal cover to the terminal to prevent cuts and
other injuries that may result from touching the
terminal area.
12. Handle the backup batteries with care.
• Danger of explosion if battery is incorrectly replaced.
Replace only with the same or equivalent type.
• Incorrect handling of the batteries may result in
rupture or leakage, leading to fi re, injury or pollution
of the surrounding area. Be sure to observe the
following precautions.
– Use only the specifi ed batteries
– Do not heat or disassemble the batteries
– Do not throw the batteries into fi re or water
– Do not charge the batteries
– Make sure the batteries are correctly oriented
and avoid short-circuiting
– Do not reuse batteries or use diff erent types of
battery
– Remove the batteries when the radio is not in use
In the event of leakage from the batteries, wipe the
battery case clean.
Should any battery fl uid get on your body, wash it off
carefully.
If
is displayed when you turn the power on with
the rechargeable battery inserted, the battery power
is low.
Power the radio from the AC adapter or insert a
charged battery.
5
English
13. Recharge only with the charger specifi ed by the
manufacturer.
• A charger that is suitable for one type of rechargeable
battery may create a risk of fi re when used with
another battery.
14. Use the radio only with specifi cally designated
rechargeable battery.
• Use of any other rechargeable battery may create a
risk of injury and fi re.
15. When rechargeable battery is not in use, keep
it away from other metal objects like paper clips,
coins, keys, nails, screws, or other small metal
objects that can make a connection from one
terminal to another.
• Shorting the battery terminals together may cause
burns or a fi re.
16. Under abusive conditions, liquid may be ejected
from the battery; avoid contact. If contact
accidentally occurs, fl ush with water. If liquid
contacts eyes, additionally seek medical help.
• Liquid ejected from the battery may cause irritation
or burns.
17. Have your radio serviced by a qualifi ed repair
person using only identical replacement parts.
• This will ensure that the safety of the radio is
maintained.
18. The main unit and adapter shall not be exposed to
dripping or splashing and that no objects fi lled with
liquids, such as vases, shall be placed on the unit
and adapter.
19. The batteries (battery pack or batteries installed)
shall not be exposed to excessive heat such as
sunshine, fi re or the like.
20. The MAINS plug of adapter is used as the disconnect
device, the disconnect device shall remain readily
operable.
PROTECTING YOUR HEARING
Continuous exposure to loud noise may result in permanent
hearing loss. The louder the volume, the shorter the time in
which hearing loss may occur.
If you listen to large volume sound over a long period of
time, your ears will become accustomed to it. This creates
the illusion that the volume level is appropriate, despite the
fact that it may be damaging your hearing.
Observe the following to prevent hearing loss.
CAUTION
1. Make sure you give your ears a rest by taking
regular breaks and not listening for long periods of
time.
Even when set at safe volume levels, listening
continuously over long periods of time may cause
hearing loss.
2. Be careful not to increase the volume as your
hearing adapts to the sound output.
Beware of being accustomed to a certain volume level.
Adjust the volume to a safe level before your ears
become accustomed to loud volumes.
3. If your ears begin to ring, if you feel any discomfort,
or if conversation seems faint or indistinct,
discontinue listening to music and have your ears
examined by a doctor.
Note that Hitachi Koki cannot be held responsible for the
corruption or loss of data stored within smartphones and
other peripheral equipment connected to the radio, nor any
damage to the equipment itself.
MAIN FUNCTIONS
○ Manual/Auto select
○ Save (Memory) (10 AM + 10 FM stations)
○ Radio On/Off /Alarm
○ Dock for playing audio from smartphones and portable
audio players
○ High-quality stereo speaker
○ Smartphone and cell phone recharging
○ Compatibility with Hitachi power tool rechargeable
battery and AC adapter
SPECIFICATIONS
Frequency
band
Antenna
Speaker 90 mm (8 Ω) × 2
Max. power
output
Power supply
Exterior
dimensions
Weight 3.4 kg
○ For applicable power supplies see user instructions:
Applicable power suppliers: Dong Guan Sun Hung Kin
Electrical Co., Ltd. (Manufacture)
HKP12-1201200dV, HKP12-1201200dB (Model)
○ Only below slide battery could be used
(Model) BSL1430: 14.4 V 3000 mAh
Lithium battery
(Model) BSL1830: 18 V 3000 mAh
Lithium battery
(Manufacture) Hitaci Koki Co., Ltd.
FM: 87.5 to 108 MHz
AM: 522 to 1629 KHz
FM: Rubber antenna
AM: Ferrite bar antenna (built-in)
AC adapter: 5 W × 2
14.4 V: 6 W × 2
18 V: 7 W × 2
Slide battery: DC 14.4 V, 18 V
Household power supply
(using provided AC adapter)
Backup batteries: DC 3 V, two AA
batteries
L 366 mm x W 303 mm x H 261 mm
(with anttena refracted)
SYMBOLS
WARNING
The following show symbols used for the machine. Be
sure that you understand their meaning before use.
UR18DSAL : Cordless radio
For applicable power supplies see user
instructions.
PRECAUTIONS WHEN CONNECTING
TO EXTERNAL EQUIPMENT
Unexpected problems may result in the loss or corruption of
data stored in smartphones and other peripheral equipment
connected to the radio. With this possibility in mind, a
backup of the data should always be made in advance.
6
English
Only for EU countries
Do not dispose of electric tools together with
household waste material!
In observance of European Directive 2002/96/EC
on waste electrical and electronic equipment and
its implementation in accordance with national law,
electric tools that have reached the end of their life
must be collected separately and returned to an
environmentally compatible recycling facility.
Power button
Source select button
Menu button
Enter / Information button
Volume button
Search button
Select button
Buzzer alarm indicator
Radio ON alarm indicator
Battery exhausted indicator
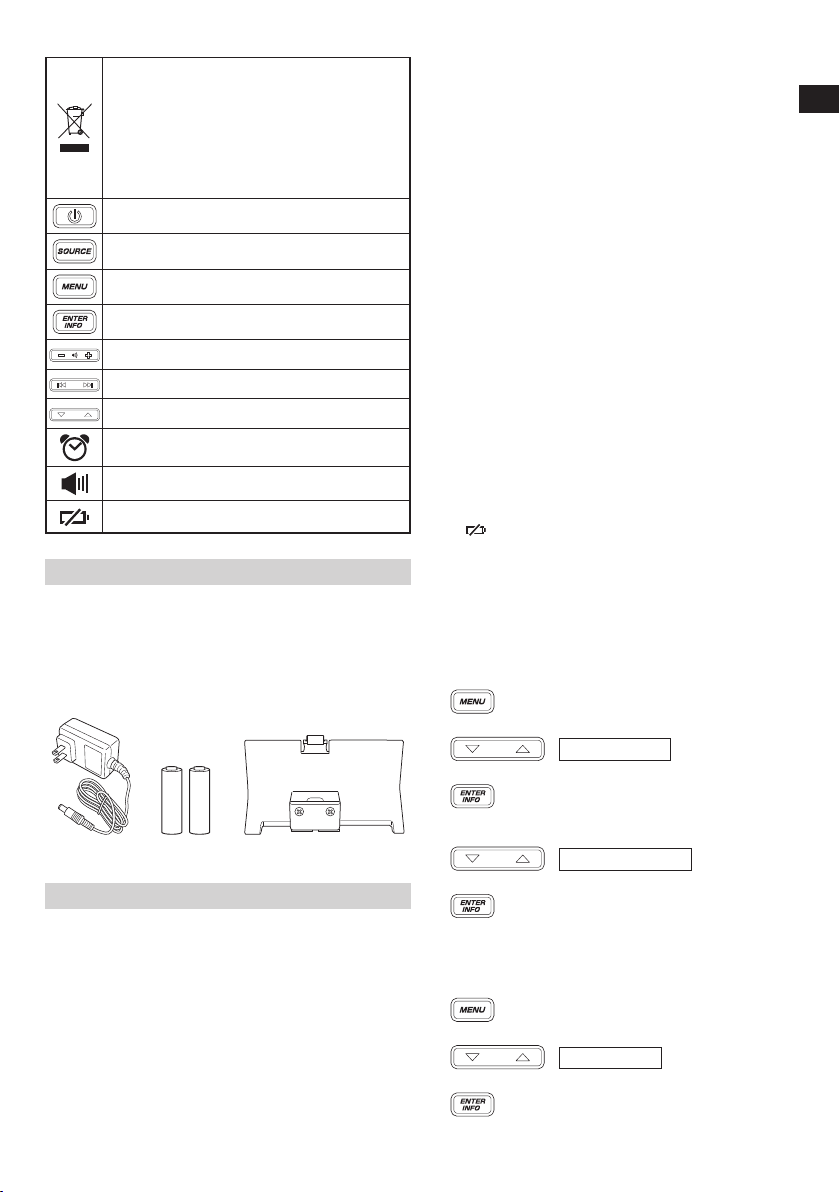
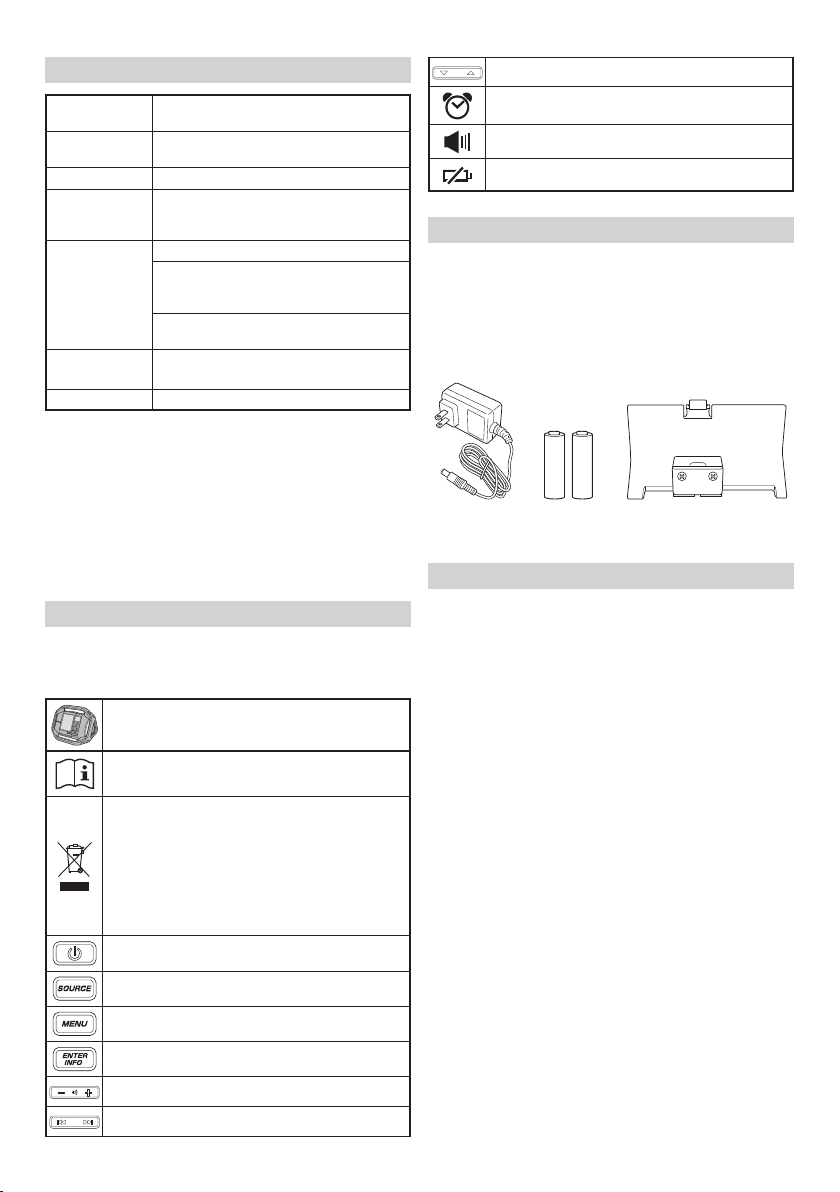
STANDARD ACCESSORIES
In addition to the main unit (1 unit), the package
contains the accessories listed in the below.
○ AC adapter ....................................................................1
○ AA batteries ..................................................................2
○ Recharge cable holder ..................................................1
(for Apple Lightning connector)
* Android holder is built into the main unit.
Standard accessories are subject to change without notice.
PRIOR TO OPERATION
● Installing backup batteries
Time settings and radio station frequencies can be saved by
installing batteries in the unit.
1. To access the storage box for the backup batteries,
unlatch the tab and open the rear cover. (Fig. 1)
2. Open the backup battery storage box and insert the
two AA batteries (included) into the storage box in the
direction indicated. (Fig. 2)
NOTE
○ Do not reverse battery polarity (+/-) when installing the
batteries.
○ Do not mix old and new batteries. Always replace both
batteries at the same time.
○ Do not burn batteries or dispose them as household
waste.
● AC adapter installation
Power can be supplied by plugging the AC adapter
(included) into a standard household outlet.
Pull back the rubber cover and connect the AC adapter to
the AC adapter port. (Fig. 3)
Next, plug the AC adapter into an electrical outlet.
NOTE
○ When used together with the batteries, the AC adapter
is the main power source and no battery power is
consumed.
○ When used together with the AC adapter, the batteries
will not recharge as this device has no recharge function.
Storing the AC adapter
The AC adapter can be stored in the compartment behind
the rear cover. (Fig. 4)
● Battery installation
CAUTION
Do not touch the terminals.
Doing so may result in cuts to the hand or other injuries.
Only a 14.4 V or 18 V slide-type battery can be used with
this device.
Installing the battery
Open the rear cover, align the battery with the grooves of this
device and slide it all the way in. (Fig. 5)
NOTE
○ Do not apply any excessive pressure when inserting the
battery. If the battery does not easily slide into place, it is
not being inserted properly.
Check to see if the battery is facing the correct direction
and that there is nothing obstructing the path of insertion.
○ If
is displayed when the device is switched on
following battery installation, the battery charge is low.
In this situation, either use the AC adapter or install a fully
charged battery.
● Changing the date display
The following selections are available for date display.
YYYY/MM/DD (Year/Month/Day)
MM/DD/YYYY (Month/Day/Year)
DD/MM/YYYY (Day/Month/Year)
1. Press the Menu button.
2. Press the Select button and display “DATE DISP”.
DATE DISP
3. Press the Enter / Information button.
4. Press the Select button and display the date display
selection of your choice.
5. Press the Enter / Information button.
YYYY/MM/DD
● Set the date
Using the control panel, follow the steps below to set up the
date.
1. Press the Menu button.
2. Press the Select button and display “DATE ADJ”.
DATE ADJ
3. Press the Enter / Information button.
7
English
4. Press the Select button and adjust “year” digits.
2014
5. Press the Enter / Information button.
6. Press the Select button and adjust “month” digits.
7. Press the Enter / Information button.
8. Press the Select button and adjust “day” digits.
9. Press the Enter / Information button.
03 / 01
03 / 31
● Set the time
Using the control panel, follow the steps below to set up the
time.
1. Press the Menu button.
2. Press the Select button and display “CLOCK ADJ”.
CLOCK ADJ
3. Press the Enter / Information button.
4. Press the Select button and adjust “hour” digits.
5. Press the Enter / Information button.
6. Press the Select button and adjust “minute” digits.
7. Press the Enter / Information button.
8. Press the Select button and select “ ” or “ ”
9. Press the Enter / Information button.
12 : 00
12 : 55
12H 24H
LISTENING TO RADIO BROADCASTS
● Selecting FM or AM bandwidth
1. Power ON.
2. Press the Source select button and select the radio’s
bandwidth (FM/AM).
● Selecting stations
Auto station selection
A long press of the Search button will automatically scan and
search clear station broadcast frequencies. To select the
next station broadcast, long press the Search button again.
(Long Press)
Manual station selection
Press the Search button to change frequencies and select
a station.
Preset station selection
Press the Select button to quickly switch between preset
stations.
At the time of purchase, there are no preset stations. Follow
the steps below to register preset stations.
<Manual preset registration>
1. Tune into a radio station of your choice and press the
Menu button.
2. Press the Select button and display “PRESET”.
PRESET
3. Press the Enter / Information button.
4. Press the Select button and select a preset number from
0 to 9 for registering the station.
5. Press the Enter / Information button to register the
station.
<Auto preset registration>
This feature allows the automatic registration of available
radio stations in the area of use.
(Maximum of 10 stations)
1. Press the Menu button.
2. Press the Select button and display “AUTO SCAN”.
3. Press the Enter / Information button to begin auto preset
registration of available radio stations.
NOTE
○ A broadcasting radio station will not be registered if its
frequency is weak.
○ Depending on location of use, non-radio signals such as
noise may be registered.
○ See page 10 when recharging with USB in “
mode.
PRESET 2
AUTO SCAN
● For better reception
FM broadcasts
Adjust reception by changing the facing and angle of the
antenna.
“STEREO” will be displayed when receiving a stereo
broadcast.
Switching to monaural reception can reduce noise.
<Switching to monaural reception>
1. Press the Menu button.
2. Press the Select button and display “STEREO”.
STEREO
”
8
3. Press the Enter / Information button.
4. Press the Select button and display “ ”.
OFF
5. Press the Enter / Information button to complete setup.
AM broadcasts
Move the device and face it in a direction in which the
reception is best.
<Volume adjustment>
Use the Volume button to adjust the volume from 0 to 30.
USING EXTERNAL DEVICES FOR
AUDIO PLAYBACK
Audio can be played back from smartphones, portable
music players and other external devices.
CAUTION
Make sure to lower the volume output of the player
before playback.
NOTE
There are two types of connector cable, straight type and
L type.
Use an L type cable when connecting or storing large
external devices.
1. Open the external device storage area
Switch the radio’s power OFF and open the front cover.
(Fig. 6)
2. Connect an external device
Using a commercially available stereo mini-plug
connector cable (ø3.5 mm), connect the radio’s AUX input
port to the audio output port of the external device. (Fig. 7)
3. Secure the external device
The right and left holders can be moved to the right or left
by pinching the top and bottom of each holder.
Secure the external device between the two holders.
(Fig. 8)
4. Playback
With the radio’s power switched ON, press the Source
select button and display “
AUX
Make sure to lower the volume output of the external
Volume can be adjusted through the radio.
Close the front cover after selecting tracks and adjusting
NOTE
You may be unable to raise the volume level if the
NOTE
○ When connecting a smartphone, please be aware that
○ External devices may be damaged if used in locations
○ See page 10 when recharging with USB in “
device before music playback.
(Volume)
volume.
volume level of the external device is too low.
the ringtones of incoming calls for some models are not
output to speaker.
exposed to the sun or hot temperatures.
mode.
”.
”
English
USING THE TIMER FUNCTION
● Setting the sleep timer
Power can be set to automatically switch OFF after a certain
amount of time has elapsed by using the sleep timer function.
1. Press the Menu button.
2. Press the Select button and display “SLEEP”.
SLEEP
3. Press the Enter / Information button.
4. Press the Select button to adjust the time period to
elapse (between “0 – 90” minutes) before the power is
switched OFF.
5. Press the Enter / Information button.
6. “SLEEP” will be displayed on the LCD.
○ To check the remaining time, press the Menu button
once again and select “SLEEP”.
○ To cancel the sleep timer, set the time to switch OFF at 0
minutes.
● Setting the alarm (Buzzer alarm)
The radio can be set up to activate a beeping alarm at a
specifi c time.
1. Press the Menu button.
2. Press the Select button and display “BUZZER ALM”.
3. Press the Enter / Information button.
4. Press the Select button and display “ ”.
5. Press the Enter / Information button.
6. Press the Select button and adjust “hour” digits.
7. Press the Enter / Information button.
8. Press the Select button and adjust “minute” digits.
9. Press the Enter / Information button.
10. Press the Select button to set up repeat.
Once ONCE
Daily DAILY
Weekdays only WEEKDAY
Saturday and Sunday only WEEKEND
30 MIN
BUZZER ALM
ON
12 : 00
12 : 30
DAILY
9
English
11. Press the Enter / Information button to complete setup.
will be displayed on the LCD.
○ To cancel the alarm setting, go to “BUZZER ALM” once
again and change the setting to “
○ The alarm sound will automatically switch off after 10
minutes. The sound can also be switched off by pressing
any button.
NOTE
The volume of the buzzer alarm cannot be changed.
● Setting the radio ON alarm timer
Using the radio ON alarm timer function, the radio can be
set up to switch ON at a specifi c time to enjoy a station
broadcast.
1. Press the Menu button.
2. Press the Select button and display “RADIO ALM”.
RADIO ALM
3. Press the Enter / Information button.
4. Press the Select button and display “ ”.
5. Press the Enter / Information button.
6. Press the Select button and adjust “hour” digits.
7. Press the Enter / Information button.
8. Press the Select button and adjust “minute” digits.
9. Press the Enter / Information button.
10. Press the Select button to set up repeat.
Once ONCE
Daily DAILY
Weekdays only WEEKDAY
Saturday and Sunday only WEEKEND
11. Press the Enter / Information button.
12. Select radio bandwidth.
Press the Select button to display “AM” or “FM”.
13. Press the Enter / Information button.
14. Press the Select button to display a preset station.
To select a station by broadcast frequency, use the
Search button.
ON
12 : 00
12 : 55
DAILY
FM
P2 FM 79.5 MHz
FM 80.0 MHz
”.
15. Press the Enter / Information button to complete setup.
will be displayed on the LCD.
○ To cancel the radio alarm setting, go to “RADIO ALM”
once again and change the setting to “
NOTE
The radio’s volume will be at the level when the radio
was last switched OFF.
”.
RECHARGING YOUR SMARTPHONE
Devices such as a smartphone and mobile phone can be
recharged by connecting the device to this radio.
The recharge function is only available for the “
mode. (Recharging cannot be done in “
NOTE
○ When recharging in “
at 20 or less.
The radio is designed to deactivate USB output and
disable the recharging of smartphones and mobile
phones when the volume is at 21 or more.
(For “
○ On rare occasions, sound output may be interrupted or
If either should occur, lower the volume level or stop
○ The radio is designed to deactivate USB output and
Should the aforementioned occur, recharge the battery
○ If the voltage is low when the AC adapter is in use, the
1. Using a commercially available USB connection/
2. Secure the smartphone with the holders and close the
(See “Secure the external device” on page 9)
NOTE
○ Use a fully charged battery when using a battery as this
You will not be able to recharge smartphones or mobile
○ The time required for charging varies in accordance with
○ Do not use the recharge function for any devices other
○ The radio may not be able to recharge some smartphone
Two recharge cable holders, one for Android and the other
for Apple (Lightning connector) are included.
Select the holder that best suits your device.
○ Should your device be too large for the radio’s external
NOTE
As the recharge cable holders are designed for standard
” mode, USB recharging will continue even if
the volume output is 21 or more.)
power could shutdown during USB recharging.
recharging with the USB.
disable the recharging of smartphones and mobile
phones when the power level of the battery is low.
or replace with a fully charged battery.
USB output may be cut off , discontinuing any recharging.
recharge cable, connect to the USB charging port
located in the radio’s storage case for external devices.
(Fig. 9)
cover. (Fig. 8)
device’s power source.
phones when the battery power level becomes low.
the smartphone or mobile phone being recharged.
than a smartphone or mobile phone.
or mobile phone models.
device storage case, draw the cable through the cable
access hole. (Fig. 10)
size terminals, the holders may not be able to securely
fasten certain terminals depending on the recharge
cable used.
” mode, set the volume output
” mode.)
” or “ ”
MAINTENANCE AND INSPECTION
WARNING
When not in use or during inspection and maintenance,
be sure to remove the AC plug, rechargeable battery and
backup batteries.
10

● Inspecting the mounting screws
Regularly inspect all mounting screws and ensure that
they are properly tightened. Should any of the screws be
loose, retighten them immediately. Failure to do so could
result in serious hazard.
● Cleaning on the outside
When the radio is stained, wipe with a soft dry cloth or a
cloth moistened with soapy water.
Do not use chloric solvents, gasoline or paint thinner, for
they melt plastics.
● Storing the Radio
Do not store the radio in the following places.
○ Within reach of or easily accessible to children
○ In humid or dusty places
○ In high temperature such as inside a car or exposed
to direct sunlight
○ In extremely cold places or directly exposed to cold
draughts
○ Where the temperature changes drastically
○ Where it is exposed to smoke or steam such as near
a cooking appliance or humidifi er
MODIFICATIONS
Hitachi Power Tools are constantly being improved
and modifi ed to incorporate the latest technological
advancements.
Accordingly, some parts may be changed without prior
notice.
GUARANTEE
We guarantee Hitachi Power Tools in accordance with
statutory/country specifi c regulation. This guarantee does
not cover defects or damage due to misuse, abuse, or
normal wear and tear. In case of complaint, please send
the Power Tool, undismantled, with the GUARANTEE
CERTIFICATE found at the end of this Handling instruction,
to a Hitachi Authorized Service Center.
English
NOTE
Due to HITACHI’s continuing program of research and
development, the specifi cations herein are subject to
change without prior notice.
11
Deutsch
(Übersetzung der Original-Gebrauchsanweisung)
BEZEICHNUNG DER TEILE
FM-Antenne
1
Griff
2
Hintere Abdeckung
3
Lautsprecher
4
Aufbewahrungstasche für externe
5
Geräte
Netzadapteranschluss
6
AUX-Eingangsanschluss
7
USB-Ladeanschluss
8
Kabeldurchführungsloch
9
Einschaltknopf
0
Quellenauswahlknopf
!
Menütaste
@
Eingabe-/Informationstaste
#
Lautstärkeknopf (-)
$
Lautstärkeknopf (+)
%
Suchknopf (-)
^
Suchknopf (+)
&
SICHERHEITSHINWEISE FÜR DAS
Auswahlknopf (-)
*
Auswahlknopf (+)
(
Schlaufe
)
AA-Batteriekasten
q
Deckel
w
Wechselstromadapter
e
Gummiabdeckung
r
Akku
t
Anschlüsse
y
Vordere Abdeckung
u
Stereoministeckeranschlusskabel
i
Smartphone
o
Audioausgangsanschluss
p
Ladekabelhalterung
a
Halterung
s
USB-Ladekabel
d
Gummikappe
f
5. Während eines Gewitters sollten Sie die FM-
BAUSTELLENRADIO
WARNUNG
Lesen Sie sämtliche Sicherheitshinweise und
Anweisungen durch.
Wenn die Warnungen und Anweisungen nicht befolgt
werden, kann es zu Stromschlag, Brand und/oder
ernsthaften Verletzungen kommen.
Bitte bewahren Sie alle Warnhinweise und
Anweisungen zum späteren Nachschlagen auf.
1. Verwenden Sie nur die angegebene
Stromversorgungsspannung.
• Die Benutzung irgendeiner anderen Spannung kann
zu Brand oder Stromschlag führen.
2. Vermeiden Sie eine Beschädigung des Kabels für
den Wechselstromadapter.
• Modifi zieren Sie das Kabel nicht, biegen Sie es
nicht mit Gewalt, verdrehen sie es nicht und ziehen
Sie nicht an ihm. Legen Sie auch keine schweren
Gegenstände auf es und verlegen Sie es nicht in
Nähe von Heizkörpern bzw. Öfen.
• Ziehen Sie den Stecker des Stromkabels
(Wechselstromadapter), wenn das Gerät nicht
benutzt wird, aus der Steckdose und vom Radio
ab. Wenn dies nicht eingehalten wird, kann das zu
Stromschlag oder einem Brand führen.
3. Berühren Sie den Kabelstecker
(Wechselstromadapter) nicht mit feuchten Händen.
• Andernfalls können Sie einen Stromschlag erleiden.
4. Benutzen Sie das Radio nicht im Badezimmer oder
unter der Dusche.
• Verwenden Sie das Radio nicht an nassen oder
feuchten Orten oder im Regen.
• Andernfalls kann es zu Stromschlag,
Rauchentwicklung, oder Fehlfunktionen kommen.
6. Zerlegen oder modifi zieren Sie das Radio nicht.
7. Stecken Sie den Kabelstecker
8. Lassen Sie keine Fremdkörper oder Wasser in das
9. Setzen Sie sich nicht auf das Radio und steigen Sie
10. Stellen Sie das Radio nicht auf einer instabilen
AM-Senderanzeige
Ⓐ
AUX-Anzeige
Ⓑ
FM-Senderanzeige
Ⓒ
RDS-Anzeige
Ⓓ
Stereoanzeige
Ⓔ
Weckeranzeige
Ⓕ
Summeralarmanzeige
Ⓖ
Radiowecker-Anzeige
Ⓗ
Anzeige für Schlaf-Timer
Ⓘ
Anzeige Batterie leer
Ⓙ
Informationsanzeige
Ⓚ
Uhr
Ⓛ
AM/PM-Anzeige
Ⓜ
MHz / KHz Anzeige
Ⓝ
Antenne oder den Stecker (Wechselstromadapter)
nicht berühren.
• Andernfalls können Sie einen Stromschlag erleiden.
• Dies könnte zu einem Stromschlag oder einem Brand
führen. Inspektionen und Reparaturen sollten von
dem Geschäft, in dem Sie das Gerät gekauft haben,
oder von einem Hitachi-Kundendienstzentrum für
Elektrogeräte durchgeführt werden.
(Wechselstromadapter) sicher bis zum Anschlag
an der Steckdose an.
• Staub oder Schmutz zwischen dem Kabelstecker
und der Steckdose können zu einem Brand führen.
Ziehen Sie den Kabelstecker regelmäßig aus der
Steckdose und wischen Sie allfälligen Staub oder
Schmutz mit einem trockenen Tuch ab.
Innere des Radiogehäuses gelangen.
• Sollten außer dem Wechselstromadapter und
der Akku-Batterie irgendwelche Metall- oder
entzündbare Gegenstände oder Wasser in die
hintere Gehäuseabdeckung gelangen, kann das zu
Stromschlägen oder zu einem Brand führen.
• Achten Sie darauf, dass kein Eisenstaub von den
Bassrefl ex-Lautsprechern, anderer Staub, oder
Wasser in das Radio hinein gelangt.
nicht auf es hinauf.
• Dies kann zu Unfällen oder zu Fehlfunktionen führen.
Fläche oder an einem hoch gelegenen Ort auf.
Hängen Sie das Radio nicht am Griff auf.
• Das Radio könnte herunter fallen und dadurch
könnten Verletzungen oder Fehlfunktionen
verursacht werden.
12

11. Bringen Sie, wenn keine Einschubbatterie
angesteckt ist, am Steckplatz die Abdeckung
an, um Schnittwunden und andere Verletzungen
zu vermeiden, die beim Berühren des
Steckplatzbereichs entstehen könnten.
12. Behandeln Sie die Speicherbatterien sorgfältig.
• Explosionsgefahr, wenn die Batterie falsch ersetzt
wird. Ersetzen Sie sie nur durch eine Batterie des
gleichen oder gleichwertigen Typs.
• Eine unsachgemäße Behandlung der Batterien
kann zu einem Bruch oder Austritt von Flüssigkeit
führen, wodurch es zu einem Brand, Verletzung,
oder Verschmutzung der Umgebung kommen
kann. Beobachten Sie unbedingt folgende
Vorsichtsmaßnahmen.
– Benutzen Sie nur die angegebenen Batterien.
– Erhitzen oder zerlegen Sie die Batterien nicht.
– Werfen Sie die Batterien nicht in Feuer oder
Wasser.
– Laden Sie die Batterien nicht auf.
– Vergewissern Sie sich, dass die Batterien richtig
ausgerichtet sind und vermeiden Sie einen
Kurzschluss.
– Benutzen Sie alte Batterien nicht wieder und
benutzen Sie keine verschiedenen Batterietypen.
– Nehmen Sie die Batterien heraus, wenn das
Radio nicht in Betrieb ist.
Sollte Flüssigkeit aus den Batterien austreten,
wischen Sie das Batteriefach sauber.
Falls Batteriefl üssigkeit auf Ihren Körper gelangen
sollte, muss sie sorgfältig abgewaschen werden.
Wenn beim Einschalten
Akku-Batterie eingelegt ist, dann ist der Ladestand
der Batterie niedrig.
Laden Sie die Batterie über den Wechselstromadapter
auf, oder setzen Sie einen aufgeladenen Akku ein.
13. Laden Sie das Gerät nur mit dem vom Hersteller
empfohlenen Ladegerät auf.
• Ein für einen Typ von Akku-Batterie geeignetes
Ladegerät kann eine Brandgefahr verursachen,
wenn es mit einem anderen Akku verwendet wird.
14. Benutzen Sie das Radio nur mit der ausdrücklich
angegebenen Akku-Batterie.
• Die Verwendung einer anderen Akku-Batterie kann
Verletzungs- und Brandrisiko verursachen.
15. Wenn die Akku-Batterie nicht verwendet wird,
muss sie von anderen Metallgegenständen
wie Zettelklemmen, Münzen, Schlüsseln,
Nägeln, Schrauben, oder anderen kleinen
Metallgegenständen, die eine Verbindung von
einem Pol zum anderen herstellen könnten, fern
gehalten werden.
• Ein Kurzschluss der Batterieanschlüsse kann zu
Verbrennungen oder Bränden führen.
16.
Im Falle von Störungen, kann Flüssigkeit aus der
Batterie austreten. Vermeiden Sie in diesem Fall
jeglichen Kontakt. Sollten Sie dennoch mit der Batterie
in Berührung kommen, waschen Sie die betroff ene Stelle
gründlich mit Wasser ab. Ist die Flüssigkeit ins Auge
geraten, suchen Sie einen Arzt auf.
• Ausgetretene Batteriefl üssigkeiten können zu
Reizungen oder Verbrennungen führen.
17. Lassen Sie den Service an ihrem Radio durch eine
qualifi zierte Reparaturwerkstatt durchführen, die
nur identische Ersatzteile verwendet.
• Das stellt sicher, dass die Sicherheit des Radios
aufrecht erhalten bleibt.
18. Das Hauptgerät und der Adapter dürfen nicht
Tropf- oder Spritzwasser ausgesetzt werden,
und es dürfen keine mit Flüssigkeiten gefüllte
Gegenstände, wie zum Beispiel Vasen, auf dem
Gerät und Adapter abgestellt werden.
angezeigt wird und die
13
Deutsch
19. Die Batterien (die eingesetzten Batterien oder
Akkus) dürfen nicht übermäßiger Hitze wie
zum Beispiel Sonneneinstrahlung, Feuer o. Ä.
ausgesetzt werden.
20. Der NETZ-Stecker des Adapters wird zur Trennung
vom Stromnetz verwendet, er muss sich in einem
ordnungsgemäßen Zustand befi nden.
SCHUTZ IHRES GEHÖRS
Ständig lauten Geräuschen ausgesetzt zu sein kann zu
bleibendem Gehörverlust führen. Je höher die Lautstärke
ist, desto rascher kann ein Gehörverlust eintreten.
Wenn Sie sich über längere Zeit etwas mit hoher Lautstärke
anhören, gewöhnen sich Ihre Ohren daran. Dadurch
entsteht trotz der Tatsache, dass sie Ihr Gehör schädigen
kann, die Täuschung, dass die Lautstärke angemessen sei.
Beachten Sie das Folgende, um einen Gehörverlust zu
verhüten.
VORSICHT
1. Achten Sie unbedingt darauf, Ihren Ohren etwas
Ruhe zu geben, indem Sie regelmäßig Pausen
einlegen und nicht zu lange Musik hören.
Selbst bei Einstellung auf eine sichere Lautstärke kann
ständiges Zuhören über längere Zeiträume Gehörverlust
verursachen.
2. Achten Sie darauf, die Lautstärke nicht zu erhöhen,
da sich Ihr Gehör an die Lautstärke gewöhnt.
Hüten Sie sich davor, sich an eine bestimmte Lautstärke
zu gewöhnen. Stellen Sie die Lautstärke auf ein sicheres
Niveau ein, bevor sich Ihre Ohren an hohe Lautstärken
gewöhnen.
3. Wenn Ihre Ohren zu pfeifen beginnen, Sie
Beschwerden verspüren, oder wenn Gespräche
verschwommen oder undeutlich zu sein scheinen,
hören Sie auf, Musik zu hören und lassen Sie Ihre
Ohren von einem Arzt untersuchen.
VORSICHTSMASSNAHME BEIM
ANSCHLIESSEN AN EXTERNE
GERÄTE
Beim Anschließen von Smartphones oder anderen
Peripheriegeräten an das Radio können unerwartete
Probleme zum Verlust oder zur Beschädigung von in
diesen gespeicherten Daten führen. Denken Sie an
diese Möglichkeit und legen Sie immer vorher eine
Sicherungskopie der Daten an.
Beachten Sie, dass Hitachi Koki für die Beschädigung
oder den Verlust von in Smartphones oder anderen
Peripheriegeräten gespeicherten Daten beim Anschließen
an das Radio oder für Schäden an den Geräten selbst nicht
haftbar gemacht werden kann.
HAUPTFUNKTIONEN
○ Manuell/Automatikwahl
○ Speichern (Speicher) (10 AM + 10 FM-Stationen)
○ Radio An/Aus/Alarm
○ Eingangsbuchse zum Abspielen von Audiodateien von
Smartphones und tragbaren Audio-Playern
○ Stereo-Lautsprecher von hoher Qualität
○ Aufl aden von Smartphones und Mobiltelefons
○ Geeignet für Akku-Batterien und Wechselstromadapter
für Hitachi-Elektrogeräte.
Deutsch
TECHNISCHE DATEN
Frequenzband
Antenne
Lautsprecher 90 mm (8 Ω) × 2
Max.
Ausgangsleistung
Stromversorgung
Außenabmessungen
Gewicht 3,4 kg
○ Für anwendbare Netzteile siehe Bedienungsanleitung:
Anwendbare Netzteile: Dong Guan Sun Hung Kin
Electrical Co., Ltd. (Produktion)
HKP12-1201200dV, HKP12-1201200dB (Modell)
○ Nur die nachfolgend genannten Schiebeakkus sind
verwendbar
(Modell) BSL1430: 14,4 V 3000 mAh
Lithium-Akku
(Modell) BSL1830: 18 V 3000 mAh
Lithium-Akku
(Produktion) Hitaci Koki Co., Ltd.
FM: 87,5 bis 108 MHz
AM: 522 bis 1629 KHz
FM: Gummiantenne
AM: Ferritstab-Antenne (eingebaut)
Wechselstromadapter: 5 W × 2
14,4 V: 6 W × 2
18 V: 7 W × 2
Einschub-Batterie: DC 14,4 V, 18 V
Haushaltsstromanschluss
(unter Benutzung des mitgelieferten
Wechselstromadapters)
Speicherbatterien: DC 3 V, zwei AABatterien
L 366 mm x B 303 mm x H 261 mm
(mit eingezogener Antenne)
SYMBOLE
WARNUNG
Die folgenden Symbole werden für diese Maschine
verwendet. Achten Sie darauf, diese vor der
Verwendung zu verstehen.
UR18DSAL : Baustellenradio
Für anwendbare Netzteile siehe
Bedienungsanleitung.
Nur für EU-Länder
Werfen Sie Elektrowerkzeuge nicht in den
Hausmüll!
Gemäß der Europäischen Richtlinie 2002/96/
EG über Elektro- und Elektronik- Altgeräte
und Umsetzung in nationales Recht müssen
verbrauchte Elektrowerkzeuge getrennt
gesammelt und einer umweltgerechten
Wiederverwertung zugeführt werden.
Einschaltknopf
Quellenauswahlknopf
Menütaste
Eingabe-/Informationstaste
Lautstärkeknopf
Suchknopf
Auswahlknopf
Summeralarmanzeige
Radiowecker-Anzeige
Anzeige Batterie leer
STANDARDZUBEHÖR
Zusätzlich zum Hauptgerät (1 Gerät) enthält die
Packung das nachfolgend aufgelistete Zubehör.
○ Wechselstromadapter ...................................................1
○ AA-Batterie ...................................................................2
○ Ladekabelhalterung ......................................................1
(für Apple Lightning-Verbindung)
* Eine Android-Halterung ist im Hauptgerät verbaut.
Das Standardzubehör kann ohne vorherige
Bekanntmachung jederzeit geändert werden.
VOR DEM BETRIEB
● Einsetzen der Speicherbatterien
Durch das Einsetzen von Speicherbatterien in
das Gerät können die Einstellungen der Uhr und
Radiosenderfrequenzen gespeichert werden.
1. Entriegeln Sie den Verschluss, um die hintere
Abdeckung zu öff nen und zum Aufbewahrungsfach für
die Speicherbatterien zu gelangen. (Abb. 1)
2. Öff nen Sie das Aufbewahrungsfach für die
Speicherbatterien und setzen Sie zwei AA-Batterien (im
Lieferumfang enthalten) in der angegebenen Richtung in
das Aufbewahrungsfach ein. (Abb. 2)
HINWEIS
○ Vertauschen Sie beim Einsetzen der Batterien die
Polarität der Batterie (+/-) nicht.
○ Verwenden Sie niemals gleichzeitig neue und
gebrauchte Batterien. Ersetzen Sie stets beide Batterien
gleichzeitig.
○ Setzen Sie die Batterien niemals Feuer aus oder
entsorgen Sie sie nicht über den Hausmüll.
● Installation des Netzadapters
Durch den Einstecken des Netzadapters (im Lieferumfang
enthalten) in eine standardmäßige Haushaltssteckdose
kann das Gerät mit Strom versorgt werden.
Ziehen Sie die Gummiabdeckung zurück und stecken Sie
den Netzadapter in den Netzadapteranschluss. (Abb. 3)
Stecken Sie dann den Netzadapter in eine Stromsteckdose.
HINWEIS
○ Wenn gleichzeitig Batterien eingesetzt sind, dient der
Netzadapter der Stromversorgung des Gerätes und die
Batterien werden nicht verbraucht.
○ Wenn gleichzeitig der Netzadapter verwendet wird,
werden die Batterien nicht aufgeladen, weil dieses Gerät
nicht über eine Wiederaufl adefunktion verfügt.
14
Aufbewahrung des Netzadapters
Der Netzadapter kann in einem Fach hinter der hinteren
Abdeckung aufbewahrt werden. (Abb. 4)
● Einsetzen der Batterie
VORSICHT
Berühren Sie die Anschlüsse nicht.
Andernfalls können Sie sich die Hand aufschneiden
oder andere Verletzungen erleiden.
Mit diesem Gerät kann nur ein 14,4-V- oder
18-V-Schiebeakku verwendet werden.
Einsetzen der Batterie
Öff nen Sie die hintere Abdeckung, richten Sie die Batterie
an den Nuten dieses Gerätes aus und stecken Sie sie
vollständig ein. (Abb. 5)
HINWEIS
○ Üben Sie beim Einsetzen der Batterie keinen
übermäßigen Druck aus. Wenn sich die Batterie nicht
leicht einsetzen lässt, ist sie nicht richtig herum eingelegt.
Überprüfen Sie, ob die Batterie in die richtige Richtung
zeigt und dass keine Hindernisse den Einlegeweg
behindern.
○ Wenn
Einlegen der Batterien eingeschaltet wird, ist der
Batterieladestand niedrig.
Verwenden Sie in diesem Falle entweder den Netzadapter
oder setzen Sie einen vollständig geladenen Akku ein.
angezeigt wird, wenn das Gerät nach dem
● Ändern der Datumsanzeige
Für die Datumsanzeige stehen die folgenden Optionen zur
Verfügung.
JJJ/MM/TT (Jahr/Monat/Tag)
MM/TT/JJJJ (Monat/Tag/Jahr)
TT/MM/JJJJ (Tag/Monat/Jahr)
1. Drücken Sie die Menütaste.
2. Drücken Sie den Auswahlknopf und zeigen Sie
„DATE DISP“ an.
3. Drücken Sie die Eingabe-/Informationstaste.
4. Drücken Sie den Auswahlknopf und zeigen Sie die
Datumsanzeige Ihrer Wahl an.
5. Drücken Sie die Eingabe-/Informationstaste.
DATE DISP
YYYY/MM/DD
● Einstellen des Datums
Führen Sie zur Einstellung des Datums mithilfe des
Bedienfelds die nachstehenden Schritte aus.
1. Drücken Sie die Menütaste.
2. Drücken Sie den Auswahlknopf und zeigen Sie
„DATE ADJ“ an.
3. Drücken Sie die Eingabe-/Informationstaste.
4. Drücken Sie den Auswahlknopf und stellen Sie die
Ziff ern des „Jahres“ ein.
DATE ADJ
2014
Deutsch
5. Drücken Sie die Eingabe-/Informationstaste.
6. Drücken Sie den Auswahlknopf und stellen Sie die
Ziff ern des „Monats“ ein.
7. Drücken Sie die Eingabe-/Informationstaste.
8. Drücken Sie den Auswahlknopf und stellen Sie die
Ziff ern des „Tages“ ein.
9. Drücken Sie die Eingabe-/Informationstaste.
03 / 01
03 / 31
● Einstellen der Uhr
Führen Sie zur Einstellung der Uhr mithilfe des Bedienfelds
die nachstehenden Schritte aus.
1. Drücken Sie die Menütaste.
2. Drücken Sie den Auswahlknopf und zeigen Sie
„CLOCK ADJ“ an.
3. Drücken Sie die Eingabe-/Informationstaste.
4. Drücken Sie den Auswahlknopf und stellen Sie die
Ziff ern der „Stunde“ ein.
5. Drücken Sie die Eingabe-/Informationstaste.
6. Drücken Sie den Auswahlknopf und stellen Sie die
Ziff ern der „Minute“ ein.
7. Drücken Sie die Eingabe-/Informationstaste.
8. Drücken Sie den Auswahlknopf und wählen Sie „ “
oder „
9. Drücken Sie die Eingabe-/Informationstaste.
CLOCK ADJ
12 : 00
12 : 55
“ aus.
12H 24H
RADIO HÖREN
● Auswahl des UKW- oder MW-
Frequenzbands
1. Schalten Sie das Gerät auf EIN.
2. Drücken Sie den Quellenauswahlknopf und wählen Sie
das Frequenzband des Radios aus (UKW/MW).
15
Deutsch
● Auswahl der Sender
Automatische Senderauswahl
Durch langes Drücken auf den Suchknopf wird das
Frequenzband automatisch nach klar empfangbaren
Sendefrequenzen durchsucht. Drücken Sie den Suchknopf
erneut lange, um zum nächsten Radiosender zu gelangen.
Manuelle Senderauswahl
Drücken Sie den Suchknopf, um die Frequenzen zu ändern
und einen Sender auszuwählen.
Auswahl eines voreingestellten Senders
Drücken Sie den Auswahlknopf, um schnell zwischen den
voreingestellten Sendern umzuschalten.
Zum Zeitpunkt des Kaufs sind keine Sender voreingestellt.
Folgen Sie den nachstehenden Schritten, um voreingestellte
Sender zu registrieren.
<Manuelle Registrierung voreingestellter Sender>
1. Stellen Sie den Radiosender Ihrer Wahl ein und drücken
Sie die Menütaste.
2. Drücken Sie den Auswahlknopf und zeigen Sie
„PRESET“ an.
3. Drücken Sie die Eingabe-/Informationstaste.
4. Drücken Sie den Auswahlknopf und wählen Sie eine
Zahl für die Registrierung des Senders von 0 bis 9 aus.
5. Drücken Sie die Eingabe-/Informationstaste, um den
Sender zu registrieren.
<Automatische Registrierung voreingestellter Sender>
Diese Funktion ermöglicht die automatische Registrierung
der im Verwendungsbereich verfügbaren Radiosender.
(Maximal 10 Sender)
1. Drücken Sie die Menütaste.
2. Drücken Sie den Auswahlknopf und zeigen Sie
„AUTO SCAN“ an.
3. Drücken Sie die Eingabe-/Informationstaste, um
die automatische Registrierung der verfügbaren
Radiosender zu starten.
HINWEIS
○ Ein Radiosender wird nicht registriert, wenn seine
Empfangsfrequenz schwach ist.
○ In Abhängigkeit vom Ort der Verwendung werden
möglicherweise Nicht-Radiosignale wie zum Beispiel
Rauschen registriert.
○ Siehe Seite 18, wenn Sie über USB im „
wiederaufl aden.
(Langes Drücken)
PRESET
PRESET 2
AUTO SCAN
“-Modus
● Für einen besseren Empfang
UKW-Sendungen
Stellen Sie den Empfang durch die Änderung der
Ausrichtung und des Winkels der Antenne ein.
Wenn Sie eine Stereosendung empfangen, wird „STEREO“
angezeigt.
Durch Umschalten auf Mono-Empfang kann das Rauschen
verringert werden.
<Umschalten auf Mono-Empfang>
1. Drücken Sie die Menütaste.
2. Drücken Sie den Auswahlknopf und zeigen Sie
„STEREO“ an.
3. Drücken Sie die Eingabe-/Informationstaste.
4. Drücken Sie den Auswahlknopf und zeigen Sie „
an.
5. Drücken Sie die Eingabe-/Informationstaste, um die
Einrichtung abzuschließen.
MW-Sendungen
Bewegen Sie das Gerät und richten Sie es in die Richtung
mit dem besten Empfang.
<Lautstärkeeinstellung>
Verwenden Sie den Lautstärkeknopf, um die Lautstärke von
0 bis 30 einzustellen.
STEREO
OFF
“
VERWENDUNG EXTERNER GERÄTE
FÜR DIE AUDIOWIEDERGABE
Das Radio kann den Ton von Smartphones, tragbaren
Musik-Playern und anderen externen Geräten wiedergeben.
VORSICHT
Stellen Sie sicher, dass Sie die Ausgabelautstärke des
Players vor der Wiedergabe senken.
HINWEIS
Es gibt zwei Arten von Anschlusskabeln, den geraden
Typ und den L-Typ.
Verwenden Sie ein Kabel vom L-Typ, wenn Sie
große externe Geräte zum Anschluss oder Speichern
verwenden.
1. Öff nen des Aufbewahrungsbereichs für externe
Geräte
Schalten Sie die Stromversorgung des Radios auf AUS
und öff nen Sie die vordere Abdeckung. (Abb. 6)
2. Anschluss eines externen Geräts
Verbinden Sie mithilfe eines handelsüblichen
Stereo-Ministeckeranschlusskabels (ø 3,5 mm)
den AUX-Eingangsanschluss des Radios mit dem
Audioausgangsanschluss des externen Geräts. (Abb. 7)
3. Sichern des externen Geräts
Die rechten und linken Halterungen können nach rechts
oder links bewegt werden, indem Sie auf die Ober- und
Unterseite jeder Halterung drücken.
Sichern Sie das externe Gerät zwischen den beiden
Halterungen. (Abb. 8)
16
4. Wiedergabe
Schalten Sie die Stromversorgung des Radios auf EIN,
drücken Sie den Quellenauswahlknopf und zeigen Sie
„
“ an.
AUX
Stellen Sie sicher, dass Sie die Ausgabelautstärke des
Die Lautstärke kann am Radio eingestellt werden.
Schließen Sie die vordere Abdeckung, nachdem Sie die
HINWEIS
Wenn die Lautstärke des externen Geräts zu leise
HINWEIS
○ Seien Sie sich bitte bewusst, dass beim Anschluss
○ Die externen Geräte können beschädigt werden, wenn
○ Siehe Seite 18, wenn Sie über USB im „
externen Geräts vor der Musikwiedergabe senken.
(Lautstärke)
Titel ausgewählt und die Lautstärke eingestellt haben.
eingestellt ist, können Sie möglicherweise die Lautstärke
nicht erhöhen.
eines Smartphones die Klingeltöne eingehender Anrufe
bei einigen Modellen nicht über die Lautsprecher
wiedergegeben werden.
Sie an Orten verwendet werden, die der Sonne oder
heißen Temperaturen ausgesetzt sind.
wiederaufl aden.
“-Modus
BENUTZUNG DER TIMER-FUNKTION
● Einstellung des Schlaf-Timers
Mithilfe der Schlaf-Timer-Funktion kann die Stromversorgung
nach dem Ablauf einer bestimmten Zeitspanne automatisch
auf AUS geschaltet werden.
1. Drücken Sie die Menütaste.
2. Drücken Sie den Auswahlknopf und zeigen Sie „SLEEP“
an.
3. Drücken Sie die Eingabe-/Informationstaste.
4. Drücken Sie den Auswahlknopf, um die Zeitspanne
einzustellen (zwischen „0 – 90“ Minuten), bevor die
Stromversorgung auf AUS geschaltet wird.
5. Drücken Sie die Eingabe-/Informationstaste.
6. „SLEEP“ wird auf dem LCD angezeigt.
○ Um die verbleibende Zeit zu überprüfen, drücken Sie die
Menütaste erneut und wählen Sie „SLEEP“.
○ Um den Schlaf-Timer zu löschen, stellen Sie die Zeit
zum Ausschalten auf 0 Minuten.
● Einstellung des Weckers
(Wecksummton)
Das Radio kann so eingestellt werden, dass zu einem
bestimmten Zeitpunkt ein Wecksummton ausgelöst wird.
1. Drücken Sie die Menütaste.
2. Drücken Sie den Auswahlknopf und zeigen Sie
„BUZZER ALM“ an.
SLEEP
30 MIN
BUZZER ALM
3. Drücken Sie die Eingabe-/Informationstaste.
4. Drücken Sie den Auswahlknopf und zeigen Sie „
5. Drücken Sie die Eingabe-/Informationstaste.
6. Drücken Sie den Auswahlknopf und stellen Sie die
Ziff ern der „Stunde“ ein.
7. Drücken Sie die Eingabe-/Informationstaste.
8. Drücken Sie den Auswahlknopf und stellen Sie die
Ziff ern der „Minute“ ein.
9. Drücken Sie die Eingabe-/Informationstaste.
10. Drücken Sie den Auswahlknopf, um die Wiederholung
einzustellen.
Einmalig ONCE
Täglich DAILY
Nur Werktage WEEKDAY
Nur Samstag und Sonntag WEEKEND
11. Drücken Sie die Eingabe-/Informationstaste, um die
Einrichtung abzuschließen.
wird auf dem LCD angezeigt.
○ Um die Einstellung des Weckers zu löschen, gehen Sie
erneut zu „BUZZER ALM“ und ändern Sie die Einstellung
auf „
○ Der Wecksummton wird automatisch nach 10 Minuten
ausgeschaltet. Der Ton kann auch durch Drücken einer
beliebigen Taste ausgeschaltet werden.
HINWEIS
Die Lautstärke des Wecksummers lässt sich nicht
einstellen.
● Einstellung des Radiowecker-Timers
Mithilfe der Radiowecker-Timer-Funktion kann das Radio so
eingestellt werden, dass es zu einem bestimmten Zeitpunkt
eingeschaltet wird, um eine Radiosender zu genießen.
1. Drücken Sie die Menütaste.
2. Drücken Sie den Auswahlknopf und zeigen Sie
„RADIO ALM“ an.
3. Drücken Sie die Eingabe-/Informationstaste.
4. Drücken Sie den Auswahlknopf und zeigen Sie „
5. Drücken Sie die Eingabe-/Informationstaste.
17
“.
ON
12 : 00
12 : 30
DAILY
RADIO ALM
ON
Deutsch
“ an.
“ an.
Deutsch
6. Drücken Sie den Auswahlknopf und stellen Sie die
Ziff ern der „Stunde“ ein.
7. Drücken Sie die Eingabe-/Informationstaste.
8. Drücken Sie den Auswahlknopf und stellen Sie die
Ziff ern der „Minute“ ein.
9. Drücken Sie die Eingabe-/Informationstaste.
10. Drücken Sie den Auswahlknopf, um die Wiederholung
einzustellen.
Einmalig
Täglich
Nur Werktage
Nur Samstag und Sonntag
11. Drücken Sie die Eingabe-/Informationstaste.
12. Wählen Sie das Frequenzband des Radios aus.
Drücken Sie den Wahlschalter, um „AM“ oder „FM“
auszuwählen.
13. Drücken Sie die Eingabe-/Informationstaste.
14. Drücken Sie den Auswahlknopf, um einen
voreingestellten Sender anzuzeigen.
Um einen Sender nach der Sendefrequenz auszuwählen,
verwenden Sie den Suchknopf.
15. Drücken Sie die Eingabe-/Informationstaste, um die
Einrichtung abzuschließen.
wird auf dem LCD angezeigt.
○ Um die Einstellung des Radioweckers zu löschen,
gehen Sie erneut zu „RADIO ALM“ und ändern Sie die
Einstellung auf „
HINWEIS
Die Lautstärke des Radios entspricht der Lautstärke, bei
der das Radio das letzte Mal auf AUS geschaltet wurde.
12 : 00
12 : 55
DAILY
FM
P2 FM 79.5 MHz
FM 80.0 MHz
“.
ONCE
DAILY
WEEKDAY
WEEKEND
AUFLADEN IHRES SMARTPHONES
Geräte wie zum Beispiel ein Smartphone oder Handy
können aufgeladen werden, indem das Gerät an dieses
Radio angeschlossen wird.
Die Aufl adefunktion ist nur für den „
verfügbar. (Das Aufl aden kann nicht im „
erfolgen.)
HINWEIS
○ Stellen Sie die Lautstärke auf 20 oder weniger ein, wenn
Sie im „
Wenn die Lautstärke auf 21 oder mehr eingestellt ist, ist
das Radio so ausgelegt, dass die USB-Ausgabe und das
Aufl aden von Smartphones und Handys deaktiviert wird.
“-Modus aufl aden.
“ oder „
“-Modus
“ -Modus
18
(Im „ “-Modus wird das USB-Aufl aden fortgesetzt,
auch wenn die Lautstärke 21 oder mehr beträgt.)
○ In seltenen Fällen kann während des USB-Aufl adens
möglicherweise die Tonausgabe unterbrochen oder die
Stromversorgung ausgeschaltet werden.
Wenn eines von beiden auftritt, senken Sie die
Lautstärke oder beenden Sie das Aufl aden über USB.
○ Wenn der Ladezustand der Batterie niedrig ist, ist das
Radio so ausgelegt, dass die USB-Ausgabe und das
Aufl aden von Smartphones und Handys deaktiviert wird.
Sollte der vorgenannte Fall eintreten, laden Sie den Akku
wieder auf oder ersetzen Sie ihn durch einen vollständig
aufgeladenen Akku.
○ Wenn die Spannung niedrig ist, wenn der Netzadapter
verwendet wird, wird die USB-Ausgabe und damit jedes
Aufl aden möglicherweise unterbrochen.
1. Stellen Sie mithilfe eines handelsüblichen USBVerbindungs-/Ladekabels eine Verbindung zum USBLadeanschluss, der sich in der Aufbewahrungstasche
des Radios für externe Geräte befi ndet, her. (Abb. 9)
2. Sichern Sie das Smartphone mit den Halterungen und
schließen Sie die Abdeckung. (Abb. 8)
(Siehe „Sichern des externen Geräts“ auf Seite 16)
HINWEIS
○ Verwenden Sie eine vollständig aufgeladene Batterie,
wenn Sie eine Batterie als Stromquelle dieses Geräts
verwenden.
Sie werden die Ladefunktion für Smartphones und
Handys nicht verwenden können, wenn der Ladezustand
der Batterie auf einen niedrigen Wert fällt.
○ Die für das Aufl aden benötigte Zeit schwankt
entsprechend dem Smartphone oder Handy, das
wiederaufgeladen wird.
○ Verwenden Sie die Aufl adefunktion für keine anderen
Geräte als ein Smartphone oder Handy.
○ Das Radio kann möglicherweise einige Smartphone-
oder Handymodelle nicht aufl aden.
Zwei Ladekabelhalterungen, eine für Android und die
andere für Apple (Lightning Connector) sind im Lieferumfang
enthalten.
Wählen Sie die Halterung aus, die am besten zu Ihrem Gerät
passt.
○ Wenn Ihr Gerät zu groß für die Aufbewahrungstasche
des Radios für externe Geräte ist, ziehen Sie das Kabel
durch das Kabeldurchführungsloch. (Abb. 10)
HINWEIS
Weil die Ladekabelhalterungen für Anschlüsse in
Standardgröße ausgelegt sind, können die Halterungen
in Abhängigkeit vom verwendeten Ladekabel einige
Anschlüsse möglicherweise nicht sicher festhalten.
WARTUNG UND INSPEKTION
WARNUNG
Ziehen Sie, wenn das Gerät nicht benutzt wird, bzw.
Bei Inspektion und Wartung, unbedingt den Stecker
des Wechselstromadapters heraus und nehmen Sie
die Akku-Batterie und die Sicherungsbatterien aus dem
Gerät heraus.
● Inspektion der Befestigungsschrauben
Alle Befestigungsschrauben werden regelmäßig
inspiziert und geprüft, ob sie gut angezogen sind. Wenn
sich eine der Schrauben lockert, muß sie sofort wieder
angezogen werden. Geschieht das nicht, kann das zu
erheblichen Gefahren führen.
● Außenreinigung
Wenn das Radio schmutzig ist, wischen Sie es mit
einem weichen trockenen Tuch oder einem mit
Seifenwasser befeuchteten Tuch ab. Verwenden
Sie keine chlorhaltigen Lösungsmittel, Benzin, oder
Farbverdünner, da diese den Kunststoff angreifen.

● Lagern des Radios
Lagern Sie das Radio nicht an folgenden Orten:
○ In Reichweite von Kindern oder an für Kinder leicht
zugänglichen Orten.
○ An feuchten oder staubigen Orten.
○ An Orten mit hoher Temperatur wie etwa in einem
Auto oder an einer Stelle, die direktem Sonnenlicht
ausgesetzt ist.
○ An extrem kalten Orten oder kalter Zugluft direkt
ausgesetzt.
○ An Orten mit starken Temperaturschwankungen.
○ An Orten, wo das Gerät Rauch oder Dampf
ausgesetzt ist, wie etwa in Nähe einer Kochstelle
oder eines Luftbefeuchters.
MODIFIKATIONEN
Hitachi-Elektrowerkzeuge werden fortwährend
verbessert und modifi ziert, um die neuesten technischen
Fortschritte einzubauen.
Dementsprechend ist es möglich, daß einige Teile ohne
vorherige Benachrichtigung geändert werden.
GARANTIE
Auf Hitachi-Elektrowerkzeuge gewähren wir eine Garantie
unter Zugrundelegung der jeweils geltenden gesetzlichen
und landesspezifi schen Bedingungen. Dieses Garantie
erstreckt sich nicht auf Gehäusedefekte und nicht auf
Schäden, die auf Missbrauch, bestimmungswidrigen
Einsatz oder normalen Verschleiß zurückzuführen sind. Im
Schadensfall senden Sie das nicht zerlegte Elektrowerkzeug
zusammen mit dem GARANTIESCHEIN, den Sie am
Ende der Bedienungsanleitung fi nden, an ein von Hitachi
autorisiertes Servicecenter.
Deutsch
HINWEIS
Aufgrund des ständigen Forschungs-und Entwicklungsprogramms von HITACHI sind Änderungen der hierin
gemachten technischen Angaben nicht ausgeschlossen.
19
Français
(Traduction des instructions d’origine)
DÉSIGNATION DES PIÈCES
Antenne FM
1
Poignée
2
Couvercle arrière
3
Haut-parleur
4
Boîtier de rangement pour
5
appareils tiers
Port de l’adaptateur CA
6
Port de l’entrée AUX
7
Port de chargement USB
8
Trou d’accès du câble
9
Bouton ON / OFF
0
Bouton de sélection de la source
!
Bouton de menu
@
Bouton d’information/entrer
#
Bouton de volume (-)
$
Bouton de volume (+)
%
Bouton de recherche (-)
^
Bouton de recherche (+)
&
Bouton de sélection (-)
*
Bouton de sélection (+)
(
Onglet
)
Boîtier de pile AA
q
Couvercle
w
Adaptateur CA
e
Cache en caoutchouc
r
Batterie
t
Bornes
y
Couvercle avant
u
Câble du connecteur de mini prise
i
stéréo
Smartphone
o
Port de sortie audio
p
Support de câble de recharge
a
Support
s
Câble de chargement USB
d
Capuchon en caoutchouc
f
AVERTISSEMENTS DE SÉCURITÉ
CONCERNANT LA RADIO DE
CHANTIER SANS FIL
AVERTISSEMENT
Lire tous les avertissements de sécurité et toutes les
instructions.
Tout manquement à observer ces avertissements et
instructions peut engendrer des chocs électriques, des
incendies et/ou des blessures graves.
Conservez tous les avertissements et toutes les
instructions pour vous y référer ultérieurement.
1. Utilisez uniquement avec une tension d’alimentation
adaptée.
• L’utilisation d’une autre tension peut entraîner un
incendie ou une électrocution.
2. Evitez d’endommager le cordon de l’adaptateur CA.
• Ne modifi ez pas le cordon et évitez de le tordre ou
de le tirer fortement. Il ne doit pas être écrasé par
des objets lourds ni placé à proximité d’appareils de
chauff age.
• Quand l’appareil n’est pas utilisé, débranchez la
prise d’alimentation (adaptateur CA) et débranchez
le cordon de la radio. Vous vous exposez sinon à une
électrocution ou un risque d’incendie.
3. Ne touchez pas la prise d’alimentation (adaptateur
CA) avec les mains mouillées.
• Vous risqueriez de vous électrocuter.
4. N’utilisez pas la radio dans une salle de bain ou
sous la douche.
• N’utilisez pas la radio dans un endroit humide ni sous
la pluie.
• Vous risqueriez de vous électrocuter et l’appareil
pourrait émettre de la fumée ou présenter un
dysfonctionnement.
Indicateur de programme AM
Ⓐ
Indicateur AUX
Ⓑ
Indicateur de programme FM
Ⓒ
Indicateur RDS
Ⓓ
Indicateur stéréo
Ⓔ
Indicateur d’alarme
Ⓕ
Indicateur d’alarme par buzzer
Ⓖ
Indicateur d’alarme de radio sur
Ⓗ
MARCHE
Indicateur de la minuterie de mise
Ⓘ
en veille
Indicateur de batterie faible
Ⓙ
Indicateur d’informations
Ⓚ
Horloge
Ⓛ
Indicateur AM/PM
Ⓜ
Témoin MHz / kHz
Ⓝ
5. Ne touchez pas l’antenne FM ou la prise
d’alimentation (adaptateur CA) en cas d’orage.
• Vous risqueriez de vous électrocuter.
6. Ne démontez pas la radio et ne tentez pas de la
modifi er.
• Vous risqueriez de vous électrocuter ou de provoquer
un incendie. Les vérifi cations et réparations doivent
être réalisées par le magasin dans lequel vous avez
acheté l’outil ou par le service après-vente Hitachi.
7. Insérez la prise d’alimentation (adaptateur CA)
aussi profondément que possible.
• La présence de poussière ou de saleté entre la fi che
d’alimentation et la prise électrique peut entraîner
un risque d’incendie. Ôtez régulièrement la fi che
d’alimentation pour essuyer la poussière et la saleté
à l’aide d’un chiff on sec.
8. Le boîtier de la radio ne doit pas être exposé à des
corps étrangers ou à de l’eau.
• A l’exception de l’adaptateur CA et de la batterie
rechargeable, si un quelconque objet en métal
ou infl ammable ou de l’eau pénètre dans le capot
arrière, cela peut provoquer un choc électrique ou le
feu.
• Protégez la radio contre l’infi ltration de poussière
de fer provenant des haut-parleurs bass refl ex, de
poussière et d’eau.
9. Ne vous asseyez pas sur la radio et ne montez pas
dessus.
• Vous risqueriez de provoquer un accident ou un
dysfonctionnement de l’appareil.
10. Ne placez pas la radio en hauteur ou sur une
surface instable. Ne laissez pas pendre la radio par
la poignée.
• En tombant, la radio risquerait de blesser quelqu’un
ou de s’endommager.
11. Lorsqu’aucune batterie encastrable n’est chargée,
recouvrez la borne à l’aide du couvercle coulissant
pour éviter de vous couper ou de vous blesser en
touchant cette zone.
20
12. Manipulez les batteries de secours avec soin.
• Il y a risque d’explosion si la pile est remplacée de
façon incorrecte. Remplacez la pile uniquement par
le même modèle ou un modèle équivalent.
• Une manipulation incorrecte des batteries peut
corrompre l’étanchéité de ces dernières, entraînant
un incendie, une blessure ou une pollution de
l’environnement. Respectez les précautions
suivantes.
– Utilisez uniquement les batteries spécifi ées
– Ne chauff ez pas les batteries et ne les démontez
pas
– Ne jetez pas les batteries dans un feu et ne les
immergez pas dans l’eau
– Ne chargez pas les batteries
– Les batteries doivent être insérées dans le bon
sens pour éviter un court-circuit
– Ne réutilisez pas les batteries et n’utilisez pas
des batteries d’un type diff érent
– Retirez les batteries lorsque vous n’utilisez pas la
radio
Si les batteries venaient à fuir, essuyez l’intérieur du
boîtier pour le sécher.
En cas de contact corporel avec le liquide des
batteries, rincez soigneusement la peau.
L’affi chage du symbole
tension de l’appareil avec la batterie rechargeable
insérée signifi e que la batterie est faible.
Branchez la radio sur l’adaptateur CA ou insérez une
batterie chargée.
13. Recharger uniquement avec le chargeur spécifi é
par le fabricant.
• Un chargeur adapté à un type de batterie
rechargeable peut s’avérer dangereux et provoquer
un incendie s’il est utilisé avec une autre batterie.
14. Utilisez la radio uniquement avec la batterie
spécifi quement désignée.
• L’utilisation d’une autre batterie rechargeable peut
entraîner un risque de blessure ou d’incendie.
15. Lorsque vous n’utilisez pas la batterie rechargeable,
conservez-la à l’écart d’objets métalliques tels
que des trombones, des pièces de monnaie, des
clés, des clous, des vis ou tout autre petit objet
métallique pouvant provoquer un court-circuit.
• L’interférence avec les bornes de la batterie peut
entraîner des brûlures ou un incendie.
16. Dans des conditions extrêmes, du liquide peut
couler de la batterie ; éviter tout contact. En cas de
contact accidentel, rincer à l’eau. En cas de contact
avec les yeux, consulter un médecin.
• Le liquide de la batterie peut entraîner des irritations
ou des brûlures.
17. Faire entretenir la radio par un technicien habilité
à l’aide de pièces de rechange identiques
exclusivement.
• Cela garantira le maintien de la sécurité de la radio.
18. L’unité principale et l’adaptateur ne doivent pas
être exposés aux gouttes ou à des éclaboussures
et aucun objet rempli de liquide, tel que des vases,
ne doit être placé sur l’unité ou l’adaptateur.
19. Les piles (pack de pike ou piles installées) ne
doivent pas être exposées à une chaleur excessive
telle que la lumière du soleil, le feu ou autre.
20. Les fi ches principales de l’adaptateur sont utilisées
comme appareil de déconnexion, l’appareil de
déconnexion doit rester prêt à l’emploi.
lors de la mise sous
PROTÉGER VOTRE AUDITION
L’exposition prolongée à des sons forts peut entraîner une
perte d’audition permanente. Plus le volume est élevé, moins
il faudra de temps pour que votre audition soit aff ectée.
Français
En cas d’utilisation prolongée à fort volume, vos oreilles
vont s’adapter et ainsi créer l’illusion que le niveau sonore
est approprié, en dépit du fait que cela peut endommager
votre ouïe.
Respectez les consignes suivantes pour éviter tout
dommage auditif.
PRÉCAUTION
1. Faîtes régulièrement des pauses pour permettre
à vos oreilles de se reposer et évitez les temps
d’écoute trop longs.
L’écoute prolongée, même à un niveau sonore
approprié, peut causer une perte auditive.
2. Veillez à ne pas augmenter le volume lorsque votre
ouïe est en phase d’adaptation.
Prenez garde à ne pas vous habituer à un certain niveau
sonore. Réglez le volume à un niveau raisonnable avant
que vos oreilles ne s’habituent à un volume élevé.
3. Si vous éprouvez un bourdonnement dans les
oreilles, une gêne ou si les conversations vous
semble faibles ou indistinctes, cessez l’écoute et
consultez un spécialiste de l’audition.
PRÉCAUTIONS À PRENDRE
LORS DE LA CONNEXION À UN
ÉQUIPEMENT EXTERNE
Des problèmes inattendus peuvent entraîner la perte ou la
corruption des données stockées dans les Smartphones et
autres périphériques connectés à la radio. En conséquence
de cela, une sauvegarde des données devrait toujours être
faite à l’avance.
Notez que Hitachi Koki ne peut être tenu responsable de
la corruption ou la perte de données stockées dans les
Smartphones et autres périphériques connectés à la radio,
ni les dommages à l’équipement lui-même.
FONCTIONS PRINCIPALES
○ Sélection Manuelle/Auto
○ Enregistrer (mémoire) (stations 10 AM + 10 FM)
○ Radio on/off /alarme
○ Dock pour la lecture de fi chiers audio stockés sur
smartphones et lecteurs audio portables
○ Haut-parleur stéréo haute qualité
○
Rechargement de smartphones et de téléphones cellulaires
○ Compatibilité avec la batterie rechargeable et
l’adaptateur CA pour outils électriques Hitachi
CARACTERISTIQUES
Bande de
fréquence
Antenne
Haut-parleur 90 mm (8 Ω) × 2
Sortie de
puissance
maximale
Alimentation
Dimensions
externes
Masse 3,4 kg
21
FM : 87,5 à 108 MHz
AM : 522 à 1629 KHz
FM : Antenne en caoutchouc
AM : Antenne tige en ferrite (intégré)
Adaptateur CA: 5 W × 2
14,4 V: 6 W × 2
18 V: 7 W × 2
Batterie encastrable: DC 14,4 V, 18 V
Alimentation
(via l’adaptateur CA fourni)
Batteries de secours: DC 3 V, deux
piles AA
L 366 mm x P 303 mm x H 261 mm
(avec antenne réfractée)

Français
○ Pour l’alimentation applicable, consultez le mode
d’emploi :
Alimentations applicables : Dong Guan Sun Hung Kin
Electrical Co., Ltd. (Fabricant)
HKP12-1201200dV, HKP12-1201200dB (Modèle)
○ Seul la batterie coulissante ci-dessous peut être utilisée
(Modèle) BSL1430: 14,4 V 3000 mAh
Pile au lithium
(Modèle) BSL1830: 18 V 3000 mAh
Pile au lithium
(Fabricant) Hitaci Koki Co., Ltd.
Les accessoires standard sont sujets à changement sans
préavis.
SYMBOLES
AVERTISSEMENT
Les symboles suivants sont utilisés pour l’outil.
Bien se familiariser avec leur signifi cation avant
d’utiliser l’outil.
UR18DSAL : Radio de chantier sans fi l
Pour l’alimentation applicable, consultez le
mode d’emploi.
Pour les pays européens uniquement
Ne pas jeter les appareils électriques dans les
ordures ménagères !
Conformément à la directive européenne
2002/96/CE relative aux déchets d’équipements
électriques ou électroniques (DEEE), et à sa
transposition dans la législation nationale, les
appareils électriques doivent être collectés à
part et être soumis à un recyclage respectueux
de l’environnement.
Bouton ON / OFF
Bouton de sélection de la source
Bouton de menu
Bouton d’information/entrer
Bouton de volume
Bouton de recherche
Bouton de sélection
Indicateur d’alarme par buzzer
Indicateur d’alarme de radio sur MARCHE
Indicateur de batterie faible
ACCESSOIRES STANDARD
Outre l’unité principale (1 unité), l’emballage contient
les accessoires répertoriés ci-dessous.
○ Adaptateur CA ..............................................................1
○ Batterie AA ....................................................................2
○ Support de câble de recharge .......................................1
(pour un connecteur Apple Lightning)
* Le support Android est intégrée à l’unité principale.
AVANT LE FONCTIONNEMENT
● Installation des piles de rechange
Les réglages de l’heure et les fréquences de station de
radio peuvent être sauvegardés en installant des piles dans
l’unité.
1. Pour accéder à la boîte de rangement des piles de
rechange, déverrouillez la languette et ouvrez le
couvercle arrière. (Fig. 1)
2. Ouvrez le boîtier de rangement de pile de rechange et
insérez les deux piles AA (fournies) dans le boîtier de
rangement dans le sens indiqué. (Fig. 2)
REMARQUE
○ N’inversez pas la polarité des piles (+/-) lors de la mise
en place des piles.
○ Ne mélangez pas les piles usagées avec des piles
neuves. Toujours remplacer les deux piles en même
temps.
○ Ne brûlez pas les piles ou ne les jetez pas avec les
déchets ménagers.
● Installation de l’adaptateur secteur
L’alimentation peut être fournie en branchant l’adaptateur
secteur (fourni) dans une prise de maison standard.
Retirez le cache en caoutchouc et connectez l’adaptateur
secteur au port de l’adaptateur secteur. (Fig. 3)
Ensuite, branchez l’adaptateur secteur dans une prise
électrique.
REMARQUE
○ Lorsqu’utilisé conjointement avec les piles, l’adaptateur
secteur est la source principale d’alimentation et aucune
pile n’est utilisée.
○ Lorsqu’utilisé avec l’adaptateur secteur, les piles ne se
rechargent pas car cet appareil n’a pas de fonction de
recharge.
Rangement de l’adaptateur secteur
L’adaptateur secteur peut être rangé dans le compartiment
qui se trouve derrière le couvercle arrière. (Fig. 4)
● Installation de la batterie
ATTENTION
Ne touchez pas les bornes.
Cela pourrait provoquer une coupure à la main ou
d’autres blessures.
Seule une batterie de type coulissante 14,4 V ou 18 V peut
être utilisée avec cet appareil.
Installation de la batterie
Ouvrez le couvercle arrière, alignez la pile avec les rainures
de cet appareil et faites glisser entièrement. (Fig. 5)
REMARQUE
○ N’appliquez pas de force excessive lors de l’insertion de
la pile. Si la pile ne glisse pas facilement en place, elle
n’est pas insérée correctement.
Vérifi ez si la batterie est orientée dans la bonne direction
et qu’il n’y a rien faisant obstruction dans le chemin
d’insertion.
○ Si
s’affi che lorsque l’appareil est mis sous tension
après la mise en place de la pile, la charge de la pile est
faible.
Dans cette situation, utilisez l’adaptateur secteur ou
installez une pile entièrement chargée.
22
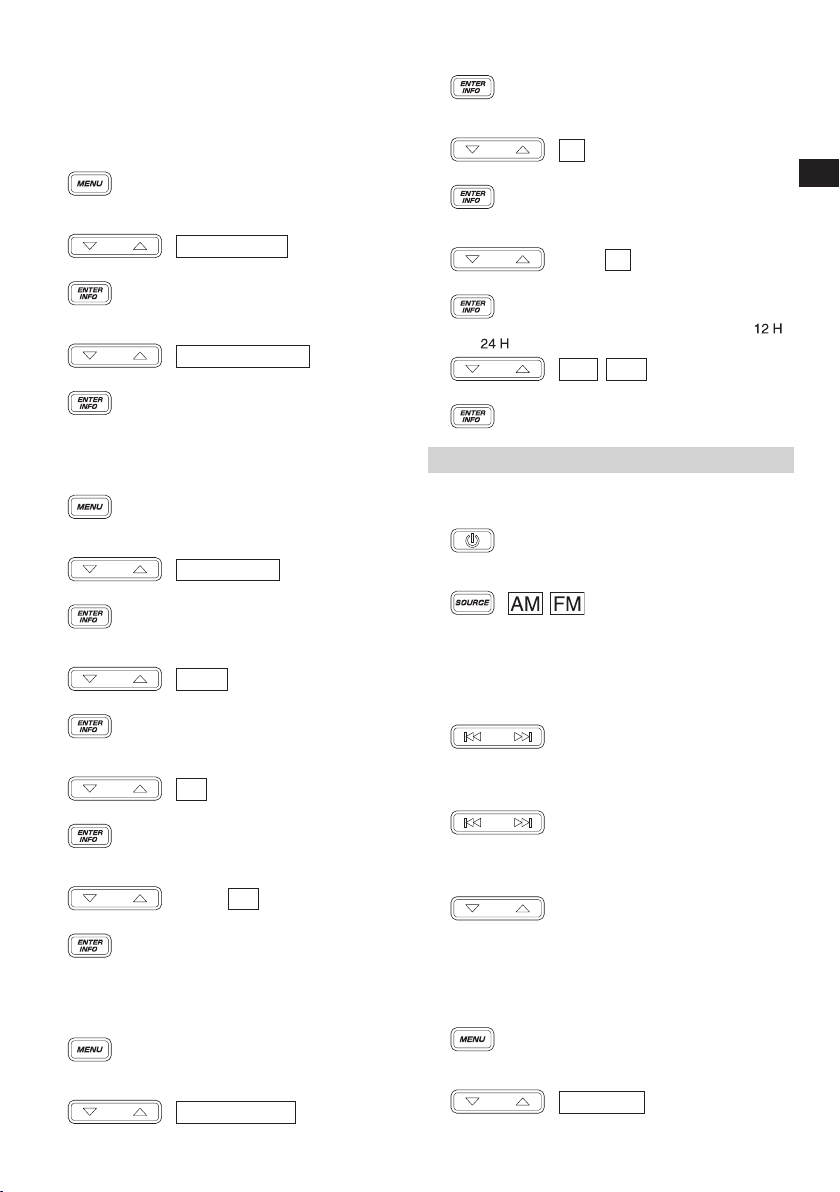
● Changement de l’affi chage de la date
Les sélections suivantes sont disponibles pour l’affi chage
de la date.
AAAA/MM/JJ (Année/Mois/Jour)
MM/JJ/AAAA (Mois/Jour/Année)
JJ/MM/AAAA (Jour/Mois/Année)
1. Appuyez sur le bouton menu.
2. Appuyez sur le bouton de sélection et affi chez
« DATE DISP ».
3. Appuyez sur le bouton Entrer/Information.
4. Appuyez sur le bouton de sélection et affi chez la
sélection d’affi chage de date de votre choix.
5. Appuyez sur le bouton Entrer/Information.
DATE DISP
YYYY/MM/DD
● Régler la date
En utilisant le panneau de commande, suivez les étapes cidessous afi n de confi gurer la date.
1. Appuyez sur le bouton menu.
2. Appuyez sur le bouton de sélection et affi chez
« DATE ADJ ».
3. Appuyez sur le bouton Entrer/Information.
4. Appuyez sur le bouton de sélection et réglez les chiff res
« année ».
5. Appuyez sur le bouton Entrer/Information.
6. Appuyez sur le bouton de sélection et réglez les chiff res
« mois ».
7. Appuyez sur le bouton Entrer/Information.
8. Appuyez sur le bouton de sélection et réglez les chiff res
« jour ».
9. Appuyez sur le bouton Entrer/Information.
DATE ADJ
2014
03 / 01
03 / 31
● Régler l’heure
En utilisant le panneau de commande, suivez les étapes cidessous afi n de confi gurer l’heure.
1. Appuyez sur le bouton menu.
2. Appuyez sur le bouton de sélection et affi chez
« CLOCK ADJ ».
CLOCK ADJ
Français
3. Appuyez sur le bouton Entrer/Information.
4. Appuyez sur le bouton de sélection et réglez les chiff res
« heure ».
»
12 : 00
12 : 55
12H 24H
5. Appuyez sur le bouton Entrer/Information.
6. Appuyez sur le bouton de sélection et réglez les chiff res
« minute ».
7. Appuyez sur le bouton Entrer/Information.
8. Appuyez sur le bouton de sélection et affi chez « »
ou «
9. Appuyez sur le bouton Entrer/Information.
ÉCOUTE DES ÉMISSIONS RADIO
● Sélection des bandes FM ou AM
1. Mise sous tension.
2. Appuyez sur le bouton de sélection de la source et
sélectionnez la bande radio (FM/AM).
● Sélection de stations
Sélection de station auto
Une longue pression du bouton de recherche balaiera
et recherchera automatiquement des fréquences radio
claires. Afi n de sélectionner la prochaine émission de radio,
appuyez longuement sur le bouton recherche à nouveau.
Sélection de station manuelle
Appuyez sur le bouton recherche pour changer les
fréquences et sélectionnez une station.
Sélection de station préréglée
Appuyez sur le bouton de sélection pour changer entre des
stations préréglées.
Au moment de l’achat, il n’y a pas de stations préréglées.
Suivez les étapes ci-dessous pour enregistrer des stations
préréglées.
<Enregistrement de préréglage manuel>
1. Réglez la fréquence d’une station radio de votre choix et
2. Appuyez sur le bouton de sélection et affi chez
(Pression longue)
appuyez sur le bouton menu.
« PRESET ».
PRESET
23

Français
3. Appuyez sur le bouton Entrer/Information.
4. Appuyez sur le bouton de sélection et sélectionnez
un numéro de préréglage compris entre 0 et 9 pour
enregistrer la station.
5. Appuyez sur le bouton Entrer/Informations pour
enregistrer la station.
<Enregistrement de préréglage automatique>
Cette fonction permet l’enregistrement automatique de
stations de radio disponibles dans la région d’utilisation.
(Jusqu’à 10 stations)
1. Appuyez sur le bouton menu.
2. Appuyez sur le bouton de sélection et affi chez
« AUTO SCAN ».
3. Appuyez sur le bouton Entrer/Informations pour
commencer un enregistrement de préréglage
automatique de stations de radio disponibles.
REMARQUE
○ Une station de radio diff usée ne sera pas enregistrée si
sa fréquence est faible.
○ En fonction du lieu d’utilisation, les signaux qui ne sont
pas radio tels que le bruit risquent d’être enregistrés.
○ Voir page 26 lors de la recharge avec USB dans le
mode «
● Pour une meilleure réception
Émissions FM
Réglez la réception en changeant l’emplacement et
l’inclinaison de l’antenne.
« STEREO » sera affi ché lors de la réception d’une émission
stéréo.
Changer vers une réception mono peut réduire le bruit.
<Changer vers une réception mono>
1. Appuyez sur le bouton menu.
2. Appuyez sur le bouton de sélection et affi chez
« STEREO ».
3. Appuyez sur le bouton Entrer/Information.
4. Appuyez sur le bouton de sélection et affi chez « ».
5. Appuyez sur le bouton Entrer/Informations pour terminer
la confi guration.
Émissions AM
Déplacez l’appareil et orientez-le dans le sens vers lequel la
réception est la meilleure.
<Réglage de volume>
Utilisez le bouton de volume pour régler le volume de 0 à 30.
PRESET 2
AUTO SCAN
».
STEREO
OFF
UTILISATION D’APPAREILS
EXTERNES POUR LA LECTURE
AUDIO
L’audio peut être lu à partir de smartphones, lecteurs de
musique portable et d’autre appareils externes.
ATTENTION
Assurez-vous d’abaisser le volume émis du lecteur
avant la lecture.
REMARQUE
Il y a deux types de câble de connexion, type droit et type
L.
Utilisez un câble de type L lors de la connexion ou du
rangement d’appareils externes grands.
1. Ouvrez la zone de rangement d’appareil externe
Mettez l’alimentation radio hors tension et ouvres le
couvercle avant. (Fig. 6)
2. Connectez un appareil externe
Utilisez un câble de connexion de type mini prise
disponible dans le commerce (ø3,5 mm), connectez le
port d’entrée AUX de la radio au port de sortie audio de
l’appareil externe. (Fig. 7)
3. Fixez l’appareil externe
Les supports droit et gauche peuvent être déplacés vers
la droite et vers la gauche en pinçant le haut et le bas de
chaque support.
Fixez l’appareil externe entre les deux supports. (Fig. 8)
4. Lecture
Avec l’alimentation de la radio sous-tension, appuyez
sur le bouton de sélection de la source et affi chez
«
».
AUX
Assurez-vous d’abaisser le volume émis de l’appareil
Le volume peut être réglé avec la radio.
Fermez le couvercle avant après la sélection de pistes et
REMARQUE
Vous risquez de ne pas pouvoir augmenter le niveau
REMARQUE
○ Lors de la connexion d’un smartphone, veuillez prendre
○ Les appareils externes risquent d’être endommagés si
○ Voir page 26 lors de la recharge avec USB dans le
externe avant de lire la musique.
(Volume)
réglez le volume.
sonore si le niveau sonore de l’appareil externe est trop
faible.
en compte le fait que les sonneries d’appels entrant pour
certains modèles ne sont pas émises par le haut-parleur.
utilisés dans des lieux exposés à la lumière du soleil ou
à des températures chaudes.
mode «
».
UTILISATION DE LA FONCTION
MINUTERIE
● Réglage de la minuterie de mise en
veille
L’alimentation peut être automatiquement mise sur arrêt
après un certain laps de temps en utilisant la fonction de
minuterie de veille.
1. Appuyez sur le bouton menu.
24
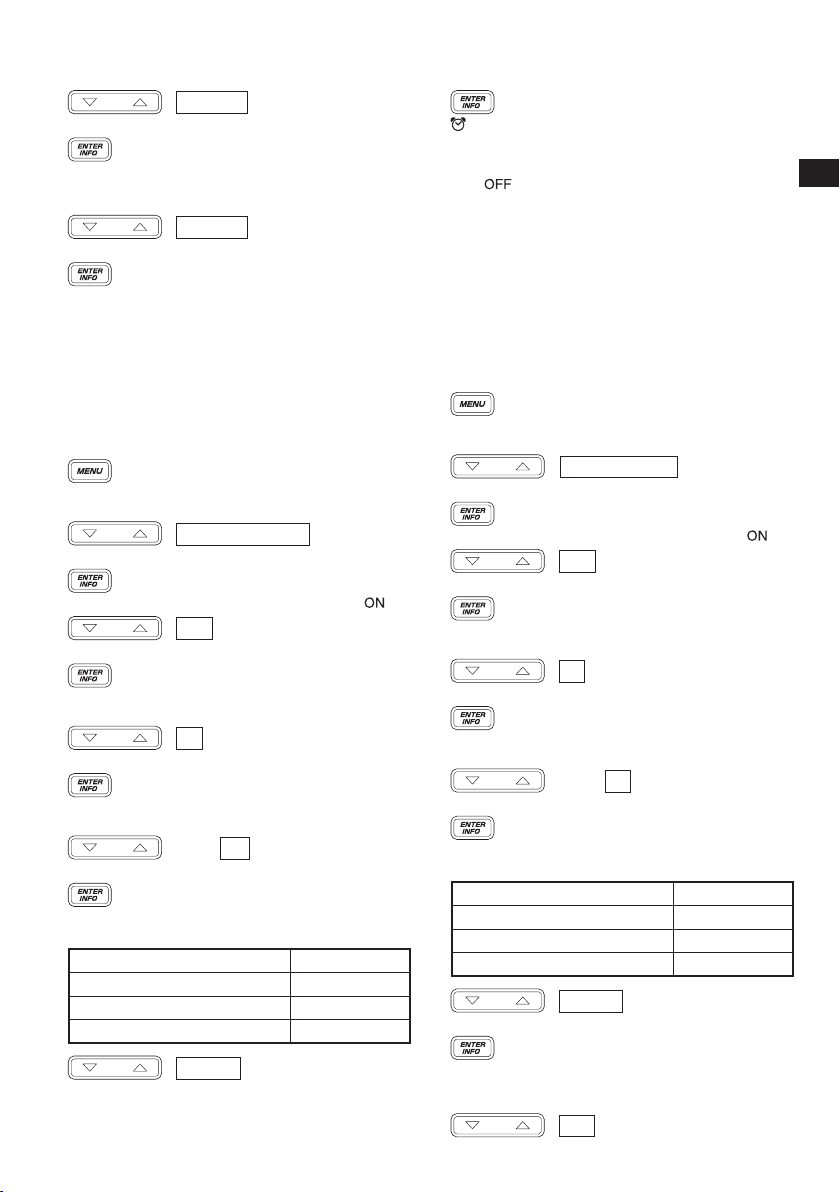
2. Appuyez sur le bouton de sélection et affi chez
« SLEEP ».
3. Appuyez sur le bouton Entrer/Information.
4. Appuyez sur le bouton de sélection pour régler la
période qui s’écoule (entre « 0-90 » minutes) avant que
l’alimentation soit éteinte.
5. Appuyez sur le bouton Entrer/Information.
6. « SLEEP » sera affi ché sur l’écran LCD.
○ Pour vérifi er le temps restant, appuyez une fois de plus
sur le bouton menu et sélectionnez « SLEEP ».
○ Pour annuler la minuterie de veille, réglez le temps pour
éteindre à 0 minutes.
SLEEP
30 MIN
● Réglage de l’alarme (alarme du signal
sonore)
La radio peut être confi gurée pour activer un bip d’alarme à
une heure spécifi que.
1. Appuyez sur le bouton menu.
2. Appuyez sur le bouton de sélection et affi chez
« BUZZER ALM ».
3. Appuyez sur le bouton Entrer/Information.
4. Appuyez sur le bouton de sélection et affi chez « ».
5. Appuyez sur le bouton Entrer/Information.
6. Appuyez sur le bouton de sélection et réglez les chiff res
« heure ».
7. Appuyez sur le bouton Entrer/Information.
8. Appuyez sur le bouton de sélection et réglez les chiff res
« minute ».
9. Appuyez sur le bouton Entrer/Information.
10. Appuyez sur le bouton de sélection pour confi gurer la
fonction de répétition.
Une fois
Tous les jours
Jours de la semaine uniquement
Samedi et dimanche uniquement
BUZZER ALM
ON
12 : 00
12 : 30
DAILY
ONCE
DAILY
WEEKDAY
WEEKEND
Français
11. Appuyez sur le bouton Entrer/Informations pour terminer
la confi guration.
sera affi ché sur l’écran LCD.
○ Pour annuler le réglage de l’alarme, allez sur
« BUZZER ALM » une fois de plus et changez le réglage
sur «
○ Le son de l’alarme s’éteindra automatiquement après 10
minutes. Le son peut également être mis hors tension en
appuyant sur n’importe quel bouton.
REMARQUE
Le volume de la sonnerie d’alarme ne peut pas être
modifi é.
● Réglage de la minuterie d’alarme de
radio en MARCHE
En utilisant la fonction de minuterie d’alarme de radio sur
MARCHE, la radio peut être réglée pour la mise sous tension
à une heure spécifi que afi n de profi ter d’une station de radio.
1. Appuyez sur le bouton menu.
2. Appuyez sur le bouton de sélection et affi chez
« RADIO ALM ».
3. Appuyez sur le bouton Entrer/Information.
4. Appuyez sur le bouton de sélection et affi chez « ».
5. Appuyez sur le bouton Entrer/Information.
6. Appuyez sur le bouton de sélection et réglez les chiff res
« heure ».
7. Appuyez sur le bouton Entrer/Information.
8. Appuyez sur le bouton de sélection et réglez les chiff res
« minute ».
9. Appuyez sur le bouton Entrer/Information.
10. Appuyez sur le bouton de sélection pour confi gurer la
fonction de répétition.
11. Appuyez sur le bouton Entrer/Information.
12. Sélectionnez la bande radio.
Appuyez sur la touche Sélectionner pour affi cher « AM »
ou « FM ».
25
».
RADIO ALM
ON
12 : 00
12 : 55
Une fois
Tous les jours
Jours de la semaine uniquement
Samedi et dimanche uniquement
DAILY
FM
ONCE
DAILY
WEEKDAY
WEEKEND
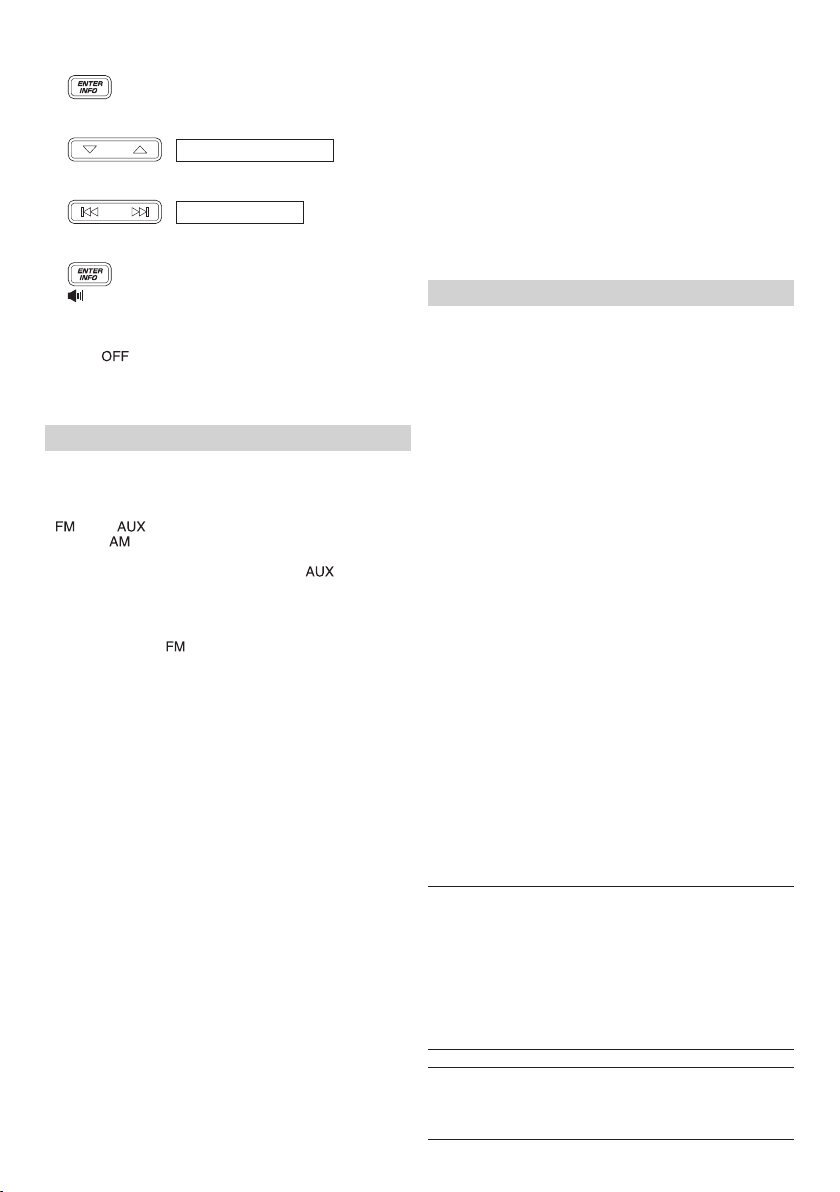
Français
13. Appuyez sur le bouton Entrer/Information.
14. Appuyez sur le bouton de sélection pour affi cher une
station préréglée.
Pour sélectionner une station par fréquence radio,
utilisez le bouton de recherche.
15. Appuyez sur le bouton Entrer/Informations pour terminer
la confi guration.
sera affi ché sur l’écran LCD.
○ Pour annuler le réglage de l’alarme radio, allez sur
« RADIO ALM » une fois de plus et changez le réglage
sur «
REMARQUE
Le volume de la radio sera au niveau auquel il était
lorsque la radio a été éteinte pour la dernière fois.
P2 FM 79.5 MHz
FM 80.0 MHz
».
RECHARGER VOTRE SMARTPHONE
Les appareils tels que les smartphones et téléphones
portables peuvent être rechargés en les connectant à cette
radio.
La fonction de recharge n’est disponible que pour le mode
«
» ou « ». (La recharge ne peut être eff ectuée dans
le mode «
REMARQUE
○ Lors de la recharge dans le mode «
sortie du volume à 20 ou moins.
La radio est conçue pour désactiver la sortie USB et
désactiver la recharge des smartphones et téléphones
portables lorsque le volume est à 21 ou moins.
(Pour le mode «
si la sortie de volume est 21 ou plus.)
○ Dans de rares cas, la sortie audio peut être interrompue
ou il peut y avoir une panne pendant la recharge USB.
Si l’un de ces cas se produit, baissez le volume ou
arrêtez la recharge avec l’USB.
○ La radio est conçue pour désactiver la sortie USB et
désactiver la recharge des smartphones et téléphones
portables lorsque le niveau d’alimentation de la batterie
est faible.
Si cela se produit, rechargez la batterie ou remplacez-la
avec une batterie complétement chargée.
○ Si la tension est basse lorsque l’adaptateur secteur est
utilisé, la sortie USB risque d’être coupée, interrompant
la recharge.
1. En utilisant un câble de recharge/connexion USB
disponible dans le commerce, connectez au port de
chargement USB situé dans le boîtier de rangement de
la radio pour les appareils externes. (Fig. 9)
2. Fixez le smartphone avec les supports et fermez le
couvercle. (Fig. 8)
(Voir « Fixer l’appareil externe » à la page 24)
REMARQUE
○ Utilisez une batterie complétement chargée lors de
l’utilisation d’une batterie comme source d’alimentation
de cet appareil.
Vous ne pourrez plus recharger les smartphones ou
téléphones portables lorsque l’alimentation de la batterie
devient faible.
○ Le temps requis pour la charge varie selon le smartphone
ou le téléphone portable en cours de recharge.
○ N’utilisez par la fonction de recharge pour des appareils
autres qu’un smartphone ou un téléphone portable.
».)
», réglez la
», la recharge USB continuera même
○ La radio peut ne pas être capable de charger certains
modèles de smartphones ou de téléphones portables.
Deux support de câble de charge, un pour Android et l’autre
pour Apple (connecteur « éclaire ») sont inclus.
Sélectionnez le support qui convient le mieux à votre
appareil.
○ Si votre appareil est trop grand pour le boîtier de
rangement de l’appareil externe de la radio, tirez le câble
à travers le trou d’accès. (Fig. 10)
REMARQUE
Comme les supports de câble de recharge sont conçus
pour des bornes de taille standard, les supports risquent
de ne pas pouvoir fi xer certaines bornes en fonction du
câble de recharge utilisé.
ENTRETIEN EN CONTROLE
AVERTISSEMENT
Lorsque l’appareil n’est pas en fonction, ou si vous devez
procéder à des contrôles ou des opérations d’entretien,
veillez à débrancher la prise AC, la batterie rechargeable
et les batteries de secours.
● Contrôle des vis de montage
Vérifi er régulièrement les vis de montage et s’assurer
qu’elles sont correctement serrrées. Resserrer
immédiatement toute vis desserrée. Sinon, il y a danger
sérieux.
● Nettoyage de l’extérieur
Si la radio est sale, essuyez-la à l’aide d’un chiff on doux
sec ou d’un chiff on trempé dans l’eau savonneuse et
essoré.
N’utilisez pas de solvants chlorés, de gasoil ou de
dissolvant qui feraient fondre le plastique.
● Stockage de la radio
Ne stockez pas la radio dans les endroits suivants.
○ À portée de ou facilement accessible par des enfants
○ Endroits humides ou poussiéreux
○ Endroits soumis à des températures élevées
(intérieur d’une voiture) ou exposés à la lumière
directe du soleil
○ Dans des endroits extrêmement froids ou
directement exposés à des courants d’air froids
○ En cas de variation importante de température
○ Des endroits exposés à la fumée ou à la vapeur (à
proximité d’une cuisinière ou d’un humidifi cateur)
MODIFICATIONS
Les outils électriques Hitachi sont constamment
améliorés et modifi és afi n d’incorporer les tous derniers
progrès technologiques.
En conséquence, il est possible que certaines pièces
soient modifi ées sans avis préalable.
GARANTIE
Nous garantissons que l’ensemble des Outils électriques
Hitachi sont conformes aux réglementations spécifi ques
statutaires/nationales. Cette garantie ne couvre pas
les défauts ni les dommages inhérents à une mauvaise
utilisation, une utilisation abusive ou l’usure et les dommages
normaux. En cas de réclamation, veuillez envoyer l’Outil
électrique, en l’état, accompagné du CERTIFICAT DE
GARANTIE qui se trouve à la fi n du Mode d’emploi, dans un
service d’entretien autorisé.
REMARQUE
Par suite du programme permanent de recherche et de
développement HITACHI, ces spécifi cations peuvent faire
l’objet de modifi cations sans avis préalable.
26
NOMI DEI COMPONENTI
(Traduzione delle istruzioni originali)
Italiano
Antenna FM
1
Maniglia
2
Coperchio posteriore
3
Altoparlante
4
Alloggiamento per dispositivi
5
esterni
Porta adattatore CA
6
Porta d’ingresso AUX
7
Porta per ricarica USB
8
Foro di accesso al cavo
9
Pulsante di accensione
0
Pulsante di selezione della fonte
!
Pulsante Menu
@
Pulsante Inserisci/Informazioni
#
Pulsante Volume (-)
$
Pulsante Volume (+)
%
Pulsante cerca (-)
^
Pulsante cerca (+)
&
Pulsante Seleziona (-)
*
Pulsante Seleziona (+)
(
Linguetta
)
Vano batteria AA
q
Coperchio
w
Adattatore CA
e
Coperchio in gomma
r
Batteria
t
Terminali
y
Coperchio anteriore
u
Cavo connettore mini plug stereo
i
Smartphone
o
Porta di uscita audio
p
Supporto cavo di ricarica
a
Supporto
s
Cavo di ricarica USB
d
Tappo in gomma
f
AVVERTIMENTI DI SICUREZZA SULLA
RADIO DA CANTIERE A BATTERIA
AVVERTENZA
Leggere tutti gli avvertimenti di sicurezza e tutte le
istruzioni.
La mancata osservanza degli avvertimenti e delle istruzioni
potrebbe essere causa di scosse elettriche, incendi e/o
gravi lesioni.
Salvare tutti gli avvertimenti e le istruzioni per
riferimenti futuri.
1. Utilizzare l’apparecchio esclusivamente alle
condizioni di alimentazione specifi cate.
• L’uso di qualsiasi altra alimentazione elettrica
potrebbe causare incendi o scosse elettriche.
2. Evitare di danneggiare il cavo dell’adattatore CA.
• Non modifi care, piegare con forza, attorcigliare
o tirare il cavo, e non riporre oggetti pesanti sopra
l’apparecchio né posizionarlo vicino a fonti di calore.
• Quando non è in uso, rimuovere la spina di
alimentazione (adattatore CA) dalla presa elettrica e
dalla radio. La mancata osservanza di questo punto
potrebbe causare scosse elettriche o incendi.
3. Non toccare la spina di alimentazione (adattatore
CA) con le mani bagnate.
• Ciò potrebbe provocare scosse elettriche.
4. Non usare la radio nel bagno o nella doccia.
• Non usare la radio in luoghi bagnati o umidi o sotto la
pioggia.
• Ciò potrebbe causare scosse elettriche, emissioni di
fumo o malfunzionamenti.
5. Non toccare l’antenna FM né la spina di
alimentazione (adattatore CA) durante i temporali.
• Ciò potrebbe provocare scosse elettriche.
6. Non smontare né modifi care la radio.
• Ciò potrebbe provocare scosse elettriche o incendi.
Le ispezioni e le riparazioni devono essere eseguite
dal negozio dove è avvenuto l’acquisto oppure
presso un centro di assistenza autorizzato per
utensili elettrici Hitachi.
27
Indicatore di trasmissione AM
Ⓐ
Indicatore AUX
Ⓑ
Indicatore di trasmissione FM
Ⓒ
Indicatore RDS
Ⓓ
Indicatore stereo
Ⓔ
Indicatore sveglia
Ⓕ
Indicatore allarme sonoro sveglia
Ⓖ
Indicatore allarme radio ON
Ⓗ
Indicatore spegnimento
Ⓘ
Indicatore batteria scarica
Ⓙ
Indicatore informazioni
Ⓚ
Orologio
Ⓛ
Indicatore AM/PM
Ⓜ
Indicatore MHz / KHz
Ⓝ
7. Inserire la spina di alimentazione (adattatore CA) il
più in fondo possibile.
• La polvere o lo sporco tra la spina di alimentazione
e la presa elettrica potrebbero causare un incendio.
Rimuovere la spina di alimentazione periodicamente
e togliere la polvere o lo sporco con un panno
asciutto.
8. Non lasciare che oggetti non specifi cati o l’acqua
entrino dentro il corpo della radio.
• Ad eccezione dell’adattatore CA e della batteria
ricaricabile, se qualsiasi oggetto metallico o
infi ammabile o l’acqua entra dentro lo sportello
posteriore, potrebbe causare scosse elettriche o
incendi.
• Fare attenzione ad impedire che la polvere di ferro
degli altoparlanti bass refl ex, la polvere o l’acqua
entrino dentro la radio.
9. Non sedersi né rimanere in piedi sulla radio.
• Ciò potrebbe causare incidenti o malfunzionamenti.
10. Non posizionare la radio su una superfi cie instabile
o su un luogo sopraelevato. Non appendere la radio
dalla maniglia.
• La radio potrebbe cadere e causare lesioni o
malfunzionamenti.
11. Quando non è caricata nessuna batteria a
scorrimento, fi ssare il coperchio del terminale a
scorrimento al terminale per impedire tagli e altre
lesioni che possono risultare quando si tocca l’area
del terminale.
12. Maneggiare le batterie di riserva con cura.
• Pericolo di esplosione se la batteria viene sostituita
in modo errato. Sostituire solo con batteria uguale o
di tipo equivalente.
• Una manipolazione scorretta delle batterie potrebbe
causare rotture o perdite, con conseguenti incendi,
lesioni o inquinamento dell’area circostante.
Assicurarsi di osservare le seguenti precauzioni.
– Usare solo le batterie specifi cate
– Non scaldare né smontare le batterie
– Non gettare le batterie nel fuoco o nell’acqua
– Non caricare le batterie
Italiano
– Assicurarsi che le batterie siano orientate
correttamente ed evitare corto circuiti
– Non riutilizzare le batterie né usare tipi diversi di
batterie
– Rimuovere le batterie quando la radio non è in
uso
In caso di perdita delle batterie, pulirne il relativo
scomparto.
Se un qualsiasi fl uido della batteria dovesse
rovesciarsi sulla pelle, lavarlo via con attenzione.
Se
Caricare la radio dall’adattatore CA o inserire una
13. Ricaricare solo con il caricatore specifi cato dal
produttore.
• Un carica batteria adatto per un tipo di batteria
14. Usare la radio solamente con batterie ricaricabili
del tipo indicato.
• L’uso di qualsiasi altre batterie potrebbe creare
15. Quando la batteria ricaricabile non viene usata,
tenerla lontano da oggetti metallici come graff ette,
monete, chiavi, chiodi, viti o altri piccoli oggetti
metallici che possono creare un collegamento da
un terminale ad un altro.
• Cortocircuitare i terminali della batteria insieme può
16. In condizioni abusive, del liquido può fuoriuscire
dalla batteria; evitare il contatto. Se il contatto si
verifi ca accidentalmente, sciacquare con acqua. Se
il liquido entra a contatto con gli occhi, richiedere
assistenza medica.
• Il liquido che fuoriesce dalla batteria può causare
17. Far riparare la radio da una persona qualifi cata
usando solo parti di ricambio identiche.
• Ciò assicurerà che sia mantenuta la sicurezza della
18. L’unità principale e l’adattatore non devono essere
esposti a perdite d’acqua o schizzi; inoltre non
posizionare oggetti contenenti liquidi, come vasi,
sull’unità o sull’adattatore.
19. Le batterie (pacco batterie o batterie installate) non
devono essere esposte a fonti di calore eccessive,
quali luce del sole, fuoco o simili.
20. La spina PRINCIPALE dell’adattatore viene
utilizzata per scollegare il dispositivo; assicurarsi
che il dispositivo scollegato sia pronto per essere
utilizzato.
viene visualizzato quando si accende
l’apparecchio con la batteria ricaricabile inserita, la
batteria è scarica.
batteria carica.
ricaricabile potrebbe provocare il rischio di un
incendio se usato con un altro tipo di batterie.
rischio di lesioni e incendi.
causare ustioni o incendi.
irritazioni o ustioni.
radio.
PROTEZIONE DELL’UDITO
L’esposizione continua a rumori a volume elevato può
causare la perdita permanente dell’udito. Più elevato è
il volume, più breve è il tempo di esposizione che può
provocare la perdita dell’udito.
Ascoltando suoni a volume elevato per periodi prolungati, le
orecchie vi si abituano. Ciò crea l’illusione che il livello del
volume sia adeguato, nonostante possa danneggiare l’udito.
per prevenire la perdita dell’udito, osservare le seguenti
precauzioni.
ATTENZIONE
1. Assicurarsi di far riposare le orecchie con regolari
interruzioni, evitando l’ascolto ininterrotto per
periodi prolungati.
Anche a un volume sicuro, l’ascolto prolungato può
causare la perdita dell’udito.
28
2. Fare attenzione a non aumentare il volume in
seguito all’adattamento dell’udito al suono emesso.
Fare attenzione a non abituarsi a certi livelli di volume.
Regolare il volume a un livello sicuro prima che le
orecchie si abituino a volumi troppo elevati.
3. Se le orecchie iniziano a fi schiare, se si avverte
fastidio o se la conversazione sembra attutita o
indistinta, interrompere l’ascolto della musica e
rivolgersi a un medico per un controllo dell’udito.
PRECAUZIONI PER IL
COLLEGAMENTO DI
APPARECCHIATURE ESTERNE
Problemi imprevisti possono provocare la perdita o il
danneggiamento dei dati memorizzati in smartphone e
altre apparecchiature periferiche collegate alla radio. In
considerazione di questa possibilità, si dovrebbe sempre
eseguire preventivamente il backup dei dati.
Hitachi Koki declina ogni responsabilità per la perdita o il
danneggiamento dei dati memorizzati in smartphone e altre
apparecchiature periferiche collegate alla radio, e per il
danneggiamento dell’apparecchiatura stessa.
FUNZIONI PRINCIPALI
○ Selezione manuale/automatica
○ Salva (Memoria) (stazioni 10 AM + 10 FM)
○ Radio On/Off /Sveglia
○ Dock per la riproduzione di audio da smartphone e lettori
audio portatili
○ Altoparlante stereo di alta qualità
○ Ricarica per smartphone e telefoni cellulari
○ Compatibilità con la batteria ricaricabile dell’utensile
elettrico Hitachi e l’adattatore CA
CHARATTERISTICHE
Banda di
frequenza
Antenna
Altoparlante 90 mm (8 Ω) × 2
Potenza
di uscita
massima
Alimentazione
Dimensioni
esterne
Massa 3,4 kg
○ Per le fonti di alimentazione utilizzabili, consultare il
manuale di istruzioni:
Fonti di alimentazione utilizzabili: Dong Guan Sun Hung
Kin Electrical Co., Ltd. (Produttore)
HKP12-1201200dV, HKP12-1201200dB (Modello)
○ Solo la batteria a scorrimento può essere utilizzata
(Modello) BSL1430: 14,4 V 3000 mAh
Batteria al litio
(Modello) BSL1830: 18 V 3000 mAh
Batteria al litio
(Produttore) Hitaci Koki Co., Ltd.
FM: Da 87,5 a 108 MHz
AM: Da 522 a 1629 KHz
FM: Antenna di gomma
AM: Antenna con barra in ferrite
(integrato)
Adattatore CA: 5 W × 2
14,4 V: 6 W × 2
18 V: 7 W × 2
Batteria a scorrimento: DC 14,4 V, 18 V
Alimentazione elettrica domestica
(usando l’adattatore CA in dotazione)
Batterie di riserva: DC 3 V, Due batterie
AA
L 366 mm x P 303 mm x A 261 mm
(con l’antenna ritratta)
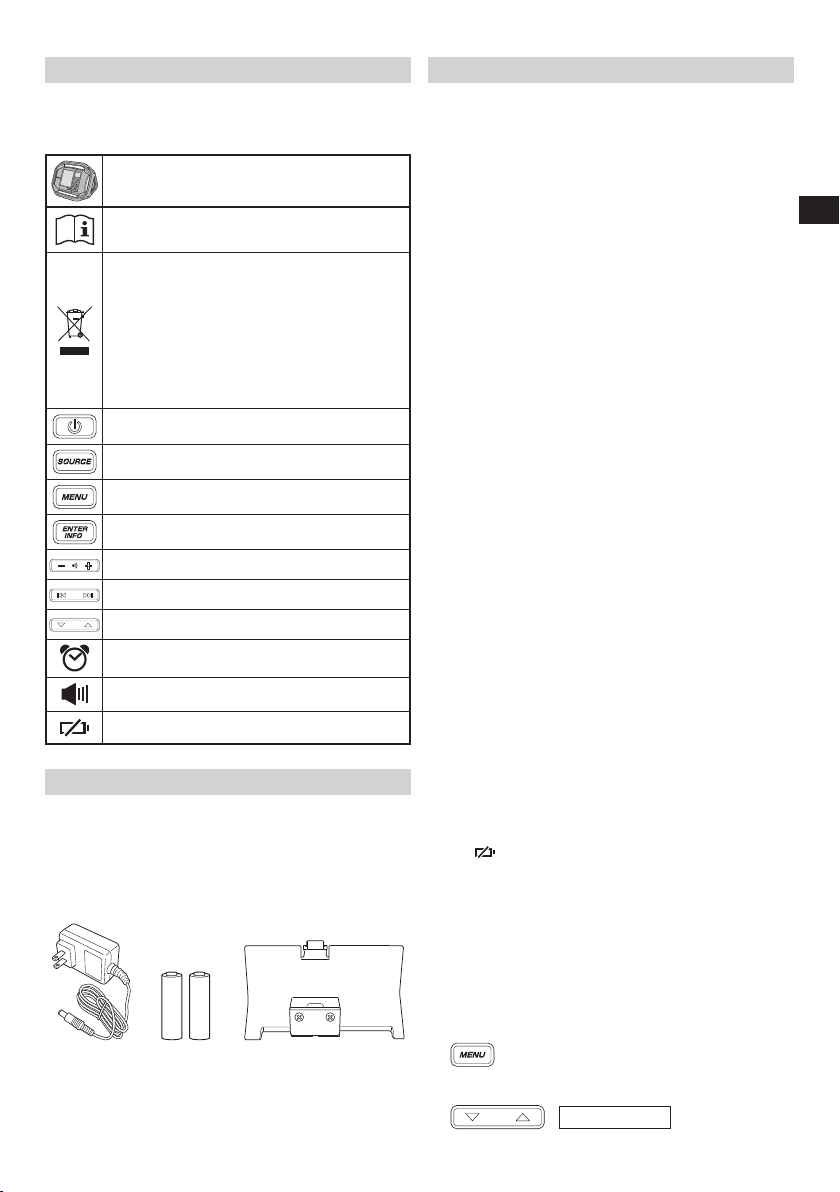
Italiano
SIMBOLI
ATTENZIONE
Di seguito mostriamo i simboli usati per la macchina.
Assicurarsi di comprenderne il signifi cato prima
dell’uso.
UR18DSAL : Radio da cantiere a batteria
Per le fonti di alimentazione utilizzabili,
consultare il manuale di istruzioni.
Solo per Paesi UE
Non gettare le apparecchiature elettriche tra i
rifi uti domestici!
Secondo la Direttiva Europea 2002/96/CE
sui rifi uti di apparecchiature elettriche ed
elettroniche e la sua attuazione in conformità
alle norme nazionali, le apparecchiature
elettriche esauste devono essere raccolte
separatamente, al fi ne di essere reimpiegate in
modo eco-compatibile.
Pulsante di accensione
Pulsante di selezione della fonte
Pulsante Menu
Pulsante Inserisci/Informazioni
Pulsante Volume
Pulsante cerca
Pulsante Seleziona
Indicatore allarme sonoro sveglia
Indicatore allarme radio ON
Indicatore batteria scarica
ACCESSORI STANDARD
In aggiunta all’unità principale (1 unità), la confezione
contiene gli accessori elencati di seguito.
○ Adattatore CA ...............................................................1
○ Batteria AA ....................................................................2
○ Supporto cavo di ricarica ..............................................1
(per il connettore Lightning di Apple)
* Il supporto per Android è integrato nell’unità principale.
Gli accessori standard possono essere cambiati senza
preavviso.
PRIMA DEL FUNZIONAMENTO
● Installazione delle batterie di backup
Le impostazioni orario e le frequenze delle stazioni radio
possono essere salvate inserendo le batterie nell’unità.
1. Per accedere al vano portaoggetti per le batterie di
backup, slacciare la linguetta e aprire il coperchio
posteriore. (Fig. 1)
2. Aprire il vano portaoggetti e inserire le due batterie AA
(in dotazione) nella direzione indicata. (Fig. 2)
NOTA
○ Non invertire la polarità delle batterie (+/-) quando si
installano.
○ Non utilizzare insieme batterie vecchie e nuove.
Sostituire sempre entrambe le batterie.
○ Non bruciare o smaltire le batterie come rifi uti domestici.
● Installazione dell’adattatore CA
L’alimentazione può essere fornita collegando l’adattatore
CA (in dotazione) in una presa domestica standard.
Rimuovere il coperchio in gomma e collegare l’adattatore
CA alla porta dell’adattatore CA. (Fig. 3)
Quindi, collegare l’adattatore CA ad una presa elettrica.
NOTA
○ Quando viene utilizzato con le batterie, l’adattatore CA
è la fonte di alimentazione principale e la carica della
batteria non viene consumata.
○ Quando vengono utilizzate con l’adattatore CA, le
batterie non si ricaricano poiché questo dispositivo non
dispone della funzione di ricarica.
Conservazione dell’adattatore CA
L’adattatore CA può essere conservato nel vano dietro il
coperchio posteriore. (Fig. 4)
● Installazione della batteria
ATTENZIONE
Non toccare i terminali.
Farlo potrebbe provocare tagli alle mani o altre lesioni.
Solo una batteria a scorrimento da 14,4 V o 18 V può essere
utilizzata con questo dispositivo.
Installazione della batteria
Aprire il coperchio posteriore, allineare la batteria con le
scanalature del dispositivo e farla scorrere fi no in fondo.
(Fig. 5)
NOTA
○ Non applicare eccessiva pressione quando si
inseriscono le batterie. Se la batteria non scorre
facilmente in posizione, vuol dire che non è inserita
correttamente.
Assicurarsi che la batteria sia rivolta nella direzione
corretta e che non ci sia niente che ostruisca il percorso
di inserimento.
○ Se
In questa situazione, utilizzare l’adattatore CA o inserire
● Modifi ca della data
Le seguenti opzioni sono disponibili per la visualizzazione
della data.
AAAA/MM/GG (anno/mese/giorno)
MM/GG/AAAA (mese/giorno/anno)
GG/MM/AAAA (giorno/mese/anno)
1. Premere il pulsante Menu.
2. Premere il pulsante Seleziona e visualizzare
29
viene visualizzato quando il dispositivo viene
acceso dopo l’installazione della batteria, il livello di
carica della batteria è basso.
una batteria completamente carica.
“DATE DISP”.
DATE DISP

Italiano
3. Premere il pulsante Inserisci/Informazioni.
4. Premere il pulsante Seleziona e visualizzare come la
selezione di visualizzazione della data di propria scelta.
5. Premere il pulsante Inserisci/Informazioni.
● Impostare la data
Tramite il pannello di controllo, seguire i passaggi riportati di
seguito per impostare la data.
1. Premere il pulsante Menu.
2. Premere il pulsante Seleziona e visualizzare “DATE ADJ”.
3. Premere il pulsante Inserisci/Informazioni.
4. Premere il pulsante Seleziona e regolare “anno”.
5. Premere il pulsante Inserisci/Informazioni.
6. Premere il pulsante Seleziona e regolare “mese”.
7. Premere il pulsante Inserisci/Informazioni.
8. Premere il pulsante Seleziona e regolare “giorno”.
9. Premere il pulsante Inserisci/Informazioni.
● Impostare l’orario
Tramite il pannello di controllo, seguire i passaggi riportati di
seguito per impostare l’orario.
1. Premere il pulsante Menu.
2. Premere il pulsante Seleziona e visualizzare
“DATE ADJ”.
3. Premere il pulsante Inserisci/Informazioni.
4. Premere il pulsante Seleziona e regolare “ora”.
5. Premere il pulsante Inserisci/Informazioni.
6. Premere il pulsante Seleziona e regolare “minuti”.
7. Premere il pulsante Inserisci/Informazioni.
YYYY/MM/DD
DATE ADJ
2014
03 / 01
03 / 31
CLOCK ADJ
12 : 00
12 : 55
8. Premere il pulsante Seleziona e selezionare “
“
”
12H 24H
9. Premere il pulsante Inserisci/Informazioni.
” o
ASCOLTO DI TRASMISSIONI RADIO
● Selezione della banda FM o AM
1. Accensione.
2. Premere il pulsante di selezione della fonte e selezionare
la banda radio (FM/AM).
● Selezione delle stazioni
Selezione automatica della stazione
Una pressione prolungata del pulsante Ricerca eff ettua
la scansione automatica e ricerca le frequenze nitide. Per
selezionare la stazione successiva, premere nuovamente a
lungo il pulsante Ricerca.
Selezione manuale della stazione
Premere il pulsante Ricerca per cambiare frequenza e
selezionare una stazione.
Selezione delle stazioni memorizzate
Premere il pulsante Seleziona per spostarsi rapidamente tra
le stazioni memorizzate.
Al momento dell’acquisto, non ci sono stazioni memorizzate.
Seguire i passaggi di seguito per memorizzare delle stazioni.
<Memorizzazione manuale>
1. Sintonizzarsi su una stazione radio desiderata e premere
2. Premere il pulsante Seleziona e visualizzare “PRESET”.
3. Premere il pulsante Inserisci/Informazioni.
4. Premere il pulsante Seleziona e selezionare un numero
5. Premere il pulsante Inserisci/Informazioni per registrare
<Memorizzazione automatica>
Questa funzione consente la registrazione automatica delle
stazioni radio disponibili nell’area di utilizzo.
(Fino a un massimo di 10 stazioni)
1. Premere il pulsante Menu.
(Pressione lunga)
il pulsante Menu.
PRESET
preimpostato da 0 a 9 per memorizzare la stazione.
PRESET 2
la stazione.
30
 Loading...