

Page 1
DAB KITCHEN RADIO
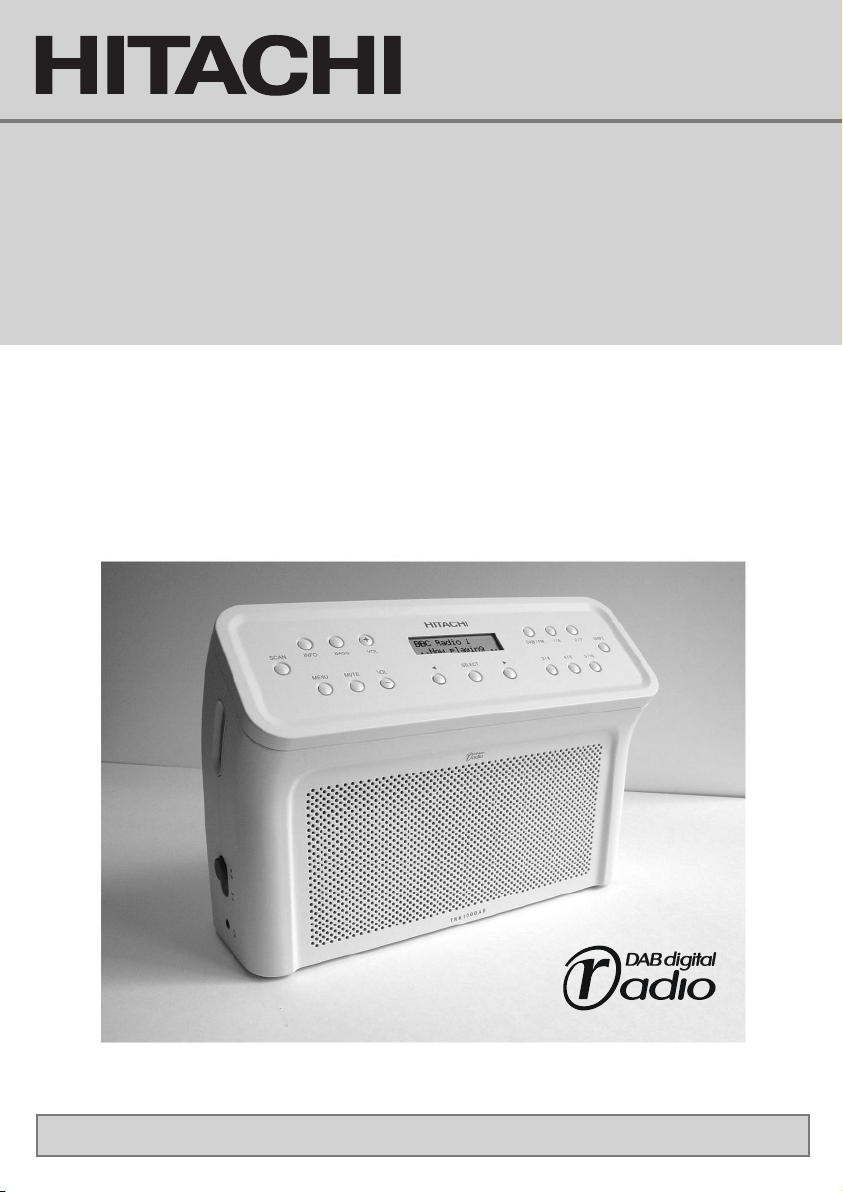
TRK100DAB
IInnssttrruuccttiioonn MMaannuuaall
Before operating please read all these instructions thoroughly.
Page 2

Contents
SSaaffeettyy DDooss aanndd DDoonn''ttss
UUKK GGuuaarraanntteeee
.. .. .. .. .. .. .. .. .. .. .. .. .. .. .. .. .. .. .. .. .. .. .. .. .. .. .. .. .. .. .. .. .. .. .. .. .. .. .. .. .. .. ..44
KKnnooww yyoouurr RRaaddiioo .. .. .
GGeettttiinngg SSttaarrtteedd .. .. .. .. .. ..
Batteries or mains adaptor . . . . . . . . . . . . . . . . . . . . . . . . . . . . . . . . . . . . . .6
When you first switch on . . . . . . . . . . . . . . . . . . . . . . . . . . . . . . . . . . . . . . .6
Tuning to DAB stations . . . . . . . . . . . . . . . . . . . . . . . . . . . . . . . . . . . . . . . . .6
Tuning to FM stations . . . . . . . . . . . . . . . . . . . . . . . . . . . . . . . . . . . . . . . . . .6
Scanning for new stations . . . . . . . . . . . . . . . . . . . . . . . . . . . . . . . . . . . . . .7
No stations available . . . . . . . . . . . . . . . . . . . . . . . . . . . . . . . . . . . . . . . . . .7
Volume . . . . . . . . . . . . . . . . . . . . . . . . . . . . . . . . . . . . . . . . . . . . . . . . . . .7
Mute . . . . . . . . . . . . . . . . . . . . . . . . . . . . . . . . . . . . . . . . . . . . . . . . . . . . .7
Bass boost . . . . . . . . . . . . . . . . . . . . . . . . . . . . . . . . . . . . . . . . . . . . . . . . .7
.. .. .. .. .. .. .. .. .. .. .. .. .. .. .. .. .. .
. .. .. .. .. .. .. .. .. .. .. .. .. .. .. .. .. .. .. .. .. .. .. .. .. .. .. .. .. .. .. .. .. .. .. .. .. .. .. ..55
.. .. .. .. .. .. .. .. .. .. .. .. .. .. .. .. .. .. .. .. .. .. .. .. ..
UUssiinngg PPrreesseett SSttaattiioonnss .. .. .. .. .. .. .. .. .. .. .. .. .. .. .. .. .. ..
Tuning to a preset station . . . . . . . . . . . . . . . . . . . . . . . . . . . . . . . . . . . . . . .8
Assigning a station to a preset button . . . . . . . . . . . . . . . . . . . . . . . . . . . . . .8
. .. .. .. .. .. .. .. .. .. .. .. .. .. .. .. .. .. .. .. ..33
.. .. .. .. .. .. .. .. .. .. .. ..66
.. .. .. .. .. .. .. .. .. .. .. .. .. .. .. .. .. .. .. .. ..88
CChhaannggiinngg tthhee SSttaattiioonn IInnffoorrmmaattiioonn DDiissppllaayy .. .. .. .. .. .. .. .. .. .. .. .. .. .. .. .. .. .. .. .. .. .. .. ..99
Scrolling information supplied by the radio station (DLS) . . . . . . . . . . . . . . . . .9
Program type . . . . . . . . . . . . . . . . . . . . . . . . . . . . . . . . . . . . . . . . . . . . . . .9
Ensemble name . . . . . . . . . . . . . . . . . . . . . . . . . . . . . . . . . . . . . . . . . . . . .9
Time & date . . . . . . . . . . . . . . . . . . . . . . . . . . . . . . . . . . . . . . . . . . . . . . . .9
Channel & frequency . . . . . . . . . . . . . . . . . . . . . . . . . . . . . . . . . . . . . . . . . .9
Bit-rate & mode . . . . . . . . . . . . . . . . . . . . . . . . . . . . . . . . . . . . . . . . . . . . .9
Signal error . . . . . . . . . . . . . . . . . . . . . . . . . . . . . . . . . . . . . . . . . . . . . . . .9
UUssiinngg tthhee DDAABB SSeettuupp MMeennuuss .. .. .. .. .. .. .. .. .. .. .. .. .. .. .. ..
Changing the station order . . . . . . . . . . . . . . . . . . . . . . . . . . . . . . . . . . . .10
Manual tune . . . . . . . . . . . . . . . . . . . . . . . . . . . . . . . . . . . . . . . . . . . . . . .11
Software version . . . . . . . . . . . . . . . . . . . . . . . . . . . . . . . . . . . . . . . . . . . .11
.. .. .. .. .. .. .. .. .. .. .. .. .. .. .. .. ..1100
FFaaccttoorryy rreesseett .. .. .. .. .. .. .. .. .. .. .. .. .. .. .. .. .. .. .. .. .. .. .. .. .. .. .. .. .. .. .. .. .. .. .. .. .. .. .. .. .. .. ..1111
SSppeecciiffiicca
attiioonnss .. .. .. .. .. .. .. .. .. .. .. .. .. .. .. .. .. .. .. .. .. .. ..
.. .. .. .. .. .. .. .. .. .. .. .. .. .. .. .. .. .. .. ..1122
page 2
Page 3

Safety Dos and Don'ts
This equipment has been designed and manufactured to meet international safety
standards bu
the best resu
t, like any electrical equipment, care must be taken if you are to obtain
lts and safety is to be assured.
DO
DO
DO
DO
DO
DON'T
DON'T
DON'T
DON'T
DON'T
DON'T
DON'T
DON'T
DON'T
ABOVE ALL
NEVER let a
NEVER guess or take chances with electr
read the operating instructions before you attempt to use the equipment.
ensure that all electrical connections (including the mains plug, extension leads and
inter-connections between the pieces of equipment) are properly made and in
accordance with the manufacturer's instructions. Switch off and withdraw the mains
plug before making or changing connections.
consult your dealer if you are ever in doubt about the installation, operation or safety
of your equipment.
be careful with glass panels or doors on equipment.
route the mains lead so that it is not likely to be walked on, crushed, chafed, or
subjected to excessive wear and tear or heat.
remove any fixed cover as this may expose dangerous voltages.
obstruct the ventilation openings of the equipment with items such as newspapers,
tablecloths, curtains, etc. Overheating will cause damage and shorten the life of the
equipment.
allow electrical equipment to be exposed to dripping or splashing, or objects filled with
liquids, such as vases, to be placed on the equipment.
place hot objects or naked flame sources such as lighted candles or nightlights on, or
close to equipment. High temperatures can melt plastic and lead to fires.
use makeshift stands and NEVER fix legs with wood screws - to ensure complete safety
always fit the manufacturer's approved stand or legs with the fixings provided
according to the instructions.
use equipment such as personal stereos or radios so that you are distracted from the
requirements of traffic safety. It is illegal to watch television whilst driving.
listen to headphones at high volume, as such use can permanently damage your
hearing.
leave equipment switched on when it is unattended unless it is specifically stated that it
is designed for unattended operation or has a stand-by mode. Switch off using the
switch on the equipment and make sure that your family know how to do this. Special
arrangements may need to be made for infirm or handicapped people.
continue to operate the equipment if you are in any doubt about it working normally,
or if it is damaged in any way - switch off, withdraw the mains plug and consult your
dealer.
nyone especially children push anything into holes, slots or any other opening in
e - this could result in a fatal electrical shock;
the cas
– it is better to be safe than sorry!
ical equipment of any kind
page 3
Page 4

UK Guarantee
Your Guarantee of Excellence
Thank you for purchasing this Hitachi product
In the unlikely event that this product should develop a fault, we undertake to replace
or repair any part of the product which fails due to a manufacturing defect within 12
months of the date of purchase provided that:
i) The product has been installed and used only in accordance with the instructions
supplied with the product.
ii) The product has not been repaired, maintained, or modified by any person other
than a Hitachi authorised engineer.
iii) The product serial number has not been removed or altered.
This guarantee does not apply to product acquired second hand or for commercial or
communal use.
This guarantee does not cover the replacement of exhausted batteries, the adjustment
of user controls, or head cleaning and general consumer maintenance tasks.
Any parts replaced under this guarantee shall become the property of Hitachi Europe
Ltd. Any claims made under guarantee must be directed to the dealer from whom the
equipment was originally purchased.
Please note that evidence of the date of purchase will be required before any service
under this guarantee is carried out.
THIS GUARANTEE DOES NOT AFFECT YOUR STATUTORY RIGHTS.
IN ALL CASES OF DIFFICULTY PLEASE CONSULT YOUR HITACHI DEALER
page 4
Page 5

Know your Radio
Mains adaptor
connector
(see page 9)
SCAN button
(see pages 6 & 7)
INFO button
Aerial
Battery compartment Headphone connector
LCD screen
SELECT
button
ON/OFF
switch
DAB mode
FM mode
or
(see page 6)
MENU button
(see page 10)
Sound control
buttons
(see page 7)
TUNING
buttons
(see page 6)
PRESET
buttons
(see page 8)
page 5
Page 6

Getting Started
Batteries or mains adaptor
The radio can be powered by batteries (not supplied), or by the mains adaptor (use
only part number KG4A-12-850D, supplied). If you are going to use the mains
adaptor all the time, you do not need to fit batteries. The radio saves all its settings
when switched off, but it doesn’t need batteries to do this.
If you are using batteries, insert six ‘C’ size
batteries, taking care to fit them the right way
round, as shown here.
When you first switch on
The first time you switch on your new radio, it will switch
DAB mode and automatically scan to find what UK
to
digital stations are available.
When all available stations are found, the radio will sort
them alphabetically and tune to the first in the list.
Tuning to DAB stations
tune...
To see what other stations are in the station list, press
the and buttons to scroll through the list. The
station names will appear one at a time on the bottom
line of the display.
When you see the name of the station you want to listen
to, press the
SELECT button.
select...
Tuning to FM stations
To flip between DAB mode and FM mode, press the
DAB/FM button.
In FM mode, tune the radio by pressing the and buttons. Or press the SCAN
button to automatically search for a station in the direction you last tuned.
page 6
Page 7

Scanning for new stations
(DAB mode only)
To add new stations to the station list, press the SCAN
button – a short press for a local (UK) scan, a long press
for a full Band III scan.
When all available stations are found, the radio will add
them to the station list, then retune to the station you
were listening to.
No stations available
If no stations are found, the radio will present a menu that enables you to perform
another scan, or to tune the radio manually. (see page 11)
Volume
To turn the volume up press the VOL+ button, to turn it
down press the
the volume by one step – hold the button down to adjust
more quickly.
VOL– button. Each short press will adjust
Mute
To turn the sound off completely press the MUTE button.
To turn the sound back on at the same level as previously,
press the
MUTE button again.
Bass boost
To turn the bass boost on press the BASS button.
To turn the bass boost off press the
BASS button again.
page 7
Page 8

Using Preset Stations
Tuning to a preset station
Press the PRESET button for the station you wish to listen to.
• For stations 1–5, press the numbered button, for example:
preset station 4
• For stations 6–10, press the
whilst you press the numbered button, for example:
Note
– The first time you switch your new radio on, or immediately after a Factory
Reset (see page 11), there will be no preset stations stored.
SHIFT button and hold it in
preset station 9
Assigning a station to a preset button
Tune to the station that you want to save.
Press the
that you wish to use for this station, and hold it in. Wait
until the message “Preset saved” is displayed, then
release the button.
You can store up to ten stations in
DAB preset stations will only be available when in DAB mode, and your FM preset
stations when in FM mode.
When you are scrolling through the DAB station list, any
preset stations will be marked with their preset number.
PRESET button (or a PRESET button and SHIFT)
DAB mode, and another ten in FM mode. Your
press...
page 8
Page 9

Changing the Station
Information Display
In DAB mode only, the second line of text can display any one of these seven items of
information:
•
Scrolling information supplied by the radio station (DLS)
•
Program type
•
Ensemble name
•
Time & date
•
Channel & frequency
•
Bit-rate & mode
•
Signal error
To change which item of information displayed press the
press...
When the last item Signal error is displayed, the next press of the button will change
back to scrolling information.
INFO button.
page 9
Page 10

Using the DAB Setup Menus
The DAB Setup Menus allow you to:
• sort the stations in the station list
• manually tune the radio
• check which version of software is being used in your radio
To display the first feature in the setup menu press the
MENU button.
Press the and buttons until you see the feature you
want to use, then press the
To exit from the Setup Menu, simply leave all controls untouched for a few seconds.
The display will return to normal.
Changing the station order
Use the MENU, and SELECT buttons to choose the Station Order Menu.
Press the and buttons to see the different ways in
which the station list can be sorted.
When you see the sorting order you want to use, press
SELECT button.
the
SELECT button.
Alphanumeric
•
All stations will be sorted alphabetically.
Active stations
•
All those stations which are not currently available will be moved to the bottom of
the station list.
Prune stations
•
All those stations which are not currently available will be removed permanently
from the station list.
Favourite stations
•
Your ten most listened-to stations will be moved to the top of the station list.
Next time you use the menu, you will see an additional item:
Favourites ( ) to preset
•
Your favourite stations will be allocated to the preset
buttons, overwriting any you have set previously.
page 10
s
Page 11

Manual tune
Use the MENU, and SELECT buttons to choose the Manual Tune Menu.
Press the and buttons to see the different channels
that are available.
When you see the channel you want to use, press the
SELECT button. The
The open bar in the middle of the meter shows you the
minimum signal strength needed for good DAB reception.
The number of grey bars will increase and decrease,
showing you the changing signal strength as you adjust
the aerial and radio position.
To turn off the Signal Strength Meter, press the
Note
– You can turn on the Signal Strength Meter any time whilst in
simply by pressing the
Signal Strength Meter
SELECT button.
will appear:
SELECT button again.
signal strength low
signal strength OK
DAB mode,
Software version
Use the MENU, and SELECT buttons to choose Software Version.
This will display the version of software that has been
used in your radio.
Factory reset
To return the radio to its factory settings, with all stations and presets cleared:
Press the
The LCD screen will display a message asking if you really want to do this. To
confirm, press the SELECT button, and the radio will be returned to its factory
settings.
MENU button and hold it in for two seconds.
page 11
Page 12

HITACHI DAB KITCHEN RADIO
TRK100DAB
Specifications
Batteries
(not supplied)
6 x ‘C’ size alkaline or rechargeable batteries
Battery life
Alkaline: 10 hours
Rechargeable: 5 hours
Mains adaptor
(supplied)
12V DC 850mA, 2.1mm power jack positive
tip
Part number: KG4A-12-850D
Note: adaptor
will not
recharge batteries
Headphones
32 ohms (not supplied)
Hitachi Home & Life Solutions, Inc.
Hitachi Atago Building,
No.15-12, Nishi Shimbashi, 2-chome,
Minato-ku, Tokyo, 105-8410 Japan
Tel: 03 3502 2111
HITACHI EUROPE LTD.
Digital Media Group
Whitebrook Park
Lower Cookham Road
Maidenhead
Berkshire SL6 8YA
UNITED KINGDOM
Tel: 01628 643000
Fax: 01628 643400
Email: consumer-service@hitachi-eu.com
HITACHI EUROPE GmbH
Munich Office
Dornacher Strasse 3
D-85622 Feldkirchen bei München
GERMANY
Tel: 089-991 80-0
Fax: 089 - 991 80 -224
Hotline: 0180 - 551 25 51 (12ct/min.)
Email: HSE-DUS.Service@Hitachi-eu.com
HITACHI EUROPE SRL
Via T. Gulli n.39
20147 MILAN
ITALY
Tel: 02 487861
Fax: 02 48786381
Servizio Clienti
Tel. 02 38073415
Email: customerservice.italy@hitachi-eu.com
HITACHI EUROPE S.A.S
Lyon Office
B.P. 45, 69671 Bron Cedex
FRANCE
Tel: 04 72 14 29 70
Fax: 04 72 14 29 99
Email: france.consommateur@hitachi-eu.com
www.hitachi-cconsumer-eeu.com
Dimensions
310mm(W) x 185mm(H) x 110mm(D)
Weight
radio: 1600g (without batteries)
mains adaptor: 540g
LCD screen
2 x lines of alphanumeric display
Viewing area 64 x 14mm
frequency coverage
Radio
174.92 to 239.2 MHz; decode rate 192
(Band III, UK only)
HITACHI EUROPE S.A.
364, Kifissias Ave. & 1, Delfon Str.
152 33 Chalandri
Athens
GREECE
Tel: 1-6837200
Fax: 1-6835694
Email: service.hellas@hitachi-eu.com
HITACHI EUROPE S.A.
Gran Via Carles III, 86 Planta 5ª
Edificios Trade - Torre Este
08028 Barcelona
SPAIN
Tel: 93 409 2550
Fax: 93 491 3513
Email: rplan@hitachi-eu.com
HITACHI EUROPE AB
Box 77
S-164 94 KISTA
SWEDEN
Tel: 08 562 711 00
Fax: 08 562 711 11
Email: csgswe@hitachi-eu.com
HITACHI EUROPE LTD.
Norwegian Branch Office
Strandveien 18
1366 Dysaker
NORWAY
Tel: 02205 9060
Fax: 02205 9061
Email csgnor@hitachi-eu.com
HITACHI EUROPE LTD.
Benelux Branche Office
Bergensesteenweg 421
1600 Sint-Pieters-Leeuw
BELGIUM
TEL : 0032/2 363 99 01
FAX: 0032/2 363 99 00
Email : info@hitachi.be
 Loading...