

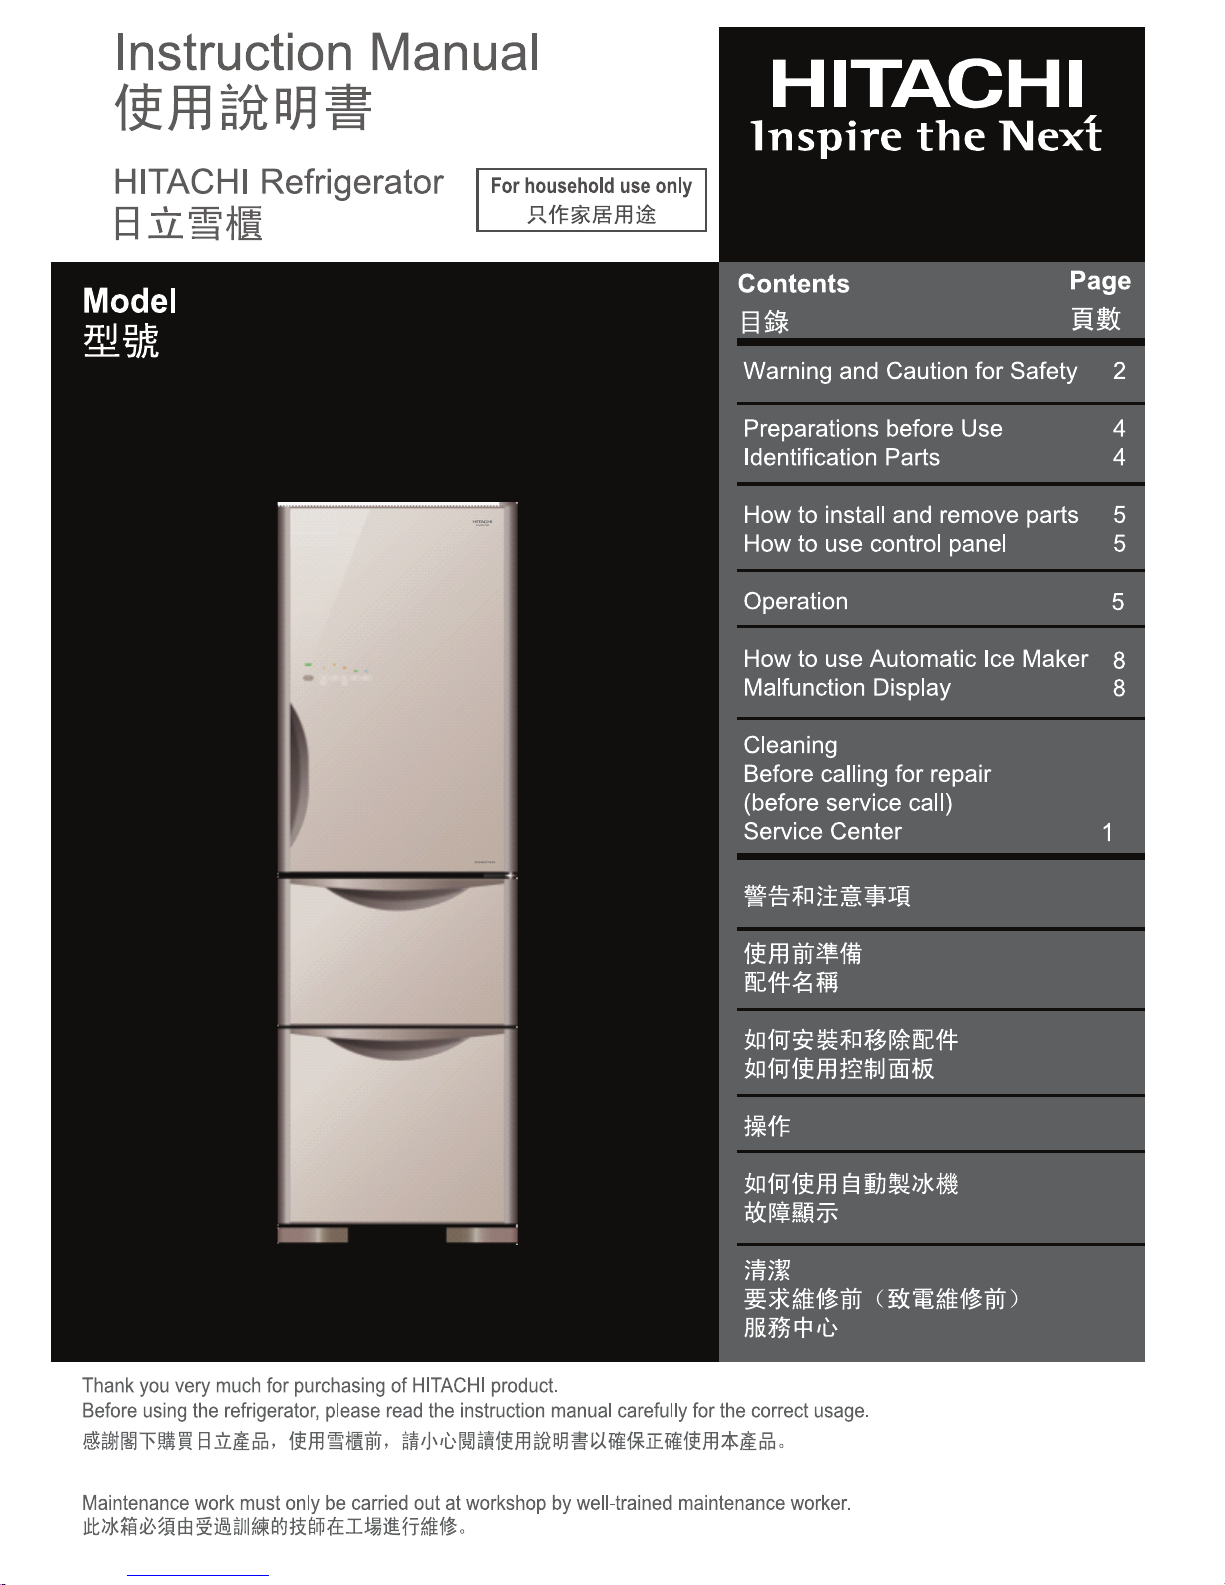
Page 1
10
12
12
16
16
17
17
17
R-SG32EPH
R-SG32EPHL
9
9
7
13
13
13
Page 2
Page 3
Page 4

4
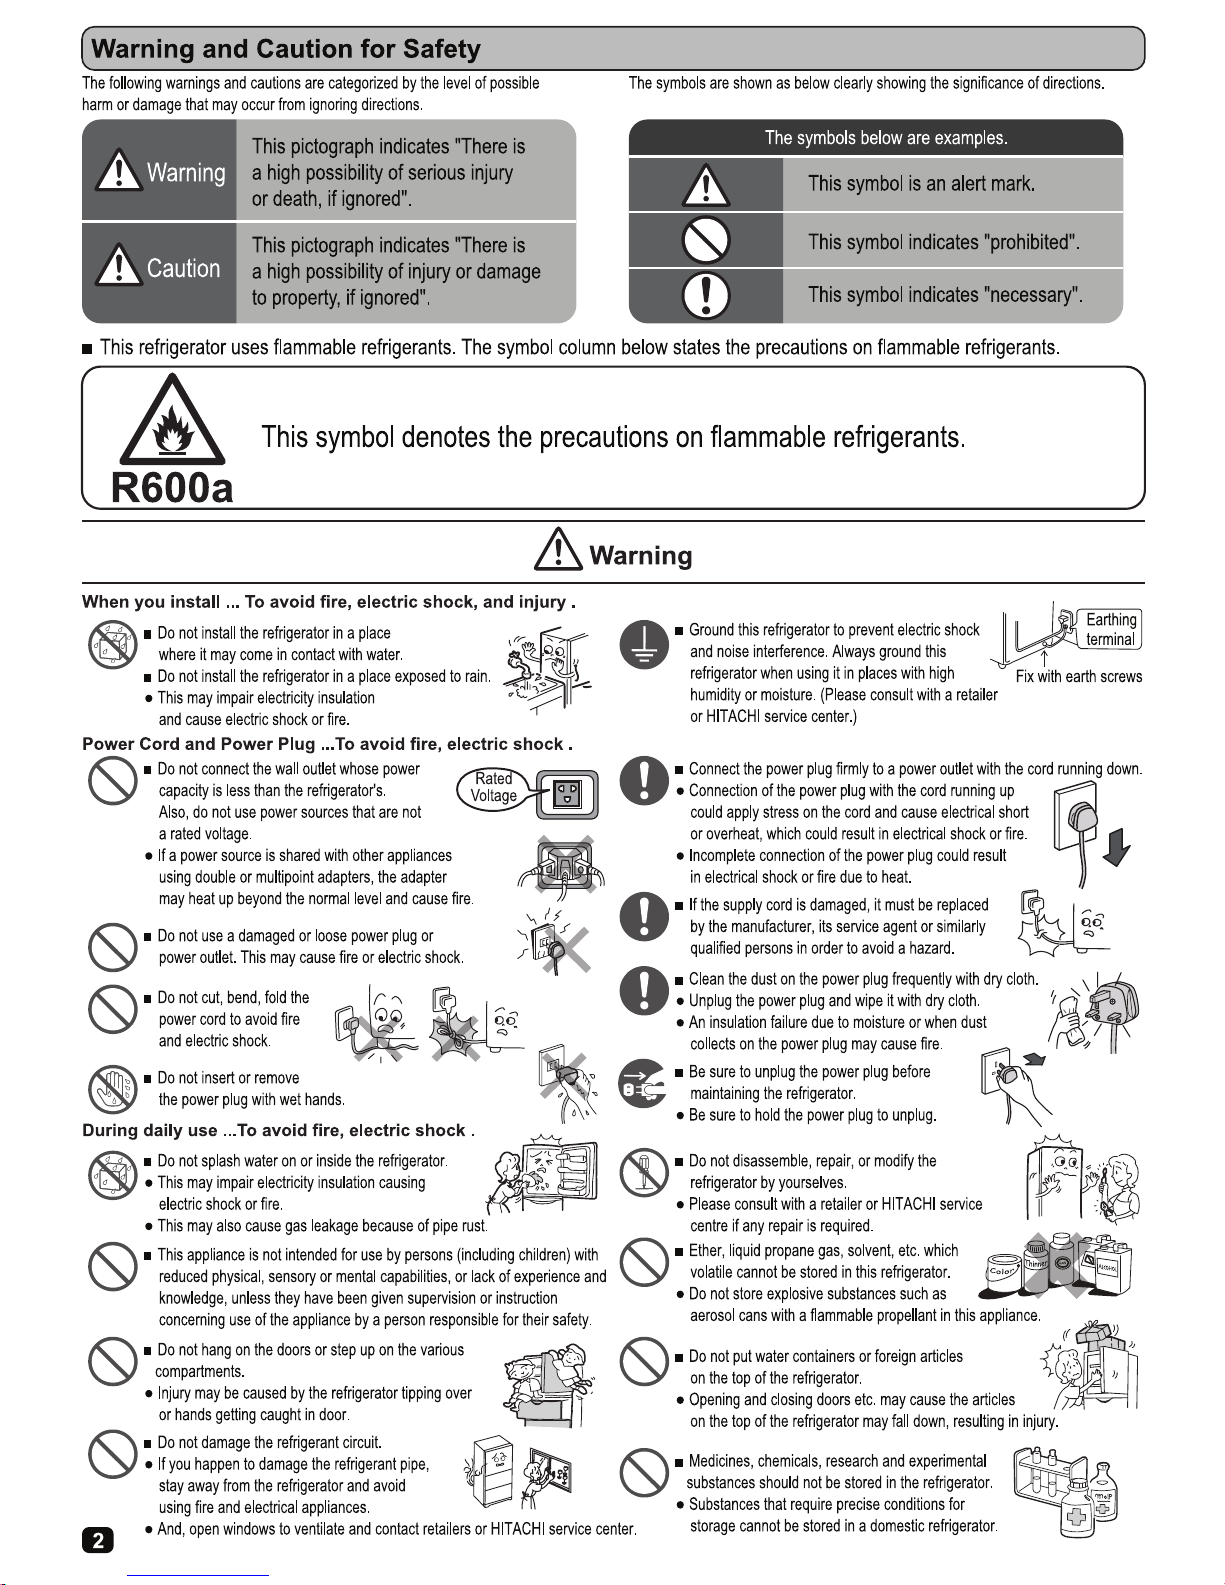
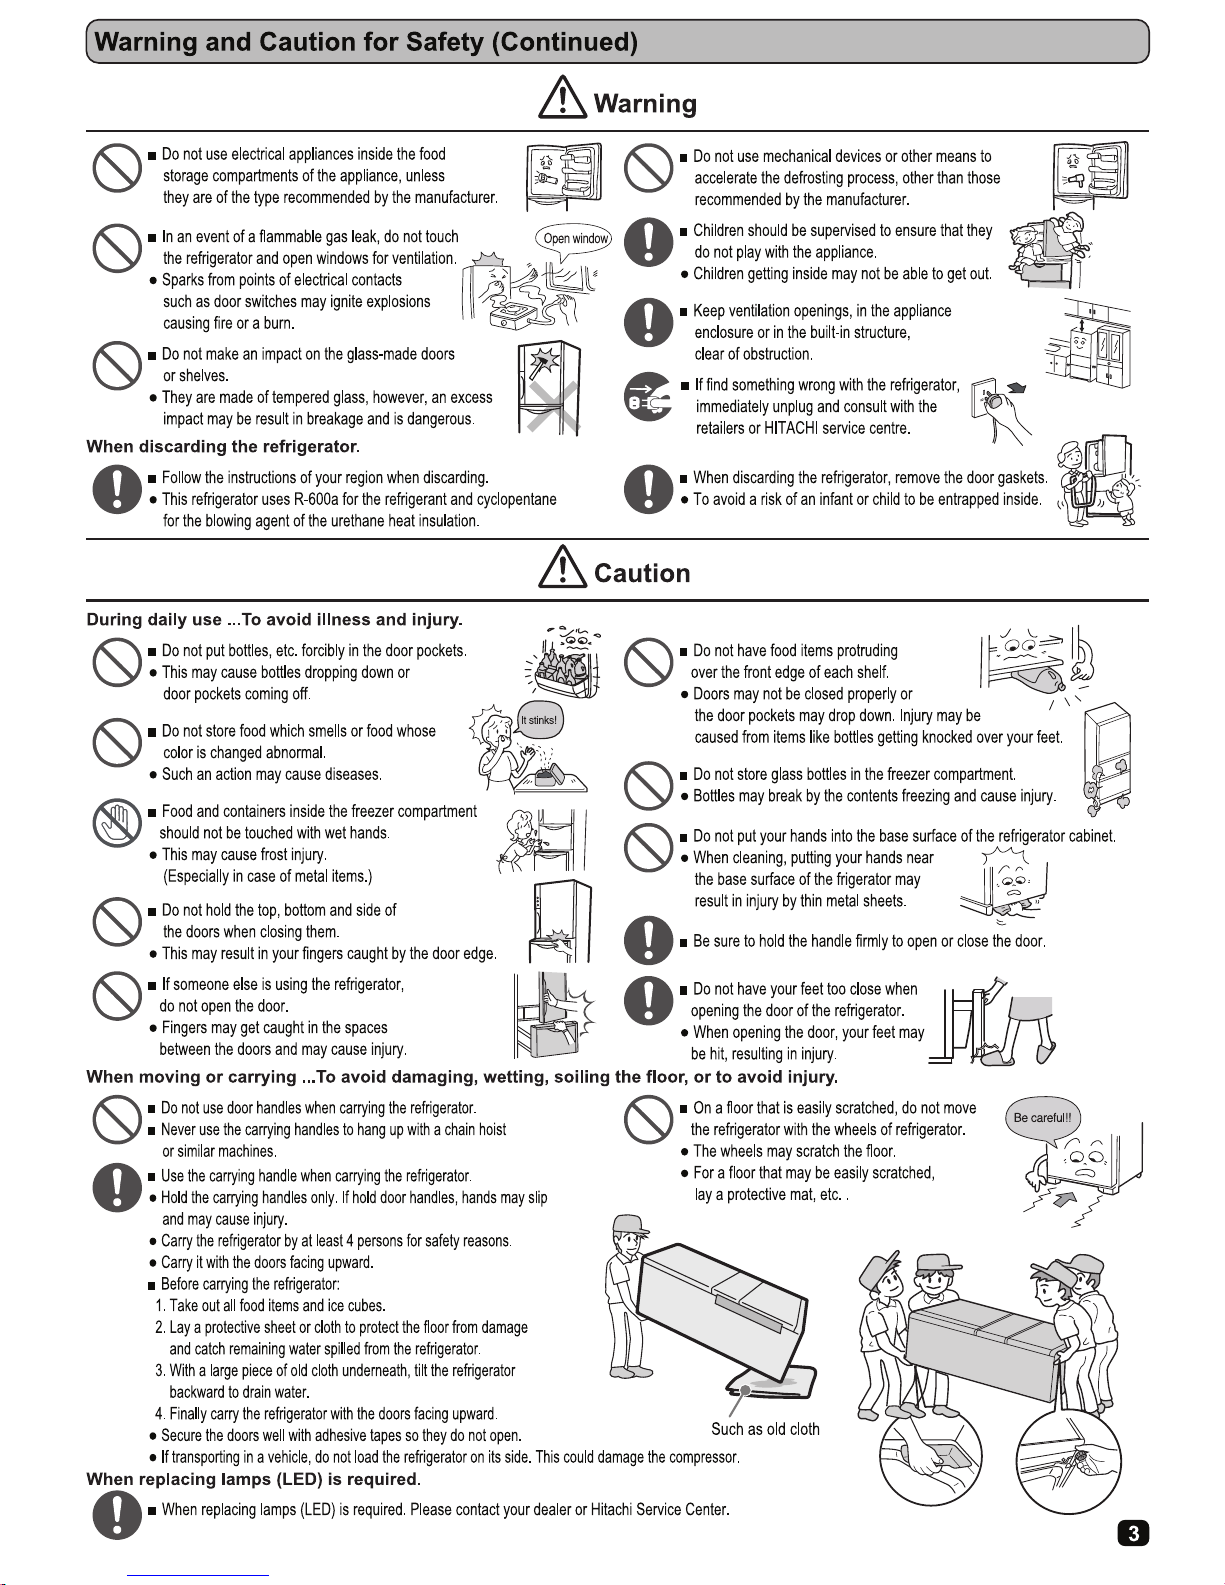
Installation
1. Install on a rigid and level floor.
2. Please use this refrigerator between the room temperature of 10
o
C to 43 oC.
Sufficient performance may not be obtained, if the room temperature is too low or too high.
3. Do not install where the refrigerator is exposed on a direct sunlight or other heat sources.
4. Install in a atmosphere which is dry or has air ventilation.
5. The refrigerator requires enough air ventilation space around the cabinet to have efficient cooling performance
space of at least 5 cm over the top and 5 cm at rear and 1 cm at both sides for proper air circulation.
6. Ground the refrigerator to prevent electric shock and noise interference. Always ground this refrigerator
when using it in places with high humidity or moisture. (Please consult with retailers or HITACHI service centre.)
7. Adjusting the adjustable legs to keep the left/right refrigerator door level.
■ Without adjusting the legs, door height may not be level,
or there may be abnormal vibration or noises depending
on floor conditions. Follow the instructions below.
(1) Turn the adjustable legs until they touch the floor firmly.
Preparations before Use
Beginning
1. Cleaning inside the refrigerator. Wipe the surface gently with soft cloth.
2. Connect the refrigerator to an exclusive wall power outlet.
The refrigerator can be connected to an outlet soon after it is installed.
Surely use with the rated voltage and exclusive power outlet.
3. The compressor will start running in approximately 30 seconds,
if inside is not cold.
4. Allow enough duration for sufficient cooling before storing food.
It may take about 4 hours to fully cool down and could even take about
24 hours when the ambient temperature is high.
1. Keep enough space between food. Several food placed to
close together may obstruct the flow of cold air.
2. Make food cool enough before putting it in the refrigerator.
Putting warm food in the refrigerator raises the inside temperature and wastes electricity.
3. Do not block the cold air vent. This will adversely affect the cold air flow and may not keep
the temperature inside even. Moreover, it could result in food near the vent freezing.
4. Using food wrap or sealed containers prevent the food from drying or transition of smells.
Food storage
4 hrs.
More than 5 cm
More than 1 cm
Rear side
more than 5 cm
Adjuster Cover
Adjustable
Leg
When installing,
do not press the
power plug with t he
refrigerator back.
Identification Parts
Vegetable Compartment 4°C~7°C
Vegetable Drawers
●Storage of fruits and vegetables.
Refrigerator Compartment 2°C~5°C
●Storage of side
dish, desert, etc.
Refrigerator Shelves
●Storage of fresh
meat, fish, prawn
and process foodstuff.
Fresh Room
Refrigerator Door Pockets
●Storage of packed small
food and drinks such
as juice, milk, etc.
Wat er Tank
● WHEELS
● LEVELING LEGS
Freezer Compartment -20°C~-18°C
Freezer Compartment
●Storage of frozen food and ice
cream, etc.
Automatic Ice Maker
Notice
● Above temperatures are the approximate values in the conditions of outside temperature 32
°
C, the temperature setting of the refrigerator compartment “Mid”,
freezer compartment “Mid”, doors being closed and without food storage.
● Door pocket temperatures may be little higher than above temperatures.
● The specification of your purchased model may be different from one of the above illustration.
Right door has fallen Left door has fallen
● 1 rotation of adjustable leg is about 1 mm in difference.
● 1-5 days might take for the main body of the refrigerator
becomes familiar with the floor, and until the door is
reconciled in parallel.
Please turn the left leg in
the direction of the arrow.
Please turn the right leg in
the direction of the arrow.
Adjustable left leg. Adjustable right leg.
Parallel adjustment of the door.
5
Page 5
●
Remove the “Fresh Room” as shown below.
Do not store more than 3 kg in the
“Fresh Room” or it may be broken.
●
5
How to install and remove parts
How to use control panel
Tap! Tap!
Tap! Tap!
Slide Case
Vegetable Case
Fresh Room
Lower Freezer Case
Remove the door pocket as shown
Door Pocket / Egg Pocket
Pull out the vegetable compartment door, and lift up slide
case and vegetable case as shown.
Do not store more than 4.3 kg in the slide case
or it may be broken.
Do not store more than 12 kg
in the vegetable case or it
may be broken.
Vegetable Compartment
Freezer Compartment
Slide Case
Lower Freezer Case
Indication line for the
food storage section
(Front)
Providing information
Display area For operation
Tank Empty
Pg.
Pg.
Pg.
Pg.
Notice
Caution
About the display
Close all the doors before adjusting the settings.
While a door of the refrigerator is opened
or an indicator lamp on the display is blinking,
it will not work even if you touch the Open Button.
If you confirm the setting, touch button or open
the refrigerator door. The display will be lit again.
If you touch button again after finishing
the operation, it will be unlit. The displayed characters
will be unlit 40 seconds later without touching
the button again for energy-saving. However,
the setting of “Energy Saving” mode, “Freezer”
indicator lamps and “Off” and “ Tank Empty ”
indicators and [“eco” operation indicator lamp]
will not be unlit.
When opening the refrigerator door and the displayed
characters are lit, they becomeunlit about 15 seconds
after closing it.
About the Open Button
Response of the touch panel may change depending
on the surrounding temperature, humidity, physical
condition of the user or operation status of the adjoining
electric product.
Release a finger and touch the panel again if
the panel does not respond after touching it.
False detection may occur (it may be kept pressed)
if the time interval between key touches is too short.
Response of the touch panel does not improve even
if you touch it strongly.
The panel may not respond if it is wet or dirty.
Wipe it off with a dry cloth.
First touch it.
Setting a cooling mode
Pg.
1.
2.
3.
Lower Freezer Case
The Open Button is a touch panel made of glass.
If you touch button, the current settings will be displayed.
The upper portion of the Open Button is the display and the lower portion is for operation.
Touch the lower portion of the Open Button to change the settings, if necessary.
Please close the door of the refrigerator door before changing the settings.
Set a cooling mode
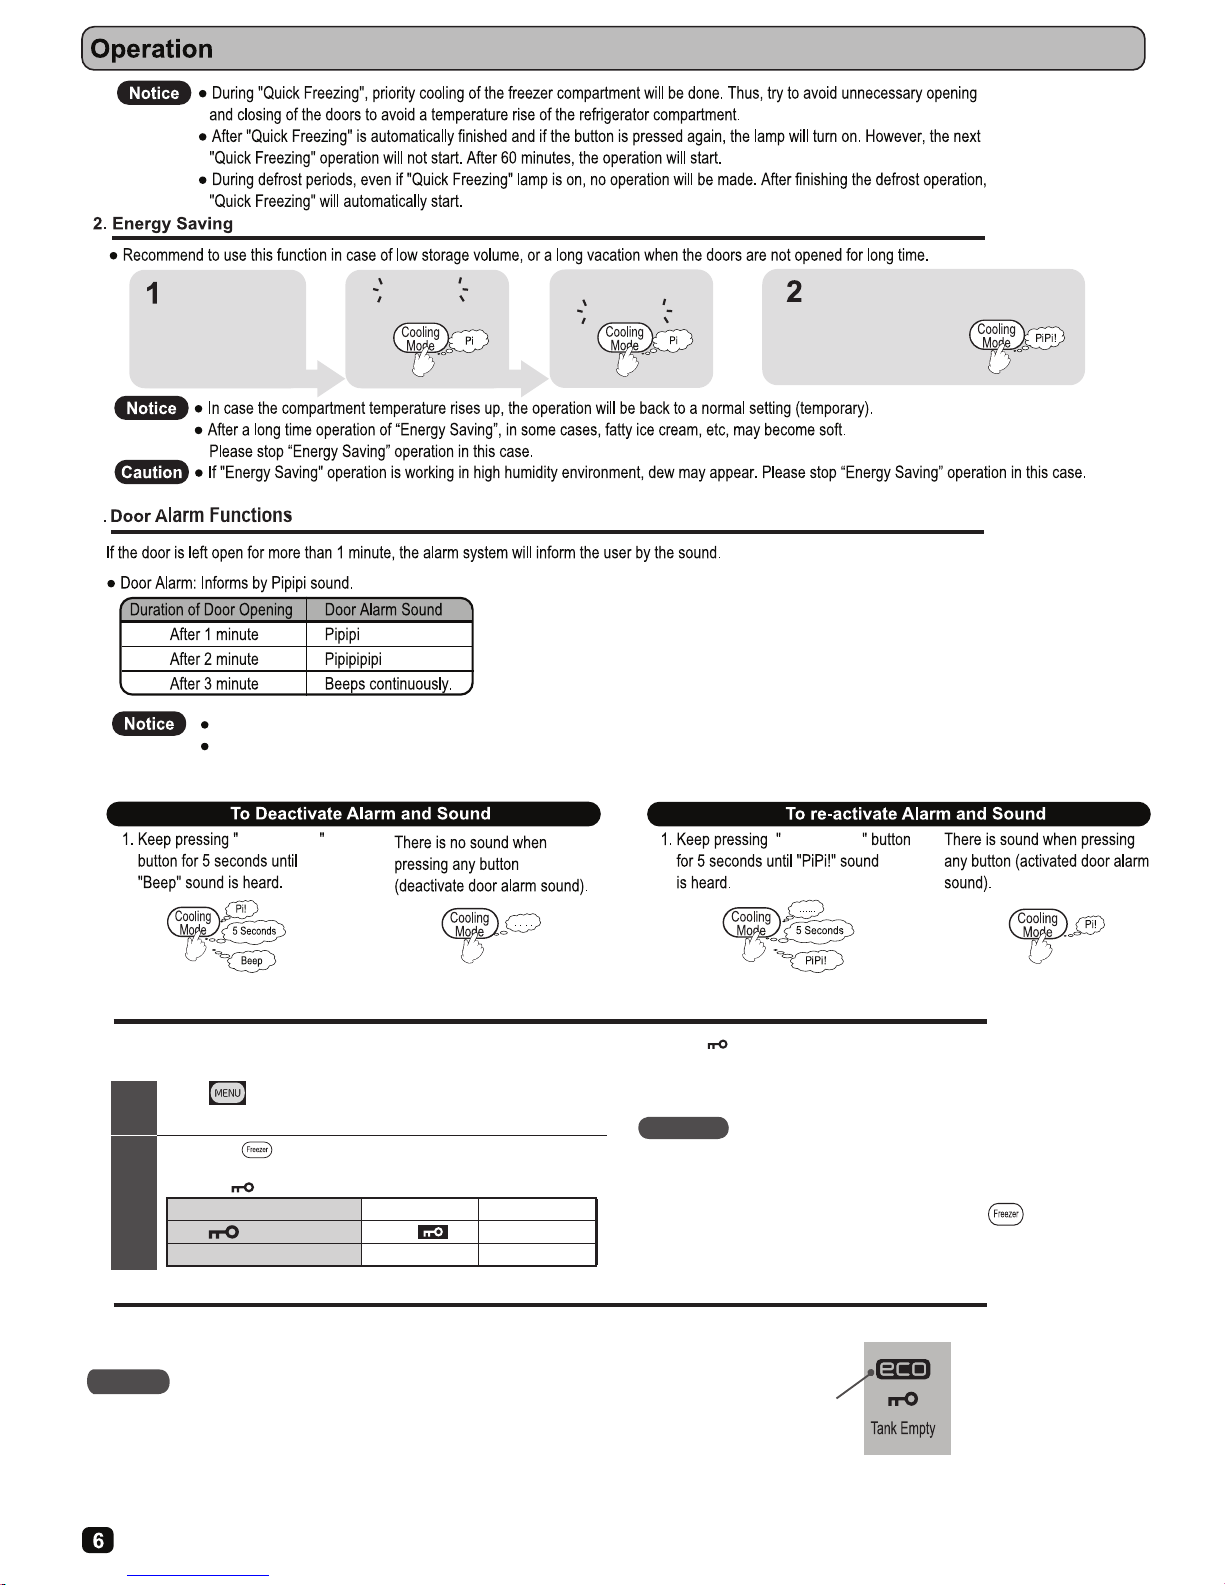
Quick Freezing
Energy Saving
All the indicator lamps are lit for the sake of explanation.
It will turn on while it is working in “eco” mode.
It will turn on while the Open Button is locked.
Blink indicating any trouble.
It will turn on when water in the water supply container is getting low.
Other Functions
1. Quick Freezing
When you want to freeze food or make ice quickly, use this function.
Setting an ice-maker
“ON”
Pg.
“OFF”
Set the ice making mode
Adjusting temperature settings
Set temperature for each
Normally,use the ”
Mid“ setting.
Refrigerator
Freezer Compartment
6
6
7
8
6
8
Lower Freezer Case is for large-sized food and those that
need to be stored over an extended time period.
Make sure food is stored below in the indication line.
Otherwise food touches the slide case above and it prevents
the door to be closed properly and cooling efficiency suffers.
Food and the slide case may be also damaged.
To remove slide case, lift it up as shown.
Do not store more than 4.6 kg in upper
freezer case or it may be broken.
Pull out the lower freezer compartment door,
and pull up toward you.
T
o remove lower freezer case, lift it up as shown.
Do not store more than 11 kg in the
lower freezer case or it may be broken.
Quick Freezing
Energy Saving
Quick Freezing
Press “Cooling Mode”
operation, light is on.
Quick Freezing
After 2 hours (approx.) Quick freezing
operation will be finished, light is off
button to start Quick Freezing
Press “Cooling Mode”
operation, light is off.
button again to stop Quick Freezing
Pg.
Pg.
7
7
Pg.
5
Page 6
(Continued)
1
2
4. Locking the Open Button
This can prevent erroneous operation of the Open Button or misuse by children. When this indicator lamp
(Lock of the Open Button) is illuminated, any other portion
of the Open Button will not be activated by touching it.
button on the Open Button to turn on the indicator lamp.
Touch
All indicator lamps turn on, and then the current settings are displayed.
Press down button 5 seconds or more until the preset sound is heard.
Lock of the Open Button is changed to “On” or “Off”.
It is set to [ ]“Off” before shipping.
Setting of the Open Button's lock
“On” (locked) “Off” (unlocked)
Long beep 2 beeps
Preset sound
“ indicator lamp”
OffOn
Electric pulling-out operation will not be disabled even if the Lock function
on the panel for operation is set as On. When stopping the setting of Auto
Door and Auto Drawer (electrical drawer compartment), unlock the Open
Button, and touch the button for 5 seconds or more until it beeps
twice.
When connecting/disconnecting the power plug or after recovering from
electric power failure, lock of the panel for operation may be released.
Notice
5. “eco” Operation indicator lamp
If [“eco” Operation indicator lamp] isn’t illuminated, check the following things.
・
Immediately after it is installed, or plentiful foods are stored at a time
・
I
f the door is frequently opened / closed
・
If the door is not closed completely because any food/bag is wedged between the door and the body
of the refrigerator.
・
Quick Freezing is set.
Notice
When the refrigerator is operated in a manner to reduce power consumption, such
as Frost Recycle Cooling, the indicator lamp is automatically l it to indicate that the
refrigerator is operating in the energy saving mode.
“
eco” Operation
indicator lamp
3
Upon shipment, the alarm and sound are activated.
Unplugging and inserting the power plug or in the event of a power
failure the refrigerator will automatically reset the alarm and sound
to activated.
Cooling Mode
Cooling Mode
Press “Cooling Mode”
Saving “ operation, light is off.
button again to stop “ Energy
Press “Cooling Mode”
Saving operation, light is on.
button to start Energy
Quick Freezing
Energy Saving
Quick Freezing
Energy Saving
Energy Saving
Page 7

Caution
Light ON
6. Water Supply indicator
7
Notice
7. Adjusting temperature in a refrigerator compartment
Touch button on the Open Button to turn on the indicator lamp
1
2
All indicator lamps turn on, and then the current settings are displayed.
Touch button to set the temperature as you like.
Each time you touch the button, the corresponding indicator lamp changes
in the order shown in the figure on the right.
The temperature is set to “ Mid ” before shipping.
Select “ Mid ” in ordinary usage. The temperature may change
depending on the operation states.
The above temperatures are standard values in the
Refrigerator Compartment under the condition that the
refrigerator is stable with no food stored and the door
closed, at ambient temperatures of 30ºC.
8. Adjusting temperature in a freezer compartment
Touch button on the Open Button to turn on the indicator lamp
1
2
All indicator lamps turn on, and then the current settings are displayed.
Touch button to set the temperature as you like.
Each time you touch the button, the corresponding indicator lamp changes
in the order shown in the figure on the right.
The temperature is set to “ Mid ” before shipping.
Select “ Mid ” in ordinary usage. The temperature may change
depending on the operation states.
Notice
If operating the refrigerator for a long time with the Freezer
Compartment “Max” selected, ice cream etc. may become
hard or it may take a longer time to thaw food.
Notice: For the Freezer Compartment ( “Max”Lower temperature freezer),
food is stored at a lower temperature than the conventional
freezer temperature. The energy consumption is approximately 20%
higher than that for the conventional freezer operation.
“
Tank Empty
” may come on regardless of water level if the water supply
container is not placed properly. Push in the container straight and
completely if the indicator lamp comes on.
“Tank Empty” indicator lamp remains off when “Off” is selected for automatic ice making.
“
Tank Empty
” indicator lamp turns comes on when water in the water supply container is getting low
Replenish the container with water. While the “Tank Empty” indicator lamp is on, the Ice Making function
“
Tank Empty
” indicator lamp turns off once (for up to 3 hours) when the left door
of the Refrigerator Compartment is opened nad closed while the indicator
lamp is on, and it turns on again if no water is added to replenish the container
About 2~6˚C
(Factory setting)
About 1~3˚C
lower than “ Mid ”
About 1~3˚C
higher than “ Mid ”
About -20 ~ -18˚C
(Factory setting)
About 1~3˚C
lower than “ Mid ”
About 1~3˚C
higher than “ Mid ”
Touch it
Touch it
Touch it
Touch it
Touch it
Touch it
Page 8

8
How to use Automatic Ice Maker
● Do not put anything, such as frozen food, ice cream other than ice in the ice box.
● Do not touch ice lever detector or ice tray with your hands, you may get injured.
Filling the pure water until the
“FULL” level then closed by cap.
2
1
Push the tank into the case
until it locked at the setting line.
Notice
● For a first installed, allow 24 hours for
the refrigerator to cool down and make ice.
Caution
Using the ice maker for the first time :
● Throw away the first full ice box of Ice cubes. Odor or dust may adhere on it.
● If water tank was dropped, make sure that water is not leaking from the tank.
● Do not fill other liquid, any beverages such as juice, cola, beer etc, into the water tank.
● Do not fill hot water into the tank (Tank Heat-resistance temperature : 50
o
C).
● Ice maker will stop automatically when
Ice box is full and it will start again
automatically when ice cubes in the ice box is
reducing or empty.
● It is normal that a noise is generated
when ice made or ice dropped into the ice box.
FULL
Ice trayIce scoop
Ice detection lever Ice cube box
(FRONT)
1. Remove the case from
the lid by turning it in the
direction as shown below.
2. While pressing the knob,
remove the water filter from
the bottom of the case.
3. Wash the water filter
with soft sponge.
● Do not use kitchen soap or bleaching agent.
● The water filter is form easily; therefore do not stab it with sharp stick.
case
lid
knob
Water filter
ON
OFF
Cleaning the Water Tank
Turning on/off the Automatic Ice Maker Function
water filter
lid
case
packing
●
As seen in the figure below, press the central front part of the lid to lift it up.
(Do not open the lid by nails.)
●
To close the lid, make sure that the grips at the back are st ill holding the lid,
then close the lid down in the direction as shown below.
● If you do not intend to use the Automatic
Ice Maker, turn it off
First, check the Automatic Ice Maker is in operation.
Notice
1. When in operation. 2. To stop the operation, press
the “Ice Maker” button.
3. When restarting operation.
The lamp will turn on. The lamp will turn on.The lamp will turn off.
water supply cover
ON
OFF
ON
OFF
PiPi
Beep
lid
grips
Malfunction Display
● *1 The freezer compartment door
might not be closed properly.
●
Remove the obstacles if any, and confirm that the freezer
compartment door is closed properly. Then, wait for the inside
of the freezer compartment to cool sufficiently.
● Remove the obstacles if any, and confirm that the refrigerator
compartment door is closed properly. Then, wait for the insi
de
of the refrigerator compartment to cool sufficiently.
● *
1
The refrigerator compartment
door might not be closed properly.
Error Trouble Display Possible cause What to check
Light 3 sec.
Blink once
Light 3 sec.
Blink twice
blink time (n = 1~2)
3 Sec
0.25 Sec
0.25 Sec
[ Lighting 3 Sec + Blink ]
lighting
0.25 Sec
*1:This case is the door incomplete closing proceed from something caught between door and cabinet of refrigerator.
It is causing a gap betweem door and cabinet of refrigerator. And it cause tempereture rise in the refrigerator.
Water tank set line
water tank
Page 9

9
flashing
This flashing shows that there is a problem. Consult your dealer.
MIN
MAX
Page 10

10
Page 11

11
例如舊布
Page 12

12
5
MID MID
Page 13

Tank Empty
Pg .
Pg .
Pg .
Pg .
“ON”
“OFF”
Pg .
Pg .
操作部是玻璃觸碰式。
按下
按鍵時可以顯示目前的設定。
操作面板的上方是顯示部,下方是操作部。
請按操作部來切換各種設定。
若要切換設定時,請在冷藏室門關閉的態下操作。
注意事項
關於顯示部
請在所有冰箱門關閉的 態下操作各種設定。當冰箱門開
時或顯示部的顯示燈閃爍時,操作各種設定則無反應。
要確認設定 況時,請按下
,或打開冷藏室門。顯示部會再次亮燈。
操作結束後,再次按下
時,則顯示滅燈。沒有按下
,為了達到省電目的,約40秒後顯示部及操作部也會滅燈。
但「節電」模式的設定及
運轉時的顯示、及「
Off
」「 」的通知顯示、環保運轉的「
ec o
運轉顯示」則不會滅燈。
開 冰箱門若顯示部及操作部亮燈,冰箱門關閉後約15秒顯示文字則滅燈。
關於操作部
觸控面板會根據周圍的 度・濕度、使用者的身體
態及旁邊的電器製品的使用 況,其反應會有所變化。
按了也沒有反應(顯示 容不變)的時候,請把手指離開一下再按
。
在兩次按鈕之間的間隔過短有可能導致檢測出錯誤訊
息(感應為持續按)。用力按也不會改善感應度的。
玻璃觸碰部濕或髒了的時候,會沒有反應。請以乾布擦拭。
通知事項
顯
示
部
分
操
作
部
為了更清楚 明,所有的顯示都呈燈亮的 態。
度設定
設定冰箱各存放空
間的 度。
平常請設定在「 」
的位置。
冷藏室
頁
冷凍室
頁
(製冰)
(製冰停止)
設定製冰模式
製冰設定
設定冷卻模式
設定冷卻模式
最初碰觸
M E NU
鍵
力消耗, 動運轉時顯示燈亮燈
操作面板按鍵鎖,上鎖時顯示燈亮燈
告知異常時,顯示燈閃爍
當給水槽中的水減少時,顯示燈亮燈
告知之顯
13
Freezer
14
14
16
15
16
14
5
Tank Empty
Quick Freezing
Energy Saving
Quick Freezing
Quick Freezing
15
15
Pg .
13
Page 14

14
操作面板鎖定功能
按下操作面板的
按鍵,顯示燈亮
顯示燈全部燈亮後,顯示目前的所有設定。
持續按住
5
秒以上,直到發出設定音為止
操作面板按鍵鎖可切換「開」或「關」。
出廠時,設定成「
」(熄滅)的 態。
1
2
雖設定為操作面板鎖定,但電動抽屜的
功能也不會因而停止。
如果想要停止電動冷藏室門以及電動抽
屜的設定時,請先解除操作部的鎖定,
持續按住
5
秒以上直到發
出嗶嗶聲音。
拔除電源插頭再插上插頭時,或停電後
恢復供電時,有可能解除操作面板的鎖
定。
通知事項
是為了防止誤觸操作面板,及兒童玩弄冰箱而設計的功能。
(
按鍵鎖) 的顯示燈亮燈時,即使按了其他的操作部也無法切換。
操作面板按鍵鎖的設定
「開」
(
鎖定中
)
「關」
(
解除鎖定
)
「 」顯示
燈亮
熄滅
設定音
嗶
-
嗶嗶
ec o
運轉顯示燈
霜能再利用時,減少電力消耗,自動顯示燈亮燈,告知冰箱是處在
省能源運轉 況。
〔
ec o
運轉顯示燈〕無法燈亮時,可能是以下的原因。
・
剛設置完成後、或一次儲放大量的食品時
・
冰箱門開閉次數頻繁時
・
當食品或包裝袋被箱門夾住,而箱門關不緊時
・
設定為「
時
通知事項
〔
ec o
運轉顯示燈〕
4.
Quick Freezing
「
5.
(續前頁)
3
Cooling Mode
Cooling Mode
Quick Freezing
Energy Saving
Quick Freezing
Energy Saving
Energy Saving
Cooling Mode
Cooling Mode
Page 15

會滅燈(最長會熄
「 」會顯示燈亮。
通知事項
注意事項
6
顯示燈亮
,「 」
15
7.
按下 操作面板的
按鍵 ,顯示燈亮
按 下
按 鍵 , 可 以 變 更 適 當 的 度
1
2
約
2 6 ˚C
(出廠時)
比“ ” 低
約
1 3 ˚C
比“ ” 高
約
1 3 ˚C
~
~
~
按下
按 鍵 ,可 以 變 更 適 當 的 度
1
2
通知事項
8
約
-20 - 18˚C
(出廠時)
比“ ” 低
約
1 3˚C
比“ ” 高
約
1 3˚C
調節冷凍室的 度
按下
按下
按下
~
~ ~
按下
按下
按下
Mid
Mid
Mid Mid
顯示燈全部燈亮後,顯示目前的所有設定。
按下按鈕時依如右圖所示順序切換。
出廠時設定為「 Mid 」。
通常請使用“ Mid ”的位置。
度因使用條件而有所變動。
調節更細微的
按下按鈕時依如右圖所示順序切換。
出廠時設定為「 Mid 」。
通常請使用“ Mid ”的位置。
度因使用條件而有所變動。
調節更細微的
注: 冷凍室「 Max 」(低冷凍)
是比平常冷凍還要低的態來保存食物。
與平常冷凍時的運轉相比,消費電力
約增加 20% 。
冷凍室「 Max 」長時間使用時,冰淇淋等會變硬、儲存的食品的解凍時間會變長。
給水槽的水量減少時,「 Tank Empty 」顯示燈亮。請補充水至給水槽。
當,「 Tank Empty 」亮燈時,縱使設定在「 On 」時也無法製冰。
「Tank Empty 」燈顯示燈亮的態下開冰箱箱門時
此時請確實地將給水槽往前推入至固定位置。
即使給水槽中有水,但是安裝給水槽時沒有確實推入,
滅3小時),若沒有補充水時則會再次燈亮。
Tank Empty
Tank Empty
自動製冰機設定為「Off」時,「 Tank Empty 」 不會顯示燈亮。
顯示燈全部燈亮後,顯示目前的所有設定。
按下操作面板的 按鍵,顯示燈亮
是在周圍度30˚C、不放入食品、關閉冰箱門、
定的況下的冷藏室的大致度。
調節冷藏室 度
告知給水警示燈
Page 16

2
1
16
ON
OFF
ON
OFF
ON
OFF
Page 17

17
閃爍
告知有異常。請與購買的經銷店商洽。
MIN
MAX
17
9
Page 18

18
Page 19

Page 20

HRPK1040A_INST-BK-315L-G-HK-15
 Loading...