

Hitachi RAS-MES10HA, RAC-ME10HA, RAC-MES10HA, RAS-MES14HA, RAC-MES14HA Instruction Manual
...Page 1
SPLIT TYPE AIR CONDITIONER
1 ~16
RAS-ME10HA/RAC-ME10HA
RAS-ME14HA/RAC-ME14HA
RAS-MES10HA/RAC-MES10HA
RAS-MES14HA/RAC-MES14HA
RAC-ME14HA
RAC-MES14HA
RAC-ME10HA
RAC-MES10HA
RAS-ME10HA
RAS-ME14HA
RAS-MES10HA
RAS-MES14HA
Page 1~18
To obtain the best performance, please read this
instruction manual completely.
Instruction manual
~
.
1
ENGLISH
Page 2
2
Page 3
PRECAUTIONS DURING OPERATION
W
A
R
N
I
N
G
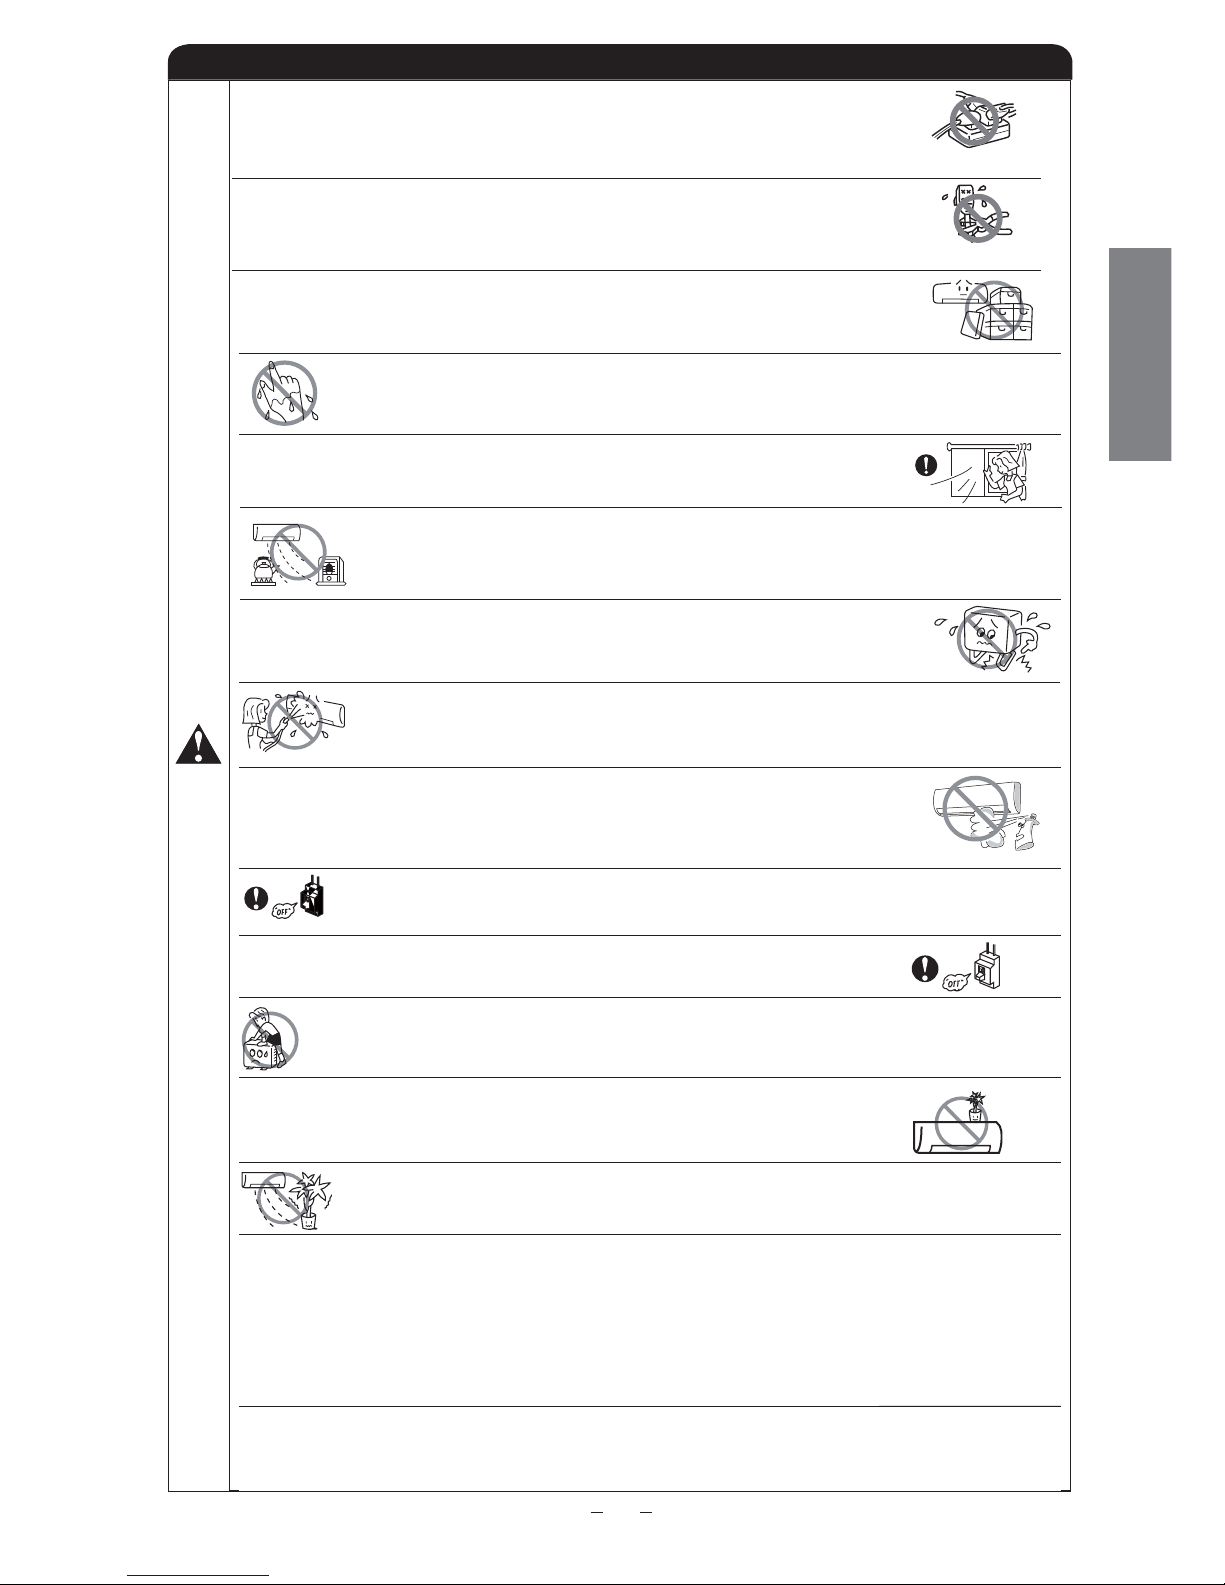
The product shall be operated under the manufacturer specification and not
for any other intended use.
•
Do not attempt to operate the unit with wet hands, this could cause fatal accident.•
When operating the unit with burning equipments, regularly ventilate the
room to avoid oxygen insufficiency.
•
Do not direct the cool air coming out from the air-conditioner panel to face
household heating apparatus as this may affect the working of apparatus such as
the electric kettle, oven etc.
•
dna mrif ,elbats syawla si emarf gnitnuom roodtuo taht erusne esaelP
without defect. If not, the outdoor unit may collapse and cause danger.
•
Do not splash or direct water to the body of the unit when cleaning it as this may
cause short circuit.
•
Do not use any aerosol or hair sprays near the indoor unit. This chemical
can adhere on heat exchanger fin and blocked the evaporation water flow to
drain pan. The water will drop on tangential fan and cause water splashing
out from indoor unit.
•
Please switch off the unit and turn off the circuit breaker during cleaning, the highspeed fan inside the unit may cause danger.
•
Turn off the circuit breaker if the unit is not to be operated for a long period.•
Do not climb on the outdoor unit or put objects on it.•
Do not put water container (like vase) on the indoor unit to avoid water
dripping into the unit. Dripping water will damage the insulator inside the unit
and causes short-circuit.
•
Do not place plants directly under the air fl ow as it is bad for the plants.•
When operating the unit with the door and windows opened, (the room humidity is always above
80%) and with the air defl ector facing down or moving automatically for a long period of time,water
will condense on the air deflector and drips down occasionally. This will wet your furniture.Therefore,
do not operate under such condition for a long time.
If the amount of heat in the room is above the cooling or heating capability of the unit (for example:
more people entering the room, using heating equipments and etc.), the preset room temperature
cannot be achieved.
•
•
• Do not connect the power cable with an extension cable or do not plug too many
leads of the other electric appliance into the socket where this cable is plugged.
In addition, wire the cable with some allowances to prevent the cable from stretching.
Not doing so will cause an electrical shock, heat generation or fire.
• Do not bundle the power cable, pull it, put something on it, heat it, process it, or
put it between things. Breakage of the power cable may result.
Use of a damaged cable may cause an electrical shock or a fire.
PROHIBITION
PROHIBITION
This appliance is not intended for use by young children unless they have been adequately
supervised by a responsible person to ensure that they can use the appliance safely.
Young children should be supervised to ensure that they do not play with the appliance.
•
•
3
ENGLISH
Page 4
RAS-ME10HA/RAS-ME14HA
RAS-MES10HA/RAS-MES14HA
780
700
700
280
500
505
211
258
258
RAC-ME10HA/RAC-MES10HA
RAC-ME14HA/RAC-MES14HA
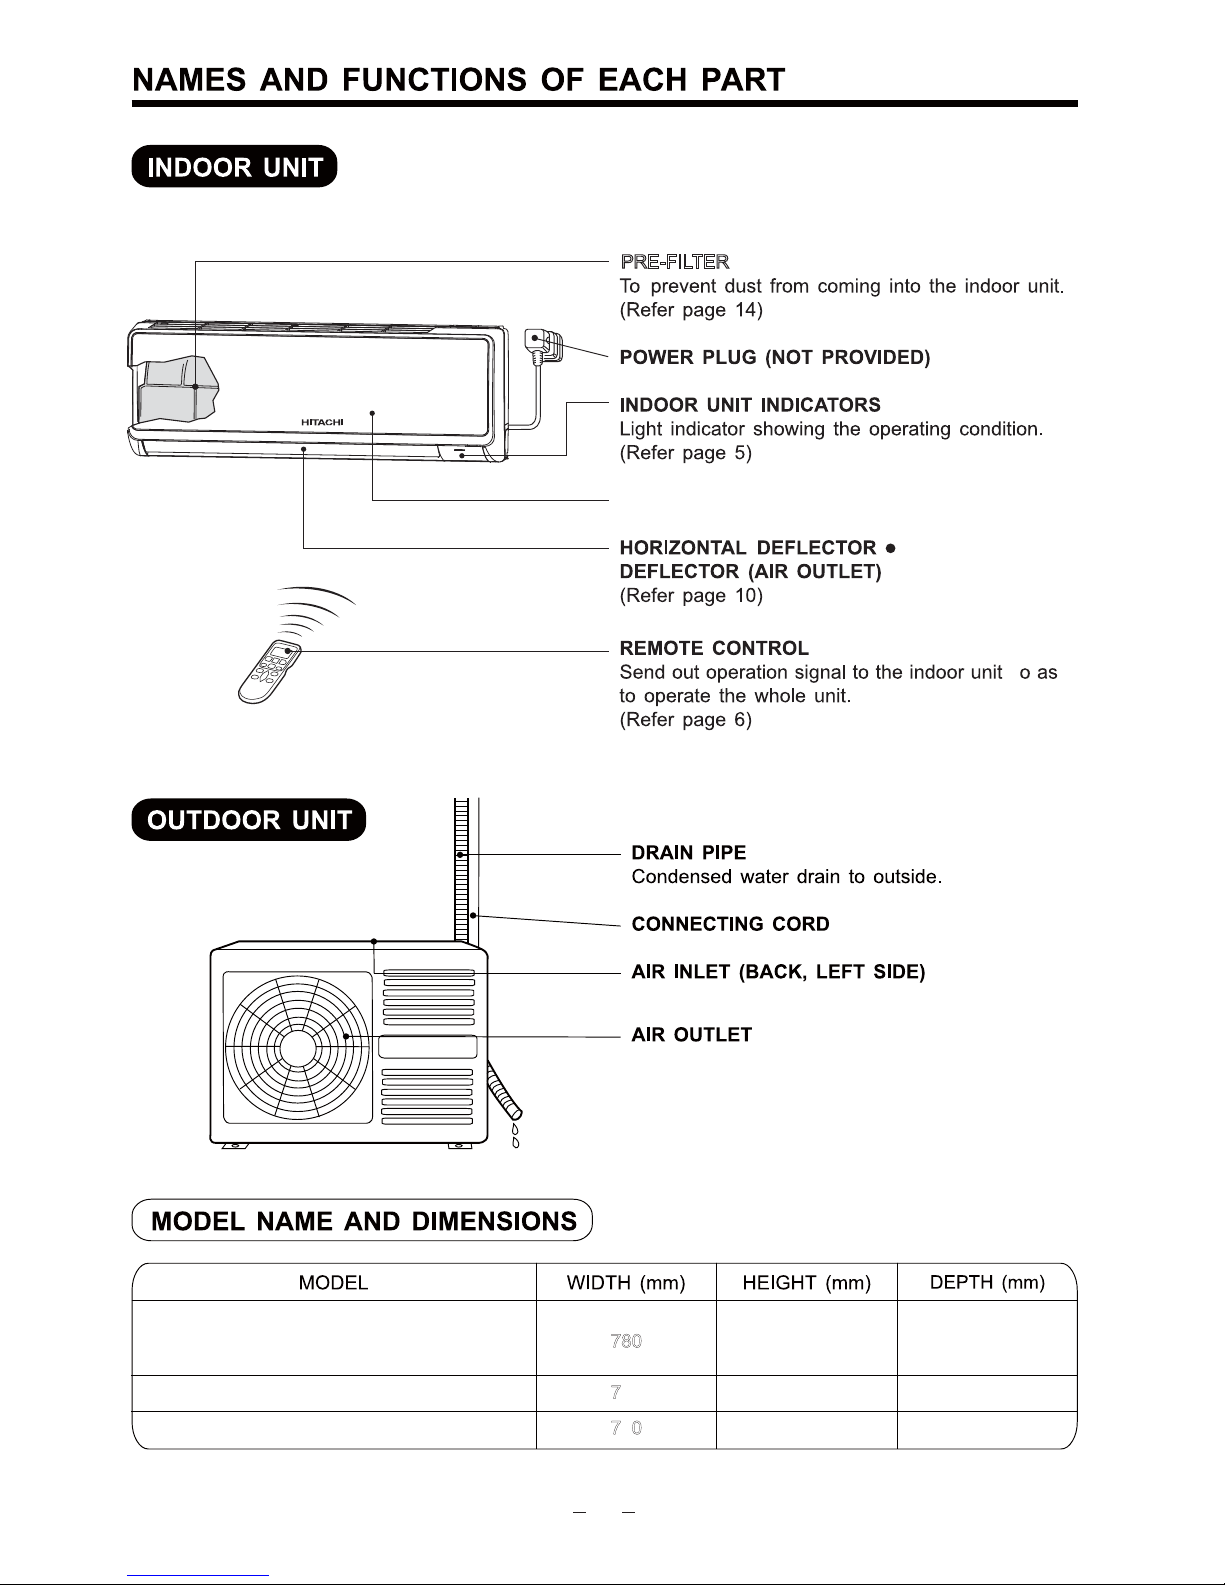
FRONT PANEL (AIR INLET)
VERTICAL
PRE-FILTER
s
4
Page 5
RAS-ME10HA RAS-MES10HA
RAS-ME14HA RAS-MES14HA
RAS-ME10HA RAS-MES10HA
RAS-ME14HA RAS-MES14HA
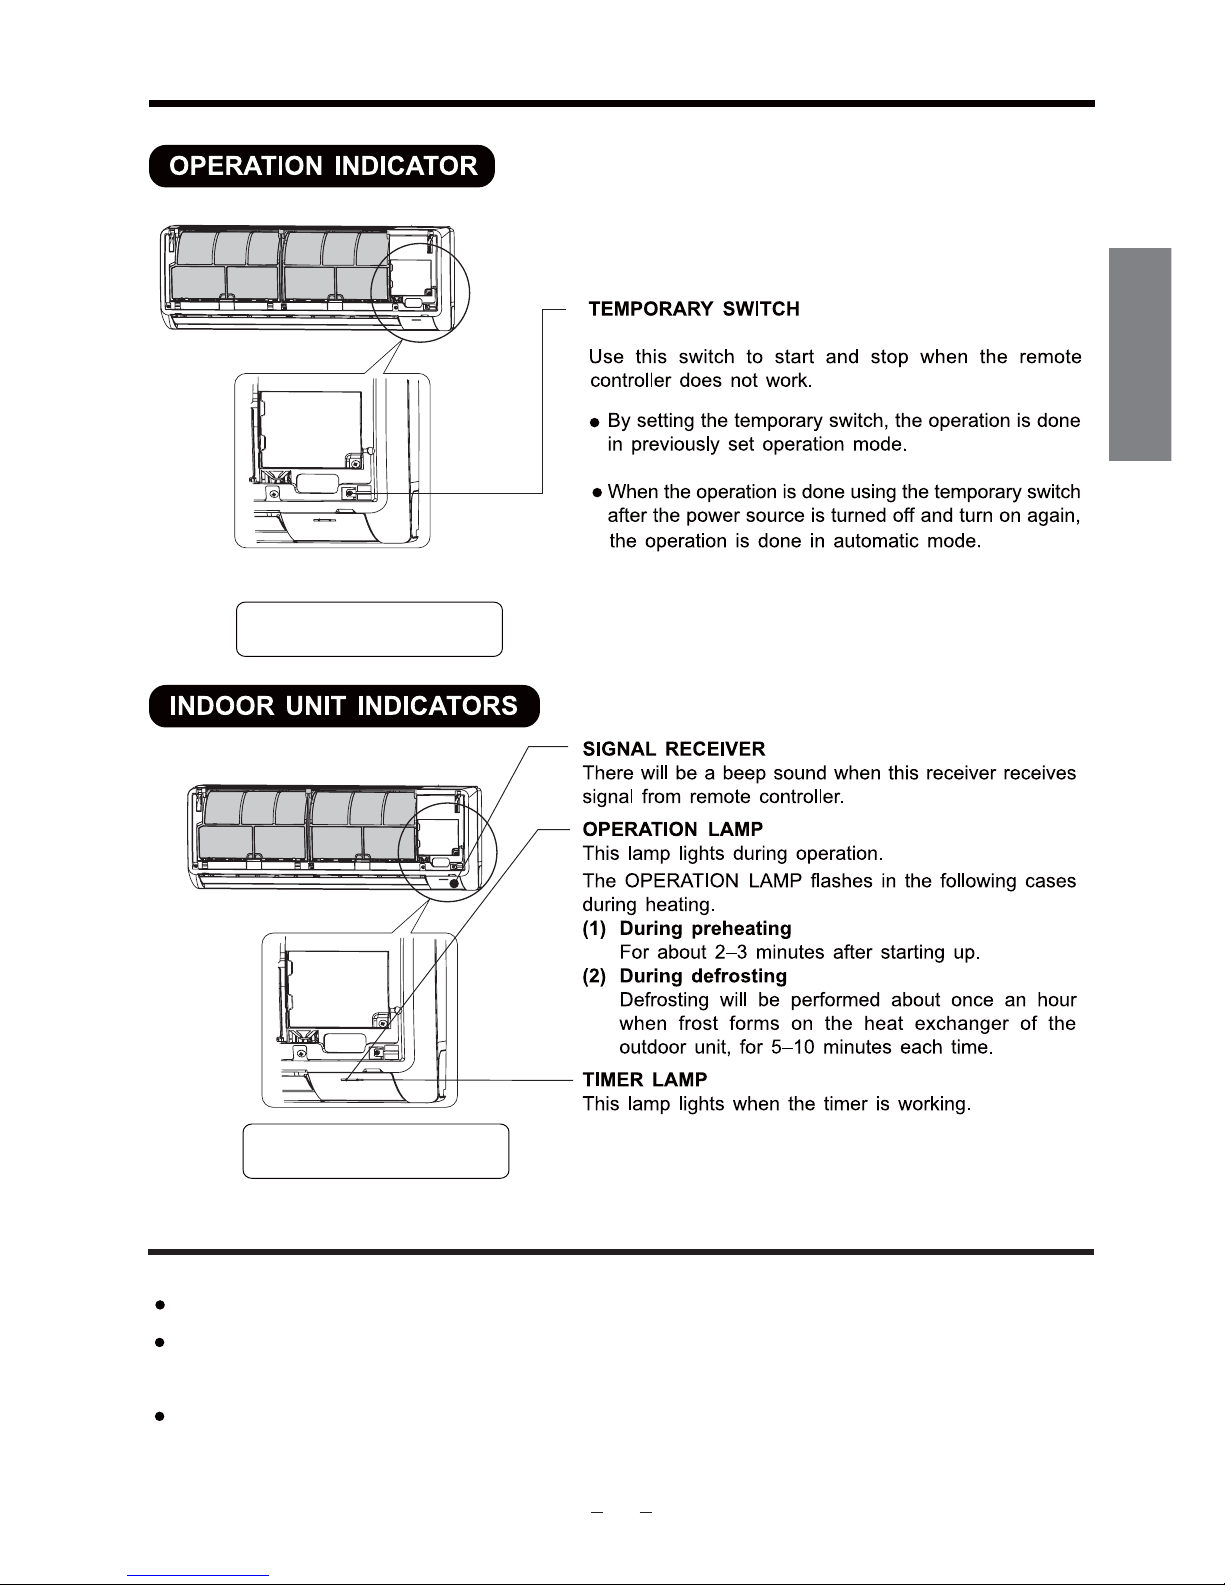
OPERATION INDICATOR
The auto restart feature prompts the air-conditioner to restart in its previous setting right after the power failure.
In case of the power failure during the use of timer mode (Sleep Timer or ON/OFF Timer), timer mode is
cancelled and the air-conditioner stops operation.
Please reset the remote controller to restart the unit after the power has been restored.
5
ENGLISH
Page 6
6
Page 7

Each time
Each time
s
7
ENGLISH
Page 8

g
will
8
Page 9

9
ENGLISH
Page 10

AIR FLOW LOUVERS ADJUSTMENTS
1
2
Adjustment of the conditioned air to the left and right.
Hold the vertical air deflector as shown in the figure and adjust
the conditioned air to the left and right.
If the “ (AUTO SWING)” button is pressed once,
the horizontal air deflector swings up and down. If the
button is pressed again, the deflector stops in its current
position. Several seconds (about 6 seconds) may be
required before the deflector starts to move.
Use the horizontal air deflector within the adjusting range
shown on the right.
When the operation is stopped, the horizontal air deflector
moves and stops at the position where the air outlet
closes.
!
CAUTION
In “Cooling” operation, do not keep the horizontal air
deflector swinging for a long time. Some dew may form
on the horizontal air deflector and dew may drop.
Adjustment of the conditioned air in the upward and downward
directions.
The horizontal air deflector is automatically set to the proper
angle suitable for each operation. The deflector can be swung
up and down continuously and also set to the desired angle
using the “ (AUTO SWING)” button.
level
about 15
about 60
about
30
about 20
about 55
level
10
Page 11

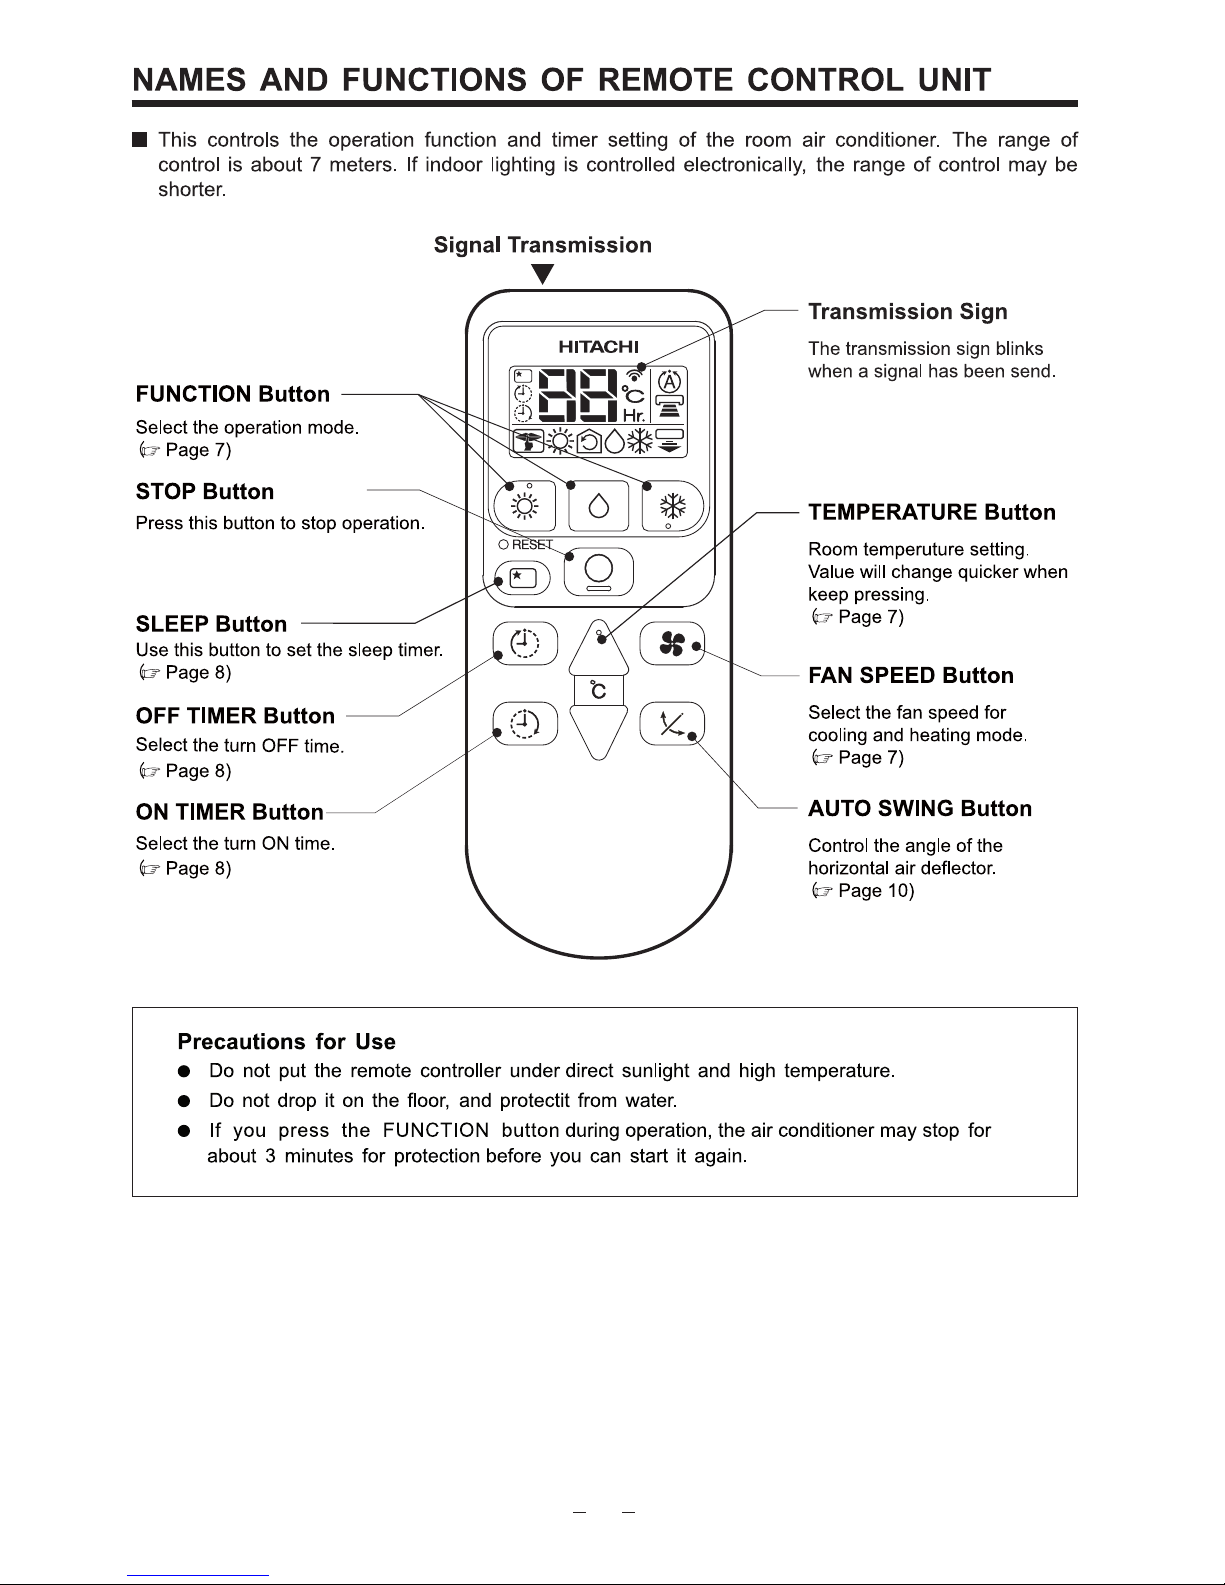
When using the remote control, if there is no response from the air conditioner unit and or the remote control
has fading and dim displays, the batteries in the remote control device need to be removed and replaced
with new ones
11
ENGLISH
Page 12

Pre
12
Page 13

13
ENGLISH
Page 14

Cleaning and maintenance must be carried out when filter lamp lights. Before cleaning, stop
operation and switch off the power supply.
1. AIR FILTER
Clean the Pre-filter, as it removes dust inside the room. In case the Pre-filter is full of dust, the air flow
will decrease and the cooling capacity will be reduced. Further, noise may occur. Be sure to clean the
Pre-filter following the procedure below.
!
CAUTION
1
Open the front panel and remove the Pre-filter
Gently lift and remove the air purifying filters
from the air purifying filter frame.
2
Vacuum dust from the Pre-filter and air
purifying filter using vacuum cleaner. If there is
too much dust, rinse under running tap water
and gently brush it with soft bristle brush. Allow
filters to dry in shade.
3
Re-insert the air purifying filter to the filter
frame. Set the Pre-filter with “FRONT” mark
facing front, and slot them into the original
state.
After attaching the Pre-filters, push the front
panel at three arrow portions as shown in
figure and close it.
!
CAUTION
Do not wash with hot water at more than 40°C. The filters may shrink.
When washing it, shake off moisture completely and dry it in the shade; do not expose it directly to
the sun. The filters may shrink.
Do not use detergent on the air purifying filter as some detergent may deteriorate the air purifying
filter electrostatic performance.
PROCEDURE
NOTE:
Air purifying filter should be cleaned every month or sooner if noticeable loading occurs. When
used overtime, it may loose its deodorizing function. For maximum performance, it is recommended
to replace it every 1 year depending on application requirements.
Pre filter
14
Page 15

B
E
N
Z
I
N
E
A
C
I
D
2. CLEANING OF FRONT PANEL
CAUTION
Never use hot water (above 40°C), benzine, gasoline, acid, thinner
or a brush, because they will damage the plastic surface and the
coating.
Removing the Front Panel
When the front panel is fully opened with
both hands, push the right arm to the inside
to release it, and while closing the front panel
slightly, pull it out forward.
Attaching the Front Panel
Move the projections of the left and right
arms into the Flanges in the unit and
securely insert them into the holes.
!
Remove the front panel and wash with clean
water.
Wash it with a soft sponge.
After using neutral detergent, wash thoroughly
with clean water.
When front panel is not removed, wipe it with
a soft dry cloth. Wipe the remote controller
thoroughly with a soft dry cloth.
Wipe the water thoroughly.
If water remains at indicators or signal
receiver of indoor unit, it causes trouble.
Method of removing the front panel.
Be sure to hold the front panel with both hands
to detach and attach it.
Projection
Flange
Hole
15
ENGLISH
Page 16

Confirm
1
2
3
PLEASE CHECK THE FOLLOWING POINTS BY QUALIFIED SERVICE PERSONAL EITHER
EVERY HALF YEARLY OR YEARLY. CONTACT YOUR SALES AGENT OR SERVICE SHOP.
Is the earth line disconnected or broken?
Is the mounting frame seriously affected by rust and is the
outdoor unit tilted or unstable?
Is the plug of power line firmly plugged into the socket?
(Please ensure no loose contact between them).
16
Page 17

MEMO
17
ENGLISH
Page 18

A
5614B
18
 Loading...