

Page 1
– 1 –
ENGLISH
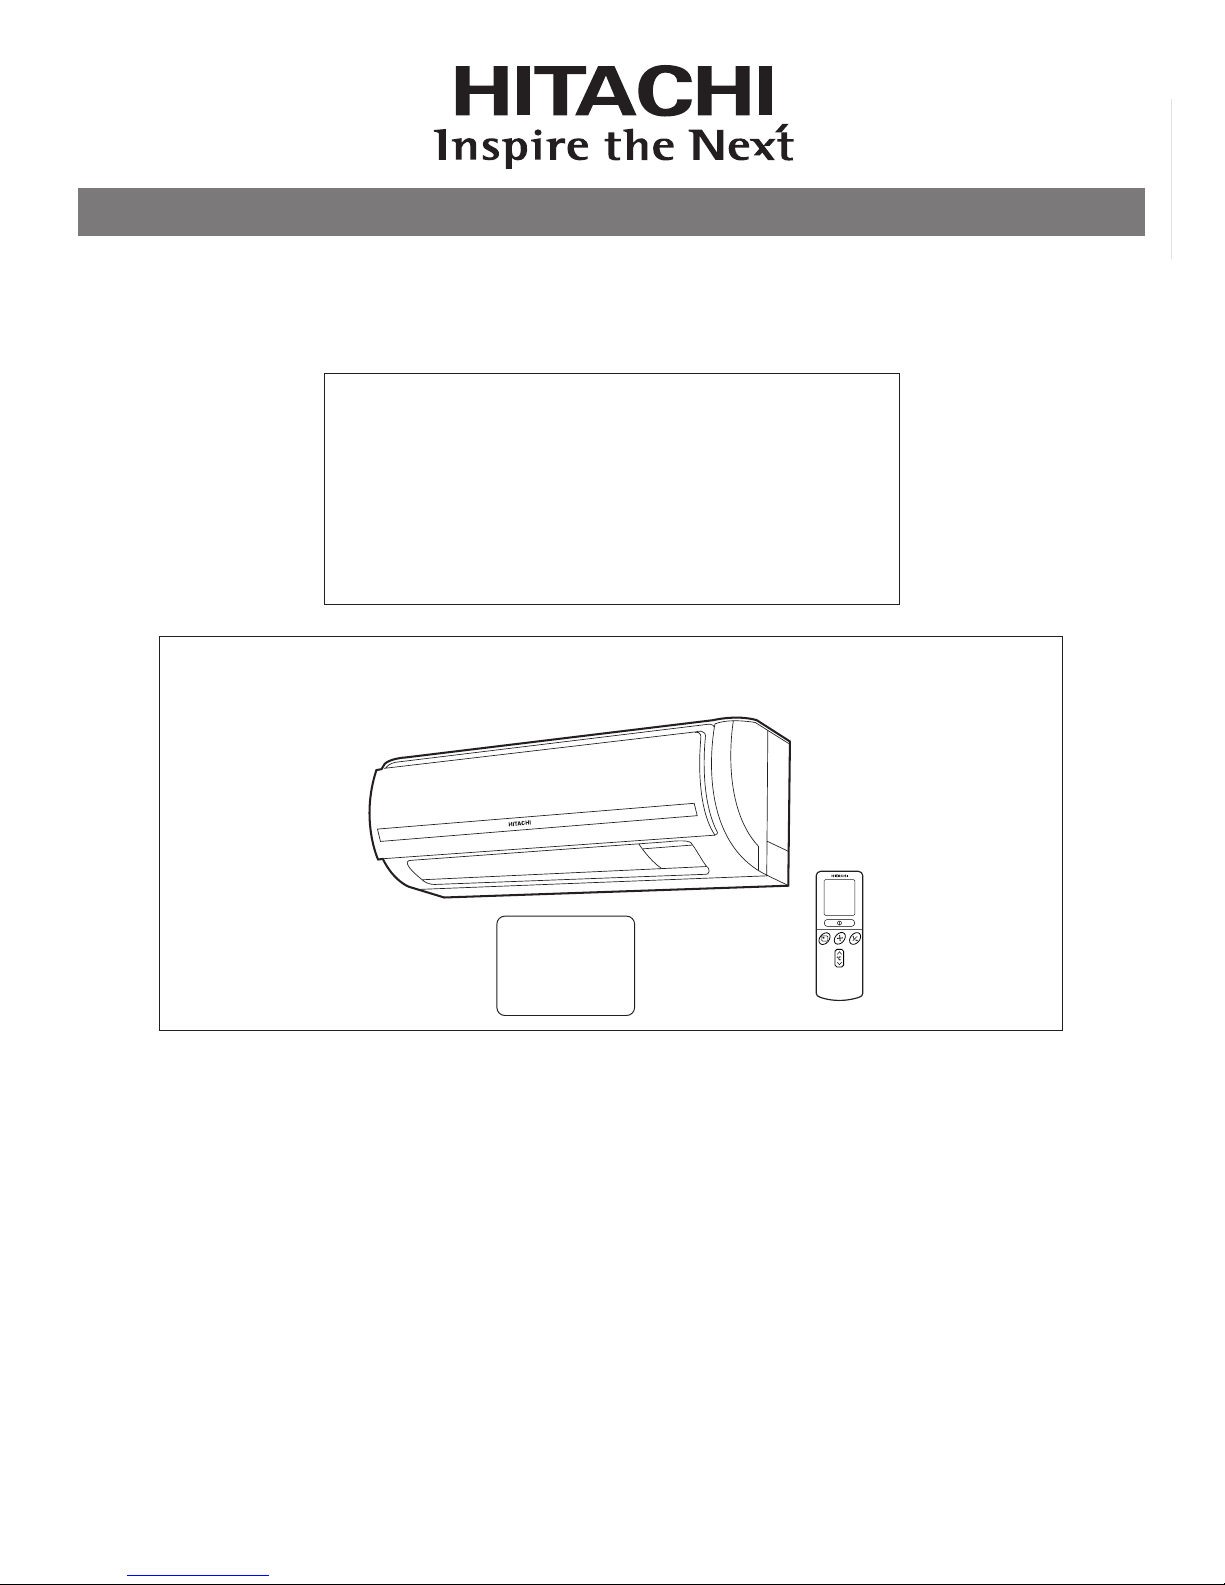
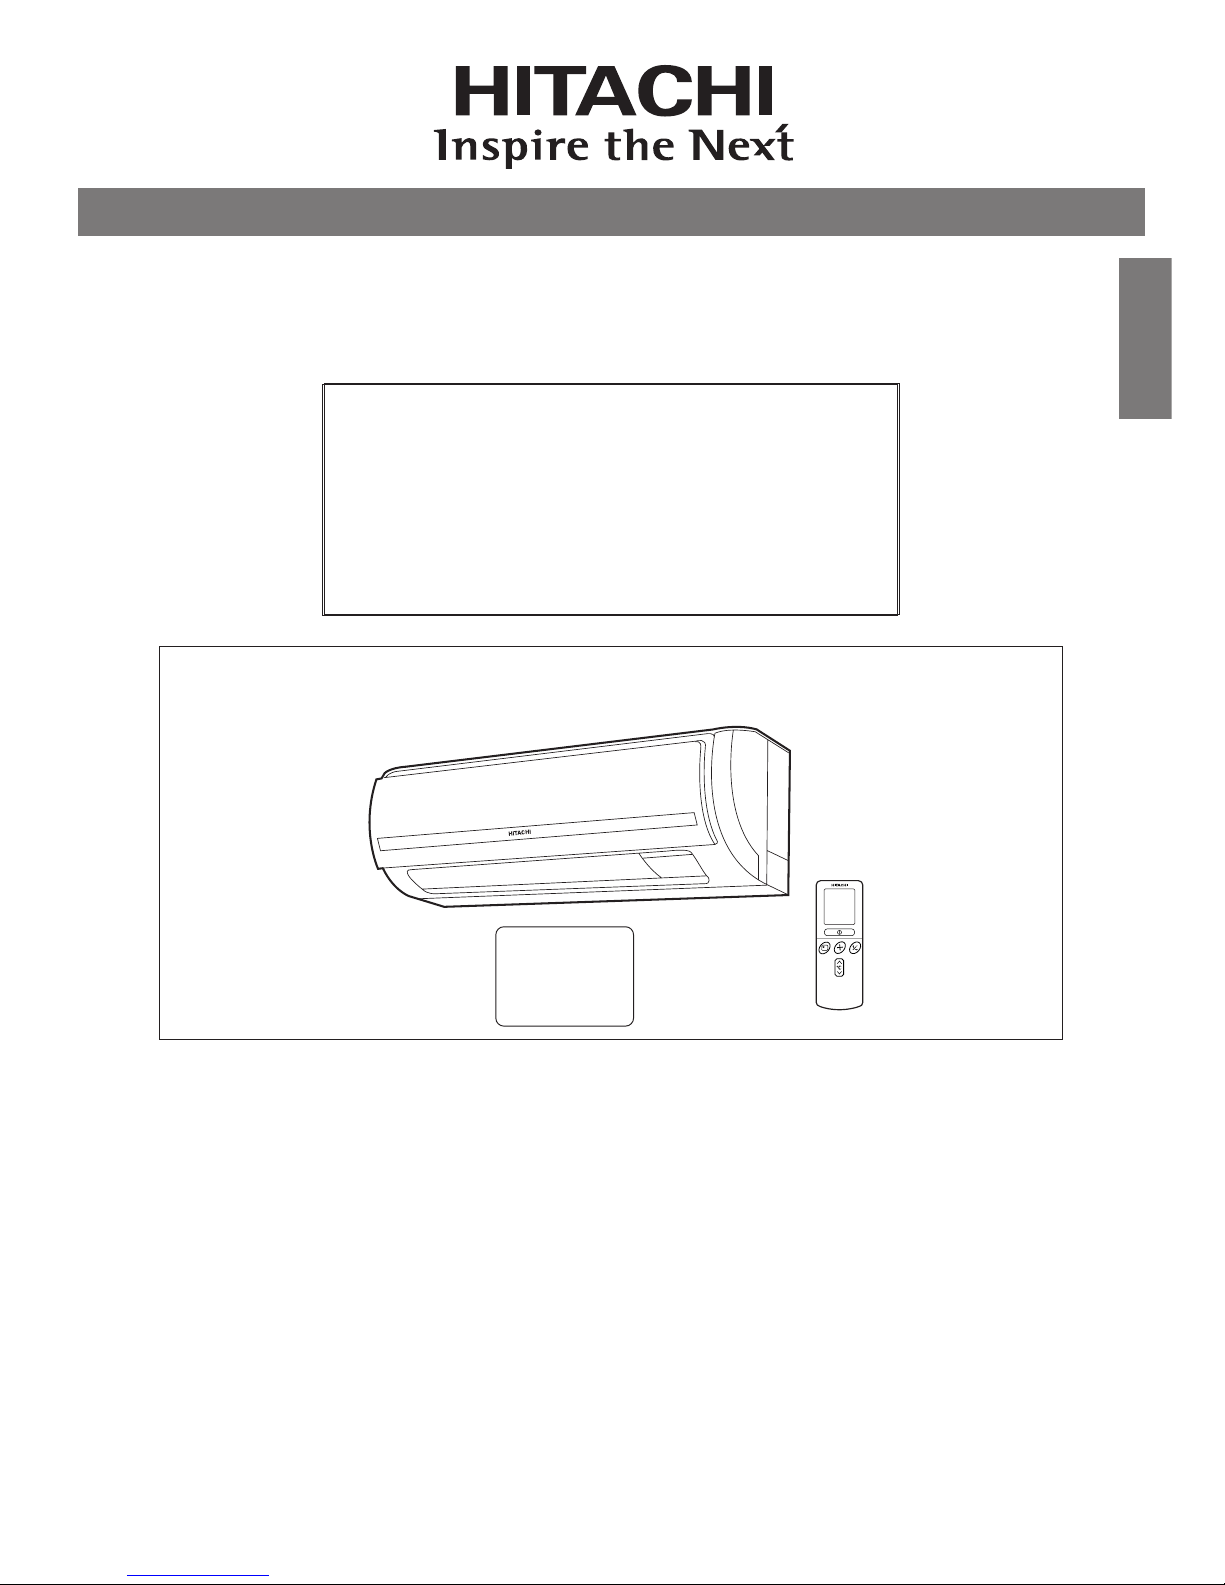
SPLIT TYPE AIR CONDITIONER
INDOOR UNIT
MODEL
RAS-08QH5E
RAS-10QH5E
RAS-14QH5E
RAS-18QH5E
Instruction manual Page 1~26
To obtain the best performance and ensure years of trouble free use, please read this instruction manual completely.
Manuale di istruzioni Pag. 27~52
Per garantire la migliore prestazione e la più lunga durataleggere attentamente e al completo le seguanti istruzioni.
Manual de instrucciones Página 53~78
Para obtener el mejor funcionamiento y asegurar años de uso libre de problemas, lea cuidadosamente este manual de
instrucciones.
O‰ЛБ›В˜ XВИЪИЫМФ‡ ™ÂÏ›‰· 79~104
°И· ЩЛУ О·П‡ЩВЪЛ ‰˘У·Щ‹ ·fi‰ФЫЛ О·И ЩЛУ М·ОЪФ¯ЪfiУИ· О·И ¯ˆЪ›˜ ЪФ‚П‹М·Щ· ¯Ъ‹ЫЛ ЩЛ˜ Ы˘ЫОВ˘‹˜ ·˘Щ‹˜, ·Ъ·О·ПФ‡МВ
‰И·‚¿ЫЩВ П‹Ъˆ˜ ЩИ˜ Ф‰ЛБ›В˜ ¯ВИЪИЫМФ‡ ЩЛ˜.
Инструкция по эксплуатации
стр. 105~130
Для обеспечения наилууших эксплуатационных характеристик и многолетней безотказной работы оборудования необходимо
полностыо оэнакомиться с данной Инструкцией по эксплуатации.
INDOOR UNIT
RAS-08QH5E
RAS-10QH5E
RAS-14QH5E
RAS-18QH5E
Page 2
– 2 –
!
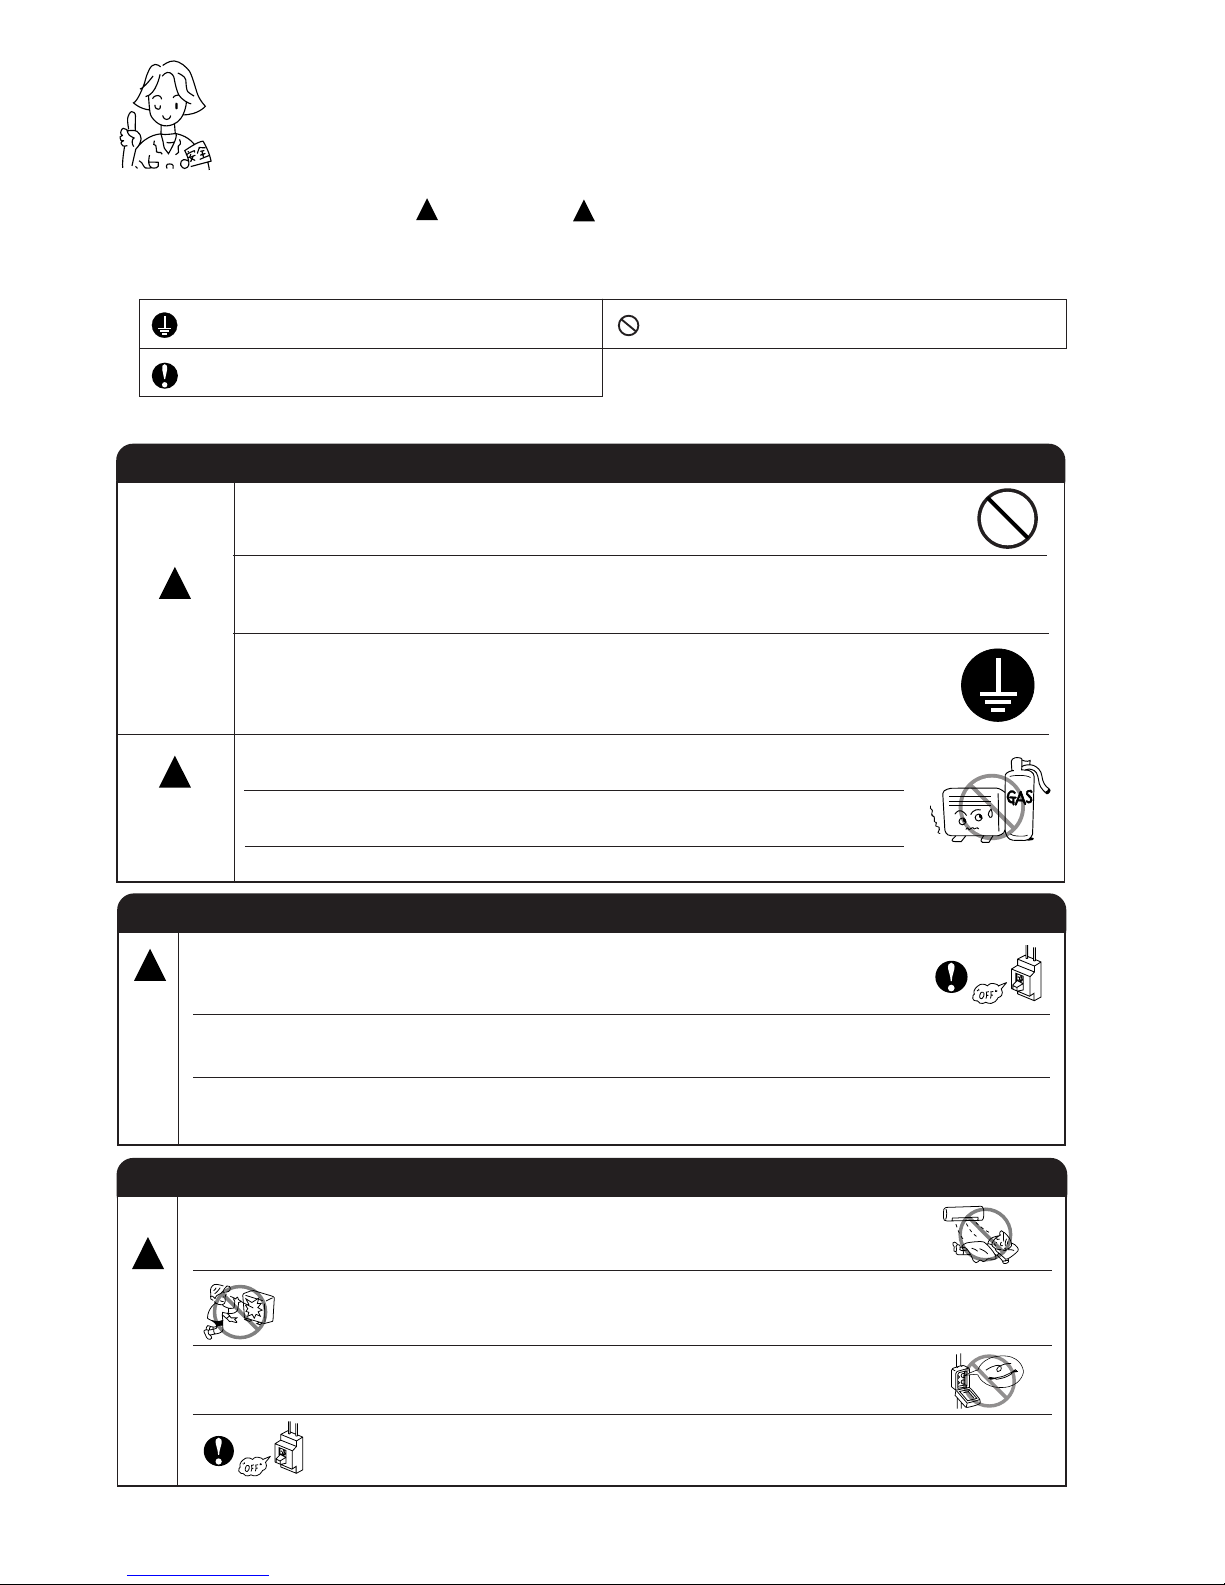
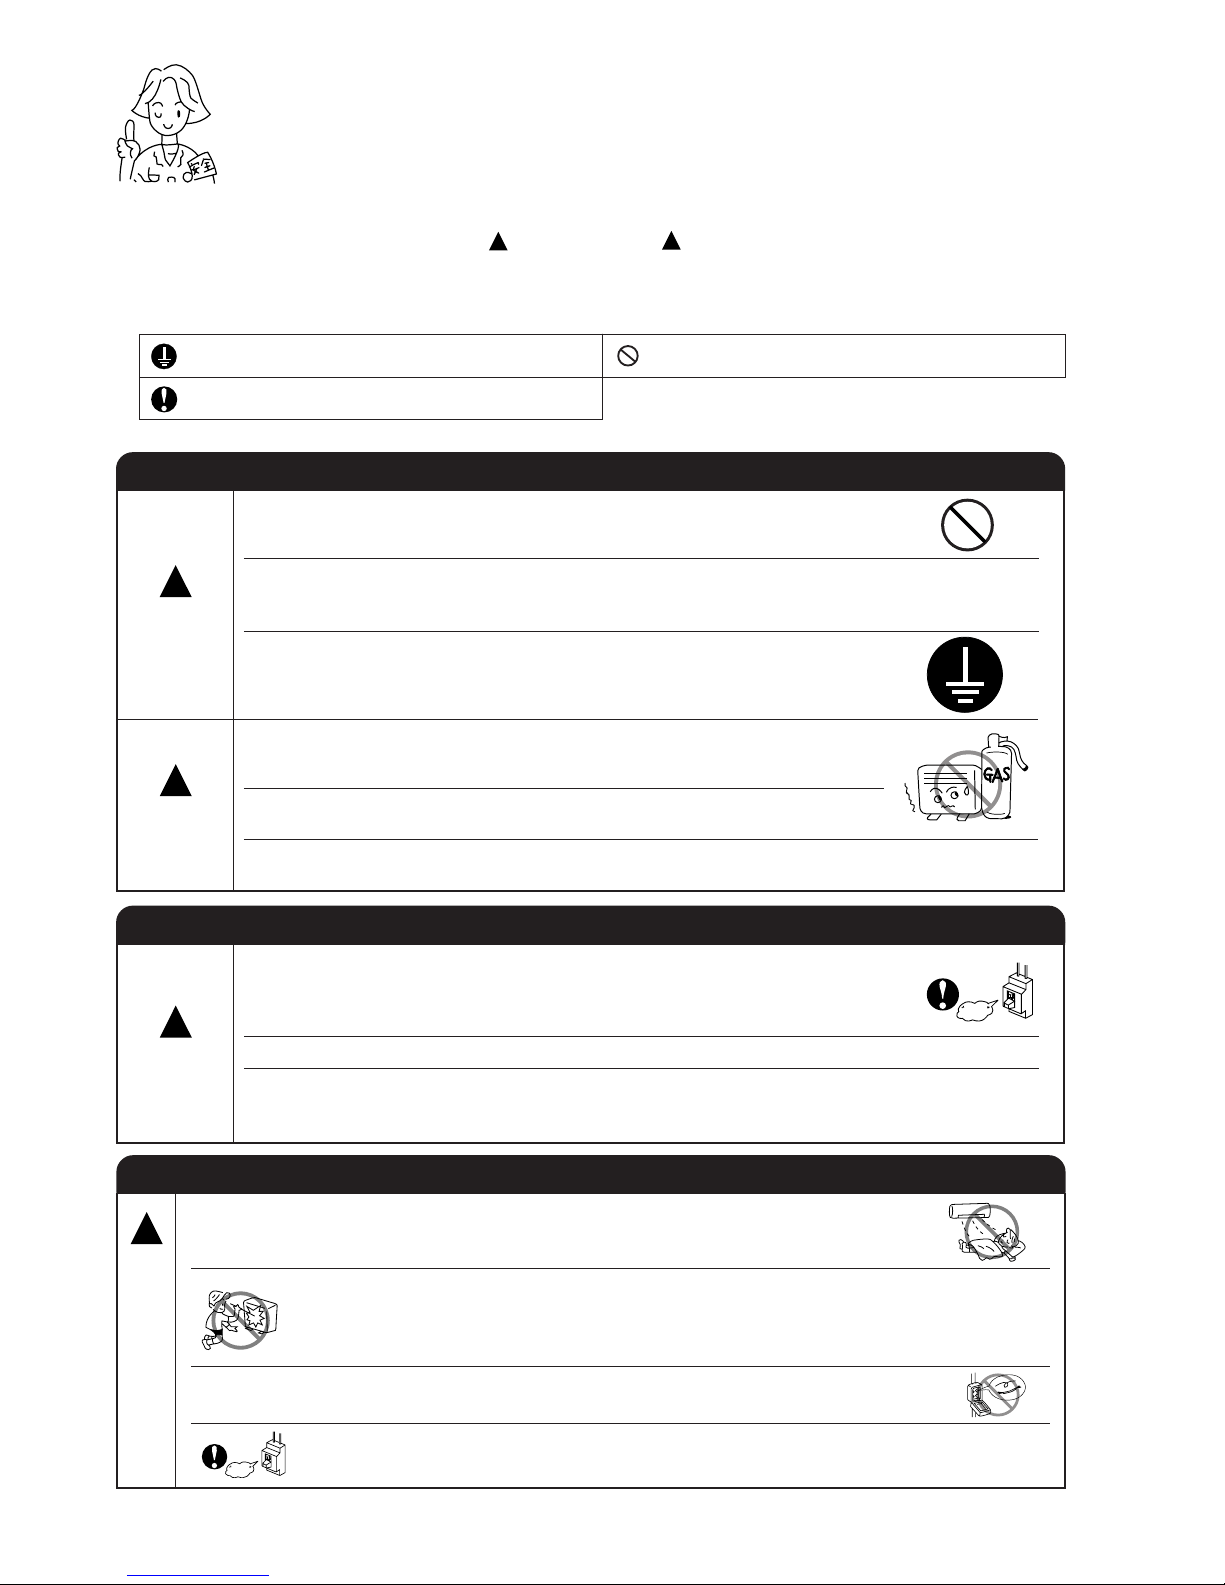
SAFETY PRECAUTION
●
Please read the “Safety Precaution” carefully before operating the unit to ensure correct usage of the unit.
●
Pay special attention to signs of “ Warning” and “ Caution”. The “Warning” section contains matters which,
if not observed strictly, may cause death or serious injury. The “Caution” section contains matters which may
result in serious consequences if not observed properly. Please observe all instructions strictly to ensure safety.
●
The sign indicate the following meanings.
●
Please keep this manual after reading.
WARNING
PRECAUTIONS DURING INSTALLATION
●
Do not reconstruct the unit.
Water leakage, fault, short circuit or fire may occur if you reconstruct the
unit by yourself.
●
Please ask your sales agent or qualified technician for the installation of
your unit. Water leakage, short circuit or fire may occur if you install the unit
by yourself.
●
Please use earth line.
Do not place the earth line near water or gas pipes, lightning-conductor, or
the earth line of telephone. Improper installation of earth line may cause
electric shock.
●
A circuit breaker should be installed depending on the mounting site of the
unit. Without a circuit breaker, the danger of electric shock exists.
●
Do not install near location where there is flammable gas. The outdoor unit
may catch fire if flammable gas leaks around it.
●
Please ensure smooth flow of water when installing the drain hose.
CAUTION
!
!
PRECAUTIONS DURING SHIFTING OR MAINTENANCE
PRECAUTIONS DURING OPERATION
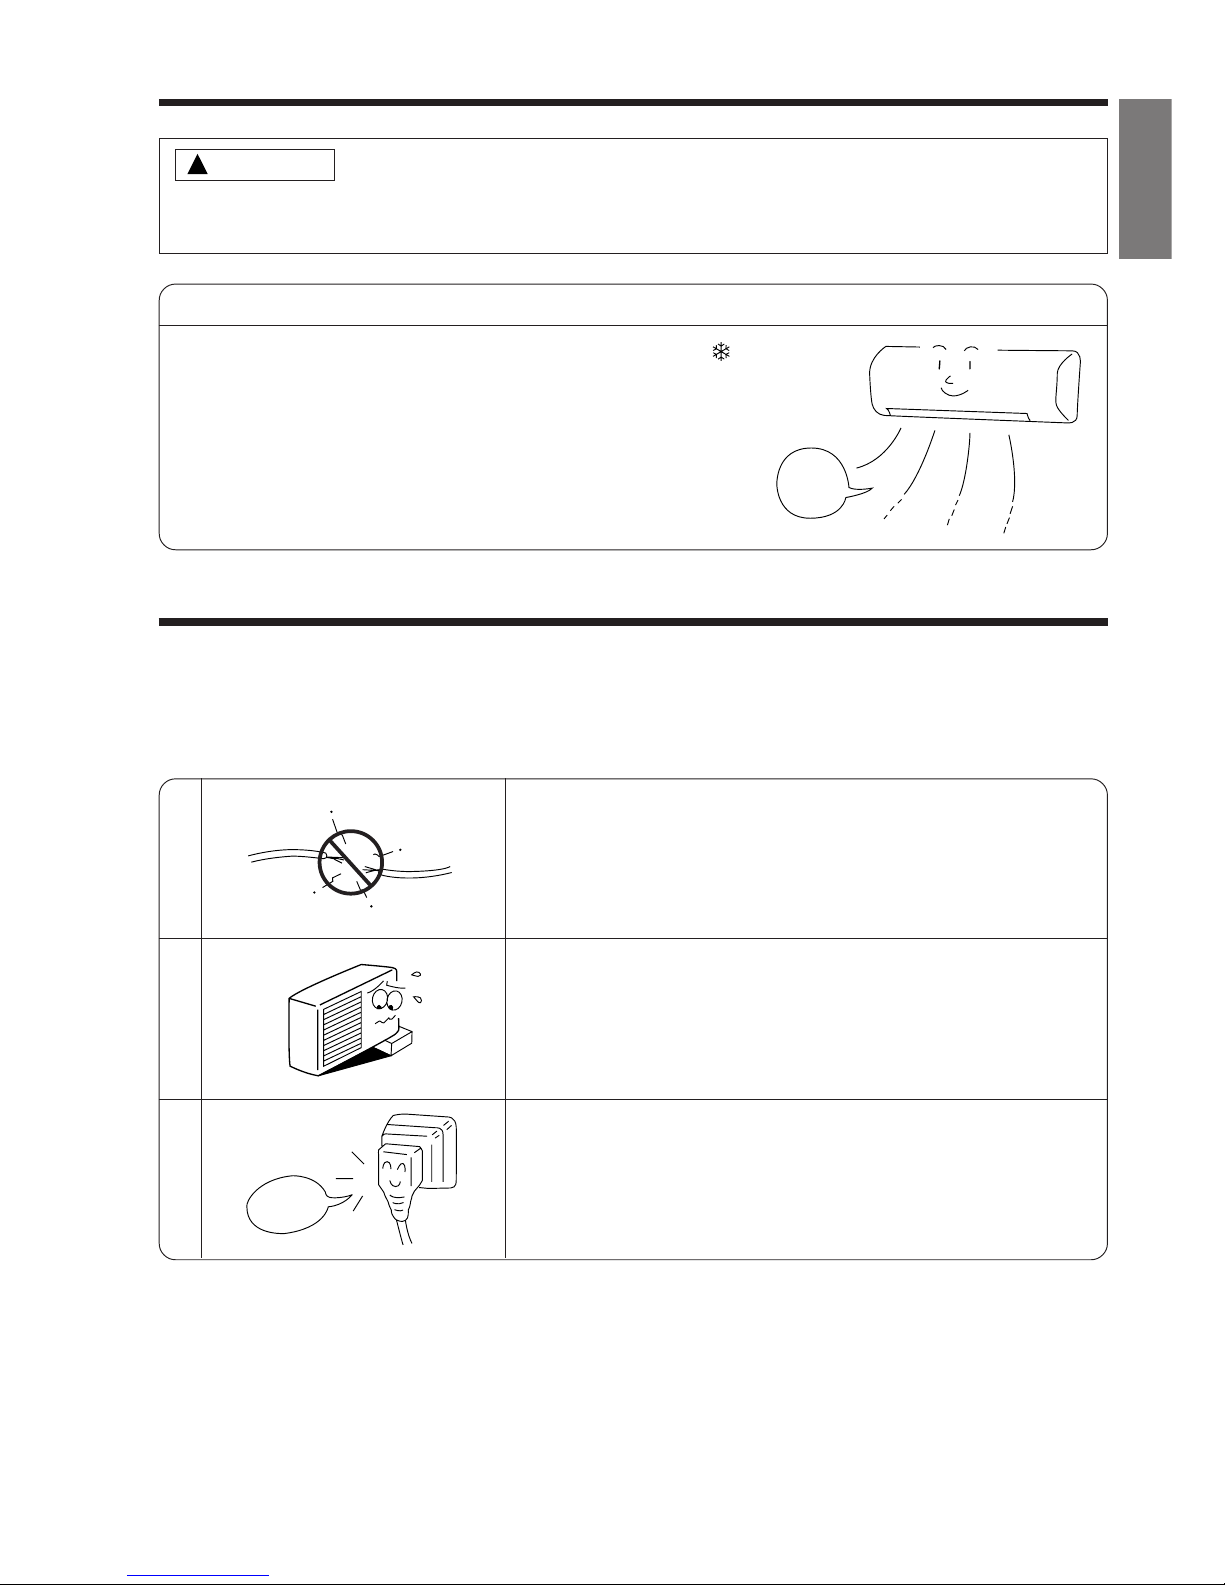
●
Avoid an extended period of direct air flow for your health.
W
A
R
N
I
N
G
!
●
Should abnormal situation arises (like burning smell), please stop operating the unit
and turn off the circuit breaker. Contact your agent. Fault, short circuit or fire may
occur if you continue to operate the unit under abnormal situation.
●
Please contact your agent for maintenance. Improper self maintenance may cause
electric shock and fire.
●
Please contact your agent if you need to remove and reinstall the unit. Electric
shock or fire may occur if you remove and reinstall the unit yourself improperly.
●
Do not insert a finger, a rod or other objects into the air outlet or inlet. As the
fan is rotating at a high speed, it will cause injury. Before cleaning, be sure
to stop the operation and turn the breaker OFF.
●
During thunder storm, disconnect and turn off the circuit breaker.
●
Do not use any conductor as fuse wire, this could cause fatal accident.
!
Make sure to connect earth line.
Indicates the instructions that must be followed.
The sign in the figure indicates prohibition.
W
A
R
N
I
N
G
!
Page 3
– 3 –
ENGLISH
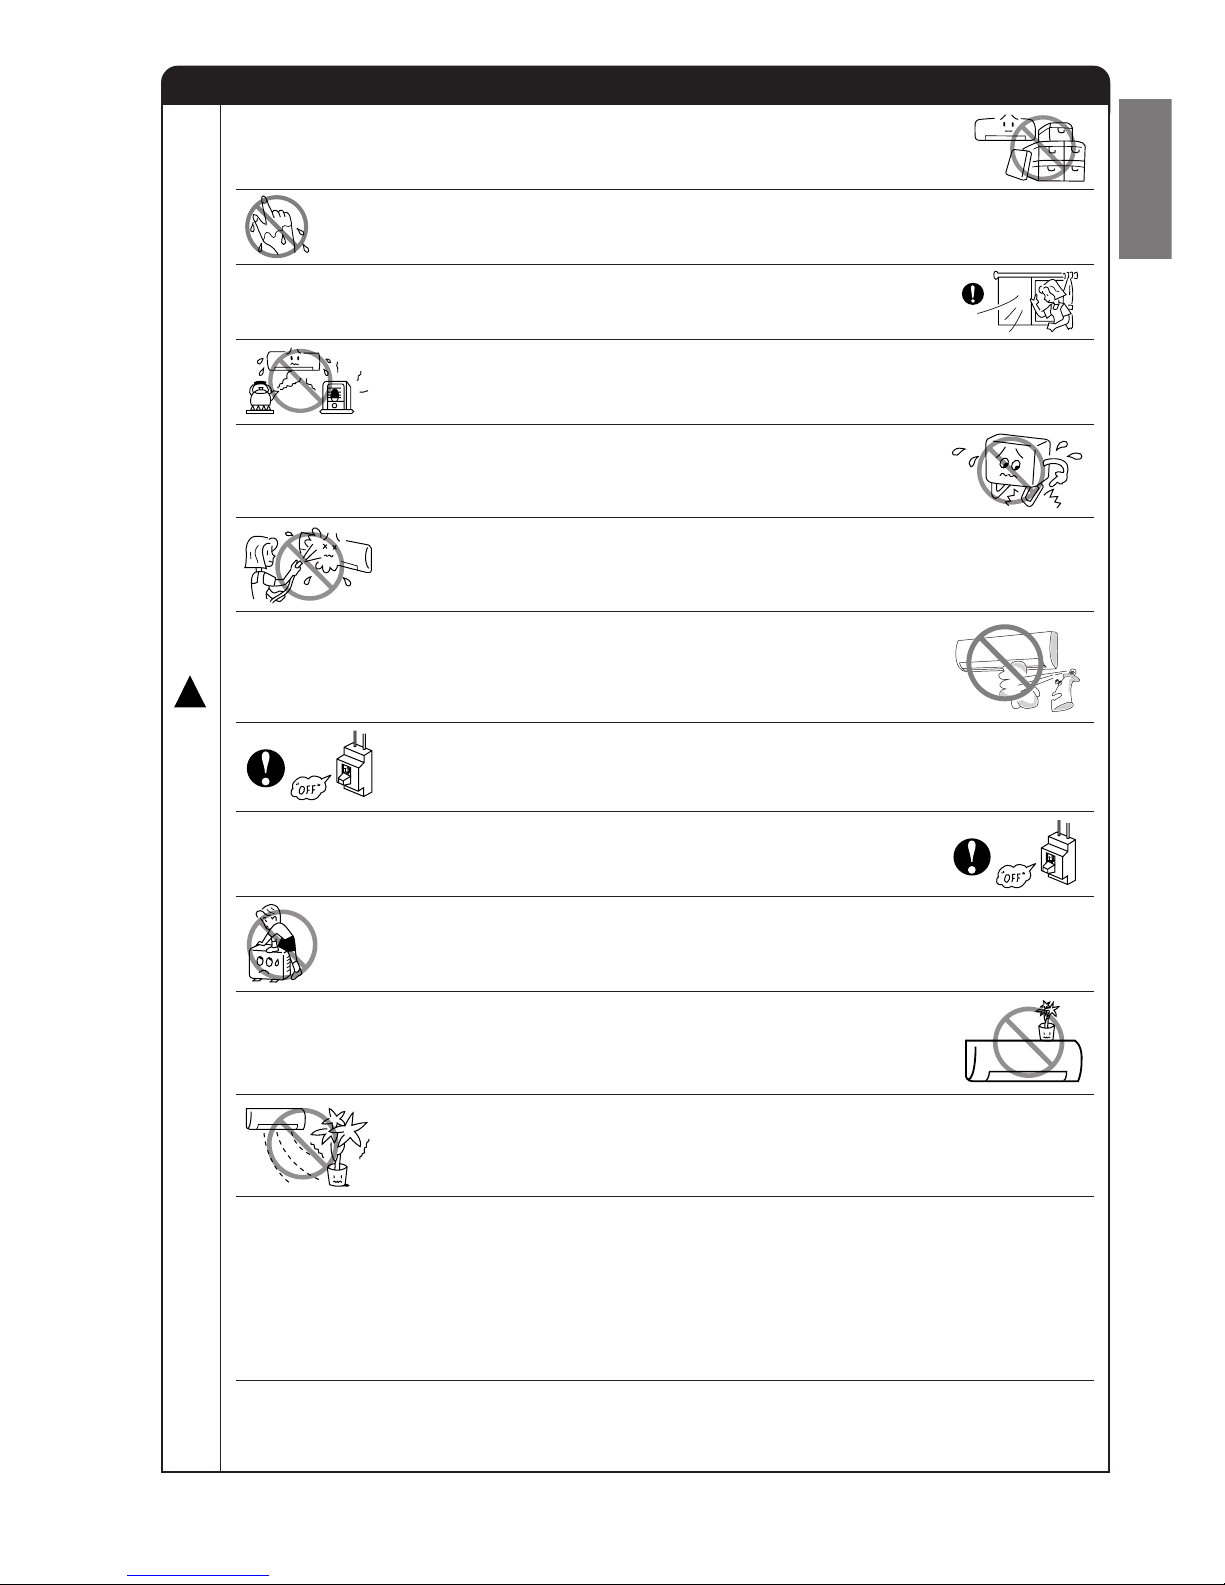
PRECAUTIONS DURING OPERATION
●
Do not attempt to operate the unit with wet hands, this could cause fatal
accident.
●
When operating the unit with burning equipments, regularly ventilate the
room to avoid oxygen insufficiency.
●
Do not direct the cool air coming out from the air-conditioner panel to face
household heating apparatus as this may affect the working of apparatus
such as the electric kettle, oven etc.
●
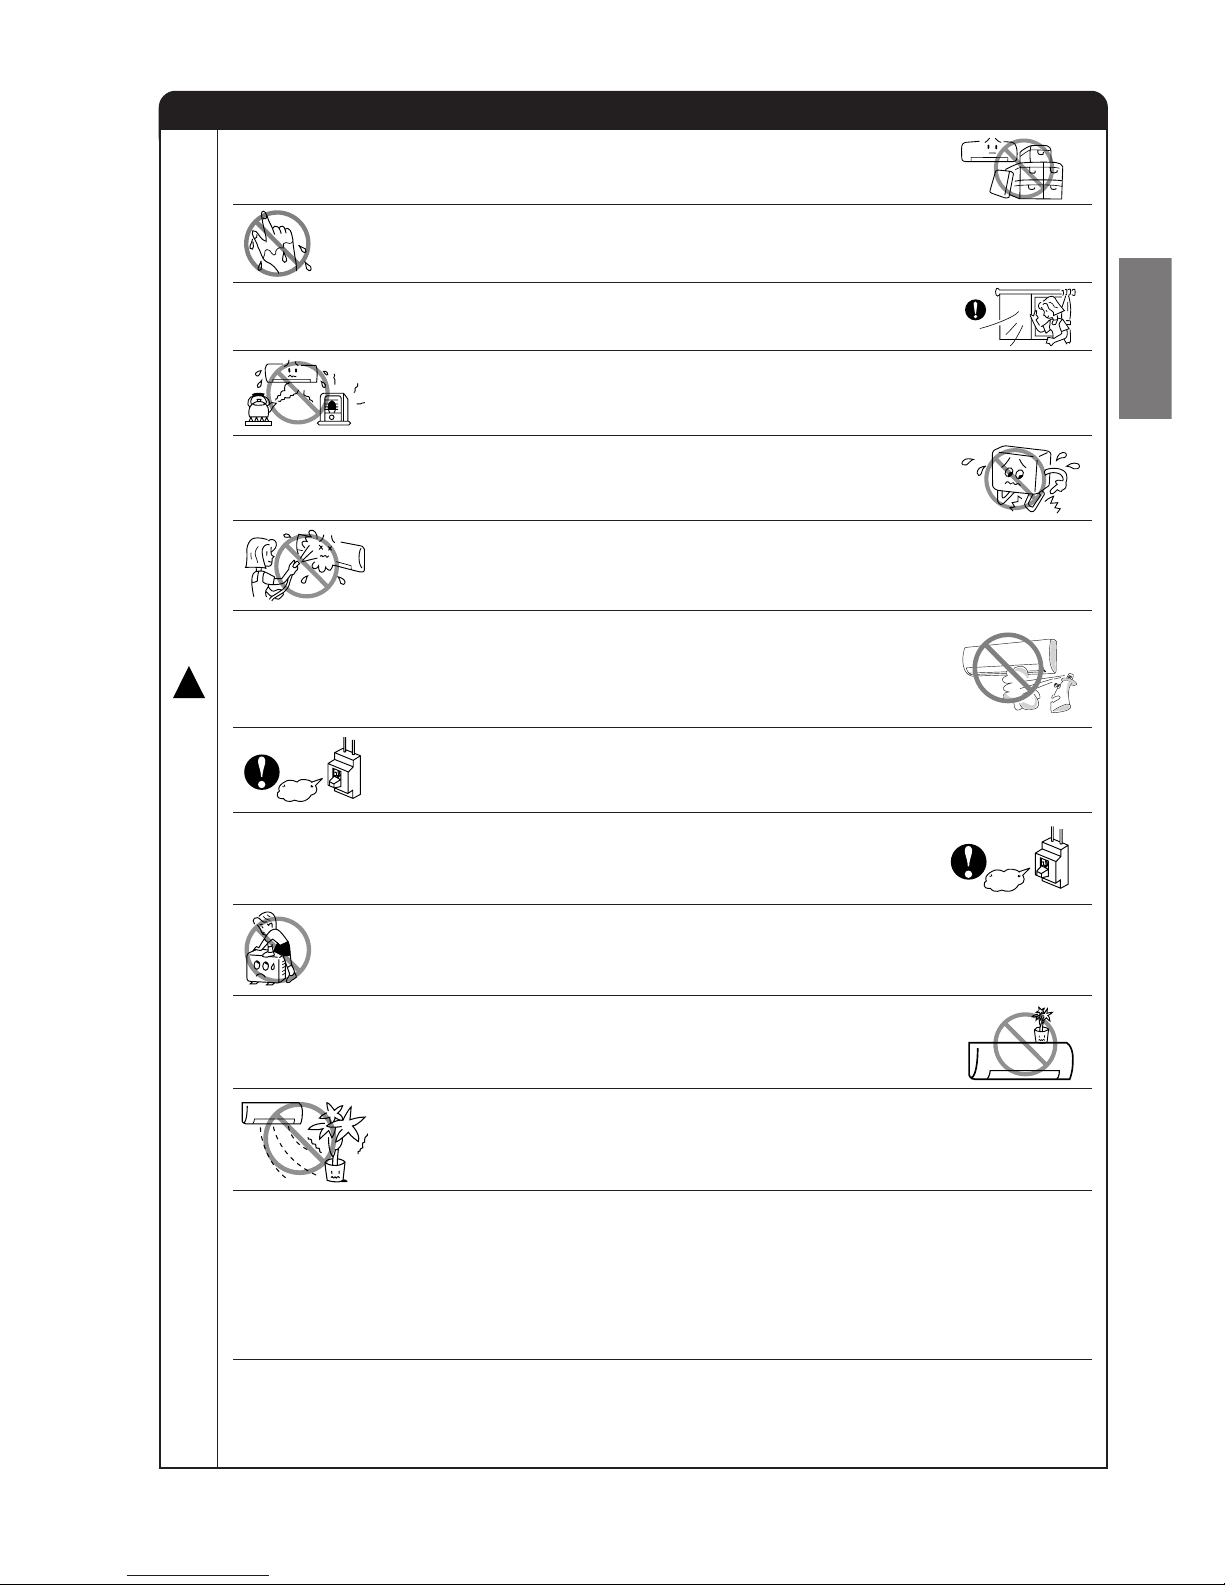
Do not place plants directly under the air flow as it is bad for the plants.
●
Please ensure that outdoor mounting frame is always stable, firm and
without defect. If not, the outdoor unit may collapse and cause danger.
●
Do not splash or direct water to the body of the unit when cleaning it as this
may cause short circuit.
●
When operating the unit with the door and windows opened, (the room humidity is always above
80%) and with the air deflector facing down or moving automatically for a long period of time,
water will condense on the air deflector and drips down occasionally. This will wet your furniture.
Therefore, do not operate under such condition for a long time.
●
If the amount of heat in the room is above the cooling or heating capability of the unit (for
example: more people entering the room, using heating equipments and etc.), the preset room
temperature cannot be achieved.
●
This appliance is not intended for use by young children or infirm persons unless they have been
adequately supervised by a responsible person to ensure that they can use the appliance safely.
●
Young children should be supervised to ensure that they do not play with the appliance.
●
Do not climb on the outdoor unit or put objects on it.
●
Please switch off the unit and turn off the circuit breaker during cleaning, the
high-speed fan inside the unit may cause danger.
●
Turn off the circuit breaker if the unit is not to be operated for a long period.
C
A
U
T
I
O
N
!
●
The product shall be operated under the manufacturer specification and
not for any other intended use.
●
Do not put water container (like vase) on the indoor unit to avoid water
dripping into the unit. Dripping water will damage the insulator inside the unit
and causes short-circuit.
●
Do not use any aerosol or hair sprays near the indoor unit. This chemical
can adhere on heat exchanger fin and blocked the evaporation water flow
to drain pan. The water will drop on tangential fan and cause water splashing
out from indoor unit.
Page 4
– 4 –
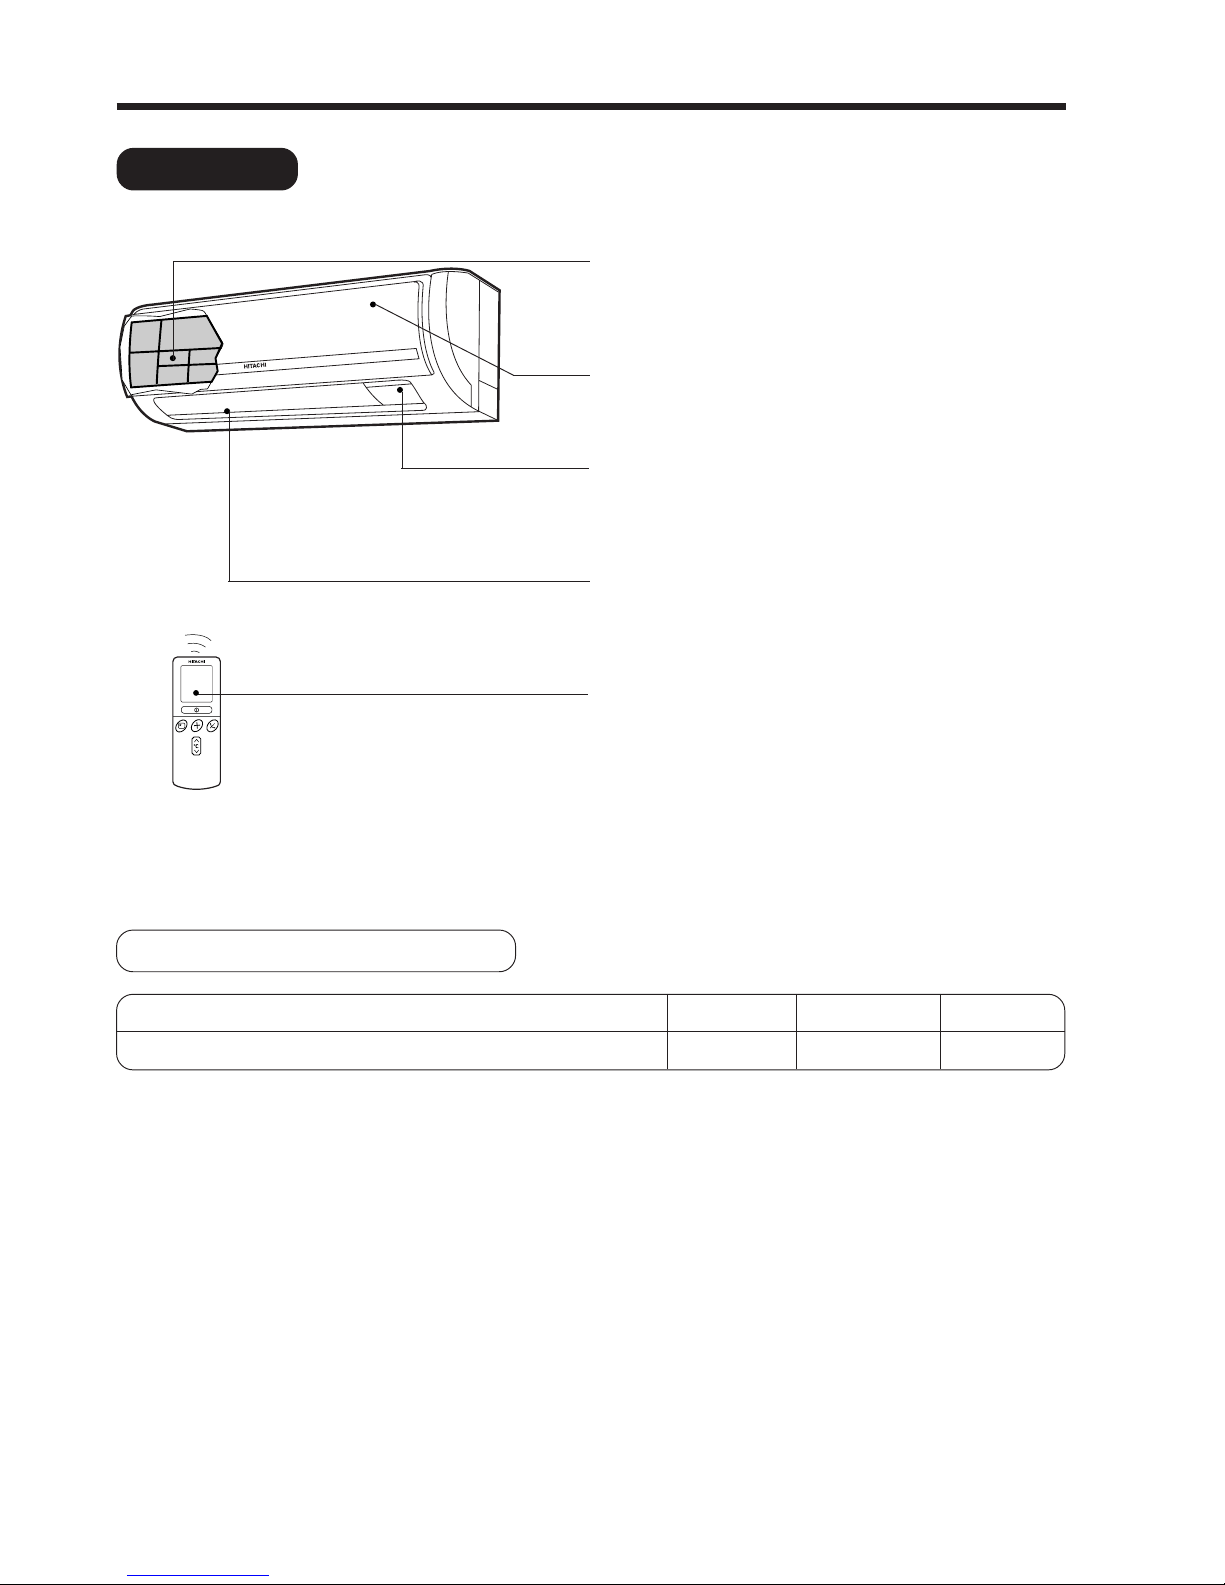
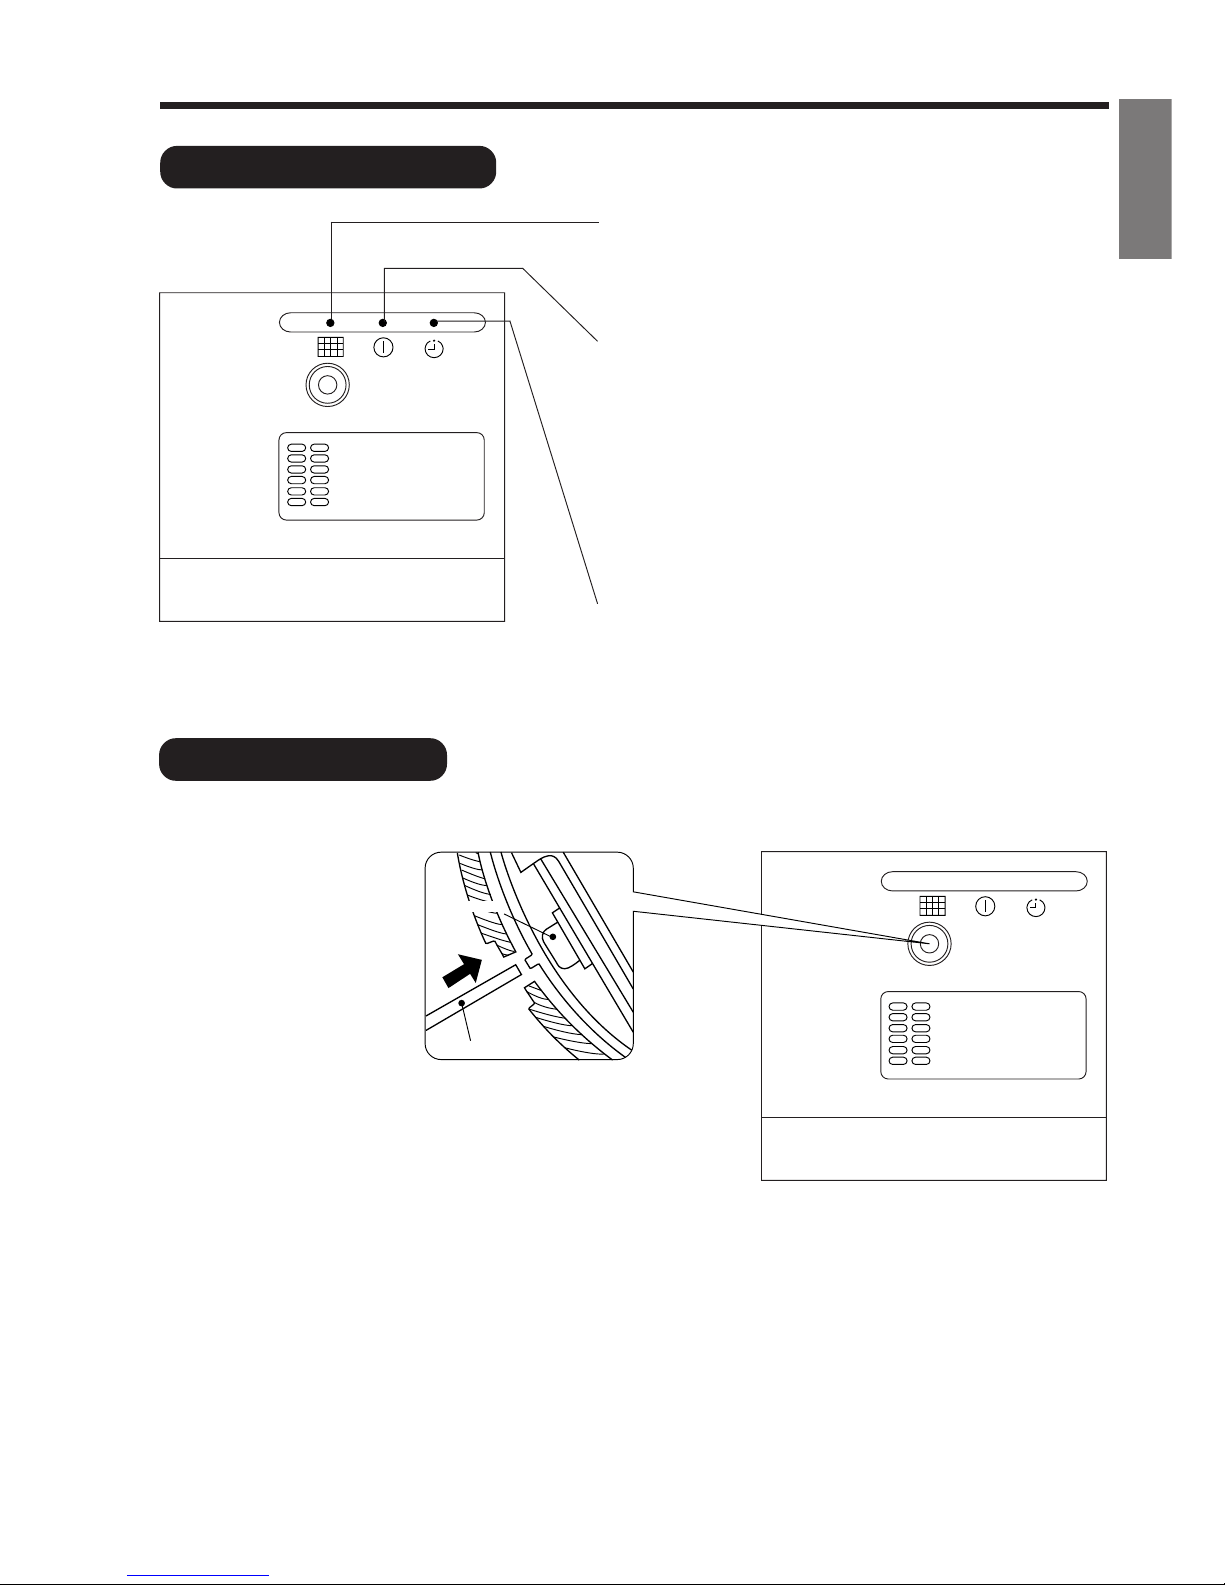
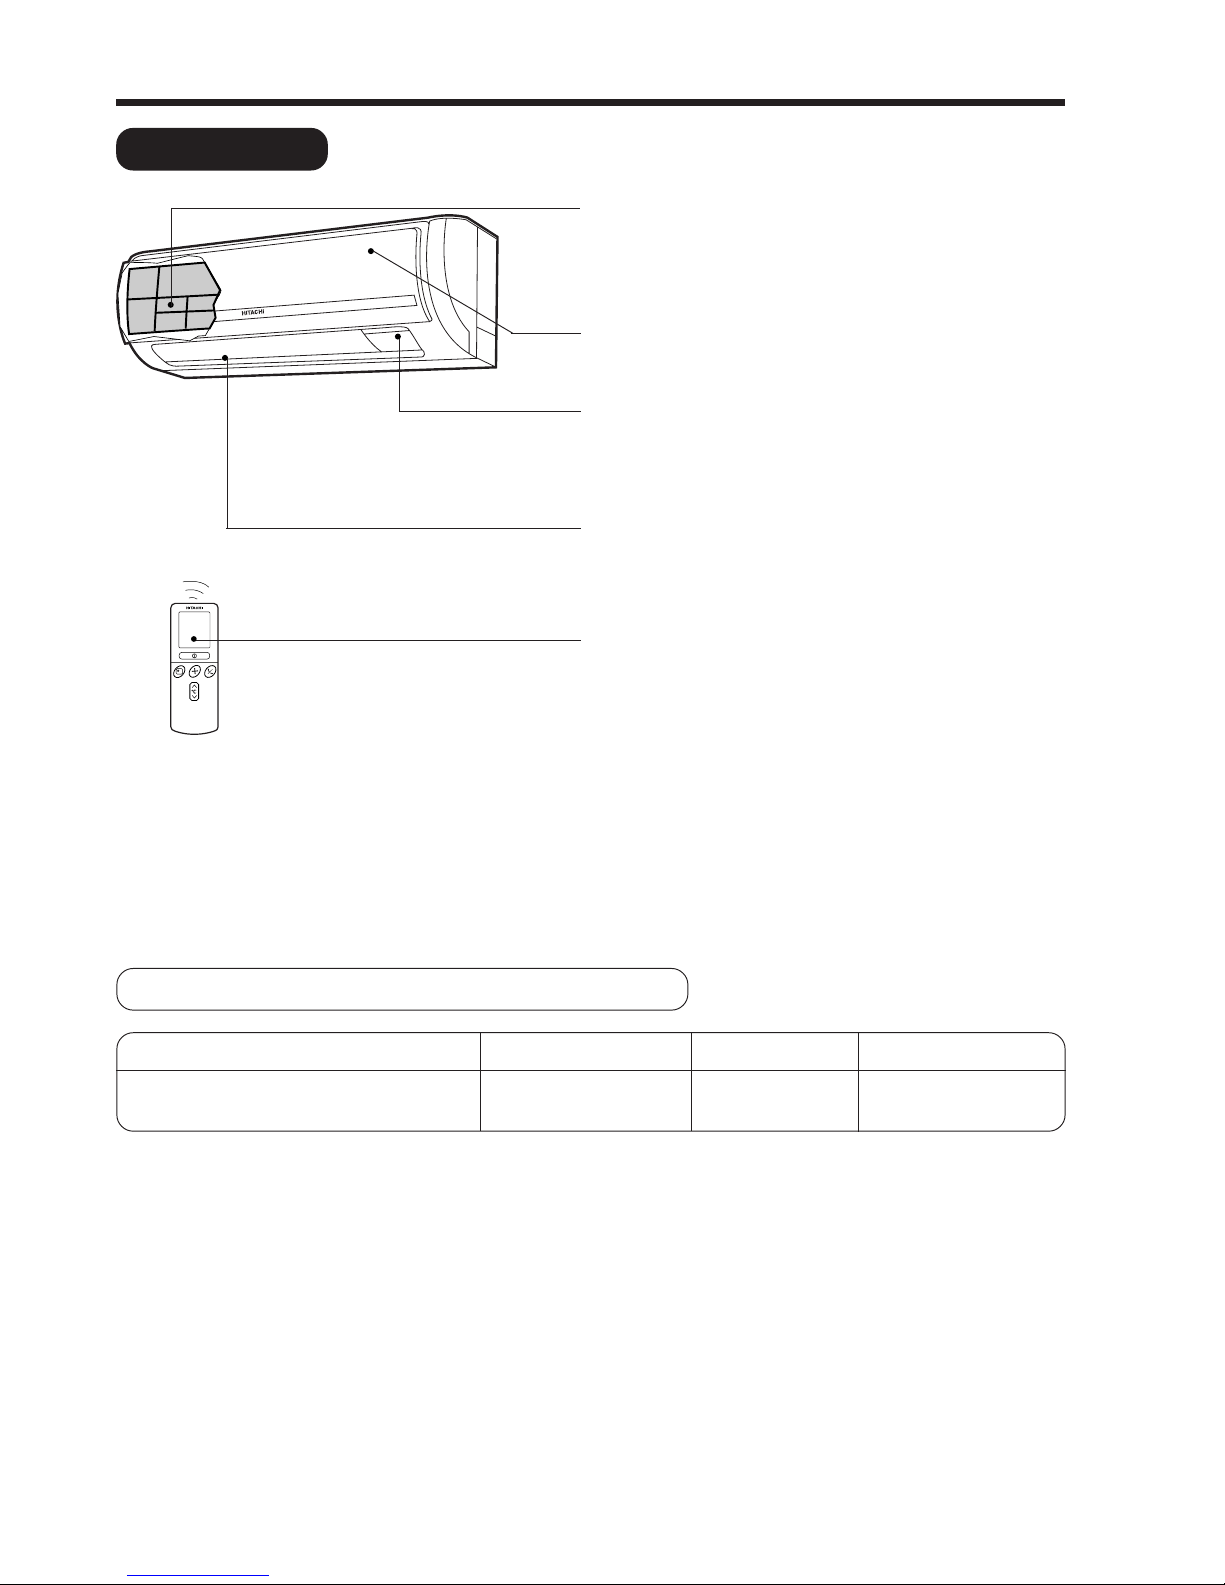
INDOOR UNIT
NAMES AND FUNCTIONS OF EACH PART
Air filter
To prevent dust from coming into the indoor unit.
(Refer page 21)
Front panel
Indoor unit indicators
Light indicator showing the operating condition.
(Refer page 5)
Horizontal deflector
●
Vertical deflector
(Air Outlet)
(Refer page 16)
Remote controller
Send out operation signal to the indoor unit. So as to
operate the whole unit.
(Refer page 6)
WIDTH (mm)
780
MODEL
RAS-08QH5E, RAS-10QH5E, RAS-14QH5E, RAS-18QH5E
HEIGHT (mm)
280
DEPTH (mm)
210
MODEL NAME AND DIMENSIONS
Page 5
– 5 –
ENGLISH
INDOOR UNIT INDICATORS
OPERATION INDICATOR
FILTER LAMP
When the device is operated for a total of about 100
hours, the FILTER lamp lights to indicate that it is time
to clean the filter.
OPERATION LAMP
This lamp lights during operation.
The OPERATION LAMP flashes in the following cases
during heating.
(1) During preheating
For about 2–3 minutes after starting up.
(2) During defrosting
Defrosting will be performed about once every one
hour when frost forms on the heat exchanger of the
outdoor unit, for 5–10 minutes each time.
TIMER LAMP
This lamp lights when the timer is working.
TEMPORARY
SWITCH
TEMPORARY
SWITCH
Press
Temporary Switch
Non-conductor Stick
TEMPORARY SWITCH
Use this switch to start and stop when the remote controller does not work. [Use non-conductor stick
(example toothpick)]
● By pressing the temporary switch, the operation is done in previously set operation mode.
● When the operation is done using the temporary switch after the power source is turned off and turn on
again, the operation is done in automatic mode.
Page 6
– 6 –
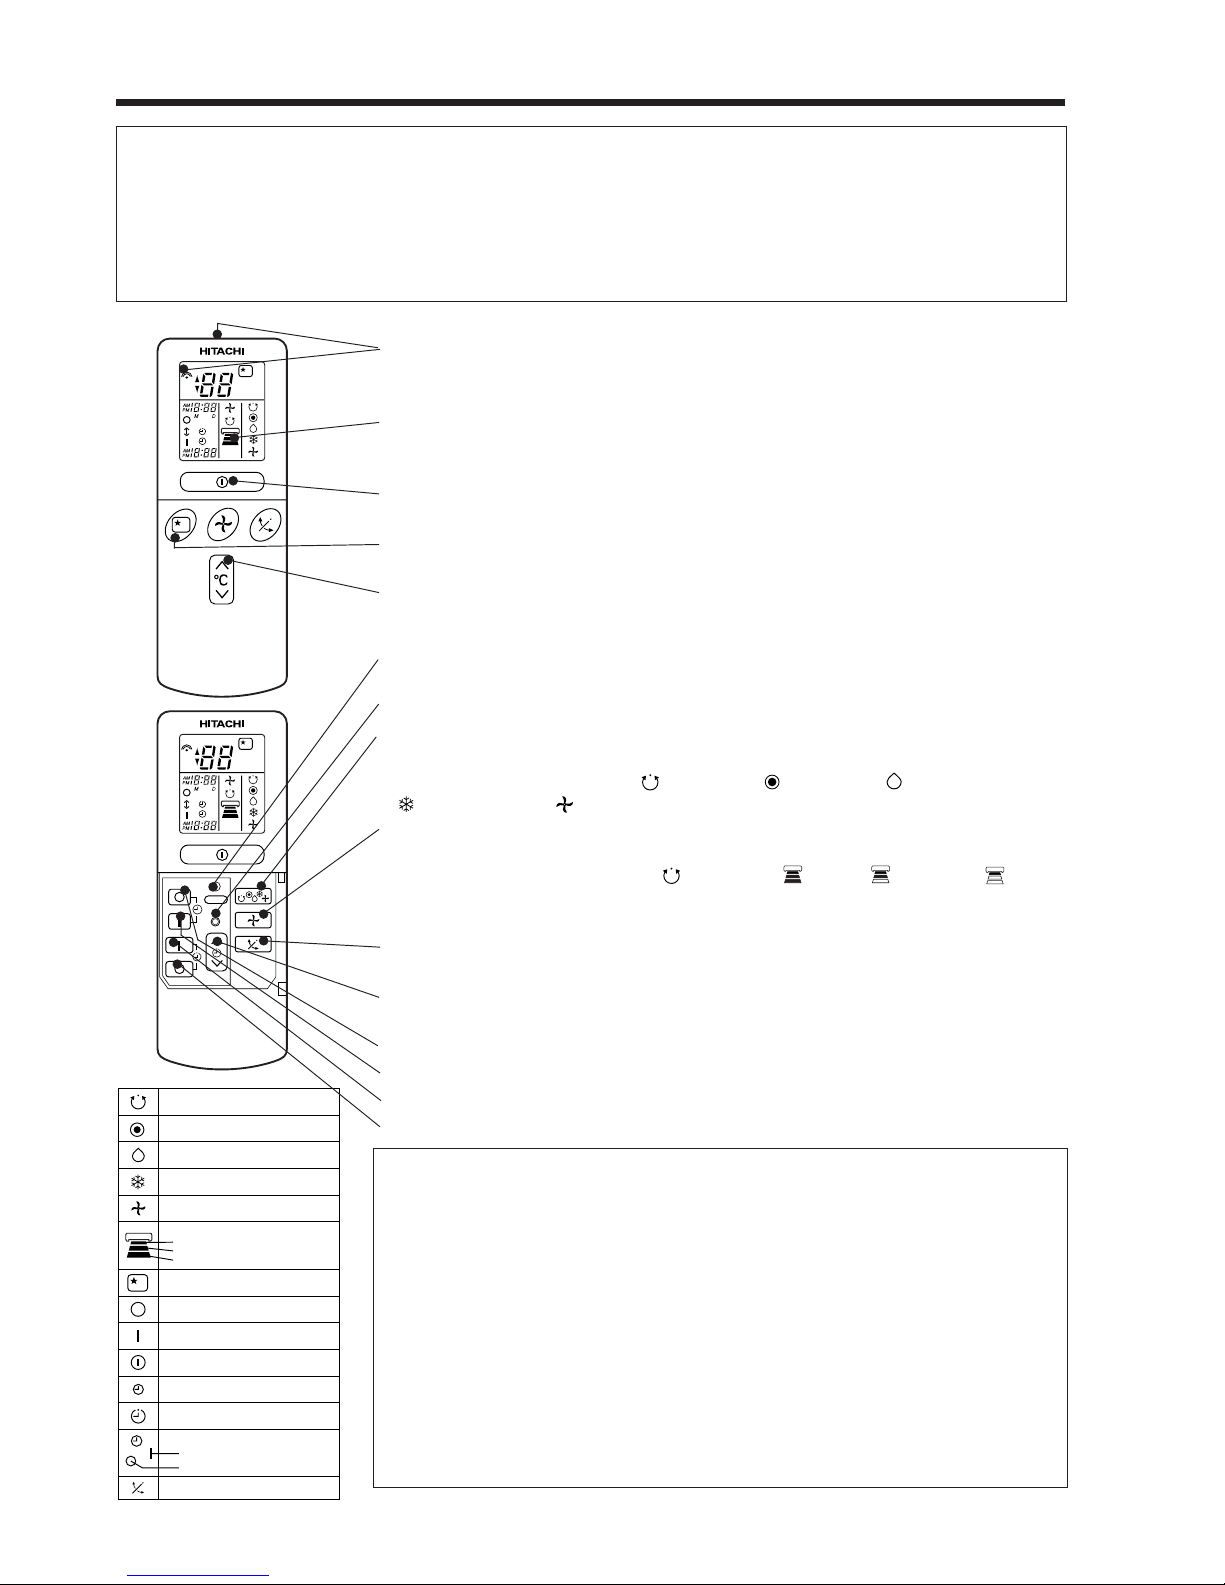
AUTO
HEAT
DEHUMIDIFY
COOL
FAN
FAN SPEED
LOW
MED
HI
SLEEPING
STOP (CANCEL)
START (RESERVE)
START/STOP
TIME
TIMER SET
TIMER SELECTOR
ON TIMER
OFF TIMER
AUTO SWING
˚
CH
RESET
˚
CH
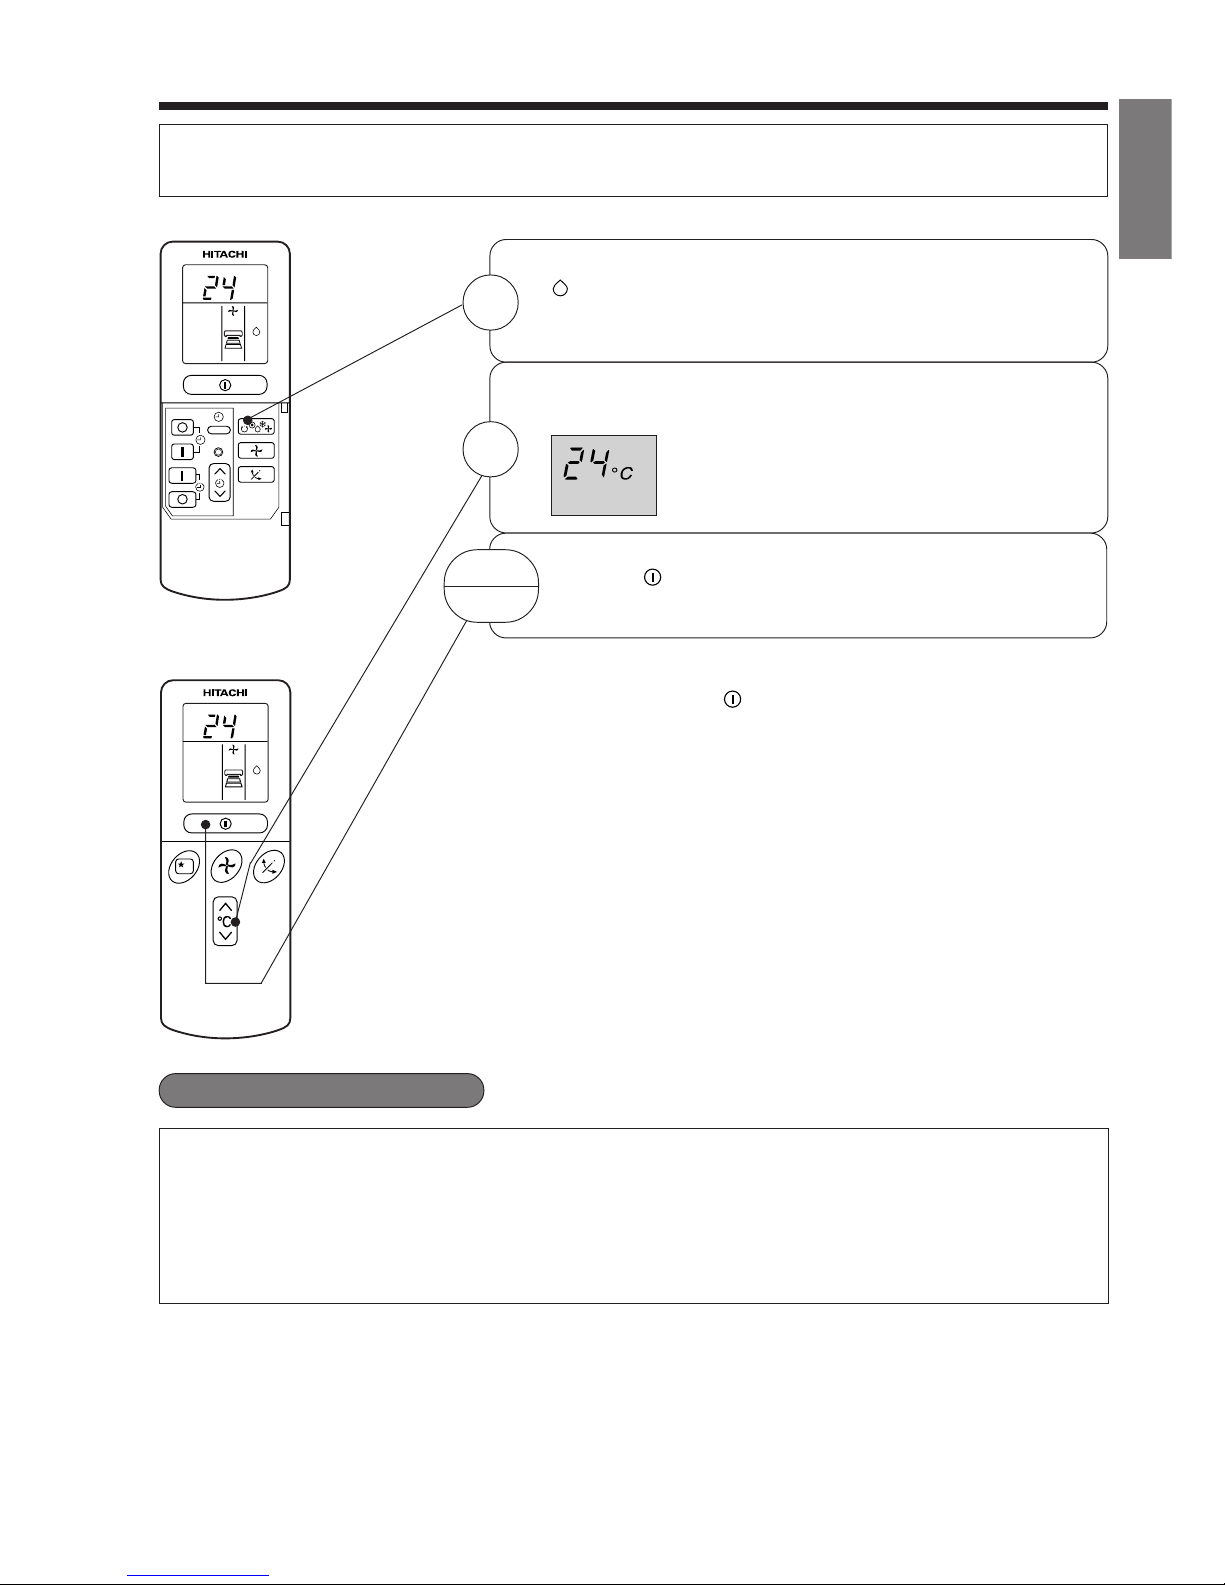
NAMES AND FUNCTIONS OF REMOTE CONTROL UNIT
REMOTE CONTROLLER
● This controls the operation of the indoor unit. The range of control is about 7 meters. If indoor lighting is controlled
electronically, the range of control may be shorter.
This unit can be fixed on a wall using the fixture provided. Before fixing it, make sure the indoor unit can be controlled
from the remote controller.
● Handle the remote controller with care. Dropping it or getting it wet may compromise its signal transmission capability.
● After new batteries are inserted into the remote controller, the unit will initially require approximately 10 seconds to
respond to commands and operate.
●
Signal emitting window/transmission sign
Point this window toward the indoor unit when controlling it.
The transmission sign blinks when a signal is sent.
● Display
This indicates the room temperature selected, current time, timer status, function
and intensity of circulation selected.
● START/STOP button
Press this button to start operation. Press it again to stop operation.
● SLEEP button
Use this button to set the sleep timer.
● TEMPERATURE buttons
Use these buttons to raise or lower the temperature setting. (Keep pressed, and
the value will change more quickly.)
● TIME button
Use this button to set and check the time and date.
● RESET buttons
● FUNCTION selector
Use this button to select the operating mode. Every time you press it,
the mode will change from (AUTO) to (HEAT) to (DEHUMIDIFY) to
(COOL) and to (FAN) cyclically.
● FAN SPEED selector
This determines the fan speed. Every time you press this button, the intensity
of circulation will change from (AUTO) to (HI) to (MED) to (LOW)
(This button allows selecting the optimal or preferred fan speed for each operation
mode).
● AUTO SWING button
Controls the angle of the horizontal air deflector.
● TIMER control
Use this button to set the timer.
● OFF-TIMER button Select the turn OFF time.
● ON-TIMER button Select the turn ON time.
● RESERVE button Time setting reservation.
● CANCEL button Cancel time reservation.
Precautions for Use
● Do not put the remote controller in the following places.
● Under direct sunlight.
● In the vicinity of a heater.
● Handle the remote controller carefully. Do not drop it on the floor,
and protect it from water.
● Once the outdoor unit stops, it will not restart for about 3 minutes
(unless you turn the power switch off and on or unplug the power
cord and plug it in again).
This is to protect the device and does not indicate a failure.
● If you press the FUNCTION selector button during operation, the
device may stop for about 3 minutes for protection.
Page 7
– 7 –
ENGLISH
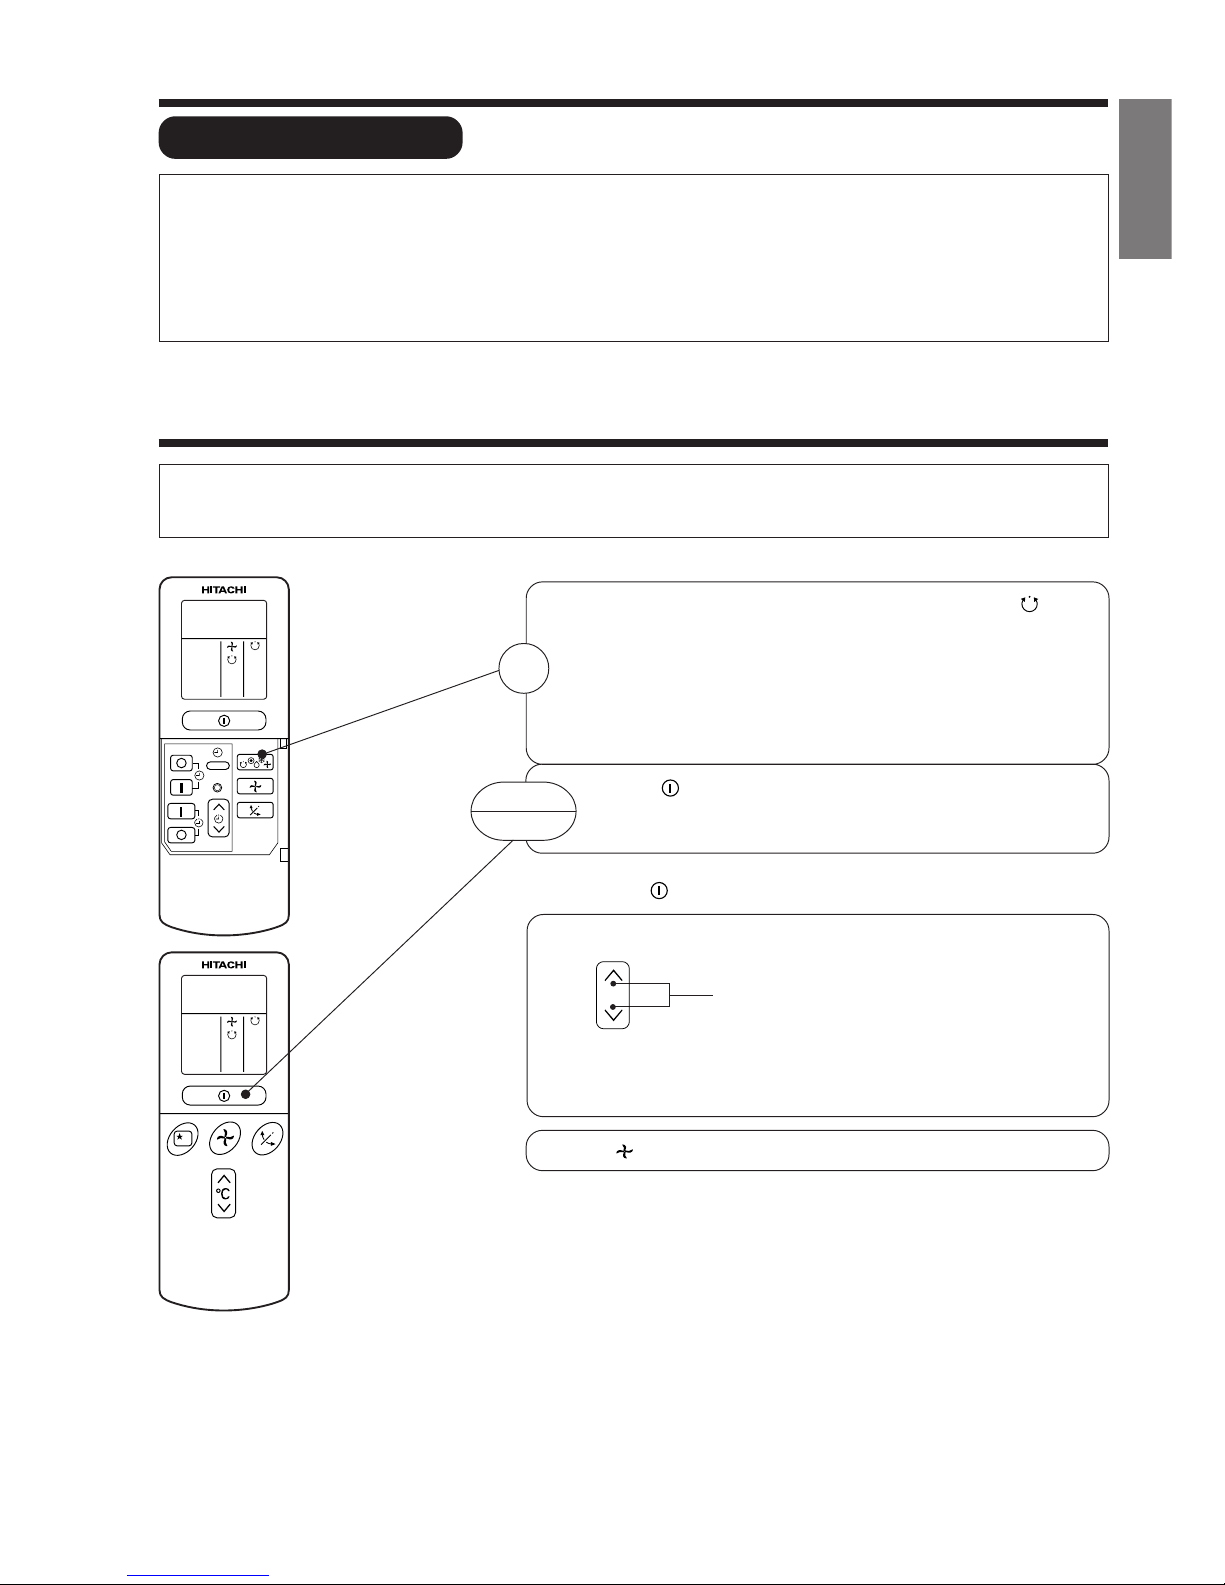
RESET
AUTOMATIC OPERATION
The device will automatically determine the mode of operation, HEAT, COOL or DEHUMIDIFY depending on the current room
temperature. The selected mode of operation will change when the room temperature varies. However the mode of operation will
not change when indoor unit connected to multi type outdoor unit.
■ As the settings are stored in memory in the remote controller, you only have
to press the (START/STOP) button next time.
Press the FUNCTION selector so that the display indicates the (AUTO)
mode of operation.
● When AUTO has been selected, the device will automatically determine
the mode of operation, HEAT, COOL or DEHUMIDIFY depending on
the current room temperature. However the mode of operation will
not change when indoor unit connected to multi type outdoor unit.
● If the mode automatically selected by the unit is not satisfactory,
manually change the mode setting (heat, dehumidify, cool or fan).
Press the (START/STOP) button.
Operation starts with a beep.
Press the button again to stop operation.
You can raise or lower the temperature setting as necessary by maximum of
3°C.
Press the temperature button and the temperature
setting will change by 1°C each time.
● The preset temperature and the actual room temperature may vary
somewhat depending on conditions.
● The display does not indicate the preset temperature in the AUTO mode.
If you change the setting, the indoor unit will produce a beep.
1
START
STOP
°C
Press the (FAN SPEED) button, AUTO and LOW is available.
VARIOUS FUNCTIONS
■ Auto Restart Control
● If there is a power failure, operation will be automatically restarted when the power is resumed with previous operation mode
and airflow direction.
(As the operation is not stopped by remote controller.)
● If you intend not to continue the operation when the power is resumed, switch off the power supply.
When you switch on the circuit breaker, the operation will be automatically restarted with previous operation mode and airflow
direction.
Note: 1. If you do not require Auto Restart Control, please consult your sales agent or OFF by remote control.
2. Auto Restart Control is not available when Timer or Sleep Timer mode is set.
Page 8
– 8 –
˚
C
RESET
˚
C
HEATING OPERATION
● Use the device for heating when the outdoor temperature is under 21°C.
When it is too warm (over 21°C), the heating function may not work in order to protect the device.
● In order to keep reliability of the device, please use this device above -15°C of the outdoor temperature.
Press the FUNCTION selector so that the display indicates
(HEAT).
Set the desired FAN SPEED with the (FAN SPEED) button
(the display indicates the setting).
(AUTO): The fan speed is HI at first and varies to
MED or LOW automatically when the preset
temperature has been reached.
(HI) : Economical as the room will become warm
quickly.
But you may feel a chill at the beginning.
(MED) : Fan speed slow.
(LOW) : Fan speed slower.
Set the desired room temperature with the TEMPERATURE
buttons (the display indicates the setting).
The temperature setting and the actual room temperature may
vary somewhat depending on conditions.
Press the (START/STOP) button. Heating operation starts
with a beep. Press the button again to stop operation.
■ As the settings are stored in memory in the remote controller, you only
have to press the (START/STOP) button next time.
1
2
3
START
STOP
Page 9
– 9 –
ENGLISH
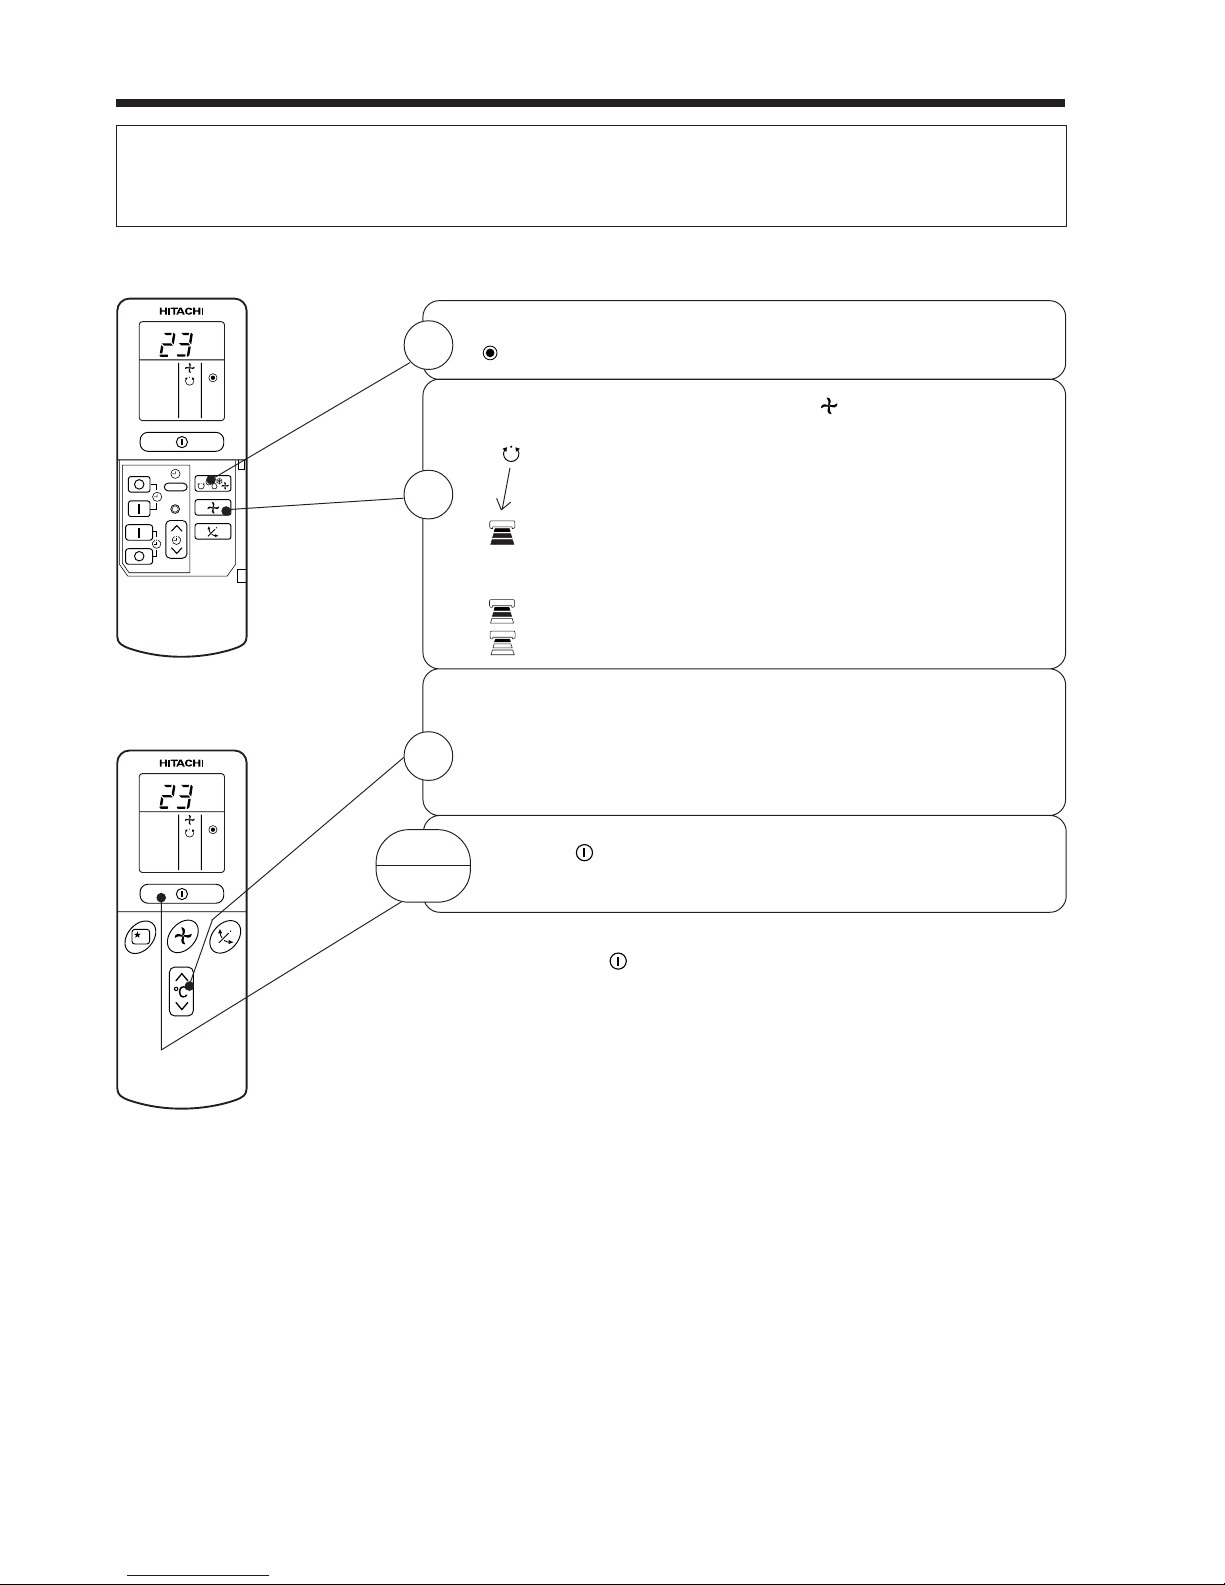
DEHUMIDIFYING OPERATION
Use the device for dehumidifying when the room temperature is over 16°C.
When it is under 15°C, the dehumidifying function will not work.
■ Dehumidifying Function
When the room temperature is higher than the temperature setting: The device will dehumidify the room,
reducing the room temperature to the preset level.
When the room temperature is lower than the temperature setting: Dehumidifying will be performed at
the temperature setting slightly lower than the current room temperature, regardless of the temperature
setting. The function will stop (the indoor unit will stop emitting air) as soon as the room temperature
becomes lower than the setting temperature.
Set the desired room temperature with the TEMPERATURE
button (the display indicates the setting).
The range of 20-26˚C is recommended as
the room temperature for dehumidifying.
Press the (START/STOP) button. Dehumidifying operation
starts with a beep. Press the button again to stop operation.
2
■ As the settings are stored in memory in the remote controller, you
only have to press the
(START/STOP) button next time.
START
STOP
Press the FUNCTION selector so that the display indicates
(DEHUMIDIFY).
The FAN SPEED is set at LOW automatically.
The FAN SPEED button does not work.
1
RESET
˚
C
˚
C
Page 10
– 10 –
˚
C
RESET
˚
C
COOLING OPERATION
Use the device for cooling when the outdoor temperature is –10 ~ 43°C.
If in doors humidity is very high (80%), some dew may form on the air outlet grille of the indoor unit.
Press the FUNCTION selector so that the display indicates
(COOL).
Set the desired FAN SPEED with the
(FAN SPEED) button
(the display indicates the setting).
(AUTO): The FAN SPEED is HI at first and varies to
MED or LOW automatically when the preset
temperature has been reached.
(HI) : Economical as the room will become cool
quickly.
(MED) : Fan speed slow.
(LOW) : Fan speed slower.
Set the desired room temperature with the TEMPERATURE
button (the display indicates the setting).
The temperature setting and the actual room temperature may
vary some how depending on conditions.
Press the
(START/STOP) button. Cooling operation starts
with a beep. Press the button again to stop operation. The
cooling function does not start if the temperature setting is
higher than the current room temperature (even though the
(OPERATION) lamp lights). The cooling function will start as
soon as you set the temperature below the current room
temperature.
■ As the settings are stored in memory in the remote controller, you
only have to press the
(START/STOP) button next time.
1
2
START
STOP
3
Page 11
– 11 –
ENGLISH
RESET
FAN SPEED (AUTO)
.....
When the AUTO fan speed mode is set in the cooling/heating operation:
For the heating operation
● The fan speed will automatically change according to the temperature
of discharged air.
● When the difference of room temperature and setting temperature is
large, fan starts to run at HI speed.
● When the room temperature reaches setting temperature, fan speed
changes to LOW automatically.
● When the difference of room temperature and setting temperature is
large, fan starts to run at HI speed.
● After room temperature reaches the preset temperature, the cooling
operation, which changes the fan speed and room temperature to obtain
optimum conditions for natural healthful cooling will be performed.
For the cooling operation
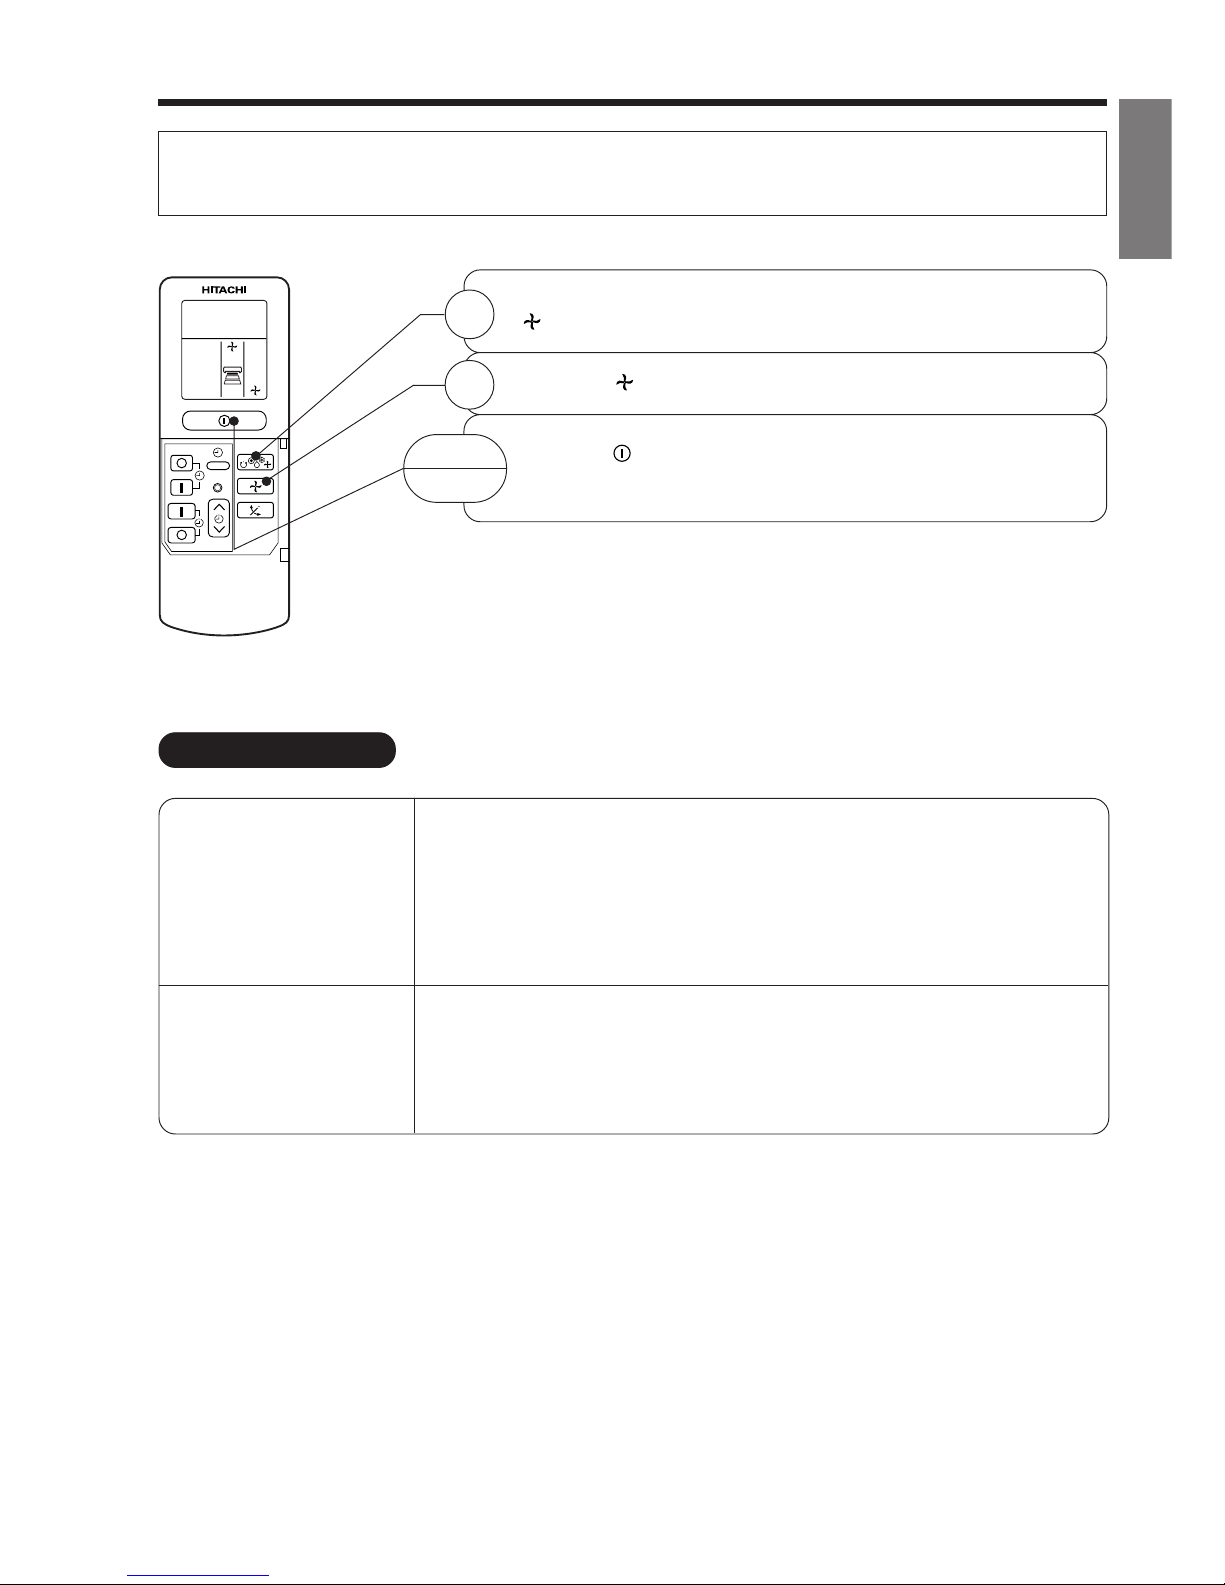
FAN OPERATION
You can use the device simply as an air circulator. Use this function to dry the interior of the indoor
unit at the end of summer.
Press the FUNCTION selector so that the display indicates
(FAN).
Press the (FAN SPEED) button.
Press the (START/STOP) button. Fan operation starts with
a beep. Press the button again to stop operation.
1
2
START
STOP
Page 12

– 12 –
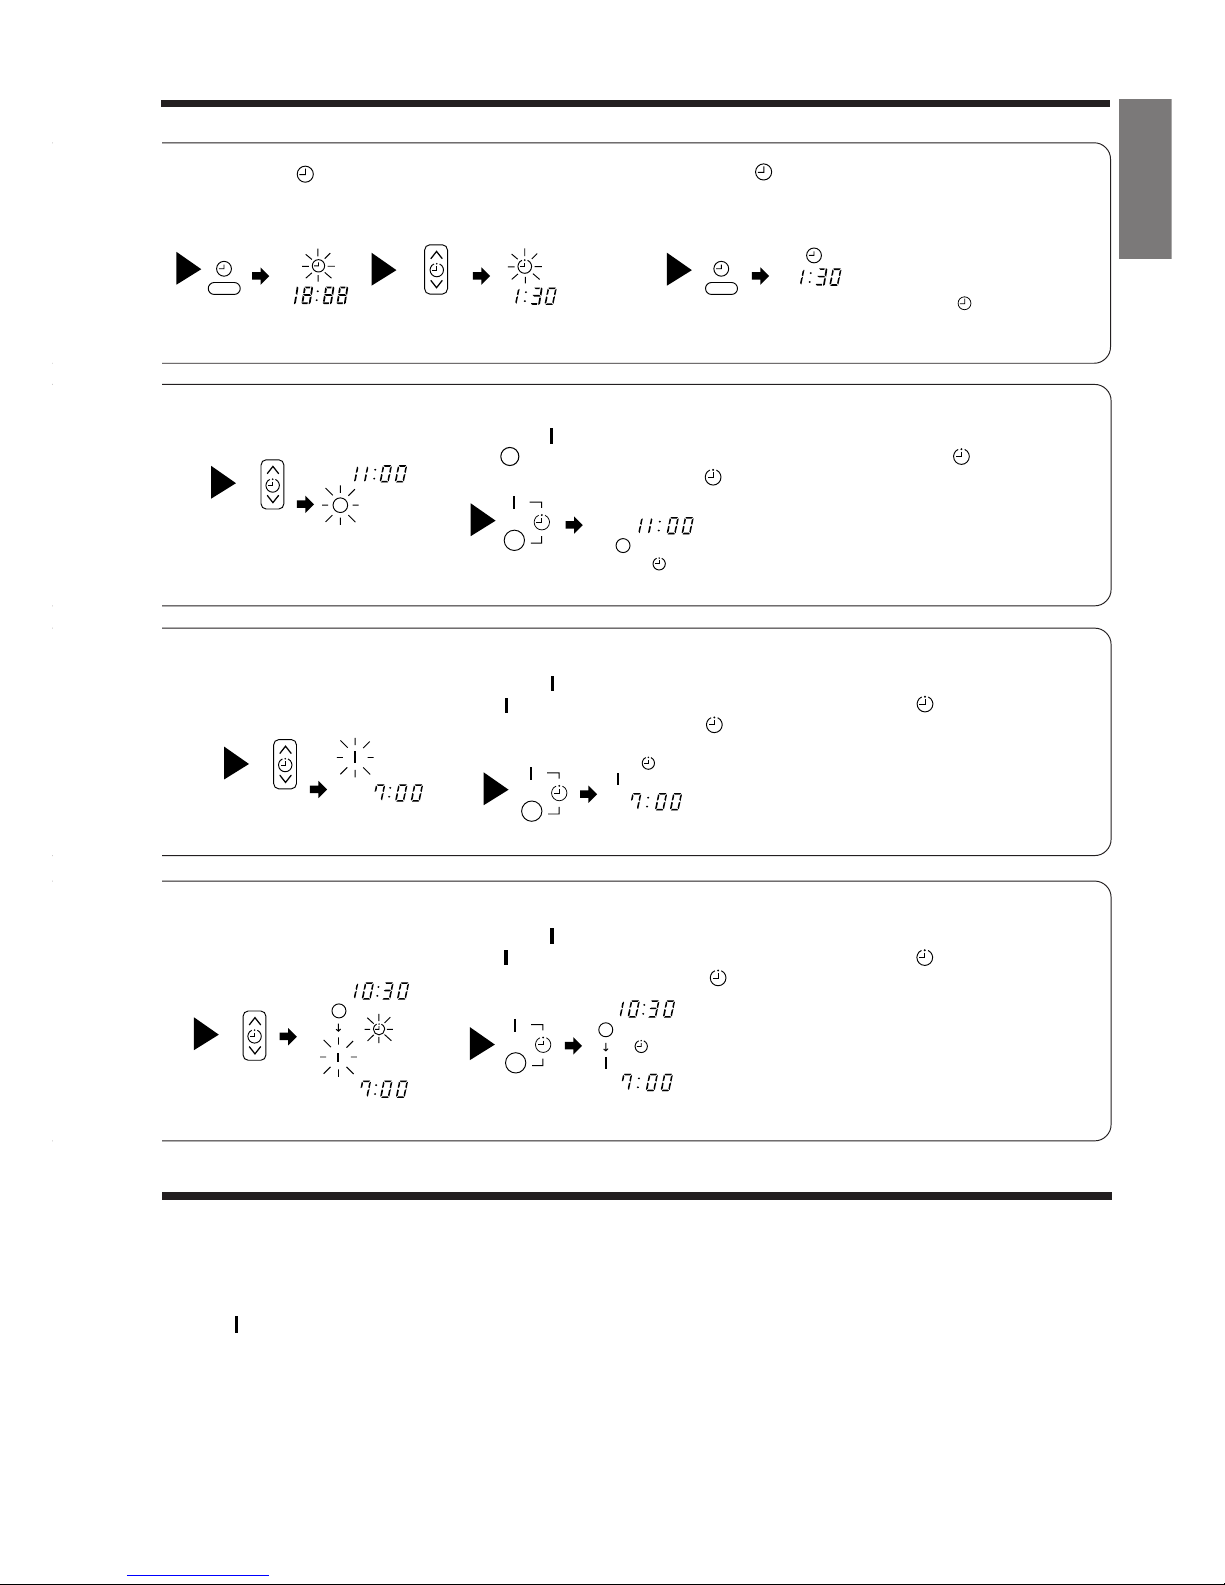
HOW TO SET THE TIMER
ON/OFF-Timer
● The device will turn on (off) and off
(on) at the designated times.
● The switching occurs first at the
preset time that comes earlier.
● The arrow mark appearing on the
display indicates the sequence of
switching operations.
1
Press the (ON-OFF)
button so that the (OFF)
mark blinks.
OFF-Timer
You can set the device to turn off
at the present time.
After you change the
batteries;
How to Cancel Reservation
Point the signal window of the remote controller toward the indoor unit, and press the (CANCEL)
button.
The (RESERVED) sign goes out with a beep and the (TIMER) lamp turns off on the indoor unit.
1
Set the current month and
day with the TIMER control
button.
1
Press the (OFF-TIMER)
button. The (OFF) mark blinks
on the display.
1
Press the (ON-TIMER)
button the (ON) mark blinks
on the display.
2
Set the turn-off time
with the TIMER control
button.
Press the (RESERVE)
button.
3
Press the (ON-
TIMER) button so that the
(OFF) mark lights and
the (ON) mark blinks.
NOTE
You can set only one of the OFF-timer,
ON-timer and ON/OFF-timer.
ON-Timer
Time, Day, Month
● The device will turn on
at the designated times.
TIME, DAY,
MONTH
(current time,
day, month)
OFF TIMER
ON TIMER
RESERVE
CANCEL
M D
M D
AM
STOP
Start
AM
Start
Stop
PM
Start Stop
PM
AM
PM
RESET
Page 13
– 13 –
ENGLISH
3
Point the signal window of the remote controller toward the indoor unit, and
press the (RESERVE) button.
The (OFF) mark starts lighting instead of flashing and the sign (RESERVED)
lights. A beep occurs and the (TIMER) lamp lights on the indoor unit.
● The time indication will disappear
automatically in 10 second.
● To check the current time setting,
press the (TIME) button twice.
The setting of the current time is
now complete.
● The timer may be used in three ways: off-timer, on-timer, and ON/OFF (OFF/ON)-timer. Set
the current time at first because it serves as a reference.
● As the time settings are stored in memory in the remote controller, you only have to press
the (RESERVE) button in order to use the same settings next time.
2
Press the
(TIME) button.
3
Set the current time with the
TIMER control button.
Example: The current time is 1:30 p.m.
2
Set the turn-off time with the
TIMER control button.
The setting of turn-off time is now complete.
Example: The device will turn off at 11:00p.m.
Example:
The device will turn on at 7:00 a.m.
The setting of the turn-on time is now complete.
4
Set the turn-on time with the
TIMER control button.
5
Point the signal window of the remote controller toward the indoor unit, and
press the (RESERVE) button.
The (ON) mark starts lighting instead of flashing and the (RESERVED) sign
lights. A beep occurs and the (TIMER) lamp lights on the indoor unit.
3
Point the signal window of the remote controller toward the indoor unit, and
press the (RESERVE) button.
The (ON) mark starts lighting instead of flashing and the (RESERVED) sign
lights. A beep occurs and the (TIMER) lamp lights on the indoor unit.
2
Set the turn-on time with the
TIMER control button.
Example:
The device will turn off at 10:30 p.m. and it will be turned on
at 7:00 a.m.
The settings of the turn-on/off times are now complete.
4
Press the (TIME) button again.
The time indication starts lighting
instead of flashing.
PM PM
AM
PM
PM
PM
AM
AM
AM
AM
PM
PM
Page 14
– 14 –
HOW TO SET THE SLEEP TIMER
1
Set the ON-timer.
Set the current time at first if it is not set before (see the pages for setting
the current time). Press the (SLEEP) button, and the display changes as
shown below.
Mode
Sleep timer
Indication
1 hour 2 hours 3 hours 7 hours
Sleep timer off
44 44
1
Sleep Timer: The device will continue working for the designated
number of hours and then turn off.
Point the signal window of the remote controller toward the indoor
unit, and press the SLEEP button.
The timer information will be displayed on the remote controller.
The TIMER lamp lights with a beep from the indoor unit. When the
sleep timer has been set, the display indicates the turn-off time.
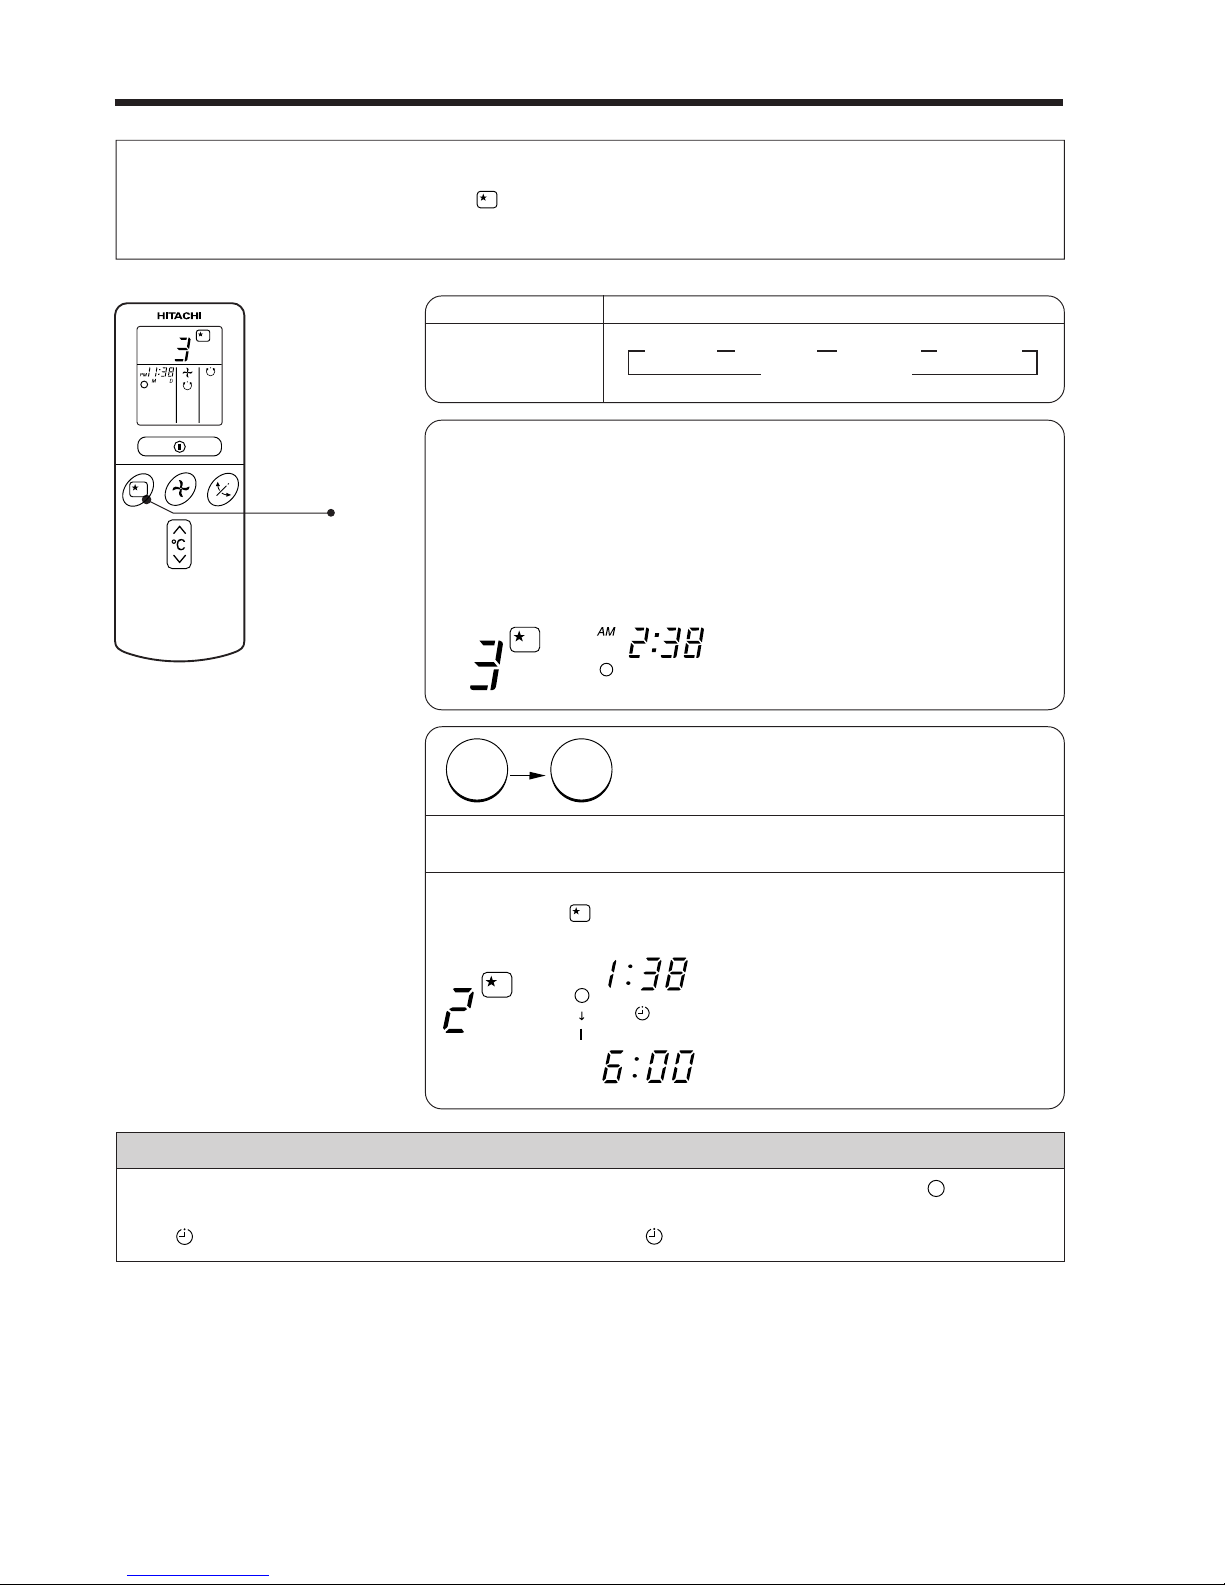
Example: If you set 3 hours sleep
time at 11:38 p.m., the turn-off
time is 2:38 a.m.
2
Press the (SLEEP) button and set the sleep timer.
The device will be turned off by the sleep
timer and turned on by on-timer.
How to Cancel Reservation
Point the signal window of the remote controller toward the indoor unit, and press the (CANCEL)
button.
The (RESERVED) sign goes out with a beep and the (TIMER) lamp turns off on the indoor unit.
For heating:
In this case, the device will turn off
in 2 hours (at 1:38 a.m.) and turn
on early so that the preset
temperature will be almost reached
at 6:00 next morning.
SLEEP
H
H
AM
AM
Sleep
timer
Start
H
Page 15
– 15 –
ENGLISH
Explanation of the sleep timer
The device will control the FAN SPEED and room temperature
automatically so as to be quiet and good for people’s health.
● If date or current time is not set, sleep timer can not be set.
● If you set the sleep timer after the off-, on/off- or off/on-timer
has been set, the sleep timer becomes effective instead of
the off-, on/off- or off/on-timer set earlier.
● You can not set other timer during sleep timer operation.
● After sleep timer time is up and when press sleep button
again, the sleep timer will be set as last setting.
● Sleep timer effective only once.
NOTE
Page 16
– 16 –
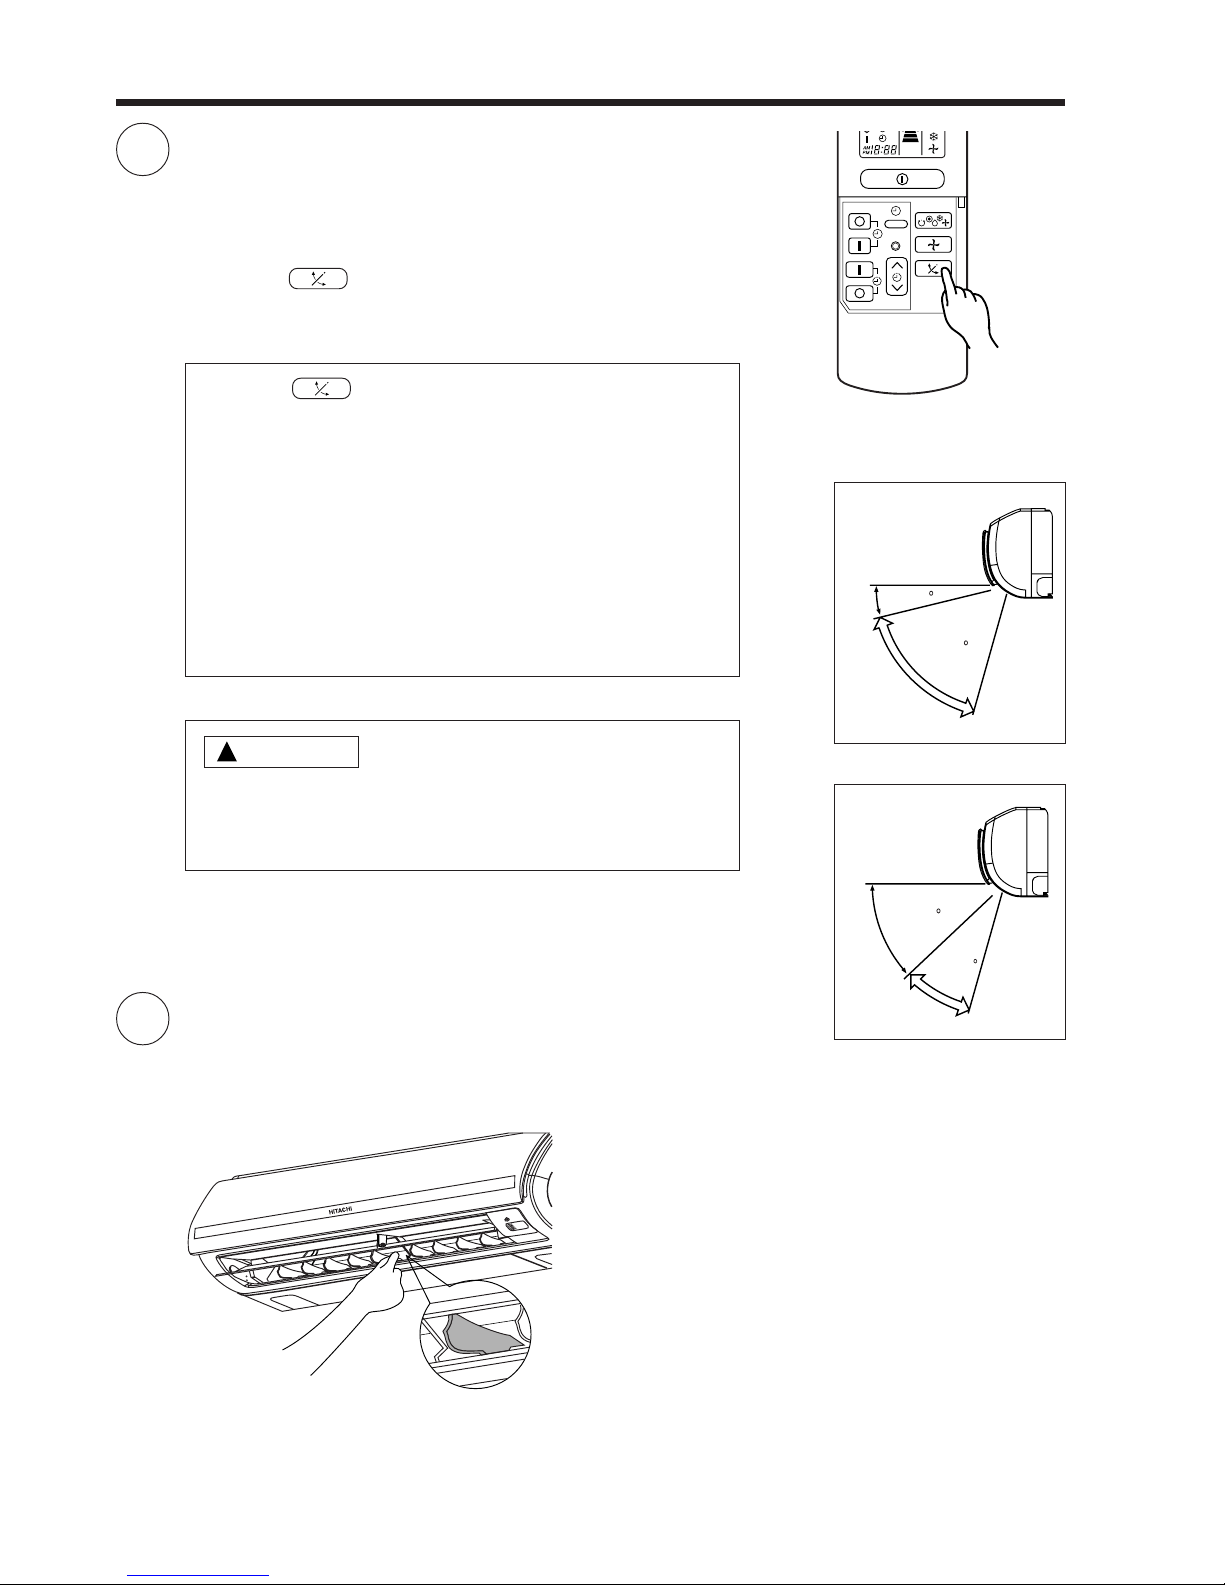
ADJUSTING THE AIR DEFLECTOR
1
2
Adjustment of the conditioned air to the left and right.
Hold the vertical air deflector as shown in the figure and adjust
the conditioned air to the left and right.
● If the “ (AUTO SWING)” button is pressed once,
the horizontal air deflector swings up and down. If the
button is pressed again, the deflector stops in its current
position. Several seconds (about 6 seconds) may be
required before the deflector starts to move.
● Use the horizontal air deflector within the adjusting range
shown on the right.
● When the operation is stopped, the horizontal air deflector
moves and stops at the position where the air outlet
closes.
!
CAUTION
● In “Cooling” operation, do not keep the horizontal air
deflector swinging for a long time. Some dew may form
on the horizontal air deflector and dew may drop.
RESET
Adjustment of the conditioned air in the upward and downward
directions.
The horizontal air deflector is automatically set to the proper
angle suitable for each operation. The deflector can be swung
up and down continuously and also set to the desired angle
using the “ (AUTO SWING)” button.
Vertical
Vertical
about 15
about 60
about 45
about 30
When cooling,
dehumidifying
When heating
Page 17
– 17 –
ENGLISH
HOW TO EXCHANGE THE BATTERIES IN THE REMOTE CONTROLLER
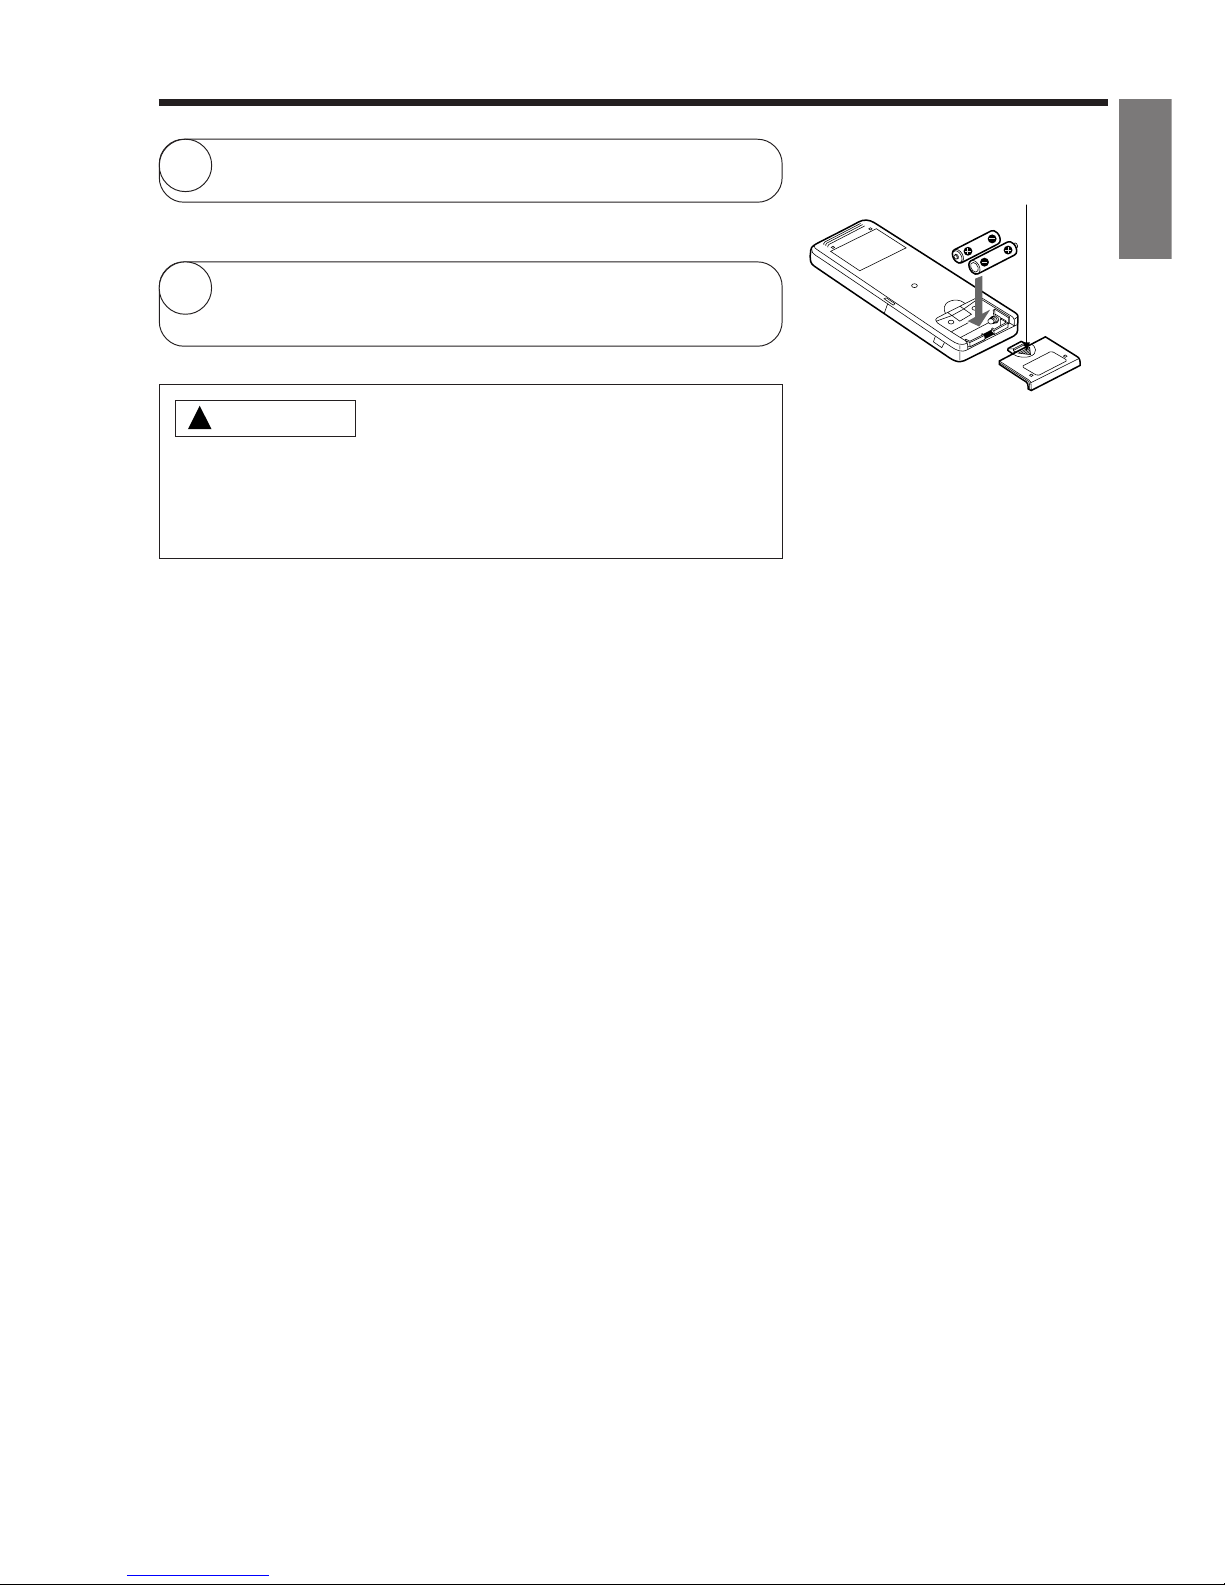
1
Remove the cover as shown in the figure and take out the
old batteries.
=
2
Install the new batteries.
The direction of the batteries should match the marks in the
case.
1. Do not use new and old batteries, or different kinds of batteries
together.
2. Take out the batteries when you do not use the remote controller
for 2 or 3 months.
CAUTION
!
Push and pull to the
direction of arrow
Page 18
– 18 –
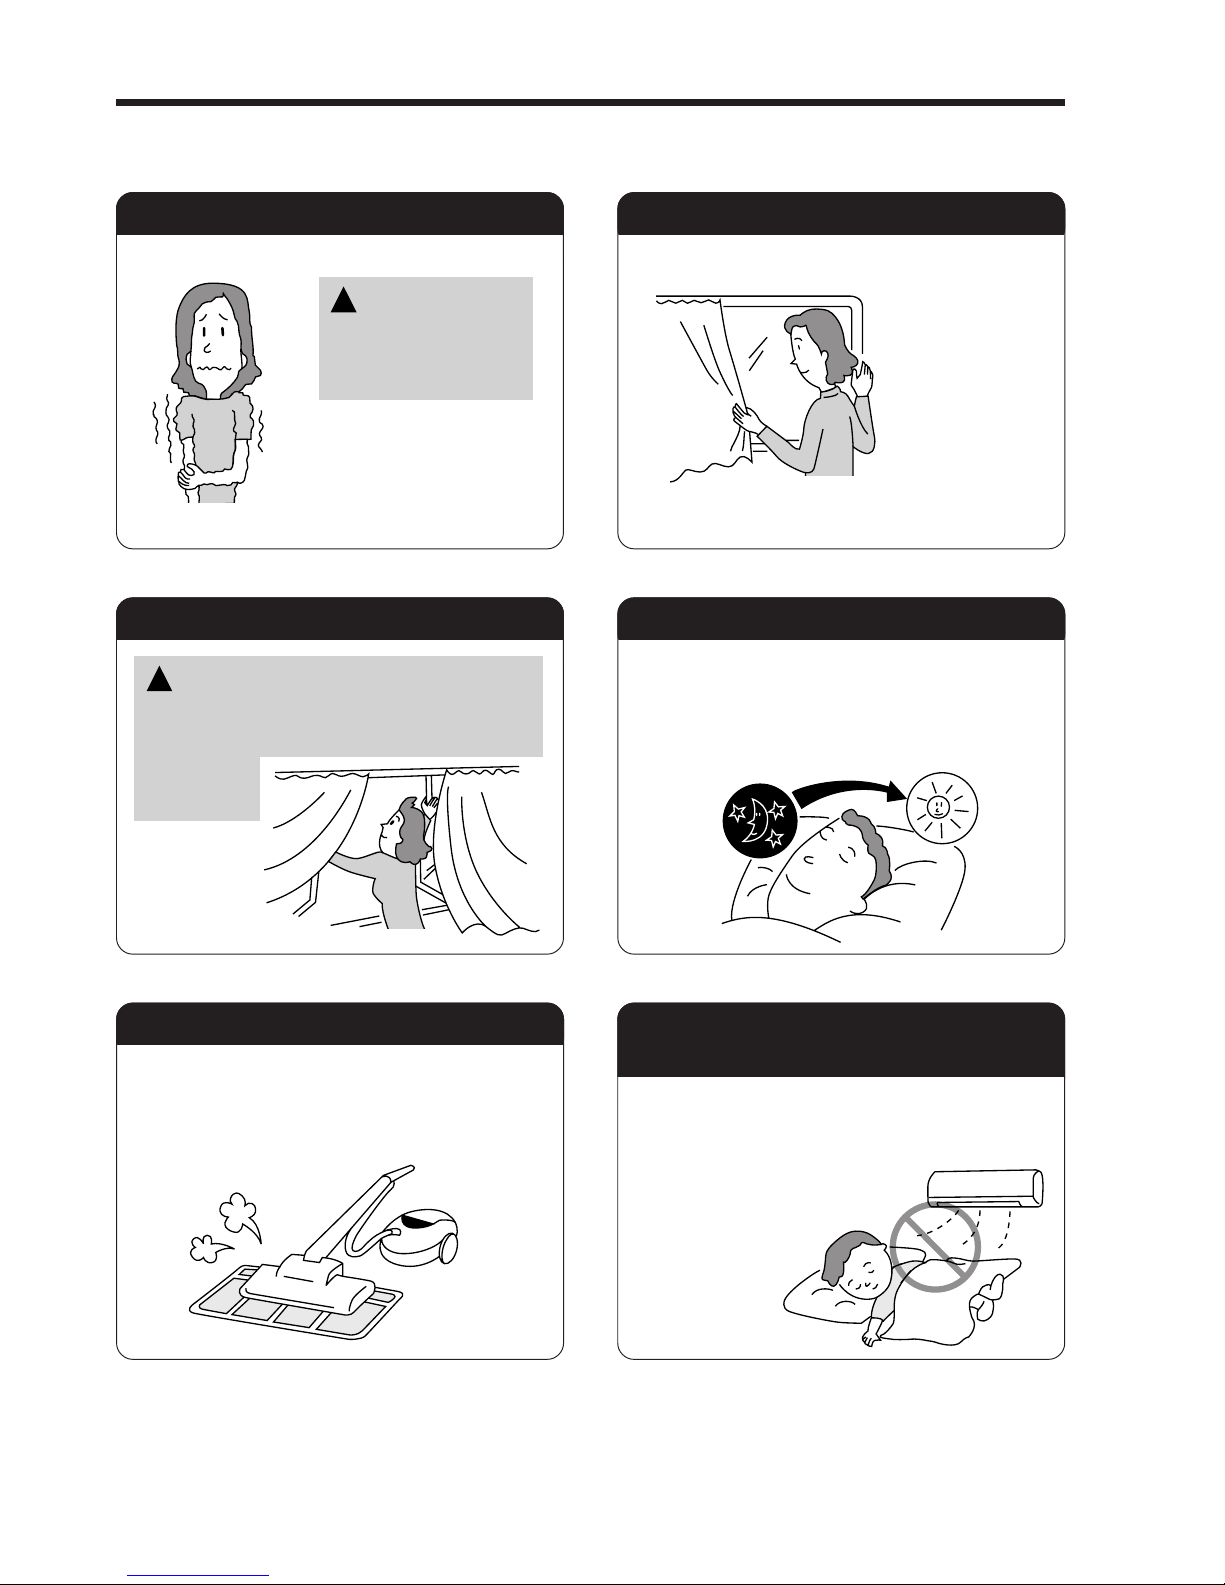
Suitable Room Temperature Install curtain or blinds
Ventilation Effective Usage Of Timer
Do Not Forget To Clean The Air Filter
Please Adjust Suitable Temperature
For Baby And Children
Warning
Freezing temperature
is bad for health and a
waste of electric power.
!
It is possible to
reduce heat
entering the
room through
windows.
At night, please use the “OFF or ON timer
operation mode”, together with your wake up
time in the morning. This will enable you to
enjoy a comfortable room temperature. Please
use the timer effectively.
Dusty air filter will reduce the air volume and
the cooling efficiency. To prevent from wasting
electric energy, please clean the filter every 2
weeks.
Please pay attention to the room temperature
and air flow direction when operating the unit
for baby, children and old folks who have
difficulty in movement.
Caution
Do not close the room for a long period of
time. Occasionally open the door and windows
to allow the
entrance of
fresh air.
!
THE IDEAL WAYS OF OPERATION
Page 19
– 19 –
ENGLISH
FOR USER’S INFORMATION
The Air Conditioner And The Heat Source In The Room
Not Operating For A Long Time
When Lightning Occurs
Caution
If the amount of heat in the room is above the cooling
capability of the air conditioner (for example: more
people entering the room, using heating equipments
and etc.), the preset room temperature cannot be
achieved.
!
When the indoor unit is not to be used for a long
period of time, please switch off the power from the
mains. If the power from mains remains “ON”, the
indoor unit still consumes about 8W in the operation
control circuit even if it is in “OFF” mode.
Warning
To protect the whole unit during lightning, please
stop operating the unit and remove the plug from the
socket.
!
OFF
Interference From Electrical Products
Caution
To avoid noise interference, please place the indoor
unit and its remote controller at least 1m away from
electrical products.
!
Inverter-type
fluorescent
lamp.
To prevent
interference,
place at least
1m away.
TV
Page 20

– 20 –
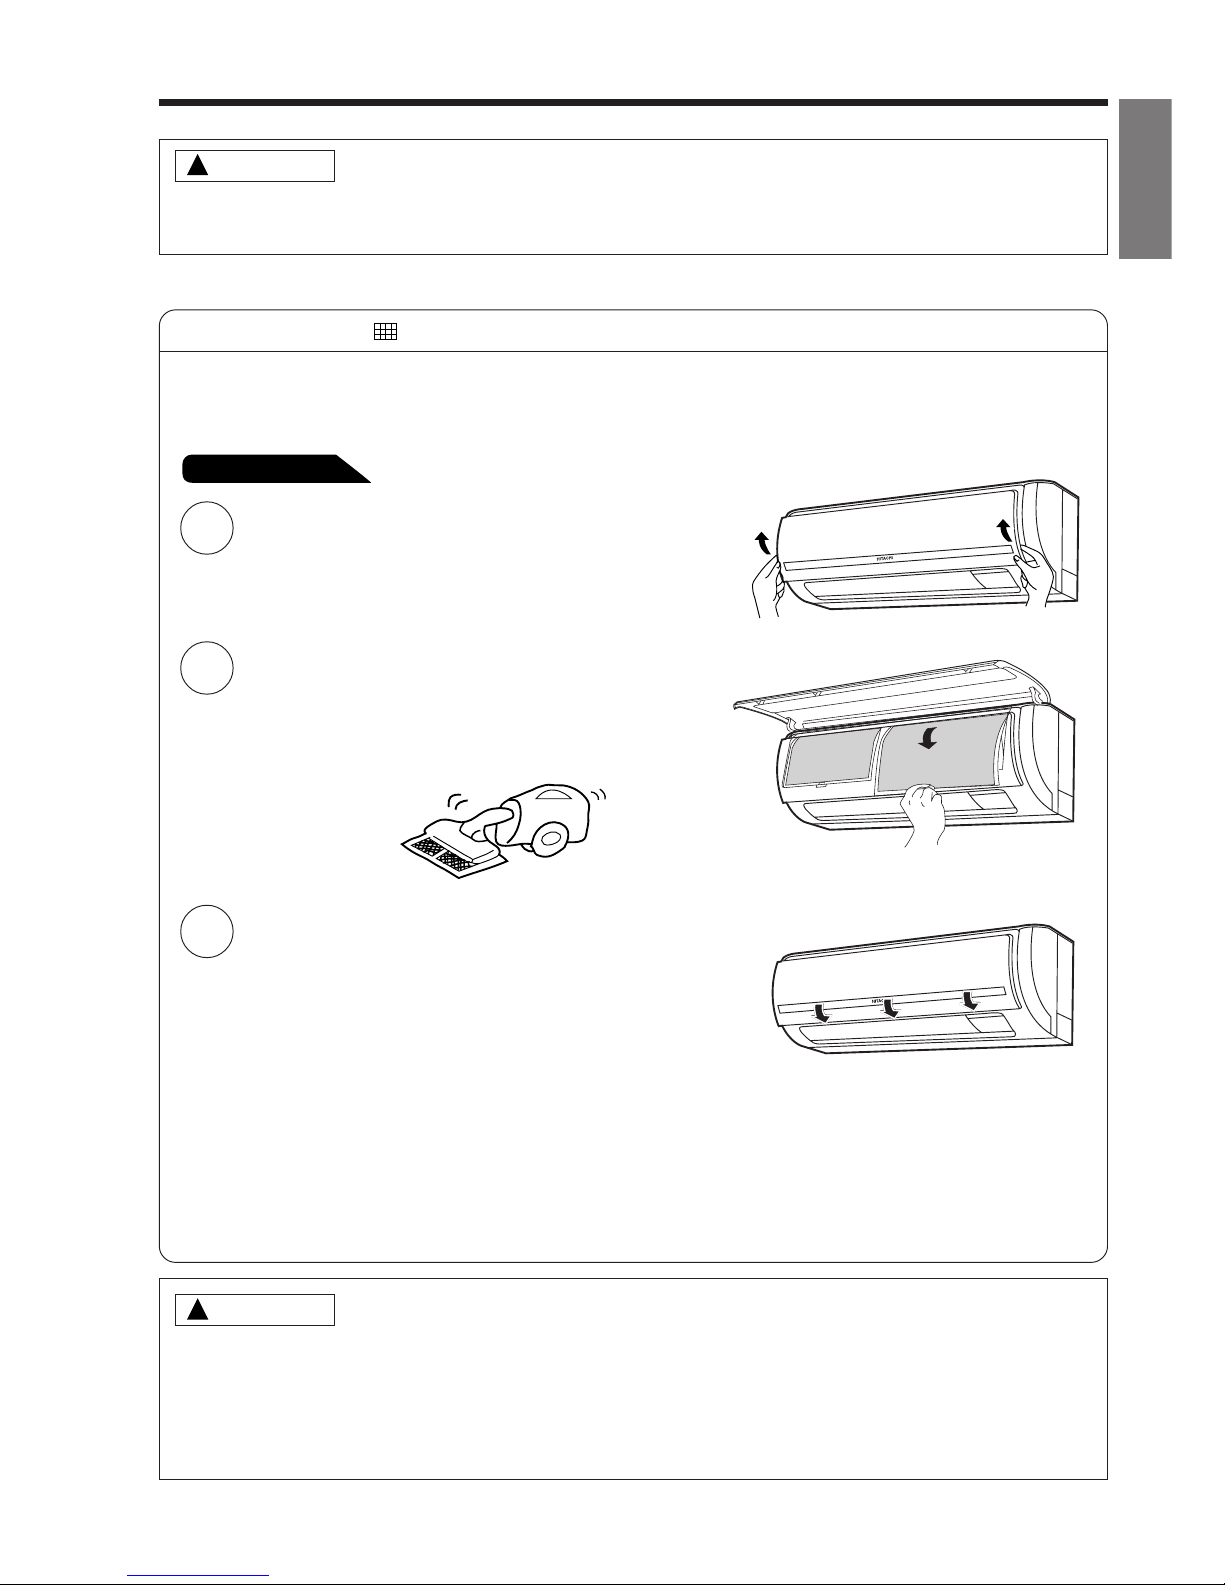
ATTACHING THE AIR CLEANSING FILTERS
1
Open the front panel.
● Pull up the front panel by holding it at both sides
with both hands.
2
Remove the filter.
● Push upward to release the claws and pull out the
filter.
3
Attaching the air cleansing filters to the filter.
● Attach the air cleansing filters to the frame by
gently compress its both sides and release after
insertion into filter frame.
4
Attach the filters.
● Attach the filters by ensuring that the surface written
“FRONT” is facing front.
● After attaching the filters, push the front panel at
three arrow portion as shown in figure and close it.
Cleaning and maintenance must be carried out only by qualified service personal. Before cleaning,
stop operation and switch off the power supply.
CAUTION
CAUTION
Do not bend the air cleansing
filter as it may cause damage
to the structure.
NOTE
● In case of removing the air cleansing filters, please follow the above procedures.
● The cooling capacity is slightly weakened and the cooling speed becomes slower when the air cleansing
filters are used. So, set the fan speed to "HIGH" when using it in this condition.
● Air cleansing filters are washable and reusable up to 20 times by using vacuum cleaner or water rinse
under running tap water. Type number for this air cleansing filter is <SPX-CFH11>. Please use this
number for ordering when you want to renew it.
● Do not operate the air conditioner without filter. Dust may enter the air conditioner and fault may occur.
!
!
Page 21
– 21 –
ENGLISH
MAINTENANCE
Cleaning and maintenance must be carried out only by qualified service personal. Before cleaning,
stop operation and switch off the power supply.
1. AIR FILTER
Clean the air filter, as it removes dust inside the room. In case the air filter is full of dust, the air flow
will decrease and the cooling capacity will be reduced. Further, noise may occur. Be sure to clean the
filter following the procedure below.
!
CAUTION
1
Open the front panel and remove the filter
● Gently lift and remove the air cleansing filter
from the air filter frame.
2
Vacuum dust from the air filter and air cleansing
filter using vacuum cleaner. If there is too much
dust, rinse under running tap water and gently
brush it with soft bristle brush. Allow filters to
dry in shade.
3
● Re-insert the air cleansing filter to the filter
frame. Set the filter with “FRONT” mark facing
front, and slot them into the original state.
● After attaching the filters, push the front panel
at three arrow portions as shown in figure
and close it.
!
CAUTION
● Do not wash with hot water at more than 40°C. The filter may shrink.
● When washing it, shake off moisture completely and dry it in the shade; do not expose it directly to
the sun. The filter may shrink.
● Do not use detergent on the air cleansing filter as some detergent may deteriorate the filter
electrostatic performance.
PROCEDURE
NOTE:
● Air cleansing filter should be cleaned every month or sooner if noticeable loading occurs. When
used overtime, it may loose its deodorizing function. For maximum performance, it is recommended
to replace it every 3-6 months depending on application requirements.
Page 22
– 22 –
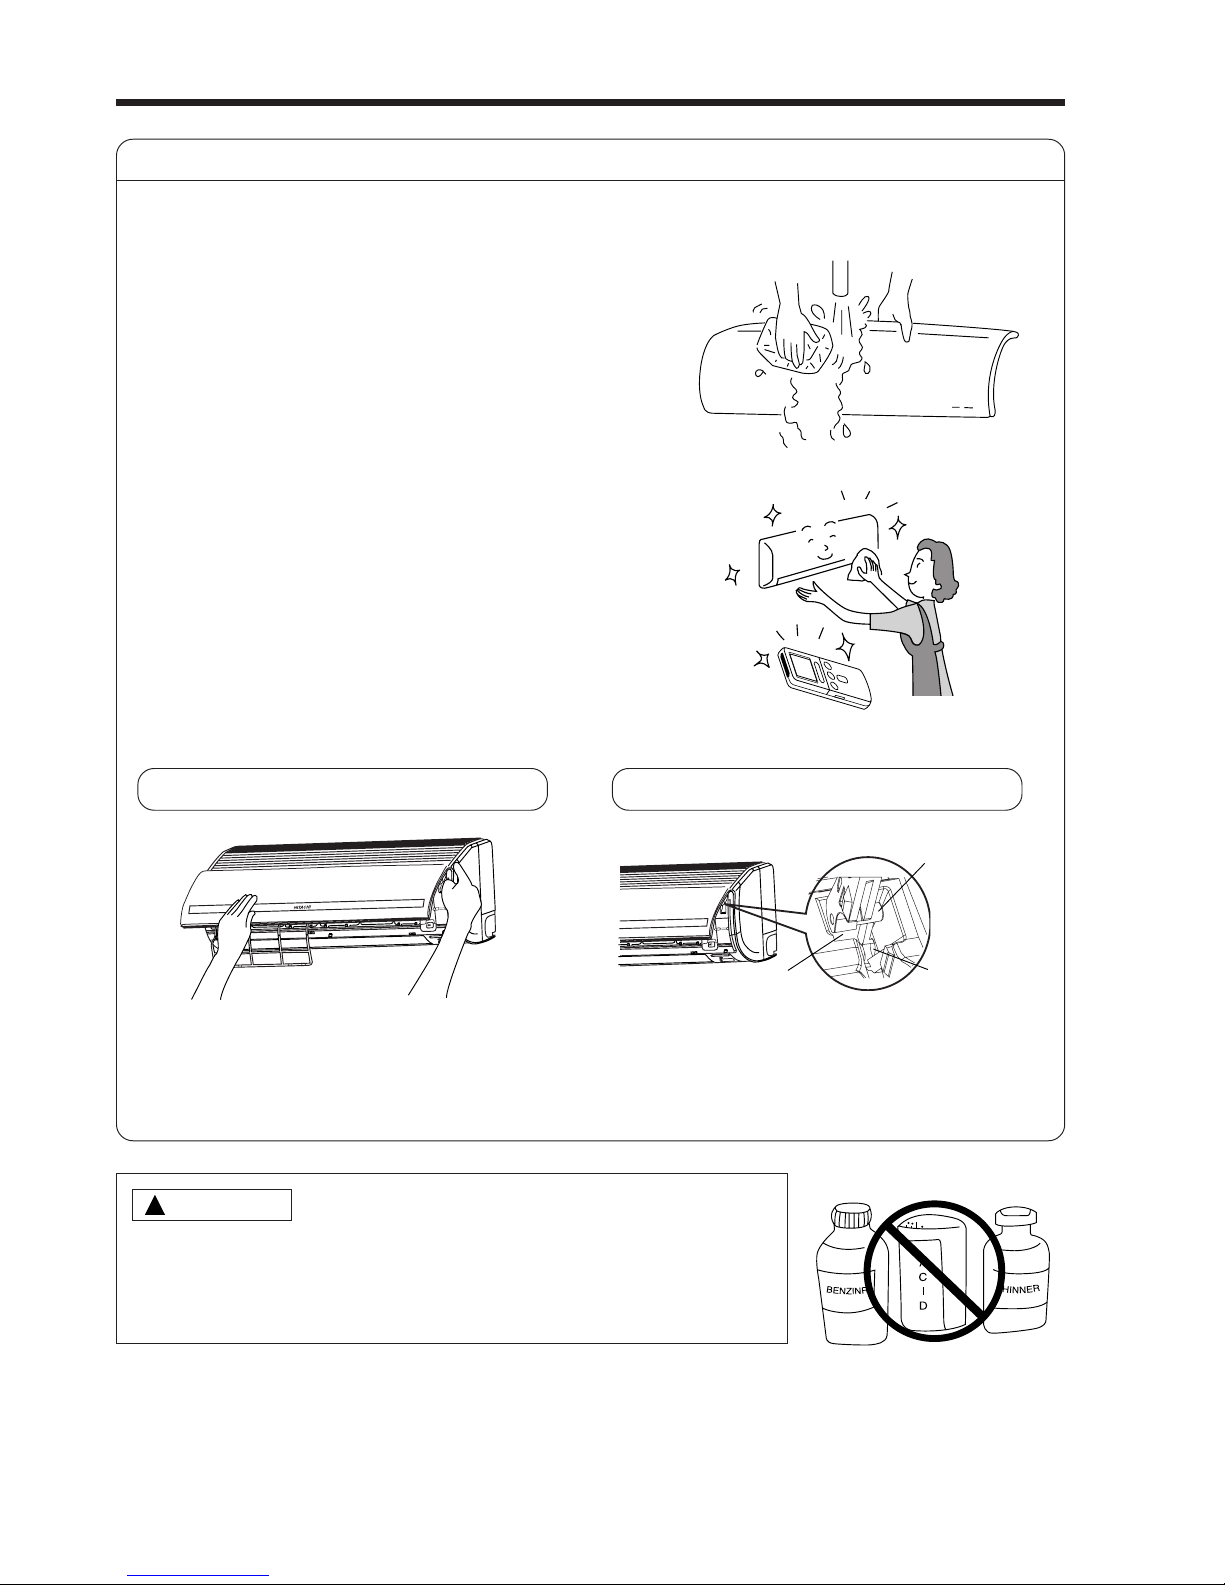
2. Washable Front Panel
● Remove the front panel and wash with clean
water.
Wash it with a soft sponge.
After using neutral detergent, wash thoroughly
with clean water.
● When front panel is not removed, wipe it with
a soft dry cloth. Wipe the remote controller
thoroughly with a soft dry cloth.
● Wipe the water thoroughly.
If water remains at indicators or signal
receiver of indoor unit, it causes trouble.
Method of removing the front panel.
Be sure to hold the front panel with both hands
to detach and attach it.
!
CAUTION
● Do not splash or direct water to the body of the unit when cleaning
it as this may cause short circuit.
● Never use hot water (above 40°C), benzine, gasoline, acid, thinner or
a brush, because they will damage the plastic surface and the coating.
Removing the Front Panel
● When the front panel is fully opened with
both hands, push the right arm to the inside
to release it, and while closing the front panel
slightly, put it out forward.
Attaching the Front Panel
● Move the projections of the left and right
arms into the Flanges in the unit and
securely insert them into the holes.
Projection
Flange
Hole
Page 23
– 23 –
ENGLISH
3. MAINTENANCE AT BEGINNING OF LONG OFF PERIOD
● Run the unit by setting the operation mode to
(COOL), the temperature to 32°C and the fan speed
to HI for about half a day on a fine day, and dry the
whole of the unit.
● Switch off the power plug.
1
2
3
REGULAR INSPECTION
PLEASE CHECK THE FOLLOWING POINTS BY QUALIFIED SERVICE PERSONAL EITHER
EVERY HALF YEARLY OR YEARLY. CONTACT YOUR SALES AGENT OR SERVICE SHOP.
Is the earth line disconnected or broken?
Is the mounting frame seriously affected by rust and is the
outdoor unit tilted or unstable?
Is the plug of power line firmly plugged into the socket?
(Please ensure no loose contact between them).
Air
Blow
Cleaning and maintenance must be carried out only by qualified service personal. Before cleaning,
stop operation and switch off the power supply.
!
CAUTION
Confirm
Page 24
– 24 –
AFTER SALE SERVICE AND WARRANTY
WHEN ASKING FOR SERVICE, CHECK THE FOLLOWING POINTS.
When it does not operate
● Is the fuse all right?
● Is the voltage extremely high or low?
● Is the circuit breaker “ON”?
● Was the air filter cleaned?
● Does sunlight fall directly on the outdoor unit?
● Is the air flow of the outdoor unit obstructed?
● Are the doors or windows opened, or is there any source of
heat in the room?
● Is the set temperature suitable?
CONDITION CHECK THE FOLLOWING POINTS
Notes
● In quiet operation or stopping the operation, the following phenomena
may occassionally occur, but they are not abnormal for the operation.
(1) Slight flowing noise of refrigerant in the refrigerating cycle.
(2) Slight rubbing noise from the fan casing which is cooled and then
gradually warmed as operation stops.
● The odor will possibly be emitted from the room air conditioner because
the various odor, emitted by smoke, foodstuffs, cosmetics and so on,
sticks to it. So the air filter and the evaporator regularly must be cleaned
to reduce the odor.
●
Please contact your sales agent immediately if the air conditioner still fails to operate normally after the above
inspections. Inform your agent of the model of your unit, production number, date of installation. Please also
inform him regarding the fault.
●
Power supply shall be connected at the rated voltage, otherwise the unit will be broken or could not reach the
specified capacity.
When it does not cool well
When it does not hot well
Page 25
– 25 –
ENGLISH
MEMO
.....................................................................................................................................................................................
.....................................................................................................................................................................................
.....................................................................................................................................................................................
.....................................................................................................................................................................................
.....................................................................................................................................................................................
.....................................................................................................................................................................................
.....................................................................................................................................................................................
.....................................................................................................................................................................................
.....................................................................................................................................................................................
.....................................................................................................................................................................................
.....................................................................................................................................................................................
.....................................................................................................................................................................................
.....................................................................................................................................................................................
.....................................................................................................................................................................................
.....................................................................................................................................................................................
.....................................................................................................................................................................................
.....................................................................................................................................................................................
.....................................................................................................................................................................................
.....................................................................................................................................................................................
.....................................................................................................................................................................................
.....................................................................................................................................................................................
.....................................................................................................................................................................................
Please note:
On switching on the equipment, particularly when the room light is dimmed, a slight brightness fluctuation
may occur. This is of no consequence.
The conditions of the local Power Supply Companies are to be observed.
Minimum Maximum Minimum Maximum
Indoor
Dry bulb °C21 32 20 27
Wet bulb °C15 23 12 19
Outdoor
Dry bulb °C21 43 2 21
Wet bulb °C15 26 1 15
Note
● Avoid to use the room air conditioner for cooling operation when the outside temperature is below
-10°C (14°F).
The recommended maximum and minimum operating temperatures of the hot and cold sides
should be as below:
Cooling Heating
Page 26

– 26 –
MEMO
.....................................................................................................................................................................................
.....................................................................................................................................................................................
.....................................................................................................................................................................................
.....................................................................................................................................................................................
.....................................................................................................................................................................................
.....................................................................................................................................................................................
.....................................................................................................................................................................................
.....................................................................................................................................................................................
.....................................................................................................................................................................................
.....................................................................................................................................................................................
.....................................................................................................................................................................................
.....................................................................................................................................................................................
.....................................................................................................................................................................................
.....................................................................................................................................................................................
.....................................................................................................................................................................................
.....................................................................................................................................................................................
.....................................................................................................................................................................................
.....................................................................................................................................................................................
.....................................................................................................................................................................................
.....................................................................................................................................................................................
.....................................................................................................................................................................................
.....................................................................................................................................................................................
.....................................................................................................................................................................................
.....................................................................................................................................................................................
.....................................................................................................................................................................................
.....................................................................................................................................................................................
.....................................................................................................................................................................................
.....................................................................................................................................................................................
.....................................................................................................................................................................................
.....................................................................................................................................................................................
.....................................................................................................................................................................................
.....................................................................................................................................................................................
.....................................................................................................................................................................................
.....................................................................................................................................................................................
.....................................................................................................................................................................................
.....................................................................................................................................................................................
.....................................................................................................................................................................................
.....................................................................................................................................................................................
.....................................................................................................................................................................................
Page 27
– 27 –
ITALIANO
RAS-08QH5E
RAS-10QH5E
RAS-14QH5E
RAS-18QH5E
Instruction manual Page 1~26
To obtain the best performance and ensure years of trouble free use, please read this instruction manual completely.
Manuale di istruzioni Pag. 27~52
Per garantire la migliore prestazione e la più lunga durataleggere attentamente e al completo le seguanti istruzioni.
Manual de instrucciones Página 53~78
Para obtener el mejor funcionamiento y asegurar años de uso libre de problemas, lea cuidadosamente este manual de
instrucciones.
O‰ЛБ›В˜ XВИЪИЫМФ‡ ™ÂÏ›‰· 79~104
°И· ЩЛУ О·П‡ЩВЪЛ ‰˘У·Щ‹ ·fi‰ФЫЛ О·И ЩЛУ М·ОЪФ¯ЪfiУИ· О·И ¯ˆЪ›˜ ЪФ‚П‹М·Щ· ¯Ъ‹ЫЛ ЩЛ˜ Ы˘ЫОВ˘‹˜ ·˘Щ‹˜, ·Ъ·О·ПФ‡МВ
‰И·‚¿ЫЩВ П‹Ъˆ˜ ЩИ˜ Ф‰ЛБ›В˜ ¯ВИЪИЫМФ‡ ЩЛ˜.
Инструкция по эксплуатации
стр. 105~130
Для обеспечения наилууших эксплуатационных характеристик и многолетней безотказной работы оборудования необходимо
полностыо оэнакомиться с данной Инструкцией по эксплуатации.
RAS-08QH5E
RAS-10QH5E
RAS-14QH5E
RAS-18QH5E
CONDIZIONATORE DELL’ARIA SPACCATO DEL TIPO
UNITA’ INTERNA
UNITA’ INTERNA
MODELLO
Page 28
– 28 –
●
Leggere attentamente i “Margini di Sicurezza” prima del funzionamento per accertarsi di usare il condizionatore in modo
corretto.
●
Prestare particolare attenzione ai simboli di “ Avvertenza” e di “ Cautela”. La sezione “Avvertenza” contiene delle
regole, che se non osservate rigorosamente si possono provocare gravi incidenti oppure la morte. La sezione “Cautela”
contiene delle regole che se non osservate attentamente possono essere causa di gravi conseguenze. Osservare
rigorosamente tutte le istruzioni per prevenire eventuali pericoli.
●
Significato dei simboli utilizzati.
●
Conservare il manuale dopo averlo letto con cura.
AVVERTENZA
CAUTELA
!
!
A
V
V
E
R
T
E
N
Z
A
!
AVVERTENZA
!
●
Spegnere il condizionatore e l’interruttore automatico durante i temporali.
ARRESTO
ARRESTO
MARGINI DI SICUREZZA
PRECAUZIONI DURANTE L’INSTALLAZIONE
PRECAUZIONI DURANTE UNO SPOSTAMENTO OPPURE DURANTE LA MANUTENZIONE
●
Non riporate/rimontate da soli il condizionatore.
Ne potrebbero derivare perdite d’acqua, malfunzionamenti, corti circuiti od
incendi.
●
Si consiglia di fare installare il condizionatore dal rivenditore oppure da un
tecnico specializzato. Potrebbe accadere una perdita d’acqua, un corto circuito
oppure prender fuoco se l’installazione viene fatta di propria iniziativa.
●
Mettere a massa.
Non collocare la messa a terra accanto ai tubi del gas e dell’acqua, al parafulmine
oppure vicino alla messa a terra del telefono. L’installazione impropria della
messa a terra potrebbe provocare una scossa elettrica.
●
Dovrebbe essere installato un interruttore automatico (per eventuali sovraccarichi)
a secondo della posizione dell’unità. Senza il tale interruttore automatico si
incorre in pericolo di una scossa elettrica.
●
Non installare l’unità vicino a fonti di gas infiammabile. L’unità esterna può
incendiarsi se avvengono della perdite di gas infiammabile.
●
Accertarsi che il flusso dell’acqua sia scorrevole quando viene installato il tubo
di drenaggio.
●
In una situazione anormale (per esempio quando c’è odore di bruciato), spegnere
il condizionatore e l’interruttore automatico. Contattare il rivenditore. Se si fa
funzionare l’unità in condizioni anormali si possono causare guasti, corto circuiti o
incendi.
●
Una manutenzione sbagliata può causare una scossa elettrica e prender fuoco.
●
Contattare il rivenditore in caso di reinstallazione e eventuale spostamento dell’unità.
Se tale reinstallazione e spostamento vengono fatti di propria iniziativa in modo non
corretto, si incorre in pericolo di una scossa elettrica e potrebbe prendere fuoco.
●
Non inserisca una barretta, un asta o altri oggetti nello scarico dell’aria o
nell’ingresso. Come il ventilatore è ruotando ad un’alta velocità, provocherà
ferite. Prima della pulitura, sia sicuro arrestare il funzionamento e spegne
l’interruttore.
●
Non utilizzare nessun tipo di filo conduttore come filo fusibile, questo potrebbe
provocare danni inevitabili.
PRECAUZIONI DURANTE IL FUNZIONAMENTO
●
Evitare il contatto diretto con il flusso d’aria per un periodo prolungato, per
ragioni di salute.
!
!
Assicuratevi di aver collegato la messa a terra.
Seguire attentamente le istruzioni.
Il simbolo sopra la figura, significa proibito.
Page 29
– 29 –
ITALIANO
PRECAUZIONI DURANTE IL FUNZIONAMENTO
●
Spegnere il condizionatore e l’interruttore automatico durante le pulizie, in
quanto la ventola interna ad alta velocità può essere pericolosa.
C
A
U
T
E
L
A
!
ARRESTO
ARRESTO
●
Se accade che qualcosa brucia nella stanza dove il condizionatore é in funzione,
ventilare regolarmente la stanza per prevenire insufficienza di ossigeno.
●
Il prodotto deve essere utilizzato secondo le specifiche del fabbricatore e per
nessun altro motivo o scopo.
●
Evitare di mettere in funzione l’apparecchio con le mani bagnate, questo
potrebbe causare gravi danni.
●
Quando il condizionatore é in funzionamento con porta e finistre aperte (l’umidità della stanza é
sempre superiore dell’ 80%) e con il deflettore dell’aria spostato verso il basso oppure automaticamente
in movimento per lungo tempo, l’aqua si condensa sul deflettore dell’aria gocciolando di quando in
quando, bagnando i mobili. Quindi evitare di farlo funzioneare in tali condizioni per un periodo prolungato.
●
Se il calore dell’ambiente è superiore alla portata di raffreddamento o riscaldamento del condizionatore
(se, per esempio, un numero elevato di persone si trovano nella stanza, o se si utilizzano altre
apparecchiature di riscaldamento ecc), non sarà possible raggiungere la temperatura ambiente impostata.
●
Questo apparecchio non è inteso ad uso dei bambini in giovane età o persone inferme a meno che
siano adeguatamente sorvegliati da una persona responsabile per assicurarsi che usino l’apparecchio
in modo sicuro.
●
I bambini in giovane età dovrebbero essere sorvegliati per accertarsi che non giochino con l’apparecchio.
●
Evitare di salire sull’unità esterna e di appoggiare oggetti di ogni tipo.
●
Non spostare il flusso d’aria fredda del condizionatore d’aria in direzione di
elettrodomestici tipo forno, bollitore ecc, oppure verso impianti di riscaldamento
ciò può influire sulla funzionalità di tali apparecchi.
●
Accertarsi che il telaio di supporto esterno sia fissato saldamente e senza
difetti. In caso contrario l’unità esterna può crollare e provocare danni.
●
Evitare di spruzzare oppure gettare acqua direttamente sulla cassetta del
condizionatore d’aria quando si pulisce, poichè ciò può provocare un corto circuito.
●
Evitare di esporre le piante direttamente al flusso d’aria, ciò le danneggerebbe.
●
Spegnere l’interruttore automatico se si prevede di non usare il condizionatore
per un lungo periodo di tempo.
●
Non mettere contenitori d’acqua (tipo vasi da fiori) sull’apparecchio esterno, per
evitare che l’acqua goccioli nella parte interna dell’unità. L’acqua gocciolando
nella parte interna dell’unità danneggia l’isolatore e provoca un corto circuito.
●
Non usi alcuni spruzzi di capelli o dell’aerosol vicino all’unità dell’interno. Questo
prodotto chimico può aderirsi sull’aletta dello scambiatore di calore ed ostruire
il flusso dell’acqua di evaporazione per vuotare la vaschetta. L’acqua cadrà sul
ventilatore tangenziale e causerà l’acqua che spruzza fuori dall’unità dell’interno.
Page 30
– 30 –
UNITA’ INTERNA
IDENTIFICAZIONE E FUNZIONE DEI COMPONENTI
Filtro Dell’Aria
Impedisce alla polvere di entrare nell’ unità interna.
(Vedi pag. 47)
Pannello Anteriore
Indicatori Unità Interna
La spia dell’indicatore segnale la messa in opera.
(Vedi pag. 31)
Deflettore Orizzontale
●
Deflettore Verticale
(Bocca Di Uscita Dell’Aria)
(Vedi pag. 42)
Controllo A Distanza
Emette il segnale di comando all’unità interna, in modo
da far funzionare tutto l’apparecchio.
(Vedi pag. 32)
LARGHEZZA (mm)
780
MODELLO
RAS-08QH5E, RAS-10QH5E
RAS-14QH5E, RAS-18QH5E
ALTEZZA (mm)
280
PROFONDITA’ (mm)
210
IDENTIFICAZIONE E DIMENSIIONI DEL MODELLO
Page 31

– 31 –
ITALIANO
INDICATORI DELL’UNITÀ DI RAFFREDDAMENTO
INDICATORE DI FUNZIONAMENTO
SPIA FILTRO
Quando l’unità ha funzionato per un totale di circa 100
ore, la spia FILTRO si illumina per indicare che è tempo
di pulire il filtro.
SPIA DI FUNZIONAMENTO
Questa si illumina durante il funzionamento.
Durante il riscaldamento la SPIA DI FUNZIONAMENTO
lampeggia nei seguenti casi.
(1) Durante il preriscaldamento
Per circa 2-3 minuti dopo l’avviamento.
(2) Durante lo sbrinamento
Il disgelamento sarà effettuato circa una volta ogni
un’ora in cui il gelo forma sul sullo scambiatore di
calore dell’unità esterna, per 5-10 minuti ogni volta.
SPIA TIMER
Questa spia si illumina quando il timer é in funzion.
TEMPORARY
SWITCH
Premere
Oggetto non conduttore
(bastoncino)
Interrutore Secondario
TEMPORARY
SWITCH
INTERRUTORE SECONDARIO
Usare questo interrutore per accensione e spegnimento quando il comando a distanza non funziona.
[Utilizzare un oggetto non conduttore (per esempio uno stuzzucadenti)]
● Quando si preme l’interruttore di servizio, l’apparecchio funziona secondo le modalità precedentemente
impostate.
● Quando il funzionamento avviene utilizzando l’interrutore secondario, dopo che l’alimentazione é disattivata
e quindi riattivata, il modo di funzionamento é automatico.
Page 32

– 32 –
˚
CH
RESET
˚
CH
AUTOMATICO
RISCALDAMENTO
DEUMIDIFICAZIONE
RAFFREDDAMENTO
VENTILATORE
VELOCITA’ VENTILATORE
BASSA
MEDIA
ALTA
SPEGNIMENTO AUTOMATICO
ARRESTO (CANCELLAZIONE)
AVVIO (RISERVA)
AVVIO/ARRESTO
ORARIO
IMPOSTAZIONE TIMER
SELETTORE TIMER
ACCENSIONE VIA TIMER
SPEGNIMENTO VIA TIMER
OSCILLAZIONE AUTOMATICA
● Finestrella emissione segnali/simbolo trasmissione
Puntare questa finestrella verso l’unità interna quando si desidera comandare il
funzionamento di quest’ultima. II marchio di trasmissione lampeggia quando viene
trasmesso un segnale.
● Display
Questo display indica la temperatura ambiente selezionata, l’orario corrente, lo stato
del timer, la funzione e l’intensità di circolazione selezionati.
● Tasto AVVIO/ARRESTO
Premere questo tasto per avviare il funzionamento. Premerlo nuovamente per
interrompere il funzionamento.
● Tasto di spegnimento automatico
Controlla la funzione di spegnimento automatico.
● Tasti controllo temperatura
Utilizzare questi tasti per aumentare o diminuire l’impostazione della temperatura.
(Tenere premuto per cambiare il valore più in fretta).
● Tasto del tempo
Usare questo tasto per controllare e regolare l’orario e la data.
● Tasti di resettamento (RESET)
● Tasto selezione di funzionamento
Utilizzare questo tasto per selezionare il modo di funzionamento.
Ogni volta che il tasto viene premuto, il modo cambia da (AUTO) a
(Riscaldamento) e quindi a (Deumidificazione), (Raffreddamento) e
(Ventilatore) in sequenza.
● Tasto velocità ventilatore
Questo tasto determina l’intensità della circolazione dell’aria. Ogni volta che questo
tasto viene premuto, l’intensità della circolazione cambia da (AUTO) a (ALTA)
e quindi a (MEDIA) e (BASSA) (Questo pulsante permette di selezionare la
velocità della ventola ottimale o preferita per ogni modalità di funzionamento.)
● Tasto di oscillazione automatica
Controlla l’angolo di oscillazione del deflettore orizzontale dell’aria.
● Comando del timer
Usare questo tasto per attivare il timer.
● Tasto di spegnimento via timer Imposta l’ora di spegnimento via timer.
● Tasto di accensione via timer Imposta l’ora di accensione via timer.
● Tasto di memorizzazione Memorizzazione dell’impostazione del timer.
● Tasto di cancellazione Cancellazione dell’impostazione del timer.
NOMI E FUNZIONI DELLE PARTI
TELECOMANDO
● Questo telecomando serve per comandare il funzionamento del l’unità di raffreddamento. Il campo di lavoro del
telecomando è di circa 7 metri. Se l’illuminazione fosse controllata elettronicamente, il campo di lavoro potrebbe
essere inferiore.
Questo telecomando può essere fissata al muro utilizzando l’accessorio apposito in dotazione.
Prima di fissare il telecomando, accertarsi che esso sia in grado di comandare l’unità di raffreddamento.
● Maneggiare il telecomando con cura. Eventuali urti o contatti con l’acqua possono comprometterne la capacità di
trasmissione dei segnali.
● Dopo la sostituzione delle batterie del telecomando, l’unità può impiegare circa 10 secondi per rispondere ai comandi.
Precauzioni per l’uso
● Non lasciare il telecomando nei luoghi seguenti.
● Esposto alla luce solare diretta.
● In prossimità di un dispositivo di riscaldamento.
● Maneggiare l’unità di telecomando con attenzione. Non farlo cadere e proteggerlo
dall’acqua.
● Una volta che l’unità esterna si è fermata, essa non si riavvia per circa 3 minuti (a
meno che non si disattivi e si riattivi l’alimentazione con l’interruttore di accensione
o non si scolleghi e si ricolleghi il cavo di alimentazione).
Ciò serve per proteggere l’unità e non indica un guasto.
● Se si preme il tasto di selezione del modo di funzionamento durante il funzionamento,
l’unità potrebbe fermarsi per circa 3 minuti per motivi di sicurezza.
Page 33

– 33 –
ITALIANO
RESET
■ Dato che le impostazioni sono memorizzate nel telecomando, la volta successiva
sarà sufficiente premere il solo tasto (AVVIO/ARRESTO).
Premere il tasto di selezione delle operazioni in modo che il display indichi
il modo (AUTOMATIO).
● Quando il modo AUTO è stato selezionato, l’unità determina
automaticamente il modo di funzionamento tra RISCALDAMENTO,
RAFFREDDAMENTO o DEUMIDIFICAZIONE a seconda della
temperatura ambiente attuale. Tuttavia il cambiamento del wll di modo di
funzionamento non quando l’unità dell’interno ha collegato multi a tipo
unità esterna.
● Se la funzione selezionata automaticamente dal condizionatore non fosse
soddisfacente, è possibile cambiarla manualmente (riscaldamento,
deumidificatore, raffreddamento o ventola).
Premere il tasto (AVVIO/ARRESTO). II funzionamento viene attivato con
un segnale acustico. Premere nuovamete il tasto per interrompere il
funzionamento.
E’possibile aumentare o diminuire l’impostazione della temperatura quando
necessario per un massimo di 3°C.
Premere il tasto temperatura e la stessa cambierà di 1°C ella
volta.
● La temperatura preimpostata e la temperatura ambiente reale potrebbero essere
leggermente diverse a seconda delle condizioni.
● Nel modo AUTO, il display non indica la temperatura preimpostata. Se si cambia
l’impostazione, l’unità interna produce un segnale acustico.
1
AVVIO
ARRESTO
FUNZIONAMENTO AUTOMATICO
L’unità determina automaticamente il modo di funzionamento, RISCALDAMENTO, RAFFREDDAMENTO o DEUMIDIFICAZIONE
a seconda della temperatura ambiente attuale.
La funzione selezionata combierà a seconda della temperatura ambiente. Tuttavia
il cambiamento del wll di modo di funzionamento non quando l’unità dell’interno ha collegato multi a tipo unità esterna.
Premere il tasto (velocità della ventola). Sono disponibili i modi di selezione
automatica e quello di bassa velocità.
°C
FUNZIONI VARIE
■ Funzione di riavvio automatico
● In caso di interruzione di corrente, l’unità si riavvia automaticamente nella modalità e con la direzione del flusso d’aria precedenti.
(L’unità non è stata spenta con il telecomando.)
● Per spegnere l’unità al ripristino della corrente, disinserire l’interruttore di rete.
Quando si reinserisce l’interruttore di rete, l’unità si riavvia automaticamente nella modalità e con la direzione del flusso d’aria
precedenti.
Nota: 1. Se non richiedete il controllo auto di riavviamento, consulti prego il vostro agente di vendite o OFF tramite telecomando.
2. La funzione di riavvio automatico non è disponibile quando sono impostati il Timer oppure la modalità Sleep Timer.
Page 34

– 34 –
˚
C
RESET
˚
C
RISCALDAMENT
● Utilizzare l’unità per il riscaldamento quando la temperatura esterna scende sotto i 21°C. Quando fa
caldo (sopra i 21°C), il riscaldamento potrebbe non funzionare per motivi di sicurezza dell’unità.
● In ingiungere a trattenere affidabilità degli dispositivo, accontentano adoperano questa dispositivo above
-15°C degli ail’aperta temperatura.
Premere il tasto di selezione delle operazioni in modo che il display
indichi il modo (RISCALDAMENTO).
Impostare l’intensità di circolazione desiderata per mezzo del tasto
della velocità del ventilatore (il display indica l’impostazione).
(AUTO) : L’intensità della circolazione è “ALTA” all’inizio
e diviene automaticamente “MEDIA” o “BASSA”
quando la temperatura preimpostata viene
raggiunta.
(ALTA) : Un modo economico in quanto la temperatura
ambiente aumenta rapidamente.
E’però possibile sentire freddo all’inizio.
(MEDIA) : Modo silenzioso.
(BASSA): Ancora più silenzioso.
Impostare la temperatura ambiente desiderata per mezzo dei tasti
di controllo della temperatura (il display indica le impostazioni).
L’impostazione della temperatura e la temperatura ambiente reale
possono differire leggermente a seconda delle condizioni.
Premere il tasto (AVVIO/ARRESTO). II riscaldamento inzia con
un segnale acustico. Premere nuovamente il tasto per interrompere
il funzionamento.
■
Dato che le impostazioni sono memorizzate nel telecomando, la
volta successiva sarà sufficiente premere il solo tasto (AVVIO/
ARRESTO).
1
2
3
AVVIO
ARRESTO
Page 35

– 35 –
ITALIANO
DEUMIDIFICAZIONE
Utilizzare l’unità per la deumidificazione quando la temperatura ambiente è sopra i 16˚C.
Quando la temperatura ambiente è sotto ai 15˚C, la deumidificazione non funziona.
Premere il tasto di selezione delle operazioni in modo che il display
indichi il modo
(DEUMIDIFICAZIONE).
La ventola viene automaticamente portata sulla velocità bassa.
Il tasto di velocità della ventola non funziona.
Impostare la temperatura ambiente desiderata per mezzo dei tasti
di controllo della temperatura (il display indica le impostazioni).
Per la deumidificazione si consiglia una
temperatura ambiente tra i 20-26°C.
1
Quando la temperatura ambiente è più alta della temperatura impostata:
L’unità deumidifica la stanza riducendo la temperatura ambiente fino al livello preimpostato.
Quando la temperatura ambiente è più bassa della temperatura impostata:
La deumidificazione viene eseguita con la temperatura impostata leggermente più bassa della
temperatura ambiente attuale indipendentemente dall’impostazione della temperatura stessa.
II funzionamento viene interrotto (l’unità interna smette di emettere aria) non appena la temperatura
ambiente diviene più bassa della temperatura impostata.
■ Funzione di deumidificazione
AVVIO
ARRESTO
Premere il tasto (AVVIO/ARRESTO). Le operazioni di
deumidificazione inizieranno con un bip. Premere nuovamente il
tasto per arrestare le operazioni.
■ Dato che le impostazioni sono memorizzate nel telecomando, la
volta successiva sarà sufficiente premere il solo tasto (AVVIO/
ARRESTO).
2
RESET
˚
C
˚
C
Page 36

– 36 –
˚
C
RESET
˚
C
RAFFREDDAMENTO
Utilizzare l’unità per il raffreddamento quando la temperatura esterna è di –10 ~ 43˚C. Se
l’umidità fosse estremamente elevata (maggiore di 80%) all’interno, sulla griglia di uscita
dell’aria dell’unità interna si potrebbe formare del ghiaccio.
Premere il tasto di selezione delle operazioni in modo che il
display indichi il modo (RAFFREDDAMENTO).
Impostare l’intensità di circolazione desiderata col tasto
(VELOCITA’ VENTILATORE) (il display indica l’impostazione).
(AUTO) : L’intensità della circolazione è “ALTA” all’inizio
e diviene automaticamente “MEDIA” o
“BASSA” quando la temperatura preimpostata
viene raggiunta.
(ALTA) : Un modo economico in quanto la temperatura
ambiente diminuisce rapidamente.
(MEDIA) : Modo silenzioso.
(BASSA) : Ancora più silenzioso.
Impostare la temperatura ambiente desiderata con i tasti di
controllo della temperatura (il display indica l’impostazione).
L’impostazione della temperatura e la temperatura ambiente
reale possono differire leggermente a seconda delle condizioni.
Premere il tasto (AVVIO/ARRESTO). II funzionamento viene
attivato con un segnale acustico. Premere nuovamete il tasto
per interrompere il funzionamento. II raffreddamento non si
avvia se l’impostazione della temperatura è più alta della
temperatura attuale della stanza (per quanto la spia
(FUNZIONAMENTO) si illumini). II raffreddamento inizia non
appena viene impostata una temperatura più bassa della
temperatura ambiente.
■ Dato che le impostazioni sono memorizzate nel telecomando, la volta
successiva sarà sufficiente premere il solo tasto (AVVIO/ARRESTO).
1
2
3
AVVIO
ARRESTO
Page 37

– 37 –
ITALIANO
RESET
1
VELOCITA’ DELLA
.....
Se la velocità della ventola AUTO viene impostata durante il riscaldamento
VENTOLA (AUTO) o raffreddamento:
Durante il riscaldamento
● La velocità della ventola cambia automaticamente a seconda della
temperatura dell’aria scaricata.
● Quando la differenza tra la temperatura interna e quella impostata e
troppo elevata, la ventola comincia a girare ad alta velocità (HI).
● Quando la temperatura interna ha raggiunto il valore impostato, la velocità
della ventola si abbassa automaticamente (LOW).
● Quando la differenza tra la temperatura interna e quella impostata e
troppo elevata, la ventola comincia a girare ad alta velocità (HI).
● Raggiuntala, viene eseguito il raffreddamento normale, che cambia la
velocità della ventola e la temperatura ambiente per garantire condizioni
di comfort ottimale.
Durante il raffreddamento
VENTILATORE
E’ possibile utilizzare l’unità semplicemente come un dispositivo per la circolazione dell’aria.
Utilizzare questa funzione per asciugare l’interno dell’unità interna alla fine dell’estate.
Premere il tasto di selezione delle operazioni in modo che il
display indichi il modo (VENTILATORE).
Premere il tasto (VELOCITA’ VENTILATORE).
Premere il tasto (AVVIO/ARRESTO). II funzionamento viene
attivato con un segnale acustico. Premere nuovamente il tasto
per interrompere il funzionamento.
AVVIO
ARRESTO
2
Page 38

– 38 –
RESET
COME IMPOSTARE IL TIMER
Timer accensione/segnimento
● L’unità si accende (o si spegne) e
si spegne (o si accende) agli orari
determinati.
● La prima operazione di accensione/
spegnimento avviene all‘orario
preimpostato che viene raggiunto
per primo.
● La freccia che appare sul display
indica la sequenza delle operazioni
di accensione/spegnimento.
1
Premere il tasto
(SPEGNIMENTO VIA
TIMER) in modo che
l’indicazione
(ARRESTO) del display
lampeggi.
Timer spegnimento
Si può far sì che il condizionatore si
spenga all’ora attuale.
Dopo aver cambiato le
batterie:
Come cancellare un’impostazione
Puntare il telecomando verso l’unità interna e premere il tasto (CANCELLAZIONE).
L’indicazione (RISERVA) si spegne con un segnale acustico e la spia (TIMER) sull’unità interna
si spegne a sua volta.
1
Impostare il giorno ed il
mese con i tasti di controllo del
timer.
1
Premere il tasto
(SPEGNIMENTO VIA TIMER).
L’indicazione (ARRESTO)
lampeggia sul display.
1
Premere il tasto
(ACCENSIONE VIA TIMER).
L’indicazione (ACCENSIONE)
lampeggia sul display.
2
Regolare l’orario di
spegnimento con i tasti
di controllo del timer.
Premere il tasto
(RISERVA).
3
Premere il tasto
(ACCENSIONE VIA
TIMER) in modo che
l’indicazione
(ARRESTO) si accenda e
quella (ACCENSIONE)
lampeggi.
ATTENZIONE
E’possibile impostare uno solo dei timer di
spegnimento, accensione o accensione/spegnimento.
Timer accensione
● L’unità si accende
all’ora impostata.
ORARIO,
GIORNO,
MESE (ora
esatta, giorno,
mese)
SPEGNIMENTO
VIA TIMER
ACCENSIONE
VIA TIMER
RISERVA
CANCELLAZIONE
M D
M D
AM
Arresto
Avvio
AM
Avvio
Arresto
PM
PM
AM
PM
Avvio
Arresto
Page 39

– 39 –
ITALIANO
3
Puntare il telecomando verso l’unità interna e premere il tasto (RISERVA).
Il marchio (ARRESTO) rimane illuminato invece di lampeggiare e l’indicazione
(ORARIO) si illumina. Viene prodotto un segnale acustico e la spia
(TIMER) sull’unità interna si illumina.
● L’indicazione dell’orario
scompare automaticamente in
10 secondo.
● Per controllare l’impostazione
corrente dell’orario premere due
volte il tasto (ORARIO).
L’impostazione dell’orario corrente
è ora completa.
● Il timer può essere utilizzato in tre modi: timer spegnimento, timer accensione, e timer
spegnimento/accensione (accensione/spegnimento). Come prima cosa impostare l’orario
corretto in quanto esso serve come riferimento.
● A questo punto le impostazioni sono memorizzate nel telecomando e basta semplicemente
premere il tasto (RISERVA) per utilizzare le stesse impostazioni la volta successiva.
2
Premere il
tasto
(ORARIO).
3
Impostare l’ora esatta con i tasti
di controllo del timer.
Esempio: L’orario corrente è 1:30 p.m.
2
Impostare l’ora di
spegnimento con i tasti di
controllo del timer.
L’impostazione dell’orario di
spegnimento è ora completa.
Esempio: L’unità si spegne alle 11:00 p.m.
Esempio:
L’apparecchio si accenderà a 7.00 a.m.. Questo completa
l’impostazione della funzione oraria.
4
Impostare l’ora di
accensione con i tasti di
controllo del timer.
5
Puntare il telecomando verso l’unità interna e premere il tasto (RISERVA).
Il marchio (AVVIO) rimane illuminato invece di lampeggiare e l’indicazione
(ORARIO) si illumina. Viene prodotto un segnale acustico e la spia
(TIMER) sull’unità interna si illumina.
3
Puntare il telecomando verso l’unità interna e premere il tasto (RISERVA).
Il marchio (AVVIO) rimane illuminato invece di lampeggiare e l’indicazione
(ORARIO) si illumina. Viene prodotto un segnale acustico e la spia
(TIMER) sull’unità interna si illumina.
2
Impostare l’ora di
accensione con i tasti di
controllo del timer.
Esempio:
L’apparecchio si spegnerà a 10.30 p.m. e sarà acceso a 7.00 a.m..
Questo completa l’impostazione della funzione oraria.
4
Premere nuovamente il tasto (ORARIO).
L’indicazione dell’orario rimane illuminata invece di
lampeggiare.
PM PM
AM
PM
PM
PM
AM
AM
AM
AM
PM
PM
Page 40

– 40 –
COME IMPOSTARE IL TIMER PER LO SPEGNIMENTO AUTOMATICO
Modo
Timer spegimento
automatico
Indicazione
1 ora 2 ore 3 ore 7 ore
Cancellazione timer
1
4444
SPEGNIMENTO
H
H
AM
AM
1
Impostare il timer di accensione.
Come prima cosa impostare l’orario corretto in quanto esso serve come riferimento
(vedere le pagine per l’impostazione dell’orario corrente). Premere il tasto
(SPEGNIMENTO) ed il display cambierà come indicato in basso.
Timer spegnimento automatico: L’unità rimane in funzione per il numero
di ore designato (1, 2, 3 o 7) e quindi si spegne.
Puntare il telecomando verso l’unità interna e quindi premere il tasto
(SPEGNIMENTO).
Le informazioni sul timer vengono visualizzate sull’unità di telecomando.
La spia (TIMER) sull’unità interna si illumina con un segnale acustico.
Quando il timer per lo spegnimento automatico è stato impostato, il
display indica l’orario di spegnimento.
Esempio: Se si imposta il timer per
3 ore alle 11:38 p.m., l’orario di
spegnimento è alle 2:38 a.m.
2
Premere il tasto (SPEGNIMENTO) ed impostare il timer per lo
spegnimento automatico.
Per il riscaldamento:
In questo caso, l’apparecchio si
spegne dopo 2 ore (alle ore 1:38) e si
riaccende presto in modo tale che la
temperatura stabilita venga raggiunta
alle ore 6:00 del giorno seguente.
L’unità viene spenta dal timer per lo
spegnimento automatico e viene accesa dal
timer di accensione.
Come cancellare un’impostazione
Puntare il telecomando verso l’unità interna e premere il tasto (CANCELLAZIONE).
L’indicazione (RISERVA) si spegne con un segnale acustico e la spia (TIMER) sull’unità interna si
spegne a sua volta.
H
Page 41

– 41 –
ITALIANO
Particolari riguardanti il timer per lo spegnimento automatico
L’unità controlla automaticamente I’intensità della circolazione e la
temperatura ambiente in modo da ottenere un funzionamento
silenzioso e non dannoso alla salute delle persone.
● Se non sono stati impostati i valori “data” od “ora”, la funzione
“riposo” non può essere utilizzata.
● Se la funzione “riposo” viene selezionata dopo aver impostato
il temporizzatore, solo la prima verrà attivata.
● Altre funzioni orarie non possono essere utilizzate durante le
operazioni di “riposo”.
● Una volta terminata la funzione “riposo” e selezionato
nuovamente il tasto SLEEP (riposo), questa riprenderà i
valori precedentemente impostati.
● La funzione “riposo” è effettiva una sola volta.
NOTE
Page 42

– 42 –
DEFLETTORI ARIA
1
Regolazione del flusso dell’aria condizionata verso l’alto
e verso il basso.
Il deflettore d’aria viene automaticamente impostato con
angolazioni specifiche per ogni operazione. Il deflettore
può essere fatto oscillare su e giù continuamente;
alternativamente è possible impostare l’angolazione
desiderata usando il tasto “ (AUTO SWING Oscillazione automatica)”.
● Premendo il tasto di regolazione “ (AUTO
SWING)” per la prima volta, il deflettore orizzontale
dell’aria si muove su e giù. Se il tasto viene premuto
una seconda volta, il deflettore si ferma nella
posizione in cui si trova. Trascorrono diversi secondi
(circa 6 secondi) prima che il deflettore inizi a
muoversi.
● Regolare il deflettore entro il campo di regolazione
indicato qui a destra.
● Quando si spegne il condizionaore il deflettore
orizzontale si ferma nella posizione in cui la bocca di
uscita dell’aria viene chiusa.
RESET
2
Regolazione del flusso dell’aria condizionata verso sinistra e
verso destra.
Afferrare il deflettore dell’aria come indicato nella figura e
regolare il flusso dell’aria verso sinistra e verso destra.
ATTENZIONE
● Nell’operazione di “Raffreddamento” non utilizzare il
deflettore orizzontale dell’aria in movimento per lungo
tempo. Si potrebbe formare della condensa sul
deflettore e l’acqua gocciolerebbe giù.
!
Circa 15˚
Circa 60˚
Verticale
Durante il
riscaldamento
Durante il
raffreddamento e la
deumidificazione
Circa 45˚
Circa
30˚
Verticale
Page 43

– 43 –
ITALIANO
COME CAMBIARE LE BATTERIE DEL TELECOMANDO
1
Rimuovere il coperchio come indicato nella figura ed estrarre
le batterie scariche.
=
2
Inserire le nuove batterie.
Fare corrispondere la direzione delle batterie con i marchi
all’interno del vano.
Premere e quindi tirare
nella direzione della freccia
CAUTELA
1. Non utilizzare batterie vecchie e nuove o tipi diversi di batterie assieme.
2. Rimuovere le batterie quando si prevede di non utilizzare il telecomando
per 2 o 3 mesi.
!
Page 44

– 44 –
CONSIGLI PRATICI PER IL FUNZIONAMENTO IDEALE
Temperatura Ambiente Appropriata
Ricorrere All’uso Delle Tende
Ventilazione
Utilizzo Del Timer In Modo Efficace
Non Dimenticare Di Pulire Il Filtro
Dell’aria
Regolare La Temperatura Adatta A
Bambini Piccoli E Grandi
Avvertenza
Una temperatura da
gelo danneggia la salute e incide sul
consumo di elettricità.
Tenendo le
tende chiuse é
possibile
ridurre il calore
che entra nella
stanza
attraverso i
vetri.
Durante la notte è bene utilizzare la modalità
di funzionamento timer assieme alla sveglia
del mattino. Si potrà così dormire in un
ambiente a temperatura confortevole.
Utilizzare il timer in modo efficace.
Prestare particolare attenzione alla
temperatura ambiente e alla direzione del
flusso dell’aria dove ci sono bambini piccoli e
grandi e persone anziane che
dormono.
Cautela
Evitare di tenere la stanza chiusa per lungo
tempo, aprire porta e finistre, di quando in
quando, per
riciclare l’aria
della stanza.
Un filtro dell’aria impolverato riduce il volume
dell’aria e il rendimento del raffreddamento.
Per evitare uno spreco inutile di energia, pulire
il filtro ogni due settimane.
!
!
Page 45

– 45 –
ITALIANO
UNFORMAZIONI UTILI
Il Condizionatore D’aria E La Fonte Di Calore Nella Stanza
Quando Non Viene Usato Per Un Periodo Prolungato
Quando C’è Il Temporale Con Fulmini
Attenzione
Se la quantità di calore nella stanza é superiore alla
portata di raffreddamento del condizionatore d’aria
(per esempio: la presenza di più persone nella stanza,
l’utilizzo di impianti di riscaldamento ecc...) non sarà
possibile raggiungere la temperatura ambiente
prefissata.
Quando si prevede di non usare il condizionatore
d’aria per un periodo prolungato togliere il cavo di
alimentazione dalla presa. Se l’alimentazione rimane
“ON” e non viene interrotta il condizionatore continua
a consumare circa 8W nell’operazione controllo
circuito anche se il modo di funzionamento é OFF/
Arresto.
Avvertenza
Per evitare che l’unità si danneggi durante una scarica
di fulmine, interrompere il funzionamento dell’unità e
togliere la spina dalla presa.
ARRESTO
!
!
Interferenza da rumore elettrico
Attenzione
Per evitare l’interferenza di rumore, disponga prego
l’unità dell’interno ed il relativo regolatore a distanza
almeno 1m via dai prodotti elettrici.
!
Page 46

– 46 –
1
Aprire il pannello anteriore.
● Estrarre il pannello frontale sollevandone le
estremità con le mani.
2
Togliere i filtri.
● Spingere verso l’alto per liberare i gancetti ed
estrarre il filtro.
3
4
Inserire i filtri.
● Montare il filtro assicurandosi che il lato con la scritta
“FRONT” sia rivolto verso di voi.
● Dopo aver inserito i filtri, premere sul pannello
anteriore in corrispondenza delle tre frecce come
mostrato nella figura e chiudere.
Note:
● Quando rimuovono i filtri di pulizia dell’aria, segua prego i suddetti filtri.
● La capienza di reffreddamento è indebolita un po’e la velocità di reffreddamento diventa più
lenta quando i filtri di pulizia dell’aria sono utilizzati. Così, regoli la velocità del ventilatore “a
MASSIMO” quando usando esso in questa circostanza.
● I filtri di pulizia dell’aria possono essere lavati ed usati fino a 20 volte, usando un aspirapolvere o
la sciacquatura del filtro sotto l’acqua di rubinetto funzionante. Il numero di codice di questo filtro,
da indicarsi al momento dell’ordinazione, è <SPX-CFH11>.
● Non utilizzate il condizionatore senza filtro. Polvere potrebbe depositarsi all’interno dello stesso e
causare malfunzionamenti.
La manutenzione e pulizia devono essere eseguite esclusivamente da personale di servizio qualificato.
Prima di iniziare la pulizia, arrestare il funzionamento e togliere potenza.
CAUTELA
!
CAUTELA
!
Fissando I filtri di pulizia dell’aria al filtro.
● Fissi I filtri di pulizia dell’aria alla struttura
delicatamente comprimendola entrambi i lati e liberisi
dopo l’inserzione nella struttura del filtro.
Non pieghi il filtro di pulizia
dell’aria come può danneggiare
la struttura.
FISSAGGIO DEI FILTRI DI PULIZIA DELL’ARIA
Page 47

– 47 –
ITALIANO
1
2
3
MANUTENZIONE
1. FILTRO ARIA
Pulire il filtro dell’aria in quanto esso rimuove la polvere dalla stanza. Quando il filtro viene intasato dalla
polvere il flusso dell’aria diminuisce e la portata di raffreddamento viene ridotta. Inoltre, l’apparecchio può
divenire rumoroso. Accertarsi di pulire regolarmente il filtro seguendo la procedura indicata in basso.
PROCEDURA
CAUTELA
La manutenzione e pulizia devono essere eseguite esclusivamente da personale di servizio qualificato.
Prima di iniziare la pulizia, arrestare il funzionamento e togliere potenza.
CAUTELA
NOTE:
● Il filtro di pulizia dell’aria dovrebbe essere pulito ogni mese o più presto se il caricamento notevole
accade. Una volta usato fuori orario, può slacciare la relativa funzione di deodorizzazione. Per le
prestazioni massime, è suggerito per sostituirlo ogni 3-6 mesi secondo i requisiti di applicazione.
!
!
Aprire il pannello frontale ed estrarre il filtro
● Delicatamente alzi e rimuova il filtri di pulizia
dell’aria dalla struttura del filtro dell’aria.
Polveri di vuoto dal filtro dell’aria e dal filtro di
pulizia dell’aria usando un aspirapolvere. Se ci
è troppa risciacquatura della polvere soltanto
sotto l’acqua di rubinetto funzionante e spazzolila
delicatamente con una spazzola di setola molle.
Permetta che il flitro si asciughi in schermo.
● Reinserisca il filtro di pulizia dell’aria alla
struttura del filtro. Regoli il filtro con la parte
anteriore “ANTERIORE” dei rivestimenti del
contrassegno e scanalili nell’originale
dichiarano.
● Dopo aver inserito i filtri, premere sul pannello
anteriore in corrispondenza delle tre frecce
come mostrato nella figura e chiudere.
● Non lavare il filtro con acqua calda a temperatura superiore ai 40°C. Il filtro potrebbe altrimente
deformarsi.
● Quando si lava il filtro, eliminare la maggior parte dell’acqua scuotendolo e quindi lasciare asciugare
all’ombra; non esporre il filtro direttamente alla luce solare. Il filtro potrebbe altrimenti defomarsi.
● Non usi il detersivo sul filtro di pulizia dell’aria come un certo detersivo può deteriorare le prestazioni
elettrostatiche del filter.
Page 48

– 48 –
2. Pulizia del pannello frontale
● Rimuovere il pannello frontale e lavare con acqua.
Lavare con una spugna morbida.
Utilizzare un detergente neutro e lavare con acqua.
● Se il pannello frontale non viene rimosso, pulirlo
con un panno morbido ed asciutto. Pulire il
telecomando con un panno morbido ed asciutto.
● Asciugare completamente eventuali tracce d’acqua
sul ricevitore segnali dell’unità interna in modo da
evitare problemi.
Estrazione del pannello frontale.
Nel togliere o inserire la griglia di aspirazione
assicurarsi di trattenerla con entrambe le mani.
Per rimuovere il pannello frontale
● Sollevare completamente il pannello frontale
con le mani e liberarlo facendo leva con la
mano destra, abbassare leggermente il
pannello ed estrarlo.
Per montare il pannello frontale
● Spingere le sporgenze del braccio destro e
del braccio sinistro nelle flange dell’unità e
inserirle bene nelle aperture.
CAUTELA
● Non spruzzare acqua direttamente sul condizionatore durante le
pulizie. Ciò può causare un corto circuito.
● Non utilizzare acqua calda (sopra i 40˚C), benzina, acido, solvente o
spazzole, in modo da evitare di danneggiare la superficie della plastica.
!
Sporgenza
Apertura
Flangia
Page 49

– 49 –
ITALIANO
3. MANUTENZIONE ALL’INIZIO DI UN LUNGO PERIODO DI INUTILIZZO
● Far funzionare l’unità nella modalità
di (RAFFREDDAMENTO), con la temperatura
regolata a 32˚C e la ventola a velocità ALTA per
circa mezza giornata, quando c’ è bel tempo, per
asciugare l’intera unità.
● Togliere corrente dalla presa.
CONTROLLI DA FARE DI QUANDO IN QUANDO
La manutenzione e pulizia devono essere eseguite esclusivamente da personale di servizio qualificato.
Prima di iniziare la pulizia, arrestare il funzionamento e togliere potenza.
CAUTELA
!
CONTROLLARE I PUNTI SEGUENTI OGNI SEI MESI OPPURE UNA VOLTA ALL’ANNO.
CONTATTARE IL RIVENDITORE IN CASO DI NECESSITÀ.
1
2
3
La messa ferra é disattivata, oppure è intatta?
L’unità esterna è inclinata oppure instabile, e il supporto è intaccato dalla
ruggine?
Inserita
Saldamente
Controllate che la spina sia ben inserita nella presa di corrente e che non
ci sia mancanza di contatto tra le due.
Page 50

– 50 –
ASSISTENZA VENDITA E GARANZIA
CONTROLLA I SEGUENTI PUNTI QUANDO VIENE RICHIESTA L’ASSISTENZA VENDITA.
● Il fusibile è intatto?
● Il voltaggio è estremamente alto o basso?
● L’interruttore automatico è acceso?
● Il filtro dell’aria è stato pulito?
● La luce del sole cade direttamente sull’unità esterna?
● Il flusso dell’aria dell’unità esterna è ostruito?
● Vi sono porte o finestre aperte oppure vi sono fonti di calore
nella stanza?
● La temperatura impostata è appropriata?
CONDIZIONE CONTROLLA I PUNTI SEGUENTI
Notes
● Durante il funzionamento silenzioso/riposo oppure quando si interrompe il
funzionamento si possono a volte riscontrare i fenomeni indicati di seguito: ma
non sono comunque segni di funzionamento anormale.
(1) Un leggero rumore prodotto dal flusso del liquido refrigerante all’interno
del ciclo.
(2) Un leggero rumore di sfregamento prodotto dal contenitore della ventola
che viene raffreddato e quindi gradualmente riscaldato quando il
funzionamento si interrompe.
● Il condizionato d’aria potrebbe essere fonte.di odori in quanto vari odori, prodotti
da fumo, cibi, cosmetici e così via, possono aderire ad esso. Quindi il filtro
dell’aria e l’evaporatore devono essere puliti con regolarità per ridurre possibili
odori.
Quando il condizionatore
non funziona
Quando il condizionatore
non raffredda bene
Quando il condizionatore
non riscalda bene
●
Se dopo aver svolto le sopra indicate ispezioni il condizionatore d’aria non dovesse funzionare, contattare il
rivenditore immediatamente. Comunicare al rivenditore il numero del modello dell’unità, il numero di fabbricazione,
la data di installazione. Informarlo anche del tipo di guasto.
●
L’alimentazione elettrica deve essere del voltaggio specificato, altrimenti il condizionatore può guastarsi o non
raggiungere la capacità specificata.
Page 51

– 51 –
ITALIANO
ATTENZIONE:
Se l’ambiente è illuminato da luce artificiale, specialmente se soffusa, è possibile che si noti una variazione
dell’intensità luminosa al momento dell’accensione dell’apparecchiatura.
Questo tipo di fenomeno non comporta alcuna conseguenza.
Si raccomanda di osservare attentamente le condizioni locali dell’Azienda fornitrice di energia elettrica.
MEMO
.....................................................................................................................................................................................
.....................................................................................................................................................................................
.....................................................................................................................................................................................
.....................................................................................................................................................................................
.....................................................................................................................................................................................
.....................................................................................................................................................................................
.....................................................................................................................................................................................
.....................................................................................................................................................................................
.....................................................................................................................................................................................
.....................................................................................................................................................................................
.....................................................................................................................................................................................
.....................................................................................................................................................................................
.....................................................................................................................................................................................
.....................................................................................................................................................................................
.....................................................................................................................................................................................
.....................................................................................................................................................................................
.....................................................................................................................................................................................
.....................................................................................................................................................................................
.....................................................................................................................................................................................
.....................................................................................................................................................................................
.....................................................................................................................................................................................
.....................................................................................................................................................................................
.....................................................................................................................................................................................
.....................................................................................................................................................................................
Minimi Massimo Minimi Massimo
Dell’interno
Lampadina asciutta °C21322027
Lampadina bagnata °C15231219
Esterno
Lampadina asciutta °C21 43 2 21
Lampadina bagnata °C15 26 1 15
Nota
● Eviti di usando il condizionatore dell’aria della stanza per il funzionamento di raffreddamento quando la
temperatura esterna è inferiore a -10°C (14°F).
Le temperature massime e minime suggerite dei lati caldi e freddi dovrebbero essere come qui sotto:-
Raffreddandosi Riscaldando
Page 52

– 52 –
MEMO
.....................................................................................................................................................................................
.....................................................................................................................................................................................
.....................................................................................................................................................................................
.....................................................................................................................................................................................
.....................................................................................................................................................................................
.....................................................................................................................................................................................
.....................................................................................................................................................................................
.....................................................................................................................................................................................
.....................................................................................................................................................................................
.....................................................................................................................................................................................
.....................................................................................................................................................................................
.....................................................................................................................................................................................
.....................................................................................................................................................................................
.....................................................................................................................................................................................
.....................................................................................................................................................................................
.....................................................................................................................................................................................
.....................................................................................................................................................................................
.....................................................................................................................................................................................
.....................................................................................................................................................................................
.....................................................................................................................................................................................
.....................................................................................................................................................................................
.....................................................................................................................................................................................
.....................................................................................................................................................................................
.....................................................................................................................................................................................
.....................................................................................................................................................................................
.....................................................................................................................................................................................
.....................................................................................................................................................................................
.....................................................................................................................................................................................
.....................................................................................................................................................................................
.....................................................................................................................................................................................
.....................................................................................................................................................................................
.....................................................................................................................................................................................
.....................................................................................................................................................................................
.....................................................................................................................................................................................
.....................................................................................................................................................................................
.....................................................................................................................................................................................
.....................................................................................................................................................................................
.....................................................................................................................................................................................
.....................................................................................................................................................................................
Page 53

– 53 –
ESPAÑOL
ACONDICIONADOR DE AIRE PARTIDO DEL TIPO
UNIDAD INTERIOR
MODELO
UNIDAD INTERIOR
RAS-08QH5E
RAS-10QH5E
RAS-14QH5E
RAS-18QH5E
Instruction manual Page 1~26
To obtain the best performance and ensure years of trouble free use, please read this instruction manual completely.
Manuale di istruzioni Pag. 27~52
Per garantire la migliore prestazione e la più lunga durataleggere attentamente e al completo le seguanti istruzioni.
Manual de instrucciones Página 53~78
Para obtener el mejor funcionamiento y asegurar años de uso libre de problemas, lea cuidadosamente este manual de
instrucciones.
O‰ЛБ›В˜ XВИЪИЫМФ‡ ™ÂÏ›‰· 79~104
°И· ЩЛУ О·П‡ЩВЪЛ ‰˘У·Щ‹ ·fi‰ФЫЛ О·И ЩЛУ М·ОЪФ¯ЪfiУИ· О·И ¯ˆЪ›˜ ЪФ‚П‹М·Щ· ¯Ъ‹ЫЛ ЩЛ˜ Ы˘ЫОВ˘‹˜ ·˘Щ‹˜, ·Ъ·О·ПФ‡МВ
‰И·‚¿ЫЩВ П‹Ъˆ˜ ЩИ˜ Ф‰ЛБ›В˜ ¯ВИЪИЫМФ‡ ЩЛ˜.
Инструкция по эксплуатации
стр. 105~130
Для обеспечения наилууших эксплуатационных характеристик и многолетней безотказной работы оборудования необходимо
полностыо оэнакомиться с данной Инструкцией по эксплуатации.
RAS-08QH5E
RAS-10QH5E
RAS-14QH5E
RAS-18QH5E
Page 54

– 54 –
!
●
Lea cuidadosamente las “Precauciones de Seguridad” antes de poner en funcionamiento la unidad para asegurarse de
que la usa correctamente.
●
Preste especial atención a las señales de “ Warning” (advertencia) y “ Caution” (precaución). La sección
“advertencia” contiene información que si no se sigue rigurosamente, puede ocurrir una muerte o heridas graves. La
sección “precaución” contiene información que de no seguirse adecuadamente podría dar como resultado consecuencias
graves. Siga todas las instrucciones rigurosa mente para mantenerse seguro.
●
Las señales indican los siguientes signficados.
●
Por favor, guarde este manual después de leerlo.
ADVERTENCIA
PRECAUCIÓN
!
!
A
D
V
E
R
T
E
N
C
I
A
!
ADVERTENCIA
!
●
Cuando hay tormentas, desconecte el interruptor.
PRECAUCIONES DE SEGURIDAD
PRECAUCIONES DURANTE LA INSTALACION
●
No reconstruya la unidad.
Puede que occura un escape de agua, un corto circuito o fuego si usted mismo
realiza la reconstrucción de la unidad.
●
Por favor pida a su agente de ventas o técnico cualificado que realice la
instalación de la unidad. Puede que ocurra un escape de agua, un corto circuito
o fuego si usted mismo realiza la instalación.
●
Por favor, utilice una línea de tierra.
No coloque la línea de tierra cerca de agua, tubos de gas, conductores de luz,
o la línea de tierra del teléfono. La instalación inapropiada de la línea de tierra
puede causar una sacudida eléctrica.
●
Debiera ser instalado un interruptor dependiendo del lugar de montaje de la
unidad. Sin interruptor, hay peligro de sacudida eléctrica.
●
No la instale cerca de un lugar donde hay gas inflamable. La unidad exterior
puede arder si el gas inflamable gotea sobre ella.
●
Asegúrese de que la circualción de agua es flúida cuando instale la manguera
de drenaje.
PRECAUCIONES DURANTE EL DESPLAZAMIENTO O MANTENIMIENTO
●
Si una situación anormal aparece (como olor a quemado), pare el funcionamiento
de la unidad y desconecte el interruptor. Contacte con su agente. Si continúa la
unidad en funcionamiento en circustancias anormal es puede que ocurra una avería,
un corto circuito o se incendie la unidad.
●
Contacte a su agente para su mantenimiento. Un inadecuado automantenimiento
puede causar una sacudida eléctrica y fuego.
●
Contacte a su agente si necesita remover y reinstalar la unidad. Puede que ocurra
una sacudida eléctrica si usted mismo remueve y reinstala la unidad
inadecuadamente.
●
Evite por razones de salud estar expuesto a la corriente de aire durante
periodos muy largos.
●
No inserte un dedo, una barra u otros objetos en el enchufe o la entrada de
aire. Como es el ventilador rotando en una velocidad, causará lesión. Antes
de limpiar, sea seguro parar la operación y da vuelta al triturador APAGADO.
●
No utilice ningún conductor como hilo fusible, esto puede causar un accidente
fatal.
PRECAUCIONES DURANTE EL FUNCIONAMIENTO
!
Desconectado
Desconectado
Asegure que la línea de tierra esté conectada.
Indica las instrucciones que se deben seguir.
La señal en la figura indica prohibición.
Page 55

– 55 –
ESPAÑOL
PRECAUCIONES DURANTE EL FUNCIONAMIENTO
●
Por favor apague la unidad y desconecte el interruptor durante su limpieza,
ya que el ventilador interior de alta velocidad puede causar daños.
P
R
E
C
A
U
C
I
Ó
N
!
●
No intente poner en funcionamiento la unidad con las manos húmedas, esto
podría causar un accidente fatal.
●
Cuando la unidad esté funcionando junto con equipos de combustión,
ventile regularmente la habitación para evitar insuficiencia de oxígeno.
●
Este producto debe ser utilizado siguiendo las indicaciones del fabricante
y no para cualquier otro uso deliberado.
●
No salpique o dirija agua al cuerpo de la unidad cuando lo limpie, ya que
esto puede causar un corto circuito.
●
No coloque plantas directamente bajo el flujo de aire, ya que es malo para
las plantas.
●
No se suba en la unidad exterior o ponga objetos sobre ella.
●
Cuando la unidad esté en funionamiento con las ventanas y puertas abiertas, (la humedad de la
habitación es siempre superior al 80%) y con el deflector de aire mirando hacia abajo o moviendose
automáticamente durante un periodo de tiempo largo, se condensará agua en el deflector de aire
y goteará de vez en cuando. Esto mojará sus muebles; por este motivo no ponga en funcionamiento
la unidad en esas condiciones durante mucho tiempo.
●
Si la cantidad de calor en la habitación es superior a la capacidad de refrigeración o calefacción
de la unidad (por ejemplo: más gente entrando en la habitación, utilizando equipos de calor y etc.)
no se podrá alcanzar la temperatura de la habitación actual.
●
Este aparado no es destinado para el uso de los niños o las personas enfermizas a menos que
ellos sean suficientemente supervisados por una persona responsable para asegurarse que puedan
usarlo sin peligro.
●
Los niños deberían ser supervisados para asegurarse que no jugueten con el aparado.
●
No dirija el aire frío que sale del panel del aire acondicionador contra aparatos
domésticos de calor, como un hervidor eléctrico, un horno, etc, ya que esto
puede afectar al funcionamiento del aparato.
●
Asegúrese de que el armazón exterior está siempre estable, firme y sin
defectos. Si no, la unidad exterior podría desplomarse y sería peligroso.
●
Desconecte el interruptor si la unidad no se va a poner en funcionamiento
durante un período largo.
Desconectado
Desconectado
●
No ponga contenedores de agua (como jarrones) sobre la unidad interior
para evitar que el agua gotee en la unidad. El goteo de agua dañará el
aislante interior de la unidad y causará un corto circuito.
●
No utilice ninguna aerosoles del aerosol o de pelo cerca de la unidad de
interior. Este producto químico puede adherir en aleta del cambiador de
calor y bloquear el flujo del agua de la evaporación para drenar la cacerola.
El agua caerá en el ventilador tangencial y causará el agua que salpica
hacia fuera de unidad de interior.
Page 56

– 56 –
UNIDAD INTERIOR
NOMBRES Y FUNCIONES DE CADA COMPONENTE
Filtro De Aire
Para prevenir que el polvo entre en la unidad interior.
(Referirse a la página 73)
Panel frontal
Indicadores De La Unidad Interior
Indicador con luz, muestra la condición del
funcionamiento.
(Referirse a la página 57)
Deflector Horizontal
●
Deflector Vertical (Salida
De Aire)
(Referirse a la página 68)
Mando A Distancia
Envía la señal de operación a la unidad interior. Para
poner en funcionamiento toda la unidad.
(Referirse a la página 58)
ANCHURA (mm)
780
MODELO
RAS-08QH5E, RAS-10QH5E
RAS-14QH5E, RAS-18QH5E
ALTURA (mm)
280
PROFUNDIDAD (mm)
210
NOMBRE DEL MODELO Y DIMENSIONES
Page 57

– 57 –
ESPAÑOL
INDICADORES DE LA UNIDAD DE ENFRIAMIENTO
INDICADOR DE FUNCIONAMIENTO
LÁMPARA FILTRO
Cuando la unidad ha operado unas 100 horas, la lámpara
Filtro se enciende para indicar que es el momento de
limpiar el filtro.
LÁMPARA DE OPERACIÓN
Este lámpara se enciende durante la operación.
La LÁMPARA DE OPERACIÓN destella en los siguientes
casos durante calentamiento.
(1) Durante precalentamiento
Alrededor de 2-3 minutos después de su puesta en
marcha.
(2) Durante la descongelación
La descongelación será realizada alrededor una vez
cada una hora en que la helada forma en en el
cambiador de calor de la unidad al aire libre, por
5-10 minutos cada vez.
LÁMPARA TEMPORIZADOR
Se enciende cuando el temporizador está funcionando.
TEMPORARY
SWITCH
Presione
Varilla no conductora
Interruptor Temporal
TEMPORARY
SWITCH
INTERRUPTOR TEMPORAL
Utilice este interruptor para comenzar la operación y pararla cuando el mando a distancia no funciona.
[Utilizando una varilla no conductora (ejemplo un palillo)]
● Al pulsar el control temporal, la operación será igual a la del modo anteriormente programado.
● Cuando la operación se realiza usando el interruptor temporal después de desconectar la alimentación
y volverla a conectar, la operación se realiza en el modo automático.
Page 58

– 58 –
˚
CH
RESET
˚
CH
AUTOMATICA
CALOR
DESHUMIDIFICACION
FRIO
VENTILADOR
VELOCIDAD DEL VENTILADOR
DEBIL
MODERADO
FUERTE
FUNCION NOCTURNA
PARADA (CANCELACION)
INCIO (RESERVA)
INCIO/PARADA
TIEMPO
AJUSTE CON TEMPORIZADOR
SELECTOR DE TEMPORIZADOR
TEMPORIZADOR DE CONEXION
TEMPORIZADOR DE DESCONEXION
OSCILACION AUTOMATICA
● Ventanilla de emisión de señales/señal de transmisión
Apunte esta ventanilla hacia la unidad interior cuando la controle. La señal de
transmisión parpadea cuando se envía una señal.
● Visuallzador
Indica la temperatura de interior seleccionada, hora actual, estado del temporizador,
función e intensidad de ventilación seleccionada.
● Botón INICIO/PARADA
Presione este botón para empezar la operación. Presiónelo de nuevo para detener
la operación.
● Botón de FUNCIÓN NOCTURNA
Utilice este botón para ajustar el temporizador de función nocturna.
● Botones de control de la TEMPERATURA
Utilice estos botones para aumentar o bajar el ajuste de la temperatura.
(Manténgalos presionados, y el valor cambiará más rápidamente.)
● Botón de la hora
Utilice este botón para ajustar y comprobar la hora y los datos actuales.
● Botones de REPOSICION
● Botón de SELECCIÓN DE OPERACIÓN
Utilice este botón para seleccionar el modo de operación. Cada vez que lo
presione, el modo cambiará de (automático) a (calor) y de
(extracción de la humedad) a (frío) y a (Ventilador) cíclicamente.
● Botón de VELOCIDAD DEL VENTILADOR
Determina la intensidad de ventilación. Cada vez que presione este botón, la
intensidad de ventilación cambiará desde (automático) a (fuerte) a
(moderado) a (débil) (Este botón permite seleccionar la velocidad óptima
o preferida del ventilador para cada modo operativo.)
● Botones de OSCILACION AUTOMATICA
Controla el ángulo del deflector de aire horizontal.
● Controles del TEMPORIZADOR
Utilice estos botones para ajustar el temporizador.
● Botón del TEMPORIZADOR DE DESCONEXION Selecciona la hora de
desconexión.
● Botón del TEMPORIZADOR DE CONEXION Selecciona la hora de conexión.
● Botón de RESERVA Reserva de ajustes de la hora.
● Botón de CANCELACION Cancelación de reserva de la hora.
NOMBRES Y FUNCIONES DE LOS COMPONENTES
MANDO A DISTANCIA
● Controla la operación de la unidad interior. El margen de control es de unos 7 metros. Si el alumbrado interior
se controla electrónicamente, el margen de control puede ser más corto.
Este unidad se puede fijar en la pared utilizando la montura que se suministra. Antes de fijarla, asegúrese de
que la unidad interior se puede controlar con el mando a distancia.
● Maneje el mando a distancia con cuidado. Si se cae o se moja puede alterarse su capacidad para la
transmisión de señales.
● Tras colocar las pilas nuevas en el mando a distancia, deberán transcurrir aproximadamente 10 segundos
hasta que responda a los diferentes comandos.
Precauciones en el uso
● No coloque el mando a distancia en los siguientes lugares.
● En la luz directa del sol.
● Cerca de un calefactor.
● Maneje el mando a distancia cuidadosamente. Tenga cuidado de que no
se caiga al suelo, y protéjalo contra el agua.
● Una vez la unidad exterior se detiene, no se volverá a iniciar durante 3
minutos (a menos que desconecte el botón de alimentación y lo conecte
de nuevo o desenchufe el cable de alimentación y lo vuelva a enchufar).
Esto es para proteger el aparato y no indica ningún fallo.
● Si presiona el botón de selección de operación durante la operación, el
aparato se paratá durante 3 minutos para su protección.
Page 59

– 59 –
ESPAÑOL
RESET
OPERACION AUTOMATICA
La unidad determinará automáticamente el modo de operación, CALOR, FRIO o DESHUMIDIFICACION, dependiendo de la temperatura
de la habitación.
El modo de operación seleccionado cambiará cuando la temperatura del interior varíe.
Sin embargo el cambio del wll del
modo de operación no cuando la unidad de interior conectó con multi el tipo unidad al aire libre.
■ Puesto que los ajustes se almacenan en la memoria del mando a distancia, usted
sólo tiene que presionar el botón (INICIO/PARADA) la próxima vez.
Presione el botón de selección de operación para que el visualizador indique
el modo de operación (automático).
● Cuando se haya seleccionado AUTO, la unidad determinará
automáticamente el modo de operación, CALOR, FRIO, o
DESHUMIDIFICACION, dependiendo de la temperatura de la habitación.
Sin embargo el cambio del wll del modo de operación no cuando la
unidad de interior conectó con multi el tipo unidad al aire libre.
● Si el modo automático seleccionado por la unidad no es satisfactorio,
cambie manualmente el modo de ajuste (calor, deshumidificación, frío
o ventilador).
Presione el botón (INICIO/PARADA).
La operación empezará con un pitido.
Presione el botón de nuevo para detener la operación.
Usted puede subir o bajar el ajuste de la temperatura si es necesario hasta um
máximo de 3°C.
Apriete el botón de temperatura y el ajuste de la
temperatura cambiará a 1°C cada vez.
● La temperatura del preajuste y la temperatura actual de la habitación puede
variar dependiendo de las condiciones.
● El visualizador no indica la temperatura preajustada en el modo
(automático). Si usted cambia el ajuste, la unidad interior producirá un
pitido.
°C
1
INICIO
PARADA
Presione el botón de la velocidad del ventilador (FAN SPEED). Tendrá
disponibles los ajustes automático (AUTO) de baja velocidad (LOW).
DIFERENTES FUNCIONES
■ Control auto restart
● Si se produce un fallo de alimentación eléctrica, el aparato se volverá a poner en marcha automáticamente cuando se restablezca
la corriente con el modo operativo y la dirección del flujo de aire anteriores.
(Ya que la parada no se puede realizar con el mando a distancia.)
● Si no tiene previsto seguir utilizando el aparato cuando se restablezca el suministro eléctrico, apague el acondicionador de aire.
Cuando conecte el disyuntor, se restablecerá el funcionamiento automáticamente en el modo operativa y con las dirección del flujo
de aire anteriores.
Nota: 1. Si usted no requiere control auto del recomenzar, consulte por favor su agente de ventas o OFF por mando a distancia.
2. El Control Auto Restart no está disponible cuando se selecciona el modo operativo Timer o Sleep Timer.
Page 60

– 60 –
˚
C
RESET
˚
C
OPERACION DE CALEFACCION
● Utilice la unidad para calentar cuando la temperatura del exterior esté por debajo de 21°C.
Cuando calienta (por encima de 21°C), la función de calefacción puede no funcionar para
proteger la unidad).
● Para mantener la seguridad del aparato, por favor utilice este aparato con temperatura de
-15°C superior a la temperatura exterior.
Presione el botón de selección de operación para que el
visualizador indique (calor).
Ajuste la intensidad deseada de circulación con el botón de
velocidad del ventilador (el visualizador indica el ajuste).
(AUTOMATICO) : La intensidad de ventilación es
“FUERTE” primero y varía a
“MODERADO” o “DEBIL”
automáticamente cuando se ha
alcanzado la temperatura preajustada.
(FUERTE) : Económico cuando la habitación se
calienta rápidamente. Pero puede sentir
un poco de frío al principio.
(MODE RADO) : Silencioso.
(DÉBIL) : Más silencioso.
Ajuste la temperatura interior deseada con los botones de control
de temperatura (el visualizador indica el ajuste).
El ajuste de la temperatura y la temperatura actual interior
pueden variar dependiendo de las condiciones.
Presione el botón (INICIO/PARADA). La operación de
calefacción empieza con un pitido. Presione el botón otra vez
para detener la operación.
■ Puesto que los ajustes se almacenan en la memoria del mando a
distancia, usted sólo tiene que presionar el botón (INICIO/
PARADA) la próxima vez.
1
2
3
INICIO
PARADA
Page 61

– 61 –
ESPAÑOL
RESET
˚
C
˚
C
OPERACION DE DESHUMECTACION
Utilice la unidad para deshumidificar cuando la temperatura interior esté por encima de 16°C.
Cuando está por debajo de 15°C, la función de deshumectación no funciona.
Presione el botón de selección de operación para que el
visualizador indique (DESHUMECTACION)
La circulación se ajusta a “DÉBIL” automáticamente.
El botón de velocidad del ventilador no opera.
Ajuste la temperatura interior deseada con los botones de
control de temperatura (el visualizador indica el ajuste).
El margen de 20-26°C se recomienda como
temperatura interior para la función de
deshumidificación.
1
■ Función de deshumectación
La siguiente operación se da de dependiendo del ajuste de la temperatura interior.
Cuando la temperatura de la habitación es mayor que la temperatura del ajuste: La unidad
deshumidificará la habitación, reduciendo la temperatura interior al nivel preajustado.
Cuando la temperatura de la habitación es más baja que la temperatura del ajuste: La función de
deshumectación se realizará con la temperatura del interior ajustada ligeramente más baja que la
temperatura actual, sea cual sea el ajuste de la temperatura.
La función se parará (la unidad interior dejará de emitir aire) tan pronto la temperatura de la habitación
sea más baja que la ajustada.
INICIO
PARADA
Presione el botón (INICIO/PARADA). La operación de
deshumidificación empezará con un pitido. Presione el botón
de nuevo para parar la operación.
■ Puesto que los ajustes se almacenan en la memoria del mando a
distancia, usted sólo tiene que presionar el botón (INICIO/
PARADA) la próxima vez.
2
Page 62

– 62 –
˚
C
RESET
˚
C
OPERACION DE REFRIGERACION
Utilice la unidad para enfriar cuando la temperatura exterior sea de –10 ~ 43˚C. Si la
humedad es muy alta (por encima del 80%) en el interior, puede formarse congelación
en la rejilla de salida de aire de la unidad interior.
Presione el botón de selección de operación para que el
visualizador indique (frío).
Ajuste la intensidad deseada de ventilación con el botón
(VELOCIDAD DEL VENTILADOR) (el visualizador indica el
ajuste).
(AUTOMATICO) : La intensidad de ventilación es
“FUERTE” primero y varía a
“MODERADO” o “DEBIL”
automáticamente cuando se ha
alcanzado la temperatura preajustada.
(FUERTE) : Económico y la habitación se enfría más
rápidamente.
(MODE RADO) : Silencioso.
(DÉBIL) : Más silenciosa.
Ajuste la temperatura de interior deseada con los botones de
control de temperatura (el visualizador indica el ajuste).
El ajuste de temperatura y la temperatura actual de la habitación
pueden variar dependiendo de las condiciones.
Presione el botón (INICIO/PARADA). La operación de
refrigeración empieza con un pitido. Presione el botón de nuevo
para detener la operación. La función de refrigeración no empieza
si el ajuste de temperatura es mayor que la temperatura actual
de la habitación (aunque la lámpara (operación) se encienda.)
La función de refrigeración empezará tan pronto ajuste la
temperatura por debajo de la temperatura actual interior.
■ Puesto que los ajustes se almacenan en la memoria del mando a
distancia, usted sólo tiene que presionar el botón (INICIO/
PARADA) la próxima vez.
1
2
3
INICIO
PARADA
Page 63

– 63 –
ESPAÑOL
OPERACION DEL VENTILADOR
Usted puede utilizar la unidad simplemente como circulador de aire. Utilice esta función
para secar la unidad interior por dentro al final del verano.
Presione el botón de selección de operación para que el
visualizador indique (Ventilador).
Presione el botón (VELOCIDAD DEL VENTILADOR).
Presione el botón (INICIO/PARADA). La operación de
circulación empieza con un pitido. Presione el botón de nuevo
para detener la operación.
VELOCIDAD DEL VENTILADOR (AUTO)
.....
Cuando el modo de velocidad del ventilador AUTO se ajusta en
la operación de refrigeración/calefacción:
Para operación
de calefacción
● La velocidad del ventilador cambiará automáticamente de acuerdo con
la temperatura del aire descargado.
● Cuando la diferencia entre la temperatura de la habitación y la temperatura
determinada es grande, el ventilador empieza a funcionar a la velocidad
HI.
● Cuando la temperatura de la habitación llega a la temperatura
determinada, la velocidad del ventilador cambia automáticamente en
BAJO.
● Cuando la diferencia entre la temperatura de la habitación y la temperatura
determinada es grande, el ventilador empieza a funcionar a la velocidad
HI.
● Después de que la temperatura de la habitación haya llegado a la
temperatura preajustada, se realizará la operación de refrigeración, que
cambia la velocidad del ventilador y la temperatura de la sala para
obtener las condiciones óptimas para una refrigeración sana y natural.
Para operación
de refrigeración
1
2
INICIO
PARADA
RESET
Page 64

– 64 –
COMO AJUSTAR EL TEMPORIZADOR
● La unidad de conectará (desconectará)
y desconectará (conectará) a las horas
designadas.
● El intercambio ocutte primero a la hora
preajustada que es más temprana.
● La marca de flecha que aparece en el
visualizador indica la secuencia de las
operaciones de intermitente.
1
Presione el botón
(TEMPORIZADOR DE
DESCONEXION) de
modo que la marca
(DESCONEXION)
parpadee.
Podrá ajustar el aparato para que se
desconecte a la hora preajustada.
Después de haber
cambiado las pilas;
Cancelación de reserva
Diriga la ventanilla de señales del mando a distancia hacia la unidad interior y presione el botón
(CANCELAR).
La señal (RESERVA) se apagará con un pitido y la lámpara (TEMPORIZADOR) de la unidad interior
se apagará.
1
Ajuste el mes y el día
actuales con el botón de
control del TEMPORIZADOR.
1
Presione el botón (TEMPORIZADOR
DE DESCONEXION). La marca
(DESCONEXION) parpadeará en el visualizador.
1
Presione el botón
(TEMPORIZADOR DE CONEXION).
La marca (CONEXION)
parpadeará en el visualizador.
2
Ajuste la hora de
desconexión con el
botón de control del
TEMPORIZADOR.
Presione el botón
(RESERVA).
3
Presione el botón
(TEMPORIZADOR DE
CONEXION) de modo que la
marca (DESCONEXION)
se encienda y la marca
(CONEXION) parpadee.
PRECAUCIÓN
Usted puede ajustar sólo uno de los modos de temporizador, entre temporizador de desconexión
automática, temporizador de conexión automática y temporizador de coenxión/desconexión automática.
● El aparato se
conectará a las
horas designadas.
HORA, DIA, MES
(la hora, el día y
el mes actuales)
TEMPORIZADOR
DE DESCONEXION
TEMPORIZADOR
DE CONEXION
RESERVA
CANCELAR
RESET
M D
M D
AM
Parada
Inicio
AM
Inicio
Parada
PM
PM
AM
PM
Inicio
Parada
Page 65

– 65 –
ESPAÑOL
3
Diriga la ventanilla de señales del mando a distancia hacia la unidad
interior, y presione el botón (RESERVA). La marca (desconexión) empieza
encendida “fijamente” en lugar de intermitente y la señal (RESERVED) se
enciende. Se emitirá un pitido y la lámpara (Temporizador) se encenderá en
la unidad interior.
● La indicación de la hora
desaparecerá automáticamente
en 10 segundos.
● Para comprobar el ajuste de la
hora actual, presione dos veces
el botón (HORA).
● El temporizador se puede utilizar de tres formas: temporizador para la desconexión, temporizador
para la conexión y temporizador para conexión/desconexión (desconexión/conexión). Primero
ajuste la hora actual, ya que sirve como referencia.
● Puesto que los ajustes del tiempo se almacenan en la memoria del mando a distancia, usted
sólo tiene que presionar el botón (RESERVE) para utilizar el mismo ajuste la próxima vez.
2
Presione el
botón (HORA).
3
Ajuste la hora actual con el
botón de control del
TEMPORIZADOR.
Ejemplo: La hora actual es la 1:30 p.m.
2
Ajuste la hora de
desconexión con el botón de
control del TEMPORIZADOR.
El ajuste de la hora de desconexión automática está completado.
Ejemplo: La unidad se desconectará
automáticamente a las 11:00 p.m.
4
Ajuste la hora de conexión
con el botón de control del
TEMPORIZADOR.
5
Diriga la ventanilla de señales del mando a distancia hacia la unidad interior,
y presione el botón (RESERVA).
La marca (conexión) empezará encendida “fijamente” en lugar de intermitente
y la señal (RESERVA) se encenderá. Se emitirá un pitido y la lámpara
(Temporizador) se encenderá en la unidad de interiores.
3
Diriga la ventanilla de señales del mando a distancia hacia la unidad interior,
y presione el botón (RESERVA). La marca (conexión) empezará encendida
“fijamente” en lugar de intermitente y la señal (RESERA) se encenderá. Se
emitirá un pitido y la lámpara (Temporizador) se encenderá en la unidad
interior.
2
Ajuste la hora de conexión
con el botón de control del
TEMPORIZADOR.
Ejemplo:
El aparato dará vuelta apagado en 10,30 P.M. y será girado en 7,00
mañanas.
Ahora los ajuste para la hora de encender-apagar están completos.
4
Presione el botón (HORA) otra vez. La indicación
de la hora empieza encendida “fijamente” en lugar de
intermitente.
El ajuste de la hora actual está completado.
Ejemplo:
El aparato se girará en 7,00 mañanas. Ahora el ajuste para la hora de
conectar está completo.
PM PM
AM
PM
PM
PM
AM
AM
AM
AM
PM
PM
Page 66

– 66 –
COMO AJUSTAR EL TEMPORIZADOR DE DESCONEXION NOCTURNA
Modo
Temporizador de
desconexión
automática por la noche
Indicación
1 hora 2 horas 3 horas 7 horas
Cancelación del temporizador
de desconexión nocturna
44 44
1
1
Ajuste el temporizador de conexión automática.
Ajuste la hora actual primero ya que sirve como referencia (vea las páginas “ajuste de
la hora actual”). Presione el botón (NOCTURNA), y el visualizador cambiará como
se muestra abajo.
Temporizador de desconexión nocturna: La unidad continuará
funcionando durante el número de horas designadas (1, 2, 3 o 7) y luego
se desconectará. Diriga la ventanilla de señales del mando a distancia
hacia la unidad interior y presione el botón (NOCTURNA). La información
del temporizador se visualizará en el mando a distancia. La lámpara
(Temporizador) se encenderá con un pitido desde la unidad interior.
Cuando se haya ajustado el temporizador de desconexión nocturna, el
visualizador indicará la hora de desconexión.
Ejemplo: Si ajusta 3 horas a las
11:38 p.m., la hora de
desconexión será a lás 2:38 a.m.
2
Presione el botón (NOCTURNA) y ajuste el temporizador de
desconexión nocturna.
La unidad se desconectará mediante la función
de desconexión nocturna y se conectará
mediante la función de conexión automática.
Cancelación de reserva
Diriga la ventanilla de señales del mando a distancia hacia la unidad interior y presione el botón
(CANCELAR).
La señal (RESERVA) se apagará con un pitido y la lámpara (TEMPORIZADOR) se apagará en la
unidad interior.
Para calefacción:
En estos casos, el aparato se apagará
en dos horas (a las 1:38 de la mañana)
y se encenderá pronto, de modo que
la temperatura predeterminada se
alcanzará hacia las 6 de la mañana
siguiente.
NOCTURNA
H
H
AM
AM
H
Page 67

– 67 –
ESPAÑOL
Explicación sobre el temporizador de desconexión nocturna
La unidad controla la intensidad de ventilación y la temperatura de
la habitación automáticamente para que sea la más apropiada
para la salud de las personas.
● Si no se ajusta la fecha o la hora actual, no se puede ajustar
el temporizador de desconexión nocturna.
● Si ajusta el temporizador de desconexión nocturna después
de haber ajustado el temporizador a apagado-, o apagado/
encendido, el temporizador de desconexión nocturna entra
en vigor en vez apagado-, encendido/apagado- o apagado/
encendido.
● No puede ajustar otro temporizador durante la operación del
temporizador de desconexión nocturna.
● Cuando se termine el plazo para el temporizador de
desconexión nocturna y cuando se presiona otra vez el botón
de desconexión nocturna, el temporizador de desconexión
nocturna se ajustará como el último ajuste.
● El temporizador de desconexión nocturna surte efecto una
vez solamente.
NOTA
Page 68

– 68 –
AJUSTEZ LE VOLET D’AIR
1
Ajuste del aire acondicionado en dirección hacia arriba o hacia
abajo.
El deflector de aire horizontal se ajusta automáticamente al
ángulo propio que es adecuado para cada operación. Se puede
oscilar el deflector hacia arriba y hacia abajo continúamente y
también se puede ajustar en el ángulo adecuado utilizando el
botón “ (AUTO SWING)”.
● La primera vez que se presiona el botón “ (AUTO
SWING)”, el deflector de aire horizontal oscila hacia arriba
y hacia abajo. La segunda vez que se presiona el botón,
el deflector se para en su posición actual.
Se necesitan varios segundos (unos 6 segundos) antes
de que el deflector empiece a moverse.
● Utilice el deflector de aire horizontal con el alcance de ajuste
mostrado a la derecha.
● Cuando la operación se para, el deflector de aire horizontal
se mueve y se para en la posición donde la salida de aire
se cierra.
RESET
2
Ajuste del aire acondicionado hacia la derecha y la izquierda.
Sujete el deflector de aire vertical como se muestra en la figura y
ajuste el aire acondicionado hacia la derecha y hacia la izquierda.
PRECAUCIÓN
● En la operación de “enfriamiento”, no mantega el deflector
de aire horizontal oscilando durante un periodo de tiempo
largo. Se formará humedad en el deflector de aire horizontal
y también es posible que gotee.
!
alrededor
de 15˚
alrededor
de 60˚
Vertical
En el enfriamiento y
deshumidificación
En el calentamiento
Vertical
alrededor
de 45˚
alrededor
de 30˚
Page 69

– 69 –
ESPAÑOL
COMO CAMBIAR LAS PILAS DEL MANDO A DISTANCIA
1
Extraiga la cubierta como se muestra en la figura y saque las
pilas viejas.
=
2
Instale las pilas nuevas. La dirección de las pilas debe
corresponderse con las marcas de la caja.
Presione y tire hacia la
dirección de la flecha
1. No utilice pilas nuevas y viejas, ni diferentes tipos de pilas juntas.
2. Saque las pilas cuando no utilice el mando a distancia durante 2
ó 3 meses.
PRECAUCIÓN
!
Page 70

– 70 –
MODO IDEAL DE OPERACIÓN
Temperatura adecuada de la
habitación
Instale cortinas o celosías
Ventilación Uso efectivo del temporizador
No se olvide de limpiar el filtro de aire
Por favor, ajuste la temperatura
adecuada para bebés y niños
Advertencia
La temperatura muy
fría es mala para la
salud y es un
desperdicio de energía
eléctrica.
Para reducir el
calor que entra
en la habitación
utilice las
ventanas.
Un filtro de aire con polvo reducirá el volumen
de aire y la eficacia de enfriamiento. Para
prevenir el desperdicio de energía eléctrica,
limpie el filtro cada 2 semanas.
Precaución
No cierre la habitación durante un periodo de
tiempo largo. De vez en cuando abra la puerta
y las ventanas
para que
entre aire
fresco.
Durante la noche, utilice “el modo de operación
del temporizador de desconexión y conexión
nocturna”, junto con la hora de despertarse en
la mañana. De esta amanera disfrutará de una
temperatura ambiente agradable. Por favor,
utilice el temporizador adecuadamente.
Por favor, preste atención a la temperatura
de la habitación y a la dirección del flujo de
aire cuando se ponga en funcionamiento la
unidad para bebés, niños y ancianos que
tienen dificultad de movimiento.
!
!
Page 71

– 71 –
ESPAÑOL
INFORMACIÓN PARA EL USUARIO
El aire acondicionado y las fuentes de calor en la habitación
Cuando no ha funcionado durante un periodo largo
Cuando hay relámpagos
Precaución
Si la cantidad de calor en la habitación es superior
a la capacidad de enfriamiento del aire acondicionado
(por ejemplo: más gente en la habitación, el uso de
equipos de combustión y etc.), no se puede alcanzar
la temperatura preajustada de la habitación.
Cuando la unidad interior no se va a utilizar durante
un periodo de tiempo largo, desconecte el suministro
de energía de la canalización principal. Si el
suministro de energía de la canalización principal
continua “Conectada”, la unidad interior todavía
consume alrededor de 8W en el circuito de control
de operación, incluso estando en el modo
“Desconectado”.
Advertencia
Para porteger toda la unidad cuando hay relámpagos,
pare el funcionamiento de la unidad y desenchufe el
enchufe del tomacorriente.
Desconectado
!
!
Interferencia del ruido eléctrico
Precaución
Para evitar interferencia de ruido, coloque por favor
la unidad de interior y su regulador alejado por lo
menos el 1m lejos de productos eléctricos.
!
TV
Page 72

– 72 –
1
Abra el panel frontal
● Levante el panel frontal soportándolo en ambos lados
por ambas manos.
2
Quite los filtros.
● Empujar hacia arriba para desenganchar los ganchos
y quitar el filtro.
3
4
Fije los filtros.
● Fije los filtros asegurandose que la marca “FRONT”
esté orientada hacia frente.
● Después de fijar los filtros, empuje el panel frontal
a las tres partes indicadas por flechas como se
muestra en el dibujo y ciérrelo.
● Quitando el aire que limpia filtros, por favor siga los susodichos procedimientos.
● La capacidad refrescante es ligeramente debilitada y la velocidad refrescante se hace más lento
cuando el aire que limpia filtros es usado. De este modo, ponga la velocidad de abanico “a ALTO”
usándolo en esta condición.
● El aire que limpia filtros puede ser lavado y usó hasta 20 veces, usando un vacío encargado de limpieza
o enjuague del filtro bajo agua del grifo que corre. El número de codigo de este filtro es <SPX-CFH11>.
Utilize este codigo para ordenarlo.
● No opere el acondicionador de aire con el filtro extraido para evitar que polvo se deposite en el aparato
causando averias.
NOTA:
Es necesario que la limpieza y la manutención sean realizadas únicamente por personal de servicio cualificado.
Antes de empezar la limpieza es necesario parar el accionamiento y cortar el suministro eléctrico.
PRECAUCIÓN
!
PRECAUCIÓN
!
Atadura del aire que limpia filtros al filtro.
● Ate el aire que limpia filtros al marco por suavemente
comprimiendo ello ambos lados y liberación después
de introducción en marco con filtro.
No doblar el aire que limpia el
filtro cuando esto puede causar
daño a la estructura.
ATADURA DEL AIRE QUE LIMPIA FILTROS
Page 73

– 73 –
ESPAÑOL
1
2
3
PRECAUCIÓN
MANTENIMIENTO
1. FILTRO DE AIRE
Limpie el filtro de aire ya que extrae el polvo dentro de la habitación. En caso de que el filtro de aire esté
lleno de polvo, el fluido de aire disminuirá y la capacidad de enfriamiento se verá muy reducida. Además
puede que se escuchen ruidos. Asegúrese de limpiar el filtro siguiendo el procedimiento de abajo.
PROCEDIMIENTO
NOTA:
● El aire que limpia el filtro debería ser limpiado cada mes o más pronto si la carga sensible ocurre.
Cuando horas extras usadas, esto puede soltar su funcuón que desodoriza. Para la interpretación
máxima, es recomendado sustituirlo cada 3-6 meses, según exigencias de aplicación.
Es necesario que la limpieza y la manutención sean realizadas únicamente por personal de servicio cualificado.
Antes de empezar la limpieza es necesario parar el accionamiento y cortar el suministro eléctrico.
PRECAUCIÓN
!
!
Abra el panel frontal y quite el filtro
● Suavemente el levantamiento y quita el aire
que limpia el filtro del filtro de aire marco.
Vacío quita el polvo del filtro de aire y aire que
limpia el filtro usando una aspiradora. Si hay
demasiado polvo sólo aclaran bajo el agua del
grifo que corre y suavemente lo cepillan con un
cepillo de cerda suave. Permita que el filtro
seque en la sombra.
● Insertar de nuevo el aire que limpia el filtro al
marco con filtro. Ponga el filtro con la señal
“DELANTERA” que afronta el frente y la
ranura ellos en el estado original.
● Después de fijar los filtros, empuje el panel
frontal a las tres partes indicadas por flechas
como se muestra en el dibujo y ciérrelo.
● No lo lave con agua caliente de más de 40°C. El filtro se encogerá.
● Cuando lo lave, saque completamente la humedad agitándolo y séquelo en la sombra; no lo exponga
directamente al sol. Puede que el filtro se encoja.
● No usar el detergente en el aire que limpia el filtro cuando algún detergente puede deteriorar la
interpretación electrostática con filtro.
Page 74

– 74 –
2. Panel Frontal Lavable
● Quite el panel frontal y lávelo con agua limpia.
Límpiela con una esponja suave.
Después de haberla lavado con detergente neutro,
lávela a fondo con agua limpia.
● Si no quita el panel frontal, limpielo con una suave
tela seca. Limpie el mando a distancia con una
suave tela seca.
● Seque el agua a fondo.
Si el agua permanece en los indicadores o en el
receptor de la señal de la unidad interior, causará
problemas.
Procedimiento para quitar el panel frontal.
Asegúrese que sujeta la rejilla de succión con
ambas manos para desmontar y montarla.
Como quitar el panel frontal
● Después de abrir el panel frontal con ambas
manos, desabroche el brazo derecho
mientras está empujando hacia dentro para
desengancharlo y, cierrandolo un poco,
quítelo hacia adelante.
Como fijar el panel frontal
● Mueva las proyecciones en los brazos
izquierdo y derecho dentro de las pestañas
en la unidad e insértelos fijamente en los
agujeros.
PRECAUCIÓN
● No rocíe o dirija agua directamente al armazón de la unidad cuando
la limpie ya que esto puede causar un cortocircuito.
● Nunca utilice agua caliente (superior a 40˚C), bencina, gasolina, ácido,
diluyente o cepillos, ya que puede dañar la superficie de plástico y
el revestimiento.
!
Pestaña
Agujero
Proyección
Page 75

– 75 –
ESPAÑOL
3. MANTENIMIENTO AL PRINCIPIO DE UN PERIODO DE DESCONEXIÓN LARGO
● Haga funcionar la unidad ajustando el modo de
operación en (FRÍO), la temperatura en 32˚C y
la velocidad del ventilador en “FUERTE” durante
medio día en un día soleado y seque toda la unidad
completamente.
● Desconecte el interruptor.
INSPECCIÒN REGULAR
Es necesario que la limpieza y la manutención sean realizadas únicamente por personal de servicio cualificado.
Antes de empezar la limpieza es necesario parar el accionamiento y cortar el suministro eléctrico.
PRECAUCIÓN
!
POR FAVOR, COMPRUEBE LOS SIGUIENTES PUNTOS CADA SEIS MESES O
ANUALMENTE. CONTACTE CON SU AGENTE DE VENTAS SI NECESITA AYUDA.
1
2
3
¿Está la línea de tierra desconectada o rota?
¿Está el armazón óxidado, está la unidad exterior inclinada o
inestable?
Confirme
¿Está firmemente enchufado el enchufe de la línea de conducción
electrica a la toma?
Page 76

– 76 –
SERVICIO POSVENTA Y GARANTÍA
CUANDO SOLICITE EL SERVICIO TÉCNICO, COMPRUEBE LOS SIGUIENTES PUNTOS
Cuando no funciona
● ¿Está el fusible en buenas condiciones?
● ¿Es el voltaje demasiado alto o deamasiado bajo?
● ¿Está el interruptor de alimentación en “ON” (Conectado)?
CONDICIÓN COMPRUEBE LOS SIGUIENTES PUNTOS
Notas
● Durante el funcionamiento al mínimo o al detener el funcionamiento, pueden
darse ocasionalmente los siguientes fenómenos, sin que ello implique que
el funcionamiento sea anormal.
(1) Leve ruido del fluido en el ciclo de refrigeración.
(2) Leve ruido de fricción del revestimiento del ventilador que se enfría y
se calienta gradualmente cuando la operación se para.
● Es posible que el aparato de aire acondicionado emita un mal olor debido
a los distintos olores emitidos por el humo, alimentos, cosméticos y otros.
Entonces el filtro de aire y el evaporador tienen que ser limpiados con
regularidad para reducir los olores.
●
Contacte a su agente de ventas inmediatamente si el aire acondicionado todavía no opera normalmente
después de haber realizado las inspecciones anteriores. Informe a su agente del modelo de la unidad, el
número de producción y la fecha de instalación. Infórmele también de lo referente a la avería.
●
La alimentación debe estar conectada en el voltaje establecido, sino la unidad se dañará o no podrá alcanzar
la capacidad especificada.
Cuando no enfría bien
Cuando no calienta bien
● ¿El filtro de aire ha sido limpiado?
● ¿Cae la luz del sol directamente en la unidad exterior?
● ¿Está el flujo de aire de la unidad obstruido?
● ¿Están las puertas o ventanas abiertas, o hay cualquier fuente
que genere calor en la habitación?
● ¿Está fijada la temperatura adecuada?
Page 77

– 77 –
ESPAÑOL
NOTA:
En la puesta en marcha del aparato, particularmente en condiciones de luz tenue, una variación de
intensidad del brillo podría producirse sin consecuencia alguna.
Los valores de la atimentación eléctrica local de las compañías suministradoras deberán ser observados.
MEMO
.....................................................................................................................................................................................
.....................................................................................................................................................................................
.....................................................................................................................................................................................
.....................................................................................................................................................................................
.....................................................................................................................................................................................
.....................................................................................................................................................................................
.....................................................................................................................................................................................
.....................................................................................................................................................................................
.....................................................................................................................................................................................
.....................................................................................................................................................................................
.....................................................................................................................................................................................
.....................................................................................................................................................................................
.....................................................................................................................................................................................
.....................................................................................................................................................................................
.....................................................................................................................................................................................
.....................................................................................................................................................................................
.....................................................................................................................................................................................
.....................................................................................................................................................................................
.....................................................................................................................................................................................
.....................................................................................................................................................................................
.....................................................................................................................................................................................
.....................................................................................................................................................................................
.....................................................................................................................................................................................
.....................................................................................................................................................................................
Mínimos Máximo Mínimos Máximo
De interior
Bulbo seco °C21 32 20 27
Bulbo mojado °C15 23 12 19
Al aire libre
Bulbo seco °C21 43 2 21
Bulbo mojado °C15 26 1 15
Nota
● Evite de usar el acondicionador de aire del sitio para la operación que se refresca cuando la temperatura
exterior está debajo de -10°C (14°F).
Las temperaturas máximas y mínimas recomendadas de los lados calientes y fríos deben estar como abajo:-
Refrescándose Calentando
Page 78

– 78 –
MEMO
.....................................................................................................................................................................................
.....................................................................................................................................................................................
.....................................................................................................................................................................................
.....................................................................................................................................................................................
.....................................................................................................................................................................................
.....................................................................................................................................................................................
.....................................................................................................................................................................................
.....................................................................................................................................................................................
.....................................................................................................................................................................................
.....................................................................................................................................................................................
.....................................................................................................................................................................................
.....................................................................................................................................................................................
.....................................................................................................................................................................................
.....................................................................................................................................................................................
.....................................................................................................................................................................................
.....................................................................................................................................................................................
.....................................................................................................................................................................................
.....................................................................................................................................................................................
.....................................................................................................................................................................................
.....................................................................................................................................................................................
.....................................................................................................................................................................................
.....................................................................................................................................................................................
.....................................................................................................................................................................................
.....................................................................................................................................................................................
.....................................................................................................................................................................................
.....................................................................................................................................................................................
.....................................................................................................................................................................................
.....................................................................................................................................................................................
.....................................................................................................................................................................................
.....................................................................................................................................................................................
.....................................................................................................................................................................................
.....................................................................................................................................................................................
.....................................................................................................................................................................................
.....................................................................................................................................................................................
.....................................................................................................................................................................................
.....................................................................................................................................................................................
.....................................................................................................................................................................................
.....................................................................................................................................................................................
.....................................................................................................................................................................................
Page 79

– 79 –
∂ППЛУИО¿
¢π∞™¶∞™ªŒ¡√ ∫§πª∞∆π™∆π∫Ÿ ª∏ÃÕ¡∏ª∞ ∆À¶ø¡
E™øTEPIKH MONA¢A
– 79 –
MONTE§O
E™øTEPIKH MONA¢A
RAS-08QH5E
RAS-10QH5E
RAS-14QH5E
RAS-18QH5E
Instruction manual Page 1~26
To obtain the best performance and ensure years of trouble free use, please read this instruction manual completely.
Manuale di istruzioni Pag. 27~52
Per garantire la migliore prestazione e la più lunga durataleggere attentamente e al completo le seguanti istruzioni.
Manual de instrucciones Página 53~78
Para obtener el mejor funcionamiento y asegurar años de uso libre de problemas, lea cuidadosamente este manual de
instrucciones.
O‰ЛБ›В˜ XВИЪИЫМФ‡ ™ÂÏ›‰· 79~104
°И· ЩЛУ О·П‡ЩВЪЛ ‰˘У·Щ‹ ·fi‰ФЫЛ О·И ЩЛУ М·ОЪФ¯ЪfiУИ· О·И ¯ˆЪ›˜ ЪФ‚П‹М·Щ· ¯Ъ‹ЫЛ ЩЛ˜ Ы˘ЫОВ˘‹˜ ·˘Щ‹˜, ·Ъ·О·ПФ‡МВ
‰И·‚¿ЫЩВ П‹Ъˆ˜ ЩИ˜ Ф‰ЛБ›В˜ ¯ВИЪИЫМФ‡ ЩЛ˜.
Инструкция по эксплуатации
стр. 105~130
Для обеспечения наилууших эксплуатационных характеристик и многолетней безотказной работы оборудования необходимо
полностыо оэнакомиться с данной Инструкцией по эксплуатации.
RAS-08QH5E
RAS-10QH5E
RAS-14QH5E
RAS-18QH5E
Page 80

– 80 –
¶POºY§A•EI™ A™ºA§EIA™
¶·Ъ·О·ПФ‡МВ ‰И·‚¿ЫЩВ ЪФЫВОЩИО¿ ЩИ˜ "¶ЪФК˘П¿НВИ˜ AЫК¿ПВИ·˜" ЪИУ ЩЛ ПВИЩФ˘ЪБ›· ЩЛ˜ Ы˘ЫОВ˘‹˜ БИ· ЩЛУ ЫˆЫЩ‹
¯ЪЛЫИМФФ›ЛЫ‹ ЩЛ˜.
¢ÒÛÙ ȉȷ›ÙÂÚË ÚÔÛÔ¯‹ ÛÙȘ ÂӉ›ÍÂȘ " ¶ÚÔÂȉÔÔ›ËÛË" Î·È " ¶ÚÔÛÔ¯‹". TФ ЩМ‹М· "¶ЪФВИ‰ФФ›ЛЫЛ" ВЪИ¤¯ВИ
ЫЩФИ¯В›· Щ· ФФ›· В¿У ‰ВУ ЪФЫВ¯ıФ‡У О·П¿, МФЪВ› У· ЪФО·П¤ЫФ˘У ı¿У·ЩФ ‹ ЫФ‚·Ъfi ЩЪ·˘М·ЩИЫМfi. TФ ЩМ‹М·
"¶ЪФЫФ¯‹" ВЪИ¤¯ВИ ЫЩФИ¯В›· Щ· ФФ›· МФЪФ‡У У· ЪФО·П¤ЫФ˘У ЫФ‚·Ъ¤˜ Ы˘У¤ВИВ˜ В¿У ‰ВУ ЪФЫВ¯ıФ‡У О·П¿.
¶·Ъ·О·ПФ‡МВ, ·ОФПФ˘ı‹ЫЩВ fiПВ˜ ЩИ˜ Ф‰ЛБ›В˜ ЪФЫВОЩИО¿ БИ· ЩЛУ ·ЫК¿ПВИ¿ Ы·˜.
∆· Û˘Ì‚ÔÏ· ÛËÌ·ÈÓÔ˘Ó Ù· ·ÎÔÏÔ˘ı·.
º˘Ï¿ÍÙ ÙÔ ÂÁ¯ÂÈÚ›‰ÈÔ ·˘Ùfi ÌÂÙ¿ ÙËÓ ·Ó¿ÁÓˆÛË.
¶POEI¢O¶OIH™H
¶POºY§A•EI™ KATA THN E°KATA™TA™H
ªЛУ ВБО·Щ·ЫЩ·ЫВЩВ ЩЛУ Ы˘ЫОВ˘Л МФУФИ Ы·˜ БИ·ЩИ МФЪВИ У· Ы˘М‚Л ‰И·ЪЪФЛ
УВЪФ˘, ‚Ъ·¯˘О˘ОПˆМ· Л’ О·И КˆЩИ·.
¶·Ú·Î·ÏÔ‡ÌÂ Û˘Ì‚Ô˘Ï¢ı›Ù ÙÔÓ ˆÏËÙ‹ Û·˜ ‹ ÙÔÓ ÂÍÔ˘ÛÈÔ‰ÔÙË̤ÓÔ Ù¯ÓÈÎfi ÁÈ·
ÙËÓ ÂÁηٿÛÙ·ÛË Ù˘ Û˘Û΢‹˜. °È·Ù› Â¿Ó ÂÁηٷÛÙ‹ÛÂÙ ÙË Û˘Û΢‹ ÌfiÓÔÈ Û·˜
ÌÔÚ› Ó· Û˘Ì‚Â› ‰È·ÚÚÔ‹ ÓÂÚÔ‡, ‚Ú·¯˘Î‡Îψ̷ ‹ Î·È ÊˆÙÈ¿.
¶·Ъ·О·ПФ‡МВ ¯ЪЛЫИМФФИ‹ЫЩВ ЩЛ БВ›ˆЫЛ.
N· МЛУ ЩФФıВЩВ›ЩВ ЩЛ БВ›ˆЫЛ ОФУЩ¿ ЫВ ·БˆБФ‡˜ УВЪФ‡ ‹ ·ВЪ›Ф˘, ЛПВОЩЪИОФ‡˜
·БˆБФ‡˜, ‹ ЩЛ БВ›ˆЫЛ ЩЛПВКТУФ˘. EЫК·ПМ¤УЛ ВБО·Щ¿ЫЩ·ЫЛ ЩЛ˜ БВ›ˆЫЛ˜ МФЪВ›
У· ЪФО·П¤ЫВИ ЛПВОЩЪФПЛН›·.
H ·ЫК¿ПВИ· ı· Ъ¤ВИ У· В›У·И ЩФФıВЩЛМ¤УЛ ·У¿ПФБ· МВ ЩЛ ПВ˘Ъ¿ ¤‰Ъ·ЫЛ˜ ЩЛ˜
МФУ¿‰·˜. XˆЪ›˜ ·ЫК¿ПВИ· Ф О›У‰˘УФ˜ ЛПВОЩЪФПЛН›·˜ В›У·И МВБ¿ПФ˜.
N· МЛ ЩФФıВЩВ›Щ·И ОФУЩ¿ ЫВ М¤ЪФ˜ Ф˘ ˘¿Ъ¯ВИ В‡КПВОЩФ ·¤ЪИФ. H ВНˆЩВЪИО‹
МФУ¿‰· МФЪВ› У· И¿ЫВИ КˆЩИ¿ ЫВ ВЪ›ЩˆЫЛ ‰И·ЪЪФ‹˜ ЩФ˘ ·ВЪ›Ф˘.
¶·Ú·Î·Ïԇ̠‚‚·Èˆı›Ù ÁÈ· ÙËÓ ÔÌ·Ï‹ ÚÔ‹ ÓÂÚÔ‡ fiÙ·Ó ÙÔÔıÂÙ›Ù ÙÔÓ ÛˆÏ‹Ó·
·Ô¯¤Ù¢Û˘.
¶PO™OXH
AФКВ‡БВЩВ У· ВОЩ›ıВЫЩВ БИ· ·ЪОВЩ‹ ТЪ· О·ЩВ˘ıВ›·У ЫЩЛ ЪФ‹ ЩФ˘ ·¤Ъ· БИ·
Щ˘¯fiУ ВИЩТЫВИ˜ ЫЩЛУ ˘БВ›· Ы·˜.
ªЛУ ·ЪВМ‚¿ПЩВ ¤У· ‰¿¯Щ˘ПФ, МИ· Ъ¿‚‰Ф˜ ‹ ¿ПП· ·УЩИОВ›МВУ· ЫЩЛУ Ф‹ ·ВЪИЫМФ‡
‹ ЩФУ ОФП›ЫОФ. Ÿˆ˜ Ф ·УВМИЫЩ‹Ъ·˜ В›У·И ВЪИЫЩЪВКfiМВУФ˜ МВ МИ· ˘„ЛП‹
Щ·¯‡ЩЛЩ·, ı· ЪФО·П¤ЫВИ ЩФУ ЩЪ·˘М·ЩИЫМfi. ¶Ъ›У О·ı·Ъ›˙ВИ, У· В›ЫЩВ ‚¤‚·ИФ˜ У·
ЫЩ·М·Щ‹ЫВИ Л ПВИЩФ˘ЪБ›· О·И ОПВ›УВИ ЩФ ‰И·ОfiЩЛ.
N· МЛУ ¯ЪЛЫИМФФИВ›ЩВ ФФИФ‰‹ФЩВ Ы‡ЪМ· Ы·У ·ЫК¿ПВИ· БИ·Щ› МФЪВ› У·
ЪФОПЛıВ› МФИЪ·›Ф ·Щ‡¯ЛМ·.
¶POºY§A•EI™ KATA TH METAKINH™H ◊ ™YNTHPH™H
™В ВЪ›ЩˆЫЛ Ф˘ ЪФО‡„ВИ О¿ФИ· ·УТМ·ПЛ О·Щ¿ЫЩ·ЫЛ (М˘Ъˆ‰И¿ О·ММ¤УФ˘) Ъ¤ВИ
У· ЫЩ·М·Щ‹ЫВЩВ ·М¤Ыˆ˜ ЩЛ ПВИЩФ˘ЪБ›· ЩЛ˜ Ы˘ЫОВ˘‹˜ О·И У· ‚Б¿ПВЩВ ЩФ КИ˜ ·fi ЩЛУ
Ъ›˙·. EИОФИУˆУ‹ЫЩВ МВ ЩФУ ЩВ¯УИОfi Ы·˜. H Ы˘У¤¯ИЫЛ ЩЛ˜ ПВИЩФ˘ЪБ›·˜ ЩЛ˜ Ы˘ЫОВ˘‹˜
О¿Щˆ ·fi ФФИ·‰‹ФЩВ Щ¤ЩФИ· ·УТМ·ПЛ О·Щ¿ЫЩ·ЫЛ, МФЪВ› У· ЪФО·П¤ЫВИ ‚П¿‚Л,
‚Ъ·¯˘О‡ОПˆМ· ‹ ·ОfiМ· О·И КˆЩИ¿.
¶·Ъ·О·ПФ‡МВ ВИОФИУˆУ‹ЫЩВ МВ ЩФУ ЩВ¯УИОfi Ы·˜ БИ· ЩЛУ Ы˘УЩ‹ЪЛЫЛ. E¿У О¿УВЩВ
МfiУФИ Ы·˜ ВЫК·ПМ¤УЛ Ы˘УЩ‹ЪЛЫЛ ЩЛ˜ Ы˘ЫОВ˘‹˜ МФЪВ› У· ЪФО·П¤ЫВЩВ ЛПВОЩЪФПЛН›·
О·И КˆЩИ¿.
¶·Ъ·О·ПФ‡МВ Ы˘М‚Ф˘ПВ˘ıВ›ЩВ ЩФУ ЩВ¯УИОfi Ы·˜ В¿У ı¤ПВЩВ У· ·К·ИЪ¤ЫВЩВ О·И
В·УВБО·Щ·ЫЩ‹ЫВЩВ ЩЛ МФУ¿‰·. MФЪВ› У· ЪФО·П¤ЫВЩВ ЛПВОЩЪФПЛН›· ‹ КˆЩИ¿ В¿У
ЩЛУ ·К·ИЪ¤ЫВЩВ О·И ЩЛУ В·УВБО·Щ·ЫЩ‹ЫВЩВ МfiУФИ Ы·˜ ВЫК·ПМ¤У·.
¶POEI¢O¶OIH™H
¶POEI¢O¶OIH™H
˘
¶POºY§A•EI™ KATA TH §EITOYP°IA
∂Ȃ‚·ÈˆÛ·Ù ÙËÓ Û˘Ó‰ÂÛË ÙÔ˘ Û˘ÚÌ·ÙÔ˜
ÁÂȈÛ˘.
∞˘ÙÔ ÙÔ Û˘Ì‚ÔÏÔ ÛËÌ·ÈÓÂÈ ··ÁÔÚ„Ë.
¢ВИ¯УВИ ЩИ˜ ˆ‰ЛБВИВ˜ Ф˘ ЪВВИ У’
·ОФПФ˘ıЛЫВЩВ.
! !
!
!
!
!
K·Ù¿ ÙË ‰È¿ÚÎÂÈ· ηٷÈÁ›‰·˜, ·Ê·ÈÚ¤ÛÙ ÙÔ ÊȘ ·fi ÙË Ú›˙·.
Page 81

– 81 –
∂ППЛУИО¿
TФ ЪФ˚fiУ ı· Ъ¤ВИ У· ПВИЩФ˘ЪБВ› О¿Щˆ ·fi ЩИ˜ ЪФ‰И·БЪ·К¤˜ ЩЛ˜
О·Щ·ЫОВ˘¿ЫЩЪИ·˜ ВЩ·ИЪ›·˜ О·И fi¯И ЫВ ФФИВЫ‰‹ФЩВ ¿ППВ˜ ЪФЩВИУfiМВУВ˜ ¯Ъ‹ЫВИ˜.
MЛУ ЪФЫ·ı‹ЫВЩВ У· ПВИЩФ˘ЪБ‹ЫВЩВ ЩЛ Ы˘ЫОВ˘‹ МВ ‚ЪВБМ¤У· ¯¤ЪИ·,
БИ· У· МЛ ЪФОПЛıВ› ·Щ‡¯ЛМ·.
ŸЩ·У ПВИЩФ˘ЪБВ› Л Ы˘ЫОВ˘‹ М·˙› МВ ¿ППВ˜ Ы˘ЫОВ˘¤˜ ВНˆЩВЪИО‹˜ О·‡ЫЛ˜ ЩФ
‰ˆМ¿ЩИФ ı· Ъ¤ВИ У· ·ВЪ›˙ВЩ·И О·П¿ БИ· У· ·ФКВ‡БВЩ·И Л ·УВ¿ЪОВИ· ФН˘БfiУФ˘.
¶POºY§A•EI™ KATA TH §EITOYP°IA
¶
P
O
™
O
X
H
O ОЪ‡Ф˜ ·¤Ъ·˜ Ф˘ ‚Б·›УВИ ·fi ЩЛ Ы˘ЫОВ˘‹ У· МЛУ О·ЩВ˘ıВ›УВЩ·И ЪФ˜
ФИОИ·О¤˜ Ы˘ЫОВ˘¤˜ Ф˘ ·Ъ¿БФ˘У ıВЪМfiЩЛЩ· БИ·Щ› ЩИ˜ ВЛЪВ¿˙ВИ fiˆ˜
ЩЛУ ЛПВОЩЪИО‹ ОФ˘˙›У· О·И ЩФ КФ‡ЪУФ.
¶·Ъ·О·ПФ‡МВ ‚В‚·ИˆıВ›ЩВ fiЩИ Л ‚¿ЫЛ ЫЩ‹ЪИНЛ˜ ЩЛ˜ ВНˆЩВЪИО‹˜ МФУ¿‰·˜ В›У·И
ЫЩ·ıВЪ‹, ¿О·МЩЛ О·И ¯ˆЪ›˜ ВПП·ЩЩТМ·Щ·. E¿У fi¯И, Л ВНˆЩВЪИО‹ МФУ¿‰·
МФЪВ› У· О·Щ·ЫЩВ› ВИО›У‰˘УЛ.
MЛУ ИЩЫИП¿ЩВ ‹ Ъ›¯УВЩВ О·ЩВ˘ıВ›·У УВЪfi ЫЩЛУ ВЫˆЩВЪИО‹ МФУ¿‰·
fiЩ·У ЩЛ О·ı·Ъ›˙ВЩВ, БИ·Щ› МФЪВ› У· ЪФНВУ‹ЫВЩВ ‚Ъ·¯˘О‡ОПˆМ·.
¶·Ъ·О·ПФ‡МВ ОПВ›УВЩВ ЩЛ Ы˘ЫОВ˘‹ О·И О·ЩВ‚¿ЫЩВ ЩЛУ ·ЫК¿ПВИ·, fiЩ·У ЩЛ
О·ı·Ъ›˙ВЩВ, БИ·Щ› Ф ·УВМИЫЩ‹Ъ·˜ ЩЛ˜ Ы˘ЫОВ˘‹˜ МФЪВ› У· ¿ıВИ ˙ЛМИ¿.
MËÓ ÙÔÔıÂÙ›ÙÂ Ê˘Ù¿ ηÙ¢ı›·Ó ÛÙËÓ ÚÔ‹ ÙÔ˘ ·¤Ú· ÁÈ·Ù› ÌÔÚ› Ó·
ÍÂÚ·ıÔ‡Ó.
MЛУ ·УВ‚·›УВЩВ ¿Уˆ ЫЩЛУ ВНˆЩВЪИО‹ МФУ¿‰· О·И МЛ ‚¿˙ВЩВ ·УЩИОВ›МВУ·
¿Уˆ ЩЛ˜.
ŸЩ·У ПВИЩФ˘ЪБВ› Л Ы˘ЫОВ˘‹ МВ ЩИ˜ fiЪЩВ˜ О·И Щ· ·Ъ¿ı˘Ъ· ·УФИОЩ¿ (Л ˘БЪ·Ы›· ЩФ˘ ‰ˆМ·Щ›Ф˘
В›У·И Ы˘У‹ıˆ˜ ¿Уˆ ·fi 80%) О·И ЩИ˜ ВЪЫ›‰В˜ ЫЩЪ·ММ¤УВ˜ ЪФ˜ Щ· О¿Щˆ ‹ МВЩ·ОИУФ‡МВУВ˜
·˘ЩfiМ·Щ· БИ· МВБ¿ПЛ ¯ЪФУИО‹ ВЪ›Ф‰Ф, ЩfiЩВ Л ˘БЪ·Ы›· Ы˘М˘ОУТУВЩ·И ЫВ УВЪfi ЫЩИ˜ ВЪЫ›‰В˜
О·И ЫЩ¿˙ФУЩ·˜ О¿Щˆ МФЪВ› У· Ы·˜ ‚Ъ¤НВИ Щ· ¤ИП·. °И· ЩФ ПfiБФ ·˘Щfi fiЩ·У ВИОЪ·ЩФ‡У
Щ¤ЩФИВ˜ Ы˘Уı‹ОВ˜ В›У·И О·П‡ЩВЪ· У· МЛУ ПВИЩФ˘ЪБВ›ЩВ ЩЛ Ы˘ЫОВ˘‹ БИ· ФПП‹ ТЪ·.
∂·У Л ФЫФЩЛЩ· ıВЪМФЩЛЩ·˜ ЫЩФ ‰ˆМ·ЩИФ ВИУ·И ·Ъ··Уˆ ·Ф ЩЛУ „˘ОЩИОЛ ИО·УФЩЛЩ· ЩЛ˜
Ы˘ЫОВ˘Л˜ (·Ъ·‰ВИБМ·ЩФ˜ ¯·ЪИУ, ФПП· ·ЩФМ· ВИУ·И МВЫ· ЫЩФ ‰ˆМ·ЩИФ Л ¯ЪЛЫИМФФИЛЩ·И МИ·
ıВЪМ·УЩИОЛ ВБО·Щ·ЫЩ·ЫЛ) ЩФЩВ Л ЪФЪ˘ıМИЫМВУЛ ıВЪМФОЪ·ЫИ· ЩФ˘ ‰ˆМ·ЩИФ˘ ‰ВУ МФЪВИ У·
О·ЩФЪıˆıЛ.
∞˘Щ‹ Л Ы˘ЫОВ˘‹ ‰ВУ ЪФФЪ›˙ВЩ·И ЪФ˜ ¯Ъ‹ЫЛ ·fi Щ· МИОЪ¿ ·И‰И¿ ‹ Щ· ·ЫıВУИО¿ ЪfiЫˆ·
ВОЩfi˜ ·У ¤¯Ф˘У ВФЩВ˘ıВ› В·ЪОТ˜ ·fi ¤У· ·ЪМfi‰ИФ ЪfiЫˆФ БИ· У· ЫИБФ˘ЪВ˘ЩФ‡У ·˘Щ¿
МФЪФ‡У У· ¯ЪЛЫИМФФИ‹ЫФ˘У ЩЛ Ы˘ЫОВ˘‹ ·О›У‰˘У·.
∆· ÌÈÎÚ¿ ·È‰È¿ Ú¤ÂÈ Ó· ÂÔÙ¢ıÔ‡Ó ÁÈ· Ó· ÂÍ·ÛÊ·Ï›ÛÔ˘Ó fiÙÈ ‰ÂÓ ·›˙Ô˘Ó Ì ÙË Û˘Û΢‹
K·ЩВ‚¿ЫЩВ ЩЛУ ·ЫК¿ПВИ· fiЩ·У Л Ы˘ЫОВ˘‹ Ы·˜ ‰ВУ ЪfiОВИЩ·И У· ПВИЩФ˘ЪБ‹ЫВИ
БИ· МВБ¿ПФ ¯ЪФУИОfi ‰И¿ЫЩЛМ·.
MЛУ ЩФФıВЩВ›ЩВ ‰Ф¯В›· Ф˘ ВЪИ¤¯Ф˘У УВЪfi (fiˆ˜ ¤У· ‚¿˙Ф) ЫЩЛУ ВЫˆЩВЪИО‹
МФУ¿‰·, БИ· У· МЛУ ¤ЫФ˘У ЫЩ·БfiУВ˜ М¤Ы· ЫЩЛ Ы˘ЫОВ˘‹. TФ УВЪfi Ф˘ ı· ¯˘ıВ› ı·
О·Щ·ЫЩЪ¤„ВИ ЩЛ МfiУˆЫЛ Ф˘ В›У·И М¤Ы· ЫЩЛ Ы˘ЫОВ˘‹ О·И ı· ЪФОПЛıВ› ‚Ъ·¯˘О‡ОПˆМ·.
!
ªЛУ ¯ЪЛЫИМФФИ‹ЫЩВ ФФИФ˘Ы‰‹ФЩВ „ВО·ЫМФ‡˜ ·ВЪФП‡М·ЩФ˜ ‹ ЩЪ›¯·˜
ПЛЫ›ФУ Л ВЫˆЩВЪИО‹ МФУ¿‰·. ∞˘Щ‹ Л ¯ЛМИО‹ Ф˘Ы›· МФЪВ› У· ВММВ›УВИ ЫЩФ
ЩВЪ‡БИФ ·УЩ·ПП·Б‹˜ ıВЪМfiЩЛЩ·˜ О·И У· ВМФ‰›ЫВИ ЩЛ ЪФ‹ ЩФ˘ УВЪФ‡ ВН¿ЩМИЫЛ˜
ЫЩФ ЩЛБ¿УИ ·БˆБТУ. ЩФ ‡‰ˆЪ ı· МВИˆıВ› ЫЩФУ ВК·ЩfiМВУФ ·УВМИЫЩ‹Ъ· О·И ı·
ЪФО·П¤ЫВИ ЩФ Ъ¿УЩИЫМ· ‡‰·ЩФ˜ ¤Нˆ ·fi ЩЛУ ВЫˆЩВЪИО‹ МФУ¿‰·.
Page 82

– 82 –
E™øTEPIKH MONA¢A
ONOMA™IE™ KAI §EITOYP°IE™ KA£E MEPOY™
ºI§TPO AEPA
°И· У· ВМФ‰›˙ВИ ЩЛ ЫОfiУЛ У· ВИЫ¤Ъ¯ВЩ·И ЫЩЛУ
ВЫˆЩВЪИО‹ МФУ¿‰· (AУ·КФЪ¿ ЫЩЛ ЫВП›‰· 99)
ªЪФЫЩИУФ О·П˘ММ·
EN¢EIKTIKA E™øTEPIKH™ MONA¢A™
ºˆЩВИУfi˜ ‰В›ОЩЛ˜ Ф˘ ‰В›¯УВИ fiЩИ Л Ы˘ЫОВ˘‹ В›У·И
ЫВ ПВИЩФ˘ЪБ›·. (AУ·КФЪ¿ ЫЩЛ ЫВП›‰· 83)
OPIZONTIE™ ¶EP™I¢E™
KA£ETE™ ¶EP™I¢E™
(E•O¢O™ AEPA)
(AÓ·ÊÔÚ¿ ÛÙË ÛÂÏ›‰· 94)
TH§EXEIPI™THPIO
¢›УВИ ВУЩФП‹ ПВИЩФ˘ЪБ›·˜ ЫЩЛУ ВЫˆЩВЪИО‹ МФУ¿‰·.
ŒЩЫИ М·›УВИ ЫВ ПВИЩФ˘ЪБ›· fiПЛ Л Ы˘ЫОВ˘‹.
(AУ·КФЪ¿ ЫЩЛ ЫВП›‰· 84)
780
RAS-08QH5E, RAS-10QH5E, RAS-14QH5E, RAS-18QH5E
280
210
¶§ATO™ (mm)
MONTE§O
YæO™ (mm)
BA£O™(mm)
ONOMA™IA MONTE§OY KAI ¢IA™TA™EI™
Page 83

– 83 –
∂ППЛУИО¿
EN¢EIKTE™ æYKTIKH™ MONA¢A™
EN¢EIKTH™ §EITOYP°IA™
§∞ª¶∞∫π ºπ§∆ƒ√À
ŸЩ·У Л Ы˘ЫОВ˘‹ ПВИЩФ˘ЪБ‹ЫВИ БИ· Ы˘УФПИОfi ¯ЪfiУФ ВЪ›Ф˘
100 ˆЪТУ, ЩФ П·М¿ОИ ЩФ˘ К›ПЩЪФ˘ ·У¿‚ВИ БИ· У· ‰В›НВИ fiЩИ
В›У·И ТЪ· У· О·ı·ЪИЫЩВ› ЩФ К›ПЩЪФ.
§AM¶AKI §EITOYP°IA™
TФ П·М¿ОИ ·˘Щfi ·У¿‚ВИ О·Щ¿ ЩЛ ПВИЩФ˘ЪБ›·.
TФ §AM¶AKI §EITOYP°IA™ ·У·‚ФЫ‚‹УВИ О·Щ¿ ЩЛ
ı¤ЪМ·УЫЛ ЫЩИ˜ ·Ъ·О¿Щˆ ВЪИЩТЫВИ˜:
(1) K·Ù¿ ÙË ‰È¿ÚÎÂÈ· ÚÔı¤ÚÌ·ÓÛ˘
°È· 2-3 ÏÂÙ¿ ÚÈÓ ÙËÓ ¤Ó·ÚÍË
(2) K·Ù¿ ÙËÓ ·fi„˘ÍË
∆Ф НВ¿БˆМ· ı· ВОЩВПВЫıВ› ВЪ›Ф˘ МИ¿ КФЪ¿
О·ı¤У·˜ ТЪ· fiЩ·У МФЪК¤˜ ·БВЩФ‡ ЫЩФУ ·УЩ·ПП¿ОЩЛ
ıВЪМfiЩЛЩ·˜ ЩЛ˜ ˘·›ıЪИ·˜ МФУ¿‰·˜, БИ· 5-10 ПВЩ¿
О¿ıВ КФЪ¿.
§AM¶AKI XPONO¢IAKO¶TH
TФ П·М¿ОИ ·˘Щfi ·У¿‚ВИ fiЩ·У ПВИЩФ˘ЪБВ› Ф ¯ЪФУФ‰И·ОfiЩЛ˜.
TEMPORARY
SWITCH
¶PO™øPINO™ ¢IAKO¶TH™
N· ¯ЪЛЫИМФФИВ›ЩВ ·˘ЩfiУ ЩФУ ‰И·ОfiЩЛ БИ· У· ·УФ›БВЩВ О·И ОПВ›УВЩВ ЩЛ Ы˘ЫОВ˘‹ fiЩ·У ЩФ ЩЛПВ¯ВИЪИЫЩ‹ЪИФ
‰ВУ ПВИЩФ˘ЪБВ›. (ГЪЛЫИМФФИ‹ЫЩВ МЛ ·БТБИМФ ˘ПИОfi fiˆ˜ Ф‰ФУЩФБП˘К›‰·)
● ¶·ЩТУЩ·˜ ЩФУ ЪФЫˆЪИУfi ‰И·ОfiЩЛ Л Ы˘ЫОВ˘‹ ı· ·Ъ¯›ЫВИ ЩЛУ ПВИЩФ˘ЪБ›· Ы‡МКˆУ· МВ ЩИ˜ ЪФЛБФ‡МВУВ˜
Ú˘ıÌ›ÛÂȘ.
● ŸЩ·У ПВИЩФ˘ЪБВ›ЩВ ЩЛ Ы˘ЫОВ˘‹ МВ ЩФУ ЪФЫˆЪИУfi ‰И·ОfiЩЛ, В¿У ЩФУ ОПВ›ЫВЩВ О·И ЩФУ ·УФ›НВЩВ ¿ПИ,
Л Л Ы˘ЫОВ˘‹ ı· ·Ъ¯›ЫВИ ·˘ЩfiМ·ЩЛ ПВИЩФ˘ЪБ›·.
TEMPORARY
SWITCH
Page 84

– 84 –
˚
CH
RESET
˚
CH
∞À∆√ª∞∆∏
£∂ƒª∞¡™∂
•∏ƒ∞¡™∏
æÀ•∏
∞¡∂ªπ™∆∏ƒ∞™
∆∞ÃÀ∆∏∆∞ ∞¡∂ªπ™∆∏ƒ∞
Ã∞ª∏§∏
ª∂™∏
Àæ∏§∏
∞À∆√ª∞∆∏ ¶∞À™∏
¢π∞∫√¶∏ (∞∫Àƒø™∏)
∂¡∞ƒ•∏ (ƒ∂™∂ƒµ)
∂¡∞ƒ•∏/¢π∞∫√¶∏
Ã√¡√™
ƒÀ£ªπ™∏ Ã√¡√À
∂¶π§√°∏ Ã√¡√À
ƒÀ£ªπ™∆∏™ ∂¡∆√™
ƒÀ£ªπ™∆∏™ ∂∫∆√™
∞À∆√ª∞∆∏ ª∂∆∞™∆ƒ√º∏
Ã∞ƒ∞∫∆∏ƒπ™ª√™ ∫∞π §∂π∆√Àƒ°π∞ ∆√À ∫∞£∂ ™∆√πÃ∂π√À
∆∏§∂ƒƒÀ£ªπ™∆∏™
● √ ЩЛПВЪЪ˘ıМИЫЩЛ˜ О·УФУИ˙ВИ ЩЛУ ПВИЩФ˘ЪБИ· ЩЛ˜ ВЫˆЩВЪИОЛ˜ МФУ·‰·˜. ∏ ВОЩ·ЫЛ ЩФ˘ ВИУ·И ВЪИФ˘ 7 МВЩЪ·.
∂·У Щ· ВЫˆЩВЪИО· КˆЩ· О·УФУИ˙ФУЩ·И ЛПВОЩЪФУИОˆ˜, Л ВОЩ·ЫЛ МФЪВИ У· ВИУ·И О·И МИОЪˆЩВЪЛ. √ ЩЛПВЪЪ˘ıМИЫЩЛ˜
МФЪВИ У· МВУЛ ЫЩФ ЩФИ¯Ф ЫЩФ ˘ФЫЩЛЪИБМ· Ф˘ ЪФМЛıВ˘ВЩ·И В‰ˆ. ¶ЪФЩФ˘ У· ЩФ ВБО·Щ·ЫЩЛЫВЩВ,
ВИ‚В‚·ИˆЫ·ЩВ ФЩИ Л ВЫˆЩВЪИОЛ МФУ·‰· МФЪВИ У· О·УФУИ˙ВЩ·И МВЫФ˘ ЩФ˘ ЩЛПВЪЪ˘ıМИЫЩФ˘.
● ГВИЪ›˙ВЫЩВ ЩФ ЩЛПВ¯ВИЪИФЩ‹ЪИФ МВ ЪФЫФ¯‹. ƒ›¯УФУЩ·˜ ‹ ‚ЪФ¤¯ФУЩ·˜ ЩФ МФЪВ› У· МВИТЫВЩВ ЩЛУ
ÈηÓfiÙËÙ· ÌÂÙ¿‰ÔÛ˘ ÛËÌ¿ÙˆÓ.
● ∞КФ‡ ЩФФıВЩЛıФ‡У У¤В˜ М·Щ·Ъ›В˜ ЫЩФ ЩЛПВ¯ВИЪИЫЩ‹ЪИФ, Л МФУ¿‰· ı· ¯ЪВИ·ЫЩВ› ВЪ›Ф˘ 10 ‰В˘ЩВЪfiПВЩ·
ЪФЩФ‡ ·УЩ·ФОЪИıВ› ЫЩИ˜ ВУЩФП¤˜ О·И ПВИЩФ˘ЪБ‹ЫВИ.
● ¶·Ú¿ı˘ÚÔ ÂÎÔÌ‹˜ ÛË¿ÙˆÓ/¤Ó‰ÂÈÍË ÂÎÔÌ‹˜
™ЛМ·‰¤„ЩВ МВ ·˘Щfi ЩФ ·Ъ¿ı˘ЪФ ЫЩЛУ ВЫˆЩВЪИО‹ Ы˘ЫОВ˘‹ Ф˘ ı¤ПВЩВ У· ВП¤БНВЩВ.
∏ ¤У‰ВИНЛ ВОФМ‹˜ ·У¿‚ВИ fiЩ·У ЫЩ¤ПУВЩВ ¤У· Ы‹М·.
● Display
A˘Щfi ‰В›¯УВИ ЩЛУ ЪФБЪ·ММ·ЩИЫМ¤УЛ ıВЪМФОЪ·Ы›· ЩФ˘ ¯ТЪФ˘, ЩЛУ В›О·ИЪЛ ТЪ·, ЩЛУ
О·Щ¿ЫЩ·ЫЛ ЩФ˘ Ъ˘ıМИЫЩ‹ ¯ЪfiУФ˘, ЩФ˘ ЩЪfiФ ПВИЩФ˘ЪБ›·˜ О·И ЩЛУ ЪФБЪ·ММ·ЩИЫМ¤УЛ
¤УЩ·ЫЛ О˘ОПФКФЪ›·˜ ·¤Ъ·.
● ∫Ô˘Ì› START/STOP
¶·Ù‹ÛÙ ·˘Ùfi ÙÔ ÎÔ˘Ì› ÁÈ· ÙÔ ¿Ó·ÌÌ· Ù˘ Û˘Û΢‹˜. •·Ó··Ù‹ÛÙ ÙÔ ÁÈ· ÙÔ Û‚‹ÛÈÌfi
Ù˘.
● ∫Ô˘Ì› ∞À∆√ª∞∆∏ ¶∞À™∏ (SLEEP)
ГЪЛЫЛИМФФИ‹ЫЩВ ·˘Щfi ЩФ ОФ˘М› БИ· ЩЛ Ъ‡ıМЛЫЛ ЩФ˘ ¯ЪfiУФ˘ ·˘ЩfiМ·ЩЛ˜ ·УЫЛ˜.
● ∫Ô˘ÌÈ¿ £∂ƒªO∫ƒ∞™π∞
¯ЪЛЫИМФФИ‹ЫЩВ ·˘Щ¿ Щ· ОФ˘МИ¿ БИ· У· ·УВ‚¿ЫВЩВ ‹ У· О·ЩВ‚¿ЫВЩВ ЩЛУ
ЪФБЪ·ММ·ЩИЫМ¤УЛ ıВЪМФОЪ·Ы›·. (∂¿У Щ· ·Щ¿ЩВ В› М·ОЪfiУ ·ПП¿˙ВИ Л ЩИМ‹ Иfi БЪ‹БФЪ·.)
● ∫Ô˘Ì› øƒ∞
¯ЪЛЫИМФФИ‹ЫЩВ ·˘Щfi ЩФ ОФ˘М› БИ· У· Ъ˘ıМ›ЫВЩВ О·И У· ВП¤БНВЩВ ЩЛУ ТЪ· О·И ЩЛУ
ЛМВЪФМЛУ›·.
● ∫Ô˘Ì› ∂¶∞¡∞º√ƒ∞
● ∫Ô˘Ì› ∂¶π§√°∏ §∂π∆√Àƒ°πø¡
¯ЪЛЫИМФФИ‹ЫЩВ ·˘Щfi ЩФ ОФ˘М› БИ· У· ВИП¤НВЩВ ЩФУ ЩЪfiФ ПВИЩФ˘ЪБ›·˜.
∫¿ıВ КФЪ¿ Ф˘ ЩФ ·Щ‹ЫВЩВ ·ПП¿˙ВИ ЩФ В›‰Ф˜ ПВИЩФ˘ЪБ›·˜ ·Ф (AUTO) ЫВ
(£EPMAN™∏) ÛÂ
(•HPAN™∏) Û (æÀ•∏) Î·È Û (∞N∂ªπ™∆∏ƒ∞)
О˘ОПФКФЪ›· ·¤Ъ·.
● ƒ˘ıÌÈÛÙ‹˜ ∆∞ÃÀ∆∏∆∞ ∞¡∂ªπ™∆∏ƒ∞
∞˘Щfi˜ Ъ˘ıМ›˙В› ЩЛУ Щ·¯‡ЩЛЩ· ЩФ˘ ·УВМИЫЩ‹Ъ·. ∫¿ıВ КФЪ¿ Ф˘ ·Щ‹ЫВЩВ ·˘Щfi ЩФ
ОФ˘М› ·ПП¿˙ВИ Л ¤УЩ·ЫЛ ЩЛ˜ О˘ОПФКФЪ›·˜ ·¤Ъ· ·fi (AUTO) ЫВ (Аж∏§∏) ЫВ
(ª∂™∏) ЫВ (Г∞ª∏§∏) (∞˘Щfi ЩФ ОФ˘М› ВИЩЪ¤ВИ ЩЛУ ВИПФБ‹ ЩЛ˜ ‚¤ПЩИЫЩЛ˜
Щ·¯‡ЩЛЩ·˜ ·УВМИЫЩ‹Ъ· БИ· О¿ıВ ЩЪfiФ ПВИЩФ˘ЪБ›·˜.)
● ∫Ô˘Ì› ∞À∆√ª∞∆∏ °ø¡π∞∫∏ ƒÀ£ªπ™∏
∞˘ÙÔ ÂϤÁ¯ÂÈ ÙË ÁˆÓ›· ÙÔ˘ ÔÚÈ˙fiÓÙÈÔ˘ ηÙ¢ı˘ÓÙ‹Ú· ·¤Ú·.
● ∫Ô˘ÌÈ¿ Ú‡ıÌÈÛ˘ ÃÚfiÓÔ˘
¯ЪЛЫИМФФИ‹ЫЩВ ·˘Щ¿ Щ· ОФ˘МИ¿ БИ· ЩФУ ЪФБЪ·ММ·ЩИЫМfi ЩФ˘ Ъ˘ıМИЫЩ‹ ¯ЪfiУФ˘.
● ∫Ô˘Ì› ƒÀ£ªπ™∆∏ Ã√¡√À ∫§∂π™πª∞∆√™
°И· ЩЛ Ъ‡ıМИЫЛ ЩФ˘ ¯ЪfiУФ˘ ОПВИЫ›М·ЩФ˜.
● ∫Ô˘Ì› ƒÀ£ªπ™∆∏ Ã√¡√À ∞¡√π°ª∞∆√™
°È· ÙË Ú‡ıÌÈÛË ÙÔ˘ ¯ÚfiÓÔ˘ ·ÓÔ›ÁÌ·ÙÔ˜.
● ∫Ô˘Ì› ∞¶√ª¡∏ª√¡∂À™∏
∞ФМУЛМfiУВ˘ЫЛ ЩˆУ Ъ˘ıМ›ЫВˆУ ¯ЪfiУФ˘.
● ∫Ô˘Ì› ∞¡∞∫§∏™∏
∞О˘ЪТУВИ ЩЛУ ·ФМУЛМfiУВ˘ЫЛ ¯ЪfiУФ˘.
Àԉ›ÍÂȘ ·ÛÊ¿ÏÂÈ·˜ ÁÈ· ÙË ¯Ú‹ÛË
● ªЛУ ·К‹УВЩВ ЩФ ЩЛПВОФУЩЪfiП ЫЩ· ВН‹˜ М¤ЪЛ.
● ™Â ̤ÚË ÂÎÙÈıÂ̤ӷ ÛÙÔÓ ‹ÏÈÔ.
● ∫ÔÓÙ¿ ÛÂ Û˘Û΢¤˜ ı¤ÚÌ·ÓÛ˘.
● ГВИЪИЫЩВ›ЩВ ЩФ ЩЛПВОФУЩЪfiП МВ ЪФЫФ¯‹. ªЛУ ЩФ Ъ›¯УВЩВ ЫЩФ ¿ЩˆМ· О·И
ÚÔÛٷهÛÙ ÙÔ ·fi ÓÂÚfi.
● ∂¿У Л ВНˆЩВЪИО‹ Ы˘ЫОВ˘‹ ЫЩ·М·Щ‹ЫВИ, ‰ВУ Н·У··›ЪУВИ МЪФ˜ БИ· ЩЪ›· ПВЩ¿
(ÂÎÙfi˜ Â¿Ó ÎÏ›ÛÂÙÂ Î·È Í·Ó·ÓÔ›ÍÂÙ ÙÔ ‰È·ÎfiÙË ‹ Â¿Ó ‚Á¿ÏÂÙ ηÈ
Í·Ó·‚¿ÏÂÙ ÙÔ Î·ÏÒ‰ÈÔ Ú‡̷ÙÔ˜).
● ∂¿У ·Щ‹ЫВЩВ ЩФ ОФ˘М› ВИПФБ‹˜ ПВИЩФ˘ЪБИТУ ЫЩЛ ‰И¿ЪОВИ· ПВИЩФ˘ЪБ›·˜ ЩЛ˜
Ы˘ЫОВ˘‹˜. ЩfiЩВ ЫЩ·М·Щ¿ВИ Л Ы˘ЫОВ˘‹ БИ· ЩЪ›· ПВЩ¿ ЩЛ ПВИЩФ˘ЪБ›· ЩЛ˜ БИ·
ПfiБФ˘˜ ·ЫК¿ПВИ·˜.
Page 85

– 85 –
∂ППЛУИО¿
∞À∆√ª∞∆∏ §∂π∆√Àƒ°π∞
■ ∂¿У ¤¯Ф˘У ·ФМУЛМФУВ˘ıВ› ФИ Ъ˘ıМ›ЫВИ˜ ЫЩЛ МУ‹МЛ ЩФ˘ ЩЛПВОФУЩЪfiП, ЩfiЩВ ·ЪОВ›
Ó· ·Ù‹ÛÂÙ ÙËÓ ÂfiÌÂÓË ÊÔÚ¿ ÌfiÓÔ ÙÔ ÎÔ˘Ì› (START/STOP).
¶·Щ‹ЫЩВ ЩФ ОФ˘М› ∂¶π§√°∏™ §∂π∆√Аƒ°πш¡ ¤ЩЫИ ТЫЩВ У· ВМК·УИЫЩВ› ЫЩФ
display Ф ЩЪfiФ˜ ·˘ЩfiМ·ЩЛ˜ ПВИЩФ˘ЪБ›·˜ (AUTO).
● √Щ·У Л ВИПФБЛ ВИУ·И AUTO, Л Ы˘ЫОВ˘Л ı’ ·ФК·ЫИЫЛ ·˘ЩФМ·Щ· ЩФУ ЩЪФФ
ПВИЩФ˘ЪБИ·˜, £∂ƒª∞¡™∏, жА•∏ Л’ ·К˘БЪ·УЫЛ ·У·ПФБ· МВ ЩЛУ ˘·Ъ¯Ф˘Ы·
ıВЪМФОЪ·ЫИ· ‰ˆМ·ЩИФ˘. ∂УЩФ‡ЩФИ˜ Ф ЩЪfiФ˜ ПВИЩФ˘ЪБ›·˜ wll fi¯И ·ПП¿˙ВИ
fiЩ·У Ы‡У‰ВЫВ Л ВЫˆЩВЪИО‹ МФУ¿‰· МВ ЩЛУ ФП˘ ˘·›ıЪИ· МФУ¿‰· Щ‡ˆУ.
● ∂·У Ф ЩЪФФ˜ ПВИЩФ˘ЪБИ·˜ Ф˘ Л Ы˘ЫОВ˘Л ·ФК·ЫИЫВ ·˘ЩФМ·Щ· ‰ВУ ВИУ·И
О·Щ·ППЛПФ˜, ЩФЩВ У· ·ПП·НВЩВ ЩЛУ ПВИЩФ˘ЪБИ· ЫВ ¯ВИЪФОИУЛЩЛ (£ВЪМ·УЫЛ,
∞К˘БЪ·ЫЛ, ж˘НЛ Л ∞УВМИЫЩЛЪ·˜).
¶·Щ‹ЫЩВ ЩФ ОФ˘М› (START/STOP).
∏ ПВИЩФ˘ЪБ›· ·Ъ¯›˙ВИ МВ ¤У· ¯·Ъ·ОЩЛЪИЫЩИОfi ·ОФ˘ЫЩИОfi Ы‹М·.
°И· У· ЫЩ·М·Щ‹ЫВЩВ ЩЛ ПВИЩФ˘ЪБ›· Н·У··Щ‹ЫЩВ ЩФ ОФ˘М›.
ªФЪВ›ЩВ У· ·УВ‚¿ЫВЩВ ‹ У· О·ЩВ‚¿ЫВЩВ ЩЛУ ЪФБЪ·ММ·ЩИЫМ¤УЛ ıВЪМФОЪ·Ы›· В¿У
¯ЪВИ·ЫЩВ› О·Щ¿ 3ЖC ЩФ ·УТЩВЪФ.
¶ИВЫ·ЩВ ЩФ ОФ˘МИ ıВЪМФОЪ·ЫИ·˜: √ ЪФБЪ·ММ·ЩИЫМФ˜
ıВЪМФОЪ·ЫИ·˜ ı· ·ПП·НЛ О·Щ· ВУ·У ‚·ıМФ ∫ВПЫИФ˘ О·ıВ ºФЪ·.
● ∏ ЪФБЪ·ММ·ЩИЫМ¤УЛ ıВЪМФОЪ·Ы›· О·И Л В›О·ИЪЛ ıВЪМФОЪ·Ы›· ¯ТЪФ˘ МФЪФ‡У,
·Ó¿ÏÔÁ· Ì ÙȘ Û˘Óı‹Î˜, Ó· ·ÚÔ˘ÛÈ¿˙Ô˘Ó ·ÔÎÏ›ÛÂȘ.
● ∆Ф display ‰ВУ ‰В›¯УВИ ЩЛУ ЪФБЪ·ММ·ЩИЫМ¤УЛ ıВЪМФОЪ·Ы›· ЫЩФУ ·˘ЩfiМ·ЩФ ЩЪfiФ
ПВИЩФ˘ЪБ›·˜ AUTO. ∂¿У ·ПП¿НВЩВ ЩЛ Ъ‡ıМИЫЛ Л ВЫˆЩВЪИО‹ Ы˘ЫОВ˘‹ ·Ъ¿БВИ ¤У·
¯·Ъ·ОЩЛЪИЫЩИОfi ·ОФ˘ЫЩИОfi Ы‹М·.
1
START
STOP
H Ы˘ЫОВ˘‹ О·ıФЪ›˙ВИ ·˘ЩfiМ·Щ· ЩЛУ ПВИЩФ˘ЪБ›·, £EPMAN™H, жА•∏ Л’ ·К˘БЪ·УЫЛ ·У·ПФБ· МВ ЩЛУ ˘·Ъ¯Ф˘Ы·
ıВЪМФОЪ·ЫИ· ‰ˆМ·ЩИФ˘. O ВИПВБМ¤УФ˜ ЩЪfiФ˜ ПВИЩФ˘ЪБ›·˜ ‰ВУ ı· ·ПП¿НВИ fiЩ·У Л ıВЪМФОЪ·Ы›· ‰ˆМ·Щ›Ф˘
‰И·КФЪФФИЛıВ›. ∏ ВИПФБЛМВУЛ ПВИЩФ˘ЪБИ· ı’ ·ПП·НЛ ФЩ·У Л ıВЪМФОЪ·ЫИ· ‰ˆМ·ЩИФ˘ ·ПП·˙ВИ. ∂УЩФ‡ЩФИ˜ Ф ЩЪfiФ˜
ПВИЩФ˘ЪБ›·˜ wll fi¯И ·ПП¿˙ВИ fiЩ·У Ы‡У‰ВЫВ Л ВЫˆЩВЪИО‹ МФУ¿‰· МВ ЩЛУ ФП˘ ˘·›ıЪИ· МФУ¿‰· Щ‡ˆУ.
RESET
¶·Ù‹ÛÙ ÙÔ ÎÔ˘Ì› (∆∞ÃÀ∆∏∆∞ ∞¡∂ªπ™∆∏ƒ∞). ªÔÚ›Ù ӷ ÂÈϤÍÂÙ ÌÂٷ͇
AUTO Î·È LOW (Ã∞ª∏§∏).
°C
¢π∞º√ƒ∂™ §∂π∆√Àƒ°π∂™
■ ∂ÏÂÁ¯Ô˜ ·˘ÙfiÌ·Ù˘ ·ÓÂÎΛÓËÔ˘
● ∞У ˘¿ЪНВИ ‰И·ОФ‹ ЪВ‡М·ЩФ˜, Л ПВИЩФ˘ЪБ›· ı· Ы˘УВ¯›ЫВИ ·˘ЩfiМ·Щ· fiЩ·У В·У¤ПıВИ ЩФ ЪВ‡М·, ЫЩФУ ЪФЛБФ‡МВУФ ЩЪfiФ ПВИЩФ˘ЪБ›·˜
О·И МВ ЩЛУ ›‰И· О·ЩВ‡ı˘УЫЛ ЩФ˘ ·¤Ъ·.
(∫·ıТ˜ Л ПВИЩФ˘ЪБ›· ‰ВУ ·‡ВЩ·И МВ ЩФ ЩЛПВ¯ВИЪИЫЩ‹ЪИФ.)
● ∞У ‰ВУ ЫОФВ‡ВЩВ У· Ы˘УВ¯›ЫВЩВ ЩЛУ ПВИЩФ˘ЪБ›· ЩЛ˜ Ы˘ЫОВ˘‹˜ fiЩ·У В·У¤ПıВИ ЩФ ЪВ‡М· Ы‚‹ЫЩВ ЩЛУ ·ЪФ¯‹ ЪВ‡М·ЩФ˜.
ŸЩ·У ·У¿„ВЩВ ЩФУ ‰И·ОfiЩЛ, Л ПВИЩФ˘ЪБ›· ı· Ы˘УВ¯›ЫВИ ·˘ЩfiМ·Щ· МВ ЩФУ ЪФЛБФ‡МВУФ ЩЪfiФ ПВИЩФ˘ЪБ›·˜ О·И ЩЛУ ЪФЛБФ‡МВУЛ
О·ЩВ‡ı˘УЫЛ ЩФ˘ ·¤Ъ·.
™ЛМВ›ˆЫЛ: 1. ∂¿У ‰ВУ ··ИЩВ›ЩВ ЩФУ ·˘ЩfiМ·ЩФ ¤ПВБ¯Ф О·ИУФ‡ЪИФ˘ НВОИУ‹М·ЩФ˜, ·Ъ·О·ПТ Ы˘М‚Ф˘ПВ˘ıВ›ЩВ ЩФУ Ъ¿ОЩФЪ· ˆП‹ЫВТУ
Ы·˜ ‹ OFF ·fi ЩФУ ЩЛПВ¯ВИЪИЫМfi.
2. √ ∂ПВБ¯Ф˜ ∞˘ЩfiМ·ЩЛ˜ ∂·УВОО›УЛЫЛ˜ ‰ВУ В›У·И ‰И·ı¤ЫИМФ˜ fiЩ·У В›У·И Ъ˘ıМИЫМ¤УВ˜ ФИ ПВИЩФ˘ЪБ›В˜ ЩФ˘ ¯ЪФУФ‰И·ОfiИЛ
(∆imer О·И Sleep ∆imer).
Page 86

– 86 –
˚
C
RESET
˚
C
§∂π∆√Àƒ°π∞ £∂ƒª∞¡™∏™
● ГЪЛЫИМФФИЛЫ·ЩВ ЩФУ ЩЛПВЪЪ˘ıМИЫЩЛ БИ· ıВЪМ·УЫЛ ФЩ·У Л ВНˆЩВЪИОЛ ıВЪМФОЪ·ЫИ· ВИУ·И
О·Щˆ ·Ф 21 ∫ВПЫИФ˘. √Щ·У ВИУ·И ФП˘ ˙ВЫЩЛ (·Уˆ ·Ф 21 ∫ВПЫИФ˘), Л ıВЪМ·УЩИОЛ
‰˘У·ЩФЩЛЩ· МФЪВИ У· МЛ ПВИЩФ˘ЪБИЫЛ БИ· ЩЛУ ЪФЫЩ·ЫИ· ЩФ˘ ЩЛПВЪЪ˘ıМИЫЩФ˘.
● ∞У·ММ¤УФЫ ·ОФПФ˘ı›· ·У·КФЪИО¿ ˜В ·ФКВ‡Бˆ ·НИФИ˜›· ·fi ¿ЪıЪФ ¤М‚ПМ·, ·Ъ¤˜ˆ ˜Н
‰Ф˘ПВ›· ¯Ъ‹˜ВˆЫ ·˘Щ‹ ¤М‚ПЛМ· ВИЫ ¿Уˆ ·fi -15ЖC ·fi ¿ЪıЪФ ˘·›ıЪИФЫ ıВЪМФОЪ·˜›·.
¶·Щ‹ЫЩВ ЩФ ОФ˘М› ∂¶π§√°∏™ §∂π∆√Аƒ°πш¡ ¤ЩЫИ ТЫЩВ У·
ВМК·УИЫЩВ› ЫЩФ display
(£∂ƒª∞¡™∏).
ƒ˘ıÌ›ÛÙ ÙËÓ ÂÈı˘ÌËÙ‹ ∆∞ÃÀ∆∏∆∞ ∞¡∂ªπ™∆∏ƒ∞ Ì ÙÔ ÎÔ˘Ì›
(∞¡∂ªπ™∆∏ƒ∞) (ÛÙÔ display ÂÌÊ·Ó›˙ÂÙ·È Ë ÚÔÁÚ·ÌÌ·ÙÈÛ
∆∞ÃÀ∆∏∆∞ ̤ÓË Ù·¯‡ÙËÙ·).
(AUTO) : ∏ ∆∞ÃÀ∆∏∆∞ ∆√À ∞¡∂ªπ™∆∏ƒ∞ Â›Ó·È ÚÒÙ·
Аж∏§∏ О·И ·ПП¿˙ВИ ЫЩЛ ı¤ЫЛ ª∂™∏ ‹
XAMH§H fiЩ·У Л ıВЪМФОЪ·Ы›· ЩФ˘ ¯ТЪФ˘
КЩ¿ЫВИ ЩФ ЪФБЪ·ММ·ЩИЫМ¤УФ В›В‰Ф.
(Àæ∏§∏) : √ИОФУФМИО‹, БИ·Щ› Ф ¯ТЪФ˜ ˙ВЫЩ·›УВЩ·И БЪ‹БФЪ·.
ªФЪВ› fiМˆ˜ У· ·ИЫı¿УВЫЩВ ·Ъ¯ИО¿ ЪВ‡М·
ОЪ‡Ф˘ ·¤Ъ·.
(ª∂™∏) : ‹Û˘¯·.
(Ã∞ª∏§∏) : Ôχ ‹Û˘¯·.
ƒ˘ıМ›ЫЩВ ЩЛУ ВИı˘МЛЩ‹ ıВЪМФОЪ·Ы›· ¯ТЪФ˘ МВ Щ· ОФ˘МИ¿
£∂ƒª√∫ƒ∞™π∞ (ЫЩФ display ВМК·У›˙ВЩ·И Л ЪФБЪ·М·ЩИЫМ¤УЛ
ıВЪМФОЪ·Ы›·).
ªФЪФ‡У У· ˘¿Ъ¯Ф˘У ·ФОП›ЫВИ˜ МВЩ·Н‡ ЩЛ˜ ЪФБЪ·ММ·ЩИЫМ¤УЛ˜
ıВЪМФОЪ·Ы›·˜ О·И ЩЛ˜ ıВЪМФОЪ·Ы›·˜ ¯ТЪФ˘, ·У¿ПФБ· МВ ЩИ˜
ВИОЪ·ЩФ‡ЫВ˜ Ы˘Уı‹ОВ˜.
¶·Ù‹ÛÙ ÙÔ ÎÔ˘Ì›
(START/STOP). ∞ОФ‡БВЩ·И ¤У·
¯·Ъ·ОЩЛЪИЫЩИОfi ·ОФ˘ЫЩИОfi Ы‹М· О·И Л ı¤ЪМ·УЫЛ Щ›ıВЩ·И ЫВ
ПВИЩФ˘ЪБ›·. °И· У· ЩЛУ ı¤ЫВЩВ ВОЩfi˜ ПВИЩФ˘ЪБ›·˜, Н·У··Щ‹ЫЩВ ЩФ
ОФ˘М›.
■ ∂¿У ¤¯Ф˘У ·ФМУЛМФУВ˘ıВ› ФИ Ъ˘ıМ›ЫВИ˜ ЫЩЛ МУ‹МЛ ЩФ˘ ЩЛПВОФУЩЪfiП,
ЩfiЩВ ·ЪОВ› У· ·Щ‹ЫВЩВ ЩЛУ ВfiМВУЛ КФЪ¿ МfiУФ ЩФ ОФ˘М›
(START/STOP).
3
START
STOP
2
1
Page 87

– 87 –
∂ППЛУИО¿
RESET
˚
C
˚
C
§∂π∆√Àƒ°π∞ •∏ƒ∞¡™∏™
ГЪЛЫИМФФИ‹ЫЩВ ЩЛ Ы˘ЫОВ˘‹ БИ· Н‹Ъ·УЫЛ, fiЩ·У Л ıВЪМФОЪ·Ы›· ЩФ˘ ¯ТЪФ˘ В›У·И ¿Уˆ ·fi
16ЖC. ŸЩ·У В›У·И О¿Щˆ ·fi 15ЖC ‹ Н‹Ъ·УФЛ ‰ВУ ПВИЩФ˘ЪБВ›.
¶·Щ‹ЫЩВ ЩФ ОФ˘М› ∂¶π§√°∏™ §∂π∆√Аƒ°πш¡ ¤ЩЫИ ТЫЩВ У·
ВМК·УИЫЩВ› ЫЩФ display (•∏ƒ∞¡™∏).
∏ ∆∞ГА∆∏∆∞ ∞¡∂ªπ™∆∏ƒ∞ Ъ˘ıМ›˙ВЩ·И ·˘ЩfiМ·Щ· ЫЩЛ ı¤ЫЛ
Г∞ª∏§∏.
∆Ф ОФ˘М› ∆∞ГА∆∏∆∞ ∞¡∂ªπ™∆∏ƒ∞ ЩТЪ· ‰ВУ МФЪВ› У·
¯ЪЛЫИМФФИЛıВ›.
ƒ˘ıМ›ЫЩВ ЩЛУ ВИı˘МЛЩ‹ ıВЪМФОЪ·Ы›· ¯ТЪФ˘ МВ Щ· ОФ˘МИ¿
£∂ƒª√∫ƒ∞™π∞ (ЫЩФ display ВМК·У›˙ВЩ·И Л ЪФБЪ·М·ЩИЫМ¤УЛ
ıВЪМФОЪ·Ы›·).
°И· ЩЛУ ·К‡БЪ·УЫЛ Л ıВЪМФОЪ·Ы›· ‰ˆМ·Щ›Ф˘
Û˘ÛÙ‹ÓÂÙ·È Ó· Î˘Ì·›ÓÂÙ·È ÌÂٷ͇ 20-26°C.
1
■ §ÂÈÙÔ˘ÚÁ›· Í‹Ú·ÓÛ˘
ŸЩ·У Л ıВЪМФОЪ·Ы›· ЩФ˘ ¯ТЪФ˘ В›У·И ˘„ЛПfiЩВЪЛ ·fi ЩЛУ ЪФБЪ·ММ·ЩИЫМ¤УЛ ıВЪМФОЪ·Ы›·:
∏ Ы˘ЫОВ˘‹ НЛЪ·›УВИ ЩФУ ·¤Ъ· ЩФ˘ ¯ТЪФ˘ МВИТУФУЩ·˜ ЩЛ ıВЪМФОЪ·Ы›· М¤¯ЪИ ЩФ ЪФБЪ·ММ·ЩИЫМ¤УФ
›‰Ф.
ŸЩ·У Л ıВЪМФОЪ·Ы›· ЩФ˘ ¯ТЪФ˘ В›У·И ¯·МЛПfiЩВЪЛ ·fi ЩЛУ ЪФБЪ·ММ·ЩИЫМ¤УЛ ıВЪМФОЪ·Ы›·:
∏ ıВЪМФОЪ·Ы›· ЩФ˘ ¯ТЪФ˘ Ъ˘ıМ›˙ВЩ·И О·Щ¿ ЩЛ Н‹Ъ·УЫЛ П›БФ О¿Щˆ ·fi ЩЛУ Ъ·БМ·ЩИО‹ ıВЪМФОЪ·Ы›· ЩФ˘
¯ТЪФ˘, ·УВН¿ЪЩЛЩ· ·fi ЩЛУ ЪФБЪ·ММ·ЩИЫМ¤УЛ ıВЪМФОЪ·Ы›·. ∏ ПВИЩФ˘ЪБ›· ЫЩ·М·Щ¿ВИ (‰ЛП. Л ВЫˆЩВЪИО‹
Ы˘ЫОВ˘‹ ·‡ВИ У· ВО¤МВИ ·¤Ъ·) fiЩ·У Л ıВЪМФОЪ·Ы›· ЩФ˘ ¯ТЪФ˘ ‚Ъ›ЫОВЩ·И МfiПИ˜ О¿Щˆ ·fi ЩЛУ
ЪФБЪ·ММ·ЩИЫМ¤УЛ ıВЪМФОЪ·Ы›·.
START
STOP
¶·Ù‹ÛÙ ÙÔ ÎÔ˘Ì› (START/STOP) ∏ ‰È·‰Èηۛ· Ù˘
·К‡БЪ·УЫЛ˜ НВОЩУ¿ВИ МВ ¤У·У ¯·Ъ·ОЩЛЪИЫЩИОfi ‹¯Ф. ¶·Щ‹ЫЩВ ¿ПИ
ЩФ ОФ˘М› БИ· У· ‰И·Оfi„ВЩВ ЩЛ ПВИЩФ˘ЪБ›·.
2
■ ∂¿У ¤¯Ф˘У ·ФМУЛМФУВ˘ıВ› ФИ Ъ˘ıМ›ЫВИ˜ ЫЩЛ МУ‹МЛ ЩФ˘ ЩЛПВОФУЩЪfiП,
ЩfiЩВ ·ЪОВ› У· ·Щ‹ЫВЩВ ЩЛУ ВfiМВУЛ КФЪ¿ МfiУФ ЩФ ОФ˘М›
(START/STOP).
Page 88

– 88 –
˚
C
RESET
˚
C
§∂π∆√Àƒ°π∞ æ∏•∏™
ГЪЛЫИМФФИ‹ЫЩВ ЩЛ Ы˘ЫОВ˘‹ БИ· „‡НЛ, fiЩ·У Л ВНˆЩВЪИО‹ ıВЪМФОЪ·Ы›· В›У·И –10 ~ 43ЖC.
∂¿У Л ˘БЪ·Ы›· ЫЩФ ¯ТЪФ В›У·И ФП‡ ˘„ЛП‹ (¿Уˆ ·fi 80%) МФЪВ› У· Ы¯ЛМ·ЩИЫЩВ› П›БФ УВЪfi
Ы˘М‡ОУˆЫЛ˜ ЫЩЛ ЫО¿Ъ· ВОЪФ‹˜ ·¤Ъ· ЩЛ˜ ВЫˆЩВЪИО‹˜ Ы˘ЫОВ˘‹˜.
¶·Щ‹ЫЩВ ЩФ ОФ˘М› ∂¶π§√°∏™ §∂π∆√Аƒ°π∞™ ¤ЩЫИ ТЫЩВ У·
ВМК·УИЫЩВ› ЫЩФ display
(æÀÃ∞).
ƒ˘ıÌ›ÛÙ ÙËÓ ÂÈı˘ÌËÙ‹ ∆∞ÃÀ∆∏∆∞ ∆√À ∞¡∂ªπ™∆∏ƒ∞ Ì ÙÔ
ÎÔ˘Ì› (∆∞ÃÀ∆∏∆∞ ∞¡∂ªπ™∆∏ƒ∞) (ÛÙÔ display ÂÌÊ·Ó›˙ÂÙ·È
Ë ÚÔÁÚ·ÌÌ·ÙÈṲ̂ÓË Ù·¯‡ÙËÙ·).
(AUTO) : ∏ ∆∞ÃÀ∆∏∆∞ ∆√À ∞¡∂ªπ™∆∏ƒ∞ Â›Ó·È ÚÒÙ·
Аж∏§∏ О·И ·ПП¿˙ВИ ЫЩЛ ı¤ЫЛ ª∂™∏ ‹
XAMH§H fiЩ·У Л ıВЪМФОЪ·Ы›· ЩФ˘ ¯ТЪФ˘
КЩ¿ЫВИ ЩФ ЪФБЪ·ММ·ЩИЫМ¤УФ В›В‰Ф.
(YжH§H) : √ИОФУФМИО‹, БИ·Щ› Ф ¯ТЪФ˜ „˘¯Ъ·›УВЩ·И
ÁÚ‹ÁÔÚ·.
(ª∂™∏) : ‹Û˘¯·.
(XAMH§H) : Ôχ ‹Û˘¯·.
ƒ˘ıМ›ЫЩВ ЩЛУ ВИı˘МЛЩ‹ ıВЪМФОЪ·Ы›· ¯ТЪФ˘ МВ Щ· ОФ˘МИ¿
£∂ƒª√∫ƒ∞™π∞ (ЫЩФ display ВМК·У›˙ВЩ·И Л ЪФБЪ·ММ·ЩИЫМ¤УЛ
ıВЪМФОЪ·Ы›·).
ªФЪФ‡У У· ˘¿Ъ¯Ф˘У ·ФОП›ЫВИ˜ МВЩ·Н‡ ЩЛ˜ ЪФБЪ·ММ·ЩИЫМ¤УЛ˜
ıВЪМФОЪ·Ы›·˜ О·И ЩЛ˜ ıВЪМФОЪ·Ы›·˜ ¯ТЪФ˘, ·У¿ПФБ· МВ ЩИ˜
ВИОЪ·ЩФ‡ЫВ˜ Ы˘Уı‹ОВ˜.
¶·Ù‹ÛÙ ÙÔ ÎÔ˘Ì›
(START/STOP). ∞ОЫ‡БВЩ·И ¤У·
¯·Ъ·ОЩЛЪИЫЩИОfi ·ОФ˘ЫЩИОfi Ы‹М· О·И Л „‡НЛ Щ›ıВЩ·И ЫВ ПВИЩФ˘ЪБ›·.
°И· У· ЩЛУ ı¤ЫВЩВ ВОЩfi˜ ПВИЩФ˘ЪБ›·˜.
Н·У··Щ‹ЫЩВ ЩЫ ОФ˘М›.
∏ „‡НЛ ‰ВУ Щ›ıВЩ·И ЫВ ПВИЩФ˘ЪБ›· fiЩ·У Л ЪФБЪ·ММ·ЩИЫМ¤УЛ
ıВЪМФОЪ·Ы›· В›У·И ¿Уˆ ·fi ЩЛУ В›О·ИЪЛ ıВЪМФОЪ·Ы›· ¯ТЪФ˘
(·ÎfiÌ· Î·È ·Ó Ë ÊˆÙÂÈÓ‹ ¤Ó‰ÂÈÍË
(§∂π∆√Аƒ°π∞) ·У¿‚ВИ). ∏
ПВИЩФ˘ЪБ›· „‡НЛ˜ ·Ъ¯›˙ВИ МfiПИ˜ Ъ˘ıМ›ЫВЩВ М›· ıВЪМФОЪ·Ы›·
¯ЫМЛПfiЩВЪЛ ·fi ЩЛУ В›О·ИЪЛ ıВЪМФОЪ·Ы›· ¯ТЪФ˘.
■ ∂¿У ¤¯Ф˘У ·ФМУЛМФУВ˘ıВ› ФИ Ъ˘ıМ›ЫВИ˜ ЫЩЛ МУ‹МЛ ЩФ˘ ЩЛПВОФУЩЪfiП.
ЩfiЩВ ·ЪОВ› У· ·Щ‹ЫВЩВ ЩЛУ ВfiМВУЛ КФЪ¿ МfiУФ ЩФ ОФ˘М›
(START/STOP).
START
STOP
3
2
1
Page 89

– 89 –
∂ППЛУИО¿
§∂π∆√Àƒ°π∞ ∆√À ∞¡∂ªπ™∆∏ƒ∞
ªФЪВ›ЩВ У· ¯ЪЛЫИЛФФИ‹ЫВЩВ ЩЛ Ы˘ЫОВ˘‹ О·И ·ПТ˜ ˆ˜ Ы˘ЫОВ˘‹ О˘ОПФКФЪ›·˜ ·¤Ъ·.
∂ИП¤НЩВ ·˘Щ‹ ЩЛ ПВИЩФ˘ЪБ›· БИ· У· ЫЩВБУТЫВЩВ ·fi М¤Ы· ЩЛУ ВЫˆЩВЪИО‹ Ы˘ЫОВ˘‹ ЫЩФ Щ¤ПФ˜
ЩФ˘ О·ПФО·ИЪИФ‡.
¶·Ù‹ÛÙ ÙÔ ÎÔ˘Ì› ∂¶π§√°∏™ §∂π∆√Àƒ°π∞™ ¤ÙÛÈ ÒÛÙ ÛÙÔ
display У· ВМК·УИЫЩВ›
(ANEMI™∆∏ƒ∞™).
¶·Ù‹ÛÙ ÙÔ ÎÔ˘Ì› (TAXYTHTA ANEMI™∆∏ƒ).
¶·Щ‹ЫЩВ ЩФ ОФ˘М› (START/STOP). ∞ОФ‡БВЩ·И ¤У·
¯·Ъ·ОЩЛЪИЫЩИОfi ·ОФ˘ЫЩИfi Ы‹М· О·И Ф ·УВМИФЩ‹Ъ·˜ Щ›ıВЩ·И ЫВ
ПВИЩФ˘ЪБ›·. °И· У· ЩФУ ı¤ЫВЩВ ВОЩfi˜ ПВИЩФ˘ЪБ›·˜, Н·У··Щ‹ЫЩВ
ЩФ ОФ˘М›.
∆·¯‡ЩЛЩ· ·УВМИЫЩ‹Ъ· (AUTO)
.....
∂¿У ВИП¤Н·ЩВ ∞А∆√ª∞∆∏ Щ·¯‡ЩЛЩ· ·УВМИЫЩ‹Ъ· ЫЩЛ ПВИЩФ˘ЪБ›·
„‡Í˘/ı¤ÚÌ·ÓÛ˘:
°И¿ ЩЛ ПВИЩФ˘ЪБ›·
ı¤ÚÌ·ÓÛ˘
● ∏ Щ·¯‡ЩЛЩ· ЩФ˘ ·УВМИЫЩ‹Ъ· ·ПП¿˙ВИ ·˘ЩfiМ·Щ· ·У¿ПФБ· МВ ЩЛ ıВЪМФОЪ·Ы›·
ÙÔ˘ ÂÎÚ¤ÔÓÙÔ˜ ·¤Ú·.
● √Щ·У Л ‰И·КФЪ· МВЩ·Н˘ ıВЪМФОЪ·ЫИ·˜ ‰ˆМ·ЩИФ˘ О·И ЪФБЪ·ММ·ЩИЫМВУЛ˜
ıВЪМФОЪ·ЫИ·˜ ВИУ·И МВБ·ПЛ, Ф ·УВМИЫЩЛЪ·˜ ПВИЩФ˘ЪБВИ О·Щ· ∏π (˘„ЛПЛ)
Щ·¯˘ЩЛЩ·.
● √Щ·У Л ıВЪМФОЪ·ЫИ· ‰ˆМ·ЩИФ˘ Кı·УВИ ЩЛУ ЪФБЪ·ММ·ЩИЫМВУЛ ıВЪМФОЪ·ЫИ·,
Ф ·УВМИЫЩЛЪ·˜ ·ПП·˙ВИ ЫЩЛ LOW (¯·МЛПЛ) ·˘ЩФМ·Щˆ˜.
● √Щ·У Л ‰И·КФЪ· МВЩ·Н˘ ıВЪМФОЪ·ЫИ·˜ ‰ˆМ·ЩИФ˘ О·И ЪФБЪ·ММ·ЩИЫМВУЛ˜
ıВЪМФОЪ·ЫИ·˜ ВИУ·И МВБ·ПЛ, Ф ·УВМИЫЩЛЪ·˜ ПВИЩФ˘ЪБВИ О·Щ· ∏π (˘„ЛПЛ)
Щ·¯˘ЩЛЩ·.
● ŸЩ·У Л ıВЪМФОЪ·Ы›· ЩФ˘ ¯ТЪФ˘ ¤КЩ·ЫВ ЩЛУ ЪФБЪ·ММ·ЩИЫМ¤УЛ ЩИМ‹ ·Ъ¯›˙ВИ
Л ПВИЩФ˘ЪБ›· „‡НЛ˜ О·Щ¿ ЩЛУ ФФ›· Ъ˘ıМ›˙ВЩ·И Л Щ·¯‡ЩЛЩ· ЩФ˘ ·УВМИФЩ‹Ъ·
О·И Л ıВЪМФОЪ·Ы›· Щ·˘ ¯ТЪФ˘ ¤Щ·И ТЫЩВ У· ‰И·ЩЛЪФ‡УЩ·И ‚¤ПЩИЫЩВ˜ Ы˘Уı‹ОВ˜
БИ· К˘ЫИО‹ О·И ˘БИВИУ‹ К‡НЛ.
°И· ЩЛ ПВИЩФ˘ЪБ›· „‡НЛ˜
1
2
START
STOP
RESET
Page 90

– 90 –
¶ø™ Xƒ∏™πª√¶√π∂π∆∞π √ ƒÀ£ªπ™∆∏™ Xƒ√¡√À
● ∫·Ù¿ ÙËÓ ÚÔÁÚ·ÌÌ·ÙÈṲ̂ÓË ÒÚ·
Л Ы˘ЫОВ˘‹ Щ›ıВЩ·И ЫВ ПВИЩФ˘ЪБ›·
(ВОЩfi˜ ПВИЩФ˘ЪБ›·˜) О·И ВОЩfi˜
ПВИЩФ˘ЪБ›·˜ (ЫВ ПВИЩФ˘ЪБ›·).
● ∏ ·Ó¿ÏÔÁË ÂÈÏÔÁ‹
Ъ·БМ·ЩФФИВ›Щ·И ЪТЩ· Ы’ ·˘Щfi
ЩФ ¯ЪФУИОfi ЫЛМВ›Ф Ф˘ ¤Ъ¯ВЩ·И
ЪТЩ·.
● ∆Ô ‚¤ÏÔ˜ Ô˘ ÂÌÊ·Ó›˙ÂÙ·È ÛÙÔ
display ВУ‰ВИОУ‡ВИ ЩЛ ‰И·‰Ф¯‹
ЩˆУ ВИПФБТУ.
ªФЪВ›ЩВ У· ЪФБЪ·ММ·Щ›ЫВЩВ ЩЛУ ТЪ· О·Щ¿
ЩЛУ ФФ›· Л Ы˘ЫОВ˘‹ Щ›ıВЩ·И ВОЩfi˜ ПВИЩФ˘ЪБ›·˜.
ªÂÙ¿ ·fi ÙËÓ ·ÏÏ·Á‹
ÙˆÓ Ì·Ù·ÚÈÒÓ
¶ˆ˜ ·Ó·Î·ÏÂ›Ù·È Ë ·ÔÌÓ‹ÌÔÓ¢ÛË
™ЛМ·‰¤„ЩВ МВ ЩФ ·Ъ¿ı˘ЪФ ВОФМ‹˜ ЫЛМ¿ЩˆУ ЩФ˘ ЩЛПВОФУЩЪfiП ЫЩЛУ О·ЩВ‡ı˘УФЛ ЩЛ˜ ВЫˆЩВЪИО‹˜ Ы˘ЫОВ˘‹˜
О·И ·Щ‹ЫЩВ ЩФ ОФ˘М› (∞¡∞∫§∏™∏).
∞ОФ‡БВЩ·И ¤У· ¯·Ъ·ОЩЛЪИЫЩИОfi ·ОФ˘ЫЩИОfi Ы‹М· О·И Л ¤У‰ВИНЛ (∞¶√ª¡∏ª√¡∂А™∏) О·И Л П˘¯У›·
(ƒА£ªπ™∆∏™ Гƒ√¡√А) ЫЩЛУ ВЫˆЩВЪИО‹ Ы˘ЫОВ˘‹ Ы‚‹УФ˘У.
1
ƒ˘ıÌ›ÛÙ ÙËÓ Â›Î·ÈÚË Ì¤Ú·
Î·È ÙÔ Ì‹Ó· Ì ÙÔ ÎÔ˘Ì›
ƒÀ£ªπ™∏™ Ã√¡√À.
1
¶·Ù‹ÛÙ ÙÔ ÎÔ˘Ì›
(ƒÀ£ªπ™∆∏™ Ã√¡√À
∞¡√π°ª∞∆√™). ™ÙÔ display
·Ó¿‚ÂÈ ÙÔ Û‹Ì·
(∞¡√π°ª∞).
2
ƒ˘ıÌ›ÛÙ ÙËÓ ÒÚ·
ОПВИЫ›М·ЩФ˜ МВ ЩФ
ОФ˘МЛ› ƒА£ªπ™∏™
Гƒ√¡√А.
3
¶·Ù‹ÛÙÂ ÙÔ
(ƒÀ£ªπ™∆∏™ Ã√¡√À
∞¡√π°ª∞∆√™) ¤ÙÛÈ ÒÛÙ ÙÔ
Û‹Ì· (∫∞∂π™πª√) Ó·
·Ó¿‚ÂÈ Î·È ÙÔ Û‹Ì·
(∞¡√π°ª∞) Ó· ·Ó·‚ÔÛ‚‹ÓÂÈ.
™∏ª∂πø™∏
ªÔÚ›Ù ӷ Ú˘ıÌ›ÛÂÙ ÌfiÓÔ ‹ ÙÔ Ú˘ıÌÈÛÙ‹ ¯ÚfiÓÔ˘ ∫§∂π™πª∞∆√™ ‹ ÙÔ Ú˘ıÌÈÔÙ‹ ¯ÚfiÓÔ˘ ∞¡√π°ª∞∆√™ ‹
ÙÔ Ú˘ıÌÈÛÙ‹ ¯ÚfiÓÔ˘ ∞¡√π°ª∞∆√™/∫§∂π™πª∞∆√™.
● ∏ Û˘Û΢‹ ı’·Ó¿„ÂÈ
ЫЩФ˘˜ О·ıФЪИЫМ¤УФ˘˜
¯ЪfiУФ˘˜.
øƒ∞,
∏ª∂ƒ∞,
ª∏¡∞™
(›ηÈÚË
ÒÚ·, Ë̤ڷ,
Ì‹Ó·˜)
ƒÀ£ªπ™∆∏™
Ã√¡√À
∫§∂π™πª∞∆√™
ƒÀ£ªπ™∆∏™
Ã√¡√À
∞¡√π°ª∞∆√™
∞¶√ª¡∏ª√¡∂À™∏
∞¡∞∫§∏™∏
flÚ·, Ë̤ڷ, Ì‹Ó·˜
ƒ˘ıÌÈÛÙ‹˜ Ã√¡√À ∫§∂π™πª∞∆√™
1
¶·Ù‹ÛÙ ÙÔ ÎÔ˘Ì›
(ƒÀ£ªπ™∆∏™ Ã√¡√À
∫§∂π™πª∞∆√™). ™ÙÔ display ·Ó¿‚ÂÈ
ÙÔ Û‹Ì· (∫§∂π™πª√).
ƒ˘ıÌÈÛÙ‹˜ Ã√¡√À ∞¡√π°ª∞∆√™
ƒ˘ıÌÈÛı‹˜ Ã√¡√À ∞¡√π°ª∞∆√™/ ∫§∂π™πª∞∆√™
1
¶·Ù‹ÔÙ ÙÔ ÎÔ˘Ì›
(ƒÀ£ªπ™∆∏™ Ã√¡√À
∫§∂π™πª∞∆√™) ¤ÙÛÈ ÒÛÙÂ
ÛÙÔ display ·Ó¿‚ÂÈ ÙÔ
Û‹Ì· (∫§∂π™πª√).
RESET
M D
M D
AM
STOP
Start
AM
Start
Stop
PM
Start Stop
PM
AM
PM
Page 91

– 91 –
∂ППЛУИО¿
3
™ЛМ·‰¤„ЩВ МВ ЩФ ·Ъ¿ı˘ЪФ ВОФМ‹˜ ЫЛМ¿ЩˆУ ЫЩЛУ ВЫˆЩВЪИО‹ Ы˘ЫОВ˘‹ О·И
·Щ‹ЫЩВ ЩФ ОФ˘М› (∞¶√ª¡∏ª√¡∂А™∏).
∆Ф ЫЩФИ¯В›Ф (∫§∂π™πª√) ·У¿‚ВИ ·УЩ› У· ·У·‚ФЫ‚‹УВИ О·И ЩФ ЫЩФИ¯В›Ф
(∞¶√ª¡∏ª√¡∂Аª∂¡√) ·У¿‚В›. ∞ОФ‡БВЩ·И ¤У· ¯·Ъ·ОЩЛЪИЫЩИОfi ·ОФ˘ЫЩИОfi
Ы‹М· О·И Л П˘¯У›· (ƒА£ªπ™∆∏™ Гƒ√¡√А) ЫЩЛУ ВЫˆЩВЪИО‹ Ы˘ЫОВ˘‹ ·У¿‚ВИ.
● ∏ ¤Ó‰ÂÈÍË Ù˘ ÒÚ·˜
ÂÍ·Ê·Ó›˙ÂÙ·È ·˘ÙfiÌ·Ù·
ÌÂÙ¿ ·fi 10 ‰Â˘ÙÂÚfiÏÂÙÔ.
● °И· У· ВП¤БНВЩВ ЩЛ
Ú‡ıÌÈÛË Ù˘ ÒÚ·˜, ·Ù‹ÛÙÂ
‰‡Ô ÊÔÚ¤˜ ÙÔ ÎÔ˘Ì›
ƒÀ£ªπ™∏™ Ã√¡√À.
√ ЪФБЪ·ММ·ЩИЫМfi˜ ЩЛ˜
В›О·ИЪЛ˜ ТЪ·˜ ¤¯ВИ ЩТЪ·
ФПФОПЛЪˆıВ›.
● √ Ъ˘ıМИЫЩ‹˜ ¯ЪfiУФ˘ МФЪВ› У· ¯ЪЛЫИМФФИЛıВ› МВ ЩЪВИ˜ ЩЪfiФ˘˜: ˆ˜ Ъ˘ıМИЫЩ‹˜ ¯ЪfiУФ˘ ∫§∂π™πª∞∆√™, ˆ˜
Ъ˘ıМИЫЩ‹˜ ¯ЪfiУФ˘ ∞¡√π°ª∞∆√™ О·И ˆ˜ Ъ˘ıМИЫЩ‹˜ ¯ЪfiУФ˘ ∞¡√π°ª∞∆√™/∫§∂π™πª∞∆√™.
¶Ъ¤ВИ ЪТЩ· У· ЪФБЪ·ММ·ЩИЫЩВ› Л В›О·ИЪ‹ ТЪ·, БИ·Щ› ·˘Щ‹ ¯ЪЛЫИМВ‡ВИ ˆ˜ ‚¿ЫЛ М¤ЩЪЛЫЛ˜.
● ∂¿У ¤¯Ф˘У ·ФМУЛМФУВ˘ıВ› ЫЩЛ МУ‹МЛ ЩФ˘ ЩЛПВОФУЩЪfiП ФИ Ъ˘ıМ›ЫВИ˜, ЩfiЩВ ¯ЪВИ¿˙ВЩ·И МfiУФ У· ·Щ‹ЫВЩВ
ЩФ ОФ˘М› (∞¶√ª¡∏ª√¡∂А™∏) БИ· У· Н·У·¯ЪЛЫИМФФИ‹ЫВЩВ ЩЛУ ВfiМВУЛ КФЪ¿ ЩИ˜ ›‰ИВ˜ Ъ˘ıМ›ЫВИ˜.
2
¶·Ù‹ÛÙÂ ÙÔ
ÎÔ˘Ì› (øƒ∞)
3
¶ÚÔÁÚ·ÌÌ·Ù›ÛÙÂ ÙËÓ
›ηÈÚË ÒÚ· Ì ÙÔ ÎÔ˘Ì›
ƒÀ£ªπ™∏™ Ã√¡√À.
¶·Ú¿‰ÂÈÁÌ·: ∏ ›ηÈÚË ÒÚ· ›ӷ 1: 30 Ì.Ì.
2
¶ЪФБЪ·ММ·Щ›ЫЩВ ЩФ ¯ЪfiУФ
ОПВИЫ›М·ЩФ˜ МВ ЩФ ОФ˘М›
ƒА£ªπ™∏™ Гƒ√¡√А.
√ ЪФБЪ·ММ·ЩИЫМfi˜ ЩФ˘ ¯ЪfiУФ˘ ОПВИЫ›М·ЩФ˜ ¤¯ВИ ЩТЪ· ФПФОПЛЪˆıВ›.
¶·Ъ¿‰ВИБМ·:
∏ Ы˘ЫОВ˘‹ ЩИıВЩ·И ВОЩfi˜ ПВИЩФ˘ЪБ›·˜ ЫЩИ˜ 11: 00 М.М.
¶·Ъ¿‰ВИБМ·:
∏ Ы˘ЫОВ˘‹ ı· ·УФ›НВИ ЫВ 7.00 ·.М.
√ ЪФБЪ·ММ·ЩИЫМФ˜ ·˘ЩЛ˜ ЩЛ˜ ˆЪ·˜ В¯ВИ ЩˆЪ· О·УФУИЫЩВИ’.
4
¶ÚÔÁÚ·ÌÌ·Ù›ÛÙÂ ÙÔ ¯ÚfiÓÔ
·ÓÔ›ÁÌ·ÙÔ˜ Ì ÙÔ ÎÔ˘Ì›
ƒÀ£ªπ™∏™ Ã√¡√À.
5
™ЛМ·‰¤„ЩВ МВ ЩФ ·Ъ¿ı˘ЪФ ВОФМ‹˜ ЫЛМ¿ЩˆУ ЫЩЛУ ВЫˆЩВЪИО‹ Ы˘ЫОВ˘‹ О·И
·Щ‹ЫЩВ ЩФ ОФ˘М› (∞¶√ª¡∏ª√¡∂А™∏).
∆Ф ЫЩФИ¯В›Ф (∞¡√π°ª∞) ·У¿‚ВИ ·УЩ› У· ·У·‚ФЫ‚‹УВИ О·И ЩФ ЫЩФИ¯В›Ф
(∞¶√ª¡∏ª√¡∂Аª∂¡√) ·У¿‚ВИ. ∞ОФ‡БВЩ·И ¤У· ¯·Ъ·ОЩЛЪИЫЩИОfi ·ОФ˘ЫЩИОfi
Û‹Ì· Î·È Ë Ï˘¯Ó›· (ƒÀ£ªπ™∆∏™ Ã√¡√À) ÛÙËÓ Û˘Û΢‹ „‡Í˘ ·Ó¿‚ÂÈ.
3
™ЛМ·‰¤„ЩВ МВ ЩФ ·Ъ¿ı˘ЪФ ВОФМ‹˜ ЫЛМ¿ЩˆУ ЫЩЛУ ВЫˆЩВЪИО‹ Ы˘ЫОВ˘‹ О·И
·Щ‹ЫЩВ ЩФ ОФ˘М› (∞¶√ª¡∏ª√¡∂А™∏).
∆Ф ЫЩФИ¯В›Ф (∞¡√π°ª∞) ·У¿‚ВИ ·УЩ› У· ·У·‚ФЫ‚‹УВИ О·И ЩФ ЫЩФИ¯В›Ф
(∞¶√ª¡∏ª√¡∂Аª∂¡√) ·У¿‚ВИ. ∞ОФ‡БВЩ·И ¤У· ¯·Ъ·ОЩЩЛЪИЫЩИОfi ·ОФ˘ЫЩИОfi Ы‹М·
О·И Л П˘¯У›· (ƒА£ªπ™∆∏™ Гƒ√¡√А) ЫЩЛУ ВЫˆЩВЪИО‹ Ы˘ЫОВ˘‹ ·У¿‚ВИ.
2
¶ÚÔÁÚ·ÌÌ·Ù›ÛÙÂ ÙÔ
¯ÚfiÓÔ ·ÓÔ›ÁÌ·ÙÔ˜ Ì ÙÔ
ÎÔ˘Ì› ƒÀ£ªπ™∏™
Ã√¡√À.
¶·Ú¿‰ÂÈÁÌ·:
∏ Ы˘ЫОВ˘‹ ı· ОПВ›ЫВИ ЫВ 10.30 .М. О·И ı· ·УФИ¯ЩВ›
ЫВ 7.00 ·.М.
√И Ъ˘ıМ›ЫВИ˜ ЩˆУ ¯ЪfiУˆУ ¤У·ЪНЛ˜/·‡ЫЛ˜
ПВИЩФ˘ЪБ›·˜ ¤¯Ф˘У ФПФОПЛЪˆıВ›.
4
•·Ó··Ù‹ÛÙ ÙÔ ÎÔ˘Ì›
ƒÀ£ªπ™∏™ Ã√¡√À.
PM PM
AM
PM
PM
PM
AM
AM
AM
AM
PM
PM
Page 92

– 92 –
¶ø™ ∞¡∞∫∞§∂π∆∞π ∏ ∞¶√ª¡∏ª√¡∂À™∏
™ЛМ·‰¤„ЩВ МВ ЩФ ·Ъ¿ı˘ЪФ ВОФМ‹˜ ЫЛМ¿ЩˆУ ЫЩЛУ ВЫˆЩВЪИО‹ Ы˘ЫОВ˘‹ О·И ·Щ‹ЫЩВ ЩФ ОФ˘М›
(∞¡∞∫§∏™∏).
∆Ф ЫЩФИ¯В›Ф (∞¶√ª¡∏ª√¡∂Аª∂¡√) Ы‚‹УВИ О·И ·ОФ‡БВЩ·И ¤У· ¯·Ъ·ОЩЛЪИЫЩИОfi ·ОФ˘ЫЩИОfi Ы‹М· О·И
Л П˘¯У›· (ƒА£ªπ™∆∏™ Гƒ√¡√А) ЫЩЛУ ВЫˆЩВЪИО‹ Ы˘ЫОВ˘‹ Ы‚‹УВИ.
¶ø™ ¶ƒ√°ƒ∞ªª∞∆π∑∂∆∞π ∏ ∞À∆√ª∞∆∏ ¶∞À™∏
1
¶ÚÔÁÚ·ÌÌ·Ù›ÛÙ ÙÔ Ú˘ıÌÈÛÙ‹ ¯ÚfiÓÔ˘ ∞¡√π°ª∞∆√™.
¶ЪТЩ· ЪФБЪ·ММ·Щ›ЫЩВ ЩЛУ В›О·ИЪЛ ТЪ· ¤·У ‰ВУ ¤¯ВИ ‹‰Л ЪФБЪ·ММ·ЩИЫЩВ› (µП¤В ЩИ˜ ЫВП›‰В˜
БИ· ЩФУ ЪФБЪ·ММ·ЩИЫМfi ЩЛ˜ В›О·ИЪЛ˜ ТЪ·˜). ¶·Щ‹ЫЩВ ЩФ ОФ˘М› (∞А∆√ª∞∆∏ ¶∞А™∏)
О·И ЩФ display ·ПП¿˙ВИ fiˆ˜ ·Ъ›ЫЩ·Щ·И ·Ъ·О¿Щˆ.
ƒ˘ıМИЫЩ‹˜ ·˘ЩfiМ·ЩЛ˜ ·‡ЫЛ˜: ∏ Ы˘ЫОВ˘‹ Ы˘УВ¯›˙ВИ ЩЛ ПВИЩФ˘ЪБ›·
ЩЛ˜ БИ· ЩФУ ЪФБЪ·ММ·ЩИЫМ¤УФ ·ЪИıМfi ˆЪТУ О·И МВЩ¿ ·‡ВИ У·
ПВИЩФ˘ЪБВ›. ™ЛМ·‰¤„ЩВ МВ ЩФ ·Ъ¿ı˘ЪФ ВОФМ‹˜ ЫЛМ¿ЩˆУ ЫЩЛУ
ВЫˆЩВЪИО‹ Ы˘ЫОВ˘‹ О·И ·Щ‹ЫЩВ ЩФ ОФ˘М› ∞А∆√ª∞∆∏ ¶∞А™∏. ∏
ПЛЪФКФЪ›В˜ ЩФ˘ Ъ˘ıМИЫЩ‹ ¯ЪfiУФ˘ ВМК·У›˙ФУЩ·И ЫЩФ ЩЛПВОФУЩЪfiП.
∏ П˘¯У›· ЩФ˘ ƒА£ªπ™∆∏ Гƒ√¡√А ·У¿‚ВИ О·И ·ОФ‡БВЩ·И ¤У·
¯·Ъ·ОЩЛЪИЫЩИОfi ·ОФ˘ЫЩИОfi Ы‹М· ·fi ЩЛУ ВЫˆЩВЪИО‹ Ы˘ЫОВ˘‹. ªВЩ¿
·fi ЩФ ЪФБЪ·ММ·ЩИЫМfi ЩЛ˜ ·˘ЩfiМ·ЩЛ˜ ·‡ЫЛ˜ ВМК·У›˙ВЩ·И ЫЩФ
display Л ТЪ· ·‡ЫЛ˜ ПВИЩФ˘ЪБ›·˜.
¶·Ú¿‰ÂÈÁÌ·:
∂¿Ó ÚÔÁÚ·ÌÌ·Ù›ÛÂÙ ÛÙȘ 11:38 Ì.Ì, ÙËÓ
·˘ЩfiМ·ЩЛ ·‡ЫЛ БИ· ЩЪВ›˜ ТЪВ˜ ЩfiЩВ
‰И·ОfiЩВЩ·И Л ПВИЩФ˘ЪБ›· ЫЩИ˜ 2:38 .М.
2
¶·Ù‹ÛÙ ÙÔ ÎÔ˘Ì› (∞À∆√ª∞∆∏ ¶∞À™∏) Î·È ÚÔÁÚ·ÌÌ·Ù›ÛÙÂ
ÙÔÓ ¯ÚfiÓÔ ·˘ÙfiÌ·Ù˘ ·‡Û˘.
∏ Ы˘ЫОВ˘‹ Щ›ıВЩ·И ВОЩfi˜ ПВИЩФ˘ЪБ›·˜ ·fi ЩЛУ
·˘ЩfiМ·ЩЛ ·‡ЫЛ О·И Щ›ıВЩ·И Н·У¿ ЫВ ПВИЩФ˘ЪБ›·
·fi ÙÔ Ú˘ıÌÈÛÙ‹ ¯ÚfiÓÔ˘ ·ÓÔ›ÁÌ·ÙÔ˜.
°И· ı¤ЪМ·УЫЛ:
™В ·˘Щ‹ ЩЛУ ВЪ›ЩˆЫЛ ЩФ
ОПИМ·ЩИЫЩИОfi ı· Ы‚‹ЫВИ 2 ТЪВ˜ (ЫЩИ˜
1:38 .М) О·И ı· ·У¿„ВИ ·ЪОВЩ¿ УˆЪ›˜
У· Кı¿ЫВИ ЫЩЛУ ЪФО·ıФЪИЫМ¤УЛ
ıВЪМФОЪ·Ы›· ЫЩИ˜ 6:00 .М
∞À∆√ª∞∆∏ ¶∞À™∏
H
H
AM
AM
∆ЪfiФ˜ ПВИЩФ˘ЪБ›·˜ ŒÓ‰ÂÈÍË
ƒ˘ıÌÈÛÙ‹˜ 1 ÒÚ· → 2 ÒÚ˜ → 3 ÒÚ˜ → 7 ÒÚ˜
·˘ÙfiÌ·Ù˘ ·‡Û˘ Ъ˘ıМИЫЩ‹˜ ·˘ЩfiМ·ЩЛ˜ ·‡ЫЛ˜ ОПВИЫЩfi˜
4
1
H
Page 93

– 93 –
∂ППЛУИО¿
∂ÂÍ‹ÁËÛË Ù˘ ·˘ÙfiÌ·Ù˘ ·‡Û˘
∏ Ы˘ЫОВ˘‹ ВП¤Б¯ВИ ·˘ЩfiМ·Щ· ЩЛУ ∆∞ГА∆∏∆∞ ∆√А ∞¡∂ªπ™∆∏ƒ∞
О·И ЩЛ ıВЪМФОЪ·Ы›· ¯ТЪФ˘ ¤ЩЫИ ТЫЩВ У· ˘¿Ъ¯Ф˘У ‹Ы˘¯Л
ПВИЩФ˘ЪБ›· О·И ˘БИВИУ¤˜ Ы˘Уı‹ОВ˜.
● ∂·У Л ЛМВЪФМЛУИ· Л’ Ф ·ЪˆУ ¯ЪФУФ˜ ‰ВУ О·УФУИЫЩЛОВ, Ф
¯ЪФУФ‰И·ОФЩЛ˜ ˘УФ˘ ‰ВУ МФЪВИ У· ЪФБЪ·ММ·ЩИЫЩЛ’.
● ∂·У ЪФБЪ·ММ·ЩИЫВЩВ ЩЛУ ˆЪ· ˘УФ˘ МВЩ·’ Ф˘ Ф
¯ÚÔÓԉȷÎÔÙ˘ off-, on/off- Ë’ off/on- В¯ВИ
ЪФБЪ·ММ·ЩИЫЩЛ, ЩФЩВ ˘ВЪИЫ¯˘ВИ Ф ¯ЪФУФ‰И·ОФЩЛ˜
˘УФ˘ ·УЩИ’ Ф ЪФБЪ·ММ·ЩИЫМФ˜ ЩФ˘ ¯ЪФУФ‰И·ОФЩЛ˜ off, on/off Л’ off/on.
● ¢ВУ ВИУ·И ‰˘У·ЩФУ У· ЪФБЪ·ММ·ЩИЫВЩВ ЩЛУ ˆЪ· О·Щ· ЩЛУ
‰И·ЪОВИ· ПВИЩФ˘ЪБИ·˜ ¯ЪФУФ‰И·ОФЩФ˘ ˘УФ˘.
● √Ù·Ó Ë ˆÚ· ÙÔ˘ ¯ÚÔÓԉȷÎÔÙË ˘ÓÔ˘ ¯ÂÈ ‰È·ÚÚ¢ÛÂÈ,
В·У ИВЫВЩВ ЩФ ОФ˘МИ ˘УФ˘ Н·У·, Ф ¯ЪФУФ‰И·ОФЩЛ˜
˘УФ˘ ı· ЪФБЪ·ММ·ЩИЫЩЛ О·Щ· ЩФУ ЩВП·И˘Щ·ИФ ЩЪФФ.
● √ ¯ÚÔÓԉȷÎÔÙ˘ ˘ÓÔ˘ ÈÛ¯˘ÂÈ ÌÔÓÔ ÌÈ· ÊÔÚ·.
™∏ª∂πø™∏
Page 94

– 94 –
ƒÀ£ªπ™∏ ∆ø¡ ∫∞∆∂À£À¡∆∏ƒø¡ ∞∂ƒ∞
1
∫·Ù‡ı˘ÓÛË ÙÔ˘ ·¤Ú· ·fi ÙÔ ·ÈÚ-ÎÔÓÙ›ÛÈÔÓ ÚÔ˜ Ù· ¿Óˆ
Î·È ÚÔ˜ Ù· οو.
√ ФЪИ˙ФУЩИФ˜ О·ЩВ˘ı˘УЩЛЪ·˜ ·ВЪ· ВИУ·И ВБО·Щ·ЫЩЛМВУФ˜
·˘ЩФМ·Щ· ЫВ БˆУИ· О·Щ·ППЛПЛ БИ· О·ıВ ПВИЩФ˘ЪБИ·. √
О·ЩВ˘ı˘УЩЛЪ·˜ МФЪВИ У· Б˘ЪИЫЛ В·Уˆ Л’ О·Щˆ Ы˘УВ¯ˆ˜
О·И МФЪВИ У· ВБО·Щ·ЫЩ·ıЛ ЫВ БˆУИ· ВОПФБЛ˜ Ы·˜ МВЫˆ
ЩФ ОФ˘МИФ˘ “ (∞А∆√ª∞∆∏ °ш¡π∞∫∏ ƒА£ªπ™∏)”.
● ŸÙ·Ó ·Ù‹ÛÂÙ ÙÔ ÎÔ˘Ì› “ (∞À∆√ª∞∆∏
°ш¡π∞∫∏ ƒА£ªπ™∏)” М›· КФЪ¿, Ф ФЪИ˙fiУЩИФ˜
О·ЩВ˘ı˘УЩ‹Ъ·˜ ·¤Ъ· ОИУВ›Щ·И ЪФ˜ Щ· ¿Уˆ О·И ЪФ˜
Щ· О¿Щˆ. ŸЩ·У ·Щ‹ЫВЩВ ЩФ ОФ˘М› Н·У¿, Ф
О·ЩВ˘ı˘УЩ‹Ъ·˜ ·ОИУЛЩФФИВ›Щ·И ЫЩЛ ı¤ЫЛ ЩФ˘. ªФЪВ›
У· ВЪ¿ЫФ˘У МВЪИО¿ ‰В˘ЩВЪfiПВЩ· (6 ‰В˘ЩВЪfiПВЩ·
ВЪ›Ф˘) М¤¯ЪИ У· ·Ъ¯›ЫВИ У· ОИУВ›Щ·И Ф
О·ЩВ˘ı˘УЩ‹Ъ·˜.
XЪЛЫИМФФИ‹ЫЩВ ЩЛУ ФЪИ˙fiУЩИ· ВЪЫ›‰· М¤Ы· ЫЩФ
Ú˘ıÌÈṲ̂ÓÔ Â‡ÚÔ˜ fiˆ˜ Ê·›ÓÂÙ·È ‰ÂÍÈ¿.
ŸЩ·У Л ПВИЩФ˘ЪБ›· ЫЩ·М·Щ‹ЫВИ, Л ФЪИ˙fiУЩИ· ВЪЫ›‰·
ÌÂÙ·ÎÈÓÂ›Ù·È Î·È ÛÙ·Ì·Ù¿ÂÈ ÂΛ fiÔ˘ ‹ ¤ÍÔ‰Ô˜ ·¤Ú·
ÎÏ›ÓÂÈ.
RESET
¶PO™OXH
™ÙËÓ "æY•H" ÌËÓ ·Ê‹ÓÂÙ ÙËÓ ÔÚÈ˙fiÓÙÈ· ÂÚÛ›‰· Ó·
ОИУВ›Щ·И БИ· МВБ¿ПФ ¯ЪФУИОfi ‰И¿ЩЛМ·. MФЪВ› У·
‰ЛМИФ˘ЪБЛıВ› П›БЛ ˘БЪ·Ы›· О·И МВЪИО¤˜ ЫЩ·БfiУВ˜ У·
¤ЫФ˘У ·fi ЩИ˜ ВЪЫ›‰В˜.
2
P‡ıМИЫЛ ЩФ˘ ·¤Ъ· ·ЪИЫЩВЪ¿ ‰ВНИ¿
¶И¿ЫЩВ ЩИ˜ О¿ıВЩВ˜ ВЪЫ›‰В˜ fiˆ˜ К·›УВЩ·И ЫЩЛУ ВИОfiУ·
О·И Ъ˘ıМ›ЫЩВ ЩФУ ·¤Ъ· ‰ВНИ¿ О·И ·ЪИЫЩВЪ¿.
!
∫¿ıÂÙÔ˜
∫¿ıÂÙÔ˜
Page 95

– 95 –
∂ППЛУИО¿
¶ø™ NA A§§AZETE TI™ M¶ATAPIE™ ™TO TH§EXEIPI™THPIO
1
AÊ·ÈÚ¤ÛÙ ÙÔ Î·¿ÎÈ fiˆ˜ Ê·›ÓÂÙ·È ÛÙËÓ ÂÈÎfiÓ· ηÈ
‚Á¿ÏÙ ÙȘ ·ÏȤ˜ ̷ٷڛ˜
2
EÁηٷÛÙ‹ÛÙ ÙȘ ηÈÓÔ‡ÚÁȘ ̷ٷڛ˜. H ηÙ‡ı˘ÓÛË
ÙˆÓ Ì·Ù·ÚÈÒÓ ı· Ú¤ÂÈ Ó· Û˘Ì‚·‰›˙ÂÈ Ì ٷ ۇ̂ÔÏ·
ÛÙËÓ ı‹ÎË.
1. MЛУ ¯ЪЛЫИМФФИВ›ЩВ М·˙› О·ИУФ‡ЪБИВ˜ О·И ·ПИ¤˜ М·Щ·Ъ›В˜, ‹
‰И·КФЪВЩИОФ‡ Щ‡Ф˘ М·Щ·Ъ›В˜.
2. BБ¿˙ВЩВ ЩИ˜ М·Щ·Ъ›В˜ fiЩ·У ‰ВУ ЪfiОВИЩ·И У· ¯ЪЛЫИМФФИ‹ЫВЩВ
ЩФ ЩЛПВ¯ВИЪИЫЩ‹ЪИФ БИ· 2 ‹ 3 М‹УВ˜.
!
¶PO™OXH
=
Page 96

– 96 –
I¢ANIKOI TPO¶OI §EITOYP°IA™
AУВОЩ‹ £ВЪМФОЪ·Ы›· ¢ˆМ·Щ›Ф˘ TФФı¤ЩЛЫЛ KФ˘ЪЩИУТУ ‹ PФППТУ
EН·ВЪИЫМfi˜
AФЩВПВЫМ·ЩИО‹ XЪ‹ЫЛ ЩФ˘
XÚÔÓԉȷÎfiÙË
MËÓ •Â¯Ó¿Ù ӷ K·ı·Ú›˙ÂÙ ÙÔ º›ÏÙÚÔ A¤Ú·
¶·Ъ·О·ПФ‡МВ P˘ıМ›˙ВЩВ ЩЛУ K·Щ¿ППЛПЛ
£ВЪМФОЪ·Ы›· °И· MˆЪ¿ О·И ¶·И‰И¿
¶ÚÔÂȉÔÔ›ËÛË
TФ ж‡¯Ф˜ В›У·И О·Оfi
БИ· ЩЛУ ˘БВ›· О·И
Ы·Щ¿ПЛ ЛПВОЩЪИОФ‡
ЪВ‡М·ЩФ˜.
E›У·И Иı·Уfi
У· МВИТУВЩ·И Л
ı¤ЪМ·УЫЛ
fiЩ·У
ВИЫ¤Ъ¯ВЩ·И
·¤Ú·˜ ·fi Ù·
·Ú¿ı˘Ú·.
TЛ У‡¯Щ·, ·Ъ·О·ПФ‡МВ У· ¯ЪЛЫИМФФИВ›ЩВ
ЩФУ "¯ЪФУФ‰И·ОfiЩЛ У˘¯ЩВЪИУ‹˜ ПВИЩФ˘ЪБ›·˜"
П·М‚¿УФУЩ·˜ ˘fi„Л ЩЛУ ТЪ· Ф˘ ı·
Н˘У‹ЫВЩВ. ŒЩЫИ ı· ·ФП·М‚¿УВЩВ М›· ¿УВЩЛ
ıВЪМФОЪ·Ы›· ‰ˆМ·Щ›Ф˘. XЪЛЫИМФФИВ›ЩВ ЩФУ
¯ЪФУФ‰И·ОfiЩЛ ·ФЩВПВЫМ·ЩИО¿.
TФ ЫОФУИЫМ¤УФ К›ПЩЪФ ·¤Ъ· МВИТУВИ ЩФУ fiБОФ
ЩФ˘ ·¤Ъ· О·И ЩЛУ ·fi‰ФЫЛ ЩЛ˜ „‡НЛ˜. °И·
У· ·ФК‡БВЩВ ЩЛ Ы·Щ¿ПЛ ЛПВОЩЪИОФ‡
ЪВ‡М·ЩФ˜ О·ı·Ъ›˙ВЩВ ЩФ К›ПЩЪФ О¿ıВ 2
В‚‰ФМ¿‰В˜
¶·Ъ·О·ПФ‡МВ ЪФЫ¤¯ВЩВ ЩЛУ ıВЪМФОЪ·Ы›·
‰ˆМ·Щ›Ф˘ О·И ЩЛУ О·ЩВ‡ı˘УЫЛ ЩЛ˜ ЪФ‹˜ ЩФ˘
·¤Ú· fiÙ·Ó ¤¯ÂÙ ̈ڿ, ·È‰È¿ Î·È ÁËÚ·È¿
¿ÙÔÌ· Ô˘ ¤¯Ô˘Ó ‰˘ÛÎÔÏ›·
Ó· ÎÈÓËıÔ‡Ó.
¶ÚÔÛÔ¯‹
MЛУ ¤¯ВЩВ ОПВИЫЩfi ЩФ ‰ˆМ¿ЩИФ БИ· МВБ¿ПФ
¯ЪФУИОfi ‰И¿ЫЩЛМ·. N· ·УФ›БВЩВ ВУ›ФЩВ fiЪЩ·,
·Ъ¿ı˘Ъ·
БИ· О·ı·Ъfi
·¤Ú·.
!
!
Page 97

– 97 –
∂ППЛУИО¿
¶§HPOºOPIE™ °IA TOY™ XPH™TE™
TФ KПИМ·ЩИЫЩИОfi О·И ХППЛ ¶ЛБ‹ £ВЪМfiЩЛЩ·˜ ЫЩФ ™›ЩИ
EОЩfi˜ §ВИЩФ˘ЪБ›·˜ БИ· MВБ¿ПФ XЪФУИОfi ¢И¿ЫЩЛМ·
™Â ¶ÂÚ›ÙˆÛË K·Ù·ÈÁ›‰·˜
¶ÚÔÛÔ¯‹
E¿У Л ıВЪМfiЩЛЩ· М¤Ы· ЫЩФ ‰ˆМ¿ЩИФ В›У·И ¿Уˆ ·fi ЩЛ
‰˘У·ЩfiЩЛЩ· „‡НЛ˜ ЩФ˘ ОПИМ·ЩИЫЩИОФ‡ (.¯. ФППФ›
¿УıЪˆФИ ЫЩФ ‰ˆМ¿ЩИФ, ¯Ъ‹ЫЛ ¿ППˆУ МЛ¯·УЛМ¿ЩˆУ
ВОФМ‹˜ ıВЪМfiЩЛЩ·˜ ОП) Л ЪФЩФФıВЩЛМ¤УЛ
ıВЪМФОЪЫ›· ‰ˆМ·Щ›Ф˘ ‰ВУ МФЪВ› У· ВИЩВ˘¯ıВ
›
ŸЩ·У Л ВЫˆЩВЪИО‹ МФУ¿‰· ‰ВУ ı· ¯ЪЛЫИМФФИЛıВ›
БИ· МВБ¿ПФ ¯ЪФУИОfi ‰И¿ЫЩЛМ·, ·Ъ·О·ПФ‡МВ ОПВ›ЫЩВ
ЩЛ Ы˘ЫОВ˘‹ ·fi ЩФУ ОВУЩЪИОfi ‰И·ОfiЩЛ. E¿У Ф
ОВУЩЪИОfi˜ ‰И·ОfiЩЛ˜ ·Ъ·МВ›УВИ "ON" Л ВЫˆЩВЪИО‹
МФУ¿‰· О·Щ·У·ПТУВИ ВЪ›Ф˘ 8W ЫЩФ О‡ОПˆМ·
ВП¤Б¯Ф˘ ПВИЩФ˘ЪБ›·˜, ·ОfiМЛ О·И В¿У В›У·И ЫВ ı¤ЫЛ
"OFF".
¶ÚÔÂȉÔÔ›ËÛË
°И· У· ЪФЫЩ·ЩВ‡ЫВЩВ ЩФ Ы‡ЫЩЛМ· О·Щ¿ ЩЛ ‰И¿ЪОВИ·
О·Щ·ИБ›‰·˜, ·Ъ·О·ПФ‡МВ ЫЩ·М·Щ‹ЫЩВ ЩЛ ПВИЩФ˘ЪБ›·
ЩЛ˜ Ы˘ЫОВ˘‹˜ О·И ·К·ИЪ¤ЫЩВ ЩФ КИ˜ ·fi ЩЛ Ъ›˙·.
OFF
!
!
¶·Ъ¤М‚·ЫЛ ·fi Щ· ЛПВОЩЪИО¿ ЪФ˚fiУЩ·
¶ÚÔÛÔ¯‹
°И· У· ·ФК‡БВЩВ ЩЛУ ·Ъ¤М‚·ЫЛ ıФЪ‡‚Ф˘,
ЩФФıВЩ‹ЫЩВ ЩЛУ ВЫˆЩВЪИО‹ МФУ¿‰· О·И Щ· М·ОЪИУ¿
ЛПВОЩЪИО¿ ЪФ˚fiУЩ· ВПВБОЩТУ ЩФ˘ ЩФ˘П¿¯ИЫЩФУ 1m
М·ОЪИ¿ frm.
!
Page 98

– 98 –
1
∞УЛН·ЩВ ЩФ МЪФЫЩИУФ О·П˘ММ·.
● ŒПНЫЩВ ЪФ˜ Щ· В¿Уˆ ЩФУ МЪФЫЩИУfi ›У·О·
ÎÚ·ÙÒÓÙ·˜ ÙÔÓ Î·È ·fi ÙȘ ‰‡Ô Ï¢ڤ˜ Ì ٷ
‰˘Ô ¯¤ÚÈ·.
2
∞К·ИЪВЫ·ЩВ Щ· КИПЩЪ·.
● ™ЪТНЩВ ÚÔ˜ Ù· ¿Óˆ ÁÈ· Ó·
·ВПВ˘ıВЪТЫВЩВ ЩИ˜ ВИ‰ИО¤˜ ЪФВНФ¯¤˜ О·И
ЩЪ·‚‹НЩВ ¤Нˆ ЩФ К›ПЩЪФ.
3
4
∂БО·Щ·ЫЩЛЫ·ЩВ Щ· КИПЩЪ·.
● ™˘Ó‰¤ÛÙ ٷ Ê›ÏÙÚ· ‰È·ÛÊ·Ï›˙ÔÓÙ·˜ fiÙÈ Ë
ÂÈÊ¿ÓÂÈ· fiÔ˘ ˘¿Ú¯ÂÈ Ë ¤Ó‰ÂÈÍË “FRONT”
Â›Ó·È Á˘ÚÈṲ̂ÓË ÚÔ˜ Ù· ÂÌÚfi˜.
● ªÂÙ·’ ÙËÓ ÂÁηٷÛÙ·ÛË, ˆıËÛ·Ù ÙÔ
МЪФЫЩИУФ О·П˘ММ· ЫЩ· ЩЪИ· ЫЛМВИ· ‚ВПˆУ,
Фˆ˜ ‰ВИ¯УВИ В‰ˆ, О·И МВЩ·’ ОПВИЫЩВЩФ.
™∏ª∂πø™∏:
● ∫·Ù¿ ÙÔÓ ·Ê·›ÚÂÛË ÙˆÓ Î·ı·Ú›˙ÔÓÙ·˜ Ê›ÏÙÚˆÓ ·¤Ú·, ·Ú·Î·ÏÒ ·ÎÔÏÔ˘ı‹ÛÙ ٷ ·ÓˆÙ¤Úˆ Ê›ÏÙÚ·.
● ∏ ИО·УfiЩЛЩ· „‡НЛ˜ ·Ф‰˘У·МТУВЩ·И ВП·КЪТ˜ О·И Л Щ·¯‡ЩЛЩ· „‡НЛ˙ Б›УВЩ·И Иfi ·ЪБ‹ fiЩ·У
¯ЪЛЫИМФФИФ‡УЩ·И Щ· О·ı·Ъ›˙ФУЩ·˜ К›ПЩЪ· ·¤Ъ·. ŒЩЫИ, ı¤ЫЩВ ЩЛУ ЩЛУ Щ·¯‡ЩЛЩ· ·УВМИЫЩ‹ЪˆУ “ЫВ А„∏§√”
О·Щ¿ ¯ЪЛЫИМФФ›ЛЫЛ ЩЛ˜ ЫВ ·˘ЩfiУ ЩФУ fiЪФ.
● ∆· О·ı·Ъ›˙ФУЩ·˜ К›ПЩЪ· ·¤Ъ· МФЪФ‡У У· П˘ıФ‡У О·И ¯ЪЛЫИМФФ›ЛЫ·У М¤¯ЪИ 20 КФЪ¤˜, МВ ЩЛ
¯ЪЛЫИМФФ›ЛЫЛ МИ·˜ ЛПВОЩЪИО‹˜ ЫОФ‡·˜ ‹ ЩФ Н¤П˘М· ЩФ˘ К›ПЩЪФ˘ О¿Щˆ ·fi ЩФ ЩЪВ¯Ф‡МВУФ УВЪfi
‚Ъ˘ЫТУ.
√ Оˆ‰ИОfi˜ БИ· ·˘Щfi ЩФ К›ПЩЪФ О·ı·ЪИЫМФ‡ ·¤Ъ· В›У·И <SPX-CFH11>. ¶·Ъ·О·ПВ›ЫЩВ У·
¯ЪЛЫИМФФИВ›ЩВ ЩФУ Оˆ‰ИОfi ·˘Щfi БИ· ЩИ˜ ·Ъ·ББВП›В˜ Ы·˜.
●
ªЛУ ı¤ЩВЩВ ЫВ ПВИЩФ˘ЪБ›· ЩФ ОПИМ·ЩИЫЩИОfi ¯ˆЪ›˜ ЩФ К›ПЩЪФ. ∞fi ЩЛ ЫОfiУЛ Ф˘ МФЪВ› У· ВИЫ¯ˆЪ‹ЫВИ ЫЩФ
ОПИМ·ЩИЫЩИОfi, ›Ыˆ˜ ЪФОПЛıФ‡У ‚П¿‚В˜.
√ О·ı·ЪИЫМfi˜ О·И Л Ы˘УЩ‹ЪЛЫЛ Ъ¤ВИ У· ВОЩВПФ‡УЩ·И МfiУФ ·fi ВНВИ‰ИОВ˘М¤УФ ЪФЫˆИОfi. ¶ЪИУ
·fi ЩФУ О·ı·ЪИЫМfi, ‰И·Оfi„ЩВ ЩЛ ПВИЩФ˘ЪБ›· О·И ЩЛУ ·ЪФ¯‹ ЪВ‡М·ЩФ˜.
¶ƒ√™√Ã∏
!
¶ƒ√™√Ã∏
!
ŒÓˆÛË ÙˆË Î·ı·Ú›˙ÔÓÙ·˜ Ê›ÏÙÚˆÓ ·¤Ú· Ì ÙÔ Ê›ÏÙÚÔ.
● ™˘Ó‰¤ÛÙ ٷ ηı·Ú›˙ÔÓÙ·˜ Ê›ÏÙÚˆÓ ·¤Ú· Ì ÙÔ Ï·›ÛÈÔ
Ì ‹È· Ó· Û˘ÌȤÛÂÈ ÙÔ Î·È ÔÈ ‰‡Ô Ï¢ڤ˜ ηÈ
·ÂÏ¢ı¤ÚˆÛË ÌÂÙ¿ ·fi ÙËÓ ÂÈÛ·ÁˆÁ‹ ÛÙÔ Ï·›ÛÈÔ
Ê›ÏÙÚˆÓ.
ªËÓ Î¿Ì„Ù ÙÔ Î·ı·Ú›˙ÔÓÙ·˜ Ê›ÏÙÚÔ
·¤Ú· ‰Â‰Ô̤ÓÔ˘ fiÙÈ ÌÔÚ› Ó·
ÚÔηϤÛÂÈ ÙË ˙ËÌ›· ÛÙË ‰ÔÌ‹.
∂Nø™H TøN KA£APIZONTA™ ºI§TPøN AEPA
Page 99

– 99 –
∂ППЛУИО¿
™YNTHPH™H
1. ºI§TPO AEPA
K·ı·Ъ›ЫЩВ ЩФ К›ПЩЪФ ·¤Ъ·, БИ·Щ› М·˙В‡ВИ ЩЛ ЫОfiУЛ М¤Ы· ·fi ЩФ ‰ˆМ¿ЩИФ. ŸЩ·У ЩФ К›ПЩЪФ В›У·И БВМ¿ЩФ
ЫОfiУЛ, Л ЪФ‹ ЩФ˘ ·¤Ъ· МВИТУВЩ·И О·И Л ‰˘У·ЩfiЩЛЩ· „‡НЛ˜ ВПП·ЩЩТУВЩ·И. E› П¤ФУ, О¿УВИ ФП‡ ıfiЪ˘‚Ф.
°И· У· В›ЫЩВ ‚¤‚·ФИ fiЩИ О·ı·Ъ›Ы·ЩВ ЫˆЫЩ¿ ЩФ К›ПЩЪФ ·ОФПФ˘ı‹ЫЩВ ЩЛ ·Ъ·О¿Щˆ ‰И·‰ИО·Ы›·.
MËÓ Ï¤ÓÂÙ ÙÔ Ê›ÏÙÚÔ Ì ˙ÂÛÙfi ÓÂÚfi ¿Óˆ ·fi 40ÆC. MÔÚ› Ó· ·Ú·ÌÔÚʈı›.
ŸЩ·У ЩФ П¤УВЩВ У· ·К·ИЪВ›ЩВ ЩВПВ›ˆ˜ ЩЛУ ˘БЪ·Ы›· О·И У· ЩФ ·К‹УВЩВ У· ЫЩВБУТЫВИ ЫЩЛ ЫОИ¿. MЛУ
ЩФ ВОı¤ЩВЩВ ЫВ ¿МВЫЛ ЛПИ·О‹ ·ОЩИУФ‚ФП›·. MФЪВ› У· ·Ъ·МФЪКˆıВ›.
ªЛУ ¯ЪЛЫИМФФИ‹ЫЩВ ЩФ ·ФЪЪ˘·УЩИОfi ЫЩФ О·ı·Ъ›˙ФУЩ·˜ К›ПЩЪФ ·¤Ъ· ‰В‰ФМ¤УФ˘ fiЩИ О¿ФИФ
·ФЪЪ˘·УЩИОfi МФЪВ› У· ВИ‰ВИУТЫВИ ЩЛУ ЛПВОЩЪФЫЩ·ЩИО‹ ·fi‰ФЫЛ КЛПЩВЪ.
¶PO™OXH
1
2
3
√ О·ı·ЪИЫМfi˜ О·И Л Ы˘УЩ‹ЪЛЫЛ Ъ¤ВИ У· ВОЩВПФ‡УЩ·И МfiУФ ·fi ВНВИ‰ИОВ˘М¤УФ ЪФЫˆИОfi. ¶ЪИУ
·fi ЩФУ О·ı·ЪИЫМfi, ‰И·Оfi„ЩВ ЩЛ ПВИЩФ˘ЪБ›· О·И ЩЛУ ·ЪФ¯‹ ЪВ‡М·ЩФ˜.
¶ƒ√™√Ã∏
™∏ª∂πø™∏:
∆Ф О·ı·Ъ›˙ФУЩ·˜ К›ПЩЪФ ·¤Ъ· Ъ¤ВИ У· О·ı·ЪИЫЩВ› О¿ıВ М‹У· ‹ Иfi Ы‡УЩФМ· В¿У Л ·НИФЪfiЫВ¯ЩЛ
КfiЪЩˆЫЛ ВМК·У›˙ВЩ·И. ŸЩ·У ¯ЪЛЫИМФФИФ‡УЩ·И ФИ ˘ВЪˆЪ›В˜, ·˘Щfi МФЪФ‡У У· ¯·П·ЪТЫФ˘У ЩЛ ПВИЩФ˘ЪБ›·
ВНФ˘‰ВЩ¤ЪˆЫЛ˜ ЩЛ˜ О·ОФЫМ›·˜ ЩЛ˜. °И· ЩЛ М¤БИЫЩЛ ·fi‰ФЫЛ, Ы˘ЫЩ‹УВЩ·И У· ·УЩИО·Щ·ЫЩ·ıВ› О¿ıВ 3-6
М‹УВ˜, ·У¿ПФБ· МВ ЩИ˜ ··ИЩ‹ЫВИ˜ ВК·ЪМФБ‹˜.
!
!
∞УФ›НЩВ ЩФУ МЪФЫЩИУfi ›У·О· О·И ·К·ИЪ¤ЫЩВ ЩФ
К›ПЩЪФ.
● ◊È· ·Ó˘„ÒÛÙÂ Î·È ·Ê·ÈÚ¤ÛÙ ÙÔ Î·ı·Ú›˙ÔÓÙ·˜
Ê›ÏÙÚÔ ·¤Ú· ·fi ÙÔ Ï·›ÛÈÔ Ê›ÏÙÚˆÓ ·¤Ú·.
∫ВУ‹ ЫОfiУЛ ·fi ЩФ К›ПЩЪФ ·¤Ъ· ОЫИ ЩФ
О·ı·Ъ›˙ФУЩ·˜ К›ПЩЪФ ·¤Ъ· Ф˘ ¯ЪЛЫИМФФИФ‡У МИ·
ЛПВОЩЪИО‹ ЫОФ‡·. ∂¿У ˘¿Ъ¯ВИ ¿Ъ· ФП‡
Н¤‚Б·ПМ· ЫОfiУЛ˜ МfiУФ О¿Щˆ ·fi ЩФ ЩЪВ¯Ф‡МВУФ
УВЪfi ‚Ъ˘ЫТУ О·И ЩФ ‚Ф˘ЪЩЫ›˙ВИ ‹И· МВ МИ· М·П·О‹
‚Ф‡ЪЩЫ· ЫОПЛЪТУ ЩЪИ¯ТУ. ∂ИЩЪ¤„ЩВ ЫЩФ К›ПЩЪФ
БИ· У· НВЪ¿УВЩВ ЫЩЛ ЫОИ¿.
● ∂·ÓÂÈÛ¿ÁÂÙ ÙÔ Î·ı·Ú›˙ÔÓÙ·˜ Ê›ÏÙÚÔ ·¤Ú·
ЫЩФ П·›ЫИФ К›ПЩЪˆУ. £¤ЫЩВ ЩФ К›ПЩЪФ МВ ЩФ
“ª¶ƒ√™∆π¡√” ЫЛМ¿‰И Ф˘ ·УЩИМВЩˆ›˙ВИ ЩФ
М¤ЩˆФ О·И ЩФ˘˜ ·˘П·ОТЫЩВ ЫЩФ ·Ъ¯ИОfi ОЪ¿ЩФ˜.
● ªВЩ·’ ЩЛУ ВБО·Щ·ЫЩ·ЫЛ, ˆıЛЫ·ЩВ ЩФ МЪФЫЩИУФ
О·П˘ММ· ЫЩ· ЩЪИ· ЫЛМВИ· ‚ВПˆУ, Фˆ˜ ‰ВИ¯УВИ
В‰ˆ, О·И МВЩ·’ ОПВИЫЩВЩФ.
Page 100

– 100 –
2. √ ÂÌÚfiÛıÈÔ˜ ›Ó·Î·˜ Âȉ¤¯ÂÙ·È Ï‡Û˘
∞Ê·ÈÚ¤ÛÙ ÙÔÓ ÂÌÚfiÛıÈÔ ›Ó·Î· Î·È Ï‡ÓÂÙ Ì ηı·Úfi
УВЪfi.
¶П‡УЩВ ЩФ МВ М·П·Оfi ЫКФ˘ББ¿ЪИ.
MВЩ¿ ЩЛ ¯Ъ‹ЫЛ Ф˘‰¤ЩВЪФ˘ О·ı·ЪИЫЩИОФ‡, П‡УЩВ ЩФ МВ
О·ı·Ъfi УВЪfi.
ŸÙ·Ó ‰ÂÓ Â›Ó·È ‰˘Ó·ÙfiÓ Ó· ÌÂÙ·ÎÈÓ‹ÛÂÙ ÙÔÓ ÂÌÚfiÛıÈÔ
›У·О·, ЫОФ˘›ЫЩВ ЩФУ МВ ¤У· М·П·Оfi, ЫЩВБУfi ОФММ¿ЩИ
‡К·ЫМ·. ™ОФ˘›ЫЩВ ЩФ ЩЛПВ¯ВИЪИЫЩ‹ЪИФ ВИМВПТ˜ МВ ¤У·
М·П·Оfi, ЫЩВБУfi ОФММ¿ЩИ ‡К·ЫМ·.
™ÎÔ˘›ÛÙ ÙÔ ÓÂÚfi ÚÔÛ¯ÙÈο.
E¿У МВ›УВИ УВЪfi ЫЩФ˘˜ ВУ‰В›ОЩВ˜ ‹ ЩФУ ФМfi Ы‹М·ЩФ˜
ЩЛ˜ ВЫˆЩВЪИО‹˜ МФУ¿‰·˜, ı· ЪФОПЛıВ› ˙ЛМИ¿.
ª¤ıÔ‰Ô˜ ·Ê·›ÚÂÛ˘ ÙÔ˘ ÂÌÚfiÛıÈÔ˘ ›Ó·Î·.
B‚·Èˆı›Ù fiÙÈ Îڷٿ٠ÙÔ Ï¤ÁÌ· ·Ó·ÚÚfiÊËÛ˘ Î·È ÌÂ
Ù· ‰‡Ô ¯¤ÚÈ· ÁÈ· Ó· ÙÔ ‚¿ÏÂÙÂ Î·È Ó· ÙÔ ‚Á¿ÏÂÙÂ.
∞Ê·›ÚÂÛË ÙÔ˘ ∂ÌÚfiÛıÈÔ˘ ¶›Ó·Î·
™‡Ó‰ÂÛË ÙÔ˘ ∂ÌÚfiÛıÈÔ˘ ¶›Ó·Î·
∞ÊÔ‡ ·ÓÔ›ÍÂÙ ÙÔÓ ÂÌÚfiÛıÈÔ ›Ó·Î· Î·È ÌÂ
Щ· ‰˘Ф ¯¤ЪИ·, ЫЪТНЩВ ЩФУ ‰ВНИfi ‚Ъ·¯›ФУ·
ЪФ˜ Щ· М¤Ы· БИ· У· ЩФУ ·ВПВ˘ıВЪТЫВЩВ
О·И ВУТ ОПВ›УВЩВ ВП·КЪ¿ ЩФУ ВМЪfiЫıИФ
›У·О·, ‚Б¿ПЩВ ЩФУ ·fi ЩЛУ МЪФЫЩИУ‹
ПВ˘Ъ¿.
MВЩ·ОИУ‹ЫЩВ ЩИ˜ ЪФВНФ¯¤˜ ·fi ЩФ˘˜
‰ВНИФ‡˜ О·И ·ЪИЫЩВЪФ‡˜ ‚Ъ·¯›ФУВ˜ М¤Ы· ЫЩИ˜
·ЩФ‡ЪВ˜ ЩЛ˜ Ы˘ЫОВ˘‹˜ О·И ·ЫК·П›ЫЩВ ЩИ˜
М¤Ы· ЫЩИ˜ ˘Ф‰Ф¯¤˜.
MЛУ ИЩЫИП¿ЩВ ‹ Ъ›¯УЩВ УВЪfi О·ЩВ˘ıВ›·У ЫЩФ ЫТМ· ЩЛ˜ МФУ¿‰·˜ fiЩ·У ЩФ
П¤УВЩВ БИ·Щ› МФЪВ› У· ЪФОПЛıВ› ‚Ъ·¯˘О‡ОПˆМ·.
¶ФЩ¤ МЛ ¯ЪЛЫИМФФИВ›ЩВ ˙ВЫЩfi УВЪfi (¿Уˆ ·fi 40ЖC), ‚ВУ˙›УЛ, ВЩЪ¤П·ИФ,
Ô͇, ‰È·Ï˘ÙÈÎfi ‹ ‚Ô‡ÚÙÛ·, ÁÈ·Ù› ı· ηٷÛÙÚ·Ê› Ë Ï·ÛÙÈ΋ ÂÈÊ¿ÓÂÈ· Î·È ÙÔ
Î¿Ï˘ÌÌ·.
!
¶PO™OXH
¶·ÙÔ‡Ú·
TÚ‡·
¶ЪФВНФ¯‹
 Loading...