

Instruction and safety manual
Manuel d’instructions et de sécurité
Instrucciones y manual de seguridad
Model
Modèle
Modelo
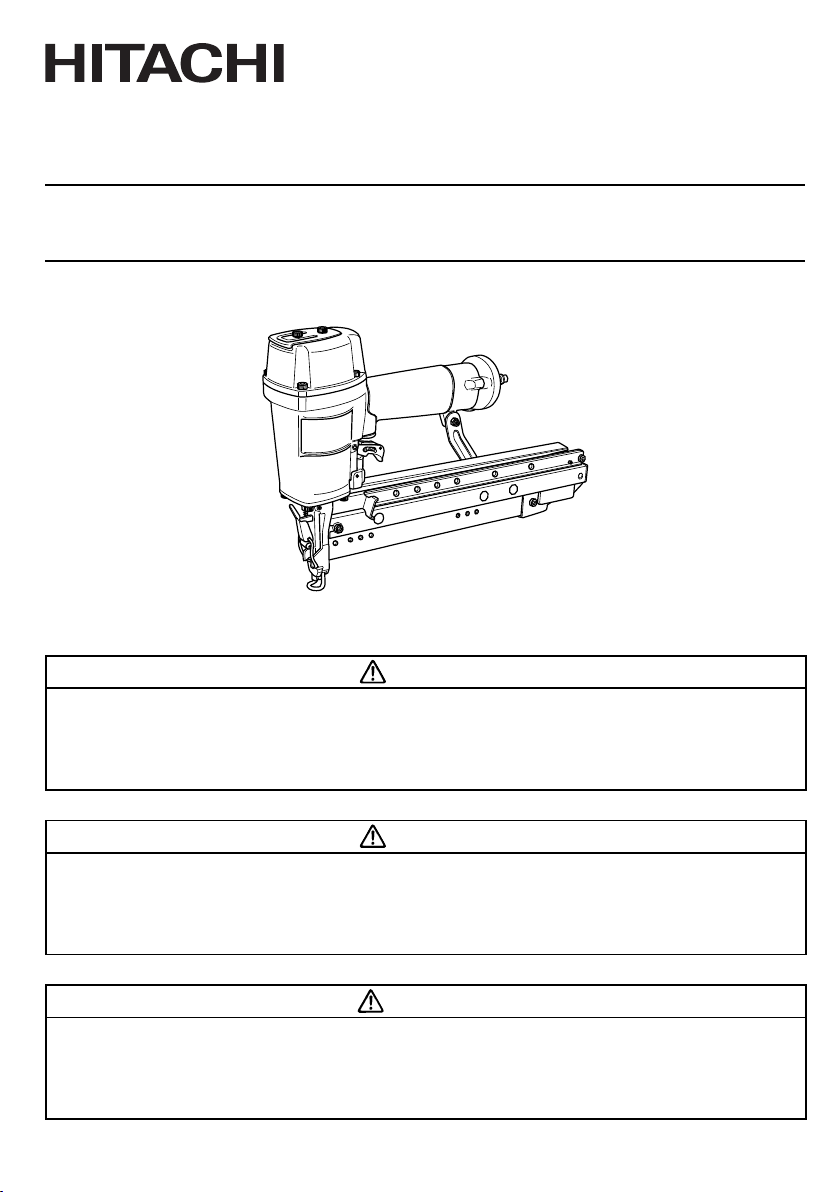
NT 65A5
DANGER
Improper use of this Nailer can result in death or serious injury!
This Manual contains important information about product safety.
Read and understand this Manual before operating the Nailer.
Never allow anyone who has not reviewed this manual to use the tool.
This manual should be stored in safe place.
Finish Nailer
Cloueur de fi nition
Clavadora de tapizar
DANGER
Une utilisation incorrecte et sans respecter la sécurité de ce cloueur risque d’entraîner la mort ou des blessures graves !
Ce manuel renferme des instructions importantes sur la sécurité de l’outil.
Lire et bien assimiler ce manuel avant d’utiliser le cloueur.
Cet outil ne doit jamais être utilisé par une personne n’ayant pas pris connaissance du manuel.
Ce mode d’emploi doit être conservé dans un endroit sûr.
PELIGRO
¡La utilización inadecuada e insegura de este clavador puede resultar en lesiones serias o en la muerte!
Este manual contiene información importante sobre la seguridad del producto.
Lea y entienda este manual antes de utilizar el martillo neumático.
La herramienta no deberá utilizarse sin haber leído previamente este manual.
Este manual debe ser guardado en un lugar seguro.
English
IMPORTANT SAFETY INFORMATION
Read and understand tool labels and all of the operating instructions, safety precautions and warnings
in this manual before operating or maintaining this Nailer.
Failure to follow warnings could result in DEATH or SERIOUS INJURY
Most accidents that result from the operation and maintenance of Nailers are caused by the failure to observe basic
safety rules or precautions. An accident can often be avoided by recognizing a potentially hazardous situation before it
occurs, and by observing appropriate safety procedures.
Basic safety precautions are outlined in the “SAFETY” section of this Manual and in the sections which contain the
operation and maintenance instructions.
Hazards that must be avoided to prevent bodily injury or machine damage are identifi ed by DANGERS and WARNINGS
on the Nailer and in this Manual.
NEVER use this Nailer for applications other than those specifi ed in this Manual.
DEFINITIONS OF SIGNAL WORDS
DANGER indicates an imminently hazardous situation which, if not avoided, will result in death or serious injury.
WARNING indicates a potentially hazardous situation which, if not avoided, could result in death or serious injury.
CAUTION indicates a potentially hazardous situation which, if not avoided, may result in minor or moderate injury, or
NOTE emphasizes essential information.
may cause machine damage.
EXPLANATION OF THE NAILING ACTION OF THE HITACHI NAILER
○
SINGLE SEQUENTIAL ACTUATION MECHANISM:
First, press the push lever against the wood; next, pull the trigger to drive the fastener.
After nailing once, nailing will not be possible again until the Trigger is released and pressed again.
○
CONTACT ACTUATION MECHANISM:
First, press the push lever against the wood; next, pull the trigger to drive the fastener.
First, pull the trigger; next, press the push lever against the wood to drive the fastener.
If the Trigger is held back, a nail will be driven each time the Push Lever is pressed against the wood.
*
At shipment, this product is locked for SINGLE SEQUENTIAL ACTUATION.
See “METHODS OF OPERATION” on how to switch between mechanisms.
2
English
SAFETY
IMPORTANT SAFETY INSTRUCTIONS - FOR USING NAILERS
INSTRUCTIONS PERTAINING TO A RISK OF FIRE, ELECTRIC SHOCK, OR INJURY TO PERSONS
●
General
To reduce the risks of electric shock, fi re, and injury to persons, READ ALL THE INSTRUCTIONS BEFORE USING
THE TOOL.
DANGER
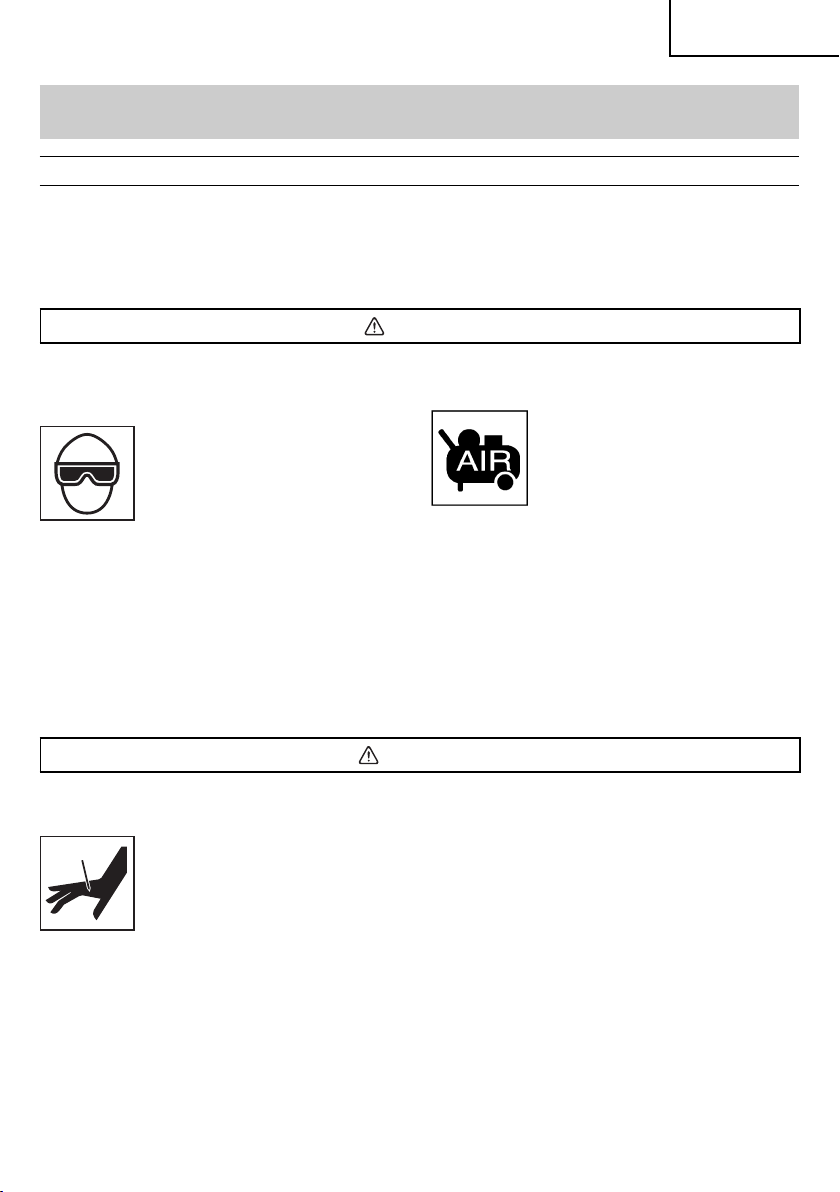
1. OPERATORS AND OTHERS IN WORK AREA
MUST WEAR EYE PROTECTION (SAFETY
GLASSES WITH SIDE SHIELDS).
When operating the Nailer, always wear
safety glasses with side shields, and
make sure others in work area wear
safety glasses, too.
Safety glasses must conform to the
requirements of American National
Standards Institute, ANSI Z87.1 and
provide protection against fl ying particles
both from the front and side.
Ordinary eyeglasses do not provide
adequate protection.
The employer must enforce the use of
safety glasses by the Nailer operator and
others in work area.
WARNING
3. NEVER POINT TOOL AT YOURSELF OR OTHERS
IN WORK AREA.
Always assume that the Nailer contains
fasteners.
Never point the Nailer toward yourself or
others, whether it contains fasteners or
not.
If fasteners are mistakenly driven, it can
lead to severe injuries.
Never engage in horseplay with the
Nailer.
Respect the Nailer as a working
implement.
2. NEVER USE REACTIVE GASES OR OTHER
BOTTLED GASES. EXPLOSION MAY OCCUR.
Never use reactive gases such as
oxygen, combustible gases or any other
bottled gases as a power source for the
Nailer.
Use of the above gases is dangerous, as
the Nailer will explode.
Use only clean, dry, regulated
compressed air.
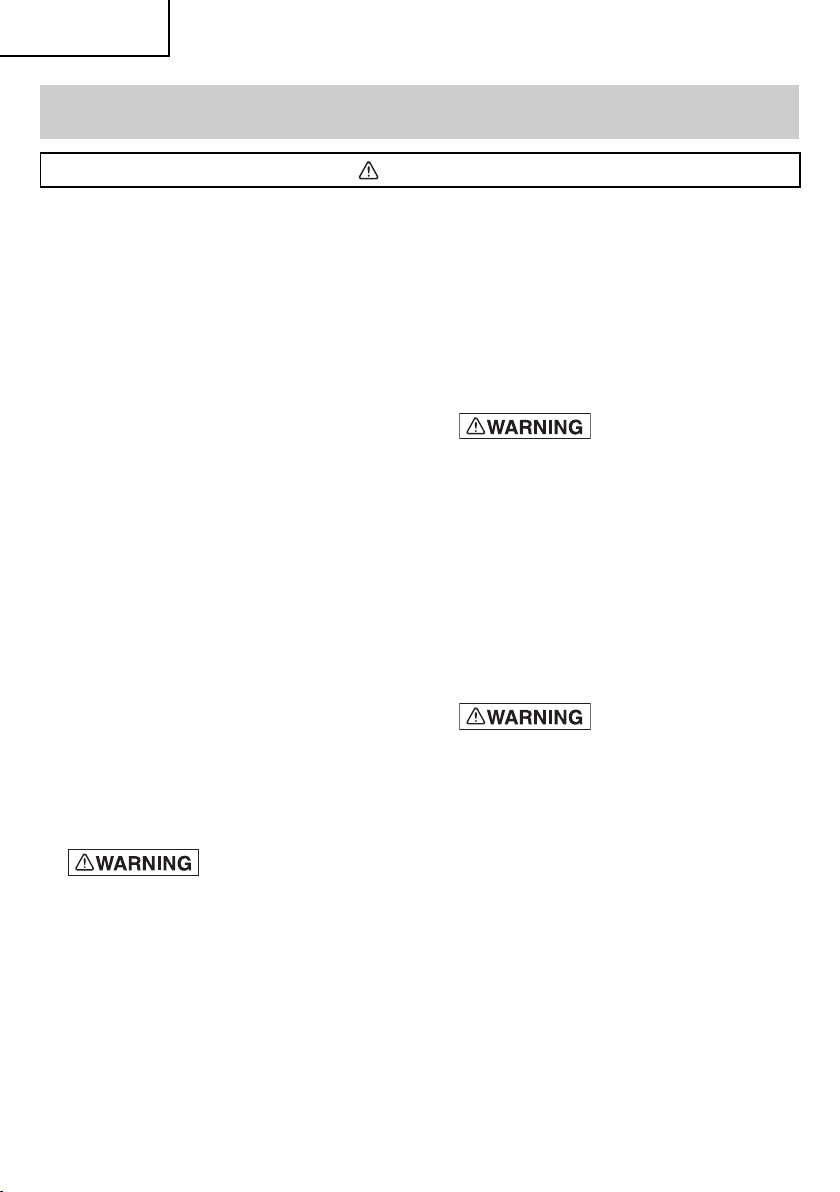
4. DO NOT PLACE FINGER ON TRIGGER AND KEEP
FINGERS AWAY FROM TRIGGER WHEN NOT
DRIVING FASTENERS TO AVOID ACCIDENTAL
DISCHARGE.
Never carry the Nailer with fi nger on Trigger since
you could drive a fastener unintentionally and injure
yourself or someone else.
Always carry the Nailer by the handle only.
5. KNOW AND UNDERSTAND WHAT TRIGGER
SYSTEM YOU ARE USING.
Read and understand section titled “METHODS OF
OPERATION.” (pages 15 – 17)
6. DO NOT MAKE CONTACT WITH SAFETY TIP
(PUSH LEVER) WHEN NOT DRIVING FASTENERS.
3
English
SAFETY — Continued
WARNING
When using tools, basic precautions should always be followed, Including the following:
1. Work area
(1) Keep the work area clean and well lighted.
Cluttered benches and dark areas increase the risks
of electric shock, fi re, and injury to persons.
(2) Do not operate the Nailer in explosive
atmospheres, such as in the presence of
fl ammable liquids, gases, or combustible dust.
The Nailer is able to create sparks resulting in the
ignition of the dust or fumes.
(3) Keep bystanders, children, and visitors away
while operating the Nailer. Distractions are able to
result in the loss of control of the Nailer.
2. Personal safety
(1) Stay alert. Focus on your work and use common
sense when working with the Nailer. Do not use
the Nailer while tired, after having consumed
drugs or alcohol, or while under the infl uence of
medication.
A moment of inattention while operating the Nailer
increases the risk of injury to persons.
(2) Dress properly. Do not wear loose clothing or
jewelry. Contain long hair. Keep hair, clothing,
and gloves away from moving parts.
Loose clothes, jewelry, or long hair increases the
risk of injury to persons as a result of being caught in
moving parts.
(3) Avoid unintentional starting. Be sure the switch
is off before connecting to the air supply. Do
not carry the Nailer with your fi nger on the switch or
connect the Nailer to the air supply with the switch on.
(4)
the air source before making adjustments, doing
Nailer maintenance, clearing jams, touching
the Push Lever, attaching or removing the nose
cap, when not in use, leaving work area, leaving
the Nailer outside of the operator's supervision
or control, loading, or unloading the Nailer,
handing it to another person, elevating, lowering
or otherwise moving the Nailer to a new location.
Never attempt to clear a jam or repair the Nailer
unless you have disconnected air hose from the
Nailer and removed all remaining fasteners from the
Nailer. The Nailer should never be left unattended
since people who are not familiar with the Nailer
might handle it and injure the themselves.
4
– Disconnect the Nailer from
Such precautionary measures reduce the risk of
injury to persons.
(5) Do not overreach. Keep proper footing and
balance at all times. Proper footing and balance
enables better control of the Nailer in unexpected
situations.
(6) Use safety equipment. A dust mask, non-skid
safety shoes and a hard hat must be used for the
applicable conditions.
(7)
hearing protection. Hearing protection shall
have a Noise Reduction Rating (NRR) determined
in accordance with US Environmental Protection
Agency rules that is appropriate for noise exposure..
(8) Always wear head protection.
Always wear head protection to protect your
head from fl ying objects.
Head protection shall conform to ANSI Z89.1,
"American National Standard for Industrial Head
Protection."
(9) Do not attach the hose or Nailer to your body.
Attach the hose to the structure to reduce the risk of
loss of balance if the hose shifts.
(10)
surface only. Do not drive nail into other nails. This
is able to cause the fastener to be defl ected and hit
someone, or cause the Nailer to react and result in a
risk of injury to persons.
– Risk of hearing loss. Wear
– Drive Nails into proper work
3. Nailer use and care
(1) Use clamps or another practical way to secure
and support the workpiece to a stable platform.
Holding the work by hand or against the body is
unstable and is able to lead to loss of control.
(2) Do not force the Nailer. Use the correct Nailer for
the application. The correct Nailer will do the job
better and safer at the rate for which the Nailer is
designed.
(3) Do not use the Nailer if the switch does not
turn the Nailer on or off . Any Nailer that cannot be
controlled with the switch is dangerous and must be
repaired.
SAFETY — Continued
WARNING
English
Never use Nailer which is defective or operating
abnormally. If the Nailer appears to be operating
unusually, making strange noises, or otherwise
appears defective, stop using it immediately and
arrange for repairs by a Hitachi authorized service
center.
(4) Disconnect the Nailer from the air source before
making any adjustments, changing accessories,
or storing the Nailer. Such preventive safety
measures reduce the risk of starting the Nailer
unintentionally.
(5) Store the Nailer when it is idle out of reach of
children and other untrained persons. A Nailer is
dangerous in the hands of untrained users.
(6) Maintain the Nailer with care. Keep the
Nailer Clean and lubricated for better and safer
performance.
(7) Check for misalignment or binding of moving
parts, breakage of parts, and any other condition
that may aff ect the Nailer's operation.
If damaged, have the Nailer serviced before using.
Because of high air pressure in the Nailer, cracks in
the surface are dangerous. To avoid this, do not drop
the Nailer or strike the Nailer against hard surfaces;
and do not scratch or engrave signs on the Nailer.
Many accidents are caused by poorly maintained
Nailers. There is a risk of bursting if the Nailer is
damaged.
(8) Do not use the Nailer that is not in proper
working order. Tags and physical segregation
shall be used for control.
(9) Use only accessories that are identifi ed by
Hitachi for the specifi c Nailer. Use of an accessory
not intended for use with the specifi c Nailer ,
increases the risk of injury to persons.
(10) Use only those fasteners listed in the
Accessories section of this manual. Fasteners not
identifi ed for use with this Nailer by Hitachi are able to
result in a risk of injury to persons or Nailer damage
when used in this Nailer.
4. Service
(1) Tool service must be performed only by qualifi ed
repair personnel.
(2) When servicing a Nailer, use only identical
replacement parts. Use only authorized parts.
(3) Use only the lubricants supplied with the Nailer
or specifi ed by Hitachi.
5. Air source
(1) Never connect to an air source that is capable
of exceeding 200 psi (13.7 bar 14 kgf/cm
regulator fails.
Over pressurizing the Nailer is able to result in
bursting, abnormal operation, breakage of the Nailer
or serious injury to persons.
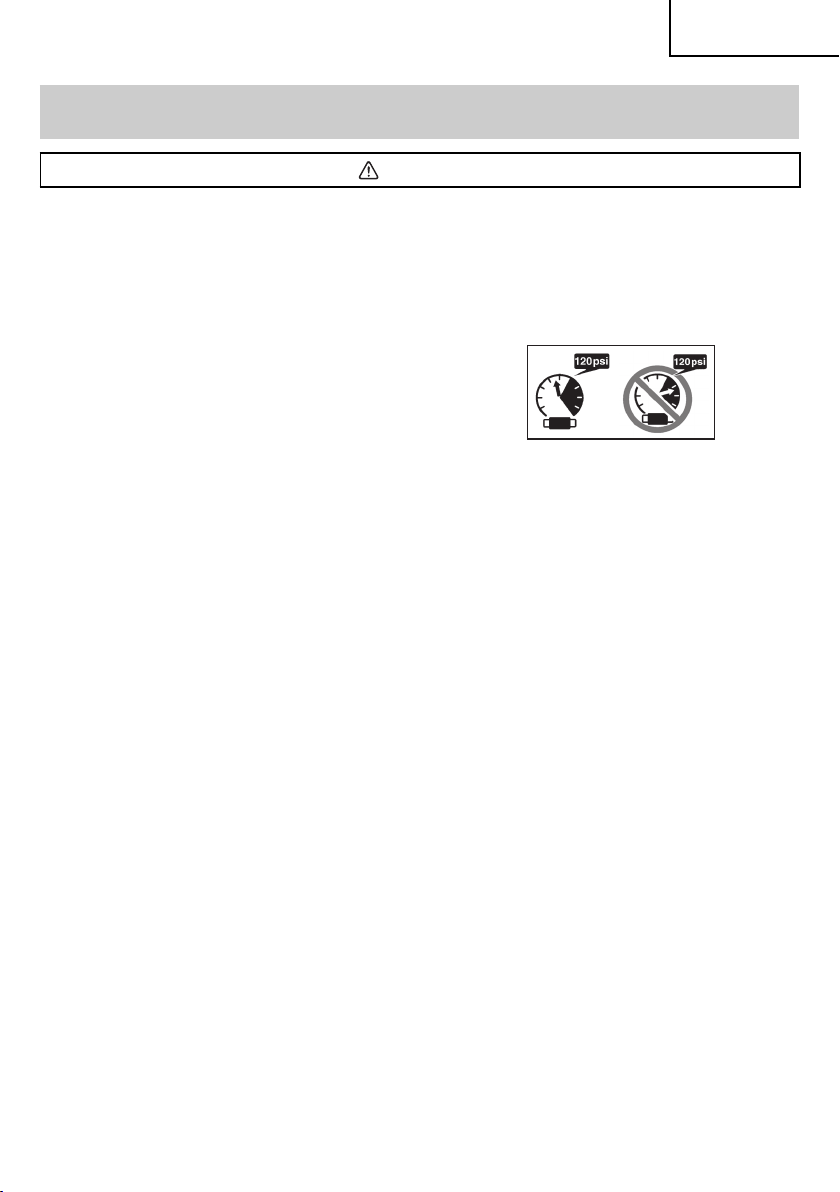
DO NOT EXCEED 120 psi (8.3 bar 8.5 kgf/cm2).
Use only clean, dry, regulated compressed air at the
rated pressure or within the rated pressure range as
marked on the Nailer.
Always verify prior to using the Nailer that the air
source has been adjusted to the rated air pressure or
within the rated air-pressure range.
(2) Never use reactive gases such as oxygen,
carbon dioxide, combustible gases or any
bottled gas as an air source for the Nailer. Such
gases are capable of explosion and serious injury to
persons.
2
) if a
6. Others
(1) Before starting work, check the nailing operation
switching device.
This Hitachi nailer includes a nailing operation
switching device.
Before starting work, check the setting of the
operation switching device.
If the switching device is not set properly, the Nailer
will not operate correctly.
(2) Always select the switching device that is
appropriate to the application and the training of
the operator.
(3) When switching between SINGLE SEQUENTIAL
and CONTACT, disconnect the air hose and
remove all nails.
(4) When the hook is attached, operate only with
SINGLE SEQUENTIAL ACTUATION MECHANISM
and not with CONTACT ACTUATION MECHANISM.
5

English
SAFETY — Continued
WARNING
(5) Be careful of double fi re and being hit by the
Nailer due to spring back (“recoil”). After driving
a nail, the Nailer may recoil causing it to move away
from the work surface.
To reduce risk of injury always manage recoil by:
1) always maintaining control of the Nailer.
2) allowing recoil to move the Nailer away from work
surface.
3) not resisting recoil such that the Nailer will be
forced back into the work surface. In “CONTACT
ACTUATION MECHANISM”, if push lever is
allowed to re-contact work surface before the
trigger is released, an unintended discharge of a
nail will occur. In order to avoid this undesirable
double fi re,
○
Intermittent operation (Trigger fi re)
1
Set the switching device to SINGLE
SEQUENTIAL ACTUATION MECHANISM.
2
Pull the trigger rapidly and fi rmly.
○
Continuous operation (Push lever fi re)
1
Set the switching device to CONTACT
ACTUATION MECHANISM.
2
Do not press the Nailer against the wood with
excessive force.
3
Separate the Nailer from the wood as it recoils
after nailing.
4) keeping face and body parts away from the Nailer.
(6) Never Use NON relieving coupler on Nailer. If a
non relieving coupler is used on the Nailer, the Nailer
can remain charged with air after disconnecting
and thus will be able to drive a fastener even after
disconnecting. The Nailer and air hose must have a
hose coupling such that all pressure is removed from
the Nailer when the coupling joint is disconnected.
(7) Check Push Lever before use. Make sure the
Push Lever operates properly, and is not inoperable,
disconnected, or altered. (The Push Lever may be
called “Safety”.) Never use the Nailer unless the Push
Lever is operating properly, otherwise the Nailer
could drive a fastener unexpectedly. Do not tamper
with or remove the Push Lever, or otherwise cause
the Push Lever to become inoperable.
(8) Keep all screws and covers tightly in place. Keep
all screws and covers tightly mounted.
Check their condition periodically. Never use the
Nailer if parts are missing or damaged.
(9) Do not load fasteners with Trigger or Push Lever
depressed. When loading fasteners into the Nailer
or when connecting the air hose,
1) do not depress the Trigger;
2) do not depress the Push Lever; and
3) keep the Nailer pointed downward.
(10) Keep hands and body away from fi ring head
during use. Never place your hands or feet closer
than 8 inches (200 mm) from the fi ring head. A
serious injury can result if the fasteners are defl ected
by the workpiece, or are driven away from the point of
entry.
(11) When working close to an edge of a workpiece
or at steep angles, or driving fasteners into
thin workpiece use care to minimize chipping,
splitting or splintering, or free fl ight, ricochet or
piercing of fasteners, which may cause injury.
(12) Never drive fasteners from both sides of a wall
at the same time. The fasteners can be driven into
and through the wall and hit a person on the opposite
side.
(13) Use extra caution when driving the Nailer into
existing walls or other blind areas to prevent
contact with hidden objects or persons on other
side (eg., wires, pipes).
(14) Check for live wires. Avoid the risk of severe
electrical shock by checking for live electrical wires
that may be hidden by walls, fl oors or ceilings. Turn
off the breaker switch to ensure there are no live
wires.
(15) Do not lift, pull or lower the Nailer by the hose.
(16) Do not disconnect air hose from Nailer with
fi nger on Trigger. The Nailer can fi re when re-
connected to An air supply.
(17) Handle Nailer correctly. Operate the Nailer
according to this Manual. Never allow the Nailer to
be operated by children, individuals unfamiliar with its
operation or unauthorized personnel.
(18) Never use Nailer for applications other than
those specifi ed in this manual.
(19) Never modify or alter a Nailer. Doing so may cause
it to malfunction and personal injuries may result.
(20) Disconnect the air hose when affi xing the hook.
(21) Do not affi x the hook on high or unstable
locations. Also, do not affi x it to the body,
clothing, belt or other personal items.
6

English
SAFETY — Continued
RESPONSIBILITIES OF EMPLOYER, TOOL OWNER AND TOOL OPERATOR
1. Ensure that this MANUAL is available to operators
and personnel performing maintenance.
2. Select an appropriate switching device considering
the applications for which the Nailer is used.
3. Train the operator in the safe use of the Nailer as
described in this MANUAL.
4. Ensure that only persons who have read and
understand this MANUAL operate the Nailer.
5. Ensure that Nailers are used only when operators and
others in work area are wearing EYE PROTECTION,
and other appropriate personal protective equipment
such as HEAD, HEARING, FOOT PROTECTION.
SAVE THIS MANUAL AND
KEEP IT AVAILABLE FOR OTHERS!
6. Enforce the use of EYE PROTECTION by operators
and others in work area.
7. Ensure that Nailers are kept in safe working order as
described in this MANUAL.
8. Maintain Nailers properly.
9. Ensure that only qualifi ed personnel shall repair
Nailers.
10. Ensure that Nailers that require repair are removed
from service and that tags and physical segregation
are used as a means of control.
7

English
OPERATION
NOTE: The information contained in this Manual is designed to assist you in the safe operation of the Nailer.
Some illustrations in this Manual may show details or attachments that diff er from those on your own Nailer.
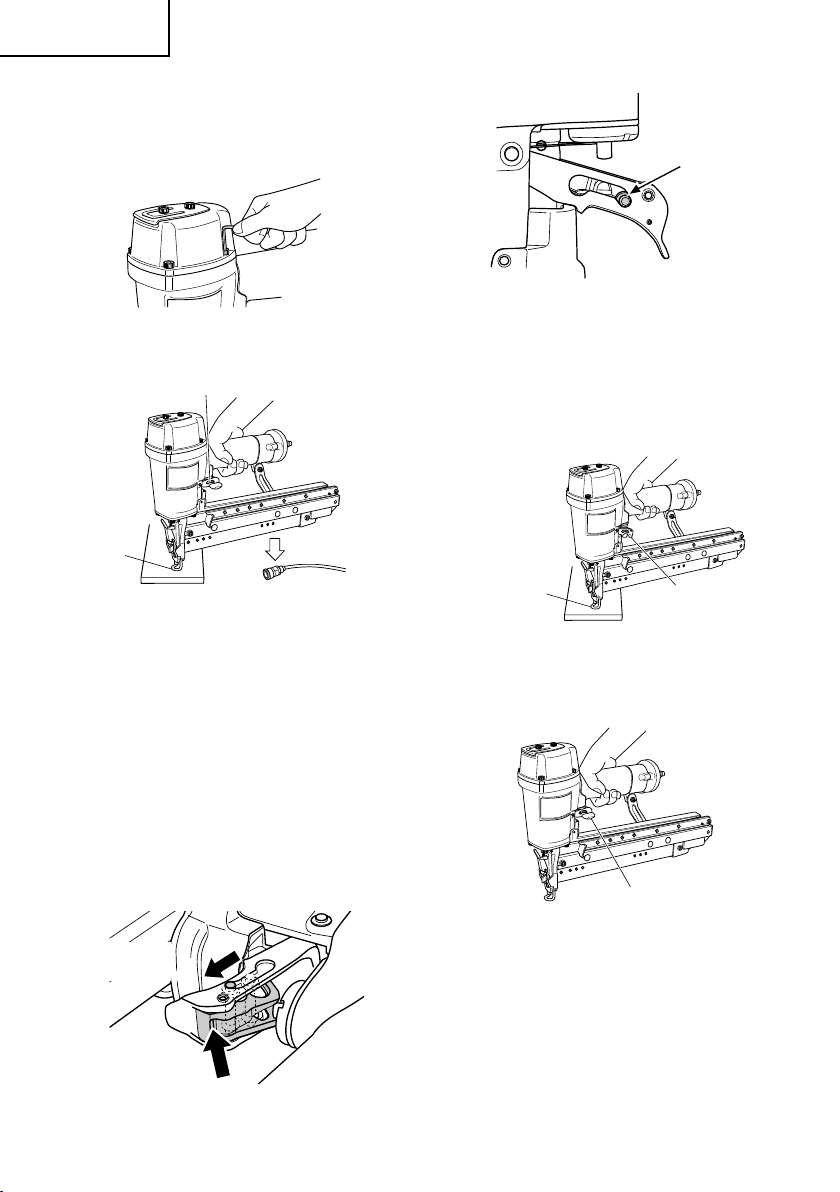
NAME OF PARTS
Enlarged view of the valve part
Nailing operation switching device
Piston
Piston O-ring
Driver Blade
Nose
Lock Lever
Tri gg er
Change Rod
Change
Stopper
Lock Pin
Position of
Change Rod
SINGLE SEQUENTIAL ACTUATION
MECHANISM
●
When the lock pin is attached, the tool is fi xed to SINGLE
SEQUENTIAL ACTUATION.
●
To operate in CONTACT ACTUATION, the lock pin should be removed
by following the steps in “How to Remove the Lock Pin” provided in the
“METHODS OF OPERATION”.
Exhaust Cover
Body
Valve Part
Ribbon Spring
CONTACT ACTUATION
MECHANISM
Cap
Air Plug
Magazine Cover
Position of
Change Rod
8
Guide Plate
Push Lever
Nail Feeder
Outlet (Firing Head)
Magazine Assembly
Magazine Protector
English
SPECIFICATIONS
Model NT65A5
Operating pressure 70 – 120 psi (4.9 – 8.3 bar, 5 – 8.5 kgf/cm2)
Dimensions
Length × Height × Width
15-5/64" × 10" × 3-5/32"
(383 mm × 254 mm × 80 mm)
Weight 4.9 lbs. (2.2 kg) (Without Hook)
Nail capacity 150 Nails
3
/cycle at 100 psi
.046 ft
Air consumption
(1.3 ltr/cycle at 6.9 bar)
(1.3 ltr/cycle at 7 kgf/cm
2
)
Air inlet 1/4 NPT Thread
NAIL SELECTION
WARNING
●
Be sure to use only the genuine Hitachi nails for the NT65A5. The use of any other nails can result in tool
malfunction and/or nail breakdown, leading to serious injuries.
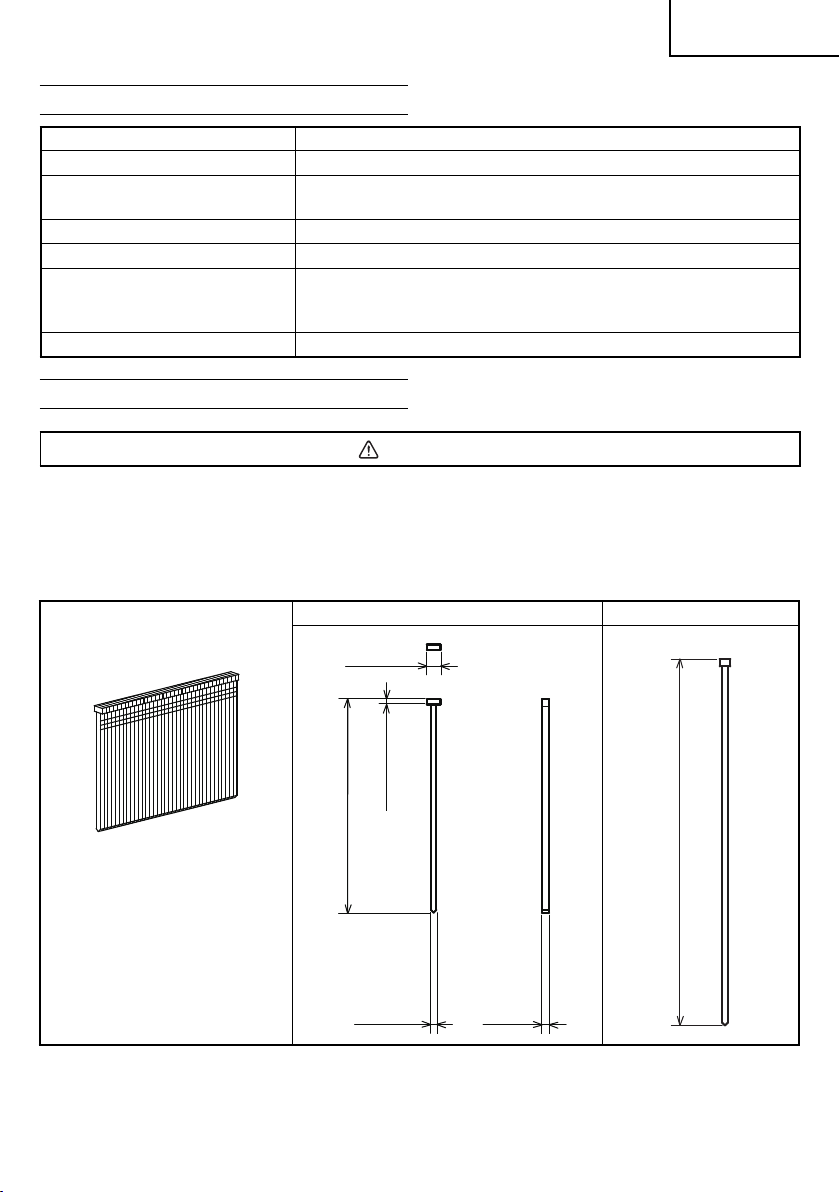
Only nails shown in the Table below can be driven with this Nailer.
Dimensions of nails
16 Gauge Finish nails
Min. Max.
.110" (2.8 mm)
.050" (1.3 mm)
1-1/2" (38 mm)
.054"
(1.4 mm)
2-1/2" (65 mm)
.065"
(1.65 mm)
9
English
ACCESSORIES
WARNING
●
Accessories other than those shown below
can lead to malfunction and resulting
injuries.
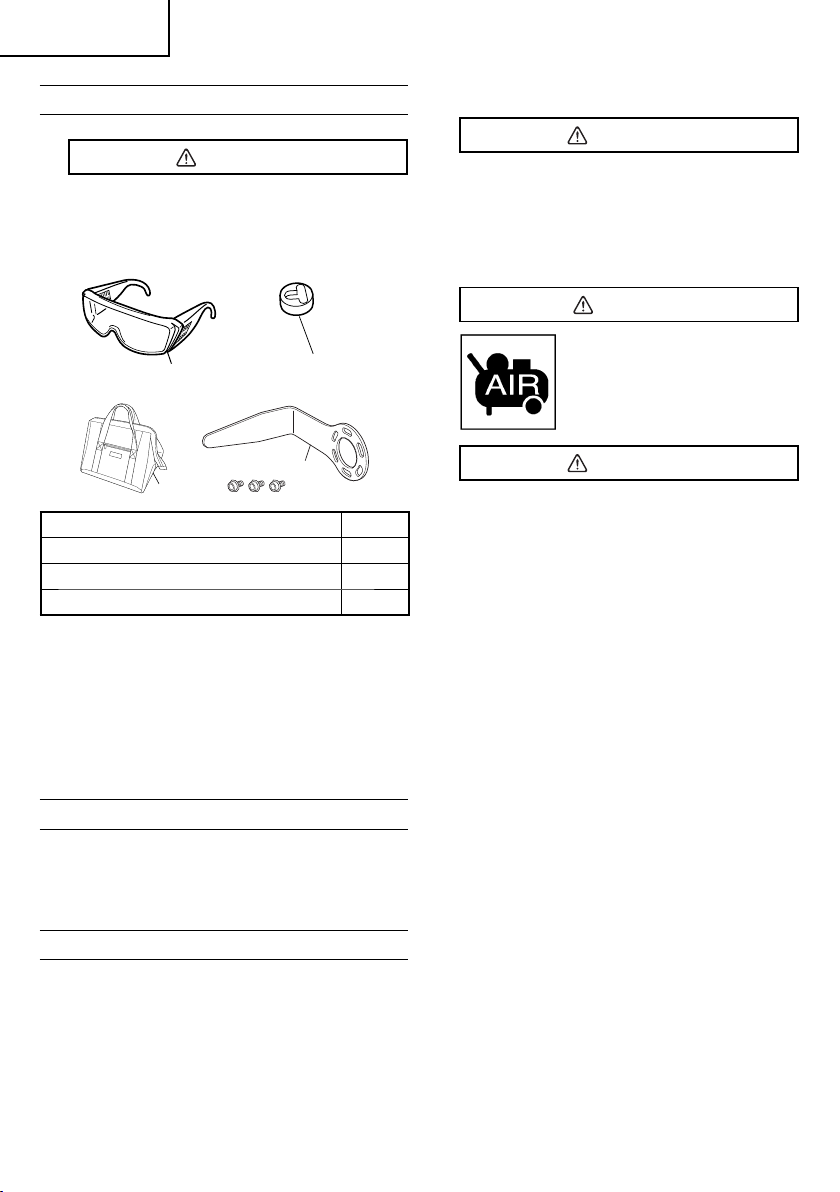
STANDARD ACCESSORIES
1
3
Safety glasses 1
1
Nose cap (mounted on tool) 1
2
Tool Bag 1
3
Hook 1
4
OPTIONAL ACCESSORIES ... sold separately
○
Pneumatic Tool Lubricant
1 oz. (30 cc) oil feeder (Code No.877153)
4 oz. (120 cc) oil feeder (Code No.874042)
1 quart (1 ltr) can (Code No.876212)
NOTE: Accessories are subject to change without any
obligation on the part of Hitachi.
2
4
APPLICATIONS
○
Nailing as fi nishing process for areas around the
doors, windows as well as edgings.
○
Securing the bottom of drawers. Making various
cases and cabinets.
BEFORE OPERATION
Read section titled “SAFETY” (pages 3 – 7).
Make sure of the followings before operation.
WORKING ENVIRONMENT
WARNING
●
No fl ammable gas, liquid or other fl ammable
objects at worksite.
●
Clear the area of children or unauthorized
personnel.
AIR SUPPLY
DANGER
●
NEVER use oxygen or other
bottled gases. Explosion
may occur.
WARNING
●
Never connect Nailer to pressure which
potentially exceeds 200 psi (13.7 bar
14 kgf/cm
●
Never use non relieving coupler on Nailer.
1. Power source
○
Use only clean, dry, regulated compressed air as a
power source for this Nailer.
○
Air compressors used to supply compressed air to
this Nailer must comply with the requirements of
the latest version of ANSI Standard B 19.3 “Safety
Standard For Compressors For Process Industries.”
○
Moisture or oil in the air compressor may accelerate
wear and corrosion in the Nailer.
Drain daily.
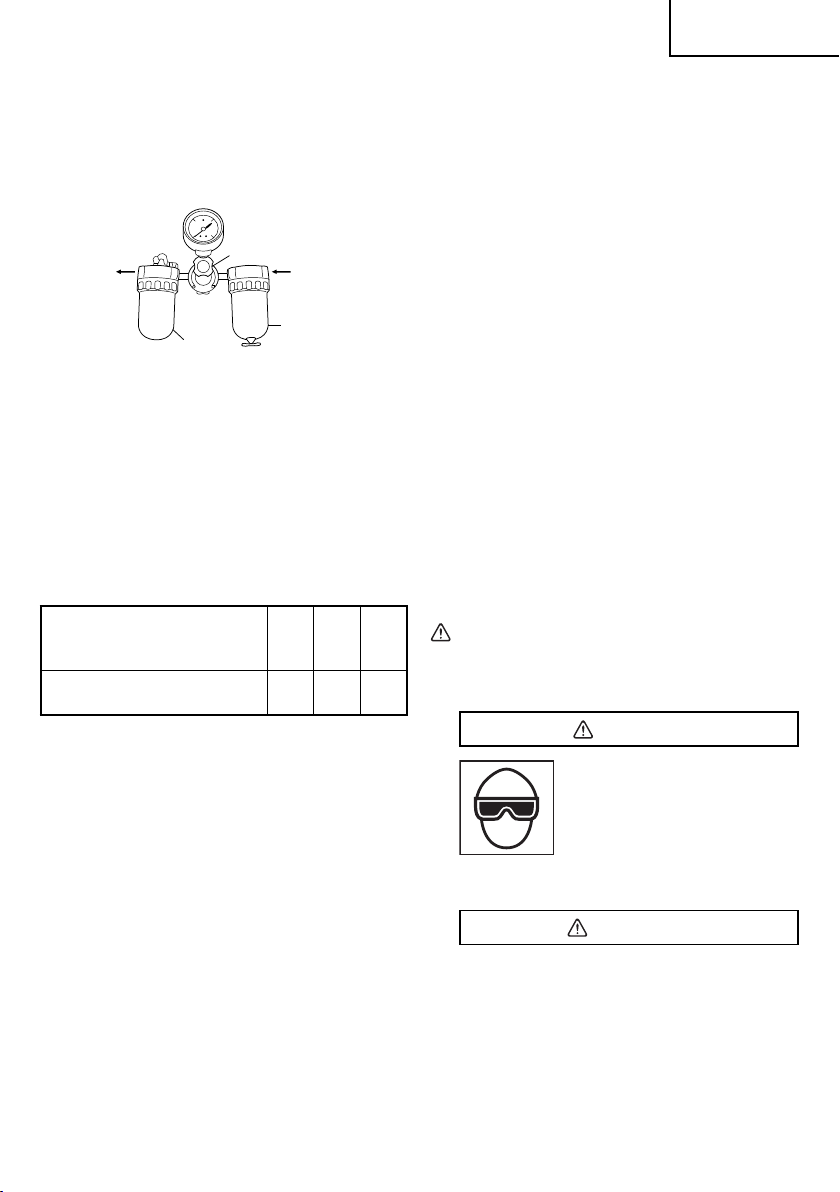
2. Filter-Regulator-Lubricator
○
Use a regulator with a pressure range of 0 – 120 psi
(0 – 8.3 bar 0 – 8.5 kgf/cm
○
Filter-regulator-lubricator units supply an optimum
condition for the Nailer and extend the Nailer life.
These units should always be used.
Filter ............ The fi lter removes moisture and dirt
Regulator ..... The regulator controls the operating
2
).
2
).
mixed in compressed air.
Drain daily unless fi tted with an
automatic drain.
Keep the fi lter clean by regular
maintenance.
pressure for safe operation of the Nailer.
Inspect the regulator before operation to
be sure it operates properly.
10
English
Lubricator .... The lubricator supplies an oil mist to the
Nailer.
Inspect the lubricator before operation
to be sure the supply of lubricant is
adequate.
Use Hitachi pneumatic tool lubricant.
Regulator
Nailer side
Compressor side
Filter
Lubricator
3. Air hose
Compressed air supply hoses shall have a minimum
working pressure rating equal to or greater than the
pressure from the power source if a regulator fails,
or 150 psi (10.4 bar 10.6 kgf/cm
2
), whichever is
greater.
4. Air consumption
Using the Air consumption table and the Air
compressor size formula, fi nd a correct compressor
size.
Air consumption table
Operating pressure
Air consumption
psi
(bar)
(kgf/cm
3
ft
/cycle
(Itr/cycle)
80
90
(6.2)
(6.3)
.039
(1.1)
100
(6.9)
(7)
.046
(1.3)
(5.5)
2
)
(5.6)
.035
(1.0)
Air compressor size formula
Amount of air required
= number of Nailers
× average nails driven each minute per Nailer
× air consumption at given air pressure
× safety factor (always 1.2)
Example: 3 Nailers operating at 100 psi driving
30 nails per minute
Amount of air required
= 3 × 30 × .046 (1.3) × 1.2
= 5.0 CFM (ft
3
/min) (140 ltr/min)
After making the calculations as shown above, you
should fi nd a compressor providing 5.0 CFM of air
that is required.
LUBRICATION
It is important that the Nailer be properly lubricated.
Without proper lubrication, the Nailer will not work
properly and parts will wear prematurely.
○
Use Hitachi pneumatic tool lubricant.
Do not use detergent oil or additives. These lubricants
will harm the O-rings and other rubber parts. This will
cause the Nailer to malfunction.
○
Filter-regulator-lubricator units should always be
used.
Keep the lubricator fi lled with Hitachi pneumatic tool
lubricant.
○
If a lubricator is not available, supply 5 – 10 drops of
Hitachi pneumatic tool lubricant into the air plug on
the Nailer twice a day.
COLD WEATHER CARE
○
Do not store the Nailer in a cold weather environment.
Keep the Nailer in a warm area until beginning the
work.
○
If the Nailer is already cold, bring it in a warm area
and allow the Nailer to warm up before use.
1
Reduce the air pressure to 40 psi (2.8 bar
2.8 kgf/cm2).
2
Remove all nails from the Nailer.
3
Connect the air hose and free-fi re (blank-fi re) the
Nailer.
The lowered air pressure will be enough to free-
fi re the Nailer.
Slow speed operation tends to warm up the
moving part.
CAUTION
●
Do not free-fi re the Nailer at high pressure.
TESTING THE NAILER
DANGER
●
Operators and others in work
area MUST wear safety
glasses with side shields
which conforms to ANSI
Z87.1 specifi cations.
Ordinary eyeglasses do not
provide adequate protection.
WARNING
●
Never use Nailer unless push lever is
operating properly.
Before actually beginning the nailing work, test the Nailer
by using the check list below. Conduct the tests in the
following order.
If abnormal operation occurs, stop using the Nailer and
contact a
Hitachi
authorized service center immediately.
11
English
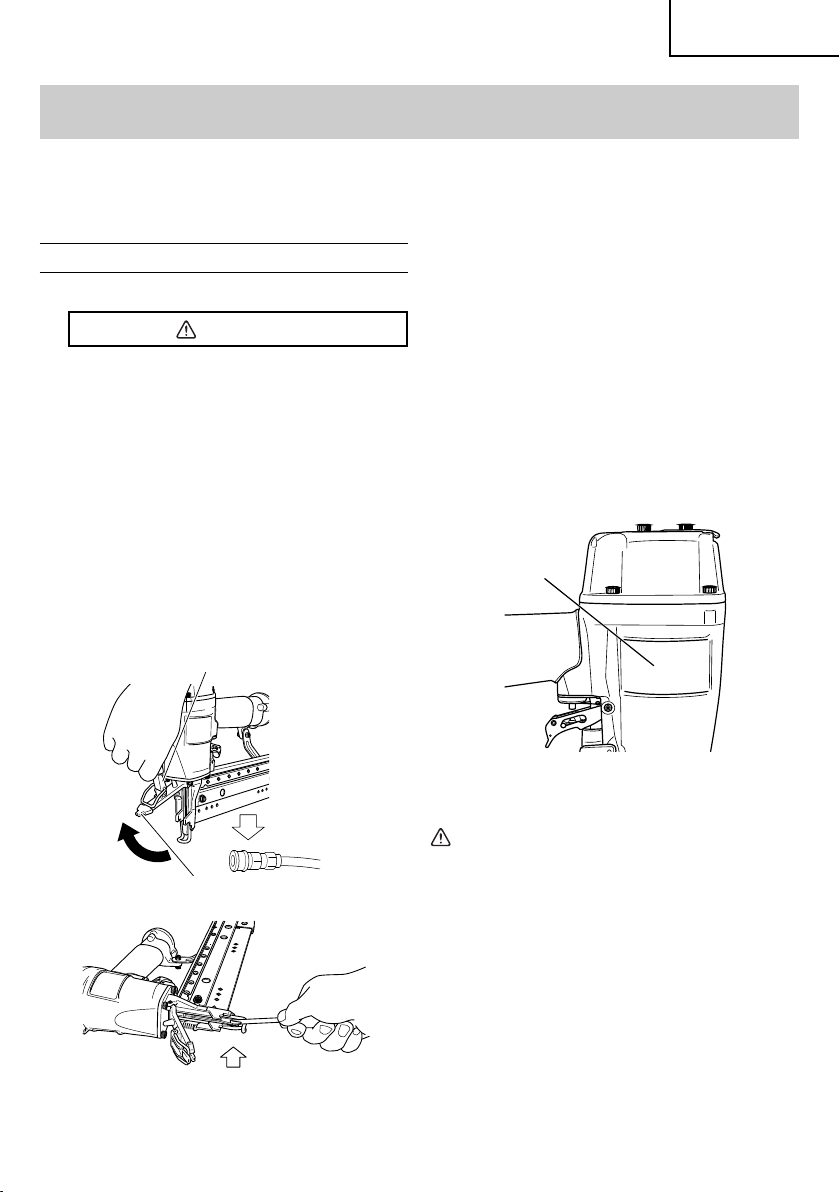
(1) DISCONNECT AIR HOSE FROM NAILER.
REMOVE ALL NAILS FROM NAILER.
□
ALL SCREWS MUST BE TIGHTENED.
If any screws are loose, tighten them.
□
THE PUSH LEVER AND TRIGGER MUST MOVE
SMOOTHLY.
Tri gg er
Push lever
Do not connect
air hose
(2) REMOVE ALL NAILS FROM NAILER.
DO NOT push or rest Push Lever against any surface.
DO NOT FORCE OR USE TOOLS TO OPERATE
SWITCH.
Select SINGLE SEQUENTIAL ACTUATION MODE
according to the following steps.
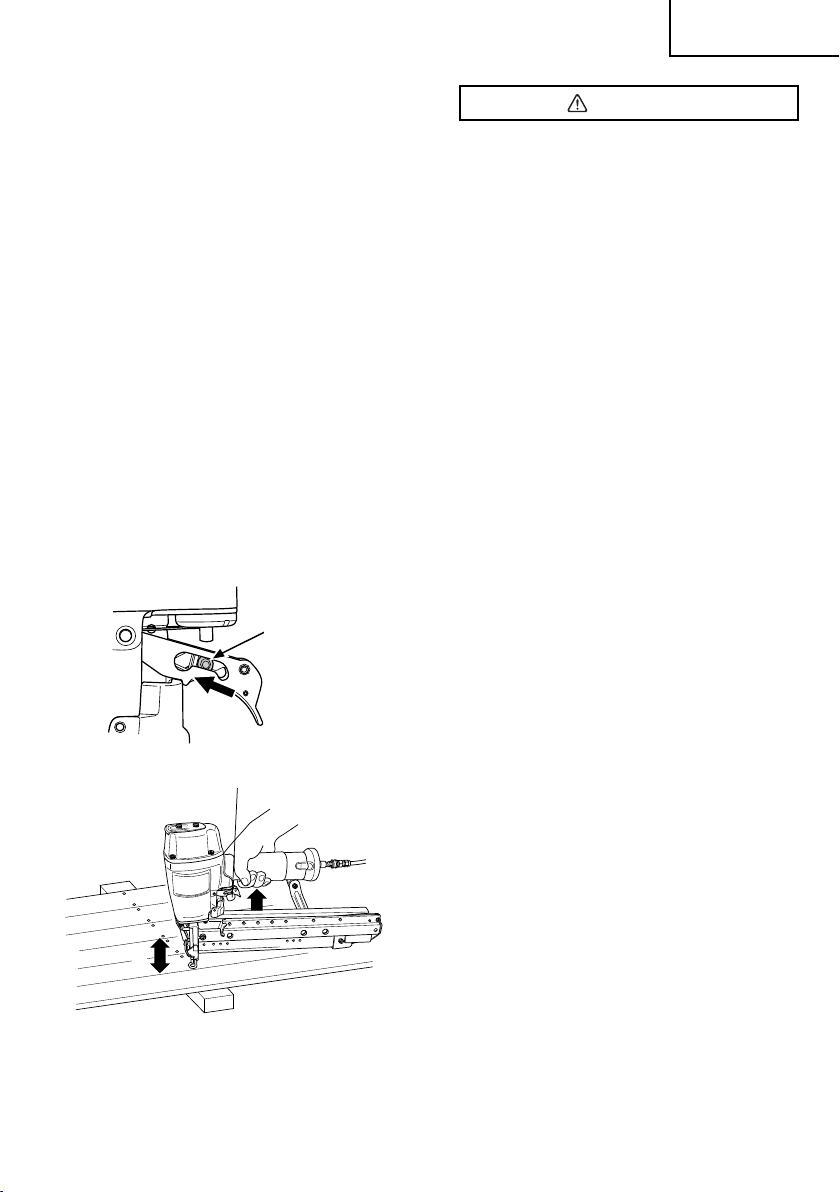
1
Open the change stopper by pushing the bottom of
trigger.
2
Grasp the change rod between two fi ngers (one on
each side of the trigger) and slide it down (Single
Sequential Actuation Mode.)
3
Confi rm that the change stopper has completely
returned to original position inside the trigger.
(SINGLE SEQUENTIAL ACTUATION MECHANISM).
Grasp The
Change Rod
2
3
Position of
Change Rod
2
(3) Adjust the air pressure to 70 psi (4.9 bar 5 kgf/cm
).
Connect the air hose.
□
THE NAILER MUST NOT LEAK AIR.
(4) Remove the fi nger from the trigger and press the
push lever against the wood.
□
THE NAILER MUST NOT OPERATE.
Depress
push lever
Do not pull
trigger
(5) Separate the push lever from the wood.
Next, point the nailer downward, pull the trigger and
then wait in that position for 5 seconds or longer.
□
THE NAILER MUST NOT OPERATE.
Pull trigger
(6) First pull the Trigger.
Next, depress the Push Lever against the wood.
□
THE NAILER MUST NOT OPERATE.
1
Push The Change stopper
12
English
(7) Without touching the Trigger, depress the Push Lever
against the wood.
Next, pull the Trigger.
□ THE NAILER MUST OPERATE.
If the lock pin is left, skip (8) through (10) and
proceed from (11).
→ If the lock pin is attached, the unit can be
operated in SINGLE SEQUENTIAL ACTUATION
MECHANISM.
(8) Disconnect the air hose.
REMOVE ALL NAILS FROM NAILER.
Remove the hook if it is attached.
→ When the hook is attached, do not operate with
CONTACT ACTUATION MECHANISM.
DO NOT push or rest Push Lever against any surface.
DO NOT FORCE OR USE ANY TOOLS TO
OPERATE SWITCH.
Select CONTACT ACTUATION MODE according to
the following steps.
1
Open the change stopper by pushing the bottom of
trigger.
2
Grasp the change rod between two fi ngers (one
on each side of the trigger) and slide it up (Contact
Actuation Mode.)
3
Confi rm that the change stopper has completely
returned to original position inside the trigger.
(CONTACT ACTUATION MECHANISM).
Grasp The
Change Rod
2
(9) Adjust air pressure to 70 psi (4.9 bar 5 kgf/cm2).
Connect the air hose.
□ THE NAILER MUST NOT LEAK AIR.
(10) With the Nailer off the wood, pull the Trigger.
Next, depress the Push Lever against the wood.
□ THE NAILER MUST OPERATE.
(11) Next, depress the Push Lever against the workpiece.
Now pull the Trigger.
□ THE NAILER MUST OPERATE.
(12) If no abnormal operation is observed, you may load
nails in the Nailer.
Drive nails into the workpiece that is the same type to
be used in the actual application.
□
THE NAILER MUST OPERATE PROPERLY.
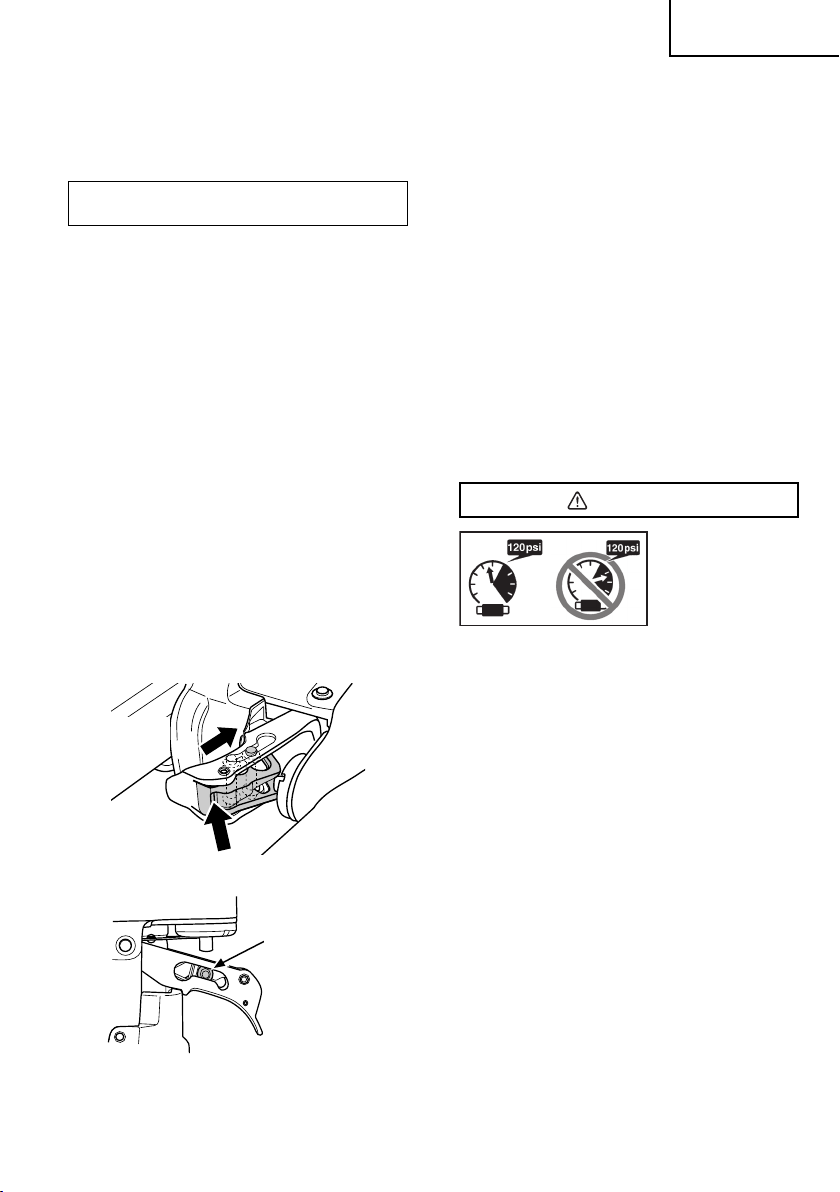
ADJUSTING AIR PRESSURE
WARNING
●
Do not exceed
120 psi (8.3 bar
8.5 kgf/cm
Adjust the air pressure at recommended
operating pressure 70 – 120 psi (4.9 – 8.3 bar
2
5 – 8.5 kgf/cm
) according to the length of nails and the
hardness of workpiece.
The correct air pressure is the lowest pressure which will
do the job. Using the Nailer at a higher than required air
pressure unnecessarily over stresses the Nailer.
2
).
1
Push The Change stopper
3
Position of
Change Rod
13

English
LOADING NAILS
WARNING
●
When loading nails into Nailer,
1) do not pull trigger;
2) do not depress push lever; and
3) keep Nailer pointed downward.
(1) Pull the nail feeder back and hang it over the roll pin.
Nail Feeder
Roll pin
(2) 1 Insert nail strips one by one from above the
magazine.
2
Slide nails forward in the magazine.
1
2
Nail strips
(3)
1
Pull the nail feeder up in backward direction and
remove it from the roll pin.
2
Slide the nail feeder forward until it contacts nails.
Nail Feeder
Roll pin
Magazine
NOTE:
●
Use nails at least 5 nails remaining.
●
Slide the nail feeder SLOWLY forward.
If the nail feeder is released roughly, it may be stuck
between the magazine and nails, which makes misfeeding trouble.
NAILER OPERATION
Read section titled “SAFETY”(pages 3 – 7).
DANGER
●
Operators and others in work
area MUST wear safety
glasses with side shields
which conforms to ANSI Z87.1
specifi cations.
Ordinary eyeglasses do not
provide adequate protection.
WARNING
●
Only person who have read
and understand this MANUAL
should operate the Nailer.
●
NEVER point tool at yourself
or others in work area.
●
Keep fi ngers AWAY from
trigger when not driving nails
to avoid accidental discharge.
●
Know and understand what trigger system you
are using.
Please read and understand “Methods of
Operation” below.
●
Inspect the Nailer before operating to determine
actuation system.
Before starting work, check the nailing operation
switching device.
This Hitachi nailer includes a nailing operation
switching device.
Before starting work, make sure that the
switching device is properly set.
14
English
If the switching device is not set properly, the
nailer will not operate correctly.
●
Never place your hands or body closer than 8
inches (200 mm) from fi ring head when using.
●
Do not drive nails into other nails; nails can
ricochet and hurt someone.
●
Do not actuate Nailer unless Nailer is placed
fi rmly against the workpiece.
●
When working close to an edge of a workpiece
or at steep angles, or driving fasteners into
thin workpiece use care to minimize chipping,
splitting or splintering, or free fl ight, ricochet or
piercing of fasteners, which may cause injury.
●
Never drive nails from both sides of a wall at the
same time. Nails can be driven into and through
the wall and hit a person on the opposite side.
●
Never use Nailer which is defective or operating
abnormally.
●
Do not use Nailer as hammer.
●
Disconnect air hose from Nailer when:
1) it is not in use;
2) leaving work area;
3) elevating, lowering or otherwise moving it to
another location;
4) handing it to another person;
5) removing the lock pin;
6) changing switching device;
7) performing any maintenance or repairs;
8) clearing a jam;
9) Nailer is outside of the operator's supervision
or control;
10) removing nails from the magazine;
11) attaching or removing the nose cap;
12) installing or removing the hook; and
13) affi xing the hook.
This Hitachi nailer is equipped with a nailer operation
switching device.
Use SINGLE SEQUENTIAL ACTUATION MECHANISM or
CONTACT ACTUATION MECHANISM in accordance with
the work to be performed.
Explanation of the various nailing operations
○
SINGLE SEQUENTIAL ACTUATION MECHANISM:
First, press the push lever against the workpiece;
next, pull the trigger to drive the nail.
After nailing once, nailing will not be possible again
until the trigger is released and pressed again.
○
CONTACT ACTUATION MECHANISM: First, press
the push lever against the workpiece; next, pull the
trigger to drive the nail. Or,
pull the trigger; next, press the push lever against the
workpiece to drive the nail.
If the trigger is held back, a nail will be driven each
time the push lever is pressed against the workpiece.
METHODS OF OPERATION
This Nailer is equipped with the push lever and does
not operate unless the push lever is depressed (upward
position).
There are two methods of operation to drive nails with this
Nailer.
They are:
1. Intermittent operation (Trigger fi re):
2. Continuous operation (Push lever fi re):
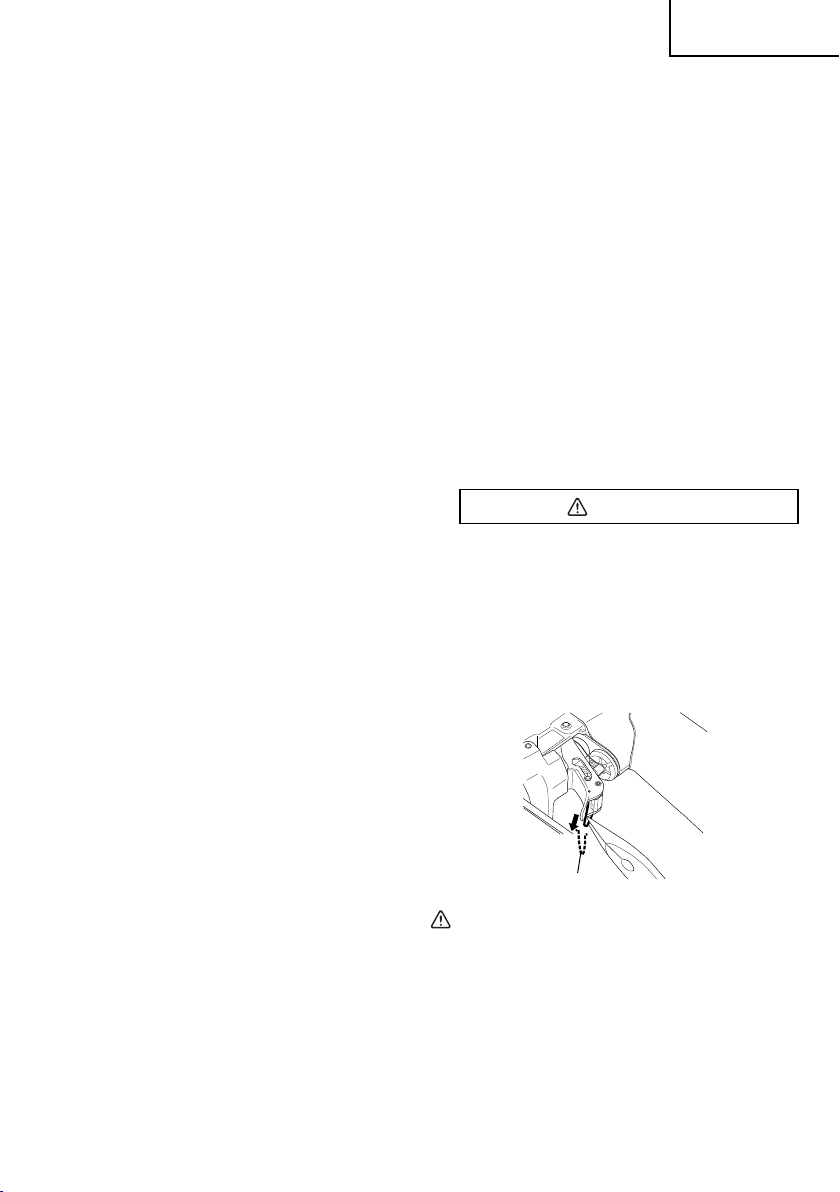
How to Remove the Lock Pin
•
When shipped, the tool’s drive mode is locked
to SINGLE SEQUENTIAL ACTUATION
MECHANISM with the lock pin.
•
By removing the lock pin as shown below, the tool
can be switched between SINGLE SEQUENTIAL
ACTUATION and CONTACT ACTUATION.
WARNING
●
When removing the lock pin, disconnect the
air hose from the tool and remove all nails.
●
Please be warned that the once the lock
pin is removed, the SINGLE SEQUENTIAL
ACTUATION and CONTACT ACTUATION
switch function will be activated.
•
Use a pair of pliers like the one shown below to
pull off the lock pin.
Lock pin
CAUTION
●
The lock pin should be discarded after removal.
15
English
(1) Intermittent operation (Trigger fi re)
Use the SINGLE SEQUENTIAL ACTUATION
MECHANISM setting.
WARNING
●
For intermittent operation, set the change
rod as shown in the fi gure below. (i.e.
Set to SINGLE SEQUENTIAL ACTUATION
MECHANISM.)
●
To avoid double fi ring or accidental fi ring due
to recoil.
1) Set the switching device to SINGLE
SEQUENTIAL ACTUATION MECHANISM.
2) Pull the trigger rapidly and fi rmly.
1
Follow the steps below to set up the SINGLE
SEQUENTIAL ACTUATION MECHANISM (as
shown in the diagrams that follow).
WARNING
●
Disconnect the air hose and remove all nails.
●
Do not depress the push lever.
●
Do not apply any unnecessary pressure or
use any tools to move the switch.
●
Do not press the change stopper for any
other purpose other than to switch between
SINGLE SEQUENTIAL ACTUATION and
CONTACT ACTUATION.
1) If the lock pin is left, skip 2) through 3) and
proceed from 4).
2) Press the bottom of the trigger and open the
change stopper.
3) Grasp the change rod between two fi ngers
and slide it downwards.
(Sets the SINGLE SEQUENTIAL ACTUATION
MECHANISM)
4) Make sure that the change rod is in its proper
position as shown in the diagram.
(If not, the tool may be set in the CONTACT
ACTUATION MECHANISM.)
2
Position the nail outlet on the workpiece with
fi nger off the trigger.
3
Depress the push lever fi rmly until it is completely
depressed.
4
Pull the trigger to drive a nail.
5
Remove fi nger from the trigger.
To continue nailing in a separate location, move the
nailer along the wood, repeating steps
required.
2
– 5 as
Position of
Change Rod
1
4
3
Push Lever
Tri gg er
WARNING
●
A nail will fi re each time the trigger is
depressed as long as the push lever remains
depressed.
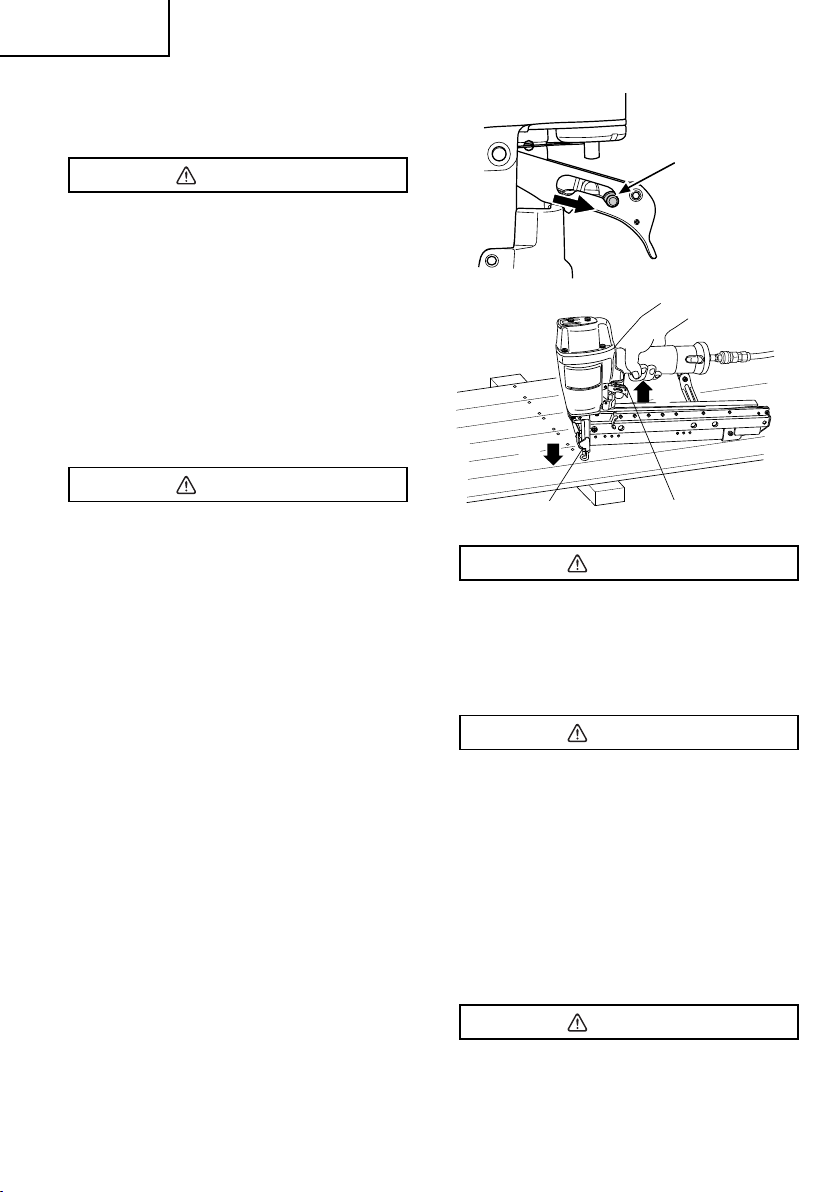
(2) Continuous operation (Push lever fi re)
Using CONTACT ACTUATION MECHANISM
WARNING
●
To avoid double fi ring or accidental fi ring due
to recoil.
1) Do not press the nailer against the wood
with excessive force.
2) Separate the nailer from the wood as it
recoils after nailing.
●
If the hook is affi xed, do not operate with
CONTACT ACTUATION MECHANISM.
1
Follow the steps below to set up the CONTACT
ACTUATION MECHANISM (as shown in the
diagrams that follow).
WARNING
●
Disconnect the air hose and remove all nails.
●
Do not depress the push lever.
●
Do not apply any unnecessary pressure or
use any tools to move the switch.
16
●
Do not press the change stopper for any
other purpose other than to switch between
SINGLE SEQUENCETIAL ACTUATION and
CONTACT ACTUATION.
1) Remove the lock pin if it is still attached.
See “How to Remove the Lock Pin” in the
“METHODS OF OPERATION”.
2) Press the bottom of the trigger and open the
change stopper.
3) Grip the change rod between two fi ngers and
slide it upwards.
(Sets the CONTACT ACTUATION
MECHANISM)
4) Make sure that the change rod is in its proper
position in the trigger as shown in the diagram.
(If not, the tool may not operate properly.)
2
Pull the trigger with the Nailer off the workpiece.
3
Depress the push lever against the workpiece to
drive a nail.
4
Move the Nailer along the workpiece with a
bouncing motion.
Each depression of the push lever will drive a nail.
As soon as the desired number of nails have been
driven, remove fi nger from the trigger.
Position of
Change Rod
1
Previously pull the trigger
2
4
English
WARNING
●
Keep your fi nger off the trigger except during
fastening operation, because serious injury
could result if the push lever accidentally
contacts you or others in work area.
●
Keep hands and body away from the
discharge area. This Hitachi nailer may
bounce from the recoil of driving a fastener
and unwanted subsequent fastener may be
driven, possibly causing injury.
●
Some types of loaded nails can spark out of
the muzzle during a nail driving operation.
Exericise caution!
The SINGLE SEQUENTIAL ACTUATION MECHANISM
is for use where precision fastener placement is desired.
The SINGLE SEQUENTIAL ACTUATION MECHANISM
may reduce the possibility of bodily injury to you or others
in the work area compared to the CONTACT ACTUATION
MECHANISM. This is because it is less likely to drive
an unwanted nail if you keep the trigger pulled and
accidentally bump the push lever against yourself or
others.
The SINGLE SEQUENTIAL ACTUATION MECHANISM
may also reduce the speed of operation compared
to the CONTACT ACTUATION MECHANISM. The
SINGLE SEQUENTIAL ACTUATION MECHANISM is
recommended to inexperienced users.
NOTE
●
If all warnings and instructions are followed, safe
operation is possible with all two systems: SINGLE
SEQUENTIAL ACTUATION MECHANISM and
CONTACT ACTUATION MECHANISM.
●
Always handle nails and package carefully. If nails
are dropped, collating plastic may be broken.
●
After nailing:
1) disconnect air hose from the Nailer;
2) remove all nails from the Nailer;
3) supply 5 – 10 drops of Hitachi pneumatic tool
lubricant into the air plug on the Nailer; and
4) open the petcock on the air compressor
tank to drain any moisture.
17

English
USING THE NOSE CAP
WARNING
●
When detaching or attaching the nose cap,
be sure to remove your fi nger from the trigger
and disconnect the air hose from the nailer.
The nose cap is attached to the push lever tip to protect
the workpiece from scratches or damage. Remove in the
order shown below when not using.
1
DISCONNECT AIR HOSE FROM NAILER.
2
Put the nose cap to the toe of the push lever.
Push
Lever
Nose Cap
When not using the nose cap, attach to the storage area
in back of the magazine.
Disconnect air hose
(1) How to attach the hook
Hexagonal bar wrench for M5
2
1
Main unit
Fig. 1 Fig. 2
•
When attaching, use a hexagonal bar wrench for M5
(separate).
•
Fix the hook (1) to the main unit in three locations
using the M5
8.3±0.5 N
•
The hook can be attached in any direction. Adjust the
hook according to the operating environment (Fig. 2).
(2) How to detach the hook
Detach the hook by reversing the aforementioned
steps for attaching the hook.
×
16 fl ange bolts (2) (Fig. 1).
Fastening Torque
•
m 6.1±0.4 ft.lbs 85±5 kgf
•
cm
Nose cap
NOTE
●
The nose cap may reduce nailing depth due
to its thickness. Adjustment of air pressure is
necessary for readjustment of naling depth.
RAFTER HOOK
An included hook can be attached by using three M5 x 16
fl ange bolts which are included with the tools.
When the tool is detached from the hose and not in use,
the hook can be used to store the unit.
WARNING
●
When attaching or detaching the hook, make
sure the hose is detached and the nails are
removed from the tool.
18
WARNING
●
When the hook is attached, operate only
with SINGLE SEQUENTIAL ACTUATION
MECHANISM and not with CONTACT
ACTUATION MECHANISM. For switching
between SINGLE SEQUENTIAL and
CONTACT, see the appropriate section in
“METHODS OF OPERATION”.
●
Disconnect the air hose when hook the unit.
●
Do not hook on high or unstable locations.
Also, do not hook it to the body, clothing, belt
or other personal items.
English
MAINTENANCE
NOTE: The information contained in this Manual is designed to assist you in the safe maintenance of the Nailer.
Some illustrations in this Manual may show details or attachments that diff er from those on your own Nailer.
MAINTENANCE AND INSPECTION
Read section titled “SAFETY” (pages 3 – 7).
WARNING
●
Disconnect air hose and remove all nails
from Nailer when:
1) doing maintenance and inspection; and
2) clearing a jam.
1. Clearing a jam
Remove a jammed nail in the following order:
1
DISCONNECT AIR HOSE.
2
Remove all nails.
3
Release the lock lever and open guide plate.
4
Remove the jammed nail with a slotted-head
screwdriver.
5
Close guide plate and latch.
6
In case of frequent jam, contact a Hitachi
authorized service center.
Lock lever
Disconnect
1
3
Guide Plate (A)
air hose
2. Storing
○
When not in use for an extended period, apply a thin
coat of the lubricant to the steel parts to avoid rust.
○
Do not store the Nailer in a cold weather environment.
Keep the Nailer in a warm area.
○
When not in use, the Nailer should be stored in a
warm and dry place.
Keep out of reach of children.
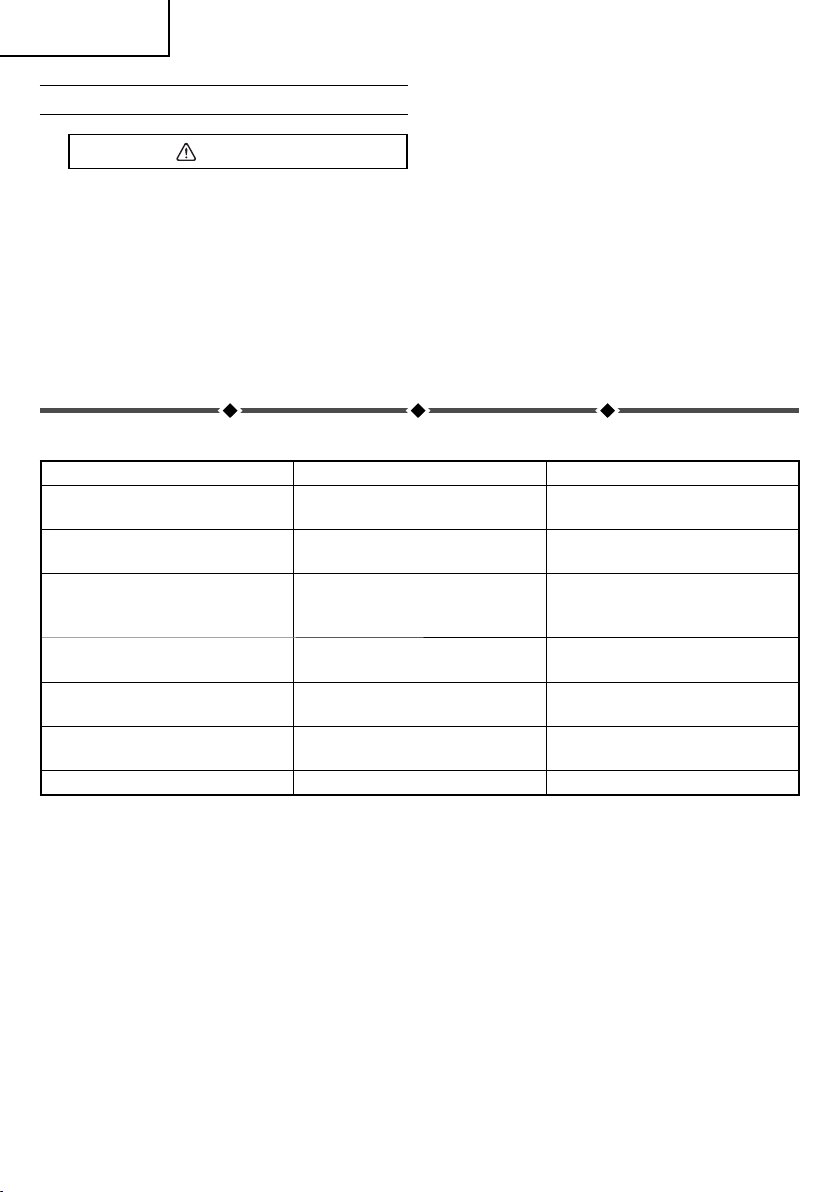
3. WARNING LABEL
Do not use the Nailer with missing or damaged
WARNING LABEL.
A new WARNING LABEL is available from a Hitachi
authorized service center.
Warning
Label
4. Maintenance chart (See page 20)
5. Operator troubleshooting (See page 21)
CAUTION
In the operation and maintenance of power tools,
the safety regulations and standards prescribed
in each country must be observed.
4
19
English
SERVICE AND REPAIRS
WARNING
●
Only service personnel trained by Hitachi,
distributor or employer shall repair the Nailer.
●
Use only parts supplied or recommended by
Hitachi for repair.
All quality Nailers will eventually require servicing or
replacement of parts because of wear from normal use.
NOTE: Specifi cations are subject to change without any
obligation on the part of Hitachi.
Maintenance chart
ACTION WHY HOW
Drain air line fi lter daily. Prevent accumulation of moisture
Keep lubricator fi lled. Keep the Nailer lubricated. Fill with Hitachi pneumatic tool
Clean fi lter element — then blow air
through fi lter in direction opposite to
normal fl ow.
Clean magazine and feeder
mechanism.
Keep push lever working properly. Promote operator safety and effi cient
Lubricate the Nailer after nailing. Extend the Nailer life. Supply 5 – 10 drops of lubricant into
Drain air compressor. Keep the Nailer operated properly.
and dirt.
Prevent clogging of fi lter with dirt. Follow manufacturer’s instructions.
Prevent a jam. Blow clean daily.
Nailer operation.
Open manual petcock.
lubricant.
Blow clean daily.
the Nailer.
Open petcock on air compressor tank.
20

Operator troubleshooting
Most minor problems can be resolved quickly and easily using the table below.
If problems persist, contact a Hitachi authorized service center for assistance.
PROBLEM CHECK METHOD CORRECTION
Nailer operates, but no nail is driven. Check for a jam. Clear a jam page 19.
Nail feeder damaged? Replace nail feeder.
Ribbon spring weakened or
Replace Ribbon spring.
damaged?
Check for proper nails. Use only recommended nails.
Weak drive.
Slow to cycle.
Check air pressure. Increase air pressure.
(Do not exceed 120 psi
(8.3 bar 8.5 kgf/cm2))
—————— Use Hitachi pneumatic tool lubricant.
Driver blade worn? Contact Hitachi for replacement.
Piston O-ring worm or damaged?
Drives too deep. Check air pressure. Reduce air pressure.
(Adjust 70 – 120 psi
(4.9 – 8.3bar 5 – 8.5 kgf/cm2))
Skipping nails.
Intermittent feed.
Check for proper nails. Use only recommended nails.
Nail feeder damaged? Replace nail feeder.
Ribbon spring weakened or
Replace Ribbon spring.
damaged?
Piston O-ring worn or damaged? Contact Hitachi for replacement.
Nails jam.
Driven nail is bent.
Drives properly during normal
Check for proper nails. Use only recommended nails.
Driver blade worn? Contact Hitachi for replacement.
Check inside diameter of air hose. Use larger air hose.
operation, but does not drive fully at
faster nailing speeds.
English
21

Français
INFORMATION IMPORTANTE DE SÉCURITÉ
Lire et bien assimiler toutes les étiquettes de l’outil ainsi que toutes les instructions de fonctionnement,
les consignes de sécurité et les avertissements de ce mode d’emploi avant d’utiliser ou d’entretenir ce
cloueur.
Le non respect des avertissements pourrait entraîner la MORT ou des BLESSURES GRAVES.
La plupart des accidents résultant de l’utilisation ou de l’entretien des cloueurs sont dus au non respect de certaines
consignes et précautions de sécurité élémentaires. Un accident peut souvent être évité en reconnaissant une situation
potentiellement dangereuse avant qu’elle ne se produise, et en respectant les procédures de sécurité applicables.
Les consignes de sécurité élémentaires sont données dans la section “SECURITE” du manuel et dans les sections
relatives aux instructions d’utilisation et d’entretien.
Les dangers à éviter pour empêcher tout risque de blessures ou de dommage de l’outil sont identifi és par les mots
DANGER et AVERTISSEMENT, sur le cloueur et dans ce manuel.
NE JAMAIS utiliser ce cloueur pour des applications autres que celles qui sont spécifi ées dans ce manuel.
DEFINITION DES MOTS DE SIGNALISATION
DANGER indique une situation imminente dangereuse qui, si elle n’est pas évitée, entraînera la mort ou des blessures
graves.
AVERTISSEMENT indique une situation potentiellement dangereuse qui, si elle n’est pas évitée, risque d’entraîner la
ATTENT ION indique une situation potentiellement dangereuse qui, si elle n’est pas évitée, risque d’entraîner des
REMARQUE met en relief les informations essentielles.
mort ou des blessures graves.
blessures légères ou modérées, ou d’endommager l’outil.
EXPLICATION DE L’ACTION DE CLOUAGE DU CLOUEUR HITACHI
○
MÉCANISME DE DÉCLENCHEMENT SÉQUENTIEL UNIQUE:
Appuyer tout d’abord le levier-poussoir contre le bois, puis tirer sur la gâchette pour enfoncer le clou.
Quand un clou est enfoncé, il n’est plus possible d’enfoncer un autre clou tant que l’on n’a pas relâché la gâchette et
appuyé à nouveau.
○
MÉCANISME DE DÉCLENCHEMENT PAR CONTACT:
Appuyer tout d’abord le levier-poussoir contre le bois, puis tirer sur la gâchette pour enfoncer le clou.
Tirer tout d’abord sur la gâchette, puis appuyer le levier-poussoir contre le bois pour enfoncer le clou.
Si la gâchette est maintenue tirée, un clou s’enfonce chaque fois que l’on appuie le levier-poussoir contre le bois.
*
À la sortie d’usine, ce produit est verrouillé sur le DÉCLENCHEMENT SÉQUENTIEL UNIQUE.
Voir « MÉTHODES D’UTILISATION » pour savoir comment basculer entre les commandes.
22

Français
SECURITE
CONSIGNES DE SÉCURITÉ IMPORTANTES POUR L’UTILISATION DU
CLOUEUR
CONSIGNES RELATIVES À UN RISQUE D’INCENDIE, DE CHOC ÉLECTRIQUE OU DE BLESSURES
CORPORELLES
●
Généralités
Afi n de réduire les risques de choc électrique, d’incendie et de blessures physiques, LIRE TOUTES LES
INSTRUCTIONS AVANT D’UTILISER L’OUTIL.
DANGER
1. LES OPÉRATEURS ET LES AUTRES PERSONNES
DANS L’AIRE DE TRAVAIL DOIVENT PORTER
UNE PROTECTION OCULAIRE (LUNETTES DE
PROTECTION AVEC ÉCRANS LATÉRAUX).
Quand on utilise le cloueur, toujours
porter des lunettes de protection avec
visières latérales, et veiller à ce que les
autres personnes dans la zone de travail
en portent également.
Les lunettes de protection devront
respecter les exigences de l’ANSI
(American National Standards Institute)
Z87.1 et assurer la protection contre les
projections de particules arrivant par
l’avant et par le côté.
Les lunettes ordinaires ne fournissent
pas une protection adéquate.
AVERTISSEMENT
3. NE JAMAIS DIRIGER L’OUTIL VERS SOI NI VERS
QUELQU’UN D’AUTRE DANS L’AIRE DE TRAVAIL.
Toujours supposer que le cloueur
renferme des clous.
Ne jamais diriger le cloueur vers soi, ni
vers quelqu’un d’autre, qu’il renferme des
clous ou non.
Si l’on enfonce des clous par erreur, cela
risque de provoquer des blessures graves.
Ne jamais s’amuser avec le cloueur.
Le cloueur est un instrument de travail.
Le respecter.
4. NE PAS PLACER LE DOIGT SUR LA GÂCHETTE
ET MAINTENIR LES DOIGTS ÉLOIGNÉS DE
CELLE-CI QUAND ON N’EFFECTUE PAS DE
CLOUAGE POUR ÉVITER TOUT RISQUE DE
CLOUAGE ACCIDENTEL.
L’employeur doit veiller à ce que la
personne qui utilise le cloueur et les
autres personnes dans l’aire de travail
portent des lunettes de protection.
2. NE JAMAIS UTILISER DE GAZ RÉACTIFS
NI AUCUN AUTRE GAZ EN BOUTEILLE. IL
POURRAIT SE PRODUIRE UNE EXPLOSION.
Ne jamais utiliser de gaz réactifs (tels
que l’oxygène), de gaz combustibles ni
aucun autre gaz en bouteille comme
source d’alimentation du cloueur.
L’utilisation de ces gaz serait
dangereuse, car le cloueur exploserait.
Utiliser exclusivement de l’air comprimé
propre, sec et régulé.
Ne jamais transporter l’outil avec le doigt
sur la gâchette, car on risquerait d’enfoncer
accidentellement un clou et de se blesser ou de
blesser quelqu’un d’autre.
Toujours transporter le cloueur exclusivement par sa
poignée.
Always carry the Nailer by the handle only.
5. CONNAÎTRE ET COMPRENDRE LE SYSTÈME DE
GÂCHETTE UTILISÉ.
Lire et bien assimiler la section intitulée “MÉTHODES
D’UTILISATION”. (pages 37 – 39)
6. NE PAS ENTRER EN CONTACT AVEC L’EMBOUT
DE SÉCURITÉ (LEVIER-POUSSOIR) QUAND ON
N’EFFECTUE PAS DE CLOUAGE.
23

Français
SECURITE — Suite
AVERTISSEMENT
Lors de l’utilisation de ces outils, des précautions de base doivent être respectées, notamment:
1. Zone de travail
(1) Maintenir la zone de travail propre et bien
éclairée.
Les zones sombres et encombrées augmentent les
risques de choc électrique, d’incendie ou blessures
physiques.
(2) Ne pas utiliser le cloueur dans un endroit
présentant un risque d’explosion, par exemple
en présence de liquides infl ammables, de gaz ou
de poussières combustibles.
Le cloueur peut provoquer des étincelles susceptibles
d’enfl ammer la poussière ou les vapeurs.
(3) Maintenir les passants, enfants et visiteurs à
l’écart pendant l’utilisation du cloueur. Tou te
distraction peut provoquer la perte de contrôle du
cloueur.
2. Sécurité personnelle
(1) Rester sur ses gardes. Se concentrer sur la
tâche et faire preuve de bon sens quand on
travaille avec le cloueur. Ne pas utiliser le
cloueur si on est fatigué, après avoir consommé
des drogues ou de l’alcool, ou sous l’infl uence
de médicaments.
Tout moment d’inattention pendant l’utilisation du
cloueur augmente le risque de blessures physiques.
(2) Porter des vêtements appropriés. Ne pas porter
de vêtements amples ou de bijoux. Si l’on a les
cheveux longs, les maintenir sous un couvrechef. Maintenir les cheveux, vêtements et gants
à l’écart des pièces mobiles.
Les vêtements amples, les bijoux et les cheveux
longs augmentent le risque de blessures physiques
car ils peuvent être entraînés par les pièces mobiles.
(3) Éviter toute mise en marche accidentelle.
Vérifi er que le commutateur est sur arrêt avant
de brancher le tuyau d’air. Ne pas transporter le
cloueur en gardant le doigt sur le commutateur ou
raccorder le tuyau d’air quand le commutateur est sur
marche.
(4)
tuyau d’air du cloueur quand on eff ectue des
réglages ou l’entretien, on retire des clous
coincés, on actionne le levier-poussoir, fi xation
et retrait du capuchon avant, on ne s’en sert
24
– Débrancher le
pas, on quitte l’aire de travail, on le laisse hors
de la supervision ou du contrôle de l’opérateur,
on le charge ou le décharge, on le passe à
quelqu’un d’autre, on le soulève ou l’abaisse, ou
on le déplace dans un autre endroit. Ne jamais
essayer de retirer des clous coincés ou de réparer le
cloueur si le tuyau d’air n’est pas débranché et que
les clous restants n’ont pas été retirés du cloueur. Le
cloueur ne doit jamais rester sans surveillance car
des personnes non familiarisées avec ce type d’outil
pourraient le manipuler et se blesser.
Ces mesures de précaution réduisent le risque de
blessures physiques.
(5) Ne pas trop se pencher. Conserver une bonne
assise et un bon équilibre en permanence. Une
bonne assise et un bon équilibre favorisent un meilleur
contrôle du cloueur dans des situations inattendues.
(6) Utiliser des équipements de sécurité. Utiliser un
masque anti-poussière, des chaussures de sécurité
antidérapantes et un casque de sécurité lorsque les
conditions l’exigent.
(7)
auditive. Porter une protection auditive.
La protection auditive doit avoir un CAS (coeffi cient
d’atténuation sonore) déterminé selon les règles
de l’Agence américaine de la protection de
l’environnement, approprié pour l’exposition au bruit.
(8) Toujours porter un casque.
Toujours porter un casque pour se protéger la
tête contre les projectiles.
Le casque doit être conforme à la norme ANSI Z89.1,
« Norme Nationale Américaine pour les Casques de
Protection Industriels ».
(9) Ne pas attacher le tuyau ou le cloueur à votre
corps.
Attacher le tuyau à la structure pour réduire le risque
de perte d’équilibre en cas de mouvements brusques
du tuyau.
(10)
clous uniquement dans une surface de travail
appropriée. Ne pas enfoncer les clous dans d’autres
clous. Celui-ci pourrait ricocher et blesser quelqu’un,
ou provoquer une réaction inattendue du cloueur
susceptible d’entraîner une blessure physique.
– Risque de perte
– Enfoncer les

SECURITE — Suite
AVERTISSEMENT
Français
3. Utilisation et entretien du cloueur
(1) Utiliser des serre-joints ou tout autre moyen
pratique pour maintenir la pièce sur une surface
stable en toute sécurité.
Maintenir la pièce à la main ou contre soi est une
technique instable et peut provoquer une perte de
contrôle.
(2) Ne pas forcer sur le cloueur. Utiliser le cloueur
approprié à votre usage. Le cloueur approprié
eff ectuera la tâche en toute sécurité selon les
spécifi cations pour lesquelles il est destiné.
(3) Ne pas utiliser le cloueur si le commutateur ne
permet pas de le mettre sur marche ou arrêt.
Tout cloueur ne pouvant pas être contrôlé par le
commutateur est dangereux et doit être réparé.
Ne jamais utiliser un cloueur défectueux ou qui
ne fonctionne pas normalement. Si le cloueur
semble ne pas fonctionner comme d’habitude, qu’il
émet des bruits bizarres ou qu’il semble défectueux,
cesser immédiatement de l’utiliser et le faire réparer
par un service après-vente Hitachi agréé.
(4) Débrancher le tuyau d’air du cloueur avant
de procéder à des réglages, de changer des
accessoires ou de le remiser. Ces mesures
de sécurité préventives réduisent le risque de
déclenchement accidentel du cloueur.
(5) Remiser le cloueur, lorsqu’il est inutilisé, hors
de portée des enfants et de toute personne
non formée à son utilisation. Un cloueur s’avère
dangereux entre les mains de personnes non
formées à son utilisation.
(6) Entretenir soigneusement le cloueur. Veiller à
ce que le cloueur soit toujours propre et graissé
pour obtenir un fonctionnement optimal et en toute
sécurité.
(7) Contrôler tout mauvais alignement ou grippage
des pièces mobiles, toute rupture de pièces
et toute autre situation pouvant aff ecter le
fonctionnement du cloueur.
S’il est endommagé, faire réparer le cloueur avant
toute nouvelle utilisation. En raison de la pression
d’air élevée à l’intérieur du cloueur, les fi ssures
en surface sont dangereuses. Pour éviter tout
risque, ne pas faire tomber le cloueur ni le heurter
contre des surfaces dures ; et ne pas le rayer ni y
graver d’inscriptions. De nombreux accidents sont
provoqués par des cloueurs mal entretenus. Il y a un
risque d’éclatement si le cloueur est endommagé.
(8) Ne pas utiliser un cloueur en mauvais état
de marche. Des étiquettes et une séparation
physique doivent être utilisées pour contrôle.
(9) Utiliser exclusivement des accessoires fournis
ou recommandés par Hitachi pour ce cloueur
spécifi que. L’utilisation d’un accessoire non destiné
à ce cloueur spécifi que augmente le risque de
blessures physiques.
(10) Utiliser exclusivement les clous mentionnés
dans la section Accessoires du présent manuel.
Les clous non recommandés par Hitachi en vue d’une
utilisation avec ce cloueur augmentent le risque de
blessures physiques ou peuvent endommager le
cloueur.
4. Entretien
(1) L’entretien de cet outil doit être confi é
exclusivement au personnel d’entretien qualifi é.
(2) Pour les réparations, utiliser exclusivement
des pièces de rechange identiques. Utiliser
exclusivement des pièces agréées.
(3) Utiliser exclusivement la graisse fournie avec le
cloueur ou recommandée par Hitachi.
5. Alimentation d’air
(1) Ne jamais raccorder le cloueur à une source
d’alimentation qui risque de dépasser 200 psi
(13.7 bars 14 kgf/cm
régulateur se produit.
Une pression excessive à l’intérieur du cloueur
peut provoquer son éclatement, un fonctionnement
anormal, la panne du cloueur ou des blessures
physiques graves.
NE PAS DÉPASSER 120 psi (8.3 bars 8.5 kgf/cm2).
Utiliser exclusivement de l’air comprimé propre, sec
et régulé à la pression nominale ou dans la plage de
pression nominale indiquée sur le cloueur.
Toujours vérifi er, avant d’utiliser le cloueur, que
l’alimentation d’air a été ajustée en fonction de la
pression d’air nominale ou dans la plage de pression
d’air nominale stipulée.
2
) si une défaillance du
25

Français
SECURITE — Suite
AVERTISSEMENT
(2) Ne jamais utiliser de gaz réactifs (tels que
l’oxygène), de dioxyde de carbone, de gaz
combustibles ou tout autre gaz en bouteille
comme source d’alimentation du cloueur.
L’utilisation de ces gaz pourrait provoquer une
explosion et causer de graves blessures physiques.
6. Autres
(1) Avant de commencer le travail, vérifi er le
dispositif de commutation de l’opération de
clouage.
Ce cloueur Hitachi comprend un dispositif de
commutation de l’opération de clouage.
Avant de commencer le travail, vérifi er le réglage du
dispositif de commutation de l’opération de clouage.
Si le dispositif de commutation de l’opération de
clouage n’est pas réglé correctement, le cloueur ne
fonctionnera pas correctement.
(2) Toujours sélectionner le dispositif de
commutation approprié pour l’application et la
formation de l’opérateur.
(3) Lors du basculement entre le déclenchement
SÉQUENTIEL UNIQUE et le déclenchement PAR
CONTACT, déconnectez le tuyau d’air et retirez
tous les clous.
(4) Lorsque le crochet est fi xé, faites fonctionner
l’outil uniquement avec le MÉCANISME DE
DÉCLENCHEMENT SÉQUENTIEL UNIQUE et pas
avec le MÉCANISME DE DÉCLENCHEMENT PAR
CONTACT.
(5) Faire attention aux doubles activations et aux
coups par le cloueur suite au retour brutal
(« rappel »). Après avoir enfoncé un clou, le cloueur
peut eff ectuer un rappel causant son éloignement de
la surface de travail.
Pour réduire le risque de blessure, toujours gérer le
rappel en :
1) maintenant toujours le contrôle du cloueur.
2) laissant le rappel éloigner le cloueur de la surface
de travail.
3) ne résistant pas au rappel de sorte que le cloueur
sera refoulé contre la surface de travail. Dans
« MÉCANISME DE DÉCLENCHEMENT PAR
CONTACT », si on laisse le levier-poussoir entrer
de nouveau en contact avec la surface de travail
avant de relâcher la gâchette, un clouage imprévu
se produira. Afi n d’éviter ces doubles activations
indésirables,
○
Fonctionnement intermittent (déclenchement par
gâchette)
1
Régler le dispositif de commutation sur la
position MÉCANISME DE DÉCLENCHEMENT
SÉQUENTIEL UNIQUE.
2
Tirer sur la gâchette rapidement et fermement.
○
Fonctionnement continu (déclenchement par
levier-poussoir)
1
Régler le dispositif de commutation sur la
position MÉCANISME DE DÉCLENCHEMENT
PAR CONTACT.
2
Ne pas appuyer le cloueur trop fort contre le
bois.
3
Eloigner le cloueur du bois car il eff ectue un
rappel après le clouage.
4) éloignant le visage et les parties du corps du
cloueur.
(6) Ne jamais utiliser de coupleur NON dégageant
sur le cloueur. Si l’on utilise un coupleur non
dégageant sur le cloueur, celui-ci risque de rester
chargé d’air après le débranchement et, par
conséquent, d’enfoncer un clou même après avoir
été débranché. Le cloueur et le tuyau d’air doivent
avoir un coupleur de tuyau de façon à ce que toute
la pression soit évacuée du cloueur quand on
débranche le joint de couplage.
(7) Vérifi er le levier-poussoir avant l’utilisation.
S’assurer que le levier-poussoir fonctionne
correctement, et qu’il ne soit pas inutilisable,
déconnecté, ou modifi é. (Le levier-poussoir est
pa rf ois appelé “ sécurité ”.) Ne jam ais util iser le cloueur
si le levier-poussoir ne fonctionne pas correctement.
Un clou pourrait s’enfoncer accidentellement. Ne
pas modifi er ou retirer le levier-poussoir, car sinon il
pourrait devenir inutilisable.
(8) Veiller à ce que toutes les vis et les couvercles
soient en place et bien serrés. Veiller à ce que
les vis et les couvercles soient solidement fi xés.
Les vérifi er périodiquement. Ne jamais utiliser le
cloueur si des pièces sont manquantes ou sont
endommagées.
26

SECURITE — Suite
AVERTISSEMENT
(9)
Ne pas charger de clous si la gâchette ou le levierpoussoir sont enfoncés. Quand on charge des clous
dans le cloueur ou qu’on raccorde le tuyau d’air,
1) ne pas appuyer sur la gâchette;
2) ne pas actionner le levier-poussoir; et
3) diriger le cloueur vers le bas.
(10) Éloigner les mains et le corps de la tête de
clouage pendant l’utilisation. Ne jamais approcher
les mains ni les pieds à moins de 8 pouces (200 mm)
de la tête de clouage. Il y a un risque de blessure
grave si les clous sont déviés par la pièce ou qu’ils
sont déportés au-delà du point d’entrée.
(11) Quand on travaille près du bord d’une pièce
ou à un angle prononcé, ou quand on enfonce
des clous dans une pièce fi ne, prendre soin de
minimiser le déchiquetage, le fractionnement
ou l’éclatement, ou le vol libre, le ricochet ou
le perçage des clous, pouvant provoquer des
blessures.
(12) Ne jamais enfoncer de clous des deux côtés d’un
mur en même temps. Les clous pourraient traverser
le mur et blesser quelqu’un de l’autre côté.
(13) Redoubler de précaution quand on cloue dans
des murs existants ou d’autres zones mortes
pour prévenir le contact avec des objets cachés
ou des personnes de l’autre côté (par ex.,
câbles, tuyaux).
Français
(14) Véri fi er s’il y a des fi ls sous tension. Pour éviter
tout risque d’électrocution grave, vérifi er s’il y a des
fi ls sous tension dissimulés dans le mur, le plancher
ou le plafond. Couper le disjoncteur pour s’assurer
qu’il n’y a pas de fi ls sous tension.
(15) Ne pas lever, tirer ou abaisser le cloueur par le
tuyau.
(16) Ne pas débrancher le tuyau d’air du cloueur avec
le doigt sur la gâchette. Le pourrait se déclencher
lorsque l’alimentation d’air sera à nouveau raccordée.
(17) Manipuler le cloueur correctement. Utiliser le
cloueur en suivant les instructions du manuel. Ne
jamais permettre que le cloueur soit utilisé par des
enfants, des personnes nonfamiliarisées avec son
fonctionnement ou du personnel non autorisé.
(18) Ne jamais utiliser le cloueur pour des
applications autres que celles spécifi ées dans le
présent manuel.
(19) Ne jamais modifi er ni altérer un cloueur. Cela
pourrait provoquer un mauvais fonctionnement et
entraîner des blessures physiques.
(20) Déconnectez le tuyau d’air lors de l’accrochage
du crochet.
(21) N’accrochez pas le crochet sur des
emplacements élevés ou instables. De plus, ne
l’accrochez pas au corps, aux vêtements, à une
ceinture ou à d’autres articles personnels.
RESPONSABILITÉS DE L’EMPLOYEUR, DU PROPRIÉTAIRE DE L’OUTIL ET DE
L’O P É R ATE U R D E L’O U T I L
1. Veiller à ce que ce MANUEL reste à la disposition des
personnes qui doivent utiliser ou entretenir le cloueur.
2. Sélectionner un dispositif de commutation approprié
en prenant en considération l’utilisation du cloueur.
3. Former l’opérateur à l’utilisation sécuritaire du cloueur
comme décrit dans ce MANUEL.
4. Veiller à ce que seules les personnes qui ont lu et
compris ce MANUEL utilisent le cloueur.
5. Veiller à ce que les cloueurs soient utilisés
exclusivement lorsque les opérateurs et les autres
personnes présentes dans l’aire de travail portent
des LUNETTES DE PROTECTION et un autre
équipement de protection individuelle approprié
comme une PROTECTION POUR LA TÊTE, LES
OREILLES ET LES PIEDS.
6. Obliger les opérateurs et les autres personnes
présentes dans l’aire de travail à porter des
LUNETTES DE PROTECTION.
7. Veiller à ce que les cloueurs soient conservés en bon
état de marche comme décrit dans ce MANUEL.
27

Français
SECURITE — Suite
8. Entretenir les cloueurs correctement.
9. Veiller à ce que seul le personnel qualifi é répare les
cloueurs.
10. Veiller à ce que les cloueurs qui ont besoin d’être
réparés soient retirés du service et que des étiquettes
et une séparation physique soient utilisées comme
moyen de contrôle.
CONSERVER CE MANUEL ET
LE METTRE A LA DISPOSITION DES UTILISATEURS!
28

UTILISATION
Français
REMARQUE: Les informations contenues dans ce manuel ont pour but d’aider l’opérateur à utiliser le cloueur en toute
Certaines des illustrations du manuel peuvent montrer des détails ou des accessoires qui diff èrent de
sécurité.
ceux de votre cloueur.
NOM DES PIECES
Vue agrandie de la section de la valve
Tige de
changement
Butée de
changement
Goupille de
Gâchette
Piston
sécurité
MÉCANISME DE DÉCLENCHEMENT
SÉQUENTIEL UNIQUE
●
Lorsque la goupille de sécurité est fi xée, l’outil est réglé sur le mode
●
Pour utiliser le DÉCLENCHEMENT PAR CONTACT, la goupille de
Couvercle d’échappement
Dispositif de commutation d’opération de clouage
Position de
la tige de
changement
MÉCANISME DE
DÉCLENCHEMENT PAR CONTACT
DÉCLENCHEMENT SÉQUENTIEL UNIQUE.
sécurité devrait être retirée en suivant les étapes de « Comment
retirer la goupille de sécurité » indiquées dans « MÉTHODES
D’UTILISATION ».
Position de
la tige de
changement
Joint torique de piston
Lame d'entrainement
Bec
Levier de verrouillage
Plaque de guidage
Levier-poussior
Alimentateur de clous
Tâte de clouge (sortie)
Section de
la valve
Ressort
de rebond
Ensemble de magasin
Corps
Capuchon
Bouchon d'air
Couvercle de magasin
Cache de protection
29

Français
SPECIFICATIONS
Modèle NT65A5
Pression d’utilisation 70 – 120 psi (4.9 – 8.3 bars, 5 – 8.5 kgf/cm2)
Dimensions
Longueur × hauteur × largeur
15-5/64" × 10" × 3-5/32"
(383 mm × 254 mm × 80 mm)
Poids 4.9 lbs. (2.2 kg) (sans crochet)
Contenance de clous 150 clous
3
/cycle à 100 psi
.046 ft
Consommation d’air
(1.3 ltr/cycle à 6.9 bars)
(1.3 ltr/cycle à 7 kgf/cm
2
)
Arrivée d’air 1/4 po NPT
SELECTION DES CLOUS
AVERTISSEMENT
● Bien utiliser exclusivement les clous Hitachi d’origine avec le NT65A5. L’utilisation d’autres clous risque
de provoquer un mauvais fonctionnement de l’outil et/ou une rupture des clous, et d’entraîner des
blessures.
Seuls les clous indiqués dans le tableau ci-dessous pourront être utilisés avec ce cloueur.
Clous de fi nition 16G
30
Dimensions des clous
Min. Max.
.110" (2.8 mm)
.050" (1.3 mm)
1-1/2" (38 mm)
.054"
(1.4 mm)
.065"
(1.65 mm)
2-1/2" (65 mm)

Français
ACCESSOIRES
AVERTISSEMENT
●
Les accessoires autres que ceux indiqués
ci-dessous risquent de mal fonctionner et de
provoquer des blessures.
ACCESSOIRES STANDARD
1
3
Lunettes de protection 1
1
Capuchon de bec (montée sur l'outil) 1
2
Sac à outils 1
3
Crochet 1
4
ACCESSOIRES EN OPTION ... vendus séparément
○
Huile de machine pneumatique
Alimenteur d’huile 1 oz (30 cc) (Code No. 877153)
Alimenteur d’huile 4 oz (120 cc) (Code No. 874042)
Alimenteur d’huile 1 quart (1 l) (Code No. 876212)
REMARQUE: Les accessoires sont sujets à modifi cation
sans préavis et sans aucune obligation de
la part de Hitachi.
2
4
APPLICATIONS
○
Pour le clouage de fi nition autour des portes, des
fenêtres ainsi que des bordures.
○
Pour la fi xation des fond de tiroir. Pour la conception
de divers caissons et armoires.
AVANT L’UTILISATION
Lire la section intitulée “SECURITE” (pages 23 – 28).
Bien vérifi er les points suivants avant de travailler.
ENVIRONNEMENT DE TRAVAIL
AVERTISSEMENT
●
Pas de gaz ou liquides infl ammables, ni
aucun autre objet infl ammable sur le chantier.
●
Evacuer les enfants et les personnes non
autorisées de l’aire de travail.
ALIMENTATION D’AIR
DANGER
●
NE JAMAIS utiliser d’oxygène
ni aucun autre gaz en
bouteille. Il pourrait se
produire une explosion.
AVERTISSEMENT
●
Ne jamais raccorder le cloueur à une
pression qui risque de dépasser 200 psi (13.7
bars, 14 kgf/cm
●
Ne jamais utiliser de coupleur non dégageant
sur le cloueur.
1. Alimentation
○
Utiliser exclusivement de l’air comprimé propre, sec
et régulé avec ce cloueur.
○
Les compresseurs d’air utilisés pour alimenter
l’air comprimé au cloueur devront respecter les
exigences ANSI B19.3 “Normes de sécurité pour les
compresseurs des industries de transformation”.
○
L’humidité ou l’huile dans le compresseur d’air
peuvent accélérer l’usure et la corrosion du cloueur.
Purger tous les jours.
2. Filtre-régulateur-lubrifi cateur
○
Utiliser un régulateur d’une pression comprise entre
0 – 120 psi (0 – 8.3 bars, 0 – 8.5 kgf/cm
○
Les unités fi ltre-régulateur-lubrifi cateur procureront
les conditions optimales du cloueur et accroîtront sa
durée de service. Toujours les utiliser.
Filtre ............. Le fi ltre enlève l’humidité et la
Régulateur .... Le régulateur contrôle la pression
Inspecter le régulateur avant le
2
).
2
).
saleté mélangées à l’air comprimé.
Purger tous les jours, sauf si l’outil
possède une purge automatique.
Nettoyer régulièrement le fi ltre.
de fonctionnement afi n d’assurer la
sécurité du cloueur.
travail pour s’assurer qu’il fonctionne
correctement.
31

Français
Lubrifi cateur
... Le lubrifi cateur alimente de l’huile
vaporisée au cloueur.
Inspecter le lubrifi cateur avant le
travail pour s’assurer que l’alimentation
d’huile est adéquate.
Utiliser une huile de machine
pneumatique Hitachi.
Régulateur
Côté cloueur
Côté compresseur
Filtre
Lubrifi cateur
3. Tuyau d’air
Les tuyaux d'alimentation d’air comprimé doivent
avoir une pression de travail minimum égale ou
supérieure à la pression de la source d'alimentation
si une défaillance du régulateur se produit, ou égale
ou supérieure à 150 psi (10.4 bar 10.6 kgf/cm
2
), à
savoir la plus élevée.
4. Consommation d’air
Sélectionner la taille du compresseur en se reportant
au tableau de consommation d’air et aux formules de
taille du compresseur.
Tableau de consommation d’air
Pression de
fonctionnement
Consommation d’air
psi
(bars)
(kgf/cm
3
ft
/cycle
(l/cycle)
80
90
(6.2)
(6.3)
.039
(1.1)
100
(6.9)
(7)
.046
(1.3)
(5.5)
2
)
(5.6)
.035
(1.0)
Formules de taille du compresseur d’air
Quantité d’air requise
= nombre de clous
× clous moyens enfoncés par minute par le cloueur
× consommation d’air à une pression donnée
× facteur de sécurité (toujours 1.2)
Exemple: 3 cloueurs fonctionnant à 100 psi et
enfonçant 30 clous par minute
Quantité d’air requise
= 3 × 30 × .046 (1.3) × 1.2
= 5.0 CFM (ft
3
/mn)(140 ltr/min)
Eff ectuer le calcul ci-dessus pour obtenir un
compresseur fournissant les 5.0 CFM d’air
nécessaires.
GRAISSAGE
Il est essentiel que le cloueur soit graissé correctement.
Si le cloueur est mal graissé, il ne fonctionnera pas
correctement et les pièces s’useront prématurément.
○
Utiliser une huile de machine Hitachi.
Ne pas utiliser d’huile détergente ni d’additifs. Ces
lubrifi ants endommageraient les joints toriques et les
autres pièces en caoutchouc. Cela provoquerait un
mauvais fonctionnement du cloueur.
○
Toujours utiliser des unités fi ltre-régulateur-
lubrifi cateur.
Veiller à ce que le régulateur soit toujours plein d’huile
de machine pneumatique Hitachi.
○
Si l’on ne possède pas de lubrifi cateur, mettre 5 à
10 gouttes d’huile de machine pneumatique Hitachi
dans le bouchon d’air du cloueur deux fois par jour.
ENTRETIEN PAR TEMPS FROID
○
Ne pas ranger le cloueur dans un environnement
froid.
Le laisser dans un endroit chaud jusqu’à ce que l’on
soit prêt à travailler.
○
Si le cloueur est déjà froid, l’amener dans un endroit
chaud et le laisser réchauff er avant de l’utiliser.
1
Réduire la pression d’air à 40 psi (2.8 bars,
2.8 kgf/cm2).
2
Sortir tous les clous du cloueur.
3
Raccorder le tuyau d’air et faire un essai de
clouage (clouage à blanc).
La pression d’air inférieure sera suffi sante pour le
clouage à blanc.
Les opérations à vitesse lente ont tendance à
chauff er les pièces mobiles.
ATTENTION
●
Ne pas faire un essai de clouage à blanc à haute
pression.
ESSAI DU CLOUEUR
DANGER
●
Les opérateurs et les autres
personnes dans l’aire de
travail DOIVENT porter des
lunettes de protection avec
visières latérales respectant
les exigences ANSI Z87.1.
Les lunettes ordinaires ne
fournissent pas une
protection adéquate.
32

AVERTISSEMENT
●
Ne jamais utiliser le cloueur si le levier-
poussoir ne fonctionne pas correctement.
Avant de commencer le travail de clouage proprement dit,
faire un essai de clouage à l'aide de la liste de vérifi cation
ci-dessous. Eff ectuer les essais dans l’ordre indiqué.
S’il se produit un fonctionnement anormal, cesser
immédiatement d’utiliser le cloueur et contacter un
service après-vente agréé Hitachi.
(1) DEBRANCHER LE TUYAU D’AIR DU CLOUEUR.
SORTIR TOUS LES CLOUS DU CLOUEUR.
□
TOUTES LES VIS DOIVENT ETRE SERREES A
FOND.
Si certaines vis sont relâchées, les revisser.
□
LE LEVIER-POUSSOIR ET LA GACHETTE
DOIVENT FONCTIONNER AVEC SOUPLESE.
Gâchette
Levierpoussoir
Ne pas raccorder
le tuyau d'sair
Français
3
Confi rmer que la butée de changement est revenue
complètement à sa position d’origine à l’intérieur de
la gâchette.
(MÉCANISME DE DÉCLENCHEMENT SÉQUENTIEL
UNIQUE)
Tenir la tige de
changement
(3) Régler la pression d’air sur 70 psi (4.9 bars
5 kgf/cm
Raccorder le tuyau d’air.
□
LE CLOUEUR NE DOIT PAS AVOIR DE FUITE
D’AIR.
(4) Retirer le doigt de la gâchette et appuyer le levier-
poussoir contre le bois.
□
LE CLOUEUR NE DOIT PAS FONCTIONNER.
2
1
Poussez la butée de changement
3
Position de la tige
de changement
2
).
(2) RETIRER TOUS LES CLOUS DE LA CLOUEUSE.
N’appuyez PAS ni ne reposez le levier-poussoir
contre une surface quelconque.
NE PAS FORCER OU UTILISER DES OUTILS POUR
OPÉRER LE COMMUTATEUR.
Sélectionner le MODE DE DÉCLENCHEMENT
SÉQUENTIEL UNIQUE conformément aux étapes
suivantes.
1
Ouvrir la butée de changement en poussant le bas de
la gâchette.
2
Tenir la tige de changement entre les deux doigts (un
de part et d’autre de la gâchette) et la faire glisser vers
le bas (mode de déclenchement séquentiel unique).
Actionner le
levier-poussoir
Ne pas tirer
sur la gâchette
33

Français
(5) Eloigner le levier-poussoir du bois.
Ensuite, diriger le cloueur en position abaissée,
tirer sur la gâchette et attendre pendant au moins
5 secondes dans cette position.
□
LE CLOUEUR NE DOIT PAS FONCTIONNER.
Tirer sur la gâchette
(6) Commencer par tirer sur la gâchette.
Et puis pousser le levier-poussoir contre la surface du
bois.
□ LA CLOUEUSE NE DOIT PAS ÊTRE EN MARCHE.
(7) Sans toucher la gâchette, appuyer le levier-poussoir
contre la surface du bois.
Ensuite, tirer sur la gâchette.
□
LA CLOUEUSE DOIT ÊTRE EN MARCHE.
Si la goupille de sécurité est laissée en place,
sautez les étapes (8) à (10) et commencez de
l’étape (11).
→ Si la goupille de sécurité est fixée, l’appareil
peut être utilisé avec le MÉCANISME DE
DÉCLENCHEMENT SÉQUENTIEL UNIQUE.
(8) Déconnectez le tuyau d’air.
RETIRER TOUS LES CLOUS DE LA CLOUEUSE.
Retirez le crochet s’il est fi xé.
→ Lorsque le crochet est fixé, n’utilisez pas le
MÉCANISME DE DÉCLENCHEMENT PAR
CONTACT.
N’appuyez PAS ni ne reposez le levier-poussoir
contre une surface quelconque.
NE PAS FORCER OU UTILISER DE QUELCONQUES
OUTILS POUR OPÉRER LE COMMUTATEUR.
Sélectionner le MODE DE DÉCLENCHEMENT PAR
CONTACT conformément aux étapes suivantes.
1
Ouvrir la butée de changement en poussant le bas de
la gâchette.
2
Tenir la tige de changement entre les deux doigts (un
de part et d’autre de la gâchette) et la faire glisser
vers le haut (mode de déclenchement par contact).
3
Confi rmer que la butée de changement est revenue
complètement à sa position d’origine à l’intérieur de
la gâchette.
(MÉCANISME DE DÉCLENCHEMENT PAR CONTACT)
Tenir la tige de
changement
2
1
Poussez la butée de changement
3
Position de
la tige de
changement
(9) Ajustez la pression de l’air à 70 psi (4,9 bar 5 kgf/cm2).
Connectez le tuyau d’air.
□ LE CLOUEUR NE DOIT PAS AVOIR DE FUITE
D’AIR.
(10) Décoller la cloueuse de la surface en bois et tirer la
gâchette.
Ensuite, appuyer le levier-poussoir contre le bois.
□
LA CLOUEUSE DOIT ÊTRE EN MARCHE.
(11) Ensuite, appuyer le levier-poussoir contre la pièce à
usiner.
Tirer la gâchette.
□
LA CLOUEUSE DOIT ÊTRE EN MARCHE.
(12) Si l’on ne remarque aucun fonctionnement anormal,
on pourra mettre des clous dans le cloueur.
Enfoncer les clous dans un matériau du même type
que celui du travail proprement dit.
□
LE CLOUEUR DOIT FONCTIONNER
CORRECTEMENT.
34

Français
REGLAGE DE LA PRESSION D’AIR
AVERTISSEMENT
● Ne pas dépasser
120 psi (8.3 bars
8.5 kgf/cm
2
).
Régler la pression d’air à la pression de travail
recommandée de 70 – 120 psi (4.9 – 8.3 bars
5 – 8.5 kgf/cm
2
) en fonction de la longueur des clous et de
la dureté du matériau.
La pression d’air correcte est la pression la plus basse
capable d’eff ectuer le travail. L’utilisation d’une pression
d’air supérieure à la pression nécessaire fatiguera
inutilement le cloueur.
CHARGEMENT DES CLOUS
AVERTISSEMENT
●
Lors du chargement des clous dans le
cloueur,
1) ne pas tirer sur la gâchette ;
2) ne pas actionner le levier-poussoir ; et
3) diriger le cloueur vers le bas.
(1) Ramener l'alimenteur de clous en arrière et
l'accrocher sur la tige de roulement.
Alimenter de clous
(2) 1 Rentrer les clous un par un par le dessus du
magasin.
2
Glisser les clous vers l'avant dans le magacin.
1
2
Magasin
Clou
(3)
1
Tirer l'alimenteur de clous vers le haut et vers
l'arrière et le dégager de la tige de roulement.
2
Glisser l'alimenteur de clous vers l'avant jusqu'à
ce qu'il touche les clous.
Alimenter de clous
Tige de roulement
REMARQUE:
●
Utiliser une recharge de clous dans laquelle il
rese au moins 5 clous.
Tige de roulement
●
Gisser l'alimenteur de clous LENTEMENT vers
l'avant. Si l'alimenteur de clous est dégagé
brusquement, il risque de rester coincé entre
le magasin et les clous, ce qui provoquera des
problèmes d'alimentation.
35

Français
UTILISATION DU CLOUEUR
Lire la section intitulée “SECURITE” (pages 23 – 28).
DANGER
●
Les opérateurs et les autres
personnes dans l’aire de
travail DOIVENT porter des
lunettes de protection avec
visières latérales respectant
les exigences ANSI Z87.1.
Les lunettes ordinaires ne
fournissent pas une
protection adéquate.
AVERTISSEMENT
●
Seules les personnes qui ont
lu et compris ce MANUEL
doivent utiliser le cloueur.
●
NE JAMAIS diriger l’outil vers
soi ni vers quelqu’un d’autre
dans l’aire de travail.
●
Maintenir les doigts ÉLOIGNÉS de la gâchette
quand on n’enfonce pas de clous pour éviter un
clouage accidentel.
●
Connaître et comprendre le système de gâchette
utilisé.
Lire et bien assimiler les “Méthodes d’utilisation”
ci-dessous.
●
Inspecter le cloueur avant utilisation pour
déterminer le système de déclenchement.
Avant de commencer le travail, vérifi er le
dispositif de commutation de l’opération de
clouage.
Ce cloueur Hitachi comprend un dispositif de
commutation de l’opération de clouage.
Avant de commencer le travail, vérifi er
que le dispositif de commutation est réglé
correctement.
Si le dispositif de commutation de l’opération de
clouage n’est pas réglé correctement, le cloueur
ne fonctionnera pas correctement.
●
Ne jamais approcher les mains ni les pieds
à moins de 8 pouces (200 mm) de la tête de
clouage lors de l’utilisation.
●
Ne pas enfoncer de clous sur d’autres clous; les
clous pourraient ricocher et blesser quelqu’un.
●
Ne pas actionner le cloueur à moins qu’il ne soit
placé fermement contre la pièce de travail.
●
Quand on travaille près du bord d’une pièce
ou à un angle prononcé, ou quand on enfonce
des clous dans une pièce fi ne, prendre soin de
minimiser le déchiquetage, le fractionnement
ou l’éclatement, ou le vol libre, le ricochet ou
le perçage des clous, pouvant provoquer des
blessures.
●
Ne jamais enfoncer de clous des deux côtés
d’un mur en même temps. Les clous pourraient
traverser le mur et blesser quelqu’un de l’autre
côté.
●
Ne jamais utiliser le cloueur s’il est défectueux
ou qu’il ne fonctionne pas normalement.
●
Ne pas se servir du cloueur comme d’un
marteau.
●
Débrancher le tuyau d’air du cloueur quand :
1) on ne s’en sert pas;
2) on quitte l’aire de travail;
3) on le soulève ou l’abaisse, ou on le déplace
dans un autre endroit;
4) on le passe à quelqu’un d’autre;
5) retrait de la goupille de sécurité;
6) on remplace le dispositif de commutation;
7) on eff ectue tout entretien ou réparation;
8) on retire les clous bloqués;
9) le cloueur n’est pas sous la supervision ou le
contrôle de l'opérateur;
10) on retire les clous du chargeur;
11) on fi xe ou retire le capuchon avant;
12) fi xation ou du retrait du crochet; et
13) accrochage du crochet.
Ce cloueur Hitachi est équipé d’un dispositif de
commutation de l’opération de clouage.
Utiliser le MÉCANISME DE DÉCLENCHEMENT
SÉQUENTIEL UNIQUE ou le MÉCANISME DE
DÉCLENCHEMENT PAR CONTACT en fonction du travail
à eff ectuer.
Explication des diverses opérations de clouage
○
MÉCANISME DE DÉCLENCHEMENT SÉQUENTIEL
UNIQUE: Tout d’abord, appuyer le levier-poussoir
contre la pièce, puis tirer sur la gâchette pour
enfoncer le clou.
Quand un clou est enfoncé, il n’est plus possible
d’enfoncer un autre clou tant que l’on n’a pas relâché
la gâchette et appuyé à nouveau.
○
MÉCANISME DE DÉCLENCHEMENT PAR
CONTACT : Tout d’abord, appuyer le levier-poussoir
contre la pièce, puis tirer sur la gâchette pour
enfoncer le clou. Ou,
tirer sur la gâchette, puis appuyer le levier-poussoir
contre la pièce pour enfoncer le clou.
36

Français
Si l’on maintient la gâchette enfoncée, un clou
s’enfoncera chaque fois que l’on appuie le levierpoussoir contre la pièce.
MÉTHODES D’UTILISATION
Le cloueur est équipé d’un levier-poussoir et il ne
fonctionne pas tant que le levier-poussoir n’est pas
enfoncé (position supérieure).
Il y a deux façons d’enfoncer des clous avec le cloueur.
Ces deux méthodes sont:
1. Fonctionnement intermittent (déclenchement par
gâchette) :
2. Fonctionnement continu (déclenchement par
levier-poussoir) :
Comment retirer la goupille de sécurité
• À la sortie d’usine, le mode d’entraînement
de l’outil est verrouillé sur le MÉCANISME DE
DÉCLENCHEMENT SÉQUENTIEL UNIQUE avec
la goupille de sécurité.
• En retirant la goupille de sécurité comme illustré
ci-dessous, l’outil peut être permuté entre le
DÉCLENCHEMENT SÉQUENTIEL UNIQUE et le
DÉCLENCHEMENT PAR CONTACT.
AVERTISSEMENT
●
Lors du retrait de la goupille de sécurité,
déconnectez le tuyau d’air de l’outil et retirez
tous les clous.
●
Sachez qu’une fois que la goupille de sécurité
est retirée, la fonction de permutation entre
DÉCLENCHEMENT SÉQUENTIEL UNIQUE
et DÉCLENCHEMENT PAR CONTACT est
activée.
•
Utilisez des pinces comme celles illustrées ci-
dessous pour extraire la goupille de sécurité.
Goupille de sécurité
ATTENTION
●
La goupille de sécurité devrait être mise au
rebut après son retrait.
(1) Fonctionnement intermittent (déclenchement par
gâchette)
Utilisez le réglage MÉCANISME DE
DÉCLENCHEMENT SÉQUENTIEL UNIQUE.
AVERTISSEMENT
●
Pour un fonctionnement intermittent, réglez
la tige de changement comme illustré
sur la fi gure ci-dessous. (c.-à-d. Régler
sur MÉCANISME DE DÉCLENCHEMENT
SÉQUENTIEL UNIQUE.)
●
Pour éviter tout déclenchement double ou tout
déclenchement accidentel du fait d’un rappel.
1) Régler le dispositif de commutation
sur la position MÉCANISME DE
DÉCLENCHEMENT SÉQUENTIEL UNIQUE.
2) Tirer sur la gâchette rapidement et
fermement.
1
Suivez les étapes ci-dessous pour régler
le MÉCANISME DE DÉCLENCHEMENT
SÉQUENTIEL UNIQUE (comme illustré sur les
schémas qui suivent).
AVERTISSEMENT
●
Déconnectez le tuyau d’air et retirez tous les
clous.
●
N’enfoncez pas le levier-poussoir.
●
N’exercez pas une pression inutile et
n’utilisez pas d’outil pour déplacer le
dispositif de commutation.
●
N’appuyez pas sur la butée de changement
à toute autre fi n que la permutation entre le
DÉCLENCHEMENT SÉQUENTIEL UNIQUE et
le DÉCLENCHEMENT PAR CONTACT.
1) Si la goupille de sécurité est laissée en place,
sautez les étapes 2) à 3) et commencez de
l’étape 4).
2) Appuyez au bas de la gâchette et ouvrez la
butée de changement.
3) Saisissez la tige de changement entre les
deux doigts et faites-la glisser vers le bas.
(Règle le MÉCANISME DE
DÉCLENCHEMENT SÉQUENTIEL UNIQUE)
37

Français
4) Assurez-vous que la tige de changement est
dans sa position adéquate comme illustré sur
le schéma.
(Le cas contraire, il se peut que l’outil soit réglé
sur le MÉCANISME DE DÉCLENCHEMENT
PAR CONTACT.)
2
Placer l’orifi ce de sortie des clous sur la pièce en
enlevant le doigt de la gâchette.
3
Actionner fermement le levier-poussoir jusqu’à ce
qu’il soit complètement enfoncé.
4
Tirer surM¸a gâchette pour enfoncer un clou.
5
Retirer le doigt de la gâchette.
Pour continuer à clouer à un autre endroit, déplacer
le cloueur le long du bois en recommençant les
opérations
2
à 5 selon les besoins.
1
3
Levier-poussoir
Position de
la tige de
changement
4
Gâchette
AVERTISSEMENT
●
Un clou sera libéré chaque fois que la
détente sera enfoncée, en autant que le
lever-poussoir demeure enfoncé.
(2) Fonctionnement continu (déclenchement par levier-
poussoir)
Utilisation du MÉCANISME DE DÉCLENCHEMENT
PAR CONTACT
AVERTISSEMENT
●
Pour éviter tout déclenchement double ou tout
déclenchement accidentel du fait d’un rappel.
1) Ne pas appuyer le cloueur trop fort contre
le bois.
2) Eloigner le cloueur du bois car il eff ectue
un rappel après le clouage.
●
Si le crochet est accroché, n’utilisez pas le
MÉCANISME DE DÉCLENCHEMENT PAR
CONTACT.
1
Suivez les étapes ci-dessous pour régler le
MÉCANISME DE DÉCLENCHEMENT PAR
CONTACT (comme illustré sur les schémas qui
suivent).
AVERTISSEMENT
●
Déconnectez le tuyau d’air et retirez tous les
clous.
●
N’enfoncez pas le levier-poussoir.
●
N’exercez pas une pression inutile et
n’utilisez pas d’outil pour déplacer le
dispositif de commutation.
●
N’appuyez pas sur la butée de changement
à toute autre fi n que la permutation entre le
DÉCLENCHEMENT SÉQUENTIEL UNIQUE et
le DÉCLENCHEMENT PAR CONTACT.
1) Retirez la goupille de sécurité si elle est
encore fi xée.
Voir « Comment retirer la goupille de sécurité »
dans « MÉTHODES D’UTILISATION ».
2) Appuyez au bas de la gâchette et ouvrez la
butée de changement.
3) Saisissez la tige de changement entre les
deux doigts et faites-la glisser vers le haut.
(Règle le MÉCANISME DE
DÉCLENCHEMENT PAR CONTACT)
4) Assurez-vous que la tige de changement est
dans sa position adéquate dans la gâchette
comme illustré sur le schéma.
(Le cas contraire, il se peut que l’outil ne
fonctionne pas correctement.)
2
Tirer sur la gâchette en retirant le cloueur de la
pièce.
3
Actionner le levier-poussoir contre la pièce pour
enfoncer un clou.
4
Déplacer le cloueur le long de la pièce en lui
faisant faire des bonds.
Chaque pression du levier-poussoir enfonce un
clou.
38

Français
Dès que le nombre de clous voulu est enfoncé, retirer
le doigt de la gâchette.
Position de
la tige de
changement
1
Au préalable, tirer sur la gâchette
2
4
AVERTISSEMENT
●
Ne pas mettre le doigt sur la gâchette sauf
pendant une opération de clouage, car un
contact accidentel du levier-poussoir sur
l’opérateur ou sur les personnes alentour
pourrait entraîner des blessures graves.
●
Ne pas approcher les mains ni le corps de
la section de sortie des clous. Ce cloueur
Hitachi risque de faire un bond sous l’eff et du
rappel après l’enfoncement d’un clou, ce qui
pourrait enfoncer un autre clou non prévu et
provoquer des blessures.
●
Certains types de clous peuvent s’éjecter de
la buse pendant une opération de clouage
quand ils sont chargés. Faire attention !
LE MÉCANISME DE DÉCLENCHEMENT SÉQUENTIEL
UNIQUE est utilisé lorsqu’un placement précis des
attaches est nécessaire.
Le MÉCANISME DE DÉCLENCHEMENT SÉQUENTIEL
UNIQUE peut réduire les risques de blessures physiques
pour l’opérateur et les autres personnes présentes
sur l’aire de travail par rapport au MÉCANISME DE
DÉCLENCHEMENT PAR CONTACT. En eff et, il risque
moins d’enfoncer accidentellement un clou si
l’on garde le doigt sur la gâchette et qu’on appuie
accidentellement le levier-poussoir contre soi ou
contre une autre personne.
Le MÉCANISME DE DÉCLENCHEMENT SÉQUENTIEL
UNIQUE peut également réduire la vitesse de
fonctionnement par rapport au MÉCANISME DE
DÉCLENCHEMENT PAR CONTACT. Il est conseillé
aux opérateurs débutants d’utiliser LE MÉCANISME DE
DÉCLENCHEMENT SÉQUENTIEL UNIQUE.
REMARQUE
●
Si l’on respecte bien tous les avertissements et toutes
les instructions, le fonctionnement s’eff ectuera sans
danger avec les deux systèmes : MÉCANISME DE
DÉCLENCHEMENT SÉQUENTIEL UNIQUE et
MÉCANISME DE DÉCLENCHEMENT PAR CONTACT.
●
Toujours manier les clous et le paquet avec
précaution. Si les clous tombent, le plastique
d’assemblage risque de se briser.
●
Après le clouage :
1) débrancher le tuyau d’air du cloueur ;
2) sortir tous les clous du cloueur ;
3) mettre 5 ou 10 gouttes d’huile de machine
pneumatique Hitachi dans le bouchon d’air du
cloueur ; et
4) ouvrir le robinet de purge du réservoir du
compresseur d’air pour purger toute l’humidité.
UTILISATION DU CAPUCHON DE BEC
AVERTISSEMENT
●
Lors du retrait ou de la fi xation du capuchon
de bec, s’assurer de retirer son doigt de la
détente et de débrancher le tuyau d’air du
cloueur.
Le capuchon de bec se fi xe au bout du bras de contact
pour protéger la pièce à travailler des érafl ures ou des
dommages. Retirer selon la séquence ci-dessous
lorsqu’il ne sert pas.
1
DISANCHER LE TUYAU D'AIR DU CLOUEUR.
2
Fixez le capuchon avant à la pointe du levier de
poussée.
39

Français
(1) Comment fi xer le crochet
Clé hexagonale pour M5
2
1
Leverpoussoir
Capuchon de bec
1
Ne pas
raccorder le
tuyau d’air
Quand le capuchon de bec ne sert pas, le fi xer dans le
rangement à l’arrière du magasin.
Capuchon de bec
REMARQUE
● Le capuchon avant peut réduire la profondeur de
clouage en raison de son épaisseur. Le réglage
de la pression d’air est nécessaire pour régler à
nouveau la profondeur du clouage.
CROCHET À CHEVRON
Un crochet inclus peut être fi xé au moyen de trois boulons
de bride M5 x 16 inclus avec les outils.
Lorsque l’outil est retiré du tuyau et pas utilisé, le crochet
peut être utilisé pour ranger l’appareil.
AVERTISSEMENT
●
Lors de la fi xation ou du retrait du crochet,
assurez-vous que le tuyau est retiré et que
les clous sont retirés de l’outil.
40
Unité principale
Fig. 1 Fig. 2
Lors de la fi xation, utilisez une clé hexagonale pour
•
M5 (vendue séparément).
•
Fixez le crochet (1) à l’unité principale en trois
emplacements au moyen des boulons de bride
×
M5
14 (2) (Fig. 1).
Couple de serrage
•
8.3±0.5 N
•
Le crochet peut être fi xé dans n’importe quelle
m 6.1±0.4 ft.lbs 85±5 kgf • cm
direction. Ajustez le crochet selon l’environnement de
fonctionnement (Fig. 2).
(2) Comment retirer le crochet
Retirez le crochet en inversant les étapes de fi xation
du crochet ci-dessus.
AVERTISSEMENT
●
Lorsque le crochet est fi xé, faites
fonctionner l’outil uniquement avec le
MÉCANISME DE DÉCLENCHEMENT
SÉQUENTIEL UNIQUE et pas avec le
MÉCANISME DE DÉCLENCHEMENT
PAR CONTACT. Pour permuter entre le
DÉCLENCHEMENT SÉQUENTIEL UNIQUE
et le DÉCLENCHEMENT PAR CONTACT, voir
la section pertinente dans « MÉTHODES
D’UTILISATION ».
●
Déconnectez le tuyau d’air lors de
l’accrochage de l’appareil.
●
N’accrochez pas le crochet sur des
emplacements élevés ou instables. De plus,
ne l’accrochez pas au corps, aux vêtements,
à une ceinture ou à d’autres articles
personnels.

ENTRETIEN
Français
REMARQUE: Les informations contenues dans ce manuel ont pour but d’aider l’opérateur à utiliser le cloueur en toute
ENTRETIEN ET INSPECTION
Lire la section intitulée “SECURITE” (pages 23 – 28).
sécurité.
Certaines des illustrations du manuel peuvent montrer des détails ou des accessoires qui diff èrent de
ceux de votre cloueur.
Levier de verrouillage
AVERTISSEMENT
●
Débrancher le tuyau d’air et sortir tous les
clous du cloueur quand :
1) on entretient ou on inspecte le cloueur ; et
2) on retire des clous coincés.
1. Dégagement des clous coincés
Pour dégager un clou coincé, procéder comme suit :
1
DÉBRANCHER LE TUYAU D’AIR.
2
Retirer tous les clous.
3
Libérer le levier de verrouillage et ouvrir la plaque
de guidage.
4
Retirer le clou coincé avec untournevis pour
écrou à fente.
5
Refermer la plaque de guidage et le cliquet
d'arrêt.
6
Si les clous se coincent fréquemment, contacter
un service après-vente Hitachi agréé.
3
Plque de guldage (A)
2. Remisage
○
Si l’on ne se sert pas du cloueur pendant un certain
temps, enduire ses pièces en acier d’une mince
couche de graisse pour éviter toute corrosion.
○
Ne pas remiser le cloueur dans un environnement
froid.
Le laisser dans un endroit chaud.
○
Lorsqu’on ne se sert pas du cloueur, le remiser dans
un endroit chaud et sec.
Le ranger hors de portée des enfants.
1
Ne pas
raccorder le
tuyau d'air
4
41

Français
3. ETIQUETTE D’AVERTISSEMENT
Ne pas utiliser le cloueur si l’ÉTIQUETTE
D’AVERTISSEMENT manque ou est endommagée.
Se procurer une nouvelle ETIQUETTE
D’AVERTISSEMENT auprès d’un service aprèsvente Hitachi agréé.
Etiquette
d’avertissement
4. Tableau d’entretien (voir page 42)
5. Guide de dépannage de l’opérateur (voir page 43)
PRÉCAUTION
Lors de l’utilisation et de l’entretien d’un outil
électrique, respecter les règlements et les
normes de sécurité en vigueur dans le pays en
question.
ENTRETIEN ET REPARATIONS
AVERTISSEMENT
●
Les réparations du cloueur seront confi ées
exclusivement au personnel d’entretien
formé par Hitachi, au distributeur ou à
l’employeur.
●
Pour les réparations, utiliser exclusivement
des pièces fournies ou recommandées par
Hitachi.
Du fait de l’usure normale, les cloueurs de qualité
fi nissent toujours par avoir besoin d’un entretien ou d’un
remplacement de pièce.
REMARQUE:
Les spécifi cations sont sujettes à modifi cation sans
préavis et sans aucune obligation de la part de
Hitachi.
Tableau d’entretien
ACTION POURQUOI COMMENT
Purger le fi ltre de la ligne d’air tous
les jours.
Veiller à ce que le lubrifi cateur soit
toujours plein.
Nettoyer l’élément du fi ltre — puis
souffl er de l’air dans le fi ltre dans le
sens inverse du débit normal.
Nettoyer le magasin et le mécanisme
de l’alimenteur de clous.
Veiller à ce que le levier- poussoir
fonctionne toujours correctement.
Graisser le cloueur après l’utilisation. Rallonger la durée de service du
Purger le compresseur d’air. Maintenir le cloueur en bon ordre de
42
Eviter l’accumulation d’humidité et de
poussière.
Maintenir le cloueur bien graissé. Remplir d’huile de machine
Eviter le colmatage du fi ltre par la
saleté.
Eviter que les clous ne se coincent. Nettoyer en souffl ant de l’air tous les
Assurer la sécurité de l’opérateur
et un fonctionnement effi cace du
cloueur.
cloueur.
marche.
Ouvrir le robinet de purge manuel.
pneumatique Hitachi.
Suivre les instructions du fabricant.
jours.
Nettoyer en souffl ant de l’air tous les
jours.
Mettre 5 ou 10 gouttes de graisse
dans le cloueur.
Ouvrir le robinet de purge du
réservoir du compresseur d’air.

Français
Guide de dépannage de l’opérateur
En suivant le tableau ci-dessous, la plupart des problèmes mineurs pourront être corrigés rapidement et en
toute facilité.
Si le problème persiste, contacter un service après-vente Hitachi agréé.
PROBLEME VERIFICATION CORRECTION
Le cloueur fonctionne, mais les clous
ne s’enfoncent pas.
Entraînement faible.
Cycle lent.
Les clous s’enfoncent trop
profondément.
Certains clous sont sautés.
Alimentation intermittente.
Des clous se coincent.
Les clous enfoncés sont tordus.
Les clous s’enfoncent bien
normalement, mais pas
complètement à des
vitesses supérieures.
Vérifi er si un clou est coincé. Dégager le clou coincé page 41.
L‘alimenteur de clous est-il
Remonter l’alimenteur de clous.
endommagé ?
Le ressort à ruban est-il aff aibli ou
Remplacez le ressort à ruban.
endommagé?
Vérifi er si l’on utilise les clous bons
clous.
Utiliser uniquement les clous
recommandés.
Vérifi er la pression d’air. Augmenter la pression d’air.
(Ne pas dépasser 120 psi
2
))
——————
La lame d’entraînement est-elle
usée ?
(8.3 bars 8.5 kgf/cm
Utiliser une huile de machine
pneumatique Hitachi.
Contacter Hitachi pour le
remplacement.
Le joint torique du piston est-il usé ou
endommagé ?
Vérifi er la pression d’air. Réduire la pression d’air.
(Régler sur 70 – 120 psi
(4.9 – 8.3 bar 5 – 8.5 kgf/cm
2
Vérifi er si l’on utilise les bons clous. Utilise r uniquement les clous
recommandés.
L‘alimenteur de clous est-il
Nettoyer et graisser.
endommagé ?
Le ressort à ruban est-il aff aibli ou
Remplacez le ressort à ruban.
endommagé?
Le joint torique du piston est-il usé ou
endommagé ?
Contacter Hitachi pour le
remplacement.
Vérifi er si l’on utilise les bons clous. Utiliser uniquement les clous
recommandés.
La lame d’entraînement est-elle
usée ?
Vérifi er le diamètre intérieur du tuyau
Contacter Hitachi pour le
remplacement.
Utiliser un tuyau d’air plus large.
d’air.
))
43

Español
INFORMACIÓN IMPORTANTE SOBRE SEGURIDAD
Lea y comprenda el signifi cado de las etiquetas de la herramienta y todas las instrucciones de
funcionamiento, las precauciones de seguridad y las advertencias de este manual antes de realizar la
operación o el mantenimiento de este clavador.
La negligencia en la observación de las advertencias puede producir la MUERTE o LESIONES DE
GRAVEDAD.
La mayoría de los accidentes se ocurridos al utilizar o mantener este clavador se deben a la falta de tener en cuenta
las normas de seguridad y precauciones básicas. Los accidentes podrán evitarse en muchos casos dándose cuenta
de una situación peligrosa antes de que se produzca, y observando fi elmente los procedimientos de seguridad
apropiados.
Las precauciones básicas de seguridad se describen en la sección “SEGURIDAD” de este manual, y en las secciones
que contienen las instrucciones sobre operación y mantenimiento.
Los riesgos que habrá que eludir para evitar lesiones o el daño de la máquina se identifi can mediante PELIGRO y
ADVERTENCIA en el clavador y en este manual.
No utilice NUNCA este clavador para aplicaciones que no sean las especifi cadas en este manual.
DEFINICIÓN DE LAS PALABRAS CLAVE
PELIGRO indica una situación inminentemente peligrosa que, si no se evita, puede resultar en lesiones serias o en la
muerte.
ADVERTENCIA indicates a potentially hazardous situation which, if not avoided, could result in death or serious injury.
PRECAUCIÓN indicates a potentially hazardous situation which, if not avoided, may result in minor or moderate injury,
NOTA enfatiza información esencial.
or may cause machine damage.
EXPLICACIÓN LA ACCIÓN DE CLAVADO DEL CLAVADOR HITACHI
○
MECANISMO DE ACTUACIÓN SECUENCIAL SIMPLE:
En primer lugar, presione la palanca de empuje contra la madera y, a continuación, jale el gatillo para introducir el
sujetador.
Una vez que se introduzca un clavo, no se podrá volver a clavar hasta que suelte el gatillo y lo vuelva a presionar.
○
MECANISMO DE ACTUACIÓN POR CONTACTO:
En primer lugar, presione la palanca de empuje contra la madera y, a continuación, jale el gatillo para introducir el
sujetador.
En primer lugar, jale el gatillo y, seguidamente, presione la palanca de empuje contra la madera para que se
introduzca el sujetador.
Si mantiene el gatillo apretado, se introducirá un clavo cada vez que se presiona la palanca de empuje contra la
madera.
* Cuando se envía, este producto está bloqueado en ACTUACIÓN SECUENCIAL SIMPLE.
Refi érase a “MÉTODOS DE OPERACIÓN” para obtener información sobre cómo cambiar de un mecanismo a otro.
44

Español
SEGURIDAD
INSTRUCCIONES IMPORTANTES DE SEGURIDAD PARA LA UTILIZACIÓN DEL
CLAVADOR
INSTRUCCIONES PARA EVITAR UN RIESGO DE INCENDIO, UNA DESCARGA ELÉCTRICA O LESIONES
●
General
Para reducir el riesgo de descarga eléctrica, incendio o lesiones, LEA TODAS LAS INSTRUCCIONES ANTES DE
UTILIZAR LA HERRAMIENTA.
PELIGRO
1. LOS OPERADORES Y DEMÁS PERSONAS QUE
SE ENCUENTREN EN EL ÁREA DE TRABAJO
DEBEN USAR PROTECCIÓN PARA LOS OJOS
(GAFAS DE SEGURIDAD CON BLINDAJES
LATERALES).
Antes de utilizar el clavador, utilice
siempre gafas protectoras con blindajes
laterales, y asegúrese de que también
sea utilizada por todas las personas que
se encuentren en el área de trabajo.
Las gafas protectoras deberán estar de
acuerdo con los requisitos del Instituto de
Normas Nacionales Americanas, ANSI
Z87.1 y proporcionar protección contra
las partículas despedidas desde la parte
frontal y posterior.
ADVERTENCIA
3. NO DIRIJA NUNCA LA HERRAMIENTA HACIA SÍ
MISMO O HACIA OTRAS PERSONAS DEL ÁREA
DE TRABAJO.
Piense siempre que el clavador puede
tener clavos cargados.
No dirija nunca el clavador hacia sí mismo
o hacia otras personas, independiente
de que contenga o no clavos.
Si utilizase los clavos incorrectamente,
podrían producirse lesiones serias.
No juegue nunca con el clavador.
Trate el clavador como herramienta de
trabajo.
Las gafas ordinarias no brindan una
protección adecuada.
El empresario deberá hacer que el
operador del clavador y demás personas
que se encuentren en el área de
trabajo utilicen en todo momento gafas
protectoras.
2. NO UTILICE GASES REACTIVOS NI OTROS
GASES EMBOTELLADOS. PODRÍA PRODUCIRSE
UNA EXPLOSIÓN.
No utilice nunca gases reactivos, como
oxígeno, gases combustibles, etc. como
fuente de propulsión de este clavador.
La utilización de estos gases, o de otros
gases embotellados, es peligrosa, ya
que el clavador podría explotar.
Utilice solamente aire comprimido
limpio, seco, y regulado.
4. NO COLOQUE EL DEDO EN EL GATILLO Y
MANTENGA LOS DEDOS ALEJADOS DEL
GATILLO CUANDO NO CLAVE CLAVOS PARA
EVITAR UNA DESCARGA ACCIDENTAL.
No transporte nunca el clavador con el dedo en el
gatillo, porque podría lanzar un clavo y lesionarse
usted mismo o a otra persona.
Transporte siempre el clavador por la empuñadura
solamente.
5. CONOZCA Y COMPRENDA EL SISTEMA DE
CLAVADOR QUE ESTÁ UTILIZANDO.
Lea y comprenda la sección titulada “MÉTODOS DE
OPERACIÓN”. (páginas 58 – 60)
6. NO REALICE NINGÚN CONTACTO CON EL
EXTREMO DE SEGURIDAD (PALANCA DE
EMPUJE) CUANDO NO CLAVE.
45

Español
SEGURIDAD — Continuación
ADVERTENCIA
Cuando utilice herramientas, deberán tomarse siempre precauciones básicas, incluidas las siguientes:
1. Zona de trabajo
(1) Mantenga la zona de trabajo limpia y bien
iluminada.
Los bancos llenos de cosas y las zonas oscuras
aumentan el riesgo de descarga eléctrica, incendio y
lesiones.
(2) No utilice el clavador en atmósferas explosivas,
como por ejemplo en presencia de líquidos
infl amables, gases infl amables o polvo
combustible.
El clavador puede crear chispas que podrían
incendiar el polvo o los gases.
(3) Mantenga a los viandantes, los niños y los
visitantes alejados mientras utiliza el clavador.
Las distracciones podrían causar la pérdida de
control del clavador.
2. Seguridad personal
(1) Permanezca alerta. Céntrese en su trabajo y
utilice el sentido común cuando trabaje con
el clavador. No utilice el clavador cuando esté
cansado, después de haber consumido drogas
o alcohol, o mientras esté bajo la infl uencia de
medicamentos.
Un momento de despiste cuando se utiliza el
clavador aumenta el riesgo de lesiones.
(2) Utilice ropa adecuada. No utilice ropa suelta
o joyas. Recójase el pelo. Mantenga el pelo,
la ropa y los guantes alejados de las partes
móviles.
La ropa suelta, las joyas o el pelo largo aumentan el
riesgo de lesiones, ya que podrían pillarse con las
partes móviles.
(3) Evite una puesta en marcha involuntaria.
Asegúrese de que el interruptor está apagado
antes de conectar el aparato al suministro de
aire. No transporte el clavador con el dedo colocado
en el interruptor o lo conecte al suministro de aire con
el interruptor encendido.
(4)
clavador del suministro de aire antes de realizar
ajustes, realizar el mantenimiento del clavador,
eliminar atascos, tocar la palanca de empuje,
fi je o quite la tapa del morro, cuando no lo esté
46
– Desconecte el
usando, al salir del área de trabajo, al dejar el
clavador fuera de la supervisión o el control
del operador, al cargar o descargar el clavador,
al entregárselo a otra persona, al elevar, bajar
o mover en cualquier otra forma el clavador
a una nueva ubicación. No trate de desatascar o
reparar el clavador salvo que haya desconectado
el conducto de aire del clavador y retirado todos
los clavos que queden en el mismo. El clavador no
deberá dejarse nunca desatendido, ya que podría
ser utilizado por personas no familiarizadas con el
mismo, pudiéndose lesionar. Dichas medidas de
precaución reducen el riesgo de lesiones.
(5) No estire el cuerpo. Mantenga los pies bien
colocados y el equilibrio en todo momento. El
mantener los pies bien colocados y el equilibrio
permite un mayor control del clavador en situaciones
inesperadas.
(6) Utilice equipo de seguridad. Deberán utilizarse
una máscara para el polvo, zapatos de seguridad
anti-deslizamiento y un casco para las condiciones
aplicables.
(7)
auditiva. Lleve protección auditiva.
La protección auditiva deberá tener una Califi cación
de reducción de ruido (NRR) determinada de
acuerdo con las reglas de la Agencia de Protección
Medioambiental de los Estados Unidos que sea
adecuada para la exposición al ruido.
(8) Utilice siempre protección para la cabeza.
Utilice siempre protección para la cabeza para
protegerse de objetos que salgan despedidos.
Protección de la cabeza se ajustará a ANSI Z89.1,
“Norma Nacional Estadounidense para Protección
Industrial de la Cabeza”.
(9) No coloque la manguera o el clavador en su cuerpo.
Coloque la manguera en la estructura para reducir
el riesgo de pérdida de equilibrio en caso de que la
manguera se mueva.
(10)
una superfi cie de trabajo adecuada. No clave
los clavos en otros clavos. Esto podría hacer que
los clavos se desvíen y golpeen a alguna persona, o
hagan que el clavador reaccione y provoque lesiones.
– Riesgo de pérdida
– Clave clavos solo en

SEGURIDAD — Continuación
ADVERTENCIA
Español
3. Uso y cuidado del clavador
(1) Utilice agarraderas u otra forma práctica de
fi jación y apoye la pieza de trabajo sobre una
plataforma estable.
Sujetar el trabajo con las manos o contra el cuerpo es
inestable y podría causar una pérdida de control.
(2) No fuerce el clavador. Utilice el clavador correcto
para la aplicación. El clavador correcto hará el
trabajo mejor y de forma más segura a la velocidad a
la que el clavador está diseñado.
(3) No utilice el clavador si el interruptor no
enciende o apaga el clavador. Los clavadores
que no pueden controlarse con el interruptor son
peligrosos y deberán repararse.
No utilice clavadores defectuosos o que
funcionen de forma anormal. Si el clavador
funciona de forma anormal, hace ruidos extraños
o parece estar defectuoso, deje de utilizarlo
inmediatamente y llévelo a un centro de servicio
autorizado de Hitachi para su reparación.
(4) Desconecte el clavador de la fuente de aire
antes de realizar cualquier ajuste, cambiar
accesorios o guardar el clavador. Dichas medidas
de seguridad preventivas reducen el riesgo de que el
clavador se ponga en marcha involuntariamente.
(5) Guarde el clavador fuera del alcance de los
niños y de las personas no capacitadas para
su uso cuando no se utilice. Los clavadores son
peligrosos en manos de usuarios no capacitados.
(6) Mantenga el clavador con cuidado. Mantenga el
clavador limpio y lubricado para un funcionamiento
mejor y más seguro.
(7) Verifi que el fallo de alineación o de unión de las
partes móviles, la rotura de las partes y otras
condiciones que puedan afectar a la operación
del clavador.
Si el clavador está dañado, llévelo a reparar antes de
utilizarlo. Debido a la alta presión de aire en el clavador,
las grietas en la superfi cie son peligrosas. Para evitarlo,
no deje que se caiga el clavador ni lo golpee contra
superfi cies duras, y no arañe o haga grabaciones en
el mismo. Muchos accidentes se producen por un
mantenimiento incorrecto de los clavadores. Existe
riesgo de explosión si el clavador está dañado.
(8) No utilice el clavador si no está en orden de
operación adecuado. Etiquetas y divisiones
físicas deberán ser usadas para el control.
(9) Utilice solo accesorios identifi cados por Hitachi
para el clavador específi co. El uso de accesorios
con el clavador no previstos aumenta el riesgo de
lesiones.
(10) Utilice solo los clavos indicados en la sección
Accesorios de este manual. Los clavos que Hitachi
no identifi que para su utilización con este clavador
podrían producir un riesgo de lesiones o podrían
dañar el clavador cuando se utilicen en el mismo.
4. Mantenimiento
(1) El mantenimiento de la herramienta deberá
ser realizado sólo por personal de reparación
cualifi cado.
(2) Cuando realice el mantenimiento de un clavador,
utilice sólo piezas de repuesto idénticas. Utilice
solo piezas autorizadas.
(3) Utilice solo los lubricantes suministrados con el
clavador o especifi cados por Hitachi.
5. Fuente de aire
(1) No realice la conexión nunca a una fuente de aire
que pueda superar 200 psi (13.7 bar 14 kgf/cm
si un regulador falla.
El exceso de presión en el clavador podría provocar
una explosión, un funcionamiento anormal, una
rotura del clavador o lesiones graves.
NO SUPERE 120 psi (8.3 bar 8.5 kgf/cm2).
Utilice solo aire comprimido limpio, seco y regulado
a la presión nominal o dentro del rango de presión
nominal tal como se indique en el clavador.
Antes de utilizar el clavador, compruebe siempre que
la fuente de aire se ha ajustado a la presión de aire
nominal o dentro del rango aire-presión nominal.
(2) No utilice nunca gases reactivos, como oxígeno,
dióxido de carbono, gases combustibles o
botellas de gas como fuente de aire para el
clavador. Dichos gases podrían explotar y producir
lesiones graves.
2
)
47

Español
SEGURIDAD — Continuación
ADVERTENCIA
6. Otros
(1) Antes de empezar a trabajar, verifi que el
dispositivo de conmutación para la operación
de clavado.
Este clavador Hitachi incluye un dispositivo de
conmutación para la operación de clavado.
Antes de empezar a trabajar, verifi que el ajuste del
dispositivo de conmutación para la operación de
clavado.
Si el dispositivo de conmutación para la operación de
clavado no está debidamente ajustado, el clavador
no funcionará correctamente.
(2) Seleccione siempre el dispositivo de
conmutación que sea apropiado para la
aplicación y la capacitación del operador.
(3) Al cambiar entre SECUENCIAL SIMPLE y POR
CONTACTO, desconecte la manguera de aire y
remueva todos los clavos.
(4)
Cuando el gancho esté montado, operar
únicamente con el MECANISMO DE ACTUACIÓN
SECUENCIAL SIMPLE y no con el MECANISMO
DE ACTUACIÓN POR CONTACTO.
(5) Tenga cuidado del doble fuego y de ser golpeado
por el clavador debido al retroceso. Luego
de clavar un clavo, el clavador podría retroceder
causando que se aleje de la superfi cie de trabajo.
Para reducir el riesgo de lesión, controle el retroceso:
1) Manteniendo siempre el control del clavador.
2) Permitiendo que el retroceso aleje el clavador de
la superfi cie de trabajo.
3) No resistiéndose al retroceso de forma que el
clavador se fuerce de nuevo hacia la superfi cie de
trabajo. En “MECANISMO DE ACCIONAMIENTO
DEL CONTACTO”, si se permite que la palanca
de empuje vuelva a contactar con la superfi cie
de trabajo antes de soltar el gatillo, ocurrirá una
descarga no deseada de un clavo. Para evitar
este doble fuego no deseado,
○
Operación intermitente (Disparo de gatillo)
1
Ajuste el mecanismo de conmutación a
MECANISMO DE ACTUACIÓN SECUENCIAL
SIMPLE.
2
Jale el gatillo rápida y fi rmemente.
○
Funcionamiento continuo (Presione el disparo de
palanca)
1 Ajuste el mecanismo de conmutación a
48
MECANISMO DE ACTUACIÓN DE CONTACTO.
2
No presione el clavador contra la madera con
una fuerza excesiva.
3
Retire el clavador de la madera después de
efectuar el clavado.
4) Manteniendo la cara y las partes del cuerpo
alejadas del clavador.
(6) No utilice nunca un acoplador sin descarga con
el clavador. Si utiliza un acoplador sin descarga en
el clavador, éste podría permanecer cargado con
aire después de haberlo desconectado y, por lo
tanto, disparar un clavo incluso después de haberlo
desconectado. El clavador y la manguera de aire
deben contar con un acople de manguera, de
manera que se pueda remover toda la presión del
clavador al desconectar la junta de acoplamiento.
(7) Compruebe la palanca de empuje antes de la
utilización. Cerciórese de que la palanca de empuje
funciona adecuadamente y de que no está inutilizada,
desconectada o modifi cada. (La palanca de empuje
puede denominarse “Seguridad”). No utilice nunca el
clavador a menos que la palanca de empuje funcione
adecuadamente, ya que de lo contrario el clavador
podría disparar inesperadamente un clavo. No
cambia ni quite la palanca de empuje, ya que de lo
contrario la palanca de empuje se volverá inoperable.
(8) Mantenga todos los tornillos y cubiertas bien
apretados en su lugar. Mantenga todos los tornillos
y cubiertas fi rmemente apretados. Compruebe
periódicamente su condición.
No utilice nunca el clavador si hay piezas perdidas o
dañadas.
(9) No cargue clavos con el gatillo o la palanca de
empuje presionada. Cuando cargue clavos en el
clavador, o cuando conecte la manguera de aire,
1) no apriete el gatillo;
2) no presione la palanca de empuje; y
3) mantenga el clavador apuntado hacia abajo.
(10) Mantenga las manos y el cuerpo alejados del
cabezal de disparo durante su uso. No coloque
las manos ni los pies a menos de 8 pulgadas
(200 mm) de la cabeza de salida de clavos. Si la
pieza de trabajo desvía los clavos o si éstos salen del
punto de introducción puede sufrir lesiones serias.
(11) Cuando trabaje cerca del borde de una pieza
de trabajo o en ángulos muy agudos, o al clavar
clavos en una pieza de trabajo fi na, tenga
cuidado para minimizar la aparición de virutas,

SEGURIDAD — Continuación
ADVERTENCIA
Español
astillas y divisiones, o el vuelo libre, el rebote
o la perforación de los clavos, ya que podrían
causar lesiones.
(12) No clave nunca clavos desde ambos lados de
una pared al mismo tiempo. Los clavos podrían
traspasar el panel y lesionar a la persona que se
encuentra en el lado opuesto.
(13) Tenga cuidado adicional cuando clave clavos
con el clavador en paredes existentes y otras
áreas ciegas, para evitar el contacto con objetos
(p. ej. cables, tuberías, etc.) o personas ocultas
que se encuentren en el otro lado.
(14) Compruebe si hay cables activos. Evite el riesgo
de descargas eléctricas comprobando si hay cables
activos escondidos en paredes, suelos o techos.
Abra el disyuntor para asegurarse de que no quedan
cables activos.
(15) No levante, tire del clavador ni lo baje jalando de
la manguera.
(16) No desconecte la manguera de aire del clavador
con el dedo puesto en el gatillo. El clavador podría
disparar un clavo cuando reconectase el suministro
de aire.
(17) MANEJE CORRECTAMENTE EL CLAVADOR.
Maneje el clavador de acuerdo con las instrucciones
de este manual. No permita que el clavador
sea utilizado por niños, personal no autorizado
o personasque no estén familiarizadas con su
funcionamiento.
(18) No utilice nunca el clavador para aplicaciones
que no sean las especifi cadas en este manual.
(19) N o m odi fi que ni altere nunca el clavador. Si lo
hiciera podría funcional mal y provocar lesiones.
(20) Desconecte la manguera de aire cuando fi je el
gancho.
(21) No fi je el gancho en ubicaciones altas o
inestables. Además, no lo fi je en el cuerpo, la
ropa, el cinturón u otros útiles personales.
RESPONSABILIDADES DEL EMPLEADOR, EL PROPIETARIO DE LA
HERRAMIENTA Y EL OPERADOR DE LA HERRAMIENTA
1. Asegúrese de que este MANUAL esté al alcance de
los operadores y del personal de mantenimiento.
2. Seleccione un dispositivo de comunicación
apropiado considerando las aplicaciones para las
que se usa el clavador.
3. Capacite al operador en el uso seguro del clavador,
como se describe en este MANUAL.
4. Asegúrese de que solo las personas que hayan leído
y comprenden este MANUAL utilizan el clavador.
5. Asegúrese de que los clavadores son usados
únicamente cuando los operadores y otras personas
que se encuentran en el área de trabajo llevan
PROTECCIÓN OCULAR y otro equipo de protección
personal apropiado, como PROTECCIÓN DE
CABEZA, OÍDOS Y PIES.
6. Recalque que el operador y las demás personas que
se encuentren en el área de trabajo necesitan utilizar
GAFAS PROTECTORAS PARA LOS OJOS.
7. Asegúrese de que los clavos son conservados en
estado de operación seguro según se describe en
este MANUAL.
8. Mantenga adecuadamente el clavador.
9. Asegúrese de que solo el personal cualifi cado repara
el clavador.
10. Asegúrese de que los clavadores que requieren
reparación se remueven del servicio, y de que son
utilizadas etiquetas y división física como método de
control.
¡GUARDE ESTE MANUAL
AL ALCANCE DE CUALQUIERA!
49

Español
OPERACIÓN
NOTA: La información contenida en este manual ha sido diseñada para ayudarle a utilizar con seguridad este clavador.
Algunas de las ilustraciones de este manual pueden mostrar detalles o accesorios diferentes a los de su propio
clavador.
NOMENCLATURA
Vista ampliada de la parte de la válvula
Dispositivo de conmutación para la operación de clavado
Gatillo
Pistón
Junta tórica del pistón
Cuchilla Impulsora
Morro
Palanca de bloqueo
Varilla de
cambio
Tope de
cambio
Clavija de
bloqueo
Posición de
la varilla de
cambio
MECANISMO DE ACTUACIÓN
SECUENCIAL SIMPLE
●
Si la clavija de bloqueo está montada, la herramienta se fi jará en
ACTUACIÓN SECUENCIAL SIMPLE.
●
Para utilizar el modo ACTUACIÓN POR CONTACTO, la clavija de
bloqueo deberá ser removida siguiendo los pasos de la sección “Cómo
remover la clavija de bloqueo” en “MÉTODOS DE OPERACIÓN”.
Cubierta de escape
Parte de la válvula
Resorte
de cinta
MECANISMO DE ACTUACIÓN
POR CONTACTO
Cuerpo
Tapa
Toma de aire
Cubierta de cargador
Posición de
la varilla de
cambio
Placa de guía
Palanca de empuje
50
Alimentador de clavos
Cabeza de salida de los clavos
Conjunto de cargador
Protector del cargador

Español
ESPECIFICACIONES
Modelo NT65A5
Presión de operación 70 – 120 psi (4.9 – 8.3 barias, 5 – 8.5 kgf/cm2)
Dimensiones
Longitud × altura × anchura
15-5/64" × 10" × 3-5/32"
(383 mm × 254 mm × 80 mm)
Peso 4.9 libras. (2.2 kg) (sin gancho)
Capacidad de puntas 150 puntas
3
/ciclo a 100 psi
2
)
Consumo de aire
.046 pies
(1.3 litros/ciclo a 6.9 bar)
(1.3 litros/ciclo a 7 kgf/cm
Entrada de aire Roscado NPT de 1/4”
SELECCIÓN DE CLAVOS
ADVERTENCIA
●
Asegúrese de usar únicamente clavos legítimos Hitachi para el NT65A5. El uso de otros clavos puede
producir un fallo de funcionamiento de la herramienta y/o la rotura del clavo, lo que provocaría a su vez
lesiones de gravedad.
Con este clavador solamente podrán utilizarse los clavos indicados en la tabla siguiente.
Clavos de acabado calibre 16
Dimensiones de los clavos
Min. Max.
.110" (2.8 mm)
.050" (1.3 mm)
1-1/2" (38 mm)
.054"
(1.4 mm)
.065"
(1.65 mm)
2-1/2" (65 mm)
51

Español
ACCESORIOS
ADVERTENCIA
●
Los accesorios que no sean los mostrados
a continuación pueden provocar el mal
funcionamiento del clavador y resultar en
lesiones.
ACCESORIOS ESTÁNDAR
1
3
Gafas protectoras 1
1
Tapa para el morro (mon tada e n la he rramie nta)
2
Bolsa para herramientas 1
3
Gancho 1
4
ACCESORIOS OPCIONALES ... vendido aparte
○
Lubricante para herramientas neumáticas
Aceitador de 1 onzas (30 cc) (Núm. de código 877153)
Aceitador de 4 onzas (120 cc) (Núm. de código 874042)
Lata de 1 cuarto de galón (1 litro) (Núm. de código 876212)
NOTA: Los accesorios están sujetos a cambios sin
ninguna obligación por parte de Hitachi.
2
4
1
APLICACIONES
○
Para realizar el clavado como proceso de acabado
alrededor de puertas, ventanas y bordes.
○
Para sujetar la parte inferior de cajones. Para hacer
diversas cajas y gabinetes.
ANTES DE LA OPERACIÓN
Lea la sección titulada “SEGURIDAD” (páginas 45 – 49).
Antes de la utilización, cerciórese de lo siguiente.
52
ENTORNO DE TRABAJO
ADVERTENCIA
●
En el lugar de trabajo no deberá haber gases,
líquidos, ni demás objetos infl amables.
●
No permita que en el área de trabajo haya
niños ni demás personas no autorizadas.
SUMINISTRO DE AIRE
PELIGRO
●
No utilice NUNCA oxígeno ni
otros gases embotellados.
Podría producirse una
explosión.
ADVERTENCIA
●
No conecte nunca el clavador a una presión
que pueda sobrepasar potencialmente
200 psi (13.7 barias 14 kgf/cm
●
No utilice nunca un acoplador sin descarga
con el clavador.
1. Fuente de propulsión
○ Utilice solamente aire comprimido limpio, seco, y
regulado como fuente de propulsión para este clavador.
○
Los compresores de aire para suministrar aire
comprimido a este clavador deberán cumplir los
requisitos de la última versión de la norma B 19.3
ANSI “Normas de Seguridad para Compresores para
Industrias de Procesos”.
○
La humedad o el aceite en el compresor de aire
puede acelerar el desgaste y la corrosión del
clavador. Drénelo diariamente.
2. Filtro-Regulador-Lubricador
○
Utilice un regulador con una presión de 0 – 120 psi
(0 – 8.3 barias 0 – 8.5 kgf/cm
○ Las unidades de fi ltro-regulador-lubricador ofrecen
la condición óptima para el clavador y prolongan su
duración útil. Estas unidades deberán utilizarse siempre.
Filtro ............ El fi ltro elimina la humedad y la
Regulador .... El regulador controla la presión de
suciedad del aire comprimido.
Drene diariamente el clavador a menos
que tenga instalado un dispositivo de
drenado automático.
Mantenga limpio el fi ltro realizando
regularmente su mantenimiento.
operación para poder utilizar con
seguridad el clavador.
2
).
2
)

Español
Inspeccione el regulador antes de la
operación a fi n de asegurarse de que
funcione adecuadamente.
Lubricador ... El lubricador rocía aceite al clavador.
Inspeccione el lubricador antes
de utilizarlo para comprobar si el
suministro de lubricante es adecuado.
Utilice lubricante para herramientas
neumáticas Hitachi.
Regulador
Lado del
clavador
Lado del
compresor
Filtro
Lubricador
3. Manguera de aire
Las mangueras de suministro de aire comprimido
deben tener una presión operativa mínima igual o
mayor que la presión procedente de la fuente de
potencia si un regulador falla, o 150 psi (10.4 bares
10.6 kgf/cm
2
), el valor que sea mayor.
4. Consumo de aire
Utilizando la tabla de consumo de aire y la fórmula de
tamaño del compresor de aire, busque el tamaño de
compresor correcto.
Tabla de consumo de aire
Presión de operación
Consumo de aire
psi
(barias)
(kgf/cm
pies3/ciclo
(litros/ciclo)
80
90
(6.2)
(6.3)
.039
(1.1)
100
(6.9)
(7)
.046
(1.3)
(5.5)
2
)
(5.6)
.035
(1.0)
Fórmula de tamaño del compresor
Cantidad de aire requerida
= número de martillos neumáticos
× promedio de puntas clavadas cada minuto por
martillo neumático
× consumo de aire a la presión dada
× factor de seguridad (siempre 1.2)
Ejemplo: 3 martillos neumáticos funcionando a
100 psi para clavar 30 puntas por minuto
Cantidad de aire requerida
= 3 × 30 × .046 (1.3) × 1.2
=5.0 CFM (pies
3
/min) (140 litros/min)
Después de haber realizado los cálculos indicados
arriba, tendrá que buscar un compresor que
proporcione 5.0 CFM de aire, que es el valor
requerido.
LUBRICACIÓN
Es muy importante que el clavador esté adecuadamente
lubricado. Sin la lubricación apropiada, el clavador no
trabajará correctamente y las piezas se desgastarán
prematuramente.
○
Utilice lubricante para herramientas neumáticas
Hitachi.
No utilice aceite detergente ni aditivos. Estos
lubricantes dañarían las juntas tóricas y demás
piezas de caucho. Esto haría que el clavador
funcionase mal.
○
Habrá que utilizar siempre unidades de fi ltro-
regulador-lubricador.
Mantenga el lubricador lleno con lubricante para
herramientas neumáticas Hitachi.
○
Si no dispone de lubricador, aplique 5 – 10 gotas de
lubricante para herramientas neumáticas Hitachi a la
entrada de aire del clavador dos veces al día.
CUIDADOS PARA CLIMAS FRÍOS
○
No guarde el clavador en un lugares fríos.
Déjelo en un lugar cálido antes de comenzar a
trabajar.
○
Si el clavador está frío, póngalo en un lugar cálido y
deje que se caliente antes de utilizarlo.
1
Reduzca la presión de aire a 40 psi (2.8 barias
2.8 kgf/cm
2
Quite todos los clavos del clavador.
3
Conecte la manguera de aire y dispare (disparo
2
).
en vacío) el clavador.
La reducción de la presión de aire será sufi ciente
para disparar en vacío el clavador.
La operación a baja velocidad tiende a calentar
las partes móviles.
PRECAUCIÓN
●
No dispare en vacío el clavador a alta presión.
PRUEBA DEL CLAVADOR
PELIGRO
●
Los operadores y demás
personas que se encuentren
en el área de trabajo DEBEN
usar gafas protectoras con
blindajes laterales que
cumplan con las
especifi caciones ANSI Z87.1.
Las gafas ordinarias no
brindan una protección
adecuada.
53

Español
ADVERTENCIA
●
No utilice nunca el clavador a menos que la
palanca de empuje funcione adecuadamente.
Antes de comenzar el clavado, pruebe el clavador
utilizando la siguiente lista de comprobaciones. Realice
las comprobaciones en el orden indicado.
Si se produce alguna operación anormal, deje de utilizar
el clavador y póngase inmediatamente en contacto con
un centro de reparaciones autorizado por Hitachi.
3
Confi rme que el tope de cambio haya vuelto por
completo a la posición original dentro del gatillo.
(MECANISMO DE ACTUACIÓN SECUENCIAL
SIMPLE).
Agarrar la varilla
de cambio
2
(1) DESCONECTE LA MANGUERA DE AIRE DEL
CLAVADOR.
QUITE TODOS LOS CLAVOS DEL CLAVADOR.
□
TODOS LOS TORNILLOS DEBERÁN ESTAR
APRETADOS.
Si hay algún tornillo fl ojo, apriételo.
□
LA PALANCA DE EMPUJE DEBERÁN PODER
ACCIONARSE SIN DIFICULTAD.
Gatillo
No conecte la
Palanca
manguera de aire
de empuje
(2) RETIRE TODOS LOS CLAVOS DEL CLAVADOR.
NO presione ni coloque la palanca de empuje sobre
ninguna superfi cie.
NO FUERCE NI USE HERRAMIENTAS PARA
OPERAR EL INTERRUPTOR.
Seleccione el MODO DE ACCIONAMIENTO
SECUENCIAL SIMPLE de acuerdo con los siguientes
pasos.
1
Abra el tope de cambio empujando la parte inferior
del gatillo.
2
Agarre la varilla de cambio con dos dedos (uno en
cada lado del gatillo) y deslícela hacia abajo (Modo
de accionamiento secuencial simple).
54
1
Empuje el tope de cambio
3
Posición de
la varilla de
cambio
(3) Ajuste la presión del aire a 70 psi (4.9 barias
2
5 kgf/cm
).
Conecte la manguera de aire.
□
EL CLAVADOR NO DEBERÁ TENER FUGAS DE
AIRE.
(4) Retire el dedo del disparador y presione la palanca
de empuje contra la madera.
□
EL CLAVADOR NO DEBERÁ FUNCIONAR.
Presione la palanca
de empuje
No apriete el
gatillo

Español
(5) Retire la palanca de empuje de la madera.
Seguidamente, dirija el clavador hacia abajo, jale el
gatillo y espere en esa posición durante 5 segundos
o más.
□
EL CLAVADOR NO DEBERÁ FUNCIONAR.
Apriete el gatillo
(6) En primer lugar, tire del gatillo.
A continuación, presione la palanca de empuje
contra la madera.
□
EL CLAVADOR NO DEBERÁ FUNCIONAR.
(7) Sin tocar el gatillo, presione la palanca de empuje
contra la madera.
A continuación, tire del gatillo.
□
EL CLAVADOR DEBERÁ FUNCIONAR.
Si se deja la clavija de bloqueo, omita los pasos del
(8) al (10) y continúe desde el paso (11).
→ Si la clavija de bloqueo está montada, la
unidad puede operarse en el MECANISMO DE
ACTUACIÓN SECUENCIAL SIMPLE.
(8) Desconecte la manguera de aire.
RETIRE TODOS LOS CLAVOS DEL CLAVADOR.
Remueva el gancho, si está montado.
→ Cuando el gancho esté montado, no opere
la herramienta con el MECANISMO DE
ACTUACIÓN POR CONTACTO.
NO empuje ni coloque la palanca de empuje sobre
ninguna superfi cie.
NO FUERCE NI USE HERRAMIENTAS PARA
OPERAR EL INTERRUPTOR.
Seleccione el MODO DE ACCIONAMIENTO por
contacto de acuerdo con los siguientes pasos.
1
Abra el tope de cambio empujando la parte inferior
del gatillo.
2
Agarre la varilla de cambio con dos dedos (uno en
cada lado del gatillo) y deslícela hacia arriba (Modo
de accionamiento por contacto).
3
Confi rme que el tope de cambio haya vuelto por
completo a la posición original dentro del gatillo.
(MECANISMO DE ACTUACIÓN POR CONTACTO).
Agarrar la varilla
de cambio
2
1
Empuje el tope de cambio
3
Posición hacia
derecha
(9) Ajuste la presión del aire a 70 psi (4,9 bar 5 kgf/cm2).
Conecte la manguera de aire.
□
EL CLAVADOR NO PUEDE PRESENTAR FUGAS
DE AIRE.
(10) Con el clavador alejado de la madera, tire del gatillo.
A continuación, presione la palanca de empuje
contra la madera.
□
EL CLAVADOR DEBERÁ FUNCIONAR.
(11) A continuación, presione la palanca de empuje
contra la pieza de trabajo.
Ahora tire del gatillo.
□
EL CLAVADOR DEBERÁ FUNCIONAR.
(12) Si no observa nada anormal, cargue clavos en el
clavador.
Clave en la pieza de trabajo los mismos clavos que
vaya a utilizar en la aplicación real.
□
EL CLAVADOR DEBERÁ FUNCIONAR
ADECUADAMENTE.
55

Español
AJUSTE DE LA PRESIÓN DE AIRE
ADVERTENCIA
● No sobrepase 120
psi (8.3 barias 8.5
2
kgf/cm
).
Ajuste la presión del aire al valor recomendado, 70 – 120
psi (4.9 – 8.3 barias 5 – 8.5 kgf/cm
2
) de acuerdo con la
longitud de los clavos y la dureza de la pieza de trabajo.
La presión de aire correcta es la más baja con la que
pueda realizarse el trabajo. La utilización del clavador
con una presión de aire más alta de la requerida lo forzará
innecesariamente.
CARGA DE CLAVOS
ADVERTENCIA
●
Cuando cargue los clavos en el clavador;
1) no apriete el gatillo,
2) no apriete la palanca de empuje; y
3) mantenga el clavador apuntando hacia
abajo.
(1) Tire del alimentador de clavos hacia atrás y cuélguelo
sobre el pasador de rodillo.
(2)
1
Inserte los clavos uno tras otro desde la parte
superior del cargador.
2
Deslice los clavos hacia adelante en el cargaador.
1
2
Clavo
Cargador
(3) 1 Tire del alimentador de clavos hacia arriba en
dirección hacia atrás y sáquelo del pasador de
rodillo.
2
Deslice el alimentador de clavos hacia adelante
hasta que entre en contacto con las clavos.
Alimentador de clavos
Pasador de rodillo
56
Alimentador de clavos
Pasador de rodillo
NOTA
●
Utilice una ristra que le queden por lo menos 5
clavos.
●
Deslice el alimentador de clavos LENTAMENTE
hacia adelante.
Si lo soltase bruscamente, podría atascarse entre el
cargador y los clavos, lo que produciría un problema
de alimentación de puntas.

OPERACIÓN DEL CLAVADOR
Lea la sección titulada “SEGURIDAD” (páginas 45 – 49).
PELIGRO
●
Los operadores y demás
personas que se encuentren
en el área de trabajo DEBEN
usar gafas protectoras con
blindajes laterales que
cumplan con las
especifi caciones ANSI Z87.1.
Las gafas ordinarias no
brindan una protección
adecuada.
ADVERTENCIA
●
Solo las personas que hayan
leído y comprenden este
MANUAL pueden utilizar el
clavador.
●
No dirija NUNCA la
herramienta hacia sí mismo o
hacia otras personas del área
de trabajo.
●
Mantenga los dedos ALEJADOS del gatillo
cuando no clave clavos, para evitar descargas
accidentales.
●
Conozca y comprenda el sistema de clavador
que está utilizando.
Por favor lea y comprenda los “Métodos de
operación” descritos más abajo.
●
Inspeccione el clavador antes de operarlo para
determinar el sistema de accionamiento.
Antes de empezar a trabajar, verifi que el
dispositivo de conmutación para la operación
de clavado.
Este clavador Hitachi incluye un dispositivo de
conmutación para la operación de clavado.
Antes de empezar a trabajar, verifi que el
ajuste del dispositivo de conmutación para la
operación de clavado.
Si el dispositivo de conmutación para la
operación de clavado no está debidamente
ajustado, el clavador no funcionará
correctamente.
●
Nunca coloque las manos o el cuerpo a menos
de 8 pulgadas (200 mm) del cabezal de disparo
cuando lo use.
●
No clave clavos en otros clavos, los clavos
pueden rebotar y herir a alguien.
Español
●
No accione el clavador a menos que esté
fi rmemente colocado contra la pieza de trabajo.
●
Cuando trabaje cerca del borde de una pieza
de trabajo o en ángulos muy agudos, o al clavar
clavos en una pieza de trabajo fi na, tenga
cuidado para minimizar la aparición de virutas,
astillas y divisiones, o el vuelo libre, el rebote
o la perforación de los clavos, ya que podrían
causar lesiones.
●
No clave nunca clavos desde ambos lados de
una pared al mismo tiempo. Los clavos podrían
traspasar la pared y lesionar a la persona de la
otra parte.
●
No utilice nunca un clavador defectuoso o que
funcione anormalmente.
●
No utilice el clavador a modo de martillo normal.
●
Desconecte la manguera de aire del clavador
cuando:
1) no vaya a utilizarlo;
2) vaya a abandonar el área de trabajo;
3) lo eleve, lo descienda o de otra manera vaya
a trasladarlo a otro lugar;
4) vaya a entregárselo a otra persona;
5) remover la clavija de bloqueo;
6) haga un cambio del dispositivo de
conmutación;
7) realice mantenimientos o reparaciones;
8) desatasque el clavador;
9) el clavador está fuera de la supervisión o el
control del operador;
10) remueve clavos del cartucho;
11) acople o quite el tapón del pico;
12) instalar o remover el gancho; y
13) montar el gancho.
Este clavador Hitachi está equipado con un dispositivo de
conmutación para la operación de clavado.
Utilice el MECANISMO DE ACTUACIÓN SECUENCIAL
SIMPLE o el MECANISMO DE ACTUACIÓN POR
CONTACTO de acuerdo con la tarea que se va a realizar.
Explicación sobre las diversas operaciones de clavado
○
MECANISMO DE ACTUACIÓN SECUENCIAL
SIMPLE: En primer lugar, presione la palanca de
empuje contra la pieza de trabajo y, a continuación,
jale el gatillo para introducir el clavo.
Una vez que se introduzca un clavo, no se podrá
volver a clavar hasta que suelte el gatillo y lo vuelva a
presionar.
○
MECANISMO DE ACTUACIÓN POR CONTACTO:
En primer lugar, presione la palanca de empuje
contra la madera y, a continuación, jale el gatillo para
introducir el clavo. O,
57

Español
jale el gatillo, y, seguidamente, presione la palanca
de empuje contra la pieza de trabajo para introducir
el clavo.
Si se mantiene el gatillo apretado, se introducirá un
clavo cada vez que se presiona la palanca de empuje
contra la pieza de trabajo.
MÉTODOS DE OPERACIÓN
Este clavador está equipado con una palanca de empuje,
y no funcionará a menos que ésta esté presionada
(posición hacia arriba).
Existen dos métodos de operación para clavar clavos con
este clavador.
Estos métodos son:
1. Operación intermitente (Disparo con el gatillo):
2. Operación continua (Disparo con la palanca de
empuje):
Cómo remover la clavija de bloqueo
•
Cuando se envía, el modo de accionamiento de la
herramienta está bloqueado en el MECANISMO
DE ACTUACIÓN SECUENCIAL SIMPLE con la
clavija de bloqueo.
•
Al remover la clavija de bloqueo como se muestra
más abajo, la herramienta puede cambiarse
entre ACTUACIÓN SECUENCIAL SIMPLE y
ACTUACIÓN POR CONTACTO.
ADVERTENCIA
●
Al remover la clavija de bloqueo, desconecte
la manguera de aire de la herramienta y
remueva todos los clavos.
●
Tenga en cuenta que cuando la clavija de
bloqueo se remueve, se activa la función
de cambio entre ACTUACIÓN SECUENCIAL
SIMPLE y ACTUACIÓN POR CONTACTO.
•
Utilice un par de alicates como los mostrados
más abajo para sacar la clavija de bloqueo.
Clavija de bloqueo
PRECAUCIÓN
●
La clavija de bloqueo deberá descartar tras
removerla.
(1) Operación intermitente (Disparo con el gatillo):
Utilice el ajuste del MECANISMO DE ACTUACIÓN
SECUENCIAL SIMPLE.
ADVERTENCIA
●
Para una operación intermitente, coloque
la varilla de cambio como se muestra en
la fi gura de abajo. (es decir, colóquela en
MECANISMO DE ACTUACIÓN SECUENCIAL
SIMPLE).
●
Para evitar el doble disparo o el disparo
accidental debido a la reculada.
1)
Ajuste el mecanismo de conmutación a
MECANISMO DE ACTUACIÓN SECUENCIAL
SIMPLE.
2) Jale el gatillo rápida y fi rmemente.
1
Siga los pasos más abajo para confi gurar el
MECANISMO DE ACTUACIÓN SECUENCIAL
SIMPLE (como se muestra en los diagramas
siguientes).
ADVERTENCIA
●
Desconecte la manguera de aire y remueva
todos los clavos.
●
No presione la palanca de empuje.
●
No aplique una presión innecesaria ni utilice
herramientas para mover el interruptor.
●
No presione el tope de cambio con ningún
propósito que no sea cambiar entre
ACTUACIÓN SECUENCIAL SIMPLE y
ACTUACIÓN POR CONTACTO.
1) Si se deja la clavija de bloqueo, omita los
pasos del 2) al 3) y continúe desde el paso 4).
2) Presione la parte inferior del gatillo y abra el
tope de cambio.
3) Agarre la varilla de cambio con dos dedos y
deslícela hacia abajo
(para ajustar en MECANISMO DE
ACTUACIÓN SECUENCIAL SIMPLE).
4) Asegúrese de que la varilla de cambio está
en la posición correcta como se muestra en el
diagrama
(de lo contrario, la herramienta podría
estar confi gurada en el MECANISMO DE
ACTUACIÓN POR CONTACTO).
58

2
Coloque la salida de los clavos sobre la pieza de
trabajo con el dedo fuera del gatillo.
3
Presione a fondo la palanca de empuje.
4
Apriete el gatillo para clavar el clavo.
5
Separe el dedo del gatillo.
Para continuar clavando en un lugar separado,
mueva el clavador a lo largo de la madera, repitiendo
los pasos
2
– 5, según se requiera.
1
3
Palanca de empuje
Posición de
la varilla de
cambio
4
Gatillo
ADVERTENCIA
●
Se dispara un clavo cada vez que se presiona
el gatillo, siempre que la palanca de empuje
permanezca presionada.
(2)
Operación continua (Disparo con la palanca de empuje)
Utilización del MECANISMO DE ACTUACIÓN POR
CONTACTO
ADVERTENCIA
●
Para evitar el doble disparo o el disparo
accidental debido a la reculada.
1) No presione el clavador contra la madera
con una fuerza excesiva.
2) Retire el clavador de la madera después
de efectuar el clavado.
●
Si el gancho está montado, no operar
la herramienta con el MECANISMO DE
ACTUACIÓN POR CONTACTO.
Español
1
Siga los pasos más abajo para confi gurar el
MECANISMO DE ACTUACIÓN POR CONTACTO
(como se muestra en los diagramas siguientes).
ADVERTENCIA
●
Desconecte la manguera de aire y remueva
todos los clavos.
●
No presione la palanca de empuje.
●
No aplique una presión innecesaria ni utilice
herramientas para mover el interruptor.
●
No presione el tope de cambio con ningún
propósito que no sea cambiar entre
ACTUACIÓN SECUENCIAL SIMPLE y
ACTUACIÓN POR CONTACTO.
1) Remueva la clavija de bloqueo si sigue
montada.
Refi érase a la sección “Cómo remover la
clavija de bloqueo” en “MÉTODOS DE
OPERACIÓN”.
2) Presione la parte inferior del gatillo y abra el
tope de cambio.
3) Agarre la varilla de cambio con dos dedos y
deslícela hacia arriba
(para ajustar en MECANISMO DE
ACTUACIÓN POR CONTACTO).
4) Asegúrese de que la varilla de cambio está
en la posición correcta en el gatillo como se
muestra en el diagrama
(de lo contrario, la herramienta podría no
operar correctamente).
2
Apriete el gatillo con el clavador fuera de la pieza
de trabajo.
3
Presione la palanca de empuje contra la pieza de
trabajo para clavar un clavo.
4
Desplace el clavador por la pieza de trabajo con
un movimiento de rebote.
Con cada presión de la palanca de empuje se
clavará un clavo.
Después de haber clavado los clavos necesarios,
separe el dedo del gatillo.
Posición de
la varilla de
cambio
1
59

Español
Apriete primero el gatillo.
2
4
ADVERTENCIA
●
Mantenga el dedo separado del gatillo
excepto durante la operación, porque esto
podría resultar en lesiones si la palanca de
presión entrase en contacto con su cuerpo o
con el de otras personas del área de trabajo.
●
Mantenga las manos y el cuerpo alejados
del área de descarga. Este clavador Hitachi
podría rebotar por la reculada producida al
meter un sujetador, y producir la introducción
no intencional del siguiente sujetador, con el
riesgo de sufrir lesiones.
●
Algunos tipos de clavos cargados pueden
echar chispas a través de la boca durante la
operación de clavado. ¡Tenga cuidado!
El MECANISMO DE ACTUACIÓN SECUENCIAL SIMPLE
se usa para colocar los fi jadores con gran precisión.
El MECANISMO DE ACTUACIÓN SECUENCIAL
SIMPLE puede disminuir la ocurrencia de lesiones en
el área de trabajo en comparación con el MECANISMO
DE ACTUACIÓN DE CONTACTO. Esto se debe a que
hay menos posibilidades de lanzar un clavo de
forma no intencional a alguna persona si continúa
presionando el gatillo y presiona la palanca de
manera accidental.
El MECANISMO DE ACTUACIÓN SECUENCIAL SIMPLE
puede también reducir la velocidad de funcionamiento
en comparación con el MECANISMO DE ACTUACIÓN
DE CONTACTO. Se recomienda que los usuarios con
poca experiencia usen el MECANISMO DE ACTUACIÓN
SECUENCIAL SIMPLE.
NOTA
●
Si se respetan todas las advertencias y
precauciones, se podrá realizar una operación
segura con los dos sistemas: MECANISMO DE
ACTUACIÓN SECUENCIAL SIMPLE y MECANISMO
DE ACTUACIÓN POR CONTACTO.
●
Maneje con cuidado el paquete de clavos. Si los
clavos se cayesen, el plástico de la ristra podría
romperse.
●
Después de haber clavado los clavos:
1) desconecte la manguera de aire del clavador,
2) extraiga todos los clavos del clavador,
3) aplique 5 – 10 gotas de lubricante para
herramientas neumáticas Hitachi a la entrada de
aire del clavador, y
4) abra la llave de escape del depósito del
compresor de aire para drenar la humedad que
pueda existir.
UTILIZACIÓN DE LA TAPA PARA EL MORRO
ADVERTENCIA
●
Al quitar o fi jar la tapa del morro, asegúrese
de retirar su dedo del disparador y de
desconectar la manguera de aire del
clavador.
La tapa para el morro está fi jada a la punta de la palanca
de empuje para proteger la pieza de trabajo de ralladuras
o daños. Cuando no estén en uso retírelos en el orden
indicado abajo.
1
DESCONECTE LA MANGUERA DE AIRE DEL
CLAVADOR.
2
Coloque el tapón del pico en la punta de la palanca
de empuje.
Palanca
de empuje
Tapa para el morro
No conecte la
manguera de aire
60

Español
Cuando no utilice la tapa para el morro, colóquela en el
área de almacenamiento en la parte trasera del depósito.
Tapa para el morro
NOTA
●
El tapón del pico puede reducir la profundidad
de clavado debido a su grosor. Es necesario
ajustar la presión del aire para volver a ajustar la
profundidad de clavado.
GANCHO DE VIGA
Se puede montar el gancho suministrado con el producto
utilizando los tres pernos de brida M5 x 16 que vienen con
las herramientas.
Cuando la herramienta se desmonta de la manguera y no
se usa, el gancho se puede usar para guardar la unidad.
ADVERTENCIA
●
Cuando monte o desmonte el gancho,
asegúrese de que la manguera está
desmontada y de que se han extraído todos
los clavos de la herramienta.
1) Cómo montar el gancho
Llave de barra hexagonal para M5
2
1
•
Cuando lo monte, utilice una llave de barra hexagonal
para M5 (no incluida).
•
Fije el gancho (1) a la unidad principal en tres
posiciones utilizando los pernos de brida M5
×
14 (2)
(Fig. 1).
Par de torsión de ajuste
8.3±0.5 N • m 6.1±0.4 ft.lb 85±5 kgf • cm
•
El gancho se puede montar en cualquier dirección.
Ajuste el gancho según el entorno operacional
(Fig. 2).
2) Cómo desmontar el gancho
Desmonte el gancho realizando los pasos de
montaje del gancho anteriormente mencionados en
orden inverso.
ADVERTENCIA
●
Cuando el gancho esté montado, operar
únicamente con el MECANISMO DE
ACTUACIÓN SECUENCIAL SIMPLE y no
con el MECANISMO DE ACTUACIÓN POR
CONTACTO. Para cambiar entre SECUENCIAL
SIMPLE y POR CONTACTO, refi érase a
la sección apropiada en “MÉTODOS DE
OPERACIÓN”.
●
Desconecte la manguera de aire cuando
enganche la unidad.
●
No fi je el gancho en ubicaciones altas o
inestables. Además, no lo enganche en el
cuerpo, la ropa, el cinturón u otros útiles
personales.
Unidad
principal
Fig. 1 Fig. 2
61

Español
MANTENIMIENTO
NOTA: La información contenida en este manual ha sido diseñada para ayudarle a mante ner con seguridad este clavador.
Algunas ilustraciones de este manual pueden mostrar detalles o dispositivos diferentes a los de su propio
clavador.
MANTENIMIENTO E INSPECCIÓN
Lea la sección titulada “SEGURIDAD” (páginas 45– 49).
ADVERTENCIA
●
Desconecte la manguera y extraiga todos los
clavos del clavador antes de:
1) realizar trabajos de mantenimiento e
inspección, y
2) desatascar el clavador.
1. Desatasco de un clavo
Quite el clavo atascado en el orden siguiente:
1
DESCONECTE LA MANGUERA DE AIRE.
2
Extraiga todos los clavos.
3
Suelte la palanca de bloqueo y abra la placa de
guía.
4
Extraiga el clavo atascado con un destornillador
de clavo plana.
5
Cierre la placa de guía y el enganche.
6
En caso de atasco frecuente, póngase en
contacto con un centro de servicio autorizado por
Hitachi.
Palanca de bloqueo
2. Almacenamiento
○
Cuando no vaya a utilizar el clavador durante mucho
tiempo, aplique una capa fi na de lubricante a las
piezas de acero para evitar que se oxiden.
○
No guarde el clavador en un lugar frío.
Guarde el clavador en un lugar cálido.
○
Cuando no vaya a utilizar el clavador, deberá
guardarlo en un lugar cálido y fresco.
3. ETIQUETA DE PRECAUCIÓN
No utilice el clavador si la ETIQUETA DE
ADVERTENCIA falta o está dañada.
Solicite la nueva ETIQUETA DE PRECAUCIÓN a un
centro de reparaciones autorizado por Hitachi.
Etiqueta de
precaución
4. Tabla de mantenimiento
(Consulte la página 63)
5. Solución de problemas por parte del operador
(Consulte la página 64)
No conecte la
1
manguera de aire
3
Placa guia (A)
62
4
PRECAUCIÓN
En el manejo y el mantenimiento de las
herramientas eléctricas, se deberán observar
las normas y reglamentos vigentes en cada país.

SERVICIO Y REPARACIONES
ADVERTENCIA
●
Este clavador solamente deberá repararlo
personal entrenado por Hitachi, un
distribuidor, o el empresario.
●
Para la reparación, utilice solamente las
piezas suministradas o recomendadas por
Hitachi.
Todos los clavadores de calidad requerirán el servicio
de mantenimiento o de reemplazo de piezas debido al
desgaste con la utilización normal.
NOTA:
Las especifi caciones están sujetas a cambio sin
previo aviso sin ninguna obligación por parte de
Hitachi.
Tabla de mantenimiento
ACCIÓN PARA CÓMO
Drenaje diario del fi ltro de la línea
de aire.
Mantenimiento del lubricador lleno. Mantener el clavador lubricado. Rellene con lubricante para
Limpieza del elemento del fi ltro y
soplado de aire a través del mismo
en sentido opuesto al normal de fl ujo
del aire.
Limpieza del cargador y del
mecanismo del alimentador.
Mantenimiento de la palanca de
empuje en perfectas condiciones.
Lubricación del clavador después de
haberlo utilizado.
Drenaje del compresor de aire. Mantener el clavador en buenas
Evitar la acumulación de humedad y
suciedad.
Evitar que el fi ltro se atasque con
suciedad.
Evitar atascos. Sople diariamente.
Garantizar la seguridad del operador
y la operación efi caz del clavador.
Prolongar la duración del clavador. Aplique 5 – 10 gotas de lubricante al
condiciones de operación.
Abra la llave de escape manual.
herramientas neumáticas Hitachi.
Siga las instrucciones del fabricante
Sople diariamente.
clavador.
Abra la llave de llave de escape.
Español
63

Español
Solución de problemas por parte del operador
La mayoría de los problemas sin importancia podrán resolverse fácilmente utilizando la tabla siguiente.
Si el problema persiste, póngase en contacto con un centro de reparaciones autorizado por Hitachi.
PROBLEMA MÉTODO DE COMPROBACIÓN SOLUCIÓN
El clavador funciona pero no clava
clavos.
Poca fuerza. Reciclado lento. Compruebe la presión de aire. Au mente la presión de aire.
Los clavos penetran demasiado. Compruebe la presión de aire. Reduzca la presión de aire.
Salto de clavos.
Alimentación intermitente.
Clavos atascados.
Los clavos se clavan doblados.
El funcionamiento es normal, pero no
es posible clavar a gran velocidad.
Compruebe si está atascado. Desatasque como se indica en la
página 62.
¿Está dañado el alimentador de
Reemplace el alimentador de clavos.
clavos?
¿El resorte de la cinta está dañado o
Reemplace el resorte de la cinta.
debilitado?
Compruebe si los clavos son los
apropiados.
Utilice solamente los clavos
recomendados.
(No sobrepase 120 psi
2
))
——————
(8.3 barias 8.5 kgf/cm
Utilice lubricantei para herramientas
neumáticas Hitachi.
¿Está gastada la cuchilla impulsora? Solicite otra de reemplazo a Hitachi.
¿Está desgastada o dañada la junta
tórica del pistón?
(Ajústela a 70 – 120 psi
(4.9 – 8.3 bar 5 – 8.5 kgf/cm
Compruebe si está los utilizando los
clavos apropiados.
¿Está dañado el alimentador de
Utilice solamente los clavos
recomendadas.
Reemplace el alimentador de clavos.
clavos?
¿El resorte de la cinta está dañado o
Reemplace el resorte de la cinta.
debilitado?
¿Está desgastada o dañada la junta
tórica del pistón?
Compruebe si los clavos son las
apropiadas.
Póngase en contacto con Hitachi
para reemplazarlo.
Utilice solamente los clavos
recomendados.
¿Está gastada la cuchilla impulsora? Póngase en contacto con Hitachi
para reemplazarlo.
Compruebe el diámetro interior de la
manguera de aire.
Utilice otra manguera de aire de
mayor diámetro.
2
))
64

656667


Issued by
Shinagawa Intercity Tower A, 15-1, Konan 2-chome,
Minato-ku, Tokyo 108-6020, Japan
Distributed by
1111 Broadway Ave,
Braselton, Georgia, 30517
3405 American Drive, Units 9-10,
Mississauga, ON, L4V 1T6
804
Code No. C99233361 T
Printed in Taiwan
 Loading...