

Page 1
INSTRUCTION MANUAL
Thank you for purchasing Hitachi gas table. Please read this operating instruction manual
carefully before using this gas table properly. We hope you are satisfied with our product.
CONTENTS
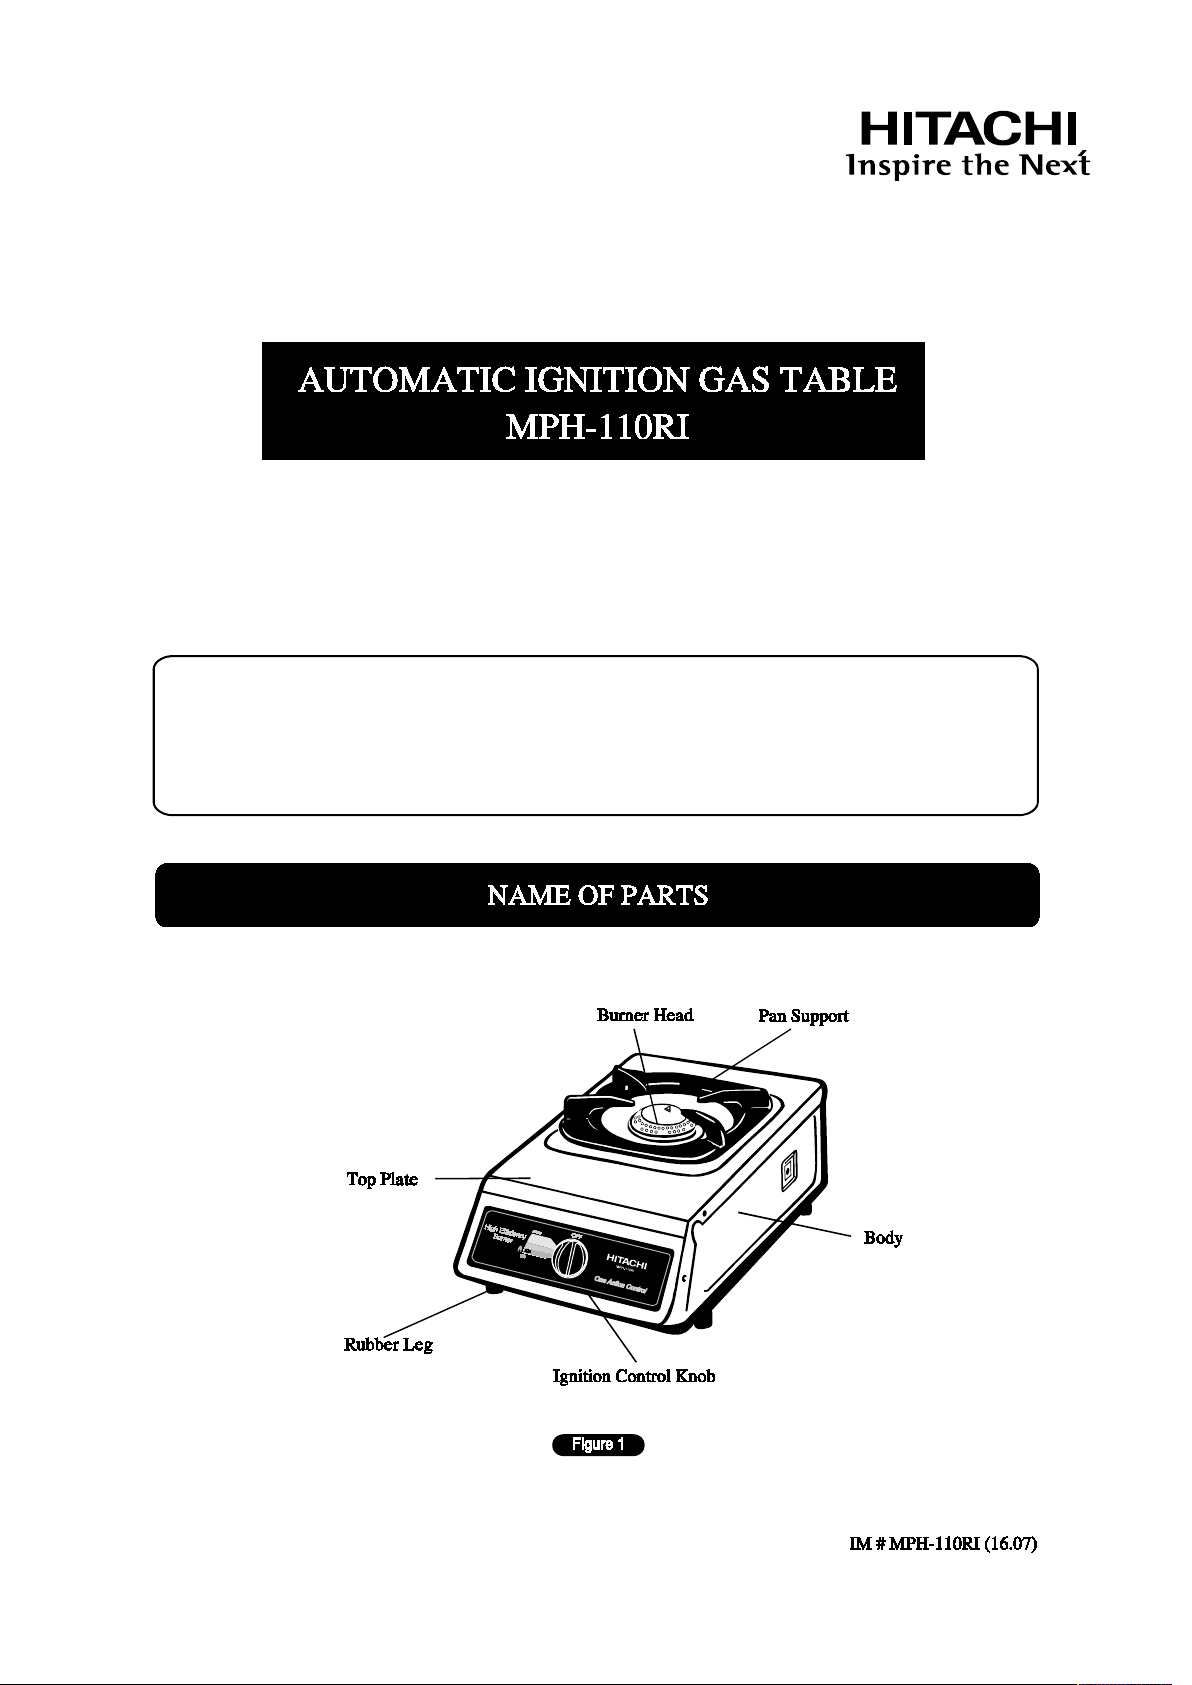
n NAME OF PARTS .............................................1
n
SPECIAL CAUTIONS AND SPECIFICATIONS .............................................2
n
PREPARING THE UNIT FOR USE,
INSTALLATION OF GAS TABLE and ........ 3
HOW TO USE
n
MAINTENANCE AND CARE and TROUBLESHOOTING ..............................................4
......................................
1
Page 2
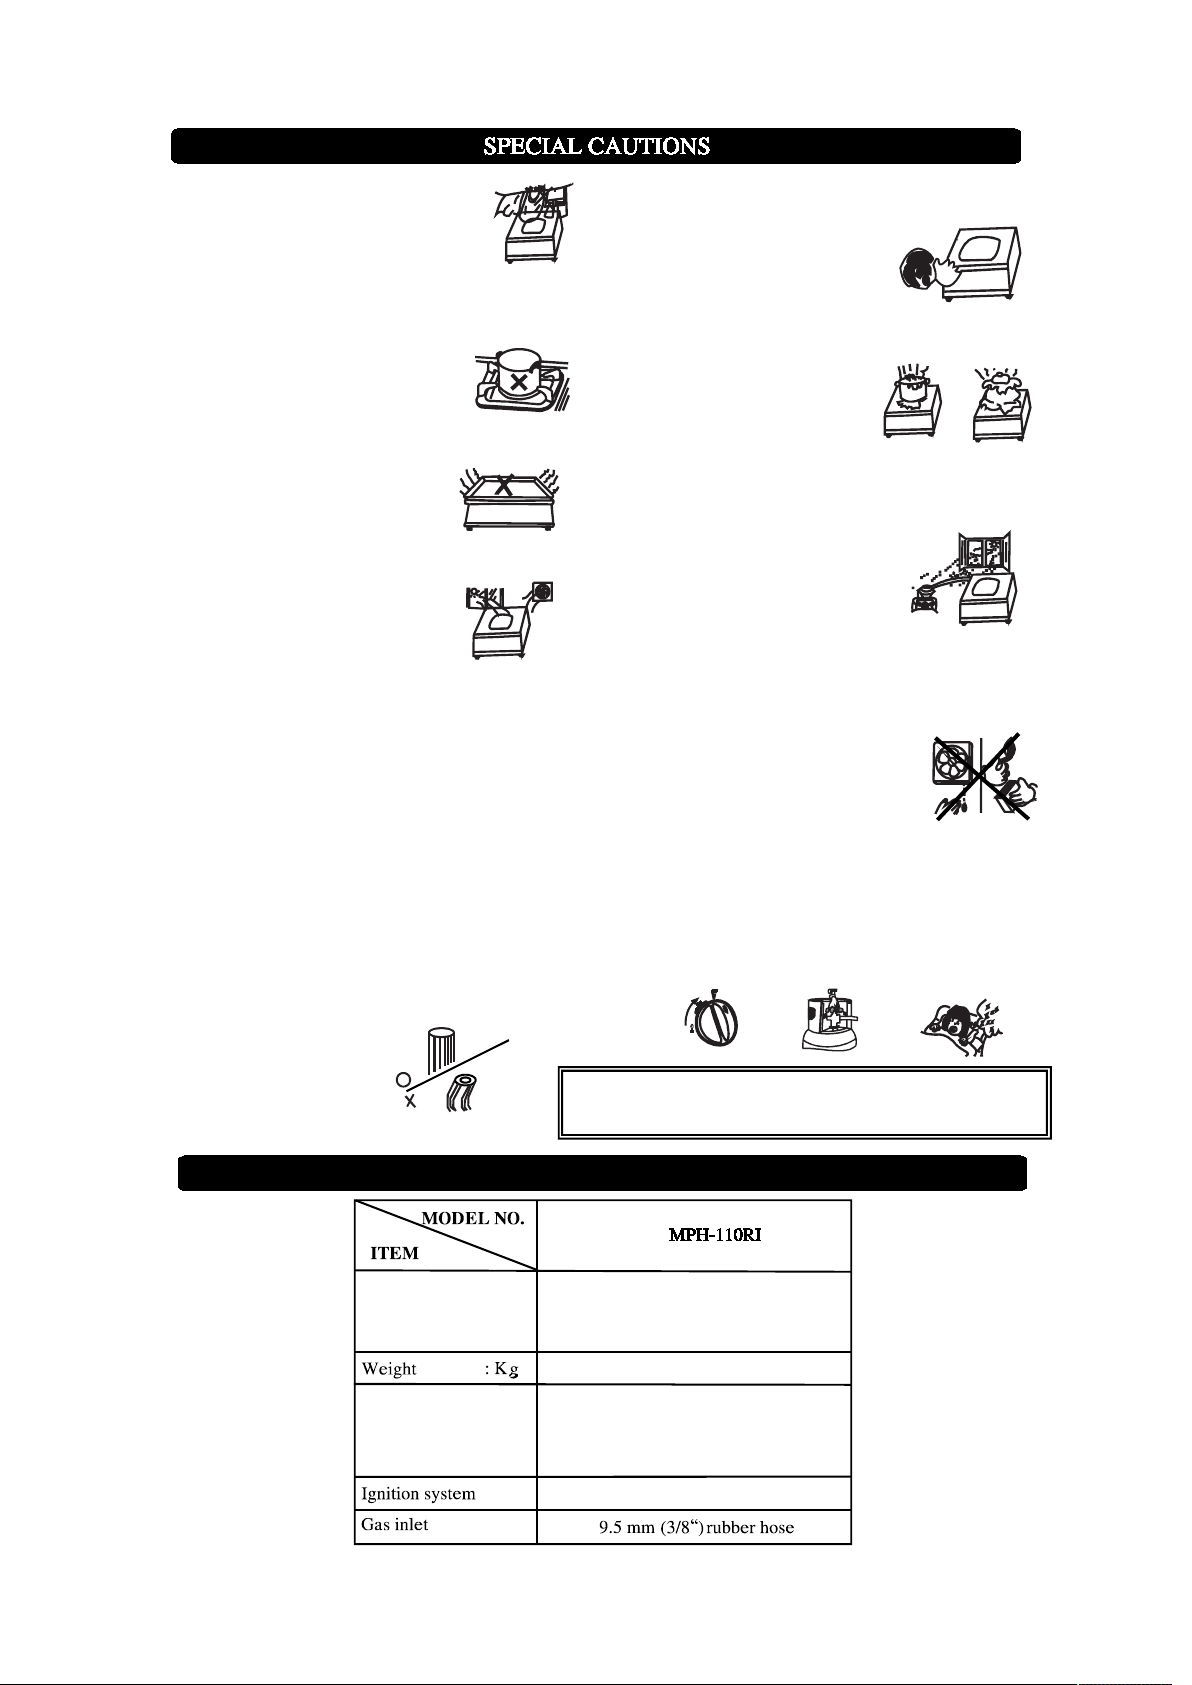
1. Use only Liquefied Petroleum (LP) gas.
2. Use this gas table only for cooking. Never
use the gas table to dry clothes, and etc.
3. Do not use any small cooking utensil that may cover
the burner flame and thereby extinguish it.
4. Do not use any large cooking utensil which covers the
entire surface of the gas table.
5. Place the gas table in an area with sufficient ventilation.
6. If the gas table is used for a long time in a closed space,
oxygen in the air becomes deficient, and there is a danger of
carbon monoxide poisoning due to incomplete combustion.
10. Trivet, top plate and other parts become hot during
use. Therefore, touch no part of the gas table except the
ON/OFF knobs.
11.Take note that no boiling water should spill onto the gas
table’s top surface.
12. If you notice gas leakage, stop using the gas table at
once, close the gas stopcock, and open all windows and
doors to allow the gas to escape.
13. In case of a gas leak, NEVER turn on the gas table, or
turn on or off ventilation fan or any other electric
appliances. The gas may catch fire and cause an
explosion.
7. Use only rubber hoses. Do not use vinyl hoses. Vinyl is
not heat resistant and has poor elasticity.
8. When turning on a burner, make sure that the flame
catches completely. Also, make sure that flame is fully
extinguished when you turn off the unit. Even during use,
make sure the flame is burning normally.
9. Do not use a worn-out rubber hose. Old hoses are not
sufficiently elastic, and cracks
due to use may result in gas
leaks. Immediately replace
rubber hose when it gets
damaged or cracked.
SPECIFICATIONS
External dimensions
(H)x(W)x(D) : mm
: inch
Gas consumption
Kcal/h (PB)
Gas pressure
300 mm WC
14. Do not leave the gas table unattended when on. After
use, never fail to turn the ON/OFF knob to the “OFF”
position and to switch off the gas stopcock. Also, make
sure that the flame is completely extinguished. When you
go out or when you go to sleep, always make sure to switch
off the gas stopcock.
Small
Max
The appropriate gas pressure range for this product is
25 0 ~350 mm H O
2
146x280x396
5.7x11x15.6
2.1
2350
Piezo-electric
2
Page 3

1. Installation of rubber legs.
Attach the rubber legs to the table by screwing them into the
openings on the table bottom.
2. Installation of ON/OFF knobs, burner heads and trivet &
trays.
Place the ON/OFF knob on the gas cook axis and push it
firmly inwards. Set the burner head on the burner body, then
place the trivet & trays on the top plate.
Burner head
Trivet &tray
Ignition (ON/OFF)
knob
Rubber leg
1. Install the gas table securing a minimum clearance of
15 cm from the side/back wall and 100cm from the
ceiling.
15 cm. 15 cm.
100 cm.
Note
Do not route the rubber hose under
l
the gas table.
Do not place any objects that may
l
easily be blown away by the wind on
the gas table.
2. Connect the rubber hose to the gas cylinder
3. Make sure there is no dust on the gas inlet pipe and fit
the rubber hose over the gas inlet pipe, making sure the
end of the hose reaches the line as shown. Fasten the
hose securely with a hose clamp.
Gas inlet pipe
Never use one single rubber hose
l
Rubber hose
Hose clamp
for two gas tables.
Keep away flammable material/
l
liquid from the gas table.
Note
Make sure that all knobs of the gas table are at the “OFF” position, and open fully the gas stopcock of gas cylinder.
1. Ignition and Flame Adjustment
Push the knob fully and turn counterclockwise to “ON”.
Flame is adjustable between “ON” and “OFF” position
by turning the knob slowly.
Push fully
Turn counter-clockwise
Small
Max
Note
Igniting the burner for the first time may be difficult because of air trapped in the gas hose. Repeat the ignition
procedure several times until the air is purged and the burner is ignited.
2. Extinction
Turn the ignition knob to the “OFF” position. In this position, no gas is supplied and the flame goes out.
3
Page 4

3. Air-Adjustment
Adjust the opening for air intake in order to get good combustion by moving the damper as indicated.
Damper
Opening for air intake
Good combustion
Damper location
Short supply of air Oversupply of air Oversupply of air
Note
When fire extinction sound is loud, adjust air supply by turning Damper upward or downward.
MAINTENANCE AND CARE
Note
If the burner and its surrounding parts get too dirty, incomplete combustion may result. Therefore, clean these
parts carefully.
1. When the combustion state gets deteriorated
Wire
due to boiling over, clean the holes of burner head
as indicated in order to recover optimum flames .
Make sure that all the parts are fitted properly
Optimum flame
before use.
Installation: Vacant position of burner head
must be fixed completely into the pad of ventury.
When returning the cleaned burner head to the
burner, make sure to set it correctly.
2. Cleaning of the trivet & tray
Always keep the trivet & tray clean.
3. Cleaning of the electrodes of the igniter. If the
1
2
3
OK
4
1. Burner head
2. Vacant position of burner
head
3. Ventury
4.Pad of ventury
electrodes are soiled, clean them with a dry cloth
as dust adhering these parts may prevent a good
ignition.
Note
Make sure that the burner body, burner head, trivet and other parts are set properly after cleaning.
TROUBLESHOOTING
If trouble occurs, fix it referring to the following table. If the problem still remains, or in case of a serious malfunction, or if
you are in doubt, take the table to the retailer from which you bought the unit, without trying to repair it yourself.
Trouble
Cause Remedial measure
- Make sure the ignition knob is at “OFF” position, then
Does not ignite
- Main gas stopcock is not open.
- Air remains in the gas piping.
- Dirty electrode or insulator.
- Bent or crushed rubber hose.
open the main gas cock fully.
- Repeat igniting operation until all air in the pipe is
completely purged.
- Clean it with a dry rag.
- Straighten gas hose.
Smell of gas
Flame makes loud
cracking sound while
burning
- Cracks or holes in the rubber hose.
- Rubber hose not connected well.
- Failure or the gas table cock.
- Air supply is not properly adjusted.
- Flame outlet of burner is closed.
- Burner is not fitted properly.
- Nozzle is clogged.
- Replace it with a new one.
- Connect gas hose surely.
- Ask the store for repairs.
- Adjust it properly.
- Clean the clogged part.
- Fix burner body properly.
- Ask the store for repairs.
4
 Loading...