

Hitachi HUS151414VL3600, HUS151414VL3800, HUS151473VL3600, HUS151473VL3800, HUS151436VL3600 Quick Installation Guide
...
Quick Installation Guide
Hitachi Ultrastar 15K147
Models:
HHUUSS115511441144VVLL33660000
HHUUSS115511447733VVLL33660
HHUUSS115511443366VVLL33660000
HANDLING PRECAUTIONS
• Do not open the electrostatic discharge (ESD) bag containing the drive until required.
• Do not apply pressure on the drive during handl i n g a n d in st al la t i on.
• To prevent damage from impact or vibration always set the drive down gently.
• Handle the drive carefully by the edges. Do not touch the exposed printed circuit board or any electronic
components.
• Do not cover the breather hole! Covering the breather hole may result in loss of data.
• Save the packaging materials including the ESD bag in the event that the drive must be returned.
INSTALLING THE DRIVE
1. Record the serial number and part number of your hard drive for future reference.
2. Turn off the computer and remove the computer system cover.
3. Before handling the hard disk drive, discharge any static electricity from yourself and your clothing. With
one hand touch an unpainted metal surface on the computer chassis, and then touch the ESD bag with the
other hand for a minimum of two seconds.
4. Remove the hard drive from the ESD bag.
5. Unplug the computer.
6. For the 68-pin model assign a SCSI ID address if necessary. The default ID is 6.
000
HHUUSS115511441144VVLL33880000
HHUUSS115511447733VVLL33880000
HHUUSS1155114
4
3366VVLL3388000
0
version 1.0
Page 1
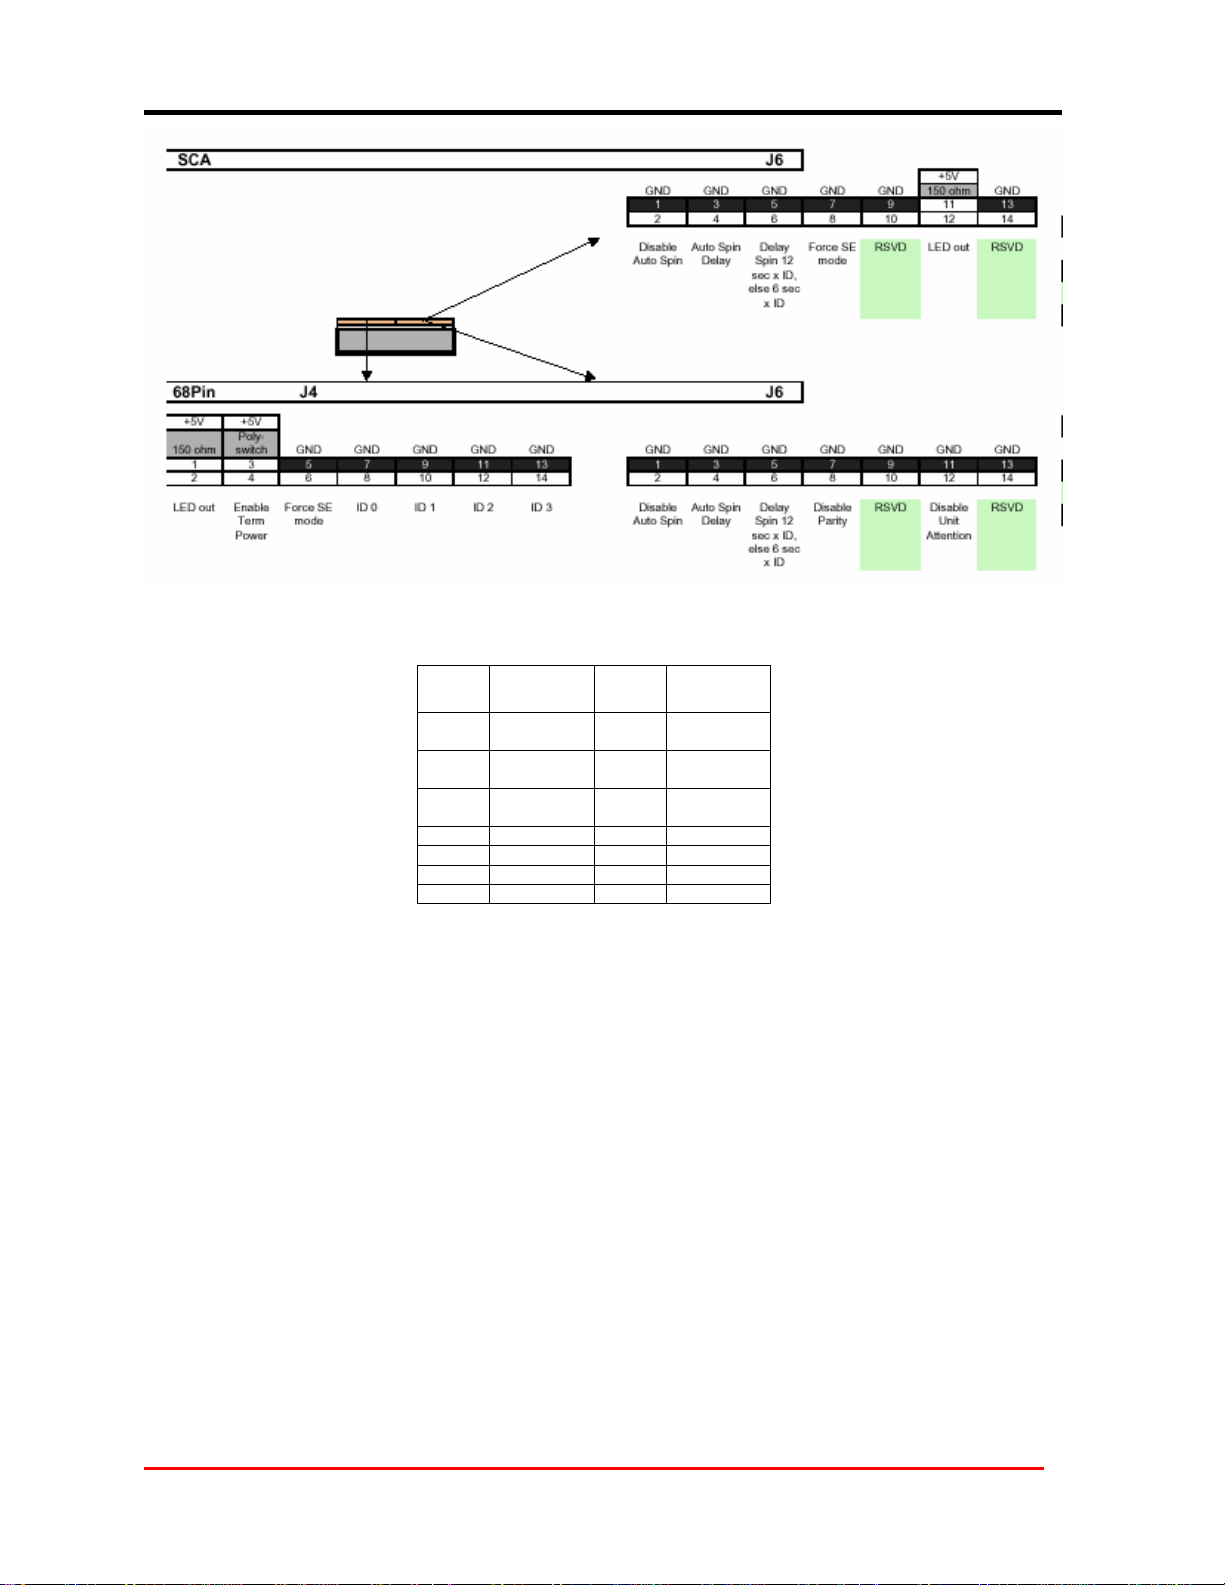
ADDRESS JUMPER AND DRIVE OPTION BLOCKS
T
HE 68PIN J4 OPTIONS (from left to right)
Pin Signal
Name
1
3
5 GND 6
7 GND 8 ID0
9 GND 10 ID1
11 GND 12 ID2
13 GND 14 ID3
+5V 150
ohm
+5V Pdyswitch
Pin Signal
Name
2 LEDout
4
Enable
Term Power
Force SE
mode
JUMPERS ARE NOT REQUIRED ON THE 80 PIN CONNECTOR.
version 1.0
Page 2
 Loading...