

Page 1
more features specifications
CD repeat functions
Press the Repeat button once. The current track will
play repeatedly.
Press the Repeat button twice. The whole CD will play
repeatedly.
Press the Repeat button three times for INTRO play.
The first 10 seconds of each track will play in sequence.
Press Play/Pause while the intro is playing to hear the
whole track.
Press the Repeat button four times for RANDOM play.
All tracks on the CD will be played in a random order.
preset radio stations
You can store up to 10 FM and 10 AM radio stations.
Switch the Radio/CD switch to RADIO. Tune to your
required station. Press the PRESET button. “CH” flashes in
the display for about 15 seconds. While “CH” is flashing
press the RECALL button to select a number between 1
and 10. Press the PRESET button to store the station
against your chosen number.
To select one of your preset stations, press RECALL until
the required number appears in the display.
To turn the radio off, switch the Radio/CD switch
to CD.
programmed CD play
You can play CD tracks in a selected order.
Operating Voltage DC 3V
10% THD power output 0.5%
S/N ratio (no filter) 55dB
Channel balance 1dB
Channel separation (no filter) 45dB
Frequency response 20Hz - 20KHz
AC/DC adaptor information:
Input AC 230V 50Hz
Output DC 4.5V 700mA
Polarity +
Rechargeable batteries (not supplied):
Nickel-cadmium (end-cut sleeving) 1.2V 650mA
Because we continually strive to improve our products we may change specifications and
designs without prior notice.
taking care of your
CD player & radio
Cleaning - Before cleaning this product, disconnect the mains power by
removing the 3 pin plug from the wall socket. Use a slightly moistened cloth to
clean. Do not use liquid cleaners or aerosol cleaners.
This equipment has been designed and manufactured to meet international
safety standards but, like any electrical equipment, care must be taken if you
are to obtain the best results and safety is to be assured.
DO read the operating instructions before you attempt to use the equipment.
DO ensure that all electrical connections (including the mains plug, extension
leads and inter-connections between the pieces of equipment) are properly
made and in accordance with the manufacturer's instructions.
DO consult your dealer if you are ever in doubt about the installation, operation
or safety of your equipment.
DON'T remove any fixed cover as this may expose dangerous voltages.
DON'T obstruct the ventilation openings of the equipment with items such as
newspapers, tablecloths, curtains, etc. Overheating will cause damage and
shorten the life of the equipment.
DON'T allow electrical equipment to be exposed to dripping or splashing, or
objects filled with liquids, such as vases, to be placed on the equipment.
DON'T place hot objects or naked flame sources such as lighted candles or
nightlights on, or close to equipment. High temperatures can melt plastic and
lead to fires.
DON'T listen to headphones at high volume, as such use can permanently
damage your hearing.
DON'T continue to operate the equipment if you are in any doubt about it
working normally, or if it is damaged in any way - switch off, withdraw the
mains plug and consult your dealer.
DON'T use equipment such as personal stereos or radios so that you are
distracted from the requirements of traffic safety.
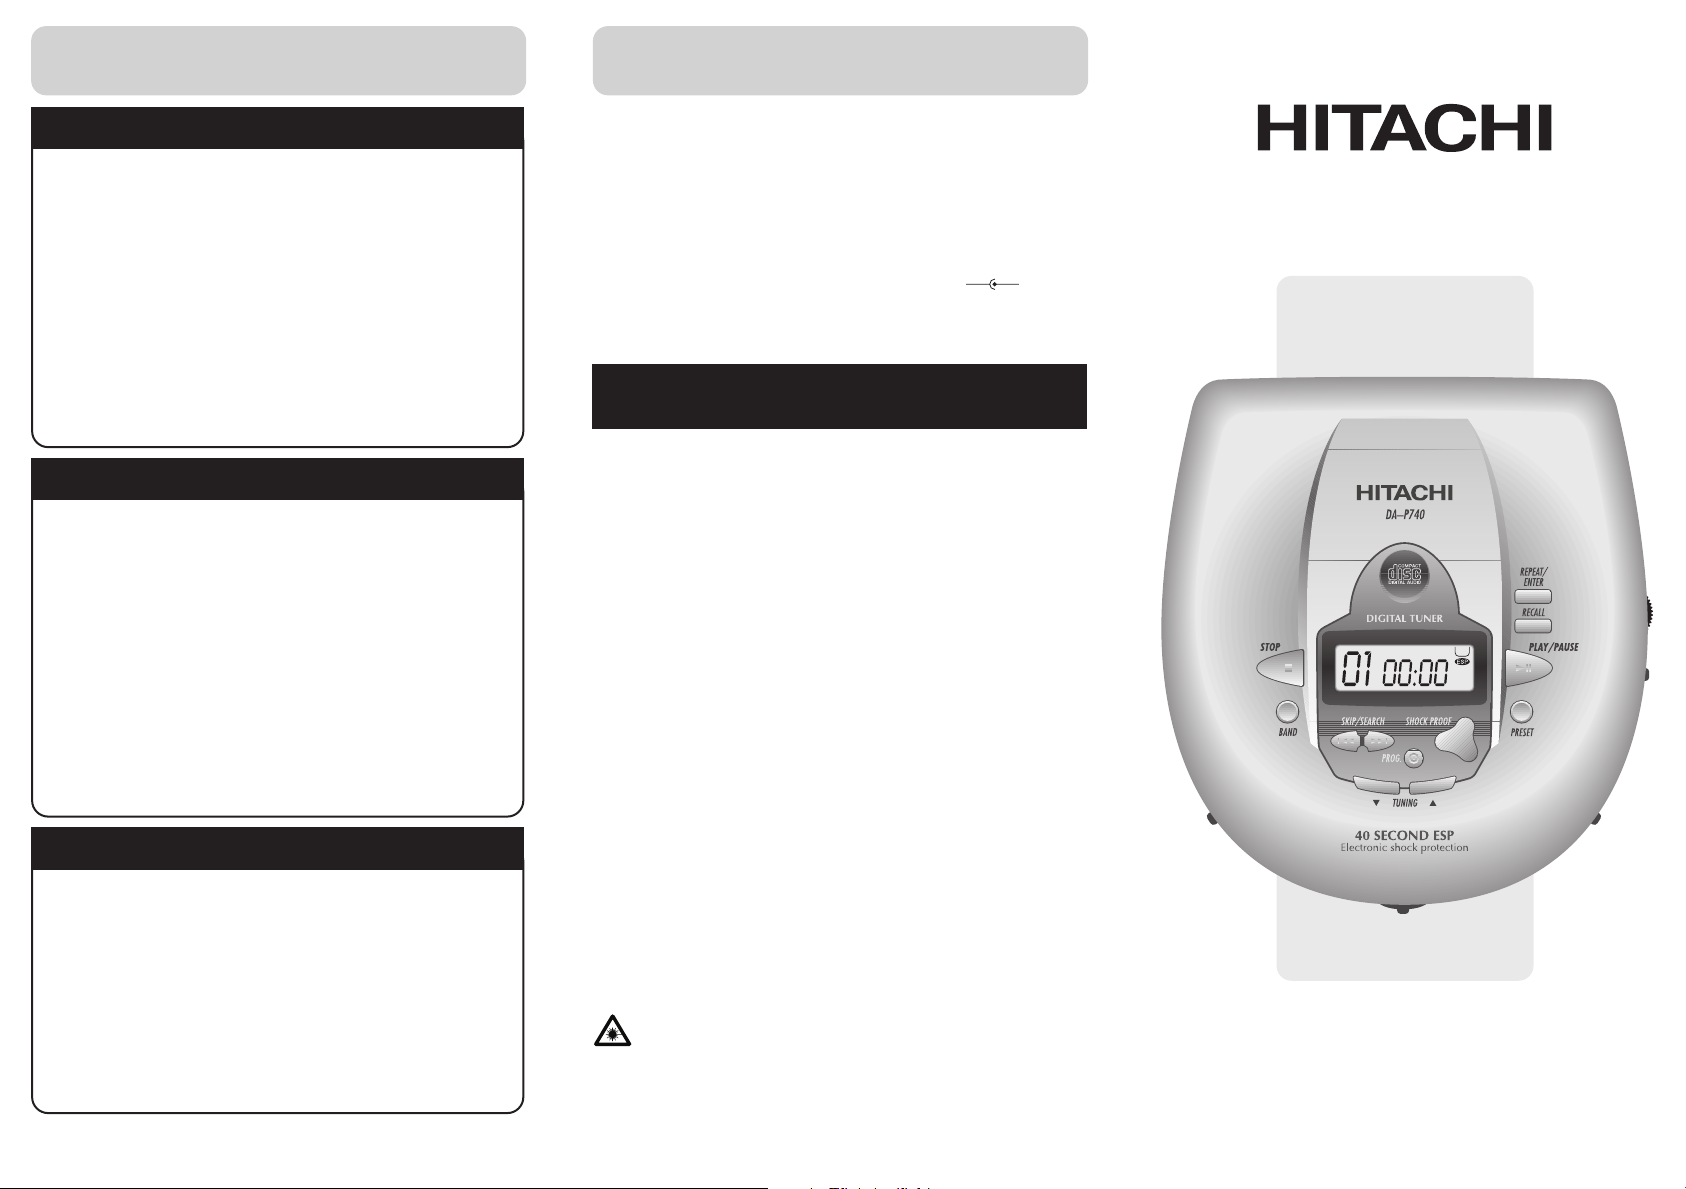
DA-P740
First press the PLAY button followed by the STOP button.
Press the PROGRAM button. Press the SKIP and
SEARCH buttons until the number of your chosen track is
displayed. Press PROGRAM to confirm. Repeat these
steps to select more tracks.
Press PLAY/PAUSE to play your chosen selections. Press
STOP to clear the programme.
In the unlikely event of a problem developing, please contact the store where
you purchased your CD Player & Radio.
ABOVE ALL
into holes, slots or any other opening in the case - this could result
in a fatal electrical shock.
– NEVER guess or take chances with electrical equipment of any
or use the product differently from the procedures given in these
instructions you may be exposed to hazardous radiation. Do not
open any covers and do not repair yourself. Repair work must be
carried out by qualified personnel.
– NEVER let anyone especially children push anything
kind – it is better to be safe than sorry!
CAUTION - Your CD player & radio incorporates a laser. If
you use the controls, make adjustments, alter performance,
portable
compact disc
player & radio
Page 2
getting started
getting to know your CD player & radio
Open the battery compartment cover on the underside of
the unit and insert 2 “AA” size batteries. Take care to
insert the batteries correctly, as illustrated inside the
battery compartment. Close the battery compartment
cover.
Insert the lead from the DC power supply into the side of
your CD player & radio. Only use the AC/DC adapter
supplied with this unit.
Your CD player & radio will operate on battery power
whenever mains power is unavailable.
Remember to remove the batteries if your CD player &
radio is not going to be used for a long time.
battery or mains operation
recharging batteries
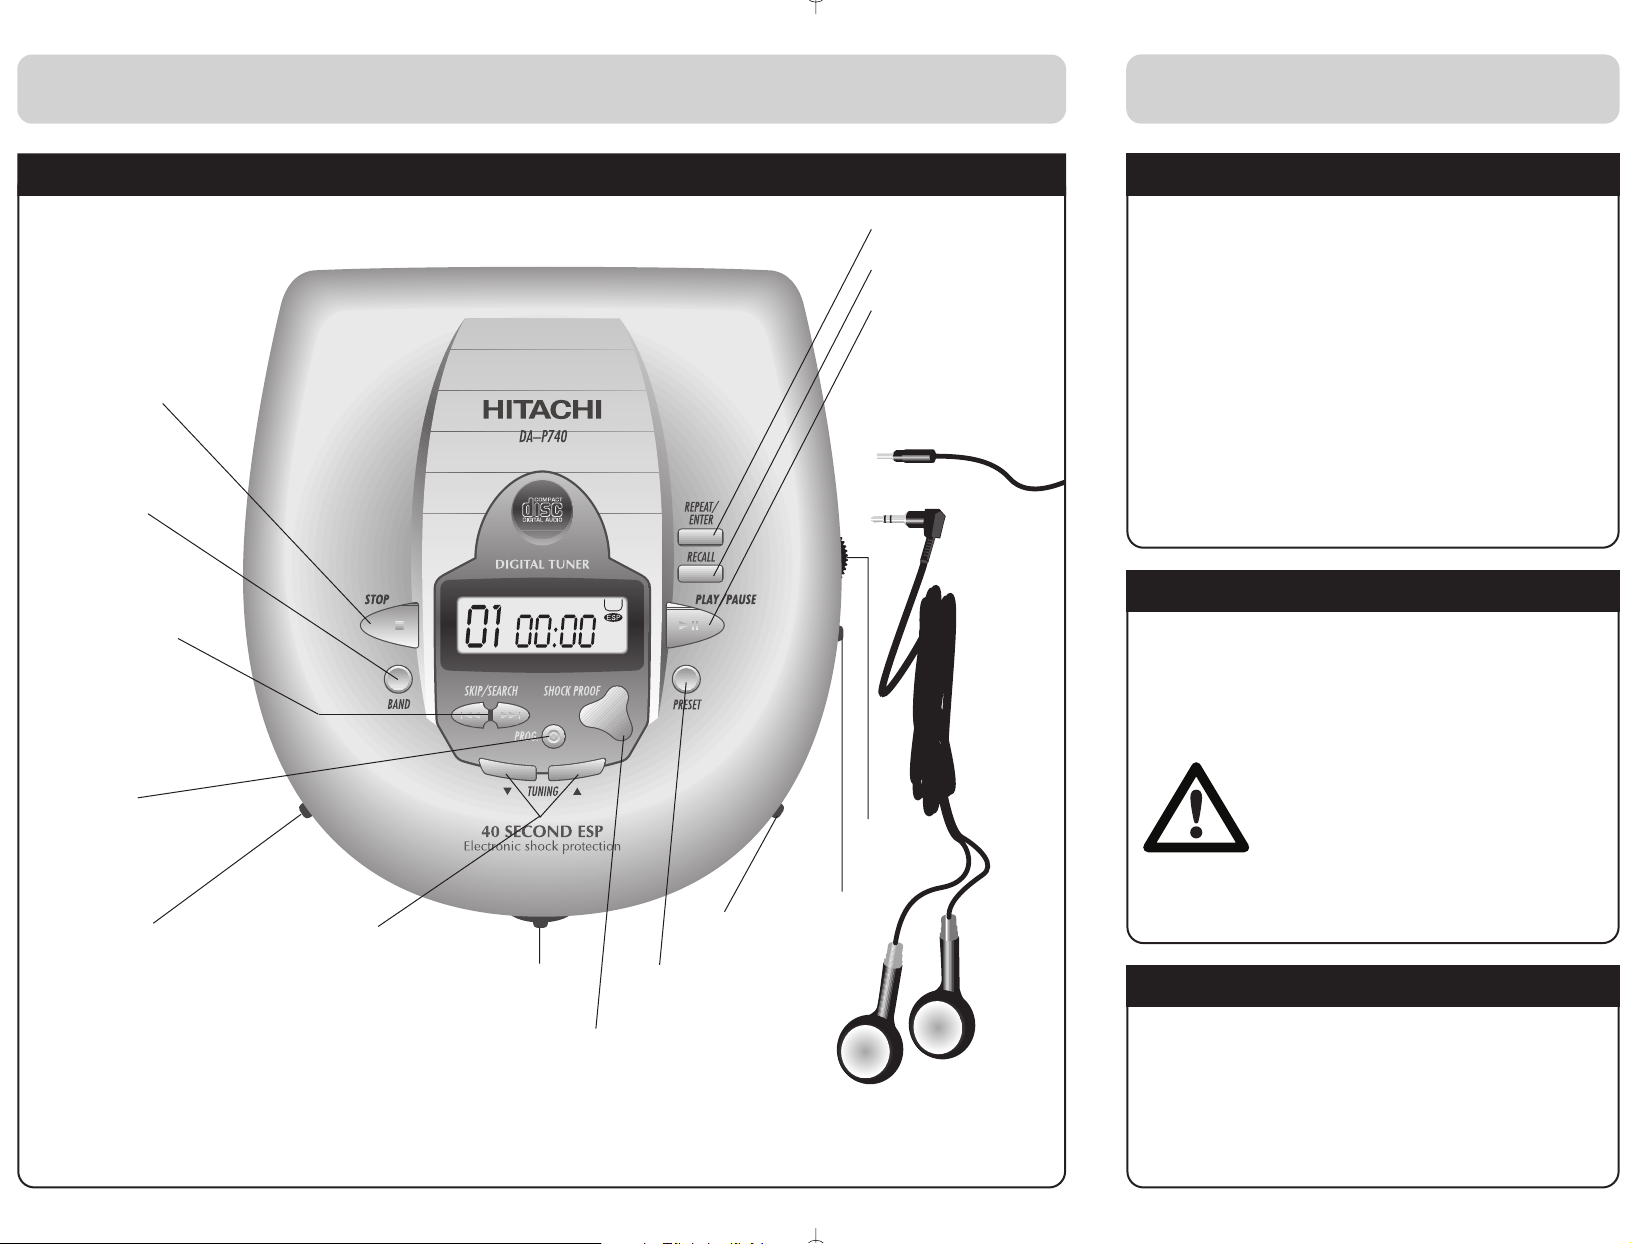
Volume
control
Earphones
jack plug
DC power supply
Radio band
selector
To select AM
or FM
Stop button
Press to stop
playing the CD
XBS switch
Switch XBS
ON to boost
sound at
low volumes
Radio/CD
selector
CD door
catch
Skip and Search
buttons
Press to select the
previous track or the
next track.
Press and hold to find a
particular part of a track
Play/Pause button
Press to start
playing a CD. Press
again to pause the
current track.
Your CD player & radio has a built in battery charger for
use with rechargeable batteries only.
With the DC power supply connected, select ON with the
CHARGE switch on the underside of the unit.
WARNING: Only rechargeable NiCad
batteries may be recharged in this
way.
Do not attempt to recharge any
other kinds of battery.
Serious
damage or injury may result.
NiCad batteries can be purchased at the store where you
purchased your CD Player & Radio.
using the CD player
Open the CD door, insert a CD with the printed side up.
Close the CD door.
Switch the Radio/CD switch to CD. Press the
Play/Pause button to start playing the CD from the
beginning. The display will show the number of the track
which is playing.
Preset
button
Shock Proof button
Your CD player can play with antishock for 40 seconds without
interruption. Press the
Shock Proof
button to turn it off (this will help your
batteries to last longer)
Tuning Down and Tuning
Up buttons
Press to select a radio
station. Press briefly to
increase or decrease the
frequency by one step.
Press and hold for a second
to search automatically for
a station with a strong
signal.
Hold button
Select Hold to
lock the CD
controls
Program
button
Recall button
Repeat button
 Loading...