

Page 1
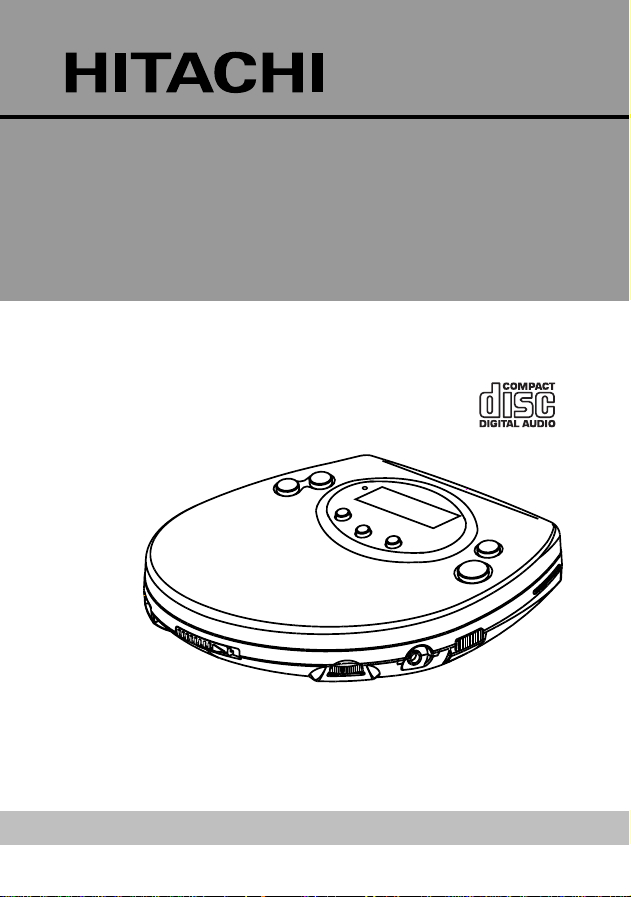
Portable Compact Disc Player
45 second Anti-Shock Memory
DA-P30 E(BS)
Operation Guide
Before operating, please read all these instructions thoroughly.
Page 2
SOME DO’S AND DON’TS ON THE
SAFE USE OF EQUIPMENT
This equipment has been designed and manufactured to meet international safety
standards but, like any electrical equipment, care must be taken if you are to
obtain the best results and safety is to be assured.
DO read the operating instructions before you attempt to use the equipment.
DO ensure that all electrical connections (including the mains plug, extension
leads and interconnections between pieces of equipment) are properly made
and in accordance with the manufacturer’s instructions. Switch off and withdraw
the mains plug when making or changing connections.
DO consult your dealer if you are ever in doubt about the installation, operation
or safety of your equipment.
DO be careful with glass panels or doors on equipment.
DON’T continue to operate the equipment if you are in doubt about it working
normally, or if it is damaged in any way – switch of f, withdraw the mains plug and
consult your dealer.
DON’T remove any fixed cover as this may expose dangerous voltages.
DON’T leave equipment switched on when it is unattended unless it is specifi-
cally stated that it is designed for unattended operation or has a standby mode.
Switch off using the switch on the equipment and make sure that your family
know how to do this. Special arrangements may need to be made for infirm or
handicapped people.
DON’T use equipment such as personal stereos or radios so that you are distracted from the requirements of traffic safety. It is illegal to watch television
whilst driving a vehicle.
DON’T obstruct the ventilation of the equipment, for example with curtains or
soft furnishings. Overheating will cause damage and shorten the life of the
equipment.
DON’T use the makeshift stands and NEVER fix legs with wood screws – to
ensure complete safety always fit the manufacturer’s approved stand or legs
with the fixings provided according to the instructions.
DON’T allow electrical equipment to be exposed to rain or moisture.
ABOVE ALL
- NEVER let anyone especially children push anything into holes, slots or any
other opening in the case – this could result in a fatal electrical shock;
- NEVER guess or take chances with electrical equipment of any kind. It is
better to be safe than sorry!
2
Page 3
DECLARATION OF CONFORMITY
We declare under our sole responsibility that this product, to which this declaration relates, is in conformity with the following standards:
EN60065, EN55013, EN55020, EN61000-3-2 and EN61000-3-3.
Following the provisions of 73/23/EEC, 89/336/EEC and 93/68/EEC Directives.
WARNING
To prevent fire or shock hazard, do not expose this appliance to dripping, splashing,
rain or moisture.
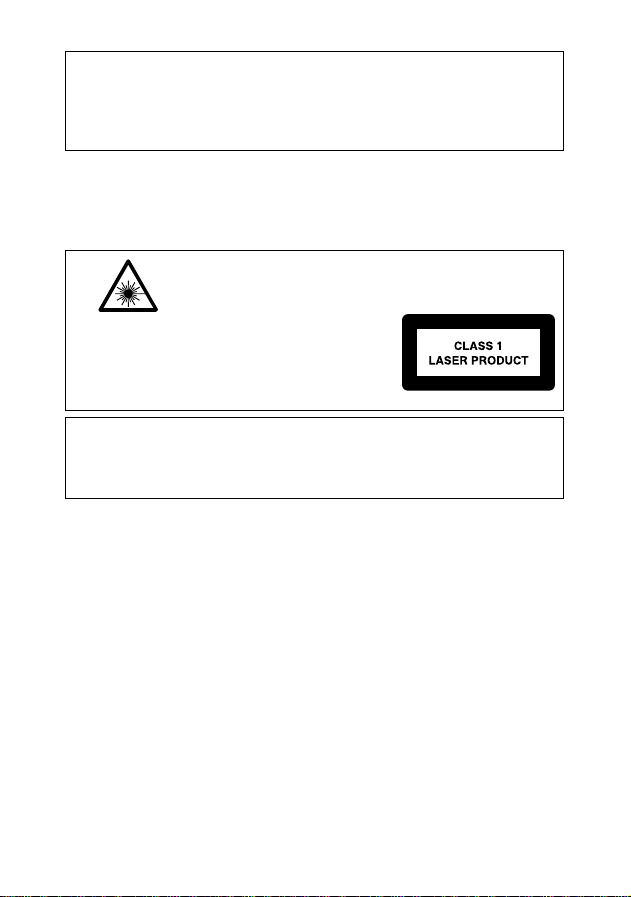
DANGER
LASER SAFETY
This unit employs an optical laser beam system in the CD mechanism, designed with built -in safeguards. Do not attempt to disassemble, refer to qualified service personnel. Exposure to this invisible laser light beam may be
INVISIBLE LASER RADIATION WHEN OPEN
AND INTERLOCK
FAILED OR DEFEATED.
AVOID DIRECT EXPOSURE TO LASER BEAM.
SAFEGUARDS
Electrical energy can perform many useful functions. This unit has been engineered and
manufactured to assure your personal safety. Improper use can result in potential electrical
shock or fire hazards. In order not to defeat the safeguards, observe the following instructions
for its installation, use and servicing.
harmful to the human eye.
THIS IS A CLASS-1 LASER PRODUCT.
USE OF CONTROLS, OR ADJUSTMENTS
OR PROCEDURES OTHER THAN THOSE
SPECIFIED HEREIN, MAY RESULT IN
HAZARDOUS LASER LIGHT BEAM
EXPOSURE.
This is shown on the bottom of the unit.
SAFETY PRECAUTIONS
1. Never open the covers or touch the inside or insert a metal object. Any of these
operations could cause an electric shock or a fault.
2. Do not expose to vibration or shock, dust, moisture,direct sunlight or excessive
heat such as inside the confined vechicles, etc. for a long period.
3. Use ONLY the AC adaptor provided, others may damage your unit. Disconnect
from the wall AC supply outlet when the set is not to be used for an extended
period of time.
4. When cleaning your unit, use a soft dry cloth to wipe off surface dirt. Do not use
solvents or commercially available cleaners as these may damage or discolour
the finish.
5. Do not wear earphones while operating a motor vehicle, this could create a traffic
hazard and is illegal in many areas.
6. The earphones supplied with your unit provide super stereo listening while allowing you to hear outside sounds when listening at normally low volume levels.
Listening at extremely high volume levels minimizes the intrusion of outside sounds
and may impair your hearing.
3
Page 4

7. If you notice that the sound has become weak or distorted, this is an indication
that your batteries are low. Replace with new or recharged batteries (see "BATTERY POWER SOURCE")
8. When the set is not going to be used for a long time, remove the batteries.
9. Discs which can be played on this player, have the following mark on
them. MP3, CD-R, CD-RW, CD-ROM, etc. cannot be played.
10. Do not move the set suddenly from a very cold room into a warm
room. When a chilled CD player is moved suddenly to a warm location, condensation may form on the pick-up lens, preventing proper operation. In this case,
wait 1 to 2 hours before resume play.
11. Do not place any objects in the disc compartment, it may cause damage to the
mechanism.
12. Do not store discs in high temperature, high-humidity locations. The discs may
develop warps and become unable to play. Also, discs with moisture on them
may be unplayable. Wipe any moisture off with a soft, dry cloth, and be sure
discs are fully dried before using.
13. Handle the discs carefully so that fingerprints and dust do not adhere to the
surfaces of the discs. T o clean of f, use a soft cloth. Do not use a hard cloth since
these will mark or scratch the disc.
14. Please do not use compact discs with cellophone tapes or with labels attached,
or those CD with peeled off stains, such as rental CD. If such discs were used on
a CD player, they may get trapped inside the unit and cause malfunction.
15. If a CD player is being operated while you are receiving a radio broadcast, you
may hear noise in the broadcast. If so, turn the operative switch of the CD player
[off].
16. Do not leave exhausted batteries in the compartment as they will leak and cause
corrosion and damage.
17. CD with special shapes (heart-shaped, octagonal etc.) cannot be played on this set. Attempting to do so may damage
the set. Do not use such CD:
18. Do not use CD-ROM and VCD disc. If these discs are played, noise will occur
from stereo earphones.
19. Be careful not to damage the AC adapter cord. Be sure to hold the adapter when
disconnecting from AC supply outlet.
20. Allow heat dissipation from the unit, otherwise malfunction may occur.
21. During playback if the unit is subjected to shock or jolt, some noise may be
produced. This is not a malfunction.
22. The CD player has wide dynamic range. As a result, if you turn your volume up
too high during soft (low volume) passages of a program, your earphones may
be damaged when the dynamic range of a sudden loud passage is produced.
23. Do not leave a disc inside the unit when it is not used for a long period.
4
Page 5
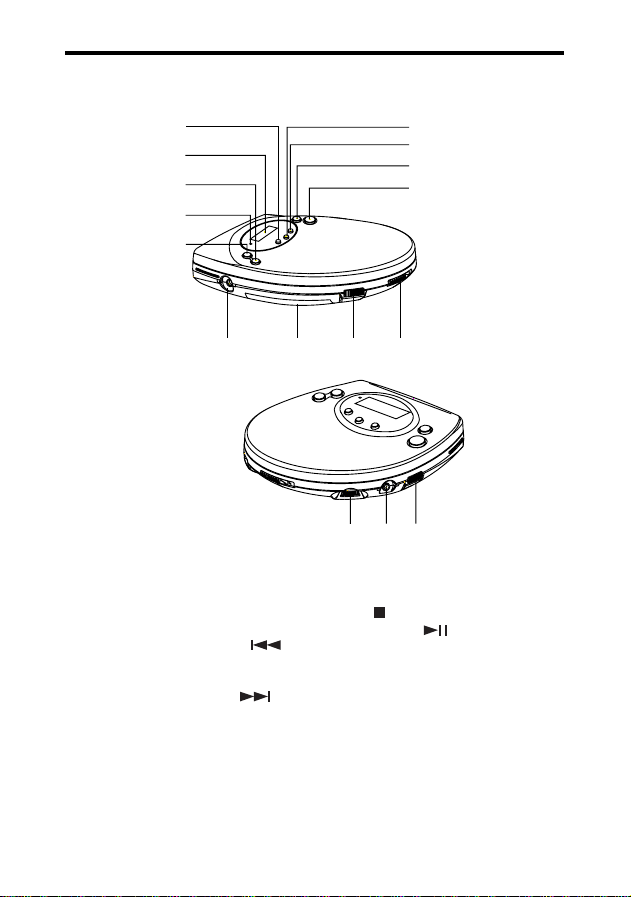
LOCATION OF CONTROLS
1
2
3
4
5
1. Mode Button
2. LCD Display
3. Backward Skip / Search ( )
Button
4. Charge Indicator
5. Forward Skip / Search (
Button
6. Program Button
7. Anti Shock Button
)
6
7
8
9
13121110
1514
16
8. Stop (
9. Play / Pause ( ) Button
10. DC Jack
11. Battery Cover
12. Hold Switch
13. CD Lid Open Switch
14. Volume Control Knob
15. Phones Jack
16. Bass Boost Switch
) Button
5
Page 6

POWER SOURCES (NORMAL BATTERIES / AC ADAPTOR)
Battery Power Source
1. Slide open the battery compartment
cover and insert two "AA" alkaline
batteries inside the battery compartment. Follow the polarity as indicated
in the battery compartment.
2. Close the battery compartment
cover.
AC Power Source
1. Insert the DC plug (at the end of the
AC adaptor cord) into the DC input
jack.
2. Plug the AC adaptor into a 230V AC
power outlet socket.
Note: If the AC adaptor plug of this unit
does not fit in your AC outlet, a plug
adaptor (NOT supplied) should be used.
Consult your local dealer on the type of
plug adaptor required.
LOW BATTERY ALERT
When the Battery indicator appears in
the LCD display, this means that the batteries are low in power. In this case the
CD player will not function properly and
the batteries must be replaced.
In case the Ni-cd rechargeable are being used, follow the instruction on how
to recharge the batteries, detailed in the
"CHARGING AND USE OF
RECHARGEABLE BATTERIES"
section.
Average Playing Time
Battery Type
Alkaline
1500, LR 6
or Equivalent
Ni-CAD
Rechargeable
(min specification
recommended
1.2V - 650mA)
Note: Zinc/Carbon, or Zinc/Chloride type
batteries are not recommended for this unit
as their use will result in extremely short
playing times. Wherever possible and for
economy, it is recommended that the mains
adaptor supplied with this unit is used.
(Continuous Play)
Normal Play Anti-Shock
Mode Play Mode
Approx. 9 hrs. Approx. 7 hrs.
Approx. 3.5 hrs. Approx. 2.5 hrs.
6
ON
Page 7

CHARGING AND USE OF RECHARGEABLE BATTERIES
Using Rechargeable Batteries
This unit can fully charge the specified rechargeable batteries, in approximately
15 hours. The rechargeable batteries (NOT supplied) should be charged before
they are used for the first time because they are low in power or they have not
been used for a long period (over 60 days).
1. Slide open the battery compartment cover
and insert two of the recommended rechargeable batteries, matching the polarity
indicated. (1.2V 650mA)
BOTH BATTERIES MUST BE OF RECHARGEABLE NICKEL-CADMIUM TYPE,
OTHERWISE THE BATTERIES MAY
EXPLODE OR LEAK.
Use the type of rechargeable battery
with negative side exposed area.
2. Connect the supplied AC adaptor's plug to
the DC input jack and corresponding end
to an AC household outlet.
USE ONL Y THE AC ADAPTOR SUPPLIED WITH THE SET FOR CHARGING.
Note : The unit will constantly charge the rechargeable batteries, so the CHARGE
light always illuminate.
3. After 15 hours, please unplug the AC adaptor.
THE CHARGE LIGHT WILL BE ON. DO NOT CHARGE CONTINUOUSLY
FOR 24 HOURS OR MORE. DOING SO CAN CAUSE THE PERFORMANCE
OF THE RECHARGEABLE BATTERY TO DETERIORATE.
4. If the operating time decreases drastically even when the rechargeable nickel-
cadmium batteries are properly charged, purchase a new set of rechargeable
nickel-cadmium batteries.
5. Diminishing in playing time will happen when new rechargeable batteries are
charged initially, or when the rechargeable batteries have not been used for a
long time. The playing time should be able to recover to normal level after the
rechargeable batteries are used for several times, otherwise the rechargeable
batteries need to be replaced by a new set.
7
Page 8

LISTENING WITH EARPHONES
Connect the plug of the stereo earphones
(supplied) into the Phones jack.
Caution: Avoid excessive volume levels and
listening for a long period of time when using
stereo earphones.
■ Adjust Volume to the desired level.
REMOVE THE DISC
Hold the edge and gently press the centre pivot
as illustrated, to pick up the disc.
Caution:
Wait for the disc to stop rotating before pressing
the OPEN switch.
Note: This unit can play 3" (8cm) single CD's
without an adaptor. Do not use with CD single
adaptor.
CLEANING DISCS
• Finger prints should be carefully wiped from
the surface of disc with a soft cloth. Unlike
conventional records, compact discs have no
grooves to collect dust and microscopic
debris, so gently wiping them with a soft cloth
should remove most particles. Wipe in a
straight motion from the center to the edge.
• Never use thinner, benzine, record cleaner or
anti-static spray on a compact disc. Such
chemicals can damage its plastic surface.
TO PHONES
8
Page 9

TURNING POWER ON AND OFF
This unit has no ON/OFF switch. To turn on and off, press the following buttons.
To turn on: Press
To turn off: Press ■ STOP button once to set at standby mode.
Press ■ STOP button twice to turn off the power immediately.
PLAY/PAUSE (playback starts).
Auto power-off function
When the unit is idle (standby mode) for approximately 30 seconds, the unit's
power will automatically turn off.
BASIC DISC PLAY
1. Connect the stereo earphones to the Phones jack.
2. Slide the CD Lid Open switch to open the CD compartment.
3. Adjust the VOLUME to minimum.
4. Load the disc with the label side facing up. Gently push down the disc completely
at the centre pivot to secure.
5. Close the CD lid securely until a click is heard.
6. Press the
7. Adjust VOLUME to the desired level.
To Emphasize the bass sound
Slide the BASS BOOST switch to the ON position.
Note: The bass boost performance will be dependent on the
VOLUME setting.
HOLD Switch
This switch prevents accidental selection of an unwanted
function during Playback or Stop mode. In the HOLD
"ON" position, no function button on the unit can operated
(except OPEN). Moving the switch to the "OFF" position,
the unit returns to normal operation.
PLAY/PAUSE button to start playing.
BASS BOOST
ON OFF
HOLD
OFF ON
9
Page 10

LCD DISPLAY INFORMATION
When unit power on
• The unit is initialising, reading the disc's table of contents.
During initialise, display shows - -.
• If no disc is present, then disc is displayed.
Put the disc in and close the CD lid, then auto adjustment
starts again.
• If the CD lid is opened, display shows OPEN.
• If the unit cannot read disc's data then Er is displayed.
• When disc's data has been read, display shows total
number of tracks and total playing time for 1 second.
• Starts playing from track No. 1 automatically and shows
playing time of the track. ANTI-SHOCK starts flashing.
To play from stop condition
• Press PLAY/PAUSE button when disc is present,
then display changes to
track no. 1 and shows playing time of the track.
ANTI-SHOCK starts flashing.
• When the anti-shock memory buffer is full,
ANTI-SHOCK stops flashing.
To stop
Press STOP button then total number of tracks and total
playing time is displayed.
01 00:00 and starts playing from
To pause
Press PLAY/PAUSE button, then pause on/off alternately.
During pause condition, track timer display is flashing.
10
Page 11

REPEAT/PLAY MODES
Every time the MODE button is pressed, the corresponding mode appears in the
display window.
NORMAL
MODE
Press repeatedly.
REPEAT
1
REPEAT
ALL
INTRO
RANDOM
During playback
MODE
X 1
During playback
MODE
X 2
NOTE: In normal mode none of the above symbols will be shown in the display.
Shown on the LCD display.
The current track on the disc
will be repeated.
Shown on the LCD display.
All tracks on the disc will be
repeated.
NORMAL PLAY (Without Anti-shock mode)
Press ANTI-SHOCK button, then disappear.
A indicator appears on the display when the
batteries need to be changed.
11
Page 12

INTRO PLAY
This allows introduction of each track to be played for about 10 sec.
1. Press MODE button three times, then INT is displayed.
2a. INTRO PLAY from stop condition
Select INTRO mode, press PLAY / PAUSE button to
start introduction play from track No.1 to last track.
2b. INTRO PLAY at play condition
Select INTRO mode during play, INT starts flashing.
• Press PLAY/PAUSE button, then INT flashing stops
and INTRO starts play from track No.1.
3. Press , to start INTRO play from next track.
4. Press , to start INTRO play from current track.
5. Press STOP button to cancel INTRO play.
PROGRAM PLAY
This allows selected tracks on the disc to be played in any desired order.
To set the program play
• Programmes can be set in the stop mode or normal play
mode.
1. Press PROGRAM button, then PRG appear and starts
flashing.
2. Press or to select the desired track.
3. When desired track is displayed, press PROGRAM
button to register. Then track No. display change to 00
again.
4. Repeat step 2 and 3 to program the order of more tracks.
Up to 20 tracks can be programmed into memory.
Caution:
If programmed 21 tracks and above or programmed at track No. 00 will clear
program memory.
12
Track No.
Program No.
Page 13

To complete programming and start PROGRAM PLAY
Press PLAY/PAUSE button, then PRG stops flashing and
will start playing.
To stop PROGRAM PLAY and clear programming
• Press
• Open CD Lid, or
•Turn off unit's power.
STOP button, or
RANDOM PLAY
Enables all the tracks on a disc to be played in a Random
order.
1. Press MODE button four times, then RND is displayed.
2a. RANDOM PLAY from stop condition
Press PLAY/PAUSE button, then the track No. is
selected at random and starts playing.
2b. RANDOM PLAY at play condition
Select RANDOM mode during play, RND starts flashing.
• Press PLAY/PAUSE button or
stops flashing and RANDOM track starts playing.
• After finish playing the current track, RND stop
flashing and randomly starts picking another track to
play.
3. Press
STOP button to stop Random play.
or , RND
SKIP AND SEARCH FUNCTION
Locating a Particular track in the stop mode or normal play mode
To back skip to the beginning of the
current or a previous tracks.
To forward skip to the beginning of
following track or other tracks.
Locating a Particular Point in a playing track
To search backwards at high speed.
To search forward at high speed.
Low level audio will be heard during the search process to assist in locating the
desired point in the track.
Press
Press
Press
Press
once or repeatedly.
once or repeatedly.
and hold.
and hold.
13
Page 14

MAINTENANCE
Cleaning the Cabinet
Wipe with a soft cloth. If the cabinet is very dirty, dampen the cloth with a weak
solution of neutral detergent and water, and then wipe clean. Never use thinner,
benzene or alcohol, as these will damage the surface finish.
Cleaning the Lens
A dirty lens will cause sound skipping and, if the lens is very dirty, the CD may not
work. Open the CD lid and clean the lens as below.
• Dust or Dry Particles
Using a camera lens brush/blower, blow
on the lens couple times, then wipe it lightly
with the brush to remove dust. Then, blow
on the lens once more.
• Fingerprints
If the lens cannot be cleaned by using a
brush/blower, use a dry cotton swab
starting in the middle and working to the
outside edge.
USING ANTI-SHOCK FEATURE
Note the " " indicator appears on display as being empty when first activated.
As it immediately begins to store sound data in memory bank, it shows " " to
indicate the data buffer is full.
When the laser loses tracking due to mechanical shock, the data stream into the
memory is interrupted but the data output from the memory buffer continues, so
the sound is uninterrupted. As the data is read from the memory, the indicator
changes from "
" to " ".
Once the laser locks again on the CD track, the data stream is fed to the memory
and joined to the previous data (see indicator changes).
REMINDER ...
If the unit is subjected to excessive and continuous repeated shocks, the memory
buffer becomes overloaded beyond its capacity therefore causing the sound to
skip. Also note the "
" indicator will remain empty.
14
Page 15

NOTES :
• When the "ANTI-SHOCK" is operating, the battery consumption is higher
because the disc rotates faster than normal and also the memory circuitry is
activated.
• When the digital anti-shock function is switched "ON" or "OFF", the sound is
interrupted for a short time. This is normal.
• Remember that condition such as dirty, scratched or warped discs may cause
skipping or noise thereby affecting performance of "ANTI-SHOCK" system.
PRODUCT SPECIFICATIONS
PICK UP
System Compact disc digital audio system
Laser diode Material : GaAlAs
Properties Wavelength: λ = 780nm
Emission duration : continuous
Laser output: < 44.6µW
Error correction Cross-interleave Reed-solomon code
AUDIO
D/A conversion DAC four times oversampling
Frequency response 20-20,000Hz (+1/-3 dB)
Wow and filter Below measurable limits
No. of channels 2 Channel (stereo)
Output level Phones : 20mW (32Ω)
Bass boost effect (100Hz) +8 dB
GENERAL
Power requirements - 2 x LR6 "AA" alkaline battery
- DC in 6V jack accepts AC power adaptor
(centre positive)
Power consumption 0.8W (DC 3V) under normal condition
Dimension Approx. 128 (W) x 28.5 (H) x 137 (D) mm
Weight Approx. 200g not including battery
15
Page 16

THE HITACHI ATAGO BUILDING,
No. 15 – 12 Nishi Shinbashi, 2 – Chome,
Minato – Ku, Tokyo 105-8430, Japan.
HITACHI HOME ELECTRONICS
(EUROPE) LTD.
Dukes Meadow
Millboard Road
Bourne End
Buckinghamshire
SL8 5XF
UNITED KINGDOM
Tel: 01628 643000
Fax: 01628 643400
Email:
consumer-service@hitachi-eu.com
HITACHI SALES EUROPA GmbH
Am Seestern 18
40547 Dusseldorf
GERMANY
Tel: 02 11 - 5 29 15 - 0
Fax: 02 11 - 5 29 15 - 190
Email:
HSE-DUS.Service@Hitachi-eu.com
HITACHI SALES ITALIANA SPA
Via T. Gulli n.39
20147 MILAN
ITALY
Tel: 02 487861
Fax: 02 48786381
Servizio Clienti
Tel: 02 38073415
Email:
customerservice.italy@hitachi-eu.com
HITACHI FRANCE S.A.
BP 45, 69674 Bron Cedex
FRANCE
Tel: 04 - 72.14.29.70
Fax: 04 - 72.14.29.99
Email:
conso-hitachi@compuserve.com
ITEM N.V./S.A. (INTERNATIONAL TRADE FOR
ELECTRONIC MATERIAL & MEDIA N.V./S.A.)
UCO Tower – Bellevue, 17
B – 9050 GENT
BELGIUM (for BENELUX)
Tel: 09 230 48 01
Fax: 09 230 96 80
Email:
www.hitachi-consumer-eu.com
Hitachi, Ltd. Tokyo Japan
International Sales Division
Tel: 03 35022111
HITACHI HOME ELECTRONICS
(HELLAS) S.A.
364 Kifisias & 1 Delfon str.
152 33 Halandri
Athens
GREECE
Tel: +301 6837200
Fax: +301 6835694
Email:
HITACHI SALES IBERICA, S.A.
Gran Via Carlos III, 101-1
08028 Barcelona
SPAIN
Tel: 93 409 2550
Fax: 93 491 3513
Email:
HITACHI HOME ELECTRONICS
(NORDIC) AB
Box 77
S-164 94 KISTA
SWEDEN
Tel: 08 562 711 00
Fax: 08 562 711 11
Email:
HITACHI HOME ELECTRONICS
NORWAY
Brugata 14
N-0186
OSLO
NORWAY
Tel: 02205 9060
Fax: 02205 9061
Email:
hitachi.item@skynet.be
service.hellas@hitachi-eu.com
rplan@hitachi-eu.com
csgswe@hitachi-eu.com
csgnor@hitachi-eu.com
 Loading...