

Page 1
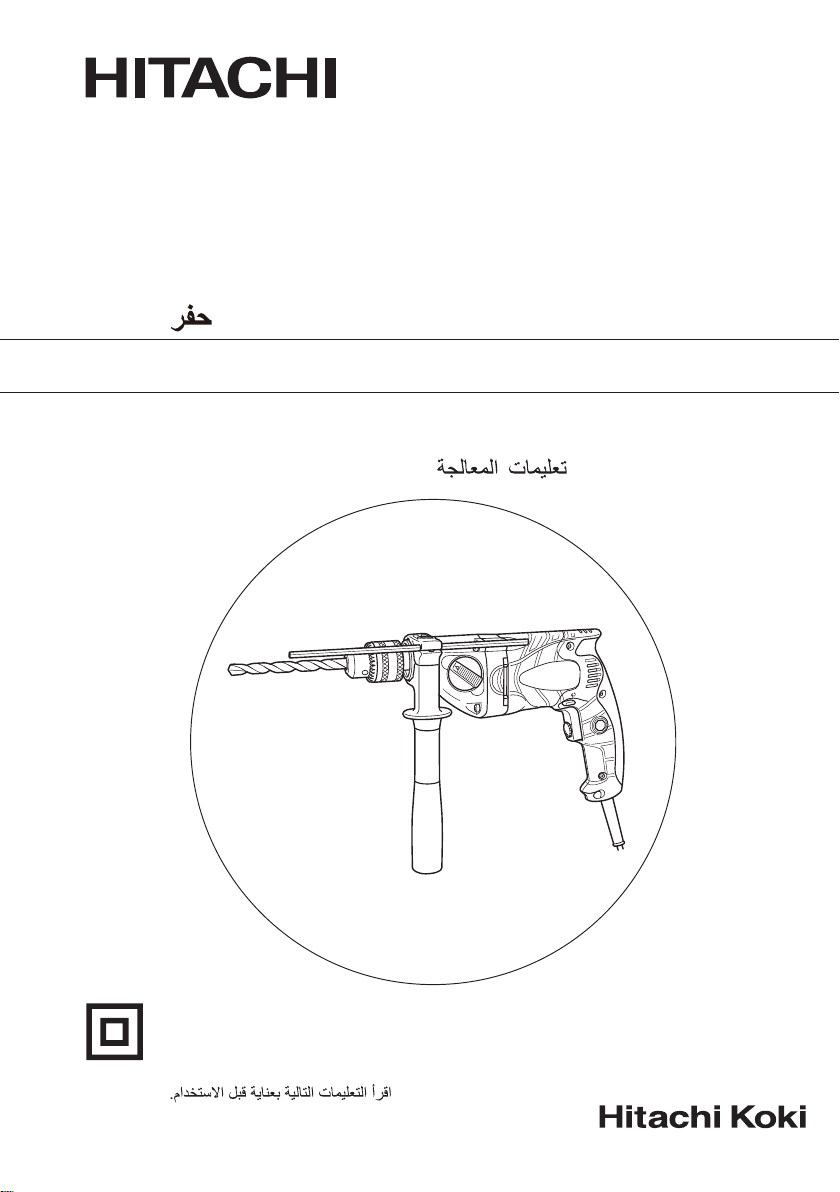
Drill
Taladro
手提電鑽
드릴
Bor
D 10VJ • D 13VH
Handling instructions
Instrucciones de manejo
使用說明書
취급 설명서
Petunjuk pemakaian
Read through carefully and understand these instructions before use.
Leer cuidadosamente y comprender estas instrucciones antes del uso.
使用前務請詳加閱讀
본 설명서를 자세히 읽고 내용을 숙지한 뒤 제품을 사용하십시오.
Bacalah dengan cermat dan pahami petunjuk ini sebelum menggunakan perkakas.
Page 2

12
2
1
5
4
6
3
3
34
5
3
4
4
6
6
4
5
7
56
!
9
8
7
0
34
78
@
#
7
34
2
Page 3
9
&
$
^
%
8
English Español
1
Drill chuck Portabrocas
2
Chuck wrench Llave
3
Tighten Apretar
4
Loosen Afl ojar
5
Sleeve Manguito
6
Retaining ring Anillo de retención
7
Side handle Asa lateral
8
Switch trigger Interruptor de gatillo
9
Push button Botón pulsador
0
mark Marca
!
mark Marca
@
Depth gauge Calibrador de profundidad
#
Gear shift dial Dial de cambio
$
Speed control dial Dial de control de velocidad
%
High speed Alta velocidad
^
Low speed Baja velocidad
&
Stopper Tope
Bahasa Indonesia
Cengkam bor
Pemutar cengkam
Menguatkan
Melonggarkan
Lengan
Cincin penahan
Handel sisi
Pemicu sakelar
Tombol tekan
Penanda
Penanda
Pengukur kedalaman
Putaran penggeser gigi
Putaran kendali kecepatan
Kecepatan tinggi
Kecepatan rendah
Penyetop
1
드릴 척
2
척 렌치
3
조임
4
풀기
5
슬리브
6
멈춤 링
7
사이드 핸들
8
스위치 트리거
9
푸시 버튼
0
표시
!
표시
@
깊이 게이지
#
변속 기어 다이얼
$
속도 조절 다이얼
%
고속
^
저속
&
스토퍼
한국어
中國語
電鑽卡盤
卡盤扳手
擰緊
鬆開
套管
扣環
邊柄
起動器開關
按鈕
(右側)標記
(左側)標記
深度計
變速轉盤
速度控制撥盤
高速
低速
止動器
3
Page 4

English
GENERAL SAFETY RULES
WARNING!
Read all instructions
Failure to follow all instructions listed below may result in
electric shock, fire and/or serious injury.
The term “power tool” in all of the warnings listed below
refers to your mains operated (corded) power tool or battery
operated (cordless) power tool.
SAVE THESE INSTRUCTIONS
1) Work area
a) Keep work area clean and well lit.
Cluttered and dark areas invite accidents.
b) Do not operate power tools in explosive
atmospheres, such as in the presence of flammable
liquids, gases or dust.
Power tools create sparks which may ignite the dust
of fumes.
c) Keep children and bystanders away while operating
a power tool.
Distractions can cause you to lose control.
2) Electrical safety
a) Power tool plugs must match the outlet.
Never modify the plug in any way.
Do not use any adapter plugs with earthed
(grounded) power tools.
Unmodified plugs and matching outlets will reduce
risk of electric shock.
b) Avoid body contact with earthed or grounded
surfaces such as pipes, radiators, ranges and
refrigerators.
There is an increased risk of electric shock if your
body is earthed or grounded.
c) Do not expose power tools to rain or wet conditions.
Water entering a power tool will increase the risk of
electric shock.
d) Do not abuse the cord. Never use the cord for
carrying, pulling or unplugging the power tool.
Keep cord away from heat, oil, sharp edges or
moving parts.
Damaged or entangled cords increase the risk of
electric shock.
e) When operating a power tool outdoors, use an
extension cord suitable for outdoor use.
Use of a cord suitable for outdoor use reduces the
risk of electric shock
3) Personal safety
a) Stay alert, watch what you are doing and use
common sense when operating a power tool.
Do not use a power tool while you are tired or
under the influence of drugs, alcohol or medication.
A moment of inattention while operating power
tools may result in serious personal injury.
b) Use safety equipment. Always wear eye protection.
Safety equipment such as dust mask, non-skid safety
shoes, hard hat, or hearing protection used for
appropriate conditions will reduce personal injuries.
c) Avoid accidental starting. Ensure the switch is in
the off position before plugging in.
Carrying power tools with your finger on the switch
or plugging in power tools that have the switch on
invites accidents.
4
d) Remove any adjusting key or wrench before turning
the power tool on.
A wrench or a key left attached to a rotating part of
the power tool may result in personal injury.
e) Do not overreach. Keep proper footing and balance
at all times.
This enables better control of the power tool in
unexpected situations.
f) Dress properly. Do not wear loose clothing or
jewellery. Keep your hair, clothing and gloves away
from moving parts.
Loose clothes, jewellery or long hair can be caught
in moving parts.
g) If devices are provided for the connection of dust
extraction and collection facilities, ensure these are
connected and properly used.
Use of these devices can reduce dust related hazards.
4) Power tool use and care
a) Do not force the power tool. Use the correct power
tool for your application.
The correct power tool will do the job better and
safer at the rate for which it was designed.
b) Do not use the power tool if the switch does not
turn it on and off.
Any power tool that cannot be controlled with the
switch is dangerous and must be repaired.
c) Disconnect the plug from the power source before
making any adjustments, changing accessories, or
storing power tools.
Such preventive safety measures reduce the risk of
starting the power tool accidentally.
d) Store idle power tools out of the reach of children
and do not allow persons unfamiliar with the power
tool or these instructions to operate the power
tool.
Power tools are dangerous in the hands of untrained
users.
e) Maintain power tools. Check for misalignment or
binding of moving parts, breakage of parts and any
other condition that may affect the power tools
operation.
If damaged, have the power tool repaired before
use.
Many accidents are caused by poorly maintained
power tools.
f) Keep cutting tools sharp and clean.
Properly maintained cutting tools with sharp cutting
edges are less likely to bind and are easier to control.
g) Use the power tool, accessories and tool bits etc.,
in accordance with these instructions and in the
manner intended for the particular type of power
tool, taking into account the working conditions
and the work to be performed.
Use of the power tool for operations different from
intended could result in a hazardous situation.
5) Service
a) Have your power tool serviced by a qualified repair
person using only identical replacement parts.
This will ensure that the safety of the power tool is
maintained.
PRECAUTION
Keep children and infirm persons away.
When not in use, tools should be stored out of reach of
children and infirm persons.
Page 5
English
PRECAUTIONS ON USING DRILL
1. Before drilling into walls, ceilings or floors, ensure
that there are no concealed power cables inside.
2. Use auxiliary handles supplied with the tool.
Loss of control can cause personal injury.
3. Do not wear gloves made of stuff liable to roll up
such as cotton, wool, cloth or string, etc.
SPECIFICATIONS
Model D10VJ D13VH
Voltage (by areas)* (110 V, 220 V, 230 V, 240 V)
Power input 690 W*
Speed change 1 2 1 2
No load speed
Capacity
Weight (without cord) 1.8 kg 1.9 kg
*Be sure to check the nameplate on product as it is subject to change by areas.
STANDARD ACCESSORIES
(1) Chuck Wrench (Spec. only for keyed chuck) ........... 1
(2) Side Handle ................................................................ 1
(3) Depth Gauge .............................................................. 1
Standard accessories are subject to change without
notice.
APPLICATIONS
䡬 Boring holes in metal, wood and plastic.
PRIOR TO OPERATION
1. Power source
Ensure that the power source to be utilized conforms
to the power requirements specified on the product
nameplate.
2. Power switch
Ensure that the power switch is in the OFF position. If
the plug is connected to a receptacle while the power
switch is in the ON position, the power tool will start
operating immediately, inviting serious accident.
3. Extension cord
When the work area is removed from the power
source, use an extension cord of sufficient thickness
and rated capacity. The extension cord should be
kept as short as practicable.
4. Selecting the appropriate drill bit
䡬 When boring metal or plastic
Use an ordinary metalworking drill bit.
䡬 When boring wood
Use an ordinary woodworking drill bit.
However, when drilling 6.5 mm or smaller holes, use
a metalworking drill bit.
5. Mounting and dismounting of the bit
For keyed chuck (Fig. 1)
(1) Open the chuck jaws, and insert the bit into the
chuck.
Forward rotation 0 – 1000/min 0 – 3000/min 0 – 1000/min 0 – 3000/min
Reverse rotation 0 – 600/min 0 – 1800/min 0 – 600/min 0 – 1800/min
Steel 10 mm 6 mm 13 mm 8 mm
Wood 25 mm 13 mm 40 mm 25 mm
(2) Place the chuck wrench in each of the three holes
in the chuck, and turn it in the clockwise direction
(viewed from the front side). Tighten securely.
(3) To remove the bit, place the chuck wrench into one
of the holes in the chuck and turn it in the
counterclockwise direction.
For keyless chuck (Fig. 2, 3)
(1) Mounting the bit
Turn the sleeve counterclockwise and open the chuck.
After inserting the drill bit into the chuck as far it will
go, grip the retaining ring and close the chuck by
turning the sleeve clockwise as viewed from the front.
(2) Dismounting the bit
Grip the retaining ring and open the chuck by turning
the sleeve counterclockwise.
NOTE
When the sleeve does not become loose any further,
fix the side handle to retaining ring, hold side handle
firmly, then turn the sleeve to loosen by hand (Fig. 4).
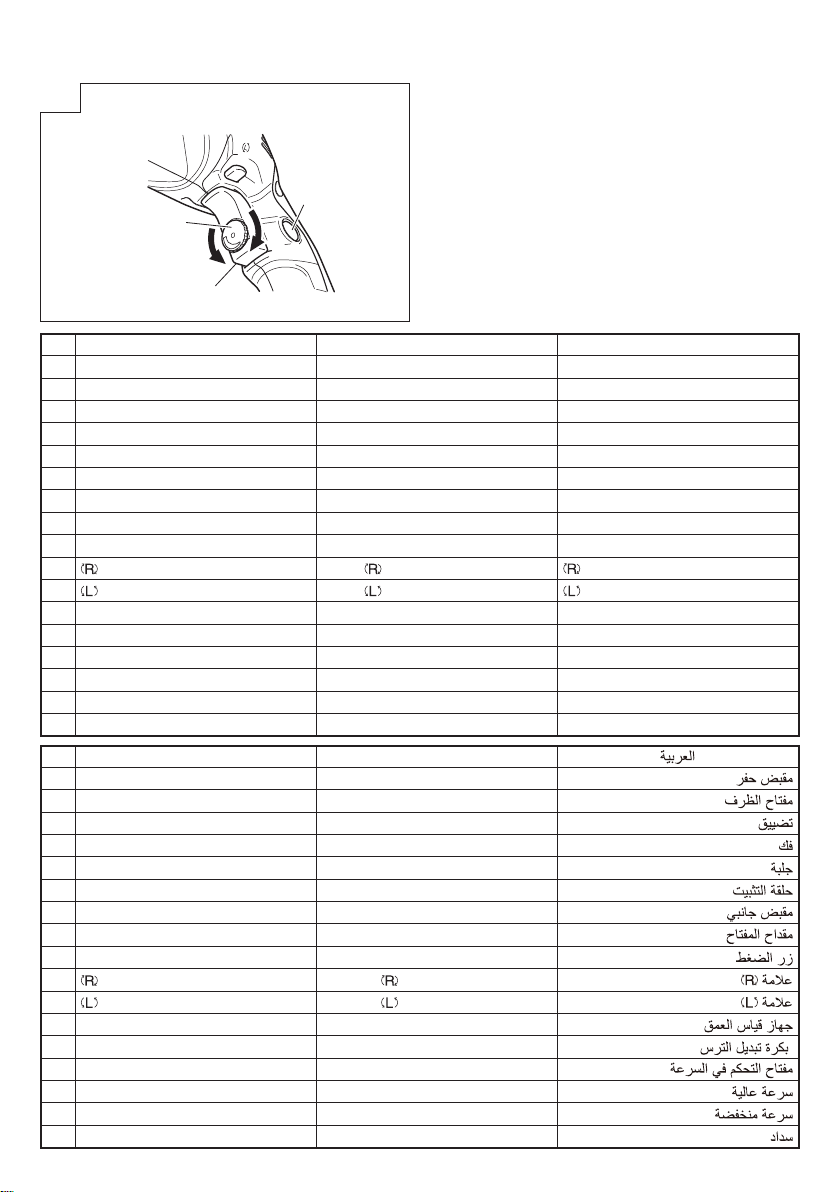
6. Check the rotational direction (Fig. 5)
The bit rotates clockwise (viewed from the rear side)
by pushing the R-side of the push button.
The L-side of the push button is pushed to turn the bit
counterclockwise.
and R marks are provided on the body.)
(The
7. Fixing the side handle (Fig. 6)
L
Attach the side handle to the mounting part.
Rotate the side handle grip in a clockwise direction
to secure it.
Set the side handle to a position that is suited to the
operation and then securely tighten the side handle
grip.
To attach a depth gauge on the side handle, insert
the gauge into the U-shaped groove on the side
handle, adjust the position of the depth gauge in
accordance with the desired depth of the hole, and
firmly tighten the side handle grip (Fig. 7).
5
Page 6

English
8. High-speed/Low-speed changeover
Prior to changing speed, ensure that the switch is in
the OFF position, and the drill has come to a complete
stop.
To change speed, rotate the gear shift dial as indicated
by the arrow in Fig. 8. The numeral “1” engraved on
the drill body denotes low speed, the numeral “2”
denotes high speed.
If it is hard to turn the gear shift dial, turn the chuck
slightly in either direction and then turn the gear shift
dial again.
HOW TO USE
1. Switch operation
䡬 When the trigger is depressed, the tool rotates. When
the trigger is released, the tool stops.
䡬 The rotational speed of the drill can be controlled by
varying the amount that the trigger switch is pulled.
Speed is low when the trigger switch is pulled slightly
and increases as the trigger switch is pulled more.
䡬 The desired rotation speed can be pre-selected with
the speed control dial.
Turn the speed control dial clockwise for higher speed
and counterclockwise for lower speed (Fig. 9).
䡬 Pulling the trigger and pushing the stopper, it keeps
the switched-on condition which is convenient for
continuous running. When switching off, the stopper
can be disconnected by pulling the trigger again.
CAUTION
If the L-side of push button is pressed for reverse bit
rotation, the stopper cannot be used.
2. Drilling
䡬 When drilling, start the drill slowly, and gradually
increasing speed as you drill.
䡬 Always apply pressure in a straight line with the bit.
Use enough pressure to keep drilling, but do not
push hard enough to stall the motor or deflect the bit.
䡬 To minimize stalling or breaking through the material,
reduce pressure on drill and ease the bit through the
last part of the hole.
䡬 If the drill stalls, release the trigger immediately,
remove the bit from the work and start again. Do not
click the trigger on and off in an attempt to start a
stalled drill. This can damage the drill.
䡬 The larger the drill bit diameter, the larger the reactive
force on your arm.
Be careful not to lose control of the drill because of
this reactive force.
To maintain firm control, establish a good foothold,
use side handle, hold the drill tightly with both hands,
and ensure that the drill is vertical to the material
being drilled.
2. Inspecting the mounting screws
Regularly inspect all mounting screws and ensure
that they are properly tightened. Should any of the
screws be loose, retighten them immediately. Failure
to do so could result in serious hazard.
3. Maintenance of the motor
The motor unit winding is the very “heart” of the
power tool. Exercise due care to ensure the winding
does not become damaged and/or wet with oil or
water.
4. Inspecting the carbon brushes
For your continued safety and electrical shock
protection, carbon brush inspection and replacement
on this tool should ONLY be performed by a Hitachi
Authorized Service Center.
5. Service parts list
CAUTION
Repair, modification and inspection of Hitachi Power
Tools must be carried out by a Hitachi Authorized
Service Center.
This Parts List will be helpful if presented with the
tool to the Hitachi Authorized Service Center when
requesting repair or other maintenance.
In the operation and maintenance of power tools, the
safety regulations and standards prescribed in each
country must be observed.
MODIFICATION
Hitachi Power Tools are constantly being improved
and modified to incorporate the latest technological
advancements.
Accordingly, some parts may be changed without
prior notice.
NOTE
Due to HITACHI’s continuing program of research and
development, the specifications herein are subject to
change without prior notice.
MAINTENANCE AND INSPECTION
1. Inspecting the drill bits
Since use of an abraded drill bits will cause motor
malfunctioning and degraded efficiency, replace the
drill bits with a new one or resharpening without
delay when abrasion is noted.
6
Page 7

Español
NORMAS GENERALES DE SEGURIDAD
¡ADVERTENCIA!
Lea todas las instrucciones
Si no se siguen las instrucciones de abajo podría producirse
una descarga eléctrica, un incendio y/o daños graves.
El término “herramienta eléctrica” en todas las
advertencias indicadas a continuación hace referencia a
la herramienta eléctrica que funciona con la red de
suministro (con cable) o a la herramienta eléctrica que
funciona con pilas (sin cable).
CONSERVE ESTAS INSTRUCCIONES
1) Área de trabajo
a) Mantenga la zona de trabajo limpia y bien
iluminada.
Las zonas desordenadas y oscuras pueden
provocar accidentes.
b) No utilice las herramientas eléctricas en entornos
explosivos como, por ejemplo, en presencia de
líquidos inflamables, gases o polvo.
Las herramientas eléctricas crean chispas que
pueden hacer que el polvo desprenda humo.
c) Mantenga a los niños y transeúntes alejados
cuando utilice una herramienta eléctrica.
Las distracciones pueden hacer que pierda el control.
2) Seguridad eléctrica
a) Los enchufes de las herramientas eléctricas tienen
que ser adecuados a la toma de corriente.
No modifique el enchufe.
No utilice enchufes adaptadores con herramientas
eléctricas conectadas a tierra.
Si no se modifican los enchufes y se utilizan tomas
de corriente adecuadas se reducirá el riesgo de
descarga eléctrica.
b) Evite el contacto corporal con superficies conectadas
a tierra como tuberías, radiadores y frigoríficos.
Hay mayor riesgo de descarga eléctrica si su
cuerpo está en contacto con el suelo.
c) No exponga las herramientas eléctricas a la lluvia
o a la humedad.
La entrada de agua en una herramienta eléctrica
aumentará el riesgo de descarga eléctrica.
d) No utilice el cable incorrectamente. No utilice el
cable para transportar, tirar de la herramienta
eléctrica o desenchufarla.
Mantenga el cable alejado del calor, del aceite, de
bordes afilados o piezas móviles.
Los cables dañados o enredados aumentan el
riesgo de descarga eléctrica.
e) Cuando utilice una herramienta eléctrica al aire
libre, utilice un cable prolongador adecuado para
utilizarse al aire libre.
La utilización de un cable adecuado para usarse
al aire libre reduce el riesgo de descarga eléctrica.
3) Seguridad personal
a) Esté atento, preste atención a lo que hace y utilice
el sentido común cuando utilice una herramienta
eléctrica.
No utilice una herramienta eléctrica cuando esté
cansado o esté bajo la influencia de drogas,
alcohol o medicación.
La distracción momentánea cuando utiliza
herramientas eléctricas puede dar lugar a
importantes daños personales.
b) Utilice equipo de seguridad. Utilice siempre una
protección ocular.
El equipo de seguridad como máscara para el
polvo, zapatos de seguridad antideslizantes, casco
o protección para oídos utilizado para condiciones
adecuadas reducirá los daños personales.
c) Evite un inicio accidental. Asegúrese de que el
interruptor está en “off” antes de enchufarlo.
El transporte de herramientas eléctricas con el
dedo en el interruptor o el enchufe de
herramientas eléctricas con el interruptor
encendido puede provocar accidentes.
d) Retire las llaves de ajuste antes de encender la
herramienta eléctrica.
Si se deja una llave en una pieza giratoria de la
herramienta eléctrica podrían producirse daños
personales.
e) No se extralimite. Mantenga un equilibrio
adecuado en todo momento.
Esto permite un mayor control de la herramienta
eléctrica en situaciones inesperadas.
f) Vístase adecuadamente. No lleve prendas sueltas
o joyas. Mantenga el pelo, la ropa y los guantes
alejados de las piezas móviles.
La ropa suelta, las joyas y el pelo largo pueden
pillarse en las piezas móviles.
g) Si se proporcionan dispositivos para la conexión
de extracción de polvo e instalaciones de recogida,
asegúrese de que están conectados y se utilizan
adecuadamente.
La utilización de estos dispositivos puede reducir
los riesgos relacionados con el polvo.
4) Utilización y mantenimiento de las herramientas
eléctricas
a) No fuerce la herramienta eléctrica. Utilice la
herramienta eléctrica correcta para su aplicación.
La herramienta eléctrica correcta trabajará mejor
y de forma más segura si se utiliza a la velocidad
para la que fue diseñada.
b) No utilice la herramienta eléctrica si el interruptor
no la enciende y apaga.
Las herramientas eléctricas que no pueden
controlarse con el interruptor son peligrosas y
deben repararse.
c) Desconecte el enchufe de la fuente eléctrica antes
de hacer ajustes, cambiar accesorios o almacenar
herramientas eléctricas.
Estas medidas de seguridad preventivas reducen
el riesgo de que la herramienta eléctrica se ponga
en marcha accidentalmente.
d) Guarde las herramientas eléctricas que no se
utilicen para que no las cojan los niños y no
permita que utilicen las herramientas eléctricas
personas no familiarizadas con las mismas o con
estas instrucciones.
Las herramientas eléctricas son peligrosas si son
utilizadas por usuarios sin formación.
e) Mantenimiento de las herramientas eléctricas.
Compruebe si las piezas móviles están mal
alineadas o unidas, si hay alguna pieza rota u
otra condición que pudiera afectar al
funcionamiento de las herramientas eléctricas.
Si la herramienta eléctrica está dañada, llévela a
reparar antes de utilizarla.
7
Page 8
Español
Se producen muchos accidentes por no realizar
un mantenimiento correcto de las herramientas
eléctricas.
f) Mantenga las herramientas de corte afiladas y
limpias.
Las herramientas de corte correctamente
mantenidas con los bordes de corte afilados son
más fáciles de controlar.
g) Utilice la herramienta eléctrica, los accesorios y
las brocas de la herramienta, etc., de acuerdo con
estas instrucciones y de la manera adecuada para
el tipo de herramienta eléctrica, teniendo en
cuenta las condiciones laborales y el trabajo que
se va a realizar.
La utilización de la herramienta eléctrica para
operaciones diferentes a pretendidas podría dar
lugar a una situación peligrosa.
5) Revisión
a) Lleve su herramienta a que la revise un experto
cualificado que utilice sólo piezas de repuesto
idénticas.
Esto garantizará el mantenimiento de la seguridad
de la herramienta eléctrica.
PRECAUCIÓN
Mantenga a los niños y a las personas enfermas alejadas.
Cuando no se utilicen, las herramientas deben
almacenarse fuera del alcance de los niños y de las
personas enfermas.
PRECAUCIONES AL USAR EL TALADRO
1. Antes de taladrar en paredes, techos o suolos
asegurarse de que no haya empotrados dentro cables
eléctricos.
2. Utilice las asas auxiliares proporcionadas con la
herramienta.
La pérdida de control puede provocar daños
personales.
3. No utilice guantes hechos de un material que se
pueda enrollar, como algodón, lana, paño, cordón,
etc.
ESPECIFICACIONES
Modelo D10VJ D13VH
Voltaje (por áreas)* (110 V, 220 V, 230 V, 240 V)
Acometida 690 W*
Alteración de velocidad 1 2 1 2
Velocidad de
marcha en vacío
Capacidad
Peso (sin cable) 1,8 kg 1,9 kg
*Verificar indefectiblemente los datos de la placa de características de la máquina, pues varían de acuerdo al país de
destino.
Rotación hacia delante 0 – 1000/min 0 – 3000/min 0 – 1000/min 0 – 3000/min
Rotación hacia atrás 0 – 600/min 0 – 1800/min 0 – 600/min 0 – 1800/min
Acero 10 mm 6 mm 13 mm 8 mm
Madera 25 mm 13 mm 40 mm 25 mm
ACCESORIOS ESTANDAR
(1) Velvedor de mandril (Espec. sólo para mandril
estriado) ..................................................................... 1
(2) Asidero lateral ........................................................... 1
(3) Calibrador de profundidad ....................................... 1
Accesorios estándar están sujetos a cambio sin previo
aviso.
APLICACIONES
䡬 Por acción de orificios en metal, madera y plástico.
ANTES DE LA PUESTA EN MARCHA
1. Alimentación
Asegurarse de que la acometida de red que ha de ser
utilizada es conforme a las exigencias de corriente
espacificadas en la placa de características del
producto.
8
2. Conmutador de alimentación
Asegurarse de que el conmutador de acometida está
en posición OFF (desconectado). Si el enchufe está
conectado a la caja del enchufe mientras el
conmutador de acometida está en posición ON
(conectado) la herramienta eléctrica empezará a
tradajar inmediatamente, provocando un serio
accidente.
3. Cable de prolongación
Cuando está alejada el área de trabajo de la red de
acometida, usar un cable de prolongación de un
grosor suficiente y potencia nominal. El cable de
prolongación debe ser mantenido o más corto posible.
4. Seleccionar la broca de taladro apropiada
䡬 Perforando metal o plástico
Usar una broca de taladro ordinaria para trabajos en
metal.
䡬 Perfornado madera
Usar una broca de taladro ordinaria para trabajos en
madera. En cualquier caso, perforando orificios de
6,5 mm, o menos, usar una broca de taladro para
trabajos en metal.
Page 9

Español
5. Montaje y desmontaje de las brocas
Para mandril estriado (Fig. 1)
(1) Abra las mordazas del portabrocas e inserte la broca
en el portabrocas.
(2) Coloque la llave del portabrocas en cada uno de los
tres orificios del portabrocas, y gírela en el sentido
de las agujas del reloj (visto desde el lado delantero).
Apriete firmemente.
(3) Para sacar la broca, coloque la llave del portabrocas
en uno de los orificios del portabrocas y gírela en el
sentido contrario a las agujas del reloj.
Para portabrocas sin llave (Fig. 2, 3)
(1) Montaje de la broca
Gire el manguito en sentido contrario a las agujas del
reloj y abra el portabrocas. Después de haber
insertado la broca en el portabrocas hasta donde
pueda entrar, sujete el anillo de retención y cierre el
portabrocas girando el manguito hacia la derecha,
visto desde la parte frontal.
(2) Desmontaje de la broca
Sujete al anillo de retención y abra el portabrocas
girando el manguito hacia la izquierda.
NOTA
Cuando el manguito no se afloje más, fije el asa
lateral en el anillo de retención, sujete firmemente el
asa, y después gire el manguito para aflojarlo
manualmente (Fig. 4).
6. Verifique la dirección de rotación (Fig. 5)
La broca gira en el sentido de las agujas del reloj
(visto desde el lado trasero) empujando el lado R del
botón.
Si empuja el lado L del botón, la broca girará en
sentido contrario a las agujas del reloj.
(Las marcas
7. Montar el asidero lateral (Fig. 6)
Instale el asidero lateral en la parte de montaje.
Gire la empuñadura del asidero lateral hacia la
derecha para asegurarla.
Coloque el asidero lateral en la posición adecuada
para la operación, y después apriete firmemente la
empuñandura del mismo. Para aplicar el calibrador
de profundidad en el asidero lateral, insertar el
calibrador en el hueco en forma de U en el asidero
lateral, ajustar la posición del calibrador de
profundidad de acuerdo con la profundidad de orificio
deseada y apretar firmemente la empuñadura del
asidero lateral (Fig. 7).
8. Alteración de velocidad alta y velocidad baja:
Antes de alterar la velocidad, asegurarse de que el
conmutador esta en posición OFF (desconectado) y
que el taladrador haya parado completamente.
Para alterar la velocidad girar el dial de cambio como
indicada por la flecha en Fig. 8. El numeral “1”
grabado en el cuerpo del taladrador denota velocidad
baja, el numeral “2” denota velocadad alta.
Si le cuesta girar el dial de cambio, gire el mandril
ligeramente en cualquier dirección y luego vuelva a
girar el dial de cambio.
y R están provistas en el cuerpo).
L
COMO SE USA
1. Operación del interruptor
䡬 La herramienta gira al presionar el interruptor de
gatillo. Al soltar el gatillo, la herramienta se detiene.
䡬 La velocidad de rotación del taladro puede controlarse
variando la fuerza de apriete del interruptor de gatillo.
Apretando ligeramente el interruptor de gatillo la
velocidad es lenta, pero aumenta mientras más se lo
aprieta.
䡬 Es posible seleccionar previamente la velocidad de
rotación deseada con el dial de control de velocidad.
Gire el dial de control de velocidad en el sentido a las
agujas del reloj para aumentar la velocidad, y en
sentido contrario para disminuirla (Fig. 9).
䡬 Tire del gatillo y empuje el tope para mantener activada
la alimentación, lo cual es conveniente para un
funcionamiento continuo. Cuando se lo desconecta, el
tope puede quitarse tirando del gatillo otra vez.
PRECAUCION
Si se pulsa el lado L del botón pulsador para girar la
broca hacia atrás, no se puede usar el tope.
2. Taladrado
䡬 Para taladrar, inicie el taladro lentamente, y aumente
gradualmente la velocidad.
䡬 Siempre aplique presión en línea recta a la broca.
Aplique una presión suficiente para seguir taladrando,
pero no empuje con una fuerza tal que pueda provocar
el calado del motor o la desviación de la broca.
䡬 Para reducir al mínimo el calado o la rotura a través del
material, disminuya la presión aplicada al taladro y
mueva la broca a través de la última parte del orificio.
䡬 Si el taladro se atasca, suelte inmediatamente el
gatillo, saque la broca de la pieza de trabajo y empiece
otra vez. No haga clic en el gatillo para conectarlo y
desconectarlo con la intención de poner en marcha
el taladro atascado, pues se podrá dañar el taladro.
䡬 Cuanto mayor sea el diámetro de la broca de taladro,
mayor será la fuerza de reacción sobre su brazo.
Asegúrese de no perder el control del taladro debido
a esta fuerza de fricción.
Para mantener un control firme, haga pie firme, utilice
el asa lateral, sujete el taladro firmemente con ambas
manos, y asegúrese de mantener el taladro vertical
con respecto al material que se está taladrando.
MANTENIMIENTO E INSPECCION
1. Inspección de las brocas de barrena
Debido a que el uso de brocas de barrena desgastadas
producen fallos de funcionamiento del motor y una
disminución de la eficiencia, cámbielas inmediatamente
por otras nuevas o reafílelas cuando note abrasión en
las mismas.
2. Inspeccionar la broca de taladro y el macho de roscar
Como el uso continuado de una broca o macho de
roscar desgastados disminuye la eficiencia operativa
y causa un posible recalentamiento del motor,
reemplazar o afilar la broca o el macho sin demora si
se nota un excesivo desgaste.
3. Mantenimiento del motor
La unidad de devanado del motor es el verdadero
“corazón” del herramientas eléctricas. Prestar el
mayor cuidado a asegurarse de que el devando no se
dañe y/o se humedezca con aceite o agua.
9
Page 10

Español
4. Inspección de las escobillas
Por motivos de seguridad contra descargas eléctricas,
la inspección y el reemplazo de las escobillas deberán
realizarse SOLAMENTE en un Centro de Servicio
Autorizado de Hitachi.
5. Lista de repuestos
PRECAUCIÓN
La reparación, modificación e inspección de las
herramientas eléctricas Hitachi deben ser realizadas
por un Centro de Servicio Autorizado de Hitachi.
Esta lista de repuestos será de utilidad si es presentada
junto con la herramienta al Centro de Servicio
Autorizado de Hitachi, para solicitar la reparación o
cualquier otro tipo de mantenimiento.
En el manejo y el mantenimiento de las herramientas
eléctricas, se deberán observar las normas y
reglamentos vigentes en cada país.
MODIFICACIONES
Hitachi Power Tools introduce constantemente
mejoras y modificaciones para incorporar los últimos
avances tecnológicos.
Por consiguiente, algunas partes pueden ser
modificadas sin previo aviso.
OBSERVACION
Debido al programa continuo de investigación y desarollo
de HITACHI estas especificaciones están sujetas a cambio
sin preaviso.
10
Page 11

- -
-
-
-
-
-
-
-
-
-
-
-
-
-
-
-
-
-
-
-
-
-
-
-
-
-
-
-
-
-
- -
-
-
-
-
-
-
-
-
-
-
-
-
-
-
-
-
-
-
-
-
-
-
-
-
11
Page 12

-
-
-
-
-
-
-
-
-
-
-
䡬 -
12
-
-
-
-
-
Page 13

䡬
L
R
-
-
䡬
-
-
䡬
-
䡬 -
-
-
䡬 -
-
-
-
䡬
-
-
-
-
-
䡬 -
-
䡬 -
-
-
䡬
-
䡬
-
-
䡬 -
-
-
-
-
-
-
-
-
-
-
-
-
13
Page 14

-
-
-
-
-
-
-
- -
-
-
14
Page 15

한국어
일반적인 안전 수칙
경고!
설명서를 자세히 읽으십시오.
설명서의 내용에 따르지 않을 시에는 감전 사고나 화재가
발생할 수 있으며 심각한 부상을 입을 수도 있습니다.
아래에 나오는 ‘전동 툴’이란 용어는 플러그를 콘센트에
연결해 유선 상태로 사용하는 제품 또는 배터리를 넣어 무선
상태로 사용하는 제품을 가리킵니다.
설명서의 내용을 숙지하십시오.
1) 작업 공간
a) 작업 공간을 깨끗하게 청소하고 조명을 밝게
유지하십시오.
작 업 공간이 정리되어 있지 않거나 어두우면 사고가
날 수 있습니다.
b) 인화성 액체나 기체 또는 먼지 등으로 인해 폭발
위험이 있는 환경에서는 전동 툴을 사용하지
마십시오.
전동 툴을 사용하다 보면 불꽃이 튀어서 먼지나
기체에 불이 붙을 수 있습니다.
c) 어린이를 비롯하여 사용자 외에는 작업장소에
접근하지 못하도록 하십시오.
주의가 산만해지면 문제가 생길 수 있습니다.
2) 전기 사용시 주의사항
a) 전동 툴 플러그와 콘센트가 일치해야 합니다.
플러그를 절대로 변형하지 마십시오.
접지된 전동 툴에는 어댑터 플러그를 사용하지
마십시오.
플러그를 변형하지 않고 알맞은 콘센트에 꽂아
사용하면, 감전 위험을 줄일 수 있습니다.
b) 파이프, 라디에이터, 레인지, 냉장고 등 접지된
표면에 몸이 닿지 않도록 주의하십시오.
작 업자의 몸이 접지되면, 감전될 위험이 있습니다.
c) 전동 툴에 비를 맞히거나 젖은 상태로 두지 마 십시오.
물이 들어가면 감전될 위험이 있습니다.
d) 코드를 조심해서 다루십시오. 전동 툴을 들거나
당기거나 콘 센트에서 뽑으려고 할 때 코 드를
잡아당기면 안 됩니다.
열, 기름, 날카로운 물건, 움직이는 부품 등으로부터
코드를 보호하십시오.
코드가 파손되거나 엉키면 감전될 위험이
높아집니다.
e) 실외에서 전동 툴 을 사용할 때는 실외 용도에 적합한
연장선을 사용하십시오.
실외 용도에 적합한 코드를 사용해야 감전 위험이
줄어듭니다.
3) 사용자 주의사항
a) 전동 툴을 사용할 때는 작업에 정신을 집중하고,
상식의 범위 내에서 사용하십시오.
약물을 복용하거나 알코올을 섭취한 상태 또는
피곤한 상태에서는 전동 툴을 사용하지 마십시오.
전동 툴을 사용할 때 주의가 흐트러지면 심각한
부상을 입을 수 있습니다.
b) 안전 장비를 사용하십시오. 항상 눈 보호 장구를
착용해야 합니다.
먼지 보호 마스크, 미끄럼 방지 신발, 안전모, 청각
보호 장비 등을 사용하면 부상을 줄일 수 있습니다.
c) 전동 툴이 갑자기 작동되지 않도록 합니다. 플러그를
꽂기 전에 스위치가 ‘OFF’ 위치에 있는지
확인하십시오.
손가락을 스위치에 접촉한 채 전동 툴을 들거나
스위치가 켜진 상태로 플러그를 꽂으면 사고가 날 수
있습니다.
d) 전원을 켜기 전에 조정 키 또는 렌치를 반드시
제거해야 합니다.
전동 툴의 회전 부위에 키 또는 렌치가 부착되어
있으면, 부상을 입을 수 있습니다.
e) 작업 대상과의 거리를 잘 조절하십시오. 알맞은
발판을 사용하고 항상 균형을 잡고 있어야 합니다.
그렇게 하면 예기치 못한 상황에서도 전동 툴을 잘
다룰 수 있습니다.
f) 알맞은 복장 을 갖추십시오. 헐렁한 옷이나 장신구를
착용하면 안 됩니다. 머리카락, 옷, 장갑 등을
움직이는 부품으로부터 보호하 십시오.
헐렁한 옷이나 장신구, 긴 머리카락이 부품에 딸려
들어갈 수도 있습니다.
g) 분진 추출 및 집진 장비에 연결할 수 있는 장치가
제공되는 경우, 그러한 장치가 잘 연결되어 있고
제대로 작동하는지 확인하십시오.
이러한 장치를 사용하면, 먼지와 관련된 사고를 줄일
수 있습니다.
4) 전동 툴 사용 및 관리
a) 전동 툴을 아무 곳에나 사용하지 마 십시오. 용도에
알맞은 전동 툴을 사용하 십시오.
적절한 전동 툴을 사용하면, 정상 속도로 안전하고
효과적으로 작업을 수행할 수 있습니다.
b) 스위치를 눌렀을 때 전동 툴이 켜지거나 꺼지지
않으면 사용하지 마십시오.
스위치로 작동시킬 수 없는 전동 툴은 위험하므로,
수리를 받아야 합니다.
c) 전동 툴을 조정하거나 부속품을 바꾸거나 보관할
때는 반드시 전원에서 플러그를 빼야 합니다.
이러한 안전 조치를 취해야 전동 툴이 갑자기 켜지는
위험을 피할 수 있습니다.
d) 사용하지 않는 전동 툴은 어린이의 손이 닿지 않는
곳에 보관하고, 사용법을 잘 모르는 사람이 사용하지
못하도록 하십시오.
전동 툴은 미숙련자가 다루기에는 매우 위험한
물건입니다.
e) 전동 툴을 잘 관리하십시오. 움직이는 부품이 잘못
결합되어 있거나 꽉 끼어 움 직이지 못하게 되어 있지
않은지 점검하십시오. 또한 전동 툴의 작동에 영향을
미칠 수 있는 기타 파손이 없는지 확인하십시오.
파손된 부분이 있는 경우, 사용하기 전에
수리하십시오.
전동 툴을 제대로 관리하지 못해서 생기는 사고가
많습니다.
f) 절삭 툴은 날카 롭고 청결한 상태로 관리하십시오.
절삭 날을 날카로운 상태로 잘 관리하면, 원활하게
잘 움직이며 다루기도 훨씬 편합니다.
g) 설명서를 참조하여 전동 툴과 부속품, 툴 비트 등을
사용하십시오. 또한 작업 환 경과 수행할 작업의
성격을 고려해서 알 맞은 종류의 전동 툴 을 선택하고,
적절한 방식으로 사용하십시오.
원래 목적과 다른 용도로 전동 툴을 사용하면 위험한
사고가 날 수 있습니다.
5) 서비스
a) 자격을 갖춘 전문가에게 서비스를 받고, 항상 원래
부품과 동일한 것으로 교체해야 합니다.
그렇게 하면 전동 툴을 보다 안전하게 사용할 수
있습니다.
주의사항
어린이나 노약자가 가까이 오지 못하도록 하십시오.
전동 툴을 사용하지 않을 때는 어린이나 노약자의 손이 닿지
않는 곳에 보관해야 합니다.
15
Page 16

한국어
임팩트 드릴 사용 시의 주의사항
1. 벽, 천장 또는 바닥에 구멍을 뚫기 전에 전력 케이블 또는
관로가 매립되어 있지 않은지 확인하십시오.
2. 함께 제공되는 보조 핸들을 사용하십시오.
장비를 제대로 다루지 못하면 부상을 입을 수 있습니다.
3. 면, 모, 천 또는 끈과 같이 말려 올라가기 쉬운 재료로
만든 장갑을 착용하지 마십시오.
사양
모델 D10VJ D13V H
전압(지역별로 차이가 있음)
소비 전력 690 W
속도 변경 1 2 1 2
무부하 속도
작업 능력
중량(코드 제외) 1.8 kg 1.9 kg
* 지역별로 차이가 있을 수 있으므로, 제품 명판의 기재내용을 반드시 확인하십시오.
정회전 0 - 1000 /분 0 - 300 0 /분 0 - 1000 /분 0 - 3000 /분
역회전 0 - 600 /분 0 - 1800 /분 0 - 600 /분 0 - 1800 /분
강철 10 mm 6 mm 13 mm 8 mm
목재 25 mm 13 mm 40 mm 25 mm
기본 부속품
(1) 척 렌치(키가 있는 척의 전용 사양) ...................... 1
(2) 사이드 핸들 .................................................1
(3) 깊이 게이지 .................................................1
기본 부속품은 예고 없이 변경될 수 있습니다.
용도
○ 금속, 목재 및 플라스틱에 구멍 뚫기.
사용 전 주의사항
1. 전원
사 용 전원이 제품 명판에 표시된 전원 요건과 부합하는지
확인하십시오.
2. 전원 스위치
전원 스위치가‘OFF’위치에 있는지 확인하십시오. 전원
스위치가‘ON’위치에 있는 상태로 플러그를 꽂으면,
제품이 갑자기 작동하기 시작해서 심각한 사고가 날 수
있습니다.
3. 연장선
작 업 공간에 전원이 없으면, 두께가 충분한 정격 용량의
연장선을 사용하십시오. 연장선은 가능한 한 짧을수록
좋습니다.
4. 적합한 드릴 비트 선택
○ 금속 또는 플라스틱에 구멍을 뚫을 때
일반 금속 작업용 드릴 비트를 사용하십시오.
○ 목재에 구멍을 뚫을 때
보통 목재 작업용 드릴 비트를 사용하십시오.
그 러나 6 .5 m m 이하의 구 멍을 뚫 을 때 금 속 작업용 드릴
비트를 사용하십시오.
5. 비트의 장착과 제거
키 있는 척의 경우 (그림 1)
(1) 척 조를 열고 비트를 척에 삽입하십시오.
(2) 척 렌치를 척에 있는 세 개의 구멍 각각에 넣고
시계 방향으로 돌리십시오(앞쪽에서 볼 때). 단단히
조이십시오.
(3) 비트를 제거하려면 척 렌치를 척에 있는 구멍들 가운데
하나에 넣고 시계 반대 방향으로 돌리십시오.
*
(110 V, 220 V, 230 V, 240 V)
*
키 없는 척의 경우 (그림 2, 3)
(1) 비트 장착
슬리브를 시계 반대 방향으로 돌리고 척을 엽니다. 드릴
비트를 척에 최대한 끼운 후, 멈춤 링을 꽉 잡고 슬리브를
정면에서 봤을 때 시계 방향으로 돌려 척을 닫습니다.
(2) 비트 제거
멈춤 링을 꽉 잡고 슬리브를 시계 반대 방향으로 돌려
척을 엽니다.
참고
슬리브가 더 이상 풀리지 않을 때는 사이드 핸들을
멈춤 링에 고정시키고 사이드 핸들을 단단히 잡은 다음
슬리브를 돌려 손으로 풉니다 (그림 4).
6. 회전 방향 확 인 (그림 5)
푸시 버튼의 R측을 누르면 비트가 시계 방향(후면에서
봤을 때)으로 회전합니다.
푸시 버튼의 L측을 누르면 비트가 시계 반대 방향으로
회전합니다.
(본체에
7. 사 이드 핸들 고정(그림 6)
사 이드 핸들을 장착 부분에 부착합니다.
사 이드 핸들 그립을 시계 방향으로 돌려 고정시킵니다.
사 이드 핸들을 작동에 적합한 위치 로 설 정한 다 음 사이드
핸들 그립을 단단히 고정시킵니다.
사이들 핸들의 깊이 게이지를 부착하려면, 게이지를
사이드 핸들의 U자형 홈에 끼우고 원하는 구멍 깊이에
따라 깊이 게이지의 위치를 조절한 다음 사이드 핸들
그립을 단단히 고정시킵니다(그림 7).
8. 고속/저속 전환
속도를 변경하기 전에 스위치가 OFF 위치에 있는지,
드릴이 완전히 멈춘 상태인지 확인합니다.
속도를 변경하려면 변속 기어 다이얼을 그림 8 의
화살표대로 돌립니다. 드릴 본체에 새겨진 숫자 “1”은
저속을 나타내고 숫자 “2”는 고속을 나타냅니다.
변속 기어 다이얼을 돌리기 힘들 때는 척을 어느
방향으로든 약간 돌린 다음 변속 기어 다이얼을 다시
돌립니다.
과 이 표시되어 있습니다.)
16
Page 17

한국어
사용법
1. 스위치 작동
○ 트리거를 누르면 툴이 회전합니다. 트리거를 놓으면 툴이
정지합니다.
○ 작동 스위치를 누르는 양을 조절해 드릴의 회전 속도를
조절할 수 있습니다.
작동 스위치를 살짝 누르면 속도가 감소하고 작동
스위치를 더 많이 누르면 속도가 증가합니다.
○ 속도 조절 다이얼로 원하는 회전 속도를 미리 선택할 수
있습니다.
속도를 높이려면 속도 조절 다이얼을 시계 방향으로
돌리고 속도를 낮추려면 시계 반대 방향으로 돌립니다
(그림 9).
○ 트리거를 잡아당기고 밀면 연속 작동에 편리한 전원
켜짐 상태가 유지됩니다. 스위치를 끄면 트리거를 다시
잡아당겨 스토퍼를 분리할 수 있습니다.
주의
역방향 비트 회전을 위해 푸시 버튼의 L측을 누르면
스토퍼를 사용할 수 없습니다.
2. 드릴링
○ 드릴링할 때, 드릴을 느리게 시동한 후 드릴링 작업을
하면서 속도를 서서히 높이십시오.
○ 항상 비트로 직선으로 힘을 가하십시오. 충분한 힘을
가해 드릴링하되 모터가 정지되거나 비트가 비끼게 될
정도로 세게 밀지 마십시오.
○ 모터 정지 또는 작업물 파손을 최소화하려면, 드릴에
가하는 힘을 줄이고, 비트 속도를 늦춰 구멍을
뚫으십시오.
○ 드릴이 정지할 경우, 트리거를 즉시 해제하고 비트를
작업물에서 제거한 후 다시 시작하십시오. 정지한
드릴을 시동하기 위해서 트리거를 눌러 켰다 껐다 하지
마십시오. 드릴이 손상될 수 있습니다.
○ 드릴 비트 직경이 클수록 팔에 가해지는 반동력이
큽니다.
반동력에 의해 드릴 통제력을 잃지 않도록 주의하십시오.
드릴 통제력을 유지하려면 바른 자세로 서서 사이드
핸들을 사용하고, 드릴을 양손으로 단단히 잡아 드릴을
드릴링할 작업물에 수직이 되게 하십시오.
전동 툴을 사용하거나 점검할 때는 각국의 안전 수칙 및
규정을 준수해야 합니다.
변경
Hitachi 전동 툴은 개선 및 수정을 통해 끊임없이 최신
기술 발전을 반영하고 있습니다.
따라서 일부 부품은 사전 예고 없이 변경될 수 있습니다.
참고
HITACHI는 지속적인 연구개발 프로그램을 진행하고
있으므로, 본 설명서의 사양은 사전 예고 없이 변경될 수
있습니다.
관리 및 검사
1. 드릴 비트 검사
마모된 드릴 비트를 사용하면 모터가 오작동하여
손상되므로, 마모가 발견되는 즉시 새 드릴 비트로
교체하거나 다시 날카롭게 갈아 주십시오.
2. 부착 나사 검사
정기적으로 모든 부착 나사를 검사하고 잘 고정되어
있는지 확인합니다. 느슨한 나사가 있는 경우, 즉시 꽉
조여야 합니다. 그렇게 하지 않으면 심각한 사고가 날 수
있습니다.
3. 모터 유지보수
모터 유닛 권선은 전동 툴의 "핵심"입니다. 적절히
관리하여 권선이 손상되지 않거나 오일 또는 물에 젖지
않게 하십시오.
4. 카 본 브러시 검사
지속적인 안전 및 감전 보호를 위해서는 이 공구의
카본 브러시 검사 및 교환은 히타치 공인 서비스 센터에
의해서만 수행되어야 합니다.
5. 서비스 부품 정보
주의
Hitachi 전동 툴의 수리, 변경 및 검사는 반드시 공식
Hitachi 서비스 센터를 통해서 해야 합니다.
공식 Hitachi 서비스 센터에 수리 또는 기타 점검을
요청할 때 툴과 함께 부품 정보를 제공하면 도움이
됩니다.
17
Page 18

Bahasa Indonesia
ATURAN KESELAMATAN UMUM
PERINGATAN!
Bacalah semua petunjuk
Gagal mengikuti semua petunjuk yang tercantum di bawah
dapat menyebabkan sengatan listrik, kebakaran, dan/atau
cedera serius.
Istilah “perkakas listrik” dalam semua peringatan yang
tercantum di bawah merujuk pada alat bantu berpenggerak
listrik (berkabel) atau alat bantu berpenggerak baterai (tanpa
kabel).
SIMPAN PETUNJUK INI
1) Area kerja
a) Jaga area kerja tetap bersih dan berpencahayaan
cukup.
Area yang berantakan dan gelap dapat mengundang
terjadinya kecelakaan.
b) Jangan gunakan perkakas listrik di lingkungan
yang mudah meledak, seperti di tempat yang
memiliki cairan yang mudah terbakar, gas, atau
debu.
Perkakas listrik dapat menimbulkan percikan api
yang dapat menyalakan kepulan gas.
c) Jauhkan anak-anak dan orang yang ada di
sekitar saat mengoperasikan perkakas listrik.
Gangguan dapat menyebabkan Anda kehilangan
kendali.
2) Keselamatan listrik
a) Colokan perkakas listrik harus cocok dengan
stopkontaknya.
Jangan sekali-kali mengubah colokan.
Jangan gunakan colokan adaptor dengan
perkakas listrik yang dibumikan (diardekan).
Colokan yang tidak dimodifi kasi dan stopkontak yang
cocok dapat mengurangi risiko sengatan listrik.
b) Hindari tubuh agar tidak bersentuhan dengan
permukaan yang dibumikan atau diardekan
seperti pipa, radiator, kompor dan kulkas.
Risiko sengatan listrik bertambah jika tubuh Anda
menyentuh bumi atau arde.
c) Hindari agar perkakas listrik tidak terkena hujan
atau terkena air.
Air yang masuk ke perkakas listrik akan meningkatkan
risiko sengatan listrik.
d) Dilarang menyalahgunakan kabel. Jangan
sekali-kali menggunakan kabel untuk membawa,
menarik, atau melepaskan colokan perkakas
listrik.
Jauhkan kabel dari panas, minyak, tepi yang
tajam atau bagian yang bergerak.
Kabel yang rusak atau terbelit dapat berisiko
meningkatkan terjadinya sengatan listrik.
e) Saat mengoperasikan perkakas listrik di luar
ruangan, pakai kabel ekstensi yang cocok untuk
digunakan di luar ruangan.
Penggunaan kabel ekstensi yang cocok untuk
pemakaian di luar ruangan dapat mengurangi resiko
terjadinya sengatan listrik.
3) Keselamatan pribadi
a) Tetap waspada, lihat yang Anda kerjakan dan
pakai akal sehat saat mengoperasikan perkakas
listrik.
Jangan gunakan perkakas listrik saat Anda
capai atau berada di bawah pengaruh obat,
alkohol, atau pengobatan.
Kehilangan konsentrasi sesaat ketika
mengoperasikan perkakas listrik dapat
mengakibatkan cedera pribadi.
18
b) Gunakan peralatan keselamatan. Selalu pakai
pelindung mata.
Peralatan pelindung seperti masker debu, sepatu
keselamatan anti selip, topi proyek, atau pelindung
pendengaran yang digunakan untuk kondisi yang
sesuai akan mengurangi cedera pribadi.
c) Hindari penyalaan perkakas listrik yang tidak
disengaja. Pastikan sakelar berada dalam posisi
mati sebelum dicolokkan.
Membawa perkakas listrik dengan jari pada sakelar
atau mencolokkan perkakas listrik yang telah
dinyalakan dapat mengundang kecelakaan.
d) Lepaskan kunci pas atau kunci Inggris sebelum
menyalakan perkakas listrik.
Kunci pas atau kunci Inggris yang terpasang
pada bagian perkakas listrik yang berputar dapat
menimbulkan cedera pribadi.
e) Jangan menjangkau berlebihan saat
menggunakan perkakas. Jaga selalu agar kaki
dan keseimbangan tetap terjaga saat bekerja.
Ini akan membuat Anda mengendalikan perkakas
listrik dengan lebih baik dalam situasi yang tidak
diharapkan.
f) Berpakaianlah sebagaimana mestinya. Jangan
memakai baju yang longgar atau perhiasan.
Jauhkan rambut, pakaian, dan sarung tangan
dari bagian yang berputar.
Pakaian yang longgar, perhiasan, atau rambut
panjang dapat tersangkut di bagian yang bergerak.
g) Jika diberikan perangkat untuk saluran
pengambilan dan pengumpulan debu, pastikan
bahwa alat itu dihubungkan dan digunakan
dengan benar.
Penggunaan perangkat ini dapat mengurangi risiko
terkait debu.
4) Penggunaan dan perawatan perkakas listrik
a) Jangan paksa perkakas listrik. Gunakan
perkakas listrik untuk penggunaan Anda.
Perkakas listrik yang benar untuk melakukan
pekerjaan akan membuat pekerjaan lebih aman dan
sesuai desainnya.
b) Jangan gunakan perkakas listrik jika sakelar
tidak menyalakan atau mematikan perkakas
listrik.
Perkakas listrik yang tidak bisa dikendalikan dengan
sakelar berbahaya dan harus diperbaiki.
c) Lepaskan colokan dari sumber listrik sebelum
melakukan penyesuaian, mengganti aksesori,
atau menyimpan perkakas listrik.
Tindakan pencegahan untuk keselamatan tersebut
mengurangi risiko menyalanya perkakas listrik
secara tidak sengaja.
d) Simpan perkakas listrik yang tidak digunakan
agar tidak terjangkau anak-anak dan jangan
izinkan orang yang tidak mengetahui cara
menggunakan perkakas listrik atau petunjuk ini
untuk mengoperasikannya.
Perkakas listrik adalah alat yang berbahaya di tangan
orang yang tidak terlatih menggunakannya.
e) Rawat perkakas listrik. Periksa ketidaksejajaran
atau ikatan pada bagian-bagian yang bergerak,
komponen yang rusak, serta kondisi lain mana
pun yang mungkin memengaruhi pengoperasian
perkakas listrik.
Jika rusak, perbaiki perkakas listrik sebelum
digunakan.
Kecelakaan banyak terjadi karena perkakas listrik
jarang dirawat dengan baik.
Page 19

Bahasa Indonesia
f) Asah dan bersihkan perkakas listrik.
Perkakas listrik dengan tepi potong yang tajam
jarang macet dan lebih mudah dikontrol jika dirawat
dengan baik.
g) Gunakan perkakas listrik, aksesori, dan
potongan alatnya dll., sesuai dengan petunjuk
ini dan dengan cara yang dimaksudkan untuk
perkakas listrik yang diinginkan dengan
memperhatikan kondisi kerja dan pekerjaan
yang akan dilakukan.
Penggunaan perkakas listrik untuk tujuan yang
berbeda dengan maksud pengoperasiannya dapat
menimbulkan risiko bahaya.
5) Servis
a) Minta agar perkakas listrik Anda diservis
oleh orang yang memenuhi syarat dengan
menggunakan suku cadang pengganti yang
identik.
Perkakas listrik yang dirawat dengan baik akan
memastikan keselamatan penggunaan perkakas
listrik.
TINDAKAN PENCEGAHAN
Jauhkan anak-anak dan orang yang tidak terkait.
Saat tidak dipakai, perkakas listrik harus disimpan di
luar jangkauan anak-anak dan orang-orang yang tidak
terkait.
TINDAKAN PENCEGAHAN SAAT
MENGGUNAKAN BOR
1. Sebelum mengebor dinding, plafon, atau lantai, pastikan
bahwa tidak ada kabel listrik yang tertanam di dalamnya.
2. Gunakan handel tambahan yang diberikan bersama
perkakas.
Kehilangan kendali dapat menyebabkan cedera pribadi.
3. Jangan menggunakan sarung tangan yang terbuat dari
bahan yang mudah tergulung seperti katun, wol, kain
atau tali, dll.
SPESIFIKASI
Model D10VJ D13VH
Voltase (menurut wilayah)* (110 V, 220 V, 230 V, 240 V)
Daya input 690 W*
Perubahan kecepatan 1 2 1 2
Kecepatan tanpa
beban
Kapasitas
Berat (tanpa kabel) 1,8 kg 1,9 kg
* Pastikan untuk memeriksa pelat nama pada produk karena dapat berubah bergantung wilayahnya.
AKSESORI STANDAR
(1) Pemutar cengkam (Spesifi kasi hanya untuk
cengkam dengan pengunci)......................................... 1
(2) Handel sisi ................................................................... 1
(3) Pengukur kedalaman ................................................... 1
Aksesori standar dapat berubah tanpa pemberitahuan.
PENGGUNAAN
○ Mengebor lubang dalam logam, kayu, dan plastik.
SEBELUM PENGGUNAAN
1. Sumber listrik
Pastikan bahwa sumber listrik yang akan digunakan
mematuhi persyaratan daya yang ditetapkan pada pelat
nama produk.
2. Sakelar daya
Pastikan bahwa sakelar daya berada dalam posisi MATI.
Jika colokan dihubungkan ke stopkontak saat tombol
sakelar dalam posisi HIDUP, perkakas listrik akan segera
menyala dan bisa mengakibatkan cedera serius.
3. Kabel ekstensi
Ketika area kerja jauh dari sumber listrik.
Gunakan kabel ekstensi dengan ketebalan yang cukup
dan kapasitas yang sesuai. Kabel ekstensi harus dibuat
sependek mungkin.
Putaran maju 0 – 1000 /mnt 0 – 3000 /mnt 0 – 1000 /mnt 0 – 3000 /mnt
Putaran mundur 0 – 600 /mnt 0 – 1800 /mnt 0 – 600 /mnt 0 – 1800 /mnt
Baja 10 mm 6 mm 13 mm 8 mm
Kayu 25 mm 13 mm 40 mm 25 mm
4. Memilih mata bor yang tepat
○ Saat mengebor logam atau plastik
Pakai mata bor untuk pengerjaan logam seperti biasa.
○ Ketika mengebor kayu
Pakai mata bor untuk pekerjaan kayu seperti biasa.
Namun saat mengebor lubang 6,5 mm atau lebih kecil,
pakai mata bor untuk pekerjaan logam.
5. Memasang dan melepas mata bor
Untuk kepala mesin bor dengan pengunci
(1) Buka rahang cengkam, dan masukkan mata bor ke
dalam cengkam.
(2) Tempatkan pemutar cengkam ke dalam setiap tiga
lubang pada cengkam, dan putar searah putaran jarum
jam (dilihat dari sisi depan). Eratkan dengan kuat.
(3) Untuk melepaskan mata bor, tempatkan pemutar
cengkam ke dalam salah satu lubang pada cengkam dan
putar berlawanan arah putaran jarum jam.
Untuk cengkam tanpa kunci
(1) Memasang mata bor
Putar lengan berlawanan arah jarum jam dan buka
cengkam. Setelah memasukkan mata bor ke cengkam
sedalam mungkin, genggam cincin penahan dan tutup
cengkam dengan memutar lengan searah jarum jam
seperti tampak depan.
(Gbr. 2, 3)
(Gbr. 1)
19
Page 20

Bahasa Indonesia
(2) Melepas mata bor
Genggam cincin penahan dan buka cengkam dengan
memutar lengan berlawanan arah jarum jam.
CATATAN
Ketika lengan tidak lagi dapat dilonggarkan, kuatkan
handel sisi ke cincin penahan, pegang handel sisi
dengan kuat, lalu putar lengan untuk dilonggarkan
dengan tangan. (Gbr. 4)
6. Cek arah putaran (Gbr. 5)
Mata obeng berputar searah putaran jarum jam (dilihat
dari sisi belakang) dengan mendorong sisi R pada
tombol tekan.
Sisi L tombol tekan ditekan untuk memutar mata obeng
berlawanan arah jarum jam.
(Penanda
7. Menguatkan handel sisi (Gbr. 6)
Pasang handel sisi ke bagian pemasangan.
Putar pegangan handel sisi searah putaran jarum jam
untuk menguatkannya.
Tetapkan handel sisi ke posisi yang cocok dengan
pengoperasian lalu kuatkan pegangan handel sisi.
Untuk memasang pengukur kedalaman pada handel
sisi, masukkan pengukur ke dalam ulir berbentuk U
pada handel sisi, sesuaikan posisi pengukur kedalaman
sesuai dengan kedalaman lubang yang diinginkan,
eratkan dengan kuat pegangan handel sisi. (Gbr. 7)
8. Penggantian Kecepatan tinggi/kecepatan rendah
Sebelum mengganti kecepatan, pastikan bahwa sakelar
berada dalam posisi MATI, dan bor telah berhenti
sepenuhnya.
Untuk mengubah kecepatan, putar putaran penggeser
gigi seperti ditunjukkan anak panah pada Gbr. 8.
Angka “1” yang terukir dalam badan bor menunjukkan
kecepatan rendah, angka “2” berarti kecepatan tinggi.
Jika sulit memutar putaran penggeser gigi, putar
cengkam ke salah arah lalu putar putaran penggeser gigi
lagi.
dan diberikan pada bodi.)
CARA PENGGUNAAN
1. Mengoperasikan sakelar
○ Ketika pemicu ditekan, perkakas akan berputar. Ketika
pemicu dilepaskan, perkakas berhenti.
○ Kecepatan putar dari bor dapat dikendalikan dengan
memvariasikan jumlah sakelar pemicu ditarik.
Kecepatan lambat ketika sakelar pemicu ditarik sedikit
dan meningkat saat sakelar pemicu ditarik lebih lanjut.
○ Kecepatan putaran yang diinginkan bisa dipilih awal
dengan putaran kendali kecepatan.
Putar putaran kendali kecepatan searah jarum jam untuk
kecepatan lebih tinggi dan berlawanan arah jarum jam
untuk kecepatan lebih rendah. (Gbr. 9)
○ Menarik pemicu dan mendorong penyetop akan
membuat kondisi sakelar tetap hidup dan ini tidak
nyaman jika terus berjalan. Ketika sakelar dimatikan,
penyetop dapat diputuskan dengan menarik pemicu
sekali lagi.
PERHATIAN
Jika sisi L pada tombol tekan ditekan untuk putaran mata
bor terbalik, stopper tidak dapat digunakan.
2. Mengebor
○ Ketika mengebor, mulailah dengan mengebor dengan
pelan, dan secara perlahan-lahan tambah kecepatannya
ketika Anda mengebor.
○ Selalu berikan tekanan dengan arah yang lurus
dengan mata bor. Gunakan tekanan yang cukup dalam
mengebor, namun jangan mendorongnya terlalu keras
sehingga motor macet atau mata bor terlepas.
○ Untuk mencegah agar tidak macet atau merusak bahan,
kurangi tekanan pada bor dan kurangi tekanan pada
mata bor ketika hampir menembus lubang.
○ Jika bor macet, segera lepaskan pemicunya, lepas mata
bor dan ulangi lagi. Jangan menyalakan dan mematikan
pemicu untuk menjalankan bor yang macet. Ini dapat
merusak bor.
○ Semakin besar diameter mata bor, semakin besar daya
tolak terhadap lengan Anda.
Hati-hati agar jangan sampai kehilangan kendali atas bor
karena daya tolak ini.
Untuk menjaga kendali, buat pijakan yang kokoh,
gunakan handel sisi, pegang bor dengan kuat
menggunakan kedua tangan, dan pastikan bor tegak
lurus dengan bahan yang dibor.
PEMELIHARAAN DAN PEMERIKSAAN
1. Memeriksa mata bor
Karena menggunakan mata bor yang tumpul akan
menyebabkan motor tidak berfungsi dan menurunkan
efi siensi, gantilah mata bor dengan yang baru atau
segera tajamkan kembali tanpa menunda ketika sudah
tampak tergerus.
2. Memeriksa sekrup pemasang
Periksa secara rutin sekrup pemasang dan pastikan
sekrup terpasang erat. Jika ada sekrup yang longgar,
segera eratkan kembali. Tidak dapat melakukan hal ini
dapat mengakibatkan risiko bahaya yang serius.
3. Pemeliharaan motor
Kumparan unit motor adalah “jantung” perkakas listrik.
Berhati-hatilah untuk memastikan kumparan tidak rusak
dan/atau basah karena oli atau air.
4. Memeriksa sikat karbon
Demi keselamatan dan perlindungan dari sengatan
listrik, pemeriksaan dan penggantian sikat karbon pada
alat ini HANYA boleh dilakukan oleh Pusat Service
Hitachi.
5. Daftar komponen servis
PERHATIAN
Perbaikan, modifi kasi, dan pemeriksaan Perkakas Listrik
Hitachi harus dilakukan oleh Pusat Servis Resmi Hitachi.
Daftar Komponen ini akan membantu jika diserahkan
bersama perkakas ke Pusat Servis Resmi Hitachi ketika
meminta perbaikan atau pemeliharaan lainnya.
Saat mengoperasikan dan memelihara perkakas listrik,
peraturan dan standar keselamatan yang ditetapkan di
setiap negara harus dipatuhi.
MODIFIKASI
Perkakas Listrik Hitachi disempurnakan dan dimodifi kasi
secara terus menerus untuk mengikuti perkembangan
teknologi terbaru.
Oleh karena itu, sebagian komponen dapat berubah
tanpa pemberitahuan terlebih dahulu.
CATATAN
Karena program penelitian dan pengembangan HITACHI
yang terus menerus, spesifi kasi di sini dapat berubah tanpa
pemberitahuan sebelumnya.
20
Page 21

ΔϣΩΧϟ ˯ίΟ ΔϣΎϗ
Hitachi
ϥϣ
ΕϭΩϷ ιΣϔϟϭ ˬϝϳΩόΗϟϭ ˬΡϼλϹ ϝΎϣϋ ΫϳϔϧΗ ΏΟϳ
Hitachi
ΔϣΩΧ ίϛέϣϟ ΓΩϷ ϊϣ ΎϬϣϳΩϘΗ Ωϧϋ ΓΩϳϔϣ ϩΫϫ ˯ίΟϷ ΔϣΎϗ
.ΩϣΗόϣϟ ΔϣΩΧϟ ίϛέϣ ϝΑϗ
.ΔϧΎϳλϟ ϝΎϣϋ ϥϣ ΎϫέϳϏ ϭ ΡϼλϹ ΏϠρ Ωϧϋ ΩϣΗόϣ
ΕΎϣϳϠόΗ ωΎΑΗ ΏΟϳ ˬΎϬΗϧΎϳλ ϭ ΔϳΎΑέϬϛϟ ΩΩόϟ ϝϳϐηΗ ΔϟΎΣ ϲϓ
.ΔϟϭΩ ϝϛΑ ΔλΎΧϟ έϳϳΎόϣϟϭ ϥΎϣϷ
ΕΎϳϧϘΗϟ ΙΩΣϷ Ύ˱όΑΗ ΎϬϠϳΩόΗϭ έέϣΗγΎΑ
Hitachi
ΕϭΩ ϥϳγΣΗ ϡΗϳ
.ΔϣΩϘΗϣϟ
.ϕΑγϣ ϡϼϋ· ϥϭΩ ˯ίΟϷ νόΑ έϳϳϐΗ ϡΗϳ Ωϗ ˬϙϟΫϟϭ
ΕΎϔλϭϣϟ έϳϐΗΗ ˬέϣΗγϣϟ έϳϭρΗϟϭ ΙΣΑϠϟ
HITACHI
ΞϣΎϧέΑϟ Ύ
.ϕΑγϣ ϡϼϋ· ϥϭΩ Ύϧϫ ΓέϭϛΫϣϟ
ϪϳΑϧΗ
ΕϼϳΩόΗϟ
ΔυΣϼϣ
5
:ΔοϔΧϧϣϟ/ΔόϔΗέϣϟ Δϋέγϟ έϳϳϐΗ
έϔΣϟ ϥϭ ˬϑΎϘϳϹ ϊοϭ ϲϓ ΡΎΗϔϣϟ ϥ ϥϣ Ωϛ΄Η ˬΔϋέγϟ έϳϳϐΗ ϝΑϗ
.ϝϣΎϛϟ ϑϗϭΗϟ ϰϟ· ϝλϭ Ωϗ
ϡϬγϟ ϲϓ οϭϣ ϭϫ Ύϣϛ έϳϭΩΗϟ ιέϗ έϳϭΩΗΑ Ωϗ ˬΔϋέγϟ έϳϳϐΗϟ
ΔϋέγϠϟ ιλΧϣ ΏϘΛϣϟ ϝϛϳϫ ϰϠϋ ϕηόϣϟ "1" ϡϗέϟ .8 ϝϛηϟ
.ΔόϔΗέϣϟ ΔϋέγϠϟ ιΧϧ "2" ΩΩόϟ ˬΔοϔΧϧϣϟ
ϲϓ ΔϔΧΑ ϑέυϟ έϳϭΩΗΑ ϡϗ ˬαϭέΗϟ έϳϭΩΗ ιέϗ έϳϭΩΗ Ώόλϟ ϥϣ
.ϯέΧ Γέϣ αέΗϟ έϳϭΩΗ ιέϗ έϳϭΩΗΑ ϡϗ ϡΛ ϩΎΟΗ ϱ
ϡΩΧΗγϻ Δϳϔϳϛ
.ΓΩϷ ϑϗϭΗΗ ˬΡΩϘϣϟ έϳέΣΗ Ωϧϋ .ΓΩϷ έϭΩΗ ˬΡΩϘϣϟ ρϐο Ωϧϋ ○
ΡΎΗϔϣ ΏΣγ ϝΩόϣ έϳϳϐΗΑ ΏϘΛϣϟ ϥέϭΩ Δϋέγ ϲϓ ϡϛΣΗϟ ϥϛϣϳ ○
˱
όΑΗ
ΩϳίΗϭ ΡΩϘϣϟ ΡΎΗϔϣ ϰϠϋ ϕϓέΑ ρϐοϟ Ωϧϋ ΔοϔΧϧϣ Δϋέγϟ ϥϭϛΗ
.ΡΩϘϣϟ ΡΎΗϔϣ ΏΣγ έέϣΗγ ϊϣ
ϲϓ ϡϛΣΗϟ ΡΎΗϔϣ ϡΩΧΗγΎΑ ΔΑϭϠρϣϟ ϥέϭΩϟ Δϋέγ ΩϳΩΣΗ ΓΩΎϋ· ϥϛϣϳ ○
ΔϋΎγϟ ΏέΎϘϋ ϩΎΟΗ ϲϓ Δϋέγϟ ϲϓ ϡϛΣΗϟ ΡΎΗϔϣ ϝϳϭΣΗΑ ϡϗ
ϝϭλΣϠϟ ΔϋΎγϟ ΏέΎϘϋ ϩΎΟΗ αϛϋ ϲϓϭ έΑϛ Δϋέγ ϰϠϋ ϝϭλΣϠϟ
(9 ϝϛηϟ) .ϝϗ Δϋέγ ϰϠϋ
ϰϠϋ ϝϣόϳ ΫϬϓ ˬϑΎϘϳϹ ΡΎΗϔϣ ϰϠϋ ρϐοϟϭ ΡΩϘϣϟ ΏΣγ Ωϧϋ ○
.έϣΗγϣϟ ϝϳϐηΗϟ ΔϳϠϣόϟ Ύ
Γέϣ ΡΩϘϣϟ ΏΣγΑ ϑΎϘϳϹ ΡΎΗϔϣ ϝλϓ ϥϛϣϳ ˬϝϳϐηΗϟ ϑΎϘϳ· Ωϧϋ
˱
ΑγΎϧϣ ϙϟΫ Ωόϳϭ ϝϳϐηΗϟ ΔϟΎΣ ϰϠϋ ˯ΎϘΑϹ
ϩΎΟΗϻ ϲϓ ΏϘΛϣϟ έϳϭΩΗϟ L-ϲΑϧΎΟϟ ϊϓΩϟ έί ϰϠϋ ρϐοϟ ϡΗ Ϋ·
.ϑΎϘϳϹ ΡΎΗϔϣ ϡΩΧΗγ ϥϛϣϳ ϼϓ ˬαϛΎόϣϟ
.έϔΣΗ Εϧϭ Δϋέγϟ ΓΩΎϳίΑ ϡϗϭ ˬ˯ρΑ έϔΣϟ ΩΑ ˬέϔΣϟ Ωϧϋ ○
˱
Ύ
ρϐο ϡΩΧΗγ .ΏϘΛϣϟ ϊϣ ϡϳϘΗγϣ ρΧ ϲϓ Ύ˱ϣΩ ρϐοϟ ϡΩΧΗγΎΑ ϡϗ
ϪϳϭηΗ ϭ ϙέΣϣϟ ΏϳϛέΗϟ ΓϭϘΑ ϊϓΩΗ ϻ ϥϛϟϭ ˬέϔΣϟ ϰϠϋ υΎϔΣϠϟ Ύ
ΏϘΛϣϟ ϰϠϋ ρϐοϟ νϔΧΑ ϡϗ ˬΓΩΎϣϟ έΑϋ έγϛϟ ϭ ΅ρΎΑΗϟ ϝϳϠϘΗϟ ○
.ΔΣΗϔϟ ϥϣ έϳΧϷ ˯ίΟϟ έΑϋ ΏϘΛϣϟ ΔΣέΈΑ ϡϗϭ
ϡϗϭ ˬϝΎΣϟ ϲϓ ϝϳϐηΗϟ ΡΎΗϔϣ έϳέΣΗΑ ϡϗ ˬΏϘΛϣϟ ΅ρΎΑΗ ΔϟΎΣ ϲϓ ○
ϝϳϐηΗ ϰϠϋ ρϐοΗ ϻ .ϯέΧ Γέϣ ΩΑϭ ϝϣόϟ ϥϣ ΏϘΛϣϟ ΔϟίΈΑ
ϱΩ΅ϳ Ωϗ .˯ϲρΑϟ έϔΣϟ ˯ΩΑϟ ΔϟϭΎΣϣϛ ϪϠϳϐηΗ ϑΎϘϳ· ϭ ϝϳϐηΗϟ ΡΎΗϔϣ
ϰϠϋ ΔϳϠϋΎϔΗϟ ΓϭϘϟ ΩϳίΗΗ ˬΎ
˱
οϳέϋ έϔΣϟ ΏϘΛϣ έρϗ ϥΎϛ ΎϣϠϛ
.ΔϳϠϋΎϔΗϟ ΓϭϘϟ ΏΑγΑ ΏϘΛϣϟ ϲϓ ϡϛΣΗϟ ϥΩϘϓ ϡΩϋ ϲϓ έΫΣϟ ΥϭΗ
νΑϘϣϟ ϡΩΧΗγΎΑ ˬϡΩϘϟ Ίρϭϣ ϊο ˬϡϛΣΗϟ ΕΎΑΛ ϰϠϋ υΎϔΣϠϟ
ϊοϭ ϲϓ ΏϘΛϣϟ ϥ Ωϛ΄Ηϭ ϥϳΩϳϟ ΎΗϠϛΑ ΔϔΧΑ ΏϘΛϣϟ ϙγϣϭ ˬϲΑϧΎΟϟ
.ΎϬΑϘΛ ϡΗϳ ϲΗϟ ΓΩΎϣϠϟ ϲγέ
ΡΎΗϔϣϟ ϝϳϐηΗ
.ΏϘΛϣϟ ϑϠΗ ϰϟ· ϙϟΫ
.ΡΩϘϣϟ
.Δϋέγϟ
.ϯέΧ
έϔΣϟ
˱
ϳϓΎϛ
.ΏϘΛϣϟ
.ϙϋέί
8
1
ϪϳΑϧΗ
2
○
○
ιΣϔϟϭ ΔϧΎϳλϟ
ϝϳϠϘΗϟϭ ϙέΣϣϟ ϑϠΗ ϰϟ· ϱΩ΅Η ΔϠϛΗϣϟ έϔΣϟ ΏϗΎΛϣ ϥ ϰϟ· ˱έυϧ
ϱϷ ϙΗυΣϼϣ έϭϓ ΎϫΫΣηΑ ϡϗ ϭ έϔΣϟ ΏϗΎΛϣ ϝΩΑΗγ ˬΓ˯Ύϔϛϟ ϥϣ
ΎϬρΑέ ϡΎϛΣ· ϥϣ Ωϛ΄Ηϟϭ ΕϳΑΛΗϟ έϳϣΎγϣ ΔϓΎϛϟ ϱέϭΩϟ ιΣϔϟΎΑ ϡϗ
.έϭϔϟ ϰϠϋ ΎϬρΑέ ϡΎϛΣΈΑ ϡϗ ˬέϳϣΎγϣ Δϳ ϙϓ ΔϟΎΣ ϲϓ .ϳΣλ ϝϛηΑ
.έρΎΧϣ ϰϟ· ϙϟΫΑ ϡΎϳϘϟ ϲϓ ϝηϔϟ νέόϳ ΩϘϓ
.ΔϗΎρϟ ΓΩ ϥϣ "ργϭϷ ˯ίΟϟ" ϭϫ ϙέΣϣϟ ΓΩΣϭ ϑϠϣ
.˯Ύϣϟ ϭ Εϳίϟ ΔργϭΑ ϪϠϠΑ ϭ/ϭ ϑϠϣϟ ϑϠΗ ϡΩϋ ϥϣ έέϣΗγΎΑ ΩϛΎΗ
ϝΩΑΗγ ϭ ιΣϓ ΏΟϳ ϻ ˬΔϳΎΑέϬϛϟ ΕΎϣΩλϟ ϥϣ ΔϳΎϗϭϟϭ ϙΗϣϼγϟ
.ΩϣΗόϣ
Hitachi
ΔϣΩΧ ίϛέϣ ϝΑϗ ϥϣ ϻ· ΓΩϷΎΑ ΔϳϧϭΑέϛϟ ΓΎηέϔϟ
˼
έϔΣϟ ΏϗΎΛϣ ιΣϓ
.ϝϛΗ
ΕϳΑΛΗϟ έϳϣΎγϣ ιΣϓ
ϙέΣϣϟ ΔϧΎϳλ
ΔϳϧϭΑέϛϟ ΓΎηέϔϟ ιΣϓ
1
2
3
4
21
Page 22

ΏΎϘΛϣϟ ϡΩΧΗγ ϝϭΣ ΕέϳΫΣΗ
ΕϼΑΎϛ ΩϭΟϭ ϡΩϋ ϥϣ Ωϛ΄Η ,ΕΎϳοέϷ ϭ ϑϘγϷ ϭ ϥέΩΟϟ ϲϓ ΏϘΛϟ ϝΑϗ 1
.ΓΩϷΎΑ ˱Ωϭίϣ ϥΎϛ Ϋ· ϲϓΎοϹ (νΑΎϘϣϟ) νΑϘϣϟ ϡΩΧΗγ 2
.ΔϳλΧηϟ ΔΑΎλϹ ϲϓ ΏΑγΗϳ Ωϗ ϡϛΣΗϟ ϥΩϘϓ ϥΈϓ
ϝϭΣ ϑΗϠΗ ϥϷ Δοέϋ ϡΎΧ ΓΩΎϣ ϥϣ Δϋϭϧλϣ ΕίΎϔϗ ϱΩΗέΗ ϻ
.ΎϫέϳϏ ϭ ρϳΧ ϭ εΎϣϘϟ ϭ ϑϭλϟ ϭ ϥρϘϟ ϝΛϣ ΎϬγϔϧ
240
ˬΕϟϭϓ
1.9
ΔϘϳϗΩ/
ΔϘϳϗΩ/
1000 – 0
600 – 0
13
ϡϣ
40
ϡϣ
ΔϘϳϗΩ/
ΔϘϳϗΩ/
3000 – 0
1800 – 0
8
ϡϣ
25
ϡϣ
ϡΟϛ
.ΎϬϠΧΩΑ ΔΗ˷ΑΛϣ ΔϗΎρ
230
ˬΕϟϭϓ
690
ΔϘϳϗΩ/
ΔϘϳϗΩ/
220
ˬΕϟϭϓ
3000 – 0
1800 – 0
6
ϡϣ
13
ϡϣ
.ΔϘρϧϣϟ ΏγΣ έϳϳϐΗϠϟ Δοέ˵ϋ ΎϬϧ ΙϳΣ ΞΗϧϣϟ ϰϠϋ ΓΩϭΟϭϣϟ ϡγϻ ΔΣϭϟ ιΣϓ ϥϣ Ωϛ΄Η *
.ϥγϟ έΎΑϛϭ ϝΎϔρϷ ϝϭΎϧΗϣ ϥϋ ˱ΩϳόΑ ΔϳΎΑέϬϛϟ ΓΩόϟ ϊοϭ ϰΟέϳ
ϥϋ ΓΩϳόΑ ΔϳΎΑέϬϛϟ ΓΩόϟ ϰϠϋ υΎϔΣϟ ΏΟϳ ϡΩΧΗγϻ ϡΩϋ ΔϟΎΣ ϲϓ
.ϥγϟ έΎΑϛϭ ϝΎϔρϷ ϝϭΎϧΗϣ
3
110
)
1.8
ΔϘϳϗΩ/
ΔϘϳϗΩ/
1212
1000 – 0
600 – 0
10
25
*(ϕρΎϧϣϟ ΏγΣ) ϲΑέϬϛϟ ΩϬΟϟ (Εϟϭϓ
ϡΎϣϸϟ ϥέϭΩϟ
ϲγϛόϟ ϥέϭΩϟ
ΏϠλϟϡϣ
ΏηΧϟϡϣ
ΕΎρΎϳΗΣϻ
ΕΎϔλϭϣϟ
ίέρϟD10VJD13VH
ΔϗΎρϟ ϝΎΧΩ·*Εϭ
Δϋέγϟ έϳϳϐΗ
ϝϣΣ ϥϭΩΑ Δϋέγϟ
Δόγϟ
(ϙϠγϟ ϥϭΩΑ) ϥίϭϟϡΟϛ
Ϫϛϓϭ ΏϘΛϣϟ ΏϳϛέΗ
(1 ϝϛηϟ)
ϲϓ ϩέΩϭ ϑέυϟ ϲϓ ΙϼΛϟ ΕΎΣΗϔϟ ϥϣ ϝϛ ϲϓ ϑέυϟ ΡΎΗϔϣ ϊο
.ϑέυϟ ϲϓ ΏϘΛϣϟ ϝΧΩϭ ϑέυϟ ϙϭϛϓ Ηϓ
.ϡΎϛΣΈΑ ϪρΑέ .(ϲϣΎϣϷ ΏϧΎΟϟ ϥϣ) ΔϋΎγϟ ΏέΎϘϋ ϩΎΟΗ
ϩέΩϭ ϑέυϟ ΕΎΣΗϓ ϯΩΣ· ϝΧΩ ϑέυϟ ΡΎΗϔϣ ϊο ˬΏϘΛϣϟ ΔϟίϹ
ϳΗΎϔϣϟ ϭΫ ϑέυϠϟ
(1)
(2)
(3)
.ΔϋΎγϟ ΏέΎϘϋ ϩΎΟΗ αϛϋ ϲϓ
(3 ˬ2 ϝϛηϟ)
ΩόΑ .ϑέυϟ Ηϓϭ ΔϋΎγϟ ΏέΎϘϋ ϩΎΟΗ αϛϋ ϲϓ ΔΑϠΟϟ ϲρΑ ϡϗ
ΡΎΗϔϣ ϥϭΩΑ ϑέυϠϟ
ΏϘΛϣϟ ΏϳϛέΗ
(1)
Ύϣϛ ΔϋΎγϟ ΏέΎϘϋ ϩΎΟΗ ϲϓ ΔΑϠΟϟ ϑέυϟ ϝΧΩ έϔΣϟ ΏϘΛϣ ϝΎΧΩ·
.ϡΎϣϷ ϥϣ νϭέόϣ ϭϫ
ΏϘΛϣϟ ϙϓ
(2)
αϛϋ ϲϓ ΔΑϠΟϟ ϲρ ϝϼΧ ϥϣ ϑέυϟ Ηϓϭ ΕϳΑΛΗϟ ΔϘϠΣ ΏΣγ
.ΔϋΎγϟ ΏέΎϘϋ ϩΎΟΗ
ΔυΣϼϣ
ΔΗΑΛϣϟ ΔϘϠΣϟΎΑ ϲΑϧΎΟϟ νΑϘϣϟ ΕϳΑΛΗΑ ϡϗ ˬΔΑϠΟϟ ϙϓ ϑϗϭΗϳ ΎϣΩϧϋ
4
(
ϝϛηϟ) .ΩϳϟΎΑ ΎϬϛϔϟ ΔΑϠΟϟ έΩ ϡΛ ΕΎΑΛΑ ϲΑϧΎΟϟ νΑϘϣϟ ϙγϣϭ
ϰϠϋ ρϐοϟΎΑ (ΏϧΎΟ Ώέϗ ϥϣ) ΔϋΎγϟ ΏέΎϘϋ ϩΎΟΗ ϲϓ ΏϘΛϣϟ έϭΩϳ
αϛϋ ϲϓ ΏϘΛϣϟ ωΎΟέϹ ρϐοϟ έί ϥϣ
(.ΓΩϷ ϝϛϳϫ ϰϠϋ ΓΩϭΟϭϣ
5
ϝϛη) ϥέϭΩϟ ϩΎΟΗ ϥϣ ϕϘΣΗ
(
.ρϐοϟ έί ϥϣ R ΏϧΎΟ
L
ΏϧΎΟϟ ϰϠϋ ρϐοϟ ϡΗϳ
.ΔϋΎγϟ ΏέΎϘϋ ϩΎΟΗ
έΎγϳϟϭ ϥϳϣϳϟ ΕΎϣϼϋ)
6
(
ϝϛηϟ) ϲΑϧΎΟϟ νΑϘϣϟ ΕϳΑΛΗ
.ΕΑΛϣϟ ˯ίΟϟΎΑ ϲΑϧΎΟϟ νΑϘϣϟ ΏϳϛέΗΑ ϡϗ
ϪΗϳΑΛΗϟ ΔϋΎγϟ ΏέΎϘϋ ϩΎΟΗ ϲϓ ϲΑϧΎΟϟ νΑϘϣϟ Δϛγϣ έϳϭΩΗΑ ϡϗ
.ϡΎϛΣΈΑ
ΕϳΑΛΗ ϡΎϛΣ· ϊϣ ϝϳϐηΗϠϟ ΏγΎϧϣ ϊοϭ ϲϓ ϲΑϧΎΟϟ νΑϘϣϟ ΕϳΑΛΗΑ ϡϗ
.Δϛγϣϟ
ίΎϬΟ ϝΎΧΩΈΑ ϡϗ ˬϲΑϧΎΟϟ νΑϘϣϟ ϰϠϋ ϕϣόϟ αΎϳϗ ίΎϬΟ ΏϳϛέΗϟ
ϲΑϧΎΟϟ νΑϘϣϟ ϰϠϋ U ϑέΣ ϝϛη ϰϠϋ ϯέΟϣ ϝΧΩ αΎϳϘϟ
ΔΣΗϔϠϟ ΏϭϠρϣϟ ϕϣόϟ ΏγΣ ϕϣόϟ αΎϳϗ ίΎϬΟ ϊοϭϣ ρΑοϭ
(7 ϝϛηϟ) .ϡΎϛΣΈΑ ϲΑϧΎΟϟ νΑϘϣϟ Δϛγϣ ρΑέϭ
22
5
1
...............(ϳΗΎϔϣϟ ϭΫ ϑέυϠϟ ρϘϓ ΕΎϔλϭϣϟ) ϑέυϟ ΡΎΗϔϣ
1
...........................................................ϲΑϧΎΟ νΑϘϣ
1
.............................................................ϕϣόϟ ΩΩγ
ΔϳγΎϳϗ ΕΎϘΣϠϣ
.έΎρΧ· ϥϭΩ ΔϳγΎϳϘϟ ΕΎϘϠΣϣϟ έϳϳϐΗ ϥϛϣϳ
.ϙϳΗγϼΑϟϭ ΏηΧϟϭ ϥΩΎόϣϟ ϲϓ ΕΎΣΗϓ ϝϣόϟ ΏϘΛϟ ○
ΔϗΎρϟ έΩλϣ
ΕΎΑϠρΗϣϟ ϕΑΎρϣ ϪϣΩΧΗγ ϡΗϳγ ϱΫϟ ΔϗΎρϟ έΩλϣ ϥ ϥϣ Ωϛ΄Η
.ΞΗϧϣϟ ϰϠϋ ΓΩϭΟϭϣϟ ϡγϻ ΔΣϭϟ ϰϠϋ ΓΩΩΣϣϟ ΔϗΎρϟ
ΔϗΎρϟ ΡΎΗϔϣ
αΑΎϘϟ ϝϳλϭΗ ΔϟΎΣ ϲϓ .ϑΎϘϳ· ϊοϭϟ ϰϠϋ ΔϗΎρϟ ΡΎΗϔϣ ϥ ϥϣ Ωϛ΄Η
ΓΩ ϝϳϐηΗ ϡΗϳγϓ ˬϝϳϐηΗ ϊοϭϟ ϰϠϋ ΔϗΎρϟ ΡΎΗϔϣ ϥΎϛϭ αΑϘϣϟΎΑ
6
.έϳρΧ ΙΩΎΣ ωϭϗϭ ϰϟ· ϱΩ΅ϳ Ωϗ Ύϣϣ ˬέϭϔϟ ϰϠϋ ΔϗΎρϟ
ϲϓΎοϹ ϝϳλϭΗϟ ϙϠγ
ϝϳλϭΗ ϙϠγ ϡΩΧΗγ ˬΔϗΎρϟ έΩλϣ ϥϣ ϝϣόϟ ΔϘρϧϣ Δϟί· Ωϧϋ
ϝϳλϭΗϟ ϙϠγ ϝυϳ ϥ ΏΟϳ .ΔϧϧϘϣ Δόγϭ ˳ϑΎϛ ϙϣγ ϭΫ ϲϓΎο·
.ωΎρΗγϣϟ έΩϘΑ
ΏγΎϧϣϟ έϔΣϟ ΏϘΛϣ ΩϳΩΣΗ
7
ϙϳΗγϼΑϟ ϭ ϥΩΎόϣϟ ϲϓ ΏϘΛϟ Ωϧϋ ○
.ϱΩΎϋ ΔϳϧΩόϣ ϝΎϐη έϔΣ ΏϘΛϣ ϡΩΧΗγ
˱
έϳλϗ ϲϓΎοϹ
ΏηΧϟ ϲϓ ΏϘΛϟ Ωϧϋ ○
.ϱΩΎϋ ΔϳΑηΧ ϝΎϐη έϔΣ ΏϘΛϣ ϡΩΧΗγ
ϝΎϐη έϔΣ ΏϘΛϣ ϡΩΧΗγ ˬέϐλ ϭ ϡϣ
6.5
ΕΎΣΗϓ ϝϣόϟ ΏϘΛϟ Ωϧϋϭ
˻
(1)
(2)
(3)
ΕΎϘϳΑρΗ
ϝϳϐηΗϟ ϝΑϗ
1
2
3
4
.ΔϳϧΩόϣ
Page 23

ǚƸǧǞů ȶȖ ȠƾƄƱƓȚ Ǡź ǙƯƃǧȘ ȢǞűȶ Ǖž ǀŻƾƭŽȚ ȝȚȶȢȖ ǚƵŲ ȸȢƻƁ
ǟŽȘ ǚƸưƪƄŽȚ ǕǤȶ Ǡź ȠƾƄƱƓȚ ƾƷƸź ȴǞƳƁ ǠƄŽȚ ǀŻƾƭŽȚ ȝȚȶȢȖ
.ȞȢȚǞŲ ȬǞŻȶ ȲƾƵƄŲȚ
.ΔϳΎΑέϬϛϟ ΓΩόϟ ϝϳϐηΗ ϝΑϗ ρΑέϟ ΡΎΗϔϣ ϭ ρΑοϟ ΩΩϋ ωίϧ (Ι
ǜž ȱǍƇƄƓȚ ȔǎƐȚ ȤƾƉƁ ǟƴŸ ǓƃǤ ȠƾƄƱž ȶȖ ǓŮȤ ȠƾƄƱž ȢǞűȶ
.ǀƸƫƈŵ ǀŮƾǧȘ ȞȶNjŲ ǟŽȘ ȸȢƻƁ ǀƸǣƾŮǍƷƳŽȚ ȜNjƯŽȚ
ϥϳΑϭ ϙϧϳΑ ΔΑγΎϧϣ ΔϓΎγϣ ϙέΗ ˬΔϳΎΑέϬϛϟ ΓΩόϟ ϥϣ ΏέΗϘΗ ϻ (Ν
.ΕΎϗϭϷ ϊϳϣΟ ϲϓ ϙϧίϭΗ ϰϠϋ υϓΎΣϭ ΔϳΎΑέϬϛϟ ΓΩόϟ
Ǡź ǚƬźȖ ǚƳƪŮ ȥƾƷƐȚ ǟƴŸ ȜǍƭƸƉŽȚ ǜž ǙŽȣ ǙŽ ljƵƉƸŴ
.ǀƯŻǞƄƓȚ ǍƸŹ ǗŻȚǞƓȚ
ΎϬΑ ϭ ΔοΎϔοϓ αΑϼϣ ϱΩΗέΗ ϻ ˬΔΑγΎϧϣ αΑϼϣ ˯ΩΗέΎΑ ϡϗ (Ρ
αΑϼϣϟϭ ϙέόη ΩΎόΑ· ϰϠϋ ˱ΎϣΩ υϓΎΣϭ ˬϲϠΣ ϭ ΔΑΎγ ϑέρ
ΓΩόϟ ϥϣ ΔϛέΣΗϣϟ ˯ίΟϷ ϥϋ ˱ΩϳόΑ ίΎϔϘϟϭ ΎϬϳΩΗέΗ ϲΗϟ
ǠƴƑȚ ȶȖ ȯȚǍŶȖ ƾƷŮ ǠƄŽȚ ȶȖ ǀǤƾƱƬƱŽȚ ǏŮǾƓȚ ǙƃŵƾƄů NjŻ
.ΔϳΎΑέϬϛϟ
.țƾƲƅƵƴŽ ǀżǍƇƄƓȚ ȔȚǎűLjƾŮ ǚƁǞƭŽȚ ǍƯƪŽȚȶȖ
ϡΗϳϭ ΔϠλΗϣ ϥϣ Ωϛ΄Ηϓ .έΎΑϐϟ ϊϳϣΟΗϭ ρϔη ίΎϬΟ ΏϳϛέΗ ίΎΟ ϥ· (Υ
ǍŶƾƥȚ ǚƸƴƲů ǟŽȘ ȜǎƷűLjȚ ȵnjƀ ȳȚNjƈƄŴȚ ȸȢƻƁ ȴȖ ǜƳƵƓȚ ǜž
.ϡϳϠγ ϝϛηΑ ΎϬϣΩΧΗγ
.ȤƾƃưŽƾŮ ǀƲƴƯƄƓȚ
:ΎϬΑ ΔϳΎϧόϟϭ ΔϳΎΑέϬϛϟ ΓΩόϟ ϡΩΧΗγ ΔϘϳέρ (4
ΔϳΎΑέϬϛϟ ΓΩόϟ ϡΩΧΗγϭ ˬΔϳΎΑέϬϛϟ ΓΩόϟ ϡΩΧΗγ ϲϓ ρέϔΗ ϻ (
Țnjƀ ȴƼź ǙŽnjŽ ǀƫƫƥȚ ǀƸǣƾŮǍƷƳŽȚ ȜNjƯŽȚ ǙžȚNjƈƄŴȚ NjƶŸ
.ϪΑ ϡϭϘΗ ϱΫϟ ϝϣόϠϟ ΔΑγΎϧϣϟ
ȹƾƯƃů ȹƾƶžȖ ǍƅżȖȶ ǚƬźȖ ǀƆƸƄſ ǟƴŸ ȲǞƫƑȚ ǟƴŸ ȱNjŸƾƉƁ
.ƾƷŽ țƾƲƅƓȚ ǛƸƵƫů Ɩ ǠƄŽȚ ǀƵƷƵƴŽ
ΓΩόϟ ϡΩΧΗγΗ ϻ ϝϣόϟ ϥϋ ϝϳϐηΗϟ ΡΎΗϔϣ ϝρόΗ ΔϟΎΣ ϲϓ (Ώ
ȨƾƒȚ ǚƸưƪƄŽȚ ȠƾƄƱž Ǡź ǛƳƇƄŽȚ ǜƳƚ ǽ ǀƸǣƾŮǍƷż ȜNjŸ ȸȖ
.ΔϳΎΑέϬϛϟ
Țnjƀ ȠǾǧȘ ƿƆƁȶ ƾƷžȚNjƈƄŴȚ NjƶŸ ȹȚǍƭų ǚƳƪů ƾƷſƼź ƾƷŮ
.ȠƾƄƱƓȚ
ϭ ΕϼϳΩόΗ ϱ ˯έΟ· ϝΑϗ ΔϗΎρϟ έΩλϣ ϥϋ αΑΎϘϟ ϝλϔΑ ϡϗ (Ε
ǚƳƪŮ ǀƸǣƾŮǍƷƳŽȚ ȜNjƯŽȚ ǚƸưƪů ȵnjƀ ȪƾƸƄŲǽȚ ȝȚȔȚǍűȘ ǕƶƢ
.ΔϗΎρϟ ΕϭΩ ϥϳίΧΗ ϭ ΕΎϘΣϠϣϟ έϳϳϐΗ
.ȢǞƫƲž ǍƸŹ
ϝϭΎϧΗϣ ϥϋ ˱ΩϳόΑ ΔϣΩΧΗγϣ έϳϐϟ ΔϳΎΑέϬϛϟ ΩΩόϟ ϥϳίΧΗΑ ϡϗ (Ι
ϝϳϐηΗ ϥϋ Γέϛϓ ϪϳΩϟ αϳϟ ιΧη ϱϷ ϣγΗ ϻϭ ϝΎϔρϷ
ƞŮȤNjž ǍƸưŽȚ ȨƾƈŵLjȚ ȸNjƁȖ Ǡź ȜȤǞƭų ǚƅƢ ǚƸưƪƄŽȚ ȝȚȶȢȖ
.ΎϬϠϳϐηΗ ϭ ΕϭΩϷ ϩΫϫ ϥϣ ΏέΗϗϻΎΑ ΏΎϘΛϣϟ
.ƾƷƸƴŸ
ΔϳΣΎϧ ϥϣ ˱ΩϳΟ ΎϬλΣϔΑ ϡϗ ˬΔϳΎΑέϬϛϟ ΩΩόϟ Δϣϼγ ϥϣ Ωϛ΄Η (Ν
˯ίΟ ϱ ϲϓ έγϛ ϱ ΩϭΟϭ ϭ ΔϛέΣΗϣϟ ˯ίΟϷ ρΑέΗ ϯΩϣ
ϝΑϗ ΎϬΣϼλ· ΏΟϳ ϝϳϐηΗϟ ΕϭΩ΄Α ϑϠΗ ΙϭΩΣ ΔϟΎΣ ϲϓ
ǚƳƪŮ ǀſƾƸƫŽȚ ǀƸƴƵƯŮ ȳƾƸƲŽȚ ȶȖ ǚƸưƪƄŽȚ ȝȚȶȢȖ ǀſƾƸǧ ȳNjŸ
ǚƷƉƁ ǂƸƇŮ ȯȚǞƑȚ ȜȢƾŲ ǕƸƭƲƄŽȚ ȝȚȶȢȖ ǟƴŸ ȫƾƱƑȚ ǟűǍƁ
.ΎϬϠϳϐηΗ ϰϠϋ έΛ΅ϳ ΎϣΑ ΎϬίΟ ϥϣ
.ϡΩΧΗγϻ
.ȞȢȚǞƑȚ ǜž ǍƸƅƳŽȚ ȞȶNjŲ ǟŽȘ ȸȢƻƁ ljƸƇǧ ǍƸŹ
Δϔϳυϧϭ ΓΩΎΣ ϊϳρϘΗϟ ΕϭΩ ϰϠϋ υΎϔΣϟ ϰΟέϳ (Ρ
.ƾƷƸź ǛƳƇƄŽȚ
ϕϓϭΗϳ ΎϣΑ ˬΦϟ· ϊρϘϟ ϡϼϗϭ ΕΎϘΣϠϣϟϭ ˬΔϗΎρϟ ΓΩ ϡΩΧΗγ (Υ
ΔϗΎρϟ ΓΩ ωϭϧϟ ΔλλΧϣϟ ΔϘϳέρϟΎΑϭ ΕΎϣϳϠόΗϟ ϩΫϫ ϊϣ
ΏϭϠρϣϟ ϝϣόϟϭ ϝϣόϟ ϑϭέυ έΎΑΗϋϻ ϲϓ ϊοϭϟ ϊϣ ˬΩΩΣϣϟ
ǟŽȘ ƾƷŽ ǀƫƫƥȚ ǍƸŹ ȩȚǍŹȀŽ ǀŻƾƭŽȚ ȜȚȢȖ ȳNjƈƄŴȚ ȸȢƻƁ NjŻ
.ϪΑ ϡΎϳϘϟ
.ǍƸƭų ǗŻǞž ȢǞűȶ
ΔϣΩΧϟ (
ρϘϓϭ ϥϳλλΧΗϣϟ ϝΑϗ ϥϣ ρϘϓ ΔϳΎΑέϬϛϟ ϙΗΩϋ ϳϠλΗΑ ϣγ (
. ρϘϓ ΔϳϠλϷ έΎϳϐϟ ϊρϗ ϝΎϣόΗγΈΑ
.ȥƾƷƐȚ ȴƾžȖ ǟƴŸ ǀƮźƾƤȚ ǙŽȣ ǜžƻƁ
ΔϣΎόϟ Δϣϼγϟ ΕΎϣϳϠόΗ
ΔϣΩλ ΙϭΩΣ ϰϟ· ϩΎϧΩ ΔΣοϭϣϟ ΕΎϣϳϠόΗϟ ϩΫϬΑ ϡίΗϟϻ ϡΩϋ ϱΩ΅ϳ Ωϗ
.ΓέϳρΧ ΔΑΎλ· ϭ ϕϳέΣ Ώϭηϧ ϭ ΔϳΑέϬϛ
ΔΣοϭϣϟ ΕέϳΫΣΗϟ ϊϳϣΟ ϲϓ Ωέϭϟ "ΔϳΎΑέϬϛϟ ΓΩόϟ" Ϡρλϣϟ
ΓΩόϟ ϭ ϙΑ ΔλΎΧϟ (ΔϳϛϠγϟ) Δϳγϳέϟ ΔϳΎΑέϬϛϟ ΓΩόϟ ϰϟ· έϳηϳ ϩΎϧΩ
ƿƃƉƄů ȜȔƾƬž ǍƸưŽȚ ǚƵƯŽȚ ȝǽƾƆžȶ ǚƵƯŽȚ ȴƾƳž Ǡź ǟǤǞƱŽƾź
.ϙϠϐη ϥΎϛϣ Γ˯Ύο· ϥγΣϭ ΔϓΎυϧ ϰϠϋ υϓΎΣ (
ΩϭΟϭ ϲϓ ϱ ΔϳέΎΟϔϧ ˯ϭΟ ϲϓ ΔϳΎΑέϬϛϟ ΩΩόϟ ϝϳϐηΗΑ ϡϘΗ ϻ (Ώ
.έΎΑϏ ϭ ϝΎόΗηϼϟ ΔϠΑΎϗ ΕίΎϏ ϭ ϝϭγ
.ǀƶųȢLjȚ ȤƾƃŹ ȲƾƯŵȘ ǟƴŸ ǚƵƯů ȜȤȚǍŵ ǀƸǣƾŮǍƷƳŽȚ ȢNjƯŽȚ ȞNjƎ
ϝΎϔρϷ ϝϭΎϧΗϣ ϥϋ ΓΩϳόΑ ΔϳΎΑέϬϛϟ ΩΩόϟ ϥϭϛΗ ϥ ϰϠϋ υϓΎΣ (Ε
ȱNjƲź ǟŽȘ ȸȢƻů ȴȖ ǜƳƵƓȚ ǜž ǁƸƄƪƄŽȚ ȲƾƳŵȖ ǜž ǚƳŵ ȸȖ
ϱΎΑ αΑΎϘϟ ϝϳΩόΗ έυΣϳ ˬ˯ΎΑέϬϛϟ ΫϔϧϣΑ αΑΎϘϟ ϝϳλϭΗ ΏΟϳ (
.ΔϳοέϷ ΔϳΎΑέϬϛϟ ΩΩόϟ ϊϣ ΊϳΎϬϣ αΑΎϗ ϱ ϡΩΧΗγΗ ϻ
ǜž ǀƵǣǾƓȚ ǏŮƾƲƓȚȶ ƾƀǍƸƸưů ǛƄƁ ǛŽ ǠƄŽȚ ǏŮȚǞƲŽȚ ǒƱƈů
. ǀƸǣƾŮǍƷƳŽȚ ȝƾžNjƫŽȚ ȞȶNjŲ Ǎƭų
ΏϳΑΎϧϷ ϝΛϣ ΔϳοέϷ ργϷ ϊϣ ϱΩγΟϟ αϣϼΗϟ ΏϧΟΗ (Ώ
.Ωϗϭϣϟϭ ΕΎΟϼΛϟϭ ΔϳέέΣϟ ΕϻΩΎΑϣϟϭ
ȱƾƶƀ ǀƸǤȤLjȚ ljƭŴLjȚ Ǚƴů ǜž ȸLj ǙƵƉű ǀƉžǾž ǀŽƾŲ Ǡź
.ǀƸŮǍƷż ǀžNjƫŽ ǙǤǍƯƄŽ ȜȤǞƭų
ȜNjƯŽȚ ǚųȚȢ ǟŽȘ ȔƾƓȚ țǍƉů ȴȘ ǀƸǣƾŮǍƷƳŽȚ ȝƾžNjƫŽȚ Ǎƭų ȢȚȢǎƁ
.ΔΑϭρέϟ ϭ έρϣϠϟ ΔϳΎΑέϬϛϟ ΩΩόϟ νέόΗ ϻ (Ε
ϭ ϝϣΣϟ ˱ΎϘϠρϣ ϪϠϣόΗγΗ ϻ ˬ(ϙϠγϟ) ϝΑΎϛϟ ϝΎϣόΗγ ˯ϲγΗ ϻ (Ι
.αΑϘϣϟ ϥϣ αΑΎϘϟ ΏΣγϟ ϭ ΔϳΎΑέϬϛϟ ΓΩόϟ ϊϓΩ ϭ Ωη
ϑϭΣϟ ϭ Εϳίϟ ϭ ΓέέΣϟ έΩΎλϣ ϥϋ ˱ΩϳόΑ ϪϳϠϋ υϓΎΣϭ
.ΔϛέΣΗϣϟ ίΎϬΟϟ ˯ίΟ ϭ ΓΩΎΣϟ
Ǎƭų ǜž ǀƳŮƾƪƄƓȚ ȶȖ ǀƱŽƾƄŽȚ (ȱǾŴLjȚ) ȝǾŮƾƳŽȚ NjƁǎů
ϙϠγ ϡΩΧΗγΎΑ λϧϳ ˬΝέΎΧϟΎΑ ΔϳΎΑέϬϛϟ ΓΩόϟ ϝϳϐηΗ ΔϟΎΣ ϲϓ (Ν
ǚƸƴƲƄƴŽ ǠűȤƾƒȚ ȲƾƵƯƄŴǽȚ Ǖž ƿŴƾƶž ǙƴŴ ȳȚNjƈƄŴƾŮ ǛŻ
.ϲΟέΎΧϟ ϝΎϣόΗγϻ ϊϣ ΏγΎϧΗϳ (ϝΑΎϛ)
.ǀƸŮǍƷż ǀžNjƫŽ ȩǍƯƄŽȚ ȜȤǞƭų ǜž
ΓΩόϟ ΔργϭΑ ϝϣόϟΎΑ ϡϗϭ ϪϠόϔΗ Ύϣ ϰϟ· ϪΑΗϧϭ Ύ˱υϘϳ ϥϛ (
ϙέϭόη ΔϟΎΣ ϲϓ ΔϳΎΑέϬϛϟ ΓΩόϟ ϡΩΧΗγΗ ϻ .ϝϘόΗΑ ΔϳΎΑέϬϛϟ
Ωϭϣ ϭ ΔϳϭΩ ϭ ΓέΩΧϣ Ωϭϣ έϳΛ΄Η ΕΣΗ Εϧϛ Ϋ· ϭ ΏόΗϟΎΑ
NjŻ ǀƸǣƾŮǍƷƳŽȚ ȜNjƯŽȚ ȳȚNjƈƄŴȘ NjƶŸ ȜNjŲȚȶ ǀƮƇƴŽ ȵƾƃƄſȁȚ ȳNjŸ
.ϥϳόϠϟ ϲϗϭϟ ωΎϧϘϟ ˯ΩΗέΎΑ Ύ˱ϣΩ ϡϗ .ϥΎϣϷ ΕϭΩ ϡΩΧΗγ (Ώ
ǀƁnjŲȖ ȶȖ ȤƾƃưŽȚ ǜž ǠŻȚǞŽȚ ȬƾƶƲŽȚ ǚƅž ȴƾžLjȚ ȝȚȶȢȖ ǚƵƯƄŴ
ǕƵƉŽȚ ǀƁƾƵŲ ȜǎƷűȖ ȶȖ ǀƃƴǧ ǀƯƃŻ ȶȖ ȰǽǎſǾŽ ȜȢƾƬƓȚ ȴƾžLjȚ
ȝǽƾƵƄŲȚ ǚƸƴƲů ǟƴŸ ǀƶƸƯž ȯȶǍŷ Ǡź ƾƷžȚNjƈƄŴȚ ǛƄƁ ǠƄŽȚȶ
5
ϊοϭ ϲϓ ΡΎΗϔϣϟ ϥ ϥϣ Ωϛ΄Η .ΩϭλϘϣϟ έϳϏ ϝϳϐηΗϟ ΏϧΟΗ (Ε
ΕΎϣϳϠόΗϟ ϊϳϣΟ Γ˯έϗ ϰΟέϳ
.ΔϳέΎρΑϠϟ (ΔϳϛϠγϼϟ) ΔϳΎΑέϬϛϟ
:ΔϳϟΎΗϟ ΕΎϣϳϠόΗϟ ωΎΑΗ ϰΟέϳ
ϝϣόϟ ΔϘρϧϣ ϥΎϣ (
.ȞȢȚǞŲ ȬǞŻȶ Ǡź
.ϙΑ ϥϳρϳΣϣϟ ϭ
.ȜǍƭƸƉŽȚ
ΔϳΑέϬϛϟ ΕΎϣΩλϟ ϥϣ ΔϳΎϗϭϟ (
.ǀƸǣƾŮǍƷƳŽȚ
.ǀƸŮǍƷƳŽȚ ȝƾžNjƫŽȚ
ΔϳλΧηϟ Δϣϼγϟ (
.ȜǍƸƭų ǀŮƾǧȘ ǟŽȘ ȸȢƻƁ
.ǀƸƫƈŵ ȝƾŮƾǧȁ ȩǍƯƄŽȚ
.ϝϳλϭΗϟ ϝΑϗ ϑΎϘϳϹ
!!! έϳΫΣΗ
1
2
.ΔϘϳέρ
3
.ΔϳϟϭΣϛ
˺
23
Page 24

Part Name
1 FLAT HD. SCRE W (A) (LEFT HAND) M6×25
2 CHUCK WRENCH
3DRILL CHUCK
4SPINDLE (E)
5 RETAINING RING FOR D35 HOLE
6 BALL BEARING 6202DDCMPS2L
7 RETAINING RING FOR D15 SHAFT
8 TAPPING SCRE W (W/FLANGE) D5×45
9 GEAR COVER (A)
Item
11 SECOND P INION (B)
12 INNER COVER
No.
10 WA SHE R (B)
17 SPR ING ( H)
14 SHIF T PIN
13 O -RIN G (S-2 2)
15 SHIF T LEVER
19 RETAINI NG RING (E-TYPE) FOR D15 SHAF T
18 STEEL BALL D3.5
16 SHIF T LEVER ASS'Y
21 PIN D5
24 ARM ATURE
23 BALL BEARING 629C2
25 FAN GUIDE
20 SHI FT ARM
26 HE X. HD. TAPPING SCREW D4×45
22 GEAR SET
27 STATOR
28 BALL BEARING 698T1XZ Z1MC2E NS7L
31 NA MEPLATE
29 RUBBER BUSHING
30 HOUSING
32 TAPPING SCREW (W/ FLANGE) D4×20
33 HANDLE COVER
36 INTERNAL WIRE (BROWN) 100L
35 SWITCH
34 PUSHING BUTTON
41 NOIS SUPPRESSOR
37 CHO KE COIL (B ROWN)
42 EARTH TERMINAL
39 BRUSH HOLDER
40 HITACHI L ABEL
38 CARBON BRUSH
47 C ORD A RMO R
46 CORD CLIP
43 INTERNAL WIRE (BLUE) 55L
48 CORD
45 TAPPING SCREW (W/ FLAN GE) D4×16
44 CHOKE COIL (BLUE)
501 SIDE HANDLE
502 DEPTH GAUGE
D10VJ
24
Page 25

Part Name
1 FLAT HD. SCRE W (A) (LEFT HAND) M6×25
2 CHUCK WRENCH
3DRILL CHUCK
4SPINDLE (E)
5 RETAINING RING FOR D35 HOLE
6 BALL BEARING 6202DDCMPS2L
7 RETAINING RING FOR D15 SHAFT
8 TAPPING SCRE W (W/FLANGE) D5×45
9 GEAR COVER (A)
Item
11 SECOND P INION (B)
12 INNER COVER
No.
10 WA SHE R (B)
17 SPR ING ( H)
14 SHIF T PIN
13 O -RIN G (S-2 2)
15 SHIF T LEVER
19 RETAINI NG RING (E-TYPE) FOR D15 SHAF T
18 STEEL BALL D3.5
16 SHIF T LEVER ASS'Y
21 PIN D5
24 ARM ATURE
23 BALL BEARING 629C2
25 FAN GUIDE
20 SHI FT ARM
26 HE X. HD. TAPPING SCREW D4×45
22 GEAR SET
27 STATOR
28 BALL BEARING 698T1XZ Z1MC2E NS7L
31 NA MEPLATE
29 RUBBER BUSHING
30 HOUSING
32 TAPPING SCREW (W/ FLANGE) D4×20
33 HANDLE COVER
36 INTERNAL WIRE (BROWN) 100L
35 SWITCH
34 PUSHING BUTTON
41 NOIS SUPPRESSOR
37 CHO KE COIL (B ROWN)
42 EARTH TERMINAL
39 BRUSH HOLDER
40 HITACHI L ABEL
38 CARBON BRUSH
47 C ORD A RMO R
46 CORD CLIP
43 INTERNAL WIRE (BLUE) 55L
48 CORD
45 TAPPING SCREW (W/ FLAN GE) D4×16
44 CHOKE COIL (BLUE)
501 SIDE HANDLE
502 DEPTH GAUGE
D13VH
25
Page 26

26
Page 27

27
Page 28

506
Code No. C99136533 F
Printed in China
 Loading...