

Page 1
HITACHI HOME ELECTRONICS HITACHI HOME ELECTRONICS
(EUROPE) LTD. (HELLAS) S.A.
Dukes Meadow 364 Kifisias & 1 Delfon Street
Millboard Road 15233 Halandri
Bourne End Athens
Buckinghamshire
GREECE
SL8 5XF Tel: +301-6837200
UNITED KINGDOM
Fax: +301-6835694
Tel: 01628 643000 Email: service.hellas@hitachi-eu.com
Fax:01628 643400
Email: consumer-service@hitachi-eu.com
HITACHI SALES IBERICA, S.A
.
Gran Via Carlos III, 101 – 1
HITACHI SALES EUROPA GmbH
08028 Barcelona
Am Seesterns 18
SPAIN
40547 Dusseldorf Tel: 93 409 2550
GERMANY
Fax: 93 491 3513
Tel: 0211 – 52915 – 0 Email: rplan@hitachi-eu.com
Fax: 02 11 – 52915 - 190
Email: HSE-DUS.Service@hitachi-eu.com
HITACHI HOME ELECTRONICS
(NORDIC) AB
HITACHI SALES ITALIANA SPA
Box 77
Via Gulli n.39 S- 164 94 KISTA
20147 MILAN
SWEDEN
ITALY
Tel: 08 562 711 00
Tel: 02 487861 Fax: 08 562 711 11
Fax: 02 48786381 Email: csgswe@hitachi-eu. com
Servizio Clienti
Tel: 02 38073415
HITACHI HOME ELECTRONICS NORWAY
Email: customerservice.italy@hitachi-eu.com
Brugata 14
N-0186 OSLO
Hitachi FRANCE S.A. NORWAY
BP 45,69671 Bron Cedex Tel: 02205 9060
FRANCE Fax: 02205 9061
Tel: 04 – 72.14.29.70 Email: csgnor@hitachi-eu.com
Fax: 04 – 72.14.29.99
Email: conso-hitachi@compuserve.com
HITACHI
Hitachi, Ltd. Tokyo, Japan
International Sales Division
THE HITACHI ATAGO BUILDING,
No. 15 – 12, Nishi Shinbashi, 2 – Chome,
Minato – Ku, Tokyo 105-8430, Japan.
Tel: 03 35022111
ITEM N.V./S.A. (INTERNATIONAL TRADE FOR
ELECTRONIC MATERIAL & MEDIA N.V./S.A.)
UCO Tower – Bellevue,
17 – B – 9050 GENT
BELGIUM (for BENELUX)
Tel: 09 230 4801
Fax: 09 230 9680
Email: hitachi.item@skynet.be
I I
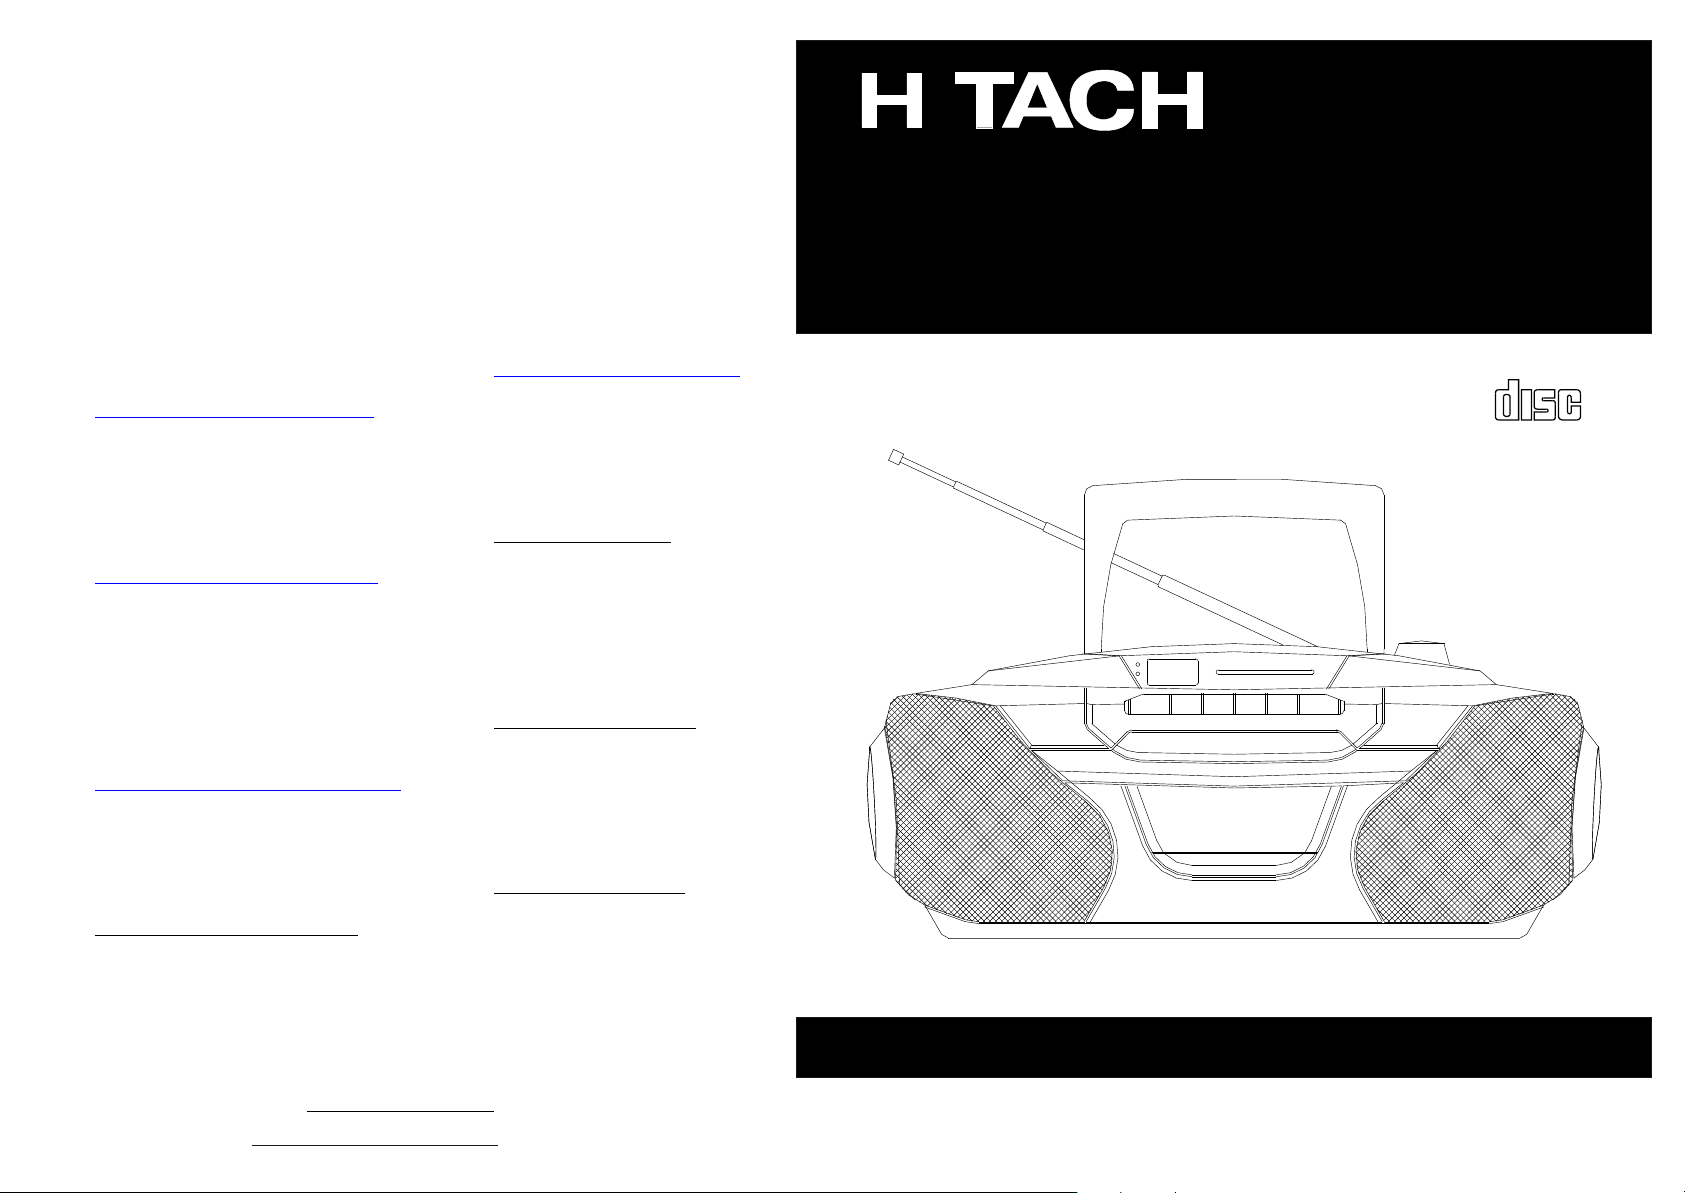
CD RADIO CASSETTE
CD RADIO CASSETTE
RECORDER FM/AM
RECORDER FM/AM
CX-39E(BS)
CX-39E(BS)
II
Instruction Manual
COMPACTCOMPACT
DIGITAL AUDIODIGITAL AUDIO
www.hitachi-consumer-eu.com
Before operating please read these instructions thoroughly
Page 2
English
·
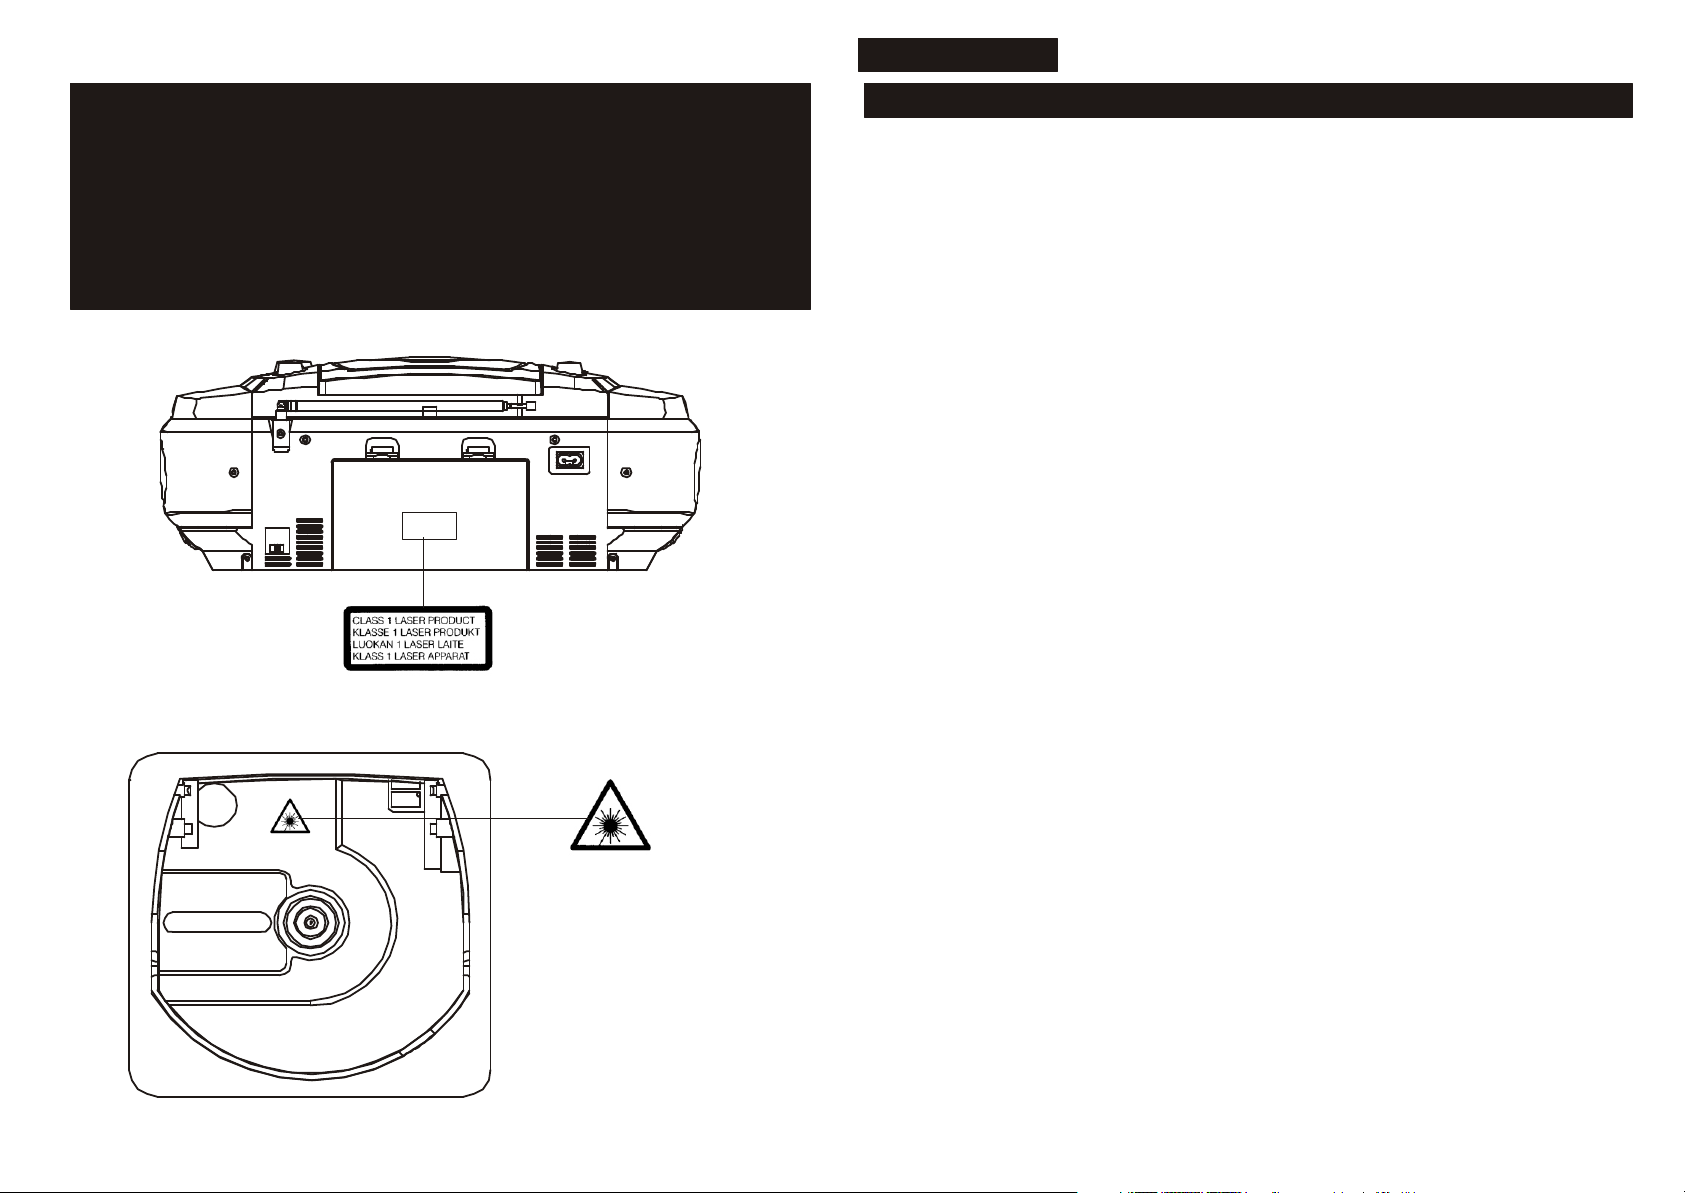
LOCATION OF EXPLANATORY LABELS
·
SIHCHERHEITSHINWEISE AUF DEM GRE Ä T
·
EMPLACEMENTS D ’ETIQUETTES EXPLICATIVES
·
LOCALIZACION DE LAS ETIQUETAS EXPLICATIVAS
·
ETICHETTE DI LOCALIT À ’ ESPLICATIVA
·
ETIKETTEN DIAGRAM
·
PLACERING AV F Ö RKLARANDE ETIKETTER
·
HVOR SIDDER KLISTERM Æ RKERNE OG HVAD BETYDER DE?
SPECIFICATIONS
RADIO SECTION
Frequency Range FM: 88 - 108MHz
AM: 530 - 1600kHz
Antennas FM: Telescopic antenna
AM: Built - in ferrite bar
TAPE RECORDER SECTION
Frequency Response 100~8,000 Hz
CD PLAYER SECTION
Disc used Compact Disc
Sampling Frequency 44.1k Hz
Quantization Number 16 bit linear/channel
Frequency Response 20 to 20,000Hz
GENERAL SPECIFICATION
Power Requirements AC 230V, 50Hz
12V DC, “D” cell or IEC R20 or JIS R20P x 8
or equivalent
Power Consumption 14W in AC operation
Speakers
Power Output 1.8W+1.8W
Outputs Phones jack (stereo 3.5 mm)
Dimensions Approx. 400(L) X 163(W) X 238(H)mm.
Weight Approx. 3.9kg with batteries
Accessory Supplied AC power cord x 1
Specifications are su bject to change for performance improvement without notice.
Main: 9cm (3.5in) x 2, Impedance: 8 ohms
2 7
Page 3
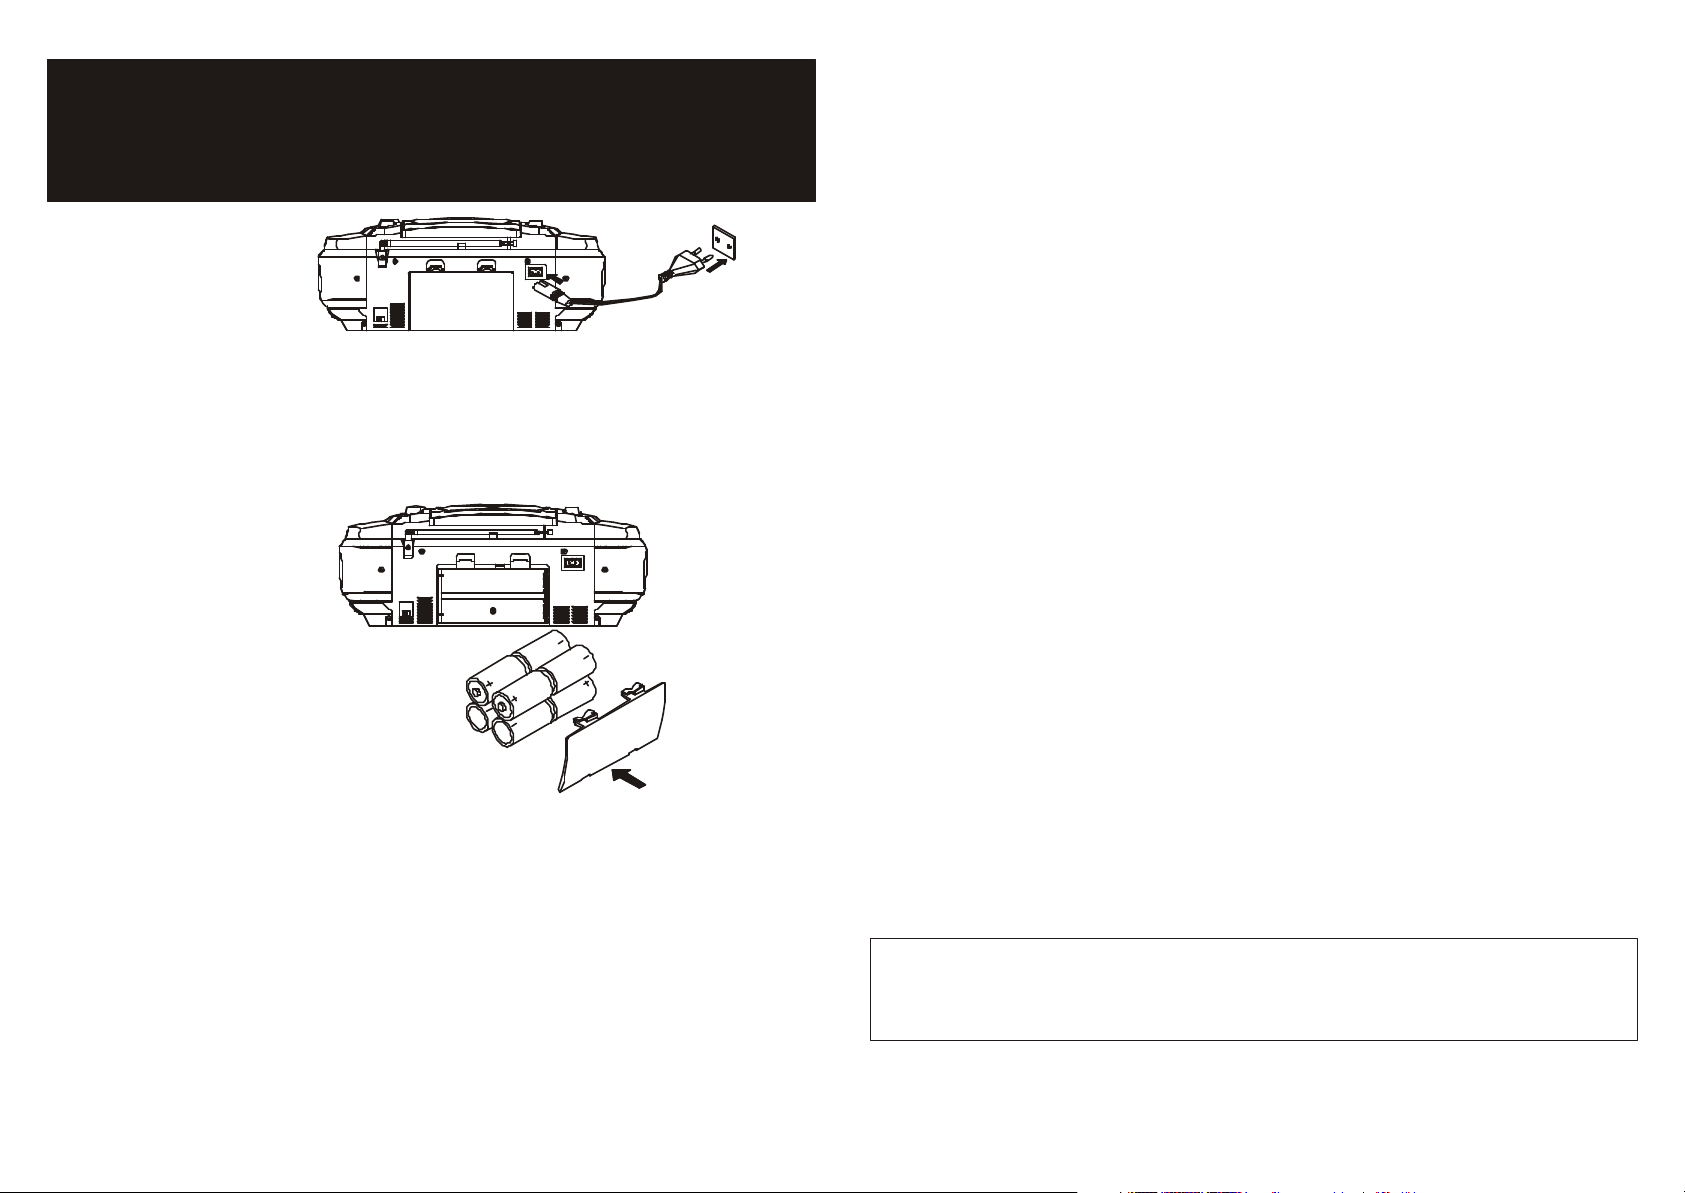
Ÿ AC POWER CONNECTION
Ÿ AC NETZANSCHLUSS
Ÿ RACCORDEMENT DE COURANT
ALTERNATIF AC
Ÿ CONEXION CON LA TOMA DE
CORRIENTE GENERA L
MAIN SUPPLY
NETZSTROMVERSORGUNG
ALIMENTATION DE SECTEUR
TOMA DE CORRIENTE GENERAL
FORNITURA ALLA RETE
NETSTROOM
N ÄT STR ÖM
HOVEDSTROMSFORSYNING
BATTERY INSTALLATION
BATTERIEN EINLEGEN
MISE DE PILE
INSTALACION DE LAS PILAS
INSTALLAZIONE DELLA BATTERIA
BATTERIJ INSTALLATIE
MONTERING AV BATTERI
BATTERIINDSTALLATION
Note: When the volume drops and the tape
·
speed slows down, it is sign that the batteries
have to be replaced.
Hinweis: Sie m ü ssen die Batterien auswechseln,
·
sobald die Lautst ä cher wird, und die
Bandlaufgeschwindigkeit langsamer wird.
Remarques: Quand le vo lume s ’a baisse et la
·
vitesse de bande ralentit, c ’e st le signe de
remplacer les piles.
Nota: Cuando el volumen empieza a bajar y la
·
velocidad de la cinta tambien, es un signo de
que las pilas necesitan reeemplazarse.
Nota Bene: Quanda il volume gocciola e la
·
peluria della velocit à , è un segno che le batterie
devono essere sostituito.
Opgelet: Lagere geluidssterkte en verminderde
·
bandsnelheid betekenen dat het tijd is om de
batterijen te vervangen.
Obs: N ä r volymen g år ned och bandhastigheten
·
blir l ån gsammar e är det ett tecken p ä att
batterierna beh öv er bytas.
BEM Æ RK: N år volumen blive lavere, og b ån det
·
k ø rer langsommere rundt skal batterier skiftes.
Ÿ COLLEGAMENTO DI CORRENTE C.A.
Ÿ WISSELSTROOM AANSLUITING
ANSLUTNING TILL N ÄT STR ÖM
Ÿ
Ÿ VEKSELSTROM FORBINDELSE
To AC outlet AC 230V 50Hz
Zur AC - Netzdose AC 230V; 50Hz
A la sortie de courant alternatif AC 230V 50Hz
A una toma de pared domestica, 230V 50Hz
Alla uscita c.a. (to AC outlet) c.a. 230V 50Hz
Naar stopcontact Wisselstroom 230V 50Hz
Till v ä gguttag 230V 50Hz v ä xelstr ö m
Til stikkontakt 230V vekselstr ø m 50Hz
12V DC 8 X IEC R20 or JIS R20P or “D” cell
·
DC 12V 8 X BATTERIEN DES TYPES IEC
·
R20 ODER JIS R20P ODER GR Ö SSE ”D”
12VDC, 8 piles X IEC R20 ou JIS R20P ou “D”
·
12V DC 8 x IEC R20 o JIS R20P o celula “D”
·
12V c.c. 8 x IEC R20 o JIS R20P o cella “D”
·
12V gelijkstro om 8 x IEC R20 of JIS R20P of
·
“D” cdl
12 V likstr ö m 8 st. IEC R20 eller JIS R20P eller
·
“D” – batteri
12V j æ vnsstr ø m 8 x IEC R20 eller JIS R20P
·
eller “D” celler batterier
3
DECLARATION OF CONFORMITY
We declare under our sole responsibility that this product, to which this declaration relates, is in conformity
with the following standards:
EN60065, EN55013, EN55020, EN61000 - 3 - 2 AND EN61000 - 3 - 3.
Following the provisions of 73/2 3/EEC, 89/336/EEC and 93/68/EEC Directives.
OBEREINSTIMMUNGSERKL ÄRUNG
Wir erkl är en unter unseret allelnlgen Verantwortung, dess dieses Produkt, auf das slch diese Erkl är ung
bezieht, den forgenden Standards entspricht:
EN60065, EN55013, EN55020, EN61000 - 3 - 2 und EN61000 - 3 - 3.
D ÉCLARATION DE CONFORMIT É
Nous d éc larons sous notre seule responsabilit é que l ’a ppareil, auquel se r éf ér e cette EN60065, EN55013,
EN55020, EN61000 - 3 - 2 ET EN61000 - 3 - 3.
D ’a pr és les dispositions 73/23/EEC, 89/336EEC et 93/68EEC Directives.
DECLARACI ÓN DE CONFORMIDAD
Declaramos bajo nuestra cenlca responsabilidad que este producto, con el que esta declaraci ón se
relaciona, est á an conformidad con las siguientes normas: EN60065, EN55013, EN55020, EN61000 - 3 - 2 Y
EN61000 - 3 - 3.
Siguiendo las cond iciones de las Directivas 73/23/EEC, 89/336/EEC y 93/68/EEC.
DICHIARAZIONE DI CONFORMIT Á
Dichiariamo con plena responsabilit à che questo prodotto, al quale la nostra dichiarazione si riferisca, è
conforme alle seguenti normatlye:
EN60065, EN55013, EN55020 , EN61000 - 3 - 2 e EN61000 - 3 - 3.
In conformit à al requistri delie direttlve EEC 73/23, EEC 89/336 e EEC 93/68.
EG VERKLARING VAN OVEREENSTEMMING
Wij verklaren onder eigen aarsprakelijkheld dat dil product waarop deze verklaring betrekking heft, in
overeensiem ming la met de volgende normen:
EN6005, EN55013, EN55020, EN61000 - 3 - 2 en EN61000 - 3 - 3.
Krachtens de bapalingen van de 73/23/EEC, 89/336/EEC en 93/68/EEC richtlljnen.
Ö VERENSST Ä MMELSEINTYG
Harmed intygas helt p ä eget ansvar alt denna product, viiken detta i ntyg avser, uppfyller t ö ijande standarder:
EN60065, EN55013, EN55020, EN61000 - 3 - 2 och EN61000 - 3 - 3.
Enligt stadgarna I directly 73/23/EEC, 89/336/EEC och 93/68/EEC.
KONFORMITETSERKL Æ NING
Vi erki æ rer p å eget ansvar, at dette product, hvortil denne erki ær ing relaterer, stemmer overens med
f øl gende normer:
EN60065, EN55013, EN55020, EN61000 - 3 - 2 og EN61000 - 3 - 3 eamt er I overensstemmeise med
bestemmeiserne j EU - direktiveme 73/23/EU (EEC), 89/336/EU (EEC) og 93/68/EU (EEC).
“L A HITACHI HOME ELECTRONICS EUROPE Ltd. IN QUALIT À DI MANDATARIO EUROPEO DEL
MARCHIO HITACHI DICHIARA CHE QUESTO PRODOTTO. E ’CONFORME AL D.M. 28/08/1991 N.
548. OTTEMPERANDO ALLE PRESCRIZIONI DI CUI AL D.M. 25/06/1985 (PARAGRAFO 3,
ALLEGATO A) ED AL D.M. 27/08/1987 (PARAGRAFO 3, ALLEGATO I) ”
4
Page 4

English
INSTRUCTION
Thank you for buying this product.
Please read through these operating introductions so you will know how to operate your
equipment properly. After you have finished reading the instructions, put them in a safe
place for future reference.
WARNING: TO PREVENT FIRE OR SHOCK HAZARD,
DO NOT EXPOSE THIS UNIT TO RAIN OR MOISTURE
AVOID INSTALLING THE UNIT IN LOCATIONS DESCRIBED BELOW:
Areas exposed to direct sunlight or close to heat radiating appliances such as electric
¨
heaters.
On top of other stereo equipment that radiates too much heat.
¨
Places lacking in ventilation or dusty places.
¨
Areas subject to constant vibration.
¨
Humid or mois t locations.
¨
Operate controls and switches as described in the manual.
¨
Before turning the power switch on for the first time, make sure the batteries and power
¨
cords are properly installed.
Store your tapes and CDs in cool areas to avoid damage from the he at.
¨
CAUTION
RISK OF ELECTRIC SHOCK
DO NOT OPEN
CAUTION: TO REDUCE THE RISK OF ELECTRIC
SHOCK. DO NOT REMOVE COVER (OR BACK). NO
USER - SERVICABLE PARTS INSIDE. REFER
SERVICING TO QUALIFIED SERVICE PERSONNEL.
DANGEROUS VOLTAGE
Uninsulated Dangerous Voltage that may be of sufficient magnitude to
constitute a risk of electric shock to person is present within this product ’s
enclosure.
ATTENTION
The Instruction Manual contains important operating and maintenance
!
instructions.
For your safety, it is necessary to refer to the manual.
DANGER
Invisible and hazardous laser radiation when open and interlock failed or
defeated. Avoid direct exposure to laser beam.
NOTE: The manufacturer is not responsible for any RADIO or TV interference caused by
unauthorized modifications to this equipment. Such modifications could void the user ’s
authority to operate the equipment.
5
!
English
PRECAUTIONS
When the set is not going to be used for a long time, unplug the AC lead and remove the batteries.
l
Do not leave exhausted batteries in the compartment as they will leak and cause corrosion and
l
damage.
Never open the covers, touch the inside of the unit or insert metal objects. Any of these actions could
l
cause an electric shock or a fault.
If you hear thunder, unplug the power cord from the AC outlet. If the set is being used outdoors,
l
collapse the antenna and stop using the set.
Collapse the antenna when ca rrying the set. If the set is carried with the antenna extended, it could
l
break.
Do not expose the unit to direct sunlight, extreme heat, and high humidity, or place it near heat
l
sources, the sea, or in a sandy or dusty place.
Do not clean the cabinet of t he set with strong detergents or solvents as these could damage the
l
surface finish.
We discourage the use of C - 120 cassette tapes as they tend to break or jam the device.
l
The apparatus should not be exposed to liquid dripping or splashing.
l
Discs which can be played on this player have the following mark on them:
l
Do not move the set suddenly from a very cold room into a warm room. When a chilled CD player is
l
moved suddenly to a warm location, moisture condensation may form on the pick - up lens, preventing
pr oper operation. In this case, wait 1 to 2 hours before resuming play.
During playback, if the CD player is subjected to a sudden shock or jolt, some noise may be
l
produced, this is not a malfunction.
Do not place any objects in the disc compartment, it may cause damage to the mechanism.
l
Whenever moving the set, first, be sure to remove the disc from it, if the player is moved with the disc
l
loaded, the disc may be damaged.
Do not store discs in high temperature, high - humidity locations. The discs may warp and become
l
unusable. Also, discs with moisture on them may be unplayable. Wipe any moisture off with a soft,
dry cloth, and be sure discs are fully dry before using.
Handle the discs carefully so that fingerprints and dust do not adhere to the surface of the discs. To
l
clean off, use a soft cloth. Do not use a hard cloth since it may scratch the disc.
If you switch on or off a fluorescent lamp placed near the set, you may hear some interference noise;
l
this is not a malfunction.
Please do not use compact discs w ith cellophane tapes or with labels attached, or those CD with
l
peeled off stains, such as rental CD. If such discs were used on a CD player, they get trapped inside
the unit and cause malfunction.
If a CD player is being operated while you are receiving a radio broadcast, you may hear a noise with
l
the broadcast. If so, turn the operative switch of the CD player [OFF].
CD with special shapes (heart - shaped CDs, octagonal CDs etc.) cannot be played on this set.
l
Attempting to do so may damage the set. Do not us e such CDs.
SAFEGUARDS
Electrical energy can perform many useful functions. This unit been engineered and manufactured to
assure your personal safety. Improper use can result in potential electrical shock or fire hazards. In order
not to defeat the safeguards, observe the following instructions for its installations, use and servicing.
INSTALLATION
Avoid the use of this unit in high temperature areas (such as near heating equipment) or in direct sunlight.
Do not block the unit from radiating heat.
IMPORTANT NOTICE
ALWAYS PRESS STOP BUTTON AND WAIT FOR THE DISC TO STOP ROTATING BEFORE OP EN
THE CD DOOR AND TO REMOVE THE DISC. OPEN THE CD DOOR WHILE IT IS STILL ROTATING
MAY DAMAGE THE DISC.
6
Page 5

CONTROLS AND LOCATIONS
(1) VOLUME CONTROL
(2) PHONES JACK
(3) SURROUND SOUND
(4) CD COMPARTMENT AND DOOR
(5) FM STEREO INDICATOR
(6) POWER INDICATOR
(7) BAND SELECTOR
(8) DIAL POINTER
(9) TUNING CONTROL
(10) FUNCTION SELECTOR
(11) CASSETTE FUNCTION BUTTONS
(12) CD DOOR OPEN BUTTON
(13) SPEAKERS
(14) ANTENNA
(15) CD DIS PLAY
(16) CD CONTROL KEYS
(17) CASSETTE DOOR
(18) BATTERY COMPARTMENT
(19) AC INPUT SOCKET
(20) BEAT CUT SWITCH
English English
8 9
Page 6

English English
FUNCTION OF CONTROLS
(1) VOLUME CONTROL
Rotate the control knob clockwise or anti - clockwise for volume control.
(2) PHONES JACK
Accepts any stereo headphones with 3.5mm diameter standard stereo plug for private
listening, insert a headphones plug into the jack, the speaker output will disconnect
automatically. The headphones volume can be adjusted by the VOLUME CONTROL (1).
(3) SURROUND SOUND
Depress this button to enhance the output sound.
(4) CD COMPARTMENT AND DOOR
A compartment for CD to be played.
(5) FM STEREO INDICATOR
Lights on when FM stereo broadcast is being received.
(6) POWER INDICATOR
Lights on whenever the unit is powered on.
(7) BAND SELECTOR
Set to desired band for radio reception.
(8) DIAL POINTER
Indicate the frequency being tuned.
(9) TUNING CONTROL
Rotate the knob to select the desired broadcast station.
(10) FUNCTION SELECTOR
Select the desired program source.
RADIO : For broadcasting programs received by built - in radio.
TAPE (CD RADIO OFF) : For playback or record the cassette tape. Also for turning off
CD or Radio.
CD : For playing compact disc either a 12cm (5 - inch) or an 8cm (3 - inch).
(11) CASSETTE DECK FUNCTION BUTTONS FOR CASSETTE DECK
REWIND : To rewind the tape.
PLAY : To start playback.
F.FWD : To advance the tape rapidly.
RECORD : Depress this button & Play Button to start recording.
STOP/EJECT : To stop the tape. To open the cassette holder, press again.
PAUSE : To stop the tap e a moment during record or playback. To restart,
press the button once again.
10
(12) CD DOOR OPEN BUTTON
Depress this button to insert the compact disc (CD).
(13) SPEAKERS
(14) ANTENNA
Used to receive a signal for FM band. Extend the antenna to its full length and rotate for
best reception.
A built - in direction antenna is used to receive a signal for AM. Do not place the unit near
the large metal object, such as steel deck, corner of con crete wall, etc. the best place is
near the window, and change the direction for best reception.
FOR FM
(15) CD DISPLAY
Displays track number.
(16) CD CONTROL KEYS
STOP : To stop playing CD or clear the program mode.
PLAY/PAUSE : Depress this key to start playing CD. Press again to stop CD a moment.
To restart, press this key once again.
SEARCH/
SKIP FWD
SEARCH/
SKIP BACKWARD
PROGRAM : Store track number to be played into the memory. Maximum storage
REPEAT : Press this key to select or cancel the repeat play mode.
: Press the key a moment to skip to next track. Press and ho ld this key to
quick advance the playing location.
: Press this key a moment to skip to the beginning of the current track.
Press this key twice to skip to previous track.
Press and hold this key to quickly rewind the playing locati on.
capacity is 19.
FOR AM
(17) CASSETTE DOOR
For placing cassette during playback or recording.
(18) BATTERY COMPARTMENT
Install batteries for battery operation.
(19) AC INPUT SOCKET
Connect supplied AC cord for AC operation.
(20) BEAT CUT SWITCH (AM only)
If beat noise is audible while recording from on AM radio programme flip switch [ 20 ] over
from [1] to [2] or from [2] to [1] to reduce the noise.
11
Page 7

English English
PLAYING A DISC - AN 8CM (3 INCH) CD CAN BE PLAYED WITHOUT AN
ADAPTOR
1. Set FUNCTION SELECTOR (10) to “CD ” position.
2. Open the CD door, place a CD on the turntable and close the CD Door. After few
seconds, the function display shows total number of tracks.
3. Press PLAY/PAUSE button to start playing.
4. Adjust VOLUME(1) and SURROUND BUTTON(3) to suit your personal listening
preference.
5. To stop playing, press STOP button.
Do not open the CD door during playing, otherwise, the disc will be damaged. Be sure
¨
to stop playing the disc first.
To play an 8cm (3 - inch) disc, place it on the turntable. If the disc is provided with an
¨
adaptor, remove adaptor first. Do not put a normal disc on top of an 8cm (3 - inch) disc.
CD PLAYER SECTION
The and buttons have several functions:
At any time, press to skip to the next track. Press repeatedly to skip multiple
¨
tracks.
Pressing
¨
again to skip the previous track. (
immediately)
¨
Pressing and holding
forward or backward search functions.
during play
either or buttons
returns to the beginning of the current track. Press it
In STOP mode
, skips to previous tracks
during play
initiates the
SELECTING VARIOUS PLAYING MODES
You can enjoy various playing modes:
PROGRAM
¨
REPEAT
¨
Plays order of tracks you programmed.
Press once, repeating the same track.
Press twice, repeating all tracks.
TO PLAY A DISC WITH PROGRAM PLAY MODE
This unit has a program memory which can store up to 19 tracks.
1. Install a disc in the CD compartment, then close the CD door.
2. In the stop mode, press PROG key, the display shows "00"and "PROG."indicator becomes
flashing.
3. Select desired track number by pr essing or keys.
4.
Press PROG key to store the track number, the track number will show "00"&"PROG." ”
indicator flashing.
5. Repeat step 3 and 4 to continue the programming up to 19 tracks.
6. During programming, you can press the STOP key to e rase all previous entries and
starts from the beginning again.
7. Press the PLAY/PAUSE key / to start playing after the desired tracks have been
memorized.
8. Press STOP key once to stop program play, the unit is still in program mode, press
PROG key , then press PLAY/PAUSE / key to resume program play.
TO CLEAR THE PROGRAM
While the unit is in program play mode, “P ROG. ” indicator is ON.
¨
First, press the PROG key and then press STOP key, this will clear the program mode
and return to play mode.
Your programmed memory will be erased by setting FUNCTION SELECTOR (10) other
¨
than CD position or unit is switched off.
"P
SETTING FOR ANOTHER PLAYING MODE
PLAYING MODE
REPEAT ONE
Repeating same track
being played.
REPEAT ALL
Repeating entire disc
BUTTON TO BE PRESSED
REPEAT
Press once
REPEAT
Press twice
DISPLAY
REP.
PLAY
REP.A
PLAY
12
13
Page 8

English English
FUNCTION DISPLAY
The function display shows you various playing modes, track numbers.
No disc is inserted in the CD compartment.
The unit is in the stop mode.
During playback.
PLAY
While player is set to pause
PLAY
During programming
PROG.
Track number will be stored
PROG.
While CD door is opened
NOTES ON HANDLING COMPACT DISCS
TO PLAY A CASSETTE
For operating the cassette deck, follow the steps below:
1. Set FUNCTION SELECTOR (10) to “T APE (CD RADIO OFF) ” position.
"T
2. Insert a recorded cassette tape with the tape surface up.
3. Press PLAY button on cassette deck to begin playback.
4. To stop the tape, pr ess STOP/EJECT button on cassette deck.
Before inserting a cassette, slack of tape must roll up to prevent tangling around the
¨
capstan.
TAPE RECORDER SECTION
Use only NORMAL tapes in the cassette deck of this sound system. The characteristics of the
cassette deck mechanisms do not match other types of tape.
"
TO RECORD TO A CASSETTE TAPE
Your equipment is able to record your desired sound source either through RADIO program or
the CD.
1. Insert a blank cassette tape into cassette deck.
2. Select your desired source by setting FUNCTION SELECTOR (10) to CD or Radio.
3. Depress PAUSE button on cassette deck.
4. Depress RECORD & PLAY button on cassette deck.
5. To start recording, press PAU SE button on cassette deck again.
6. To stop recording, press STOP/EJECT button on cassette deck.
Keep the disc clean, hold the disc by its edge. Do not touch the surface.
¨
Do not stick paper or tape nor write anything on the surface.
¨
After playing, store the disc in its case.
¨
TO LISTEN TO A RADIO STATION
1. Set FUNCTION SELECTOR (10) to “RADIO ” position.
2. Set BAND SELECTOR (7) to the desired band.
3. Tune to the desired station by turning the TUNING CONTROL (9).
4. Adjust VOLUME CONTROL (1) and SURROUND BUTTON (3) to suit your personal
listening preference.
5. To switc h off the radio, set the FUNCTION SELECTOR (10) to TAPE (CD RADIO OFF).
14
A) TO RECORD FROM RADIO TO A CASSETTE TAPE
Select your desired band (7) and follow steps 1 - 6.
·
B) TO RECORD FROM CD PLAYER TO A CASSETTE TAPE
Place the CD in the CD compartment. Key in the program play settings on the CD
·
settings. If necessary.
Then, follow the steps 1 - 6.
·
C) CD TO TAPE SYNCHRONISED RECORDING
Insert a blank cassette tape into the deck.
·
Place the CD in the CD compartment.
·
Move the FUNCTION SELECTOR (10) to select CD.
·
Press RECORD key and PLAY key will automatically engage. CD will play
·
automatically (Synchro Recording From CD).
Pres s STOP/EJECT to end recording.
·
NOTE: If you select any track, other than track 1 to begin, you must press the RECORD and
play key within two (2) seconds after selecting that specific track to start.
15
Page 9

English English
TAPE ERASING
1. Set FUNCTION SELECTOR (10) to “T APE (CD RADIO OFF) ” position.
2. Insert recorded cassette into the cassette deck.
3. Depress RECORD & PLAY button on cassette deck.
4. To stop erasing, press STOP/EJECT button on cassette deck.
WARNING:
Copyright may exist in material you wish to record.
Copying of such material requires the permission of the owner.
The recording level is automatically adjusted by built - in ALC circuit.
¨
The recording level is not affected by the VOLUME CONTROL (1) AND SURROUND
¨
button (3), so you can listen to the program with surround and any level of volume that
you want.
Before you jump to the conclusion that the unit is out of order!
When the set is not operating properly, one is apt to assume that the set is faulty. There are, however,
many possible faults which are not directly attributable to the set itself. It is rec ommended to check the
following before taking the set to a Hitachi dealer.
Symptom
P o w e r T a p e R e c o r d e r C D p l a y e r
CHECK THE FOLLOWING BEFORE CALLING FOR SERVICE
Cause/Method of solution
·
NO AC power
NO DC power
Tape does not run when a button
is pressed.
Cassette can not be inserted.
No recording.
Sound deterioration or irregular
tape speed.
Slow tape speed or low volume.
Disc is not played.
Player does not operate correctly;
sound is interrupted, noise occurs
and tracks cannot be selected.
Player does not operate normally
when control butt ons are pressed.
Is the power cord connected properly?
·
Are the batteries properly inserted in the battery
·
compartment?
Are the batteries exhausted?
·
Is the cassette upside down?
·
Is the Pause button pressed? If so, unlock and release.
·
Are the accidental - erasure prevention tabs punched
·
out? If so, cover the holes with plastic tape.
Clean heads, capstan and pressure roller with a
·
cleaning stick.
Are the batteries exhausted?
·
Is the disc loaded upside down?
·
Is the disc scratched or warped?
·
Is the pick - up lens dirty? If so, clean it with a cleaning
·
stick.
Is the disc scratched or otherwise flawed?
·
Is the disc soiled?
·
First, press the Stop button then play the disc again.
·
MAINTENANCE
CLEANING OF HEADS AND TAPE PATH
¨
We recommend cleaning after every 10 hours of operation. To make the best possible
recordings, you should clean all surfaces which the tape travels before every recording.
1. Press STOP/EJECT button to op en the cassette holder.
2. Wipe the heads, pinch roller and capstan with cleaning tip slight hoisted with cleaning
fluid or alcohol.
3. After cleaning the heads and tape path, do not insert a cassette until the areas cleaned
are completely dry.
¨
CLEANING THE CABINET
Clean the cabinet, panel and controls with a soft cloth light moisted with a mild detergent
solution. Do not use any type of adrasive pad, scouring powder or solvent such as alcohol or
benzine.
16
17
 Loading...