

Page 1

QUICK GUIDE
40HBD06U
444-7889
Please read this quick guide fully before installing or operating because it contains important setup information and keep for
future reference.
For any help concerning set up and use of your TV please call theCustomer Helpline:
0345 604 0105
Lines open: 9am - 8pm Monday to Saturday and 10am - 4pm Sunday
IMPORTANT - If placing TV into cabinet or alcove, ensure there is at least a 100mm (10cm) gap to the sides,
rear and top of the TV. This is to allow for adequate ventilation during operation. Please read the
main Users Guide for more safety information before installation.
insert the batteries into your handset
either connect the aerial straight to your TV...
2a
Aerial (RF)
Lead
2
SPDIF
Coax.OUT
wall
socket
Aerial (RF) Socket
Page 2
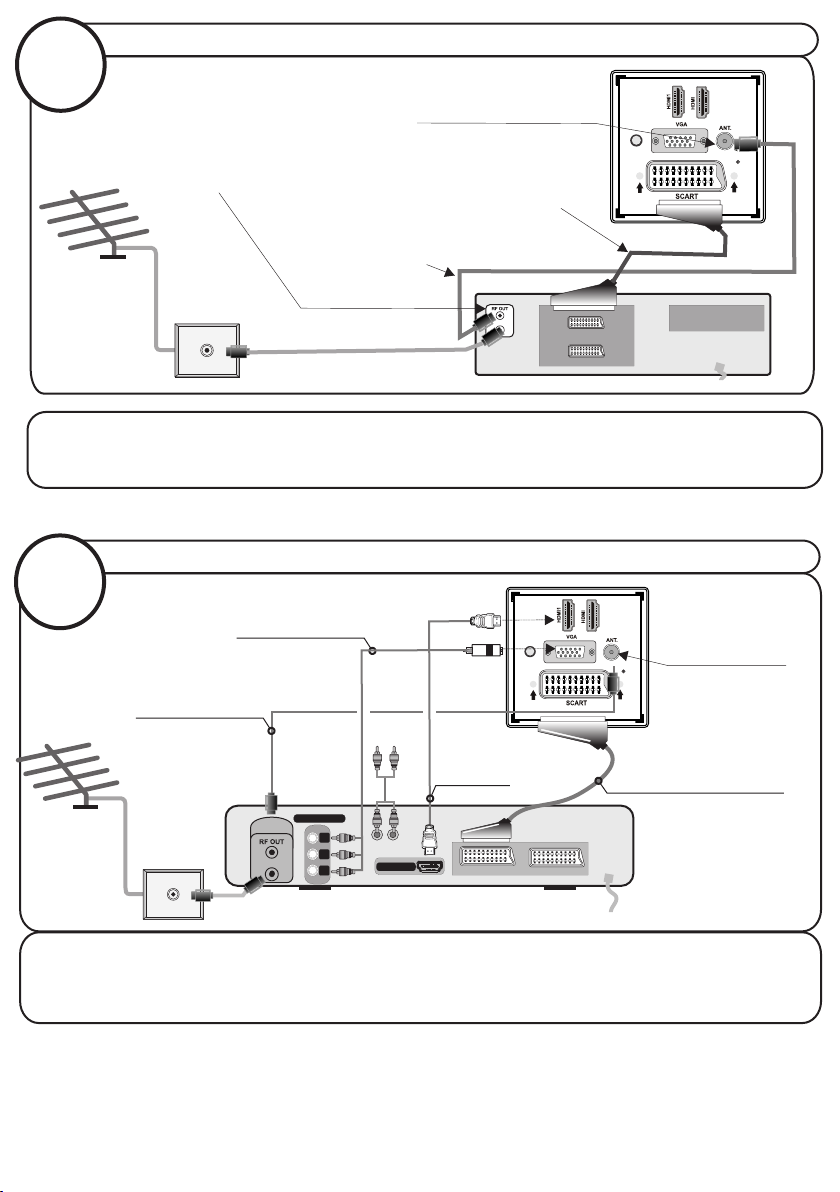
...or connect the aerial through a VCR...
2b
Aerial (RF) Socket VCR
Aerial (RF) Socket
Optional Scart Lead
SPDIF
Coax.OUT
2
TV to VCR
(RF) connector
wall
Aerial (RF)
socket
Lead
• It is recommended that a scart lead should be fitted between your TV and VCR to enhance your picture and sound
quality. Scart leads are essential if you have a stereo TV and VCR and wish to obtain stereo sound from your
equipment. These leads can be purchased from your Hitachi dealer or any good High Street electrical retailer.
lead VCR to TV
ANT.IN
AV-1
AV-2
VCR
...or through a HDMI and YPbPr products (DVD-RW)
2c
PC to YPbPr cable
2
SPDIF
Coax.OUT
TFT-LCD TV
Aerial (RF) Socket
(RF) connector
lead Device to TV
Audio In
HDMI cable
COMPONENT
wall
ANTENNA
Aerial (RF)
socket
ANT.IN
Lead
Note : These three methods of connection perform the same function but in different levels of quality. It is not
necessary to connect by all three methods.
• High Definition
Your LCD Television is capable of displaying High Definition pictures from devices such as a High Definition Satellite Receiver or DVD
Device.These devices must be connected via the HDMI socket or Component Socket.
Y
PB
PR
AUDIO OUT
HDMI OUT
DVD RECORDER
Scart Lead to AV-1 on TV.
Page 3
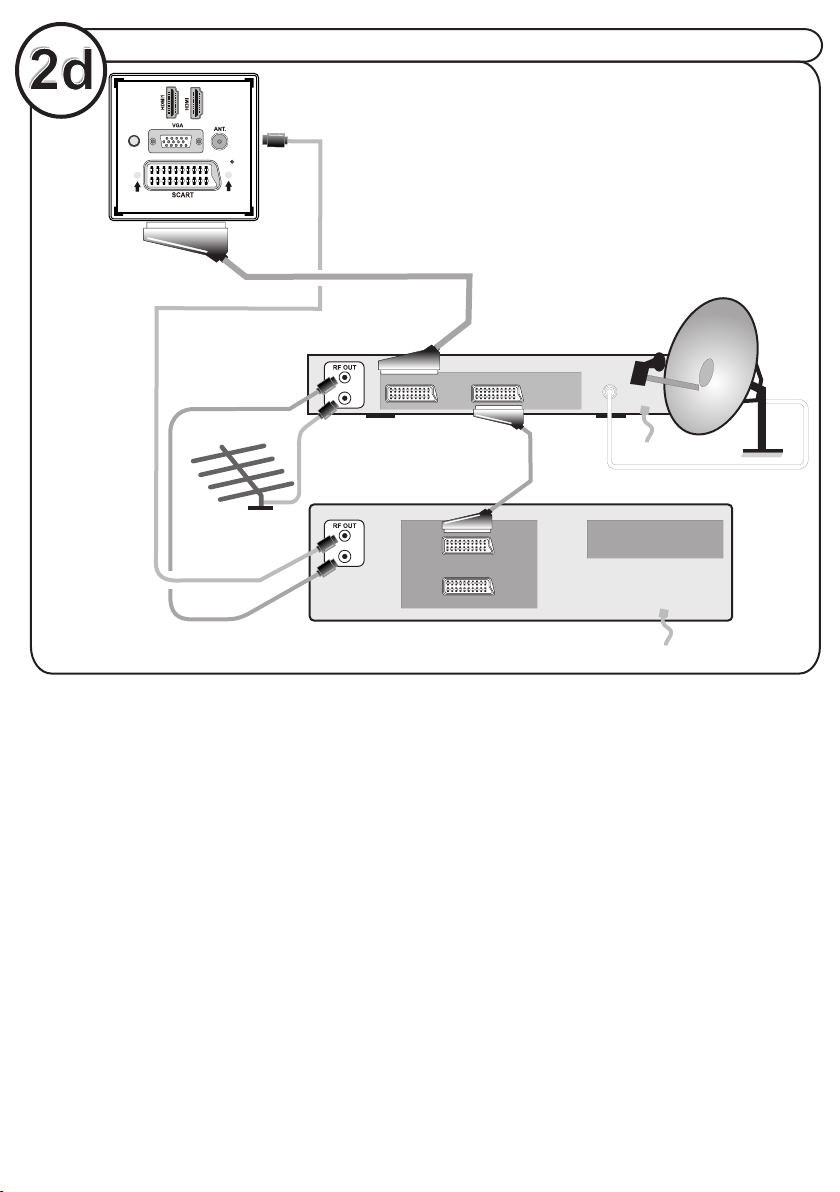
...or through a VCR and satellite decoder.
SPDIF
Coax.OUT
RF Lead from
VCR to TV
2
TFT-LCD TV
RF Lead
from VCR to
Satellite
Aerial
ANT.IN
RF Lead to
Aerial
ANT.IN
• Scart Lead to
AV-1 on TV.
TV VCR
AV-1
AV-2
Satellite LNB lead
VCR
Page 4
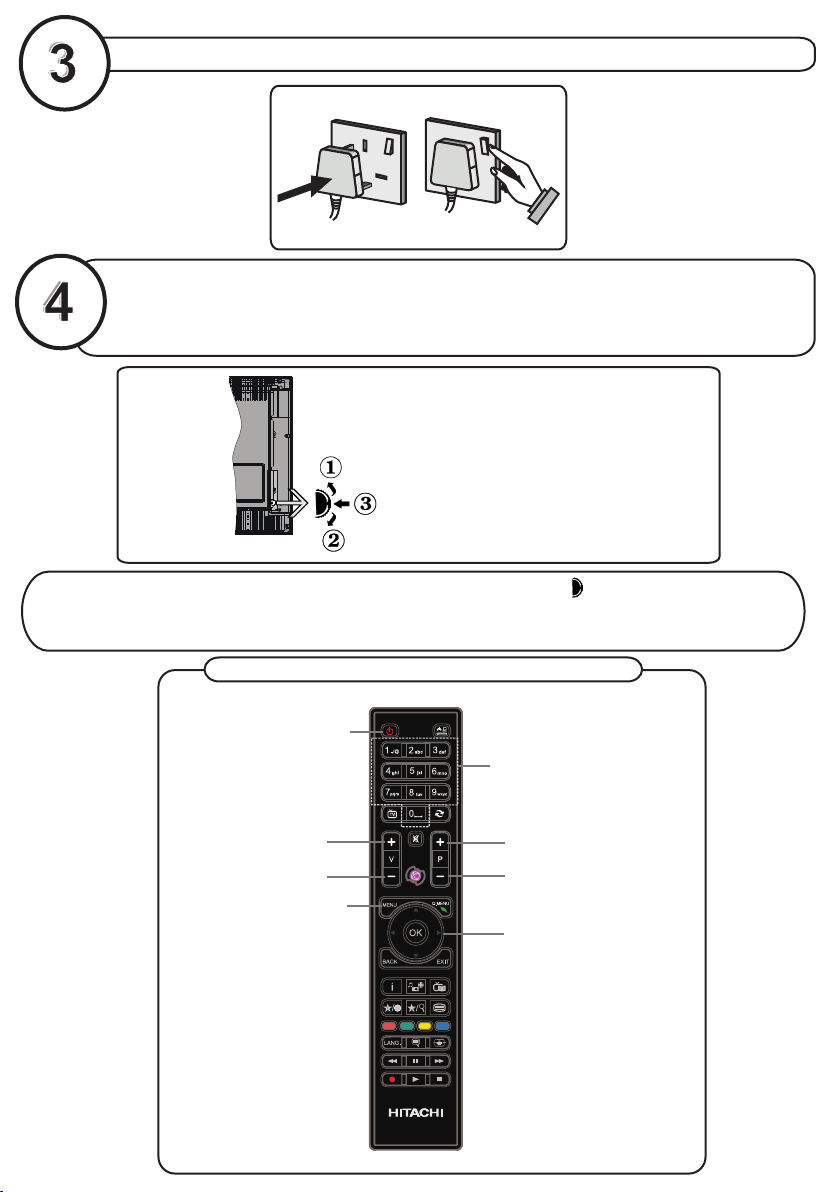
connect the TV plug to the mains socket
UK plug
insert plug...
...and switch on
Press OPERATE/STANDBY button on the remote control orthe
press the control switch,located on the left side of the TV.
The TV will then switch on.
Rear view
1. Up direction
2. Down direction
3. Programme/Volume/Av/Standby-on
selection switch
NB: When the set is first switched on, the set will be in standby. Press or channel up down
(P- , P+) or numeric buttons (1, 2, 3, ...) on the remote control to operate.
basic functions of remote control
OPERATE/STANDBY
To select a programme
number.
Volume Up
Volume Down
To enter the main menu
Programme Up
Programme Down
For navigation of the menus
RC 4862
Page 5
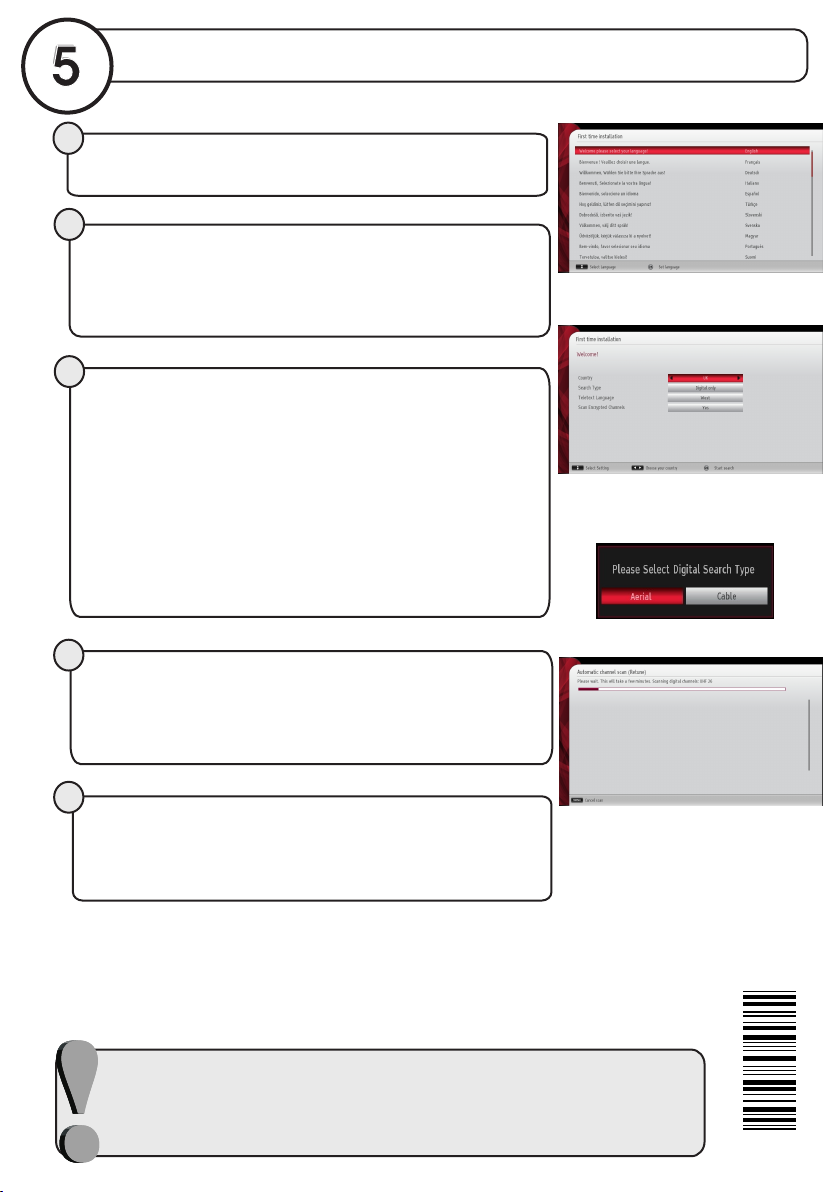
start A.P.S. (Auto Programming System)
1
When the TV is operated for the first time, installation wizard will guide you
through the process. First, language selection screen will be displayed.
2
• Use "up" or "down" buttons to select your language and press OK
button to set selected language and continue.
• After selecting the language, “First Time Installation” screen will be
displayed, requiring you to set Country, Search Type, Teletext
Language and Scan Encrypted options.
3
• By pressing "left" or "right" button, select the country you want to set press
"down" button to highlight Search Type option. Use Left or Right button to
set the desired Search Type. Available search types are digital only,
analog TV only and full. When set, press Down button to highlight Teletext
Language. Use "left" or "right" button to select desired Teletext Language.
•Press "down" button after setting Teletext Language option. Scan
Encrypted will be then highlighted. You can set Scan Encrypted as Yes if
you want to scan coded stations.
• Press OK button on the remote control to continue and the 'Please
select digital search type.” message will be displayed on the screen.
4
Please select Aerial option and press OK button to continue, a message
asking for the starting process appears on the screen. To continue please
select YES and press OK. To cancel operation, select NO and press OK.
5
Note: As the Cable feature is not supported in the UK, please ensure that you
select Aerial during the First Time Installation. If you mistakenly select Cable,
please repeat the First Time Installation (which can be selected from the
tuning menu) and select Aerial.
important note.
Once the TV has found all your local stations, they are then automatically
assigned a programme number and name, if available from the broadcast.
50321119
 Loading...