


user manual
CONTENT
CONTENT
CHAPTER
CONTENT
1 INTRODUCTION
About this smartphone
About this user manual
Notes for this manual
Overview
2 GETTING STARTED
Makes sure you have everything
Charging battery
Turning the device on or off
Locking and unlocking the screen
Using headset
3 LEARNING THE BASICS
Home screen
Extended home screen
Shortcut icons
Widgets
MIGHTY
Wallpaper
Application
Text entry
Contact
1
Importing and exporting contact
Communicating with contact
3
Managing contact
3
Favorite contact
3
Using the phone
3
4 EMAIL & MESSAGING
5
Text message
Multimedia message
5
Customizing message settings
5
Email accounts
5
Using email
6
6
5 INTERNET & BLUETOOTH
7
Connecting to internet
Browsing web page
7
Using Bluetooth
7
9
6 MULTIMEDIA APPLICATIONS
9
Videos and photos
9
10
11
12
12
13
13
14
14
16
16
17
17
18
19
22
22
23
23
25
25
CONTENT
Viewing photos
Using music player
FM radio
7 PROGRAMS
Backup and Restore
Browser
Calculator
Calendar
Camera
Clock
Contact
Downloads
Email
Messaging
Play music
Gallery
Phone
Settings
Video Player
8 Q-Touch
9 MANAGING YOUR PHONE
1
Device settings
Changing basic settings
2
25
Using wireless & networks
25
Protecting your phone
26
Resetting the device
27
APPENDIX
27
Appendix : Safety information
27
27
27
27
27
27
27
28
28
28
28
28
28
28
29
30
31
32
33
33
34
35
INTRODUCTION
1.INTRODUCTION
ABOUT THIS SMARTPHONE
Phone Model :Q50 Parkpour
Transceiver Manufacture :Galaxy Satellite
Communications Ltd.
Trademark :CONNECT
ABOUT THIS USER MANUAL
This User’s Manual provides
information on the various components in the
Smartphone and how to use them.
NOTES FOR THIS MANUAL
A few notes and warnings in bold are used throughout
this guide that you should be aware of in order to
complete certain tasks safely and completely.
NOTES
Tips and information for special situations
OVERVIEW
This manual refers to the hardware and essential
software required to run the Smartphone.
Not included – Operating System (e.g: Android Jelly
Bean) have their own manuals. If you have questions
about the operating systems or programs then please
consult the appropriate manuals.
Operating system – Your Smartphone may already
come with system software pre-installed. Where this is
not the case, or where you are re-configuring your
Smartphone for a different system, you will find this
manual refers to the following operating systems:
Android Jelly Bean
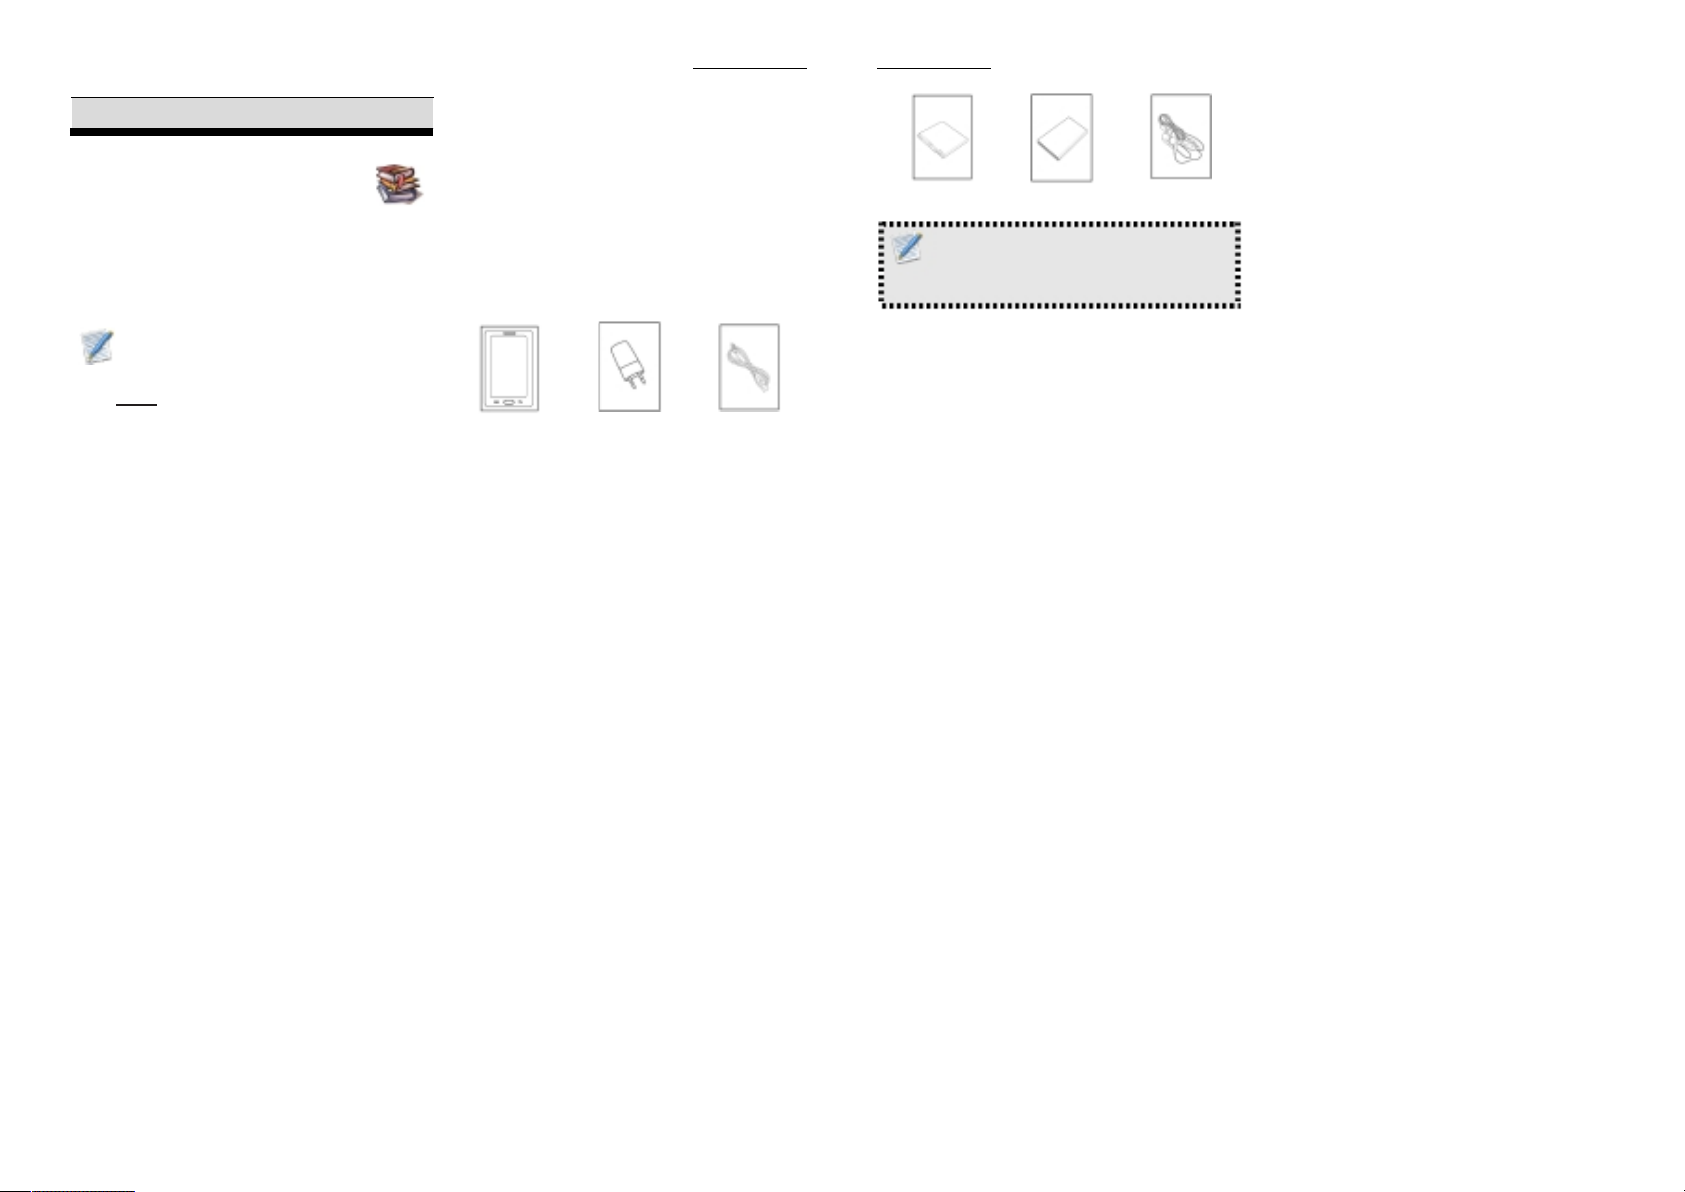
What’s in the Box?
Your package comes with the following items. If any
of them is missing, please contact your retailer:
Device
AC Adapter USB Cable
INTRODUCTION
Battery
Quick Start Guide
NOTES
Actual accessories design may differ from what is
represented this visual.
Headset
4
3
GETTING STARTED
2. GETTING STARTED
MAKES SURE YOU HAVE EVERYTHING
Before moving on the next set of instructions, make
sure that you have received all items/components. If
any items are missing and/or damaged, notify your
dealer immediately (see “What’s in the Box” on
chapter 1).
CHARGING BATTERY
The battery that came with your device is only partially
charged. To fully charge the battery, charge it for 2
hours.
Charge the battery
1. Connect one end of the AC adaptor to the Micro
USB connector of the device.
2. Plug the other end of the AC adaptor to the wall
outlet to start charging.
NOTES
Battery can also be charged when device connects to
computer through USB cable.
Battery life varies depending on network, applications, and
ambient temperature.
TURNING THE DEVICE ON or OFF
After installing SIM card and charging battery, device
is ready to turn on.
Turn on your device
Press and hold the power button.
Turn off your device
1. Press and hold power button for 5 seconds.
2. A pop-up window appears, tap Power off.
Set device to airplane mode
1. Press and hold the Power button for 5 seconds.
2. On the options menu, tap Airplane mode.
GETTING STARTED
Set device to silent mode
1. Press and hold the Power button for 5 seconds.
5
2. On the options menu, tap .
Set device to sleep mode
To set the device to sleep mode, press the Power
button. This turns the display off.
To turn the display on, press the Power button again.
LOCKING AND UNLOCKING THE SCREEN
Lock the screen to prevent it from accidentally being
touched. By default, the screen locks after being idle
for a period of time (see “Display Settings” on chapter
8).
Lock the screen
To manually lock the screen and turn off the display,
press the Power button.
Unlock the screen
1. Press power button or front buttons to turn on the
display from Sleep mode.
6
2. Drag to the right of the screen to unlock the
screen.
USING HEADSET
For hands-free conversation or listening to music,
plug one headset to headset jack.
NOTES
When using headset, your ability to hear outside sounds
may be limited. Do not use headset if it will endanger you.
Do not set volume to maximum with headset as it may
damage your hearing.
LEARNING THE BASICS
3. LEARNING THE BASICS
HOME SCREEN
From Home screen, you can quickly access common
features and view notifications of missed calls, receive
messages and check connection status.
EXTENDED HOME SCREEN
Swipe your finger to the left or right across the home
screen. The two extensions to the left and to the right
of the Home screen provide more space for icons,
widgets, shortcuts, and other items.
Status bar
The Status bar icons indicate different types of
information. The following icons may appear on the
status bar.
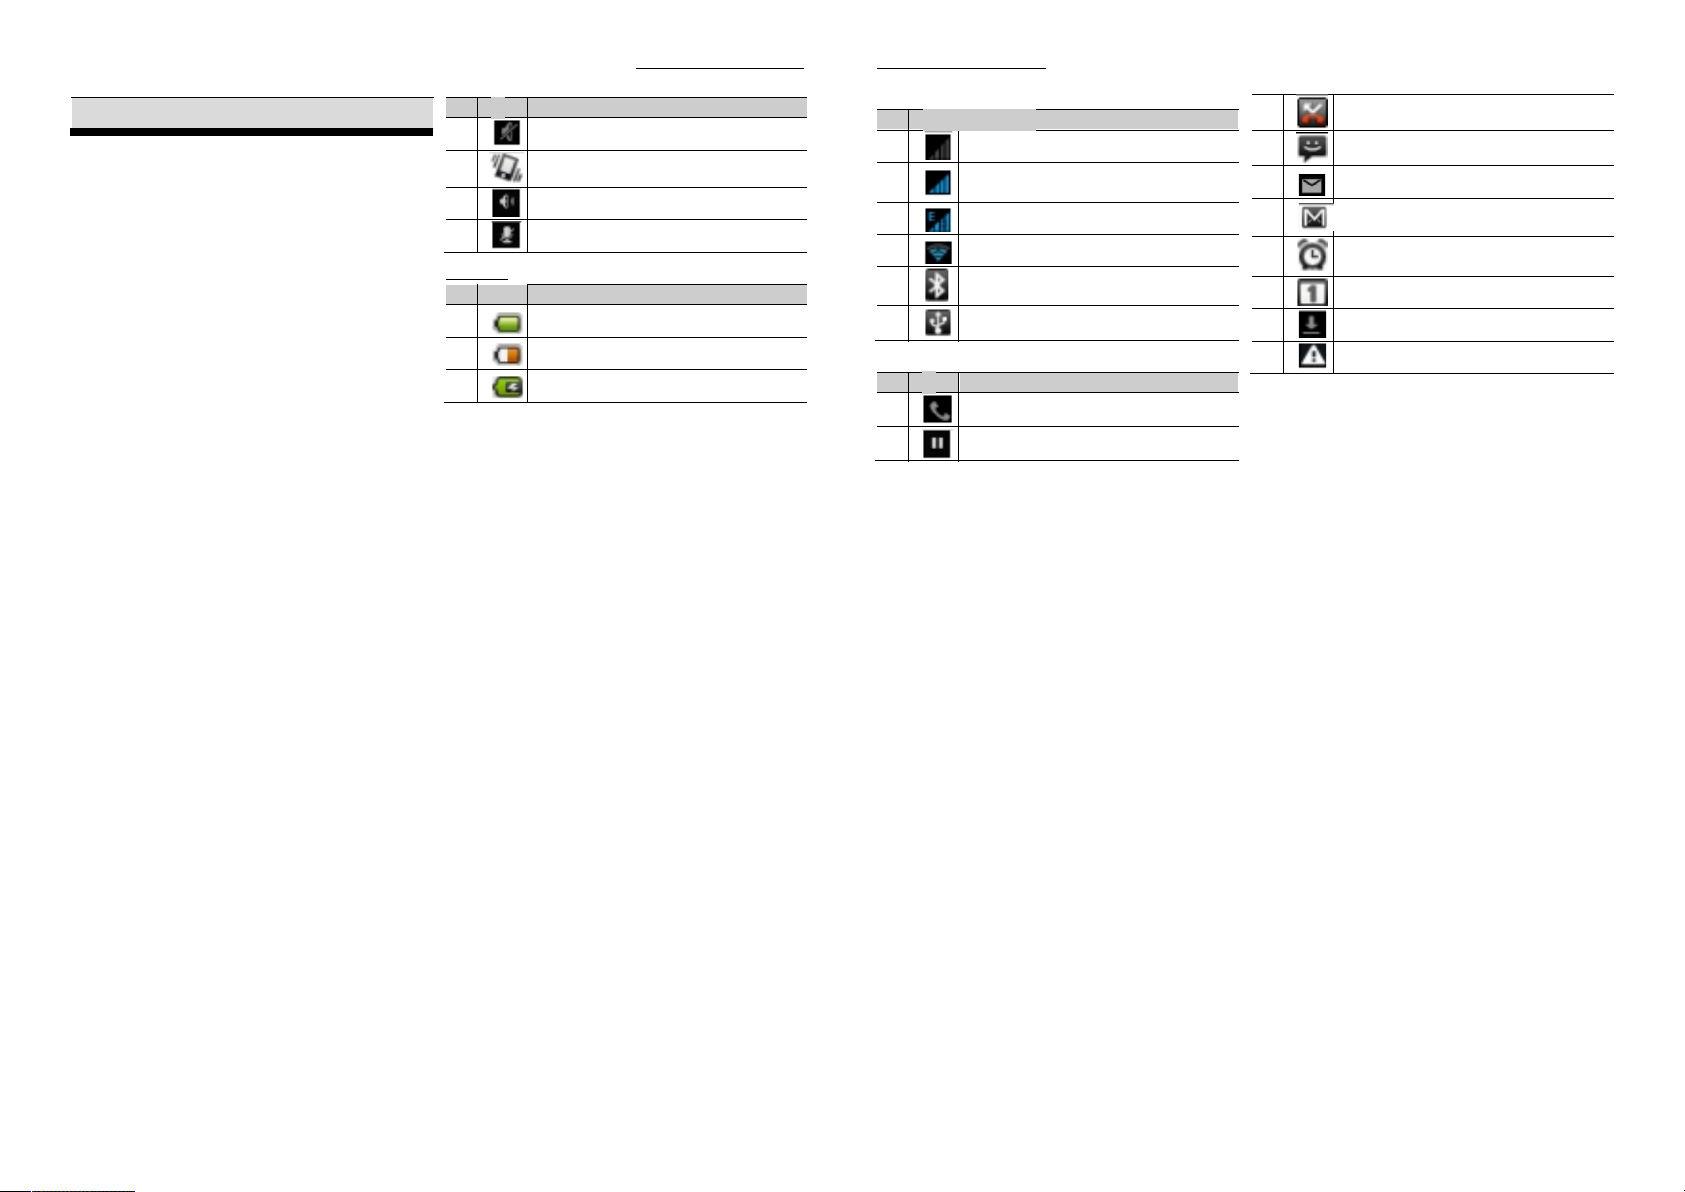
Volume icons
The following icons may appear on the volume icon
area:
No Icon
1
2
3
4
Battery icon
No Icon
1
2
3
Description
Sound is off
Vibrate mode is activated
Speakerphone is on
Phone is muted
Description
Battery is full
Battery is low
Battery is charging
LEARNING THE BASICS
Connection icon
No Icon Description
1
2
3
4
5
6
Notification icons
No Icon
1
2
No network signal
Maximum signal strength. Fewer
bars indicate lower signal strength.
GPRS network is in use.
Wi-Fi is connected.
Bluetooth connection is active.
Device is connected to PC via USB
connector
Description
Call is progress
Call is on hold.
3
4
5
6
7
8
9
10
Notification panel
The notifications panel displays the device activities,
details of status or other notifications.
Miss call notification
New text message notification.
New email notification.
New Google mail notification.
Alarm.
Task notification.
File has been downloaded
No SIM card inserted
7
8

LEARNING THE BASICS
Open the notifications panel
Tap and slide the status bar downwards. To open
related applications, touch a notification.
Close the notifications panel
Tap and hold the bottom of the panel, then slide
upwards to close the notifications panel.
SHORTCUT ICONS
Shortcut icons allow you to access an application
directly from the home screen.
Add a shortcut icon
1. Tap and hold the shortcut icon until it enlarges.
2. Add the shortcut icon that you want to appear on
the home screen.
Move a shortcut icon
1.Tap and hold the shortcut icon until it enlarges.
2.Drag the shortcut icon to the desired area on the
home screen.
Remove a shortcut icon
1. Tap and hold the desired shortcut icon until the
delete icon enlarges. The icon apprears at the top of
screen.
2. Drag into the Delete icon to remove the shortcut.
WIDGETS
Widgets allow you to receive live and personalized
updates right on the home screen.
Add a widget
You may add and customize the Widgets on the home
screen as you like.
1. Tap and hold the widget until it enlarges.
2. Add the widget that you want to appear on the
home screen.
Move a widget
1. Tap and hold the widget until it enlarges.
2. Drag the widget to the desired area on the home
screen.
Remove a widget
1. Tap Remove to remove an application
WALLPAPER
You can customize the wallpaper of your home screen
with default wallpaper or with pictures taken with this
device.
Set wallpaper from live wallpaper
Live wallpapers are animated images that you can set
as wallpaper.
1. Tap and hold a blank area on the Home screen.
2. On the options menu, tap Live wallpapers. Live
wallpapers and their descriptions are listed. Swipe
up or down to scroll through the list
3. Tap to preview wallpaper.
4. Tap Set wallpaper to confirm.
Set wallpaper from my gallery
You can use pictures taken by the phone camera or
pictures saved on the micro-SD card as the wallpaper.
1. Tap and hold a blank area on the home screen.
2. On the options menu, tap Gallery.
3. Thumbnails of pictures saved in the micro-SD card
appear. Tap to select a picture. Drag your finger to
select the crop area.
4. Tap OK to confirm.
Set wallpaper from wallpaper gallery
1. Tap and hold a blank area on the home screen.
2. On the options menu, tap Wallpapers.
9
10
3. All system wallpapers are displayed. Swipe your
finger to the left or to the right to view the available
wallpapers.
4. Tap to preview the wallpaper.
5. Tap OK to apply your selection.
APPLICATION
The Application Menu contains all the applications
installed on the device. On the home screen, Tap
APPS to display all applications swipe your finger from
right to the left for more applications.
Open applications
Tap an icon to open the application.
View Recently-Used Applications
Tap and hold the Home key and the recent application
will appear.
Create Application Shortcuts
To easily access frequently-used applications, add the
shortcut icon to the home screen.
1. Tap Home key and hold an application icon until the
home screen is displayed.
LEARNING THE BASICS
LEARNING THE BASICS
2. Drag the icon to the desired area to place the
shortcut.
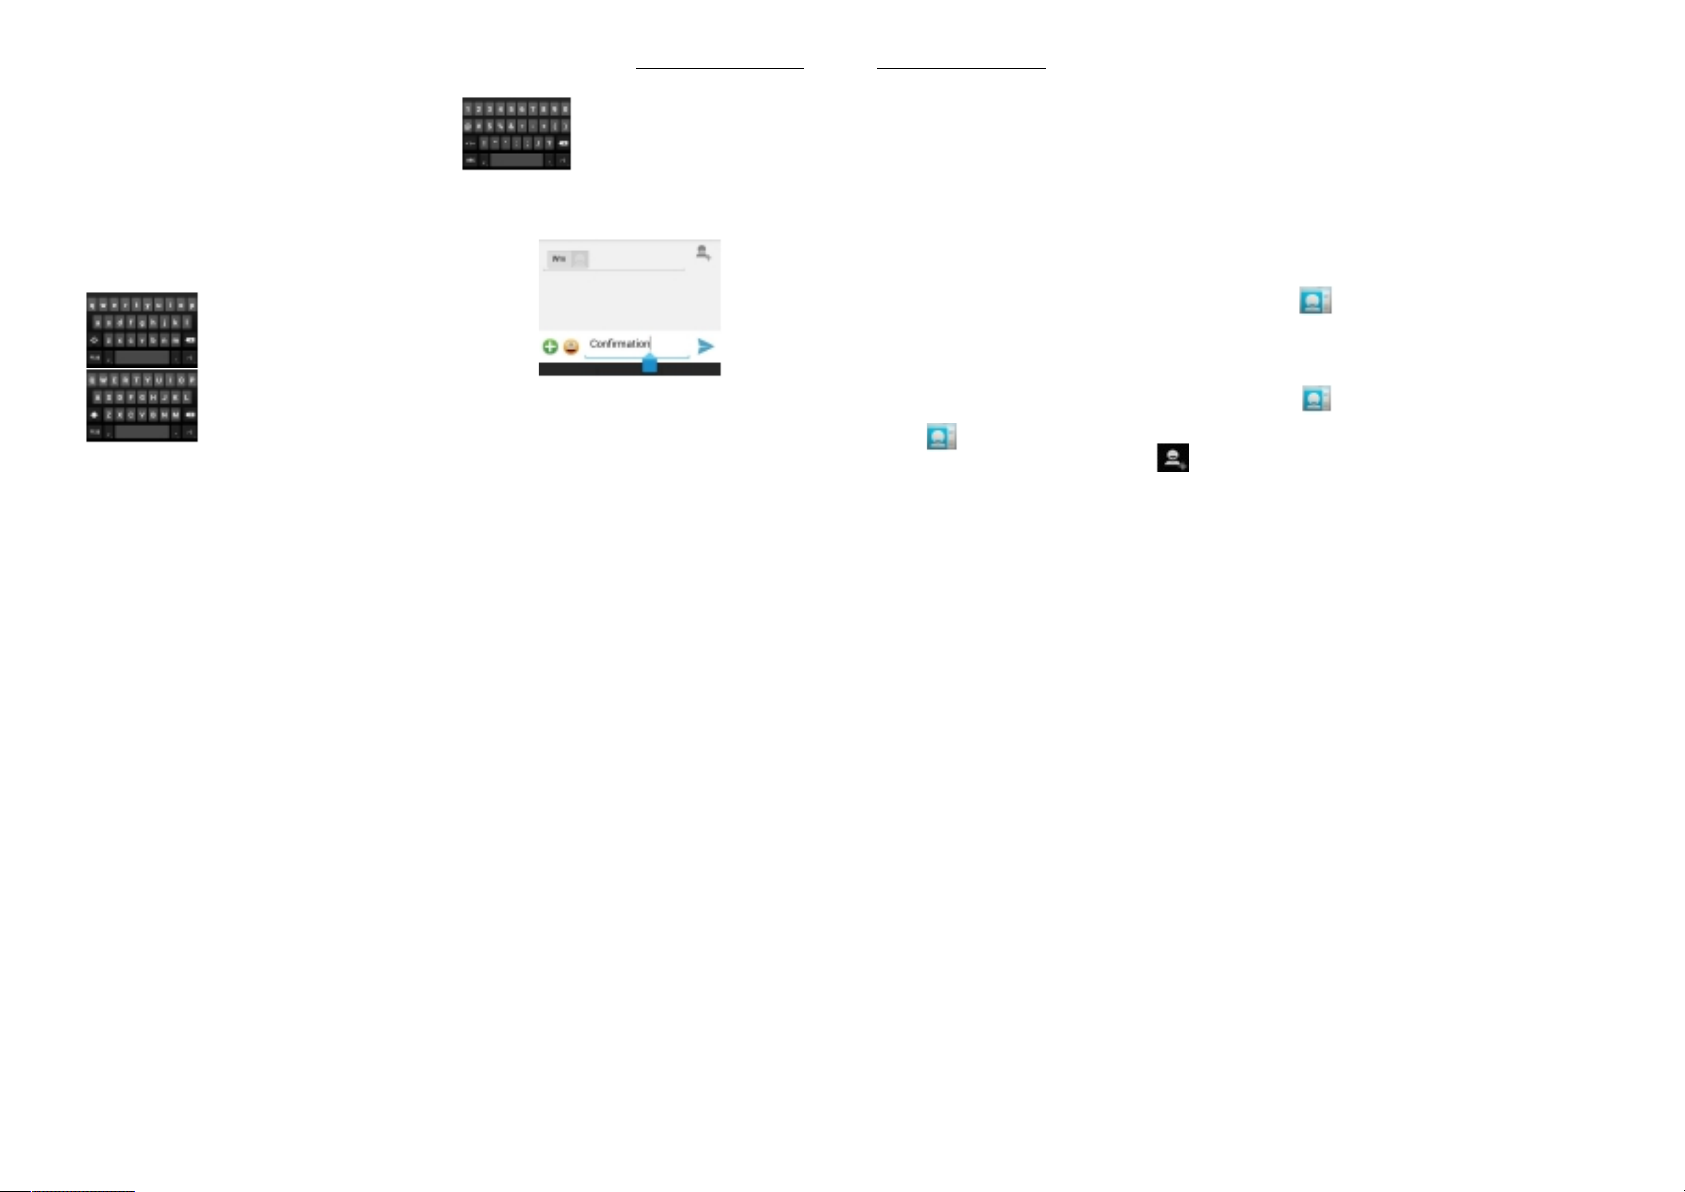
TEXT ENTRY
On-Screen Keyboard
Use the on-screen keyboard to enter text, numbers,
and symbols.
Open and close the keyboard
Tap a text field to activate the keyboard.
Tap back to close the keyboard.
Using the on-screen keyboard
Lower case keyboard (default)
Numbers and symbols
Tap the keys to enter characters as you would on a
computer keyboard.
Edit Text
Upper case keyboard
Select, cut, or copy
To select, cut, or copy a word or a portion of text, do the
following:
1. Touch the area where you want to place the cursor.
2. Touch and hold the text field box.
11
3. From the cursor, swipe your finger across the text that
you want to select.
4. Edit the text. To cut or copy the highlighted text, touch
and hold the text field box, then touch Cut or Copy.
Paste Text
To paste text, do the following:
1. Touch and hold the text field box of where you want to
paste the text.
2. On the options menu, tap Paste.
CONTACT
Contact is your phonebook that lets you store names,
phone numbers, email addresses and other
information. Contacts are stored in the phone memory.
You can save information such as names pictures,
phone numbers, e-mail addresses, etc. You can also
add the frequently used Contacts to the favorites list.
Adding Contact
From the Home screen, do one of the following to
open Contact.
1. Tap .
2. Tap the Add icon at the right of bottom
12
3. Tap one of the following:
Phone: To save the contact to phone memory.
4. Enter Contact information such as name, phone
number, email address etc. To add a Contact
picture, tap the photo icon.
5. Tap Save to save the Contact.
IMPORTING AND EXPORTING CONTACT
You can export Contact to the memory card to back up
Contact information and import it to the device.
Import from memory card
1. Tap .
2. Tap Menu > Import/Export.
3. Tap Import from Phone or SD card to import Contact
from the memory card to the device.
Back up Contacts
1. Tap .
2. Tap Menu > Import/Export.
3. Tap PHONE
4. Tap Next, and Tap SD Card to Export to SD card.

LEARNING THE BASICS
NOTES
Exporting Contact will overwrite the old backup file in the
memory card.
5. A warning message pops up, tap OK to proceed. All
Contacts are copied to the memory card.
COMMUNICATING WITH CONTACT
Call Contact
1. Tap .
2. Tap a Contact.
3. Tap Call mobile, Call work, or Call home.
NOTES
The available call options vary depending on the phone
number(s) saved for a specific Contact and the number of SI M
cards installed on the device.
Text Contact
1. Tap .
2. Tap a Contact.
3. Tap Message icon.
4. Compose and send your message. See “Create
and Send Text Messages” on chapter 4.
MANAGING CONTACT
Edit Contact
1. Tap .
2. Tap a Contact.
3. Tap Menu->Edit.
4. Modify the necessary information.
5. Tap Save to save changes.
Delete Contact
1. Tap .
2. Tap a Contact.
3. Tap Menu > Delete.
LEARNING THE BASICS
13
4. Tap OK to confirm.
Send Contact Information
You can send Contact information to other devices via
Bluetooth, Email, Messaging, or WLAN directly.
1. Tap .
2. Tap a Contact.
3. Tap Menu > Share.
4. Tap a sharing application to send the contact
information.
Assign Contact Ringtone
1. Tap .
2. Tap a Contact that you want to assign a ringtone to.
3. Tap Menu > Set Ringtone.
4. Tap desired ringtone.
5. Tap OK.
FAVORITE CONTACT
Add the most frequently called Contact to Favorites to
access contacts quickly and easily.
View Favorites
Tap
14
then tap the favorite .
Add to Favorites
1. Tap .
2. Tap a Contact.
3. Tap to add Favorites.
Remove from Favorites
1. Tap .
2. Tap a Favorites Contact.
3. Tap to remove form Favorites
USING THE PHONE
To open the Phone screen, Tap Phone.
Making a call
Make a call from the Phone screen
1. Tap Phone.
2. Tap the phone number on the keypad.
3. Tap Dial Button after finished step 2

LEARNING THE BASICS
Answering a call
When an incoming call is received, the device may
ring or vibrate and the screen displays an incoming
call message. If the caller is listed in your Contact, the
Contact’s name appears. You may also see the
caller’s phone number, if available.
Accept or reject an incoming call
To answer a call, drag to the right side.
To reject the call, drag to the left side.
Ending a call
To end a call, tap end button.
In-call options
To put the call on hold, tap hold .
To place a second call while putting the current
caller on hold, tap Add call .
To display the on-screen keypad, tap Dial-pad
To record the call conversation, tap Record.
To mute or un-mute the microphone tap Mute
To activate or deactivate the
Speakerphone tap Speaker .
Call log
The Call Log screen displays the most recent
outgoing, received, or missed calls.
To view the Call Log screen, tap Phone
To call an entry, touch the corresponding phone
icon.
To send a message, add to Contacts, and view call
details, tap the entry.
To remove the entry from the list, tap and hold an
entry, then tap Delete icon.
To clear the call log, touch Menu > Delete > Slecte
call log >Delete Call log > Ok.
.
.
EMAIL & MESSAGING
4. EMAIL & MESSAGING
Use Messaging to access text and MMS messages.
Use Email to send and receive email messages via
your internet e-mail accounts.
TEXT MESSAGE
A text message can only contain letters, numbers
and symbols.
Creating and sending a text message
This device offers several ways to create and send a
new text message.
1. From Messaging screen
2. Tap Messages.
3. Tap .
4. In the To field, enter the recipient’s phone number.
15
5. Tap Type message then type your message.
16
NOTES
If you close messaging before sending your message, the
unsent message will be automatically saved as a draft.
Receiving and managing messages
When you send and receive messages from a
contact, these messages are grouped as a message
thread.
Reply to a text message
1. Tap Messaging.
2. Tap a message thread to open it.
3. Tap Type message then type your message.
Forward a text message
1. Tap Messaging.
2. Tap to view a message thread.
3. Tap and hold a message to display the message
options.
4. Tap Forward.
5. In the To field, enter the recipient’s phone number.

Delete one message thread
1. Tap Messaging.
2. Tap and hold the message thread you want to
delete.
3. Tap Delete icon.
4. Tap OK to confirm.
Delete several or all messages thread
1. Tap Messaging.
2. Tap Menu > Delete threads.
3. Select the check box of the message threads that
you want to delete or tap All to select all threads.
4. Tap Delete.
5. Tap OK to confirm.
Copy message text
Use this function to save a copy of the message to
the SIM card(s) memory.
1. Tap Messaging.
2. Tap a message thread to open it.
3. Tap and hold the message to display the options.
4. Tap Copy.
MULTIMEDIA MESSAGE
A multimedia message (MMS) can contain letters,
images, audio or video file.
Create and send MMS messages
The device offers several ways to create and send an
MMS message.
1. Tap Messaging.
2. Tap New Message.
3. In the To field, enter the recipient’s phone number
or email address.
TIP: To add recipients from Contacts, tap To and
enter at least two numbers of a contact number or
two characters of a contact name. Then the
corresponding contact will be listed for you to
select.
4. Tap Type to message, type your message.
CUSTOMIZING MESSAGE SETTINGS
1. Tap Application Drawer > Messaging.
2. Tap Menu > Settings. The following message
settings are available:
Text message (SMS) settings: Use this setting
17

EMAIL & MESSAGING
to enable Delivery reports, manage SIM1 card
and SIM2 card text messages.
Multimedia (MMS) settings: Use this setting to
enable Delivery reports, Read reports, Send
delivery report, Auto-retrieve, and Roaming
auto-retrieve of MMS messages. You can also
set the Maximum picture resolution and
Maximum message size.
Notification settings: Use this setting to enable
and set notifications of new messages.
General settings: Contains the display, storage
cell broadcast and service message settings.
EMAIL ACCOUNTS
This device can send and receive emails just as you
do with a computer. This device supports Internet
email: email account provided by an Internet Service
Provider (ISP) or web-based email, such as Gmail,
Hotmail, Yahoo! Mail, etc.
Set up email accounts
1. Tap Application Drawer > Email.
2. Enter your Email address and Password.
3. Tap Next. The device will automatically retrieve
18
the email settings.
To manually set up the email, tap Manual setup.
4. Enter Name and Account display name.
NOTES
The Account display name is the name shown on the Home
screen and the Email screen.
5. Tap Done.
Add more email accounts
1. Tap Application Drawer > Email.
2. Tap Menu > Settings > Add account.
3. Select the email account type, enter your Email
address and Password.
4. Select Send email from this account by default to
set this account as the default email account.
5. Tap Next. The device will automatically retrieve
the email settings.
6. Enter Name and Account display name.
7. Tap Next.
Select email accounts
1. Tap Application Drawer > Email.
The Email account screen lists the available email
EMAIL & MESSAGING
accounts.
2. Tap the account you want to access.
Delete email accounts
1. Tap Application Drawer > Email > Menu > Settings.
2. Tap the email account.
3. Tap Remove account.
4. Tap OK to confirm.
USING EMAIL
Compose and send emails
1. Tap Application Drawer > Email, then tap an
email account.
2. Tap Menu > Compose.
3. In the To field, enter the recipient’s email address.
4. Tap Subject Then type a subject.
5. Compose your email.
6. Tap Send.
Send email from Contacts
You can send an email to a contact with an email address
stored in Contacts.
1.
Tap Application Drawer > Contacts.
2.
Tap a contact.
3.
Tap Email.
4.
Enter a subject and compose your email.
5.
Tap Send.
Add attachments to email message
1.
Before sending your message, tap Menu > Attach file.
2.
Select the type of file then select the file you want to
attach.
Receive emails
Emails are automatically received in Inbox folder
when the device connects to a network.
Manually receive e-mails
1. Tap Application Drawer > Email, then tap an
email account.
2. On the Inbox screen, tap Refresh.
Read and reply to emails
1. Tap Application Drawer > Email, then tap an
email account.
2. On the Inbox screen, tap an email to open it.
The Inbox displays the email headers. When you open
the email, it shows only a part of the message, unless
19

EMAIL & MESSAGING
EMAIL & MESSAGING
it is a very short message. Download the email to view
the complete content.
Download attachments
With POP3 email accounts, attachments are
downloaded when you download the complete
message.
With IMAP4 email accounts, tap the attachment to
mark it for download. The attachment is downloaded
the next time you connect to your email server.
NOTES
Only supported file types can be opened on this device.
Reply or forward e-mails
Open the message.
1.
Do any of the following:
2.
Tap Reply or Reply all to reply the email.
Tap Forward. Then enter the recipient in the To field.
Compose your message.
3.
Tap Send.
4.
20
Manage email folders
Delete emails
1. Tap Application Drawer > Email, then tap an
email account.
2. On the Inbox screen, tap and hold the message.
3. Tap Delete.
View other folders
If you are viewing the Inbox or a messaging list
screen, tap Folders, then tap the folder that you want
to view.
Move between emails accounts
If you are viewing the messaging list screen of one
account and you want to view the list of another
account, tap Menu > Accounts, then tap the account
you want to view.
Customize email settings
You can configure the general settings of your email
account such as account name, email checking
frequency, default account, notifications, and server
settings.
Set up your account name
1. Tap Application Drawer > Email then tap an email
account.
2. Tap Menu > Account settings to view the email
account settings.
3. Tap Account name to change the account name.
4. Tap OK to confirm.
Set up the email checking frequency
1. Tap Application Drawer > Email then tap an email
account.
2. Tap Menu > Account settings to view the email
account settings.
3. Tap Inbox check frequency.
4. Tap an option.
21

BROWSING WEB PAGE
Drawer > Browse.
2. Tap the address bar.
3. Type the URL then tap Go.
While viewing a web page, tap Menu to change view
settings or apply other functions.
INTERNET & BLUETOOTH
5. INTERNET & BLUETOOTH
CONNECTING TO INTERNET
This device connects to Internet via:
Wi-Fi
Cellular Data Networks
Wi-Fi
Turn Wi-Fi on or off
1. Tap Application Drawer > Settings > Wireless &
networks > Wi-Fi.
2. Tap on/off switch beside Wi-Fi, to turn the Wi-Fi
function.
Connect to a Wi-Fi network
1. Tap Application Drawer > Settings > Wireless &
networks.
2. Turn on Wi-Fi.
3. Tap Wi-Fi. The device scans for Wi-Fi network.
4. Detected networks are displayed below. Tap a network
connection then tap Connect.
5. If you select an unsecured network, the connection is
automatically established.
6. Otherwise, proceed to the next step.
22
7. When connecting to a secured network, you will be
prompted for the password. Enter the password, then
tap Connect.
When Wi-Fi is connected, the connection icon is
displayed on the status bar.
Add Wi-Fi network
1. Tap Application Drawer > Settings > Wireless &
networks.
2. Tap Wi-Fi.
3. On bottom of the screen, tap then a new window is
displayed.
4. Follow the on-screen instructions and enter the
necessary information, then tap Save to save the
settings.
Advanced/Configure Wi-Fi settings
1. Tap Application Drawer > Settings > Wireless &
networks.
2. Tap Wi-Fi > Menu > Advanced to access and set up
more advanced options
.
Cellular data network
Check the availability of service and plan rates of data
INTERNET & BLUETOOTH
connections with your network service provider and
obtain the following information:
Access Point Names
Proxy
1. On the home screen, tap Browse or tap Application
Port
User name
Password
Enable data connection
1. Tap Application Drawer > Settings > SIM management.
2. To enable data connection, do not check the disable data
connection check box.
Set up wireless data connection
1. Tap Application Drawer > Settings > Dual SIM Settings
2. Enable data connection.
3. Tap Default data network, then select the network that
you want to use for data connection.
Starting a data connection
Data connection is automatically activated when the
device is turned on. If you set up multiple data
connection, select the connection you want to use
manually.
Manually start a data connection
1. Tap Application Drawer > Settings > SIM management.
2. Tap Data connection.
3. Tap SIM1, SIM2 or
off
.
To scroll the page, swipe your finger up or down and
left or right.
Manage web page
USING BLUETOOTH
Bluetooth modes
On: Bluetooth is turned on. This device detects
other Bluetooth devices, but this device is not
visible to others.
23

INTERNET & BLUETOOTH
Discoverable: Bluetooth is turned on and this
device is visible to other Bluetooth devices.
Off: Bluetooth is turned off.
To turn Bluetooth on or off
1. Tap Application Drawer > Settings > Wireless &
networks.
2. Tap on/off switch to turn the Bluetooth on.
3. To make your phone visible to others, tap
Bluetooth name.
4. To adjust your device visibility time tap Application
Drawer > Visibility Timeout then select adjustable
time you want
Connecting to Bluetooth devices
A connection to a Bluetooth device is called a
partnership. You need to pair and create a
partnership with a Bluetooth device to exchange
information.
1. Tap Application Drawer > Settings > Wireless &
networks.
2. Tap Bluetooth settings to view the menu options.
3. To search for a new device, tap Scan for devices.
4. Tap the device to connect.
24
NOTES
The PIN entered on the device must be the same PIN
entered on the other Bluetooth device.
If you connect with an audio device which only supports
HSP/HFP, "Connected to phone audio" is displayed on the
screen.
If you connect with audio device which supports
HSP/HFP/A2DP, "Connected to phone and media audio" is
displayed on the screen
5. If necessary, tap and hold the selected device to
enter device options menu.
NOTES
Once a partnership has been created, connecting to that
device again will no longer require entering the pass-code
MULTIMEDIA APPLICATIONS
6. MULTIMEDIA APPLICATIONS
VIDEOS AND PHOTOS
This device is equipped with camera to take videos
and photos.
Record videos
1. Tap Application Drawer > Camera.
2. Aim the device at the subject.
3. Tap then choose to activate the video.
4. To start recording, tap To stop recording
Take photos
1. Tap Application Drawer > Camera.
2. Tap and hold to focus on the subject.
3. Release your finger to take the shot.
VIEWING PHOTOS
View Photos in the Album
1. Tap Application Drawer > Gallery.
2. Tap a folder to view the images.
3. Tap an image to view in full screen.
4. Swipe your finger to the left/right to view the
previous/next image.
Stretch image to zoom in or zoom out.
To play the slideshow, tap Menu select slideshow
To delete, or edit the image, tap Menu then tap
desired option.
USING MUSIC PLAYER
Play music
1. Tap Application Drawer > Music. Library screen is
displayed.
2. Tap a song to start playback.
Create a Playlist
Add songs to a specific playlist or create a playlist.
1. Tap Application Drawer > Music. The Library screen
is displayed.
2. Tap and hold the song you want to add.
3. Tap Add to playlist.
25

MULTIMEDIA APPLICATIONS
4. Select from the current playlist or tap New to create
a new playlist. The song is added to the playlist.
Remove a music file from playlist
1. Tap Application Drawer > Music. The Library screen
is displayed.
2. Tap Playlists and select the desired playlist.
3. Tap and hold the song that you want to remove
from playlist.
4. Tap Remove from playlist.
5. The song is removed from the playlist.
FM RADIO
You can use your phone to listen to FM radio stations
once the original Headset is plugged into the
connector. Please press the side key to adjust music
volume . Tap the (
) to search the channels.
26
7. PROGRAMS
Backup and Restore
Open the Backup and Restore, you can backup your
Data as Contacts,SMS,Apps etc.
BROWSER
Open the Browser to view web pages.
CALCULATOR
With Calculator, you can perform basic arithmetic
functions on your device. Tap Application drawer >
Calculator.
CALENDAR
The Calendar lets you schedule and sound alarms for
appointments, meetings and other events. Scheduled
appointments for the day can be displayed on the
Home screen.
To schedule an event
1. Tap Application Drawer > Calendar.
2. Tap twice on the date.
3. Enter the event name.
4. Tap the From and To date and time boxes.Slide to
select time, then tap Done to set the date and time.
PROGRAMS
5. To set repetition, select the repetition from the list.
6. To set a reminder, select the reminder time from
the list.
7. When finished, tap Done to return to the calendar
CAMERA
Capture images with this device. See “Take Photos”
on chapter 6.
CLOCK
Can not set date and time. See “Setting alarms” on
chapter 8.
CONTACT
View or manage your contact list. See “Contact” on
chapter 3.
Downloads
From Browser downloading/downloaded files showing
here
27

Answering and hang up the phone: phone call interface,
PROGRAMS
EMAIL
Use Email to connect to your remote mailbox to
retrieve your new email messages, or view your
previously retrieved email messages offline.
File Manager
Open the application, User can manage the files of
stored in Memory
MESSAGING
Use the Messaging to send or receive text and MMS
messages. See “Text Message” on chapter 4.
PLAY MUSIC
Use the Music player to play music files or recorded
voice files. See “Using Music Player” on chapter 6
GALLERY
You can view your captured images,recorded video
clips, and downloaded images in the Gallery.
1. Tap Application Drawer > Gallery.
2. Tap the desired folder to view the camera pictures
or camera videos. The images or videos aredisplayed
in thumbnails.
3. To view photos or videos, see “Viewing Videos &
Photos” on chapter 6.
PHONE
Use Phone to make phone calls or manage call log.
See “Learning the basics” on chapter 3.
SETTINGS
In the Settings menu, you can view and make
adjustments for wireless & network settings, Device
settings, Personal settings and System settings. See
“Managing Your Phone” on chapter 8.
Video Player
Use the Music player to play Video files or recorded
video files.
28
8. Q-Touch
Q-Touch
Q-Touch is a new feature ,and the development is based on
the convenience degree of user gestures .It enhances the
user’s experience in some interface and module USES,which
allows users to touch back cover on the designated area to
realize mobile phone part related function. Specific functions
to be introduced as follows:
Wake up the screen: in mobile phone screen saver conditions,
users can double click mobile phones back cover on the
designated area to achieve bright screen function
Unlock: in bright screen mobile phone lock screen interface,
users can click the designated area to achieve the unlock
function mobile phone back cover
Slide up and down or so: in the mobile phone support the
sliding interface, the user can slide through the mobile phone
back cover of the designated area to achieve the function of
the interface slip.
users can click the designated area to realize
answering the telephone, mobile phone back cover by
double click hang up
the phone of the regions; The mobile phone on state,
the user can also by double-clicking the region realize
hang up the phone
Pause, broadcast and music: switch on the phone's
built-in music application interface, users can click on
the cell phone back cover of the designated area to
implement the pause and play music, by
double-clicking the region realize the switch under the
function of a musi
Photos and videos: the camera preview interface,
users can click the photo camera functions of mobile
phone back cover specified regions; In the process of
the video, the user can be realized by clicking on the
cell phone back cover the designated area to stop
video recording.
Q-Touch
29

MANAGING YOUR PHONE
9. MANAGING YOUR PHONE
DEVICE SETTINGS
Device Setting
Tap Application Drawer > Settings to view and adjust
the settings of this device.The Settings menu is
categorized into: Wireless & networks, Sound, Display,
Storage, Language & input, Date & time, and About
phone.
Wireless & networks
Setting
Dual SIM
Setting
WLAN
Bluetooth
Data usage
Description
Your device supports Dual Sim setting,
which can be managed by accessing the
Dual SIM Setting.
Set up and manage wireless access
points.
Manage connections, set device name,
and discoverability of the device.
Serves to determine a connection
based on data from a device.
More
Audio Profiles
Setting
General
Ringtones and
Notification
System
Display
Setting
Brightness
Wallpaper
Auto rotate
screen
Set options for network applications.
Description
Select the desire Audio profiles, Volume
and vibrate menu.
Select the desire ringtone (Voice call,
Video call, notification and message)
Check to activated/deactivated the
system service on the list.
Description
Adjust the brightness of the screen.
Select the desire wallpaper through this
menu.
Switch orientation automatically when
rotating the device.
MANAGING YOUR PHONE
Sleep
Font Size
Storage
Setting Description
Internal storage Show available phone storage.
Total space
Language & input
Setting
Language
Personal
dictionary
Adjust the delay before the screen
automatically goes off.
To Adjust the font of Smartphone.
Show the total space memory card
storage.
Description
Select language and region for this
device.
Add user preset words to the dictionary.
Date & time
Setting
Automatic date
& time
Automatic time
zone
Set date
Set time
Select time
zone
Use 24 hours
format
Choose date
format
Description
Check to use network provided values.
Check to use network provided values.
Tap to set date for this device.
Tap to set time for this device.
Tap to set time zone for this device.
Set the clock to 24-hour format.
Set the preferred date format.
30
31

MANAGING YOUR PHONE
About Phone
View legal information, device status and software
version.
CHANGING BASIC SETTINGS
Date and time
To set the date and time
1. Tap Application Drawer > Settings > Date & time.
2. Tap Set date to set the date.
3. Tap Set time zone to select the time zone from the
list.
4. Tap Set time to set the time.
5. To use 24-hour format, tap Use 24-hour format.
6. Tap Select date format to select the format of date.
Display Settings
The display settings of this device affect the battery
and external power level.
USING WIRELESS & NETWORKS
Wireless & networks allows you to manage Wi-Fi,
Bluetooth, airplane mode, and mobile networks.
1. Tap Application Drawe r > Settings > Wireless &
networks.
2. To enable or disable Wi-Fi, or Bluetooth tap on/off
switch beside their own settings.
3. To change connection settings, tap the
corresponding function settings then select the
setting to change.
PROTECTING YOUR PHONE
You can protect this device from unauthorized users
by requiring the PIN code or entering a password.
Enable or Disable SIM card lock
When PIN code is enabled, you are required to enter
the PIN code before making a call.
1. Tap Application Drawer > Settings > Security.
2. Tap Set up SIM card lock.
3. Select Lock SIM card to require PIN to use the
device.
4. Enter the current PIN code.
5. To change the PIN code, tap Change SIM PIN.
6. Enter the old PIN code.
7. Enter the new PIN code and confirm.
MANAGING YOUR PHONE
32
RESETTING THE DEVICE
You can reset your phone to its factory defaults.
1. Tap Application Drawer > Settings > Backup & reset.
2. Tap Factory data reset.
3. Tap Reset phone to erase all data on your device.
33

APPENDIX
APPENDIX
SAFETY INFORMATION
Please read before proceed
1. Use only the batteries and power adapter provided
by the manufacturer. Use of unauthorized
accessories may void your warranty.
2. Do not remove the battery while the phone is
charging.
3. Avoid using the phone near electromagnetic
sources such a s TVs, ra dios, and microwave ove ns.
4. Unplug the power adapter from the wall outlet
during lightning storms to avoid electric shock or
fire.
5. Do not expose the phone or the battery to direct
sunlight.
6. Do not store your phone in temperatures higher
than 47ºC.
7. Do not use harsh chemicals or detergents to clean
your phone.
8. Do not handle the phone with wet hands while it is
being charged. This may cause an electric shock or
serious damage to the phone.
9. The operating temperature for this device is from
0ºC to 47ºC.
Safety Precautions for battery use
1. Use only approved battery.
2. Keep the battery dry and away from any liquid since
this may cause a short circuit.
3. Keep the battery away from metal objects since this
may cause a short circuit.
4. Do not use damaged or deformed batteries.
5. If the battery emits a foul odor, discontinue use.
6. Keep the battery away from babies and small
children.
7. If the battery leaks:
a. Do not allow the leaking fluid to come in contact
with your skin, eyes or clothing. If already in
contact, rinse with clean water immediately and
seek medical advice.
b. Keep the battery away from fire since this may
cause the battery to explode.
APPENDIX
8. Do not attempt to open or service the battery
yourself.
9. Do not dispose battery in fire or water.
10.Recycle or dispose used batteries according to the
local regulations.
Road and environmental safety
1. Turn off the phone in areas with a potentially
explosive atmosphere or where flammable objects
exist such as gas stations, fuel depots, and
chemical plants among others. Sparks from these
areas could cause explosion or fire and result in
injury or even death.
2. Do not use hand-held phones while driving a
34
vehicle. Use hands-free devices as an alternative.
Safety in aircraft
Do not use the phone on board an aircraft. The
phone’s network signals may cause interference to the
navigation system. As a safety measurement, it is
against the law in most countries to use the phone on
board an aircraft.
35

FCC Statement:
1. This device complies with Part 15 of the FCC Rules. Operation is subject to the following two conditions:
(1) This device may not cause harmful interference.
(2) This device must accept any interference received, including interference that may cause undesired operation.
2. Changes or modifications not expressly approved by the party responsible for compliance could void the user's
authority to operate the equipment.
NOTE:
This equipment has been tested and found to comply with the limits for a Class B digital device, pursuant to Part 15
of the FCC Rules. These limits are designed to provide reasonable protection against harmful interference in a
residential installation.
This equipment generates uses and can radiate radio frequency energy and, if not installed and used in accordance
with the instructions, may cause harmful interference to radio communications. However, there is no guarantee that
interference will not occur in a particular installation. If this equipment does cause harmful interference to radio or
television reception, which can be determined by turning the equipment off and on, the user is encouraged to try to
correct the interference by one or more of the following measures:
Reorient or relocate the receiving antenna.
Increase the separation between the equipment and receiver.
Connect the equipment into an outlet on a circuit different from that to which the receiver is connected.
Consult the dealer or an experienced radio/TV technician for help.
SAR Information Statement
Your wireless phone is a radio transmitter and receiver. It is designed and manufactured not to exceed the
emission limits for exposure to radiofrequency (RF) energy set by the Federal Communications Commission of the
U.S. Government. These limits are part of comprehensive guidelines and establish permitted levels of RF energy
for the general population. The guidelines are based on standards that were developed by independent scientific
organizations through periodic and thorough evaluation of scientific studies. The standards include a substantial
safety margin designed to assure the safety of all persons, regardless of age and health. The exposure standard
for wireless mobile phones employs a unit of measurement known as the Specific Absorption Rate, or SAR. The
SAR limit set by the FCC is 1.6 W/kg. * Tests for SAR are conducted with the phone transmitting at its highest
certified power level in all tested frequency bands. Although the SAR is determined at the highest certified power
level, the actual SAR level of the phone while operating can be well below the maximum value. This is because the
phone is designed to operate at multiple power levels so as to use only the power required to reach the network. In
general, the closer you are to a wireless base station antenna, the lower the power output. Before a phone model is
available for sale to the public, it must be tested and certified to the FCC that it does not exceed the limit
established by the government adopted requirement for safe exposure. The tests are performed in positions and
locations (e.g., at the ear and worn on the body) as required by the FCC for each model. The highest SAR value for
this model phone when tested for use at the ear is 0.247W/Kg and when worn on the body, as described in this
user guide, is 1.041W/Kg(Body-worn measurements differ among phone models, depending upon available
accessories and FCC requirements). The maximum scaled SAR in hotspot mode is 1.041W/Kg. While there may
be differences between the SAR levels of various phones and at various positions, they all meet the government
requirement for safe exposure. The FCC has granted an Equipment Authorization for this model phone with all
reported SAR levels evaluated as in compliance with the FCC RF exposure guidelines. SAR information on this
model phone is on file with the FCC and can be found under the Display Grant section of http://www.fcc.gov/
oet/fccid after searching on
FCC ID: 2AAIWMIGHTY Additional information on Specific Absorption Rates (SAR) can be found on the Cellular
Telecommunications Industry Asso-ciation (CTIA) web-site at http://www.wow-com.com. * In the United States and
Canada, the SAR limit for mobile phones used by the public is 1.6watts/kg (W/kg) averaged over one gram of
tissue. The standard incorporates a sub-stantial margin of safety to give additional protection for the public and to
account for any variations in measurements.
Body-worn Operation
This device was tested for typical body-worn operations. To comply with RF exposure requirements, a minimum
separation distance of 10mm must be maintained between the user’s body and the handset, including the antenna.
Third-party belt-clips, holsters, and similar accessories used by this device should not contain any metallic
components. Body-worn accessories that do not meet these requirements may not comply with RF exposure
requirements and should be avoided. Use only the supplied or an approved antenna.
 Loading...