


ES-G170864-1

©Hisense Company Ltd. and Roku, Inc. 2017
All material in this Quick Start Guide is the property of Hisense Company Ltd. and Roku Inc. and its subsidiaries, and is protected under
U.S. and International copyright and/or other intellectual property laws. Reproduction or transmission of the materials, in whole or in part,
in any manner, electronic, print, or otherwise, without the prior written consent of Hisense Company Ltd. and Roku, Inc. is a violation of
the rights of Hisense Company Ltd. and Roku, Inc. rights under the aforementioned laws.
No part of this publication may be stored, reproduced, transmitted or distributed, in whole or in part, in any manner, electronic or
otherwise, whether or not for a charge or other or no consideration, without the prior written permission of Hisense Company Ltd. and
Roku, Inc.
Requests for permission to store, reproduce, transmit or distribute materials may be made to the following address:
USA: Hisense USA Corporation
PO Box 3289
Suwanee, GA 30024
Hisense, and any and all other Hisense product names, logo’s, slogans or marks are registered trademarks of Hisense Company
Ltd. and its subsidiaries. All other trademarks are the property of their respective holders. ROKU, ROKU TV and the ROKU logo are
trademarks and the property of Roku, Inc. Other channel logos, brand and product names are trademarks or registered trademarks of
their respective holders.
©2017. All rights reserved. Hisense and the Hisense logo are registered trademarks of Hisense. Other brand and product names are
registered trademarks of their respective owners.
© 2017 Roku, Inc. All rights reserved. ROKU, ROKU TV and the ROKU logo are trademarks and the property of Roku, Inc. Other
channel logos, brand and product names are trademarks or registered trademarks of their respective holders.
Your easy way to endless entertainment
Legal Disclaimers:
* Subscription or other payment may be required to access certain channels. Content may not be available in all areas in which the Roku TVs are sold and
channel availability is subject to change.
† Roku search is for movies and TV shows and does not work with all channels.
# Limitations apply to the Roku mobile app. Please see support.roku.com for device compatibility information.
1
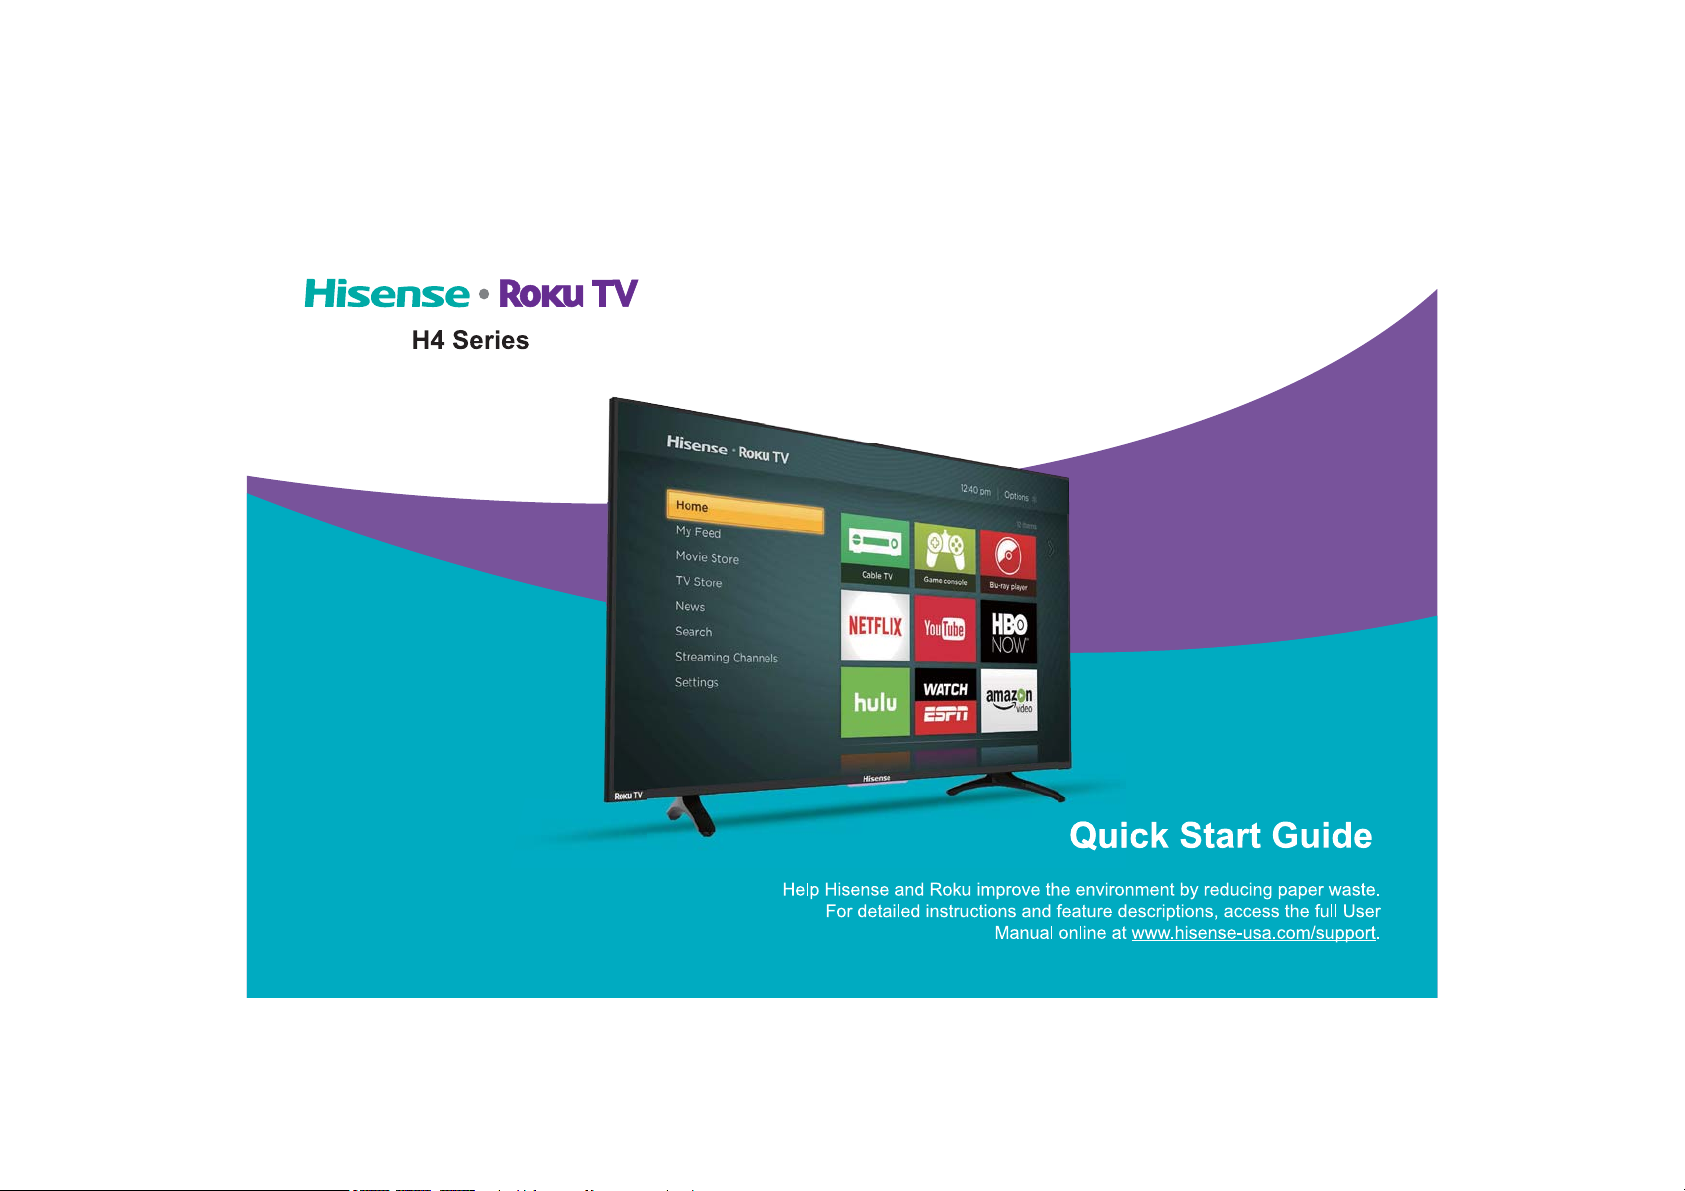
WELCOME TO THE HISENSE FAMILY!
Congratulations on the purchase of your new Hisense Roku TV H4 Series! This Quick Start Guide will walk you
through a few easy steps to set up your TV.
Because we value your business, we want to keep you in the know of 'all things Hisense'. Using your mobile phone, scan the Registration page QR code
to register your TV. Depending on the make and model of your phone, you may need to download a QR code scanning app.
Country
U.S.A
CANADA
MEXICO
Phone: 1-888-935-8880
Hours of Operation:
Monday - Friday: 9 AM to 9 PM EST
Saturday - Sunday: 9 AM to 6 PM EST
Service Email: Service@hisense-usa.com
Phone: 1-855-344-7367
Hours of Operation:
Monday - Friday: 8 AM to 8 PM EST
Service Email: canadasupport@hisense.com
Phone: 01-800-008 8880
Hours of Operation: Monday - Friday 9:00-18:00
Service Email: servicio@hisense.com.mx
Customer Care Center Hisense Support Page REGISTER YOUR TV
http://www.hisense-usa.com/
support/
http://www.hisense-canada.
com/support/
http://www.hisense.com.mx/
support/
*Scan to download user manual
http://www.hisenseusa.com/support/
register
http://www.hisense canada.com/support/
productReg.asp
http://www.hisense.
com.mx/support/
productReg.asp
Disclaimer: This Quick Start Guide is intended as a general guideline to help you set up your Hisense Roku TV.
Images throughout this document are for illustrative purposes only and may differ from the actual product.
2
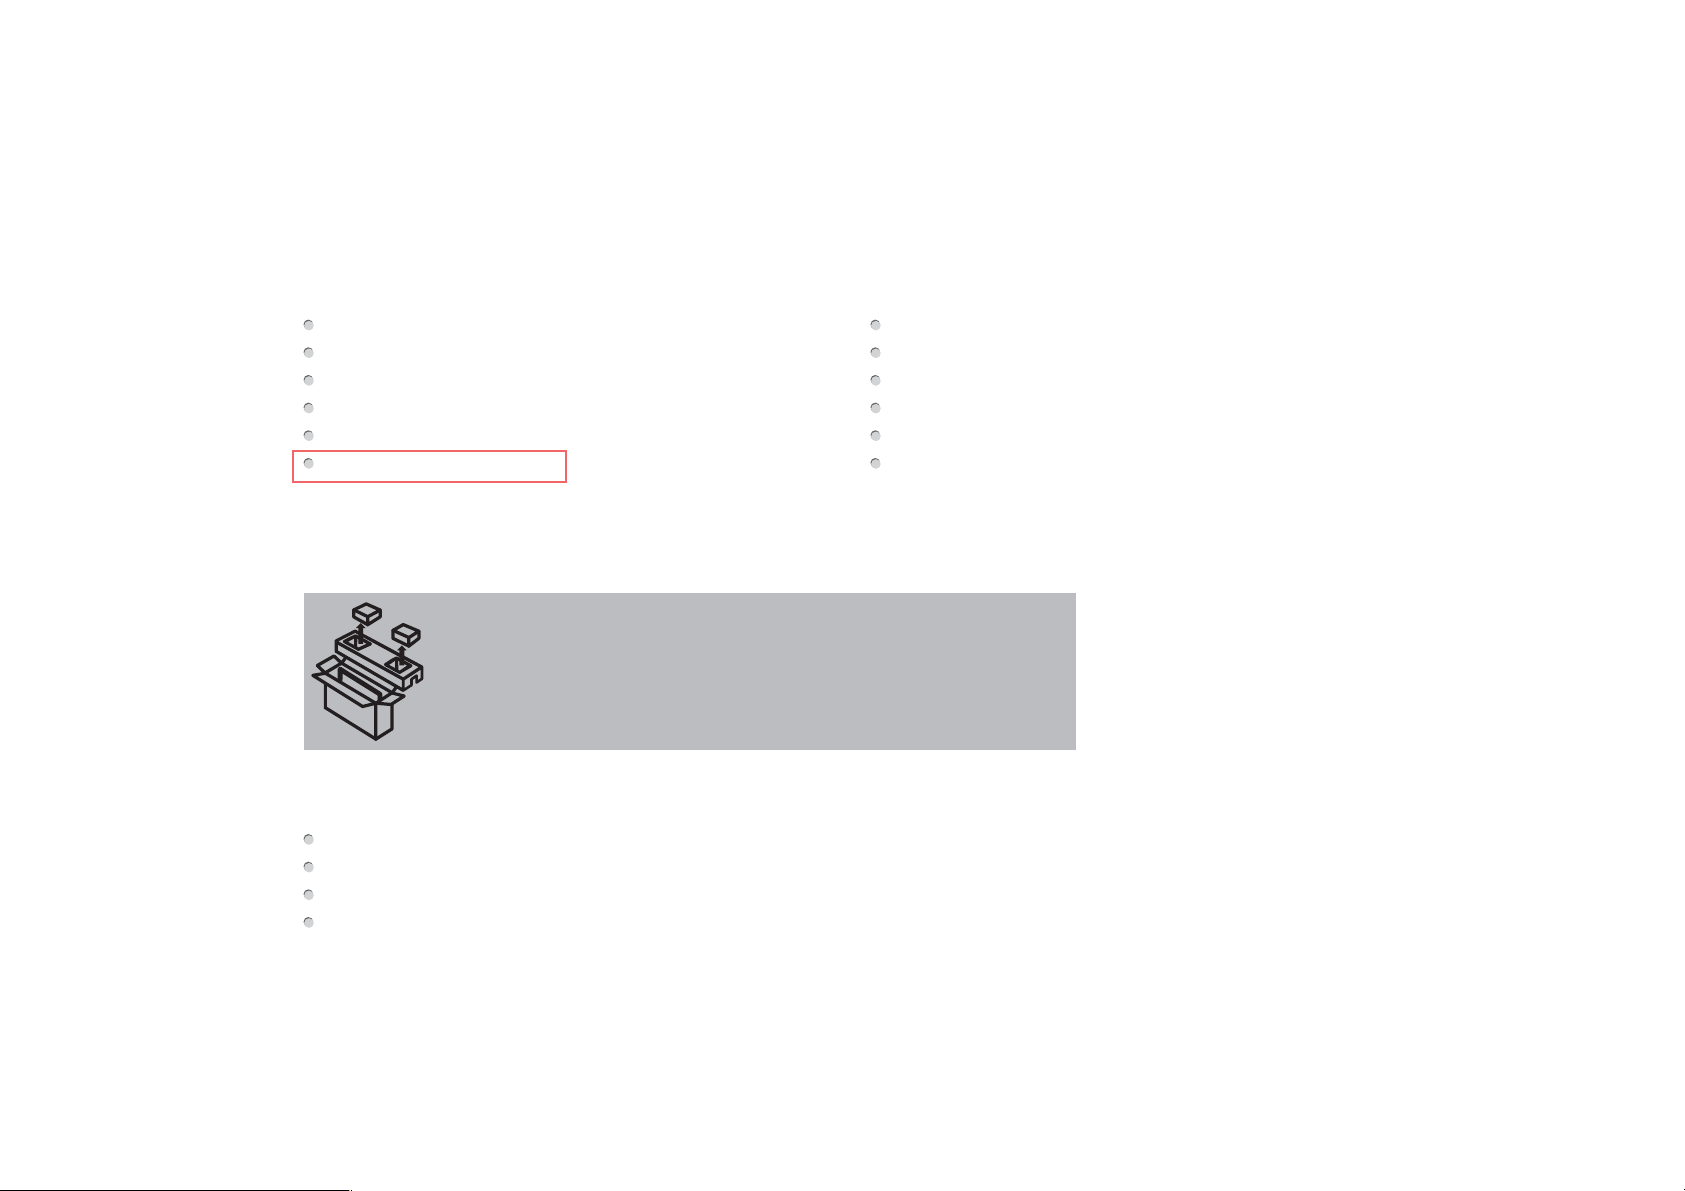
Packaged contents
Your package in which you purchased your new TV contains the following items:
TV Power Cord
Remote Control 2 AAA batteries
Quick Start Guide (this document) Important Safety Information and Warranty Card leaflet
2 legs that form the TV stand 2 screws (ST3.5×10F) (for 32")
4 screws (ST4×16C) (for 40") 4 screws (M4×12) (for 43")
4 screws (ST4×25C) (for 50") 4 screws (M4×20) (for 55")
IMPORTANT:
To prevent accidentally discarding items that came with your TV, be sure to check ALL of the foam in the carton box.
Please check foam for accessories before discarding.
·
Veuillez vérifier la mousse pour qu'il n'y ait pas d'accessoires avant de la jeter.
·
Antes de desechar la espuma, asegúrese de retirar todos los accesorios.
·
Required tools and devices
Wireless router (not included) for Internet connectivity
Phillips screwdriver (not included) to secure the TV stand
HDMI and other types of cables (not included) to connect external devices to the TV
Wall mount bracket (not included) if you prefer to mount the TV to the wall
3
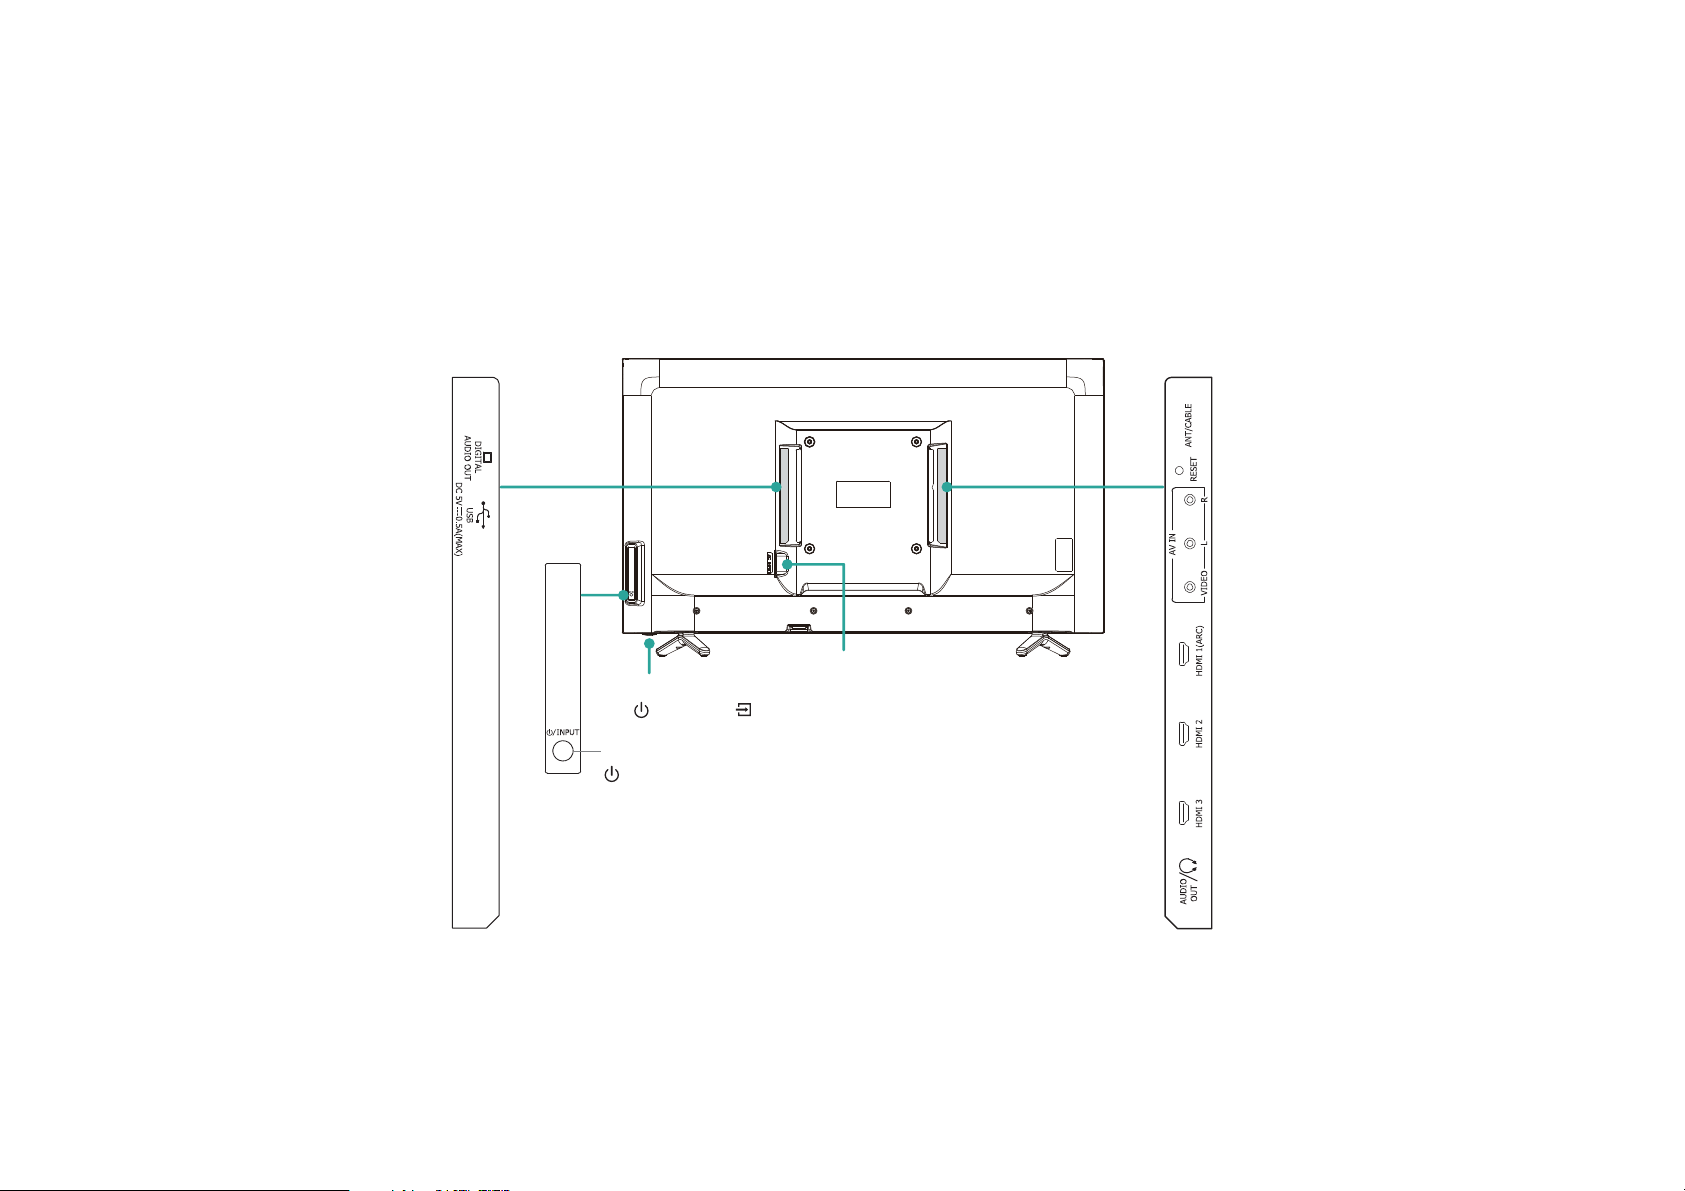
Buttons and ports on the Hisense Roku TV
Back View of the TV (32"/40")
AC INPUT
for 32"
STANDBY / INPUT
for 40"
STANDBY / INPUT
TV Side ViewTV Side View
4

Back View of the TV (43"/50"/55")
TV Side View
USB
DC 5V 0.5A(MAX)
ANT/CABLE
RESET
AC INPUT
TV Bottom View
HDMI 3
VIDEO
AV IN
5
DIGITAL
AUDIO OUT
LR
STANDBY / INPUT
HDMI 2 HDMI 1
AUDIO
OUT
ARC

STEP 1. Attach the TV stand or wall mount bracket (not included)
Attach the TV Stand (For steps to attach the wall mount see page 7)
Follow the illustrations and instructions below to complete the installation steps:
1. Carefully place your TV facing down on a soft, flat surface to prevent damage to the TV or scratches to the screen.
2. Remove the two legs (that form the stand) from the accessory bag and then insert them into the bottom slots of the TV.
3. Secure the legs to the TV with the screws in the accessory bag.
for 32" for 40"/43"/50"/55"
leg
leg
Screw:
ST3.5×10F (32")
Screws:
ST4×16C (40")
M4×12 (43")
ST4×25C (50")
M4×20 (55")
6

Attach the Wall Mount Bracket (not included)
Before you begin the third-party manufacturer instructions, be
sure to do the following things:
1. Place the TV face down on a flat, clean, safe and cushioned
surface.
2. Remove the TV stand if you already attached it.
3. Place the spacers (not included) in the corresponding bracket
holes.
To prevent internal damage to the TV and ensure it is
mounted securely be sure to use fi[ing screws (not
provided) that are 9.5 - 11.5 mm in length when measured
from the attaching surface of the mounting hook.
9.5 - 11.5 mm
Wall mount bracket
Screw
(not provided)
Spacer
(not provided)
Bracket
(not provided)
CAUTION:
When you attach the mount be sure to use the spacers
(provided by the third-party manufacturer) between the TV
and the bracket.
Rear cover of the TV Spacer
Wall mount hole pattern
VESA (mm)
Wall mount screw size (mm) M6
Screw
200 × 200 (for 32"/40"43"/55")
200 × 400 (for 50")
Follow instructions provided with the Wall mount bracket.
If you have additional questions, please contact the wall-mount
manufacturer or the retailer from which you purchased the TV.
The selected screws are 9.5 - 11.5 mm in length when
measured from the attaching surface of the rear cover.
NOTE: The diameter and length of the screws differ depending
on the wall mount bracket model.
7

STEP 2. Connect devices to your TV
Check to ensure that you have selected the right cables for the ports and that they are connected securely. Loose connections can
affect the quality of the picture image and color. (Cables and External Equipment not included.)
TV label Port Cable External Equipment Brief Description
ANT/CABLE
HDMI
AV IN
DIGITAL
AUDIO OUT
VIDEO
L
R
Yellow
White
Red
Antenna
Video
Camera
VHF/UHF Antenna
ANT OUT
VCR
DVD Player/Recorder
Set-top Box
Satellite Receiver
SpeakerAudio Ampli¿er
Satellite
antenna
cable
Connect an outdoor or indoor
antenna.
Connect a High De¿nition Multimedia
Interface (HDMI
®
) cable from an
external device.
Connect a composite video cable
and left-right audio cables from an
external AV device.
Connect a digital audio cable from an
external digital audio system.
8

TV label Port Cable External Equipment Brief Description
Connect headphone for audio out of the
TV.
AUDIO OUT /
Connect an audio adapter (not provided)
from an external analog audio system.
Connect a USB device for browsing
photos, music and movies.
The unit only recognizes a USB Memory
DC 5V
USB
0.5A(MAX)
Stick.
RESET
Restart or factory reset your TV.
9

Buttons on your TV remote
The TV remote should feel right at home in your hand. We designed it to be incredibly intuitive for watching TV and navigating onscreen menus.
Turns your TV on or off
POWER
BACK
Returns to the previous screen
OK
Select an option from a menu
Directional keypad
CHANNEL RECALL/JUMP BACK AND INSTANT REPLAY
Changes to the previous channel when viewing antenna or
cable (no set-top box) programming
Jumps back one position in video when viewing
streaming content
Backspaces one letter during menu entries, such as Search
REWIND
Rewind streaming video, jumps to the previous audio track or
selection, jumps up one page in menus
PLAY/PAUSE
Pauses or resumes playback
Disclaimer: Remotes may vary.
HOME
Displays your TV's Home screen / Stops playback if you are
watching TV or streaming content
VOLUME UP (Side view)
Increases the volume or un-mutes the sound
VOLUME DOWN (Side view)
Decreases the volume
MUTE (Side view)
Mutes or un-mutes the sound
SLEEP Sets the sleep timer
VIEW MORE OPTIONS
Gives you easy access to picture settings, display options,
and more / Press
FAST FORWARD
Fast forwards streaming video, jumps to the next audio track
or selection, jumps down one page in menus
STREAMING CHANNELS SHORTCUTS
When you press a button:
If you have not added the channel, displays a sign up page
If you have added the channel, displays the channel's home
page
If your TV is off, turns on your TV and displays the channel’s
home page
10
on any screen to access options

STEP 3. Begin using your remote
Power up your TV remote by inserting the included batteries.
CAUTION
Dispose of the batteries in a designated disposal area. Do not throw them into a fire.
Remove old batteries immediately to prevent them from leaking into the battery compartment.
If you do not intend to use the remote control for a long time, remove the batteries.
Battery chemicals can cause a rash. If the batteries leak, clean the battery compartment. If chemicals touch your skin, wash it
immediately.
Do not mix old and new batteries.
Do not mix alkaline, standard (carbon-zinc) or rechargeable (for example, NiCd or NiMH) batteries.
If your remote gets warm/hot during use, discontinue use and contact customer support immediately at
www.hisense-usa.com/support.
Using Your Cable Set-top Bo[ or Satellite Receiver Remote as a µUniversal¶ Remote.
If you prefer to use your Cable Set-top Box or Satellite Receiver Remote as a ‘Universal Remote’, please refer to the manual that
your cable or satellite service provided. It will include instructions on how to program their remote to your television. You can ¿nd
codes that work with your Hisense Roku TV and the most common cable and satellite provider’s universal remote control at
www.roku.com/universalremote
.
11

Turn on the TV
Connect the power cord to the back of your TV and plug it into a
power outlet.
Press the Power button on the remote to turn on the TV. A
startup screen appears that displays the Hisense Roku TV logo.
Wall Outlet
Power
Cord
Choose Set up for home use to access all TV features and
maximize Eco Save.
NOTE: Only retailers that need to set up the TV for display should
select Set up for store use.
12

Connect your TV to the Internet to access
thousands of streaming channels like
Netfli[ YouTube.
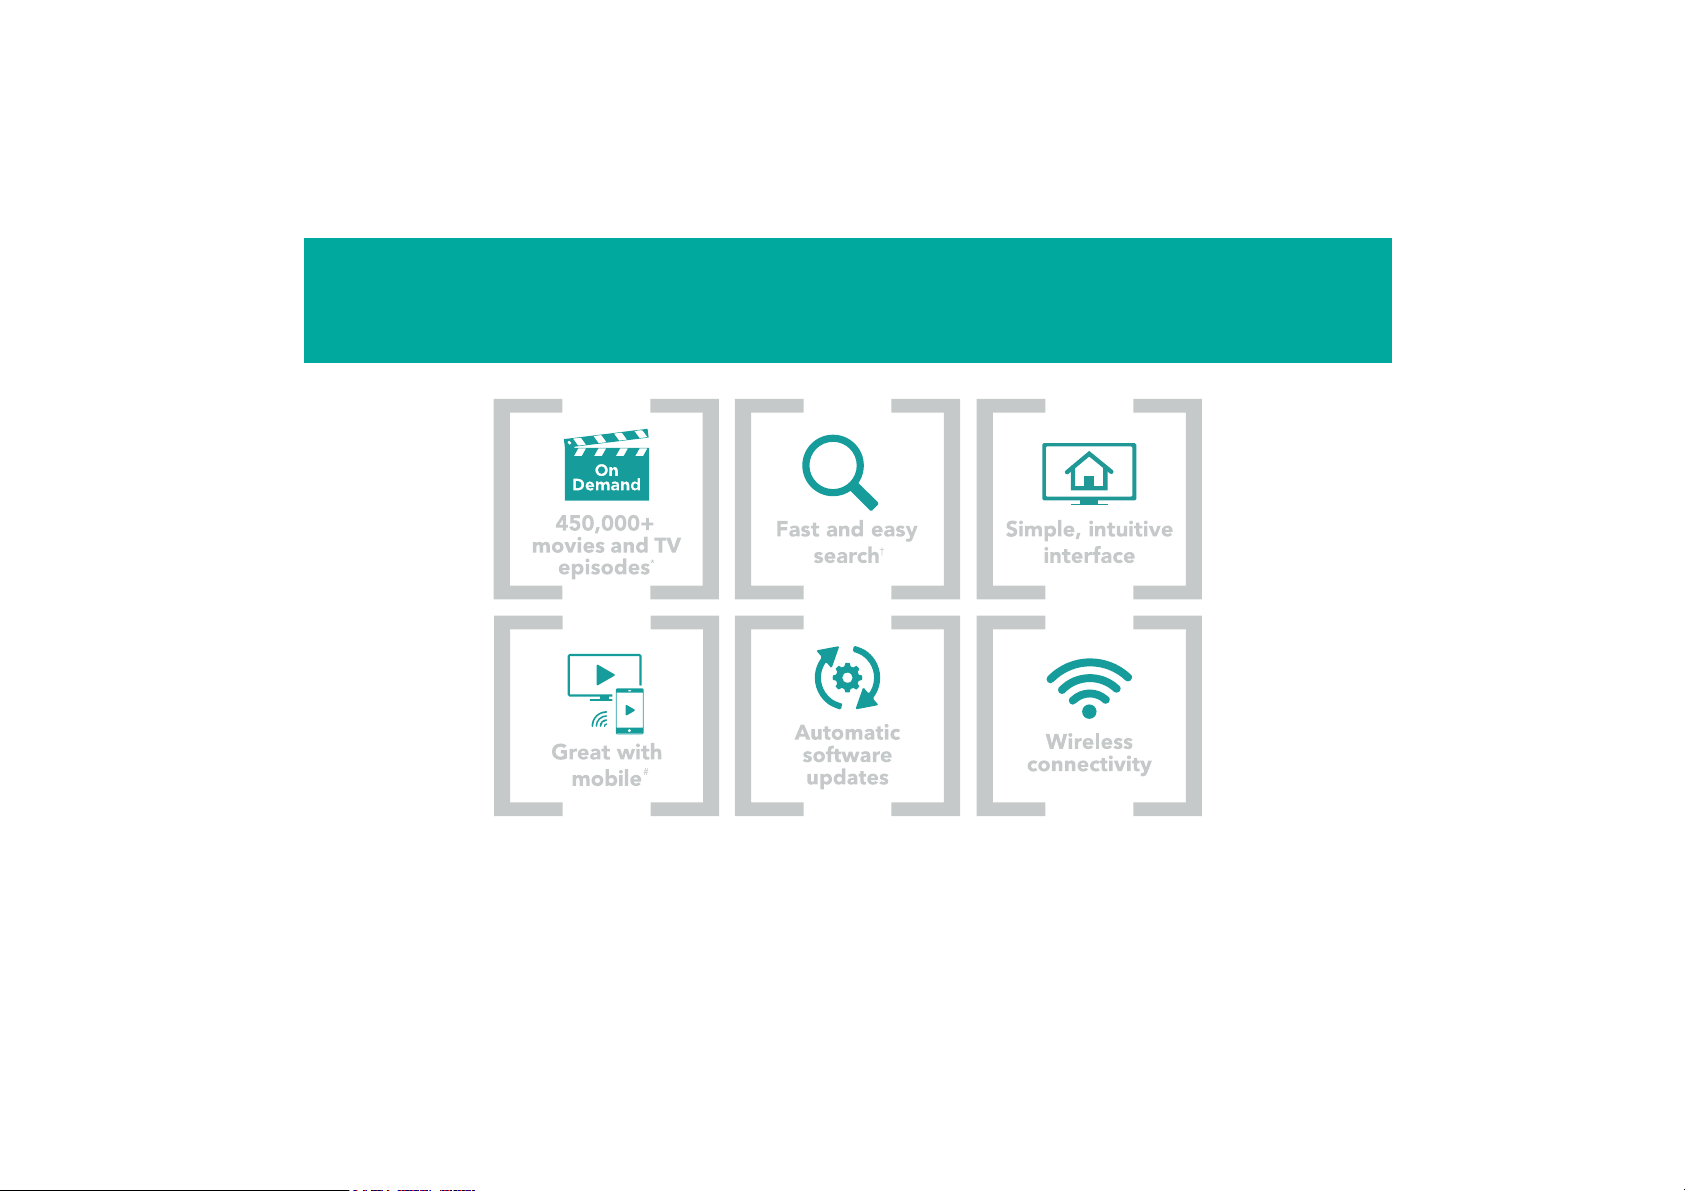
Make any night a movie night
Access more than 450,000* movies and TV episodes across
major streaming services like Netflix, Hulu, Amazon Video, VUDU
and more. Choose from free, rental, and subscription services.
Stream sports on the big screen
Choose from over 140 sports channels like WatchESPN, FOX
Sports Go, NBA, NFL, MLB, WWE, CBS Sports, and more.
E[plore loads of free channels and free trials
Your Roku TV has hundreds of popular free channels like Crackle,
CBS News, PBS, VEVO, and more. Plus, take advantage of
free trials** to popular subscription services like HBO NOW,
SHOWTIME, Netflix, Amazon Video, and Hulu.
E[plore your passions
Your Roku TV offers hundreds of streaming channels to fuel
your passions – including fitness, kids & family, cooking, sports,
religion, travel, International programming and more.
*Subscription or other payment may be required to access certain channels. Content may not be available in all areas in which the Roku
TVs are sold and channel availability is subject to change.
**Cancel before free trial ends to avoid subscription fees. Credit card may be required. Eligibility restrictions may apply.
13

STEP 4. Complete the guided setup
Connect your Hisense Roku TV to your home network:
1. Sign in to your wireless network. Your TV will automatically detect wireless networks in your area. Have your network name and
password handy and follow the easy on-screen instructions.
2. Activate your Roku account. From your smartphone, tablet, or computer, go to
displayed on your TV screen. Roku accounts are free, and while a valid credit card number is not required to create your account,
providing your credit card information makes renting and purchasing entertainment from the Roku Channel Store fast and
convenient.
If you are not ready to connect your TV to a wireless network, you can still use it to view live broadcast channels through your antenna,
Set Top Box (STB) or Satellite.
Complete the rest of the on-screen prompts and setup is done. Congratulations!
NOTE: Once you’re connected, your TV will automatically update with the latest software—plus you can start streaming the
entertainment you know and love. Unlike other TVs, your new Hisense Roku TV automatically receives regular software updates in the
background when it’s connected to the Internet. This allows it to give you a better experience.
All software, applications, services and content accessible through the Television belong to providers who are not controlled by or
affiliated with Hisense, are protected by copyright, patent, trademark and/or other intellectual property laws and are the sole property of
their respective owners. Software, applications, services and content accessible through the Television are at the sole discretion and
control of such providers and are completely outside Hisense’s control. These services and/or content may be unavailable, discontinued
or suspended by such providers, temporarily or permanently, at any time, without liability and without notice to you. HISENSE AND
ROKU EXPRESSLY DISCLAIM ANY AND ALL RESPONSIBILITY FOR THE AVAILABILITY, CONTINUITY OF SERVICE, OR THE
CONTENT PROVIDED BY ANY OR ALL SUCH PROVIDERS.
www.roku.com/link and enter the code that is
14

STEP 5. Personalize your Home screen
Easily switch between streaming channels and inputs.
The Home screen menu lets you access a ton of streaming
entertainment, search for streaming movies and TV shows and
change your settings.
The grid of tiles on the right lets you visually choose among
your favorite streaming channels and the inputs where you have
attached devices such as a DVR, game console, antenna, or set
top box.
You can easily rearrange the order of the tiles on the Home
screen to suit your viewing preferences. Highlight the tile you wish
to move and press the * button on your Roku TV remote.
15

Product specifications
MODEL NAME 32H4D 40H4D 43H4D 50H4D 55H4D
Dimension
(W x H x D)
Weight Without
DISPLAY
Active Screen Size
(Diagonal)
Screen Resolution 1366×768 1920×1080 1920×1080 1920×1080 1920×1080
Panel Selected High De¿nition
POWER
Power Supply AC 120V, 60Hz AC 120V, 60Hz AC 120V, 60Hz AC 120V, 60Hz AC 120V, 60Hz
Standby Consumption Less than 1W Less than 1W Less than 1W Less than 1W Less than 1W
Audio Power 6W + 6W 7W + 7W 8W + 8W 10W + 10W 10W + 10W
Without
Stand
With Stand 29.2×18.6×6.8 inches
Stand
With Stand 11.9 lbs (5.4 kg) 17.6 lbs (8.0 kg) 22.3 lbs (10.1 kg) 31.3 lbs (14.2 kg) 34.6 lbs (15.7 kg)
29.2×17.4×3.6 inches
(741×442×91 mm)
(741×472×173 mm)
11.7 lbs (5.3 kg) 17.2 lbs (7.8 kg) 22.0 lbs (10 kg) 30.4 lbs (13.8 kg) 33.7 lbs (15.3 kg)
31.5 inches 40 inches 42.6 inches 49.5 inches 54.6 inches
backlight
35.5×20.3×3.4 inches
(902×515×86 mm)
35.5×22.0×7.4 inches
(902×558×189 mm)
Full High De¿nition
backlight
38.1×22.2×3.4 inches
(969×563×87 mm)
38.1×23.9×7.6 inches
(969×607×192 mm)
Full High De¿nition
backlight
44.2×25.8×3.1 inches
(1123×656×79 mm)
44.2×27.4×9.7 inches
(1123×697×247 mm)
Full High De¿nition
backlight
49.0×28.4×3.3 inches
(1244×721×83 mm)
49.0×30.4×10.6 inches
(1244×773×268 mm)
Full High De¿nition
backlight
16

Product specifications (continued)
CHANNELS SIGNALING
Receiving Channels VHF: 2 - 13, UHF: 14 - 69, CATV: 1 - 125
Digital Terrestrial Broadcast (8VSB): 2 - 69
Digital cable (64/256 QAM): 1 - 135
Tuner Type Frequency synthesized
Receiving System Analog: NTSC
Digital: ATSC/QAM
HDMI Input RGB/60Hz (640×480, 800×600, 1024×768, 1280×1024, 1360×768, 1440×900, 1680×1050, 1920×1080)
YUV/60Hz (480I, 480P, 720P, 1080I, 1080P)
OTHER FEATURES
Parental Control Yes
HD Supported De¿nitions 480i, 480P, 720P, 1080i,1080P
Sleep Timer Yes
Wall Mount Support VESA Standard (excluded)
Wireless Built In Yes
Environmental Conditions Temperature: 41°F - 95°F (5°C - 35°C)
Humidity: 20% - 80% RH
Atmospheric pressure: 86 kPa - 106 kPa
17

Quick problem-solving tips
When you experience an issue with your TV, turn it off and on again. If this does not resolve the problem, then refer to the tips below. If
the problem is still not resolved, then contact us at one of the phone numbers on Page 2.
SOUND OR PICTURE ISSUES POSSIBLE SOLUTIONS
You do not see a picture when
turning on the TV
You have connected an external
source to your TV but can not ¿nd
it on the Home screen
When you turn on your TV, there is
a delay for a few seconds before
the picture appears
You see a normal picture but do
not hear any sound
You hear sound but picture color
is faded or in black and white
Your sound or picture is distorted
or appears wavy
Check if the LED light is on. If it is, then there is power to the TV.
The TV may be in Standby mode. Press the Power
Standby.
Check if the power cord is plugged into an active electrical outlet.
Make sure your external source is turned on.
Check to see if the correct input tile is selected on the Home Screen for the external source you
want to view.
Check to see if the external source device connection is snug and fully inserted into the TV port.
This is normal. If you have already set up your TV, it is initializing and searching for previous setting
information.
Check that volume is turned up.
Check if ³Mute´ mode is ON. Turn off mute by pressing the Mute
Check that the Color value is set to 50 or greater.
Check the color on another channel or input tile.
Turn off and/or remove any electrical appliance that may be nearby the TV panel.
Insert the power plug of the TV set into another power outlet.
button on the remote control to activate the unit from
button again, or pressing volume up.
18

Quick problem-solving tips (continued)
SOUND OR PICTURE ISSUES POSSIBLE SOLUTIONS
Your sound or picture is blurry or
cuts out
You see horizontal/vertical
stripes on the picture, or it is
shaking
CONNECTIVITY ISSUES POSSIBLE SOLUTIONS
You cannot connect to your
wireless network
REMOTE CONTROL ISSUES POSSIBLE SOLUTIONS
Your remote control is not
responding to button presses
If you are using an external antenna, check the connections for a snug and tight ¿t.
Adjust or reposition the antenna placement.
Turn off and/or remove any electrical appliance that may be nearby the TV panel.
Insert the TV power cord into another electrical outlet.
Make sure you have selected the correct wireless network name on the Choose Wireless
Network screen.
Make sure that you entered the correct wireless password for your network (passwords are
case sensitive).
If you have turned off SSID broadcasting on your wireless router, add your network by selecting
Add Private Network from the Select Wireless Network screen.
To check if it is a password problem, temporarily disable security on the wireless router.
If you are not getting 3 or more signal strength bars above the wireless network icon, adjust the position of
the TV (if possible) or the wireless router. Even a few inches in one direction or
another may help.
Check that the TV is still on.
Check that the batteries are good and are inserted properly.
Check that there are no obstacles between the remote control and the front of the TV.
Try moving closer to the TV. If the LED on the TV Àashes when you press any of the buttons on the remote
control, the issue is not with the remote control.
19

Certification and Compliance
FCC Notice
This device has been tested and found to comply with the limits for a
Class B digital device pursuant to Part 15 of the FCC Rules. These
limits are designed to provide reasonable protection against harmful
interference in a residential installation. This device generates, uses,
and can radiate radio frequency energy and, if not installed and used
in accordance with the instructions, may cause harmful interference to
radio communications.
However, there is no guarantee that interference will not occur in a
particular installation. If this device does cause harmful interference
to radio or television reception, which can be determined by turning
the device off and on, the user is encouraged to try to correct the
interference by one or more of the following measures:
Reorient or relocate the receiving antenna.
Increase the separation between the device and receiver.
Connect the device into an outlet on a circuit different from that to
which the receiver is connected.
Consult the dealer or an experienced radio/TV technician for help.
NOTE: The manufacturer is not responsible for any radio or
TV interference caused by unauthorized modifications to this
equipment. Such modifications could void the user's authority to
operate the equipment.
The WiFi Module complies with FCC radiation exposure limits set
forth for an uncontrolled environment. This device should be installed
and operated with a minimum distance of 20 centimeters between the
radiator and your body.
Manufactured under license from Dolby Laboratories. Dolby, Dolby Audio, and
the double-D symbol are trademarks of Dolby Laboratories.
The terms HDMI and HDMI High-Definition Multimedia Interface,
and the HDMI Logo are trademarks or registered trademarks
of HDMI Licensing LLC in the United States and other countries.
20
 Loading...