

Page 1
13
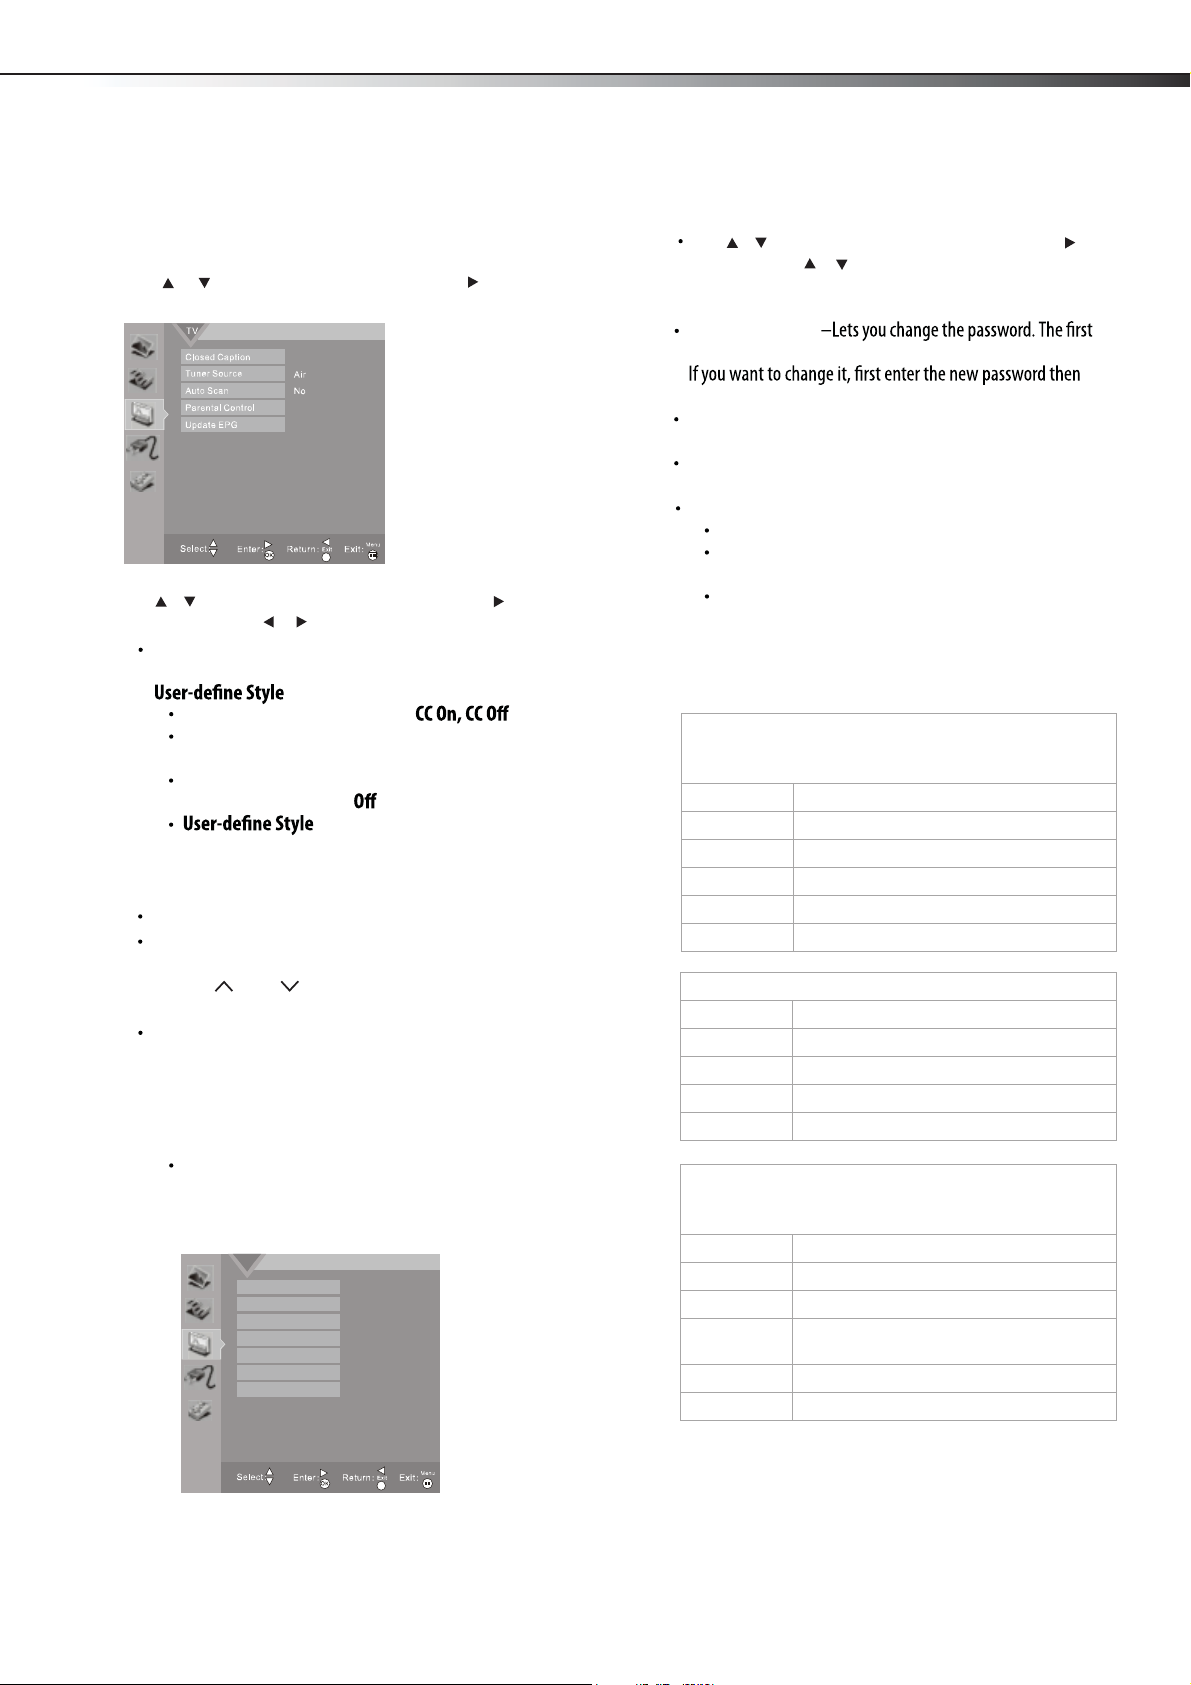
Changing channel settings
To change the channel settings:
1 Press MENU. The Main menu opens.
2 Press or to highlight TV, then press ENTER or . The
TV menu opens.
3
Tuner Source –Lets you select standard Cable, orHRC, IRC
Auto Scan –Lets you scan for channels that have signals
and stores the channels information in memory. When you
press CH or CH , your TV skips any channels that do
not have a signal.
inappropriate material on TV. When set, parental controls read the
rating of the program (with some exceptions, such as news and sports)
and deny access to programs that exceed the ratings level you select. To
watch programs that exceed the selected rating, you must ent
er a
password.
Press the number buttons to enter the four-digit password. The
default password is 0000. You should change the password to a
number you can remember. The Parental Controls menu opens.
Change Password
time you use this function, use the default password (0000).
enter the same password again.
Program Block–
A–Rating Enable is on.
B–U.S. TV Ratings: You can choose TV ratings according
to the illustration on the screen.
C–The settings for U.S. Movie Ratings, Canada (English)
Ratings, and Canada (French) Ratings follow Step B. If
you want to block an unrated program, turn on this
function. You can select all the ratings listed in the
charts below.
MTS/SAP
U.S. TV ratings (age-based)
These ratings are determined by the Federal
Communications Commission (FCC).
TV-Y All children.
TV-Y7 Suitable for children 7 and older.
TV-G General audiences.
TV-PG Parental guidance suggested.
TV-14 Parental guidance strongly suggested.
TV-MA Mature audiences only.
U. S. TV ratings (content-based)
FV Fantasy violence.
V Violence.
S Sexual situations.
L Strong language.
D Suggestive dialog.
U.S. movie (MPAA) ratings
These ratings are determined by the Motion Picture
Association of America (MPAA).
G General audiences.
PG Parental g
uidance suggested.
PG-13 Suitable for children 13 and older.
R Parental guidance suggested for children
under 17.
NC-17 Not suitable
for children under 17.
X Adults only.
Press or to highlight an option, then press or to access
the option, and press or to adjust
the option. You can select:
ENTER
Air.
Closed Caption –Lets you set up closed captions. Choose from
Closed Caption, Analog CC Mode, Digital CC Mode and
.
TEXT3, and TEXT4.
Digital CC Mode –Service1, Service2,
Service5, Service6 and
.
–There are two digital caption styles.
You can choose to select the automatic function set by the
broadcaster, and you can choose to select the custom style where
you can adjust the font size, color, opacity, background color.
Service3, Service4,
yes
No
Analog CC Mode – CC1, CC2, CC3, CC4, TEXT1,
TEXT2,
Closed Caption – Lets you select
CC Mute.
or
Parental Control –Lets you prevent your children from watching
Access to Parental Control Menu
Press or to highlight an option, then press or to access
the option. Press or to highlight a rating and press to
ENTER
ENTER
lock the rating and all other higher ratings or unlock the rating and
all other lower ratings.
Clear Downloaded RRT
current rating table in memory.
(Rating Region Table) – Lets you delete
Set Downloaded RRT
unblock ratings.
(Rating Region Table) – Lets you block or
Changing channel settings
LHDN32V88MH / LTDN42V77MH
US MPAA Rating
US TV Rating
CA English Rating
CA French Rating
Clear Downloaded RRT
Set Downloaded RRT
Change Password
TV > Parental Control > US MPAA Rating
No
Page 2

14
5
Adjusting Power settings
To adjust power settings:
1 Press MENU. The Main menu opens.
2
3
Language –Press the right or left arrow buttons to choose the
OSD Language. Choices include English, Spanish and French.
Screen Mode –Press the arrow buttons to choose the screen
aspect ratio. Choices include Normal, Full Screen, Zoom1, Zoom2
Panorama. You can also press the ASPECT button on your remote
control.
DPMS Mode –Use this setting with a computer. When DPMS
For example, if the computer is in sleep mode, the screen is
is activated, the screen also is
activated.
TV ON/OFF Time –Lets you set up auto turn TV on time and
4
Update EPG–Lets you update the digital program guide,
which may show a list of available programs, program times,
and program summaries, depending on the information
provided by the broadcaster.
Press
MENU
to return to the previous menu, or press
EXIT
to
close the menu.
Press or to highlight Power, then press ENTER or . The
POWER menu opens.
Press or to highlight an option, then press or to access
the option, and press or to choose a value and press to
adjust the option. You can select:
ENTER
Sleep –Lets you choose the auto sleep time. Choices include
ENTER
30 Minutes, 60 Minutes, 90 Minutes, 120 Minutes
and
.
Power Mode –Lets you select energy saving mode to save
power consumption.
Press
MENU
to return to the previous menu, or press
EXIT
to
close the menu.
Adjusting the TV settings
To adjust the setup:
1 Press MENU. The Main menu opens.
2
3
Press or to highlight Setting, then press ENTER or . The
Setup menu opens.
Press or to highlight an option, then press or to access
the option, and press or to choose a value and press to
adjust the option. You can select:
ENTER
ENTER
Zoom V-Position–In zoom1 or zoom2 screen mode, lets you move
picture up or down vertically.
OSD Timeout –Lets you set the main menu timeout time.
Transparency
Date Time –Lets you set the exact time. You can set up date, time,
time zone and daylight saving.
Note: When clock update selects Automatically, TV will pick up time from signal
if signal from source is available.
Input Source Labeling –Lets you name each input. After labeling,
select Enter on full keyboard to save.
Canadian French ratings
determined by La Régle du cinéma du Québec.
G General audiences.
8 ans+ Suitable for children 8 and older.
13 ans+ Suitable for children 13 and older.
16 ans+ Suitable for children 16 and older.
18 ans+ Adults only.
Canadian English ratings
These ratings are based on the Canadian Home Video
Rating System, determined by the Canadian Motion
Picture Distributors Association (CMPDA).
C Suitable for all children.
C8+ Suitable for children 8 and older.
G General audiences.
PG Parental guidance suggested.
14+ Suitable for children 14 and older.
18+ Adults only.
Adjusting power settings and TV settings
LHDN32V88MH / LTDN42V77MH
Page 3

15
Remote control
General
Note: If the problem is not solved by using these troubleshooting
The picture has a few bright
or dark spots.
A few bright or dark spots on an
LCD screen is normal. It does not
Good picture, but no
sound.
Make sure that the sound is not
muted.
Make sure that the sound mode is
set to Stereo or Mono. For more
information, see “Selecting the
audio mode” on page 12.
Audio noise.
Make sure that there is no
interference with infrared
equipment such as a cordless
telephone or headphones. Move
the infrared equipment away
from the TV to eliminate the
noise.
Problem Solution
Remote control does not
work.
Make sure that the TV power cord
is plugged in.
Make sure that there are no
obstructions between the remote
control and the remote control
sensor on the front of the TV.
Make sure that the batteries are
installed correctly. For more
information, see “Installing
remote control batteries” on
page 6.
Replace the batteries. For more
information, see “Installing
remote control batteries” on
page 6.
Trouble programming your
existing universal remote
control.
Replace the batteries. For more
information, see “Installing
remote control batteries” on
page 6.
Refer to the User Guide that
accompanied your universal
remote control and contact the
manufacturer if problems persist.
Problem Solution
Problem Solution
One or more channels do
not display.
Make sure that the channels are
not blocked. For more
information, see “Setting parental
controls” on page 13.
Password is lost.
Enter 0000 to access parental
controls, then set a new
password. For more information,
see “Setting parental controls” on
page 13.
Some settings cannot be
accessed.
If a setting is grayed, the setting is
not available in the current video
input mode.
TV cabinet creaks.
When the TV is in use, the
temperature rises naturally and
may cause the cabinet to expand
or contract which can cause a
creaking noise. This is not a
malfunction.
Co
ntrol buttons on the TV
do not work.
Disconnect the power cord, wait a
few seconds, then reconnect the
power cord and turn on the TV.
Troubleshooting
Before calling for service, check the following information for possible
solutions to problems you may experience. If none of these solutions
Caution: Do not try to repair the TV yourself. Refer all servicing to
Video and audio
Problem Solution
No picture (screen is not lit)
and no sound.
Make sure that the power cord is
plugged in.
Press POWER on the TV or the
remote control.
Make sure that the correct video
input source is selected. For more
information, see “Selecting the
video input source” on page 9.
Try another channel. The station
may be experiencing problems.
Dark, poor, or no picture
(screen is lit), but sound is
good.
Adjust the brightness. For more
information, see “To adjust the
picture:” on page 12.
Make sure that the correct picture
mode is selected.
For more
information, see “To adjust the
picture:” on page 12.
Make sure that the antenna or
cable TV is connected correctly
and securely. For more
information, see “Connecting an
antenna, cable TV, or satellite TV
box” on page 8.
No color, dark picture, or
color is not correct.
Adjust the color saturation. For
more information, see “Adjusting
the picture” on page 12.
Only snow (noise) appears
on the screen.
Try another channel. The station
may be experiencing problems.
Make sure that the antenna or
cable TV is connected correctly
and securely. For more
information, see “Connecting an
antenna, cable TV, or satellite TV
bo
x” on page 8.
Dotted lines or stripes
appear on the screen.
Adjust the antenna.
Move the TV away from noise
sources such as cars, neon signs,
or hair dryers.
Double images.
Try using a highly directional
outdoor antenna or cable TV.
Troubleshooting
LHDN32V88MH / LTDN42V77MH
Page 4

16
LHDN32V88MH / LTDN42V77MH
Specifications, Legal notices
Maintenance
Just like with any other household appliance, the performance and
life-expectancy of your TV depends on how well you maintain it. Follow
the procedures described here to clean the TV case and the LCD screen.
Cautions:
disconnected from the power outlet before cleaning the TV.
Never spray or pour any liquid directly onto the screen or the case.
Cleaning
Clean your TV with a soft, dry cloth. If surfaces are extremely
dirty, use a soft cloth dampened with a small amount of
non-ammonia, non-alcohol-based, non-abrasive detergent
solution.
Clean the screen with a clean, soft, lint-free cloth. If additional
cleaning is necessary, apply a small amount of non-ammonia,
non-alcohol-based, non-abrasive detergent solution to the cloth.
Weight and dimensions shown are approximate.
Legal notices
FCC Part 15
This device complies with Part 15 of the FCC Rules. Operation of this
product is subject to the following two conditions: (1) this device may
not cause harmful interference, and (2) this device must accept any
interference received, including interference that may cause undesired
operation.
This equipment has been tested and found to comply within the limits
for a class B digital device, pursuant to Part 15 of the FCC Rules. These
limits are designed to provide reasonable protection against harmful
interference in a residential installation. This equipment generates,
uses, and can radiate radio frequency energy and, if not installed and
used in accordance with the instructions, may cause harmful
interference to radio communications. However, there is no guarantee
that interference will not occur in a particular installation. If this
equipment does cause harmful interference to radio or television
on, the user is encouraged to try to correct the interference by one or
more of the following measures:
Reorient or relocate the receiving antenna.
Increase the separation between the equipment and receiver.
that to which the receiver is connected.
Consult the dealer or an experienced technician for help.
FCC warning
TV type
TV panel
TV system
Receiving channels
Audio multiples
Audio out
Power requirement
Power consumption
Dimensions
(W × H × D with stand)
Weight with stand
Input terminals
Output terminals
Control terminals
LHDN32V88MH
31.5-inch TFT LCD
NTSC-M, ATSC
VHF: 2 - 13
UHF: 14 - 69
CATV: 1 - 125
CADTV: 1-135
DTV: 2-69
BTSC system
6 W x 2 8 W x 2
AC 120 V, 60 Hz
140 W
(With Max backlight)
31.02×22.09×9.92 inches
(788 × 561 × 252 mm)
27.56 lbs. (12.5 kg) 44.1 lbs. (20 kg)
Composite video/L and R audio (1)
Component video/L and R audio (2)
HDMI (4)
VGA/audio (1)
ANT/Cable In (1)
S-Video (1)
Digital Coaxial Audio (1)
Headphone (1)
SERVICE PORT (1)
LTDN42V77MH
42-inch TFT LCD
180 W
(With Max backlight)
40.2×27.6×12 inches
1020×700×302.9 mm)
responsible for compliance with the FCC Rules could void the user’s
authority to operate this equipment.
Cables
Connections to this device must be made with shielded cables with
metallic RF/EMI connector hoods to maintain
compliance with FCC
Rules and Regulations.
Canada ICES-003 statement
This Class B digital apparatus complies with Canadian ICES-003.
Cet appareil numerique de la classe B est conforme a la norme NMB-003
du Canada.
Standard Television Receiving Apparatus — Appareil de réception
télévision ordinaire, Canada BETS-7 / NTMR-7
HDMI
trademarks or registered trademarks of HDMI Licensing LCC.
Page 5

KB LOCK
Hotel Settings > FUNCTION LOCK > KB LOCK
Off
Off
On
Off
On
Off
Off
Off
Off
Off
SEARCH LOCK
USER SAVE LOCK
SUBMENU LOCK
INPUT SELECTION
PARENTAL LOCK
INFO LOCK
PICTURE LOCK
AUDIO LOCK
POWER LOCK
SETTING LOCK
17
Adjusting hotel settings
To adjust hotel settings:
1 Press MENU. The Main menu opens.
2 Press or to highlight Audio, then press ENTER or , audio
3
HOTEL MODE —Allows installer to active or disable hotel options.
TV ON SETTING —Allows installer to set up initial options each
Press or to highlight an option, then press or to access
the option, press or to select a value and press to adjust
the option. You can select:
ENTER
menu opens. Press or to highlight balance, use or to
adjust to zero, then press the number buttons to enter the three digit password 5 4 8. The Hotel Settings Menu opens.
Note: Please redo above step if fail when opening Hotel Settings Menu.
ENTER
: Hotel options are active.
On
: Hotel options are disabled.
time a guest turns TV on.
On Volume
In ON mode, can be adjusted from 0 to 100.ON VOLUME VALUE
On Source
Input options. Choices include antenna ( )
TV , AV, S-VIDEO,
component ( )
YPbPr1, YPbPr2 , HDMI1,HDMI2,HDMI3,
HDMI4 VGA.
and
will remember previous input source.
LAST
HDMI4 VGA.
on source will activate selection and
TV ON CHANNEL ON
CHANNEL NUMBER.
—Allows installer to set up desired
On Channel Number
channel when TV is turned on. If no desired channel is requested
ON CHANNEL
—Allows installer to choose one of three options. Choices
LOGO
are and .
: No logo when TV is turned on. TV goes directly to source.
OFF
: Displays Hisense TV logo.
HISENSE
: Displays customed logo.
WELCOME
How to update customed logo:
Make a picture with .bmp format and size less than 480k.
Name it exactly as splash1-3549B1-ACM607002- .bmp.
A--B---
Copy correctly named picture to a USB drive.
C--D---
Turn TV on and welcome logo will be updated successfully.
E---
—Allows installer to select one of three options.
Power On
OFF, HISENSE WELCOME
Choices are and
LAST, ON Standby.
: TV will return to whatever operation it was in before power
LAST
outage.
ON
: TV will turn on when power is restored.
Standby
: TV will be activated but not turned on.
—Allows installer to active or disable basic settings.
Basic Setting
ON
: TV picture defaults to Normal viewing mode, Normal Audio
OFF
: Installer can go to and adjust settings.
and Zoom Aspect is full screen.
User Save Lock
FUNCTION Lock —Allows installer to lock the following functions.
—Locks key pad buttons.
kB Lock
OFF
: Usable.
ON
: Locked down (disabled).
—Locks channel scan function in Menu.
Search Lock
OFF
: Usable.
ON
: Locked down (disabled).
—Locks hotel guest adjustment.
User Save Lock
OFF
: Menu features can be adjusted by hotel guest and be
ON
remembered in TV memory.
factory default settings.
—Locks advanced menu settings.Submenu Lock
OFF
: Allows access to submenu video: Reset in picture Menu,
ON
Update EPG (Electonic Program Guide).
Settings functions.
: Disables Video Reset, Update EPG, Power Options and all
Input Selection
OFF
: Locked down (disabled).
ON
: Usable.
—Locks parental control function in Menu.
Parental Lock
OFF
: Locked down (disabled).
ON
: Usable.
Info Lock
OFF
: Programing name and description (if available) are
displayed when info button on remote is touched. Programing
LHDN32V88MH / LTDN42V77MH
Hotel Settings
HOTEL MODE
Hotel Settings > HOTEL MODE
On
100
0
On
No
READ OUT
TV ON SETTING
FUNCTION LOCK
MAX VOLUME
MIN VOLUME
AUTO STANDBY
CHANNEL SETTING
SRS ENABLE
CLONE
HOTEL SETTING
SW Version
ON VOLUME
Hotel Settings > TV ON SETTING > ON VOLUME
On
10
LAST
Off
1
HISENSE
STANDBY
Off
ON VOLUME VALUE
ON SOURCE
ON CHANNEL
ON CHANNEL NUMBER
LOGO
POWER ON
BASIC SETTING
Page 6

18
CLONING OPTION 1.
Plug in new TV.
A---
Plug in loaded USB drive.
B---
Turn TV on.
C---
On screen will acknowledge USB detected.
D---
Press menu.
E---
Key in numbers 2 5 6 6 3 on remote.
F---
Cloning option will appear on screen.
G---
CLONING OPTION 2.
Take loaded USB drive to next unit, plug in next installation
A---
Plug in loaded USB drive.
B---
Turn TV on.
C---
Go to Menu.
D---
Go to Audio menu.
E---
Go to Balance. Use arrows to adjust to zero.
F---
Enter access code 548 with remote number key. Hotel menu
G---
unit (You do not need to have sources connected).
Go to clone near bottom.
H---
opens.
Choose option Write In. Hit Enter on remote. Cloning option
J---
will appear on screen.
Select Yes. System will acknowledge download success. TV
k---
will be cloned.
HOTEL SETTING
set SSID for Pro:Idiom decording
—Allows installer to mute speaker, reset options and
Hotel Mute
: TV is muted. User can not adjust volume.
—Allows installer to mute TV speaker.
ON
: TV is not muted. User can adjust volume.
OFF
Options Reset
: Resets unit to factory default settings (normal).
—Allows installer to reset hotel settings to original
YES
: Keeps
all current settings.
NO
factory default settings.
SSID
—Set or reset SSID code for Pro:Idiom decording.
Set SSID
: Reset to factory default code.
YES
—Enter new SSID code.
Reset SSID
—Reset SSID code to factory default value.
: Maintain current settings.
NO
SW Version
—shows current software version information.
SRS ENABLE
: Surround Sound is disabled.NO
: Surround Sound is active.YES
CLONE
(copy) settings to any additional units you are installing.
First plug in USB drive to unit that is already set up. (TV will showA---
USB found).
Select READ OUT which brings up cloning function.B---
Select YES to clone (copy). When complete, TV will show uploadC---
success. Hotel Menu will close automatically.
MAX VOLUME —Allows installer to adjust max volume from 0 to 100.
: TV will stay on with no signal.OFF
MIN VOLUME —Allows installer to adjust minimum volume from 0 to 100.
The volume value can be input by digit-number buttons on remote.
The volume value can be input by digit-number buttons on remote.
AUTO Standby
: TV goes to Standby mode when there is no signal after 15 mimutes.ON
hotel settings menu.
CHANNEL SETTINGS —Allows access to channel setting without exiting
: In channel setting mode, Allows editing and Program Guide Edit
remapping of channels available. Using the color keys
installer can change channel position and name.
ON
: No detail information on channel.
info may also be available depending on provider.
—Locks Picture adjustments in menu.
Picture Lock
OFF
: Picture adjustments in menu are allowed by user.
ON
: Locks all picture adjustments.
—Locks Audio adjustments in menu.
Audio Lock
OFF
: Audio adjustments in menu are allowed by user.
ON
: Locks all audio adjustments except Balance.
—Locks Power menu adjustments in menu.
Power Lock
OFF
: Allows normal access to Power menu.
ON
: Locks all Power menu functions including DPMS Mode,
Sleep Mode, Timer Mode and Energy Saving mode.
—Locks Settings menu adjustments in menu.
Setting Lock
OFF
: Allows full access to Settings (5th Icon on right) menu.
ON
: Locks all Settings menu functions including Language,
Aspect ratio, Zoom, OSD Timeout, Transparency and Date & Time.
LHDN32V88MH / LTDN42V77MH
Hotel Settings
Hotel Settings > CHANNEL SETTING > PROGRAM
Hotel MUTE
Hotel Settings > HOTEL SETTING > Hotel MUTE
Off
No
OPTIONS RESET
SSID
46.1 WGCL - TV (19) eng [eng] TV (1080i)
The Talk ( USTV - 14) 10:00 - 11:0 TV
Actress Eva LaRue;chefs Gina and Patrick Neely;a young woman whose
daughter has a heart defect;guest host Gina Neely.
020 WGCL - TV (19) eng [eng] TV (1080i)
TV
No
001
002
003
004
005
006
007
008
009
010
011
012
013
PHY.
2
3
4
5
6
7
8
101
9
10
72
11
12
Program
2.0
3.0
4.0
5.0
6.0
7.0
8.0
8.1
9.0
10.0
10.3
11.0
12.0
Skip Name
E2 1 WG
E2 2 WX
Rename:
Skip:
Copy:
Delete:
Swap:
Enter:
Select:
Return: Exit:
Menu
Page 7

 Loading...