

Page 1
DH7019K1G
DH7019KP1WG
DH7019W1WG
1-877-465-3566
Page 2
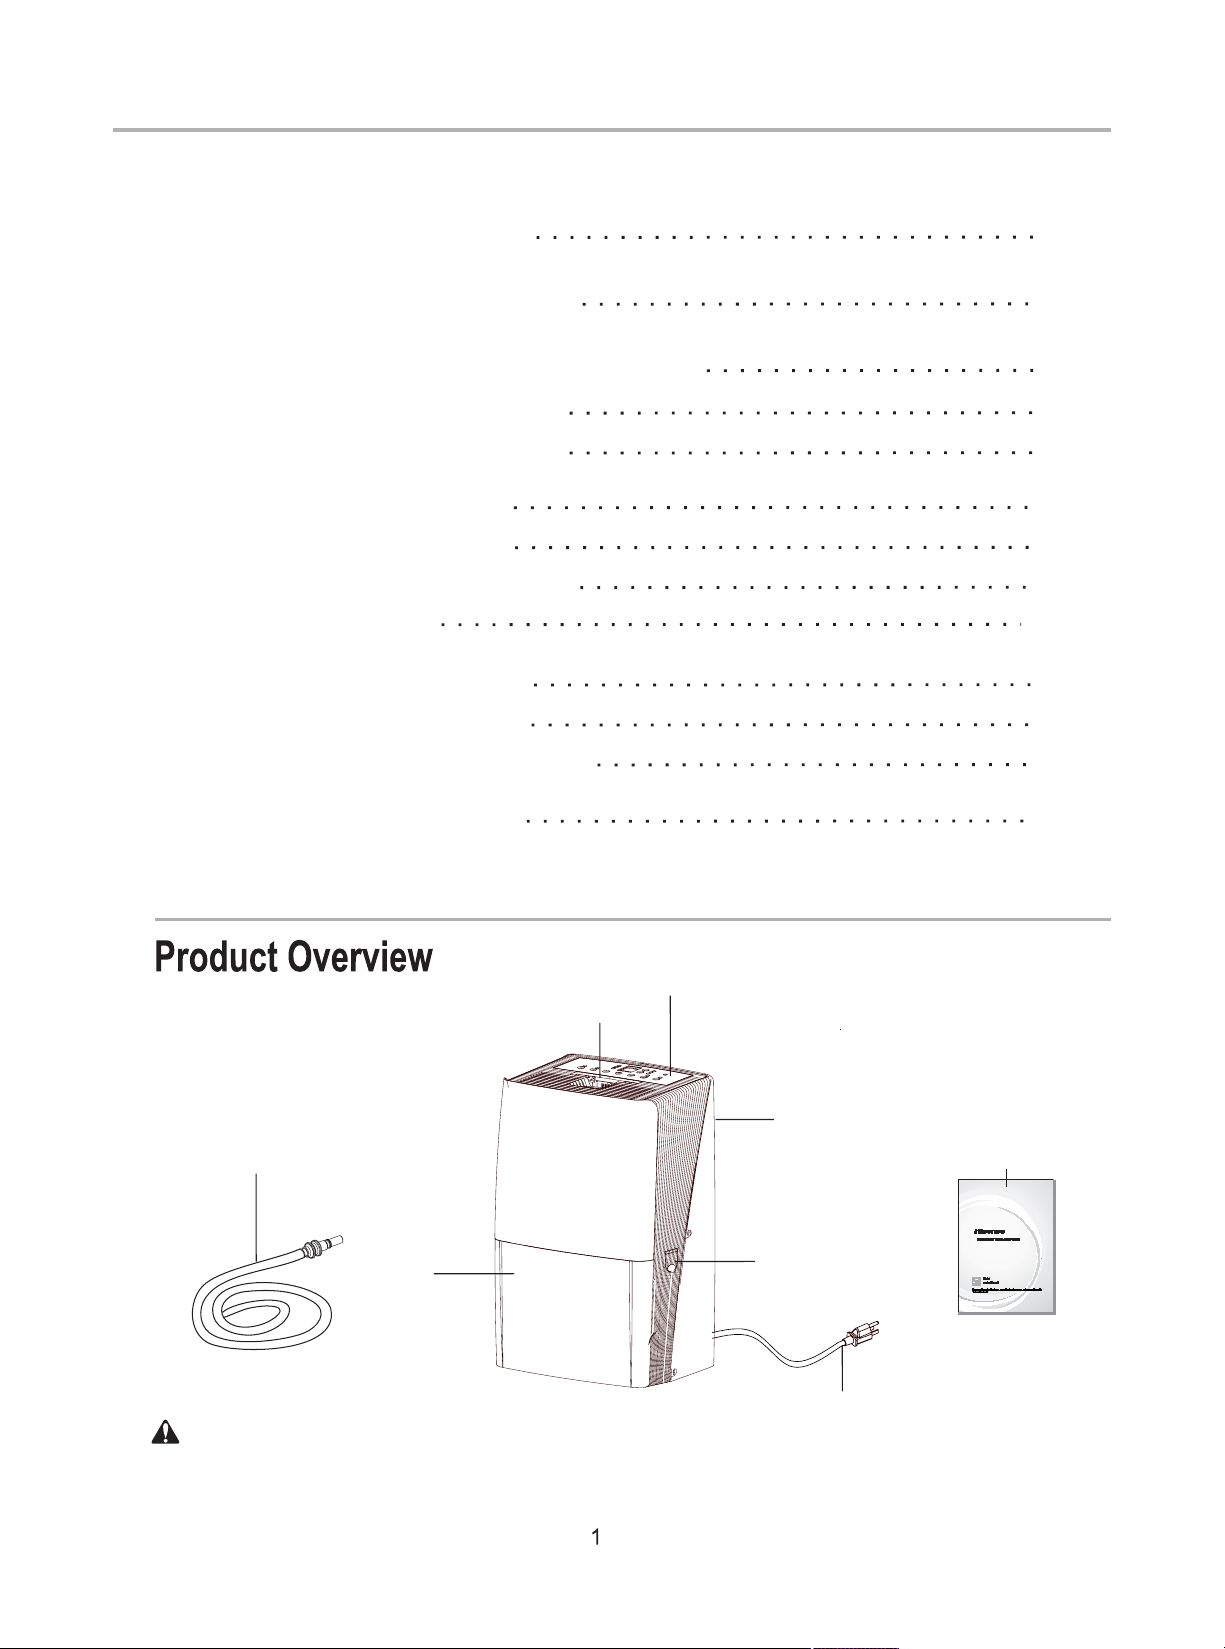
TABLE OF CONTENTS
PRODUCT OVERVIEW
DEHUMIDIFIER SAFETY
INSTALLATION REQUIREMENTS
Electrical Requirements
Location Requirements
DEHUMIDIFIER USE
Setting the Controls
Draining the Dehumidifier
Normal Sounds
DEHUMIDIFIER CARE
Cleaning the Air Filter
Cleaning the Dehumidifier
1
2
5
5
5
6
6
10
13
14
14
14
TROUBLE SHOOTING
Quick Con nect Hos e
(for pump f unctio n
model onl y)
Bucket
Control P anel
Handle
Air Intak e Grill
and Air Filter
Hose Cover
Power Plug
15
User Manu al
The figur es in this m anual ar e based on t he exter nal view o f a standa rd model . They m ay differ
from that o f the dehu midifi er you hav e select ed.
Page 3
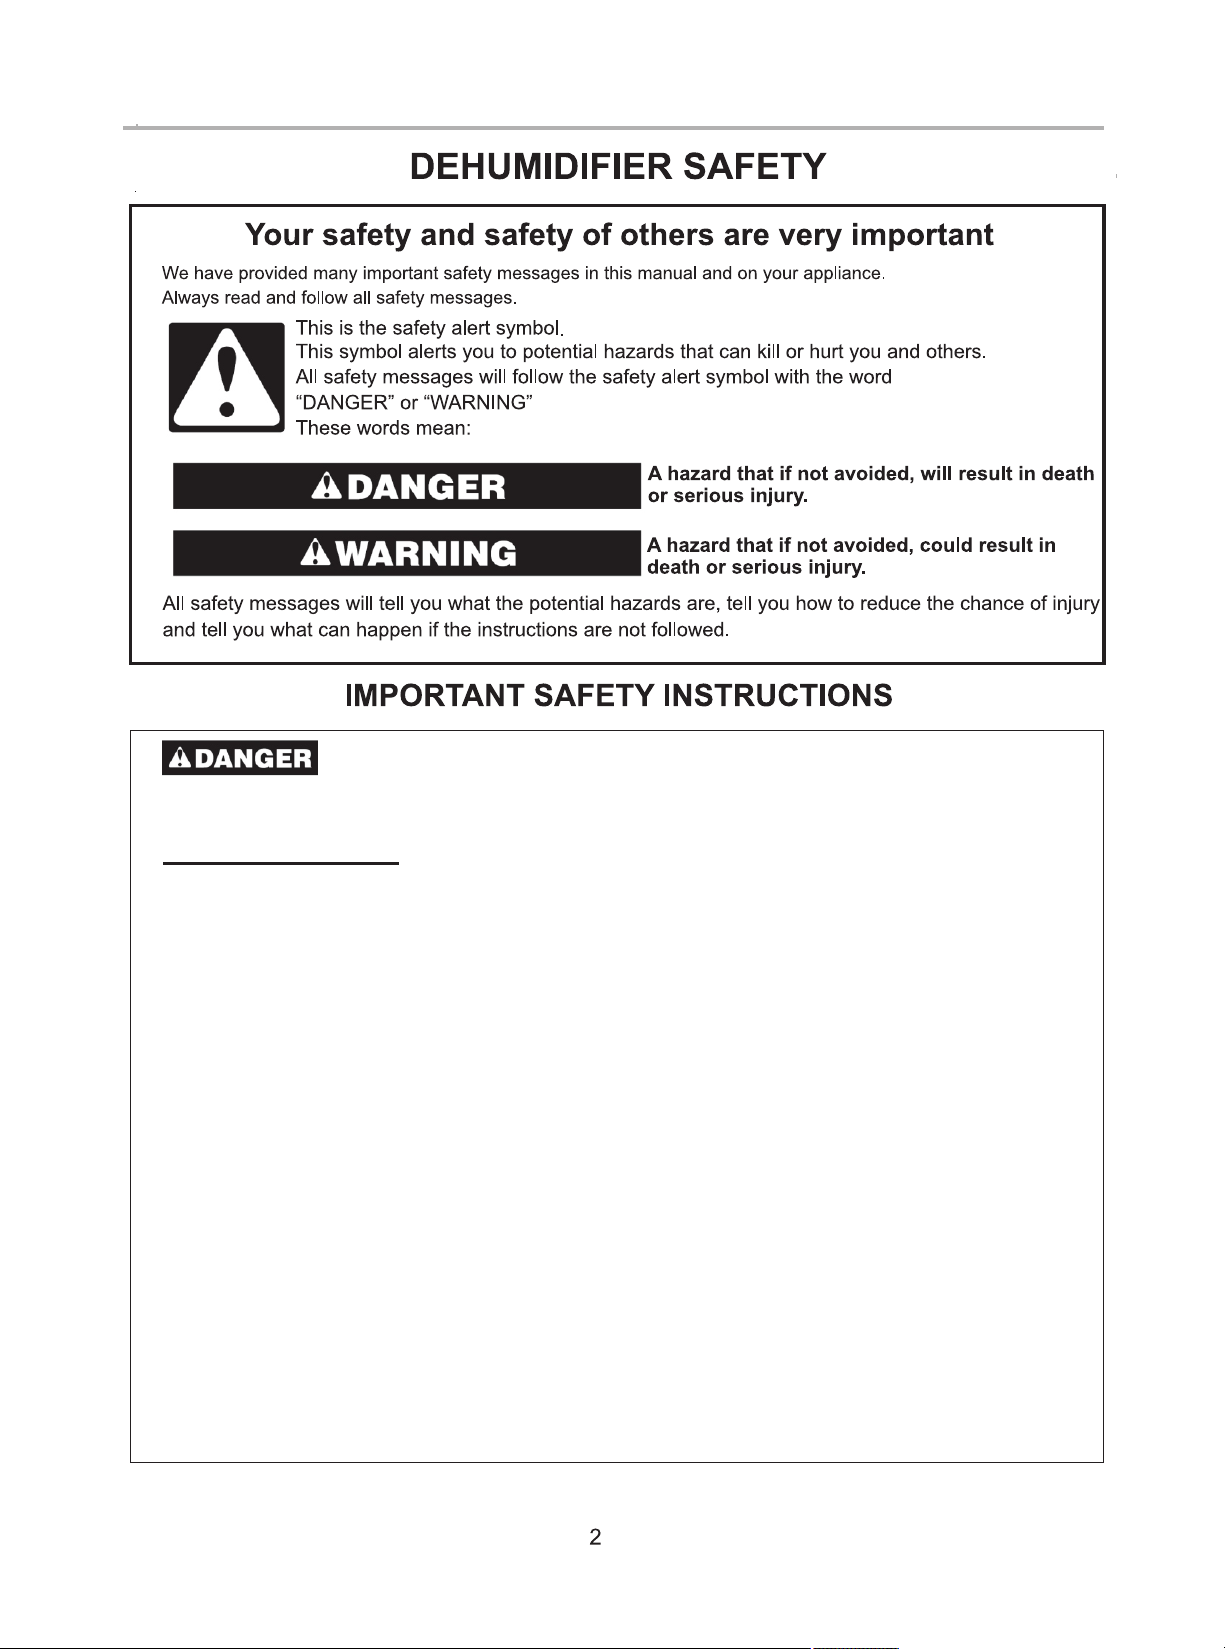
To reduce the risk of explosion, fire, death, electric shock, scalding, or injury to
persons when using this appliance, follow basic precautions, including the following:
INSTALLATION
■ Plug into a grounded 3 prong outlet. Do not remove ground prong.
■ Never attempt to operate this appliance if it is damaged, malfunctioning, partially
disassembled, or has missing or broken parts, including a damaged cord or plug.
■ Do not use an electrical adapter or multiple-outlet adaptors with this dehumidifier.
■ Do not use an extension cord.
■ Unplug dehumidifier before servicing.
■ Do not drink water collected in the water bucket.
■ The appliance is not intended for use by young children or impaired people without
supervision, young children should be supervised to ensure that they do not play with
the appliance.
■ When installing or moving the appliance, be careful not to pinch, crush, or damage
the power cord.
■ Keep packing materials out of the reach of children. Packaging material can be
dangerous for children. There is a risk of suffocation.
■ Do not use the appliance in standing water or allow the product to be directly splashed by water
during use.
■ Store and install the appliance where it will not be exposed to temperatures below
freezing or exposed to outdoor weather conditions.
■ Call an authorized service technician to repair or immediately replace all power cords
that have become damaged. Do not use a cord that shows cracks or abrasion damage
along its length or at either end.
Page 4
■ Do not use th e produc t if the out let is dam aged or lo ose.
■ In the even t of a gas lea k (propa ne gas, LP g as, etc. ) do not ope rate this or any other
applian ce. Open a w indow or d oor to ven tilate t he area im mediat ely.
■ Do not disa ssembl e, repai r or modif y the prod uct.
■ Do not stor e or use fla mmable g ases or ma terial s near the d ehumid ifier.
OPERATION
■ Read all instruct ions bef ore usin g the appl iance an d save the se instr uction s.
■ Do not tamp er with co ntrols .
■ Push the po wer plug a ll the way i nto the wa ll outle t so that it i s not loos e.
■ Do not gras p the powe r cord or to uch the ap plianc e contro ls with we t hands.
■ Do not modi fy or exte nd the pow er cord.
■ If the prod uct make s a strang e noise or e mits a sme ll or smok e, pull the power plug out and
contact H isense c ustome r servic e.
■ Avoid placing the dehumidifier or other heavy objects on top of the power cord.
■ Do not use wa ter to cle an the deh umidif ier.
■ Keep the ai r inlet an d outlet f ree from o bstruc tions.
■ Do not cove r the powe r cord wit h a rug or car peting . Placin g heavy ob jects on top of the cord
could dam age it.
■ Keep the pr oduct aw ay from fi re and hig h heat.
■ Do not use th e produc t in place s where it c ould be sp lashed b y water.
■ Do not inse rt finge rs, stic ks etc. in to the air i nlet or outlet. The fan is r unning a t high spe eds
and could c ause per sonal in juries .
■ Do not repa ir or repl ace any pa rt of the ap plianc e. All repa irs and se rvicin g must be pe rformed
by qualif ied serv ice pers onnel un less spe cifica lly reco mmende d in this ow ner's ma nual. Use
only auth orized f actory p arts.
■ Connect t o a proper ly rated , protec ted, and s ized pow er circu it to avoid electrical overload.
3
Page 5
To reduce the risk of injury to per sons ,ma lfunct ion, or da mage to th e produc t
or proper ty when us ing this a pplian ce, foll ow basic s afety pr ecauti ons, inc luding the following:
INSTALLATION
■ Use this ap plianc e only for i ts inten ded purp ose.
This product is not designed for preserving precision instrumen ts, tabl eware or a rt works .
■ Never unp lug the ap plianc e by pulli ng on the po wer cord . Always gr ip the plu g firmly a nd pull
straigh t out from t he outle t.
■ Do not use th e produc t in place s where ch emical s are used .
Chemica ls and sol vents di ssolve d in the air c ould cau se produ ct defor mation a nd leaki ng,
■ Turn off the dehumidifier and pull out the power plug before cleaning.
Wait f or the fan to stop moving.
■ Do not oper ate the de humidi fier wit hout a fil ter.
Using the p roduct w ithout a f ilter co uld resu lt in a redu ced prod uct life span, electric shock
or injury.
OPERATION
■ Do not use th e produc t for pres erving a nimals /plant s, preci sion ins truments, art works etc.
■ Do not plac e any obje cts on top o f the dehu midifi er.
■ Turn off the dehumidifier and empty the water bucket before mo ving the d ehumid ifier.
■ Pull out th e power pl ug if you wi ll not be us ing the pr oduct fo r an exten ded peri od.
■ Do not use th e produc t in a very sm all spac e such as a cl oset.
Poor vent ilatio n could re sult in ov erheat ing.
■ Do not use wa x, thinn er or a stro ng deter gent whe n cleani ng. Wipe t he produ ct using a soft
cloth.
■ Do not use th e produc t in direc t sunlig ht or rain .
■ Do not touc h the prod uct with w et hands .
■ Positio n the prod uct on a fir m, stabl e surfac e.
■ Remove ca ble ties a nd exten d power co rd befor e use.
■ Do not spra y foreig n substa nces or wa ter on the p roduct .
■ Dispose o f this app liance i n accord ance wit h Federa l and Loca l regula tions.
■ Refrige rants mu st be evac uated be fore dis posal.
■ Please re cycle or d ispose o f the pack aging ma terial o f the prod uct in an en vironm ent-friendly
manner.
■ To avo id damag e to the compressor, never store or ship the appliance upside down or sideways.
4
Page 6
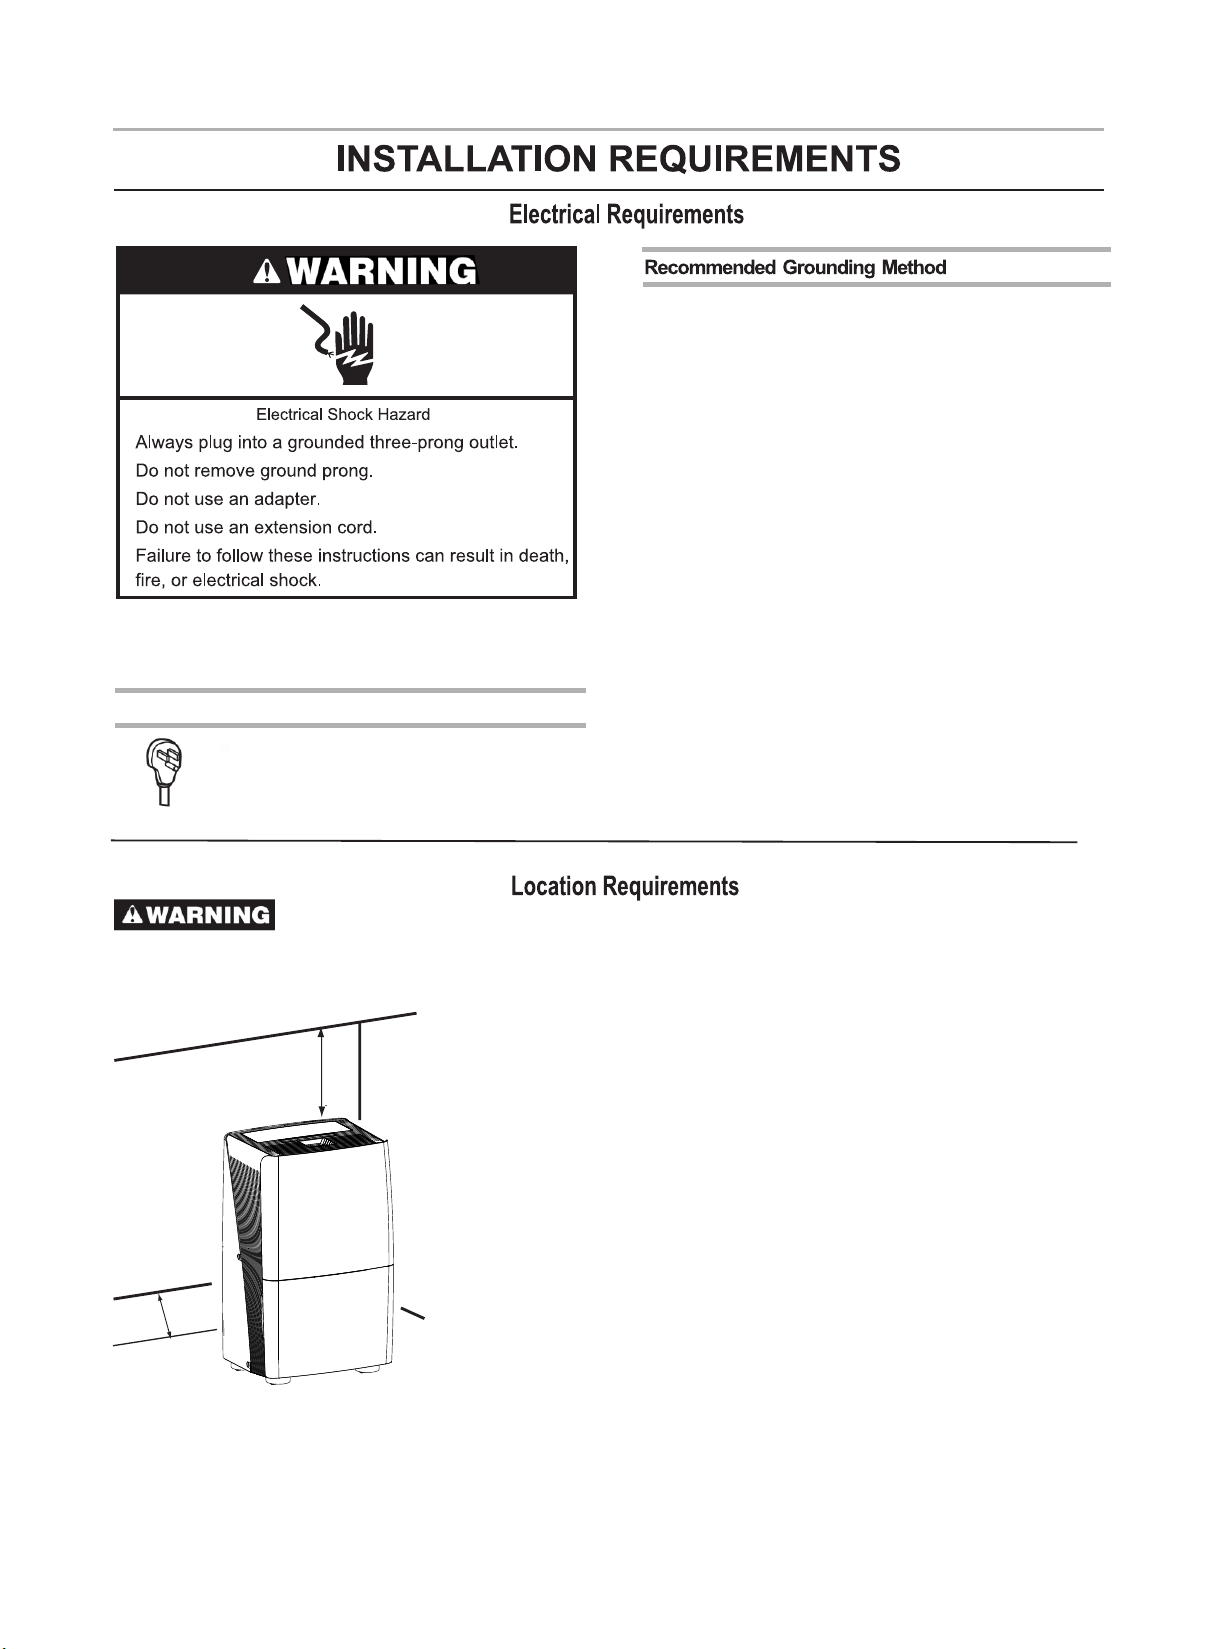
Specifi c electr ical req uireme nts are li sted in th e
chart bel ow. Follo w the requ iremen ts for the t ype
of plug on th e power su pply cor d.
This dehu midifi er must be g rounde d. This
dehumidifier is e quippe d with a pow er suppl y
cord with a t hree-p rong gro unding p lug. The
cord must b e plugge d into a mat ing, gro unded
three-p rong out let, gro unded in a ccorda nce
with all lo cal code s and ordi nances . If a matin g
outlet is n ot avail able, it i s the cust omer's
respons ibilit y to have a pr operly g rounde d
three-p rong out let inst alled by a q ualifi ed
electri cian.
It is the cus tomer' s respon sibility:
■ To con tact a qua lified electrical installer.
■ To ass ure that the electrical installation is
adequat e and conf orms to th e Nation
Electri cal Code , ANSI/NF PA 70-last edition,
and all loc al codes a nd ordin ances.
Power Supply Requirements
■ 115V (103.5 min. to 126.5 max.)
■ 15A time-delay fuse or circuit breaker
To reduce the risk of injury to per sons, ma lfunct ion, or da mage to th e produc t or
propert y when usi ng this ap plianc e, follo w basic sa fety pre cautio ns, incl uding th e following:
NOTE: Your model may differ from the one shown.
■ Do not loca te outdo ors. This dehumidifier is intended for indoor,
A
A
residen tial use o nly. This dehumidifier is not recommended for
commerc ial use.
■ Allow at least 12" to 18 " (30.5 cm t o 45.7 cm) o f space on t he rear
and sides o f the dehu midifi er for mod els with b ack louv er and
above the d ehumid ifier fo r models w ith top lo uvers.
■ You will need a surface strong en ough to su pport th e
dehumid ifier wh en its buc ket is ful l of water.
■ You will need a surface level enough to kee p the wate r from
spillin g when the b ucket is f ull of wat er.
■ Do not bloc k the louv ers of the u nit .
■ Never ope rate thi s dehumi difier i n an area th at is like ly to
accumul ate stan ding wat er. If this c onditi on devel ops, for y our
safety di sconne ct the pow er suppl y before s teppin g into the
water.
Copies of the stand ards lis ted may be o btaine d
from:
Nation Fi re Prote ction Ass ociati on
1 Battery march Pa rk
Quincy, Ma 02169-7471
www.nfpa.org
A. 12" to 18" (30.5cm to 45.7cm)
5
Page 7

Control P anel
Control Type 1
AUTO D RY
CONT INUOU S
MAN UAL SET
TIM ER
MOD E
Control Type 2
AUTO D RY
CONT INUOU S
MAN UAL SET
TIM ER
MOD E
NOTE:
The control panel of your model may differ from
the one sho wn above .
The deh umidif ier shou ld be
upright f or at leas t 2 hours be fore use .
NOTES:
■ Before tu rning on t he dehum idifie r, be sure th at
the bucke t is empty a nd fits al l the way in to the
dehumid ifier.
■ Each time y ou unplu g the dehu midifi er or powe r
is interr upted, t he contr ols will r eturn to t he
previou s settin gs when po wer is res tored.
■ Humidit y displa yed is bet ween 30% R elativ e
Humidit y and 90% Re lative H umidit y.
■ Humidit y can be set b etween 3 0% Relat ive
Humidit y and 80% Re lative H umidit y.
■ It's impo rtant to s et the des ired hum idity le vel
to an achie vable se tting. To ensure energy efficient operation, only use the dehumidifier in
a closed sp ace, wit h no open wi ndows or o ther
sources o f moist ai r (to avoi d contin uous run ning).
■ Operati ng tempe rature i s betwee n 38ºF to 90 ºF
(3.2ºC to 3 2.2ºC) .
At tempera tures of 3 8ºF(3. 2ºC) or le ss,
AUTO
POW ER
FAN
HIG H
LOW
CLE AN FILTER
AUTO
HIG H
LOW
EMP TY BUCK ET
EMP TY BUCKE T
P
POW ER
FAN
CLE AN FILTER
water fre ezes ins ide the pr oduct. A t
tempera tures ov er 90ºF( 32.2ºC ), the int ernal
tempera ture of th e produc t trips a pr otecti ve
device wh ich deac tivate s the prod uct to avo id
product d amage.
■ The compressor has a 3-minute delay
before re starti ng. If the p roduct i s stoppe d
and immed iately r estart ed, to pro tect the
compres sor ther e is a 3-min ute dela y until
the compr essor re starts .
■ When the de humidi fier is op eratin g, the
indoor te mperat ure will r ise.
The dehumidifier does not have a cooling
/heatin g functi on.
Heat is gen erated d uring op eratio n, so the
room temp eratur e may be inc reased b y
about 6ºF (3ºC) de pendin g on the usa ge
conditi ons (ind oor temp eratur e, size of t he
room).
PUM P
6
Page 8

NOTE:
Once the hu midity s et point i s reache d, the
dehumidifier wi ll stop ru nning co ntinuo usly,
and the fan w ill be off periodically.
The fan may p eriodi cally tu rn on, to re ad the
humidity level, w ithout t he compr essor
running.
Desired H umidit y-Mode
1. Press MO DE to sele ct the des ired hum idity
setting .
1. Plug int o a ground ed three -prong o utlet.
2. Press PO WER to tur n on the deh umidif ier.
3. Press FAN t o choose t he fan spe ed.
4. Press MO DE to choo se the mod e.
5. Press th e plus or mi nus butt on to set th e level
of humidi ty.
6. Press PO WER to tur n off the dehumidifier.
NOTE:
The dehum idifie r will ret ain your l ast sett ings.
Empty Buc ket Ligh t
If this lig ht is on, th e fan and th e compre ssor wil l
stop runn ing.Th is light i ndicat es that yo u need
to check:
■ If the buck et is full , empty an d re-ins tall
bucket.
■ If the buck et is not in p ositio n, remov e the
bucket an d re-ins tall it. M ake sure t he
bucket fi ts all the w ay into th e dehumi difier
and the buc ket ligh t is off, or duhumidifier
will not ru n.
Fan Speed
1. Press FAN t o select f an speed .
2. Choose L OW, HIGH o r AUTO.
2. Choose Au to Dry, Continuous or Manual Set.
■ AUTO DRY: The dehumidifier will operate in dry
mode only. The Fa n Speed is set automatically.
The Desired Humidity is set to 50%
automat ically.
■ CONTINU OUS: The dehumidifier will operated
continu ously. The Fan Speed can be adjusted.
The Desired Humidity can not be adjusted.
■ MANUAL SET: The dehumi difier w ill oper ate at
the selec ted fan sp eed to the s et humid ity leve l.
If the humi dity lev el of the ro om is high er than
the desir ed humid ity sett ing, the c ompres sor
will turn o n. If the hu midity l evel of th e room is
lower tha n the desi red humi dity set ting, th e
compres sor will t urn off, as well as the fan.
NOTE:
The de-ic ing func tion wil l turn off the
compres sor if a low t empera ture con dition
occurs. P ressin g the MODE b utton or t he plus
or minus bu tton wil l not incr ease or de crease
the amoun t of moist ure remo ved. Whe n the
de-icer s enses th en corre ct opera ting
tempera ture, th e compre ssor wil l cycle ba ck
on. Some fr eezing i s normal w ill dehu midifi ers
are used at l ow tempe rature s.
Power
■ LOW-Reaches the desired humidity setting
with lowe r sound le vel.
■ HIGH-Wi ll more qu ickly re ach the de sired
humidit y settin g.
AUTO-Achieves set humidity at normal speed.■
Press POW ER to turn o n or turn off the
dehumidifier.
7
Page 9

Humidit y Level
1. Press th e Plus or Mi nus butt on to set th e
desired h umidit y level. D esired h umidit y in
the digit al displ ay will fl ash for 5 se conds af ter
operati on.
2. Actual r oom humi dity wil l be displ ayed aft er
5 seconds o f flashi ng the des ired hum idity.
NOTE:
Humidity can only b e adjust ed manua lly in
Manual Se t mode. In C ontinu ous and Aut o Dry
mode, hum idity le vel is set a utomat ically.
Digital D isplay
Display shows rel ative hu midity o r time
(depend ing on set ting).
1. When the d ehumid ifier op erates i n Manual
Set mode, t he displ ay shows t he relat ive
humidit y of the roo m.
2. When the t imer is se lected , the disp lay show s
the time wh en the deh umidif ier will t urn on or
turn off operates, depending on the setting.
NOTE:
The humid ity disp layed is o nly for re ferenc e. For
accurat e humidi ty, please check a hygrometer.
To set Ti mer to turn on the dehumidifier, with
previou s settin g:
1. Turn off the dehumidifier.
2. Press TIMER. Timer indicator light will flash.
The display will show remaining time before
the dehum iditie r will tur n on.
3. Press th e Plus or Mi nus butt on to chan ge the
delay tim e, from 30 m inutes t o 24 hours .
To clear the Time r delay program:
NOTE: Dehumiditier can be either on or off.
1. Press TIMER once after it has been
program med. Dis play wil l show rem aining t ime.
2. While th e displa y is showi ng the rem aining
time, pre ss TIMER again. Timer indicator light
will turn o ff.
To see the remaining time.
Press TIMER once after it has been programmed.
Display will show r emaini ng time.
NOTE:
Empty the d rain wat er bucke t before s etting
the timer f unctio n. If the wa ter buck et
becomes f ull duri ng the Time r functi on, the
Bucket Fu ll light g oes on and
dehumidificat ion stop s.
Clean Fil ter
1. When the C lean Fil ter indi cator li ght is on,
remove, c lean and r eplace t he air fil ter. See
“Cleani ng the Air Fi lter”.
2. Press th e Clean Fi lter but ton to res et the fil ter
monitor.
Timer
To set Ti mer for a 30 -minute to 24-hour delay
before th e dehumi difier i s turned off (the
dehumid ifier mu st be On):
1.Press TIMER. Timer indicator light will come
on, and the d isplay w ill flas h. The display will
show rema ining ti me befor e the dehu midifi er
will turn o ff.
2. Press th e Plus or Mi nus butt on to chan ge the
delay tim e, from 30 m inutes t o 24 hours .
NOTE:
When the li ght is on, i t will rem ain on for 1 80
hours or un til you pr ess Clea n Filter b utton.
8
Page 10

Pump (for Pump function model only)
This feat ure pump s water ho rizont ally or
vertica lly. Pump water to a drain, out a window
or anywhe re you thi nk suita ble.
IMPORTANT:
You mus t connec t the drain hose to the unit
before pr essing t he Pump bu tton, or t he
pump will n ot opera te. See “P ump drai n” for
connect ing inst ructio ns.
Site for installing hose for pump function:
Water
Container
P
1. Press PU MP to activate the pump system for
active dr ainage .
2. Once the p ump butt on is pres sed, the p ump ligh t
will swit ch on.
NOTE:
If the pump light flashes, it means that the pump is not ■
functioning properly.
If the drain hose is not correctly connected to the ■
unit or is bent, the pump light will flash and the
pump system will not work. See “Trouble shooting”
for direction.
Hose length is
16 feet Max.
Height should
be less than
16 feet
Dehumidifier
9
Page 11

Option 1 Bu cket Dra ining
If a floor dr ain is not a vailab le, or you d o not plan
to run your d ehumid ifier co ntinuo usly, you may
want to sim ply empt y the buck et.
1. Gra sp the buc ket side s to slide o ut bucke t.
2. Lift the b ucket up b y the hand le.
4. Fold dow n the hand le and rei nstall t he bucke t.
IMPORTANT:
If the Empt y Bucket l ight com es on, the
dehumidifier wi ll not ope rate. The bucket may
need to be em ptied or r e-inst alled.
NOTE:
■ If the wate r bucket i s remove d immedi ately
after tur ning off the dehumidifier, the water
remaini ng in the he at excha nger may d rip
inside th e water bu cket sto rage are a.
Remove th e water wi th a soft cl oth.
■ While cle aning, d o not touc h the wate r level
float.
■ Clean the w ater buc ket once a w eek duri ng
use.
■ If the ambi ent temp eratur e is low, the re is
less mois ture in th e air for th e produc t to
remove.
■ Unplug th e produc t before r emovin g the wate r
bucket. I f the buck et is remo ved whil e the
product i s operat ing, the c ompres sor will s top.
3. Pour water in to a sink or t ub.
Option 2 Gr avity Dr aining
If you plan t o run your d ehumid ifier co ntinuo usly,
you can cho ose dire ct drain ing by att aching a
garden hose to the un it.
1. Turn off the dehumidifier and unplug the power
supply co rd.
2. Uncove r the conn ector co ver on the s ide of
the unit.
10
Page 12

3. Remove bucket.
4. Attach a garden hose to the drain hose
connect or on the in side of th e dehumi difier.
Securel y attach t he hose to b e sure the re is
no water le ak.
NOTE:
The garde n hose sol d separa tely.■
The conne ction is d esigne d for Nort h ■
American g arden ho ses only.
A
B
A. Garden hose
B. Drain hose connector
IMPORTANT:
In North Ame rica the g arden ho se conne ctors ar e
3/4” diam eter str aight (n on-tap ered) th read wit h a
pitch of 11.5 threads per inch(male part has an
outer dia meter of 1 1 /16 inch es (26.9 9mm).
Option 3 PUMP-Drain (for Pump function model only)
This feat ure can he lp to pump w ater hor izonta lly
or vertic ally wit h a 16 feet (4 87.68c m) hose
included. You can also pump water to a floo r drain,
out a windo w or anywh ere you th ink suit able.
NOTE: T here are t wo types c onnect ors, ple ase
choose th e operat ing inst ructio ns for you r model
to use.
CONNECTOR TYPE 1
NOTE: You mus t connec t the drain hose (with
connect or B) to dra in hose co nnecto r A before
pressin g Pump but ton. If th e pump doe s not
functio n proper ly, see “Tro uble sho oting” f or
directi on.
Drain hos e connec tor A
Take car e not to inj ure hands
while con nectin g the hose .
5. Place the oth er end of ga rden hos e into a
floor dra in. Chec k to see tha t the hose l ies
flat and is i n the drai n. Make su re the
drainin g end of the h ose is on a lo wer leve l
than the ho se conne ction to t he
dehumid ifier. The hose should not be
kinked or p inched .
6. Reinstall b ucket.
NOTE:
■ To use t he bucke t without the garden hose,
simply re move the g arden ho se, then r einsta ll
bucket.
■ The bucke t must be in stalle d and prop erly
aligned f or the deh umidif ier to ope rate wit h or
without a g arden ho se conne cted.
Drain hos e connec tor B
Drain hos e
1. To connect the drain hose to the unit, push
drain hos e connec tor B into t he conne ctor A.
11
Page 13

2.To discon nect the d rain hos e, push co nnecto r A
in, and the n pull con nector B o ut.
1. Push
2. Pull
sh
u
1. P
2.To discon nect the d rain hos e, press t he relea se
button on c onnect or A, and the n pull con nector
B out.
Press
l
ul
P
1. Press
Button
1. P
How to disc onnect
CONNECTOR TYPE 2
2. Pull
u
sh
NOTE:
You mus t connec t the drai n hose (wi th connector B)
to connec tor A before pressing the Pump button. If
the pump do es not fun ction pr operly, see “Troub le
shootin g” for ins tructi ons.
Drain hos e connec tor A
Drain hos e connec tor B
2. Pull
How to disc onnect
Drain hos e
1. To connect the drain hose to the unit, push drain
hose conn ector B in to the con nector A.
Push
12
Page 14

Wate r filter cleaning
(For pump f unctio n model only)
1. Unplug t he unit be fore cle aning it .
After ever y 3 months o f usage, t he water f ilter
need to be cl eaned fo r a smooth w ater pum p
running .
2. Remove t he bucke t.
4. Clean th e water fi lter wit h soft bru sh.
■ If the filt er is very d irty, wa sh it in wat er and a
neutral d eterge nt.
■ Clean the w ater fil ter ever y 3 months .
5. Re-ins tall the f ilter, fi lter sea ling bol t and
plastic n ut back to t he unit, m ake sure t he
filter is i nstall ed to the ri ght posi tion.
3. Remove t he plast ic nut, se aling bo lt and tak e
the filte r off.
NOTE: B efore re move the f ilter, pl ease put a
draining dish und er the uni t and make s ure ther e
is not wate r draini ng from th e port.
Wate r Filter position
Step 3
Filter
Step 2
Sealing bolt
Step 1
Plastic n ut
Open
Step 1
Filter
6. Re-ins tall the b ucket to t he unit.
Step 2
Sealing b olt
Step 3
Plastic n ut
Close
NOTE:
If the unit w ill not us ed for a cer tain per iod of tim e,
please cl ean the wa ter filt er, drain t he dehum idfier
complet ely. And make sure re-install the water
filter pa rts.
Take car e not to inj ure hands
while dis assemb le and re- instal l the water
filter pa rts.
Service c alls to cl ean the wa ter filt er are not
covered u nder the p roduct w arrant y.
Normal Sounds
When your d ehumid ifier is o perati ng norma lly, you may hear sounds such as:
■ Compres sor soun ds, whic h may be lou d.
■ Air moveme nt from th e fan.
■ Clickin g sounds w hen the de humidi fier or co mpress or turns o n and off, and whe n the Autom atic
shut-off Switch is working.
13
Page 15

Your ne w dehumi difier i s design ed to give y ou many years of dependable service. Thi s sectio n explai ns
how to clea n and care f or your de humidi fier.
To avoid damage to the co mpress or, never s tore or sh ip the app liance u pside do wn or side ways.
The air fil ter is rem ovable f or easy cl eaning . A
clean fil ter help s remove d ust, lin t, and oth er
particl es from th e air and is i mporta nt for bes t
operati ng efficiency. Check the filter every two
weeks to se e whethe r it needs c leanin g.
1. Turn off the dehumidifier.
2. Remove t he air int ake gril l.
3. Take out the air filter.
4. Use a vacu um clean er to clea n the air fi lter if
the air fil ter is dir ty, wash it in warm water wit h
a mild dete rgent.
5. Reinst all the ai r filter a nd the air i ntake gr ill.
6. Turn on the d ehumid ifier.
NOTE:
Do not wash a ir filte r in the dis hwashe r or use
any chemi cal clea ners. Air d ry filte r comple tely
before re instal ling to en sure max imum ope rating
efficiency.
B
A. Air intak e grill
B. Air filte r
A
Cleaning the Dehumidifier
1. Turn off the dehumidifier and unplug the power
supply co rd.
2. Dust the surf ace of the u nit with a s oft clot h or
the dusti ng attac hment of y our vacc um clean er.
Every few w eeks, ri nse the in side of th e water
bucket wi th a mild de tergen t to avoid g rowth of
mold, mil dew and ba cteria .
Wate r level float
The dehum idifie r has a EMPT Y BUCKET light and
a water flo at. The bucket must be properly aligned
for the wat er level f loat and t he EMPTY BUCKET
light to wo rk.
14
NOTE:
Be sure the f loat is sn apped co rrectl y in place .
A
B
A. Wat er level float
B. Bucket
Page 16

Before ca lling fo r servic e, try the s uggest ions bel ow.
Dehumid ifier wi ll not run
■ Is the dehu midifi er turne d on?
Turn o n the dehu midifi er.
■ Is the powe r cord plu gged int o a ground ed
three-p rong out let?
Plug into a g rounde d three- prong ou tlet.
See “Elec trical R equire ments” o n page 5.
■ Has a house dhold fu se blown o r has a circ uit
breaker t ripped ?
Replace t he fuse or r eset the c ircuit b reaker.
If the prob lem cont inues, c all an ele ctrici an.
See “Elec trical R equire ments” o n page 5.
Is the buck et insta lled pro perly?■
Reinsta ll the buc ket so tha t it fits al l the way
into the de humidi fier.
Does the bu cket nee d to be empt ied?■
Empty the b ucket.
Is the wate r level fl oat in pla ce?■
Remove th e bucket . Make sur e the floa t is
snapped i n place. R einsta ll the buc ket.
Did the deh umidif ier sudd enly sto p operat ing, ■
and won't t urn on?
Confirm t he power i s connec ted, and t he bucke t
is in place . If the uni t still do esn't op erate, c all
Hisense f or Wa rranty service.
Dehumid ifier ru ns but doe s not dehumidify
■ All model s have an au tomati c de-ici ng
functio n that wil l shut off the compressor
and allow t he fan to ru n.
When the de -icing f unctio n senses t he
correct o perati ng tempe rature , the
compres sor will c ycle bac k on.
The filte r is dirty o r obstru cted deb ris.■
Clean the f ilter.
Air comin g from the d ehumid ifier is worm
■ Dehumid ifier wi ll put out w arm air un der
normal op eratin g condit ions.
Dehumid ifier di splays e rror cod es
■ If the dehu midifi er displ ays an err or code,
please co ntact Hi sense cu stomer s ervice .
15
Page 17

Version NO. 1899864-03
 Loading...