

Page 1

ES-G200366-1 B
Page 2
Quick Setup Guide
Help Hisense improve the environment by reducing paper
waste. For detailed instructions and feature descriptions, access the full User Manual online or refer to the E-manual in
TV. Before using the TV, please read this guide carefully and
keep it for future reference.
English
Page 3

Copyright statement
© 2020 Hisense Company Ltd. All Rights Reserved.
All material in this Quick Setup Guide is the property of Hisense Company Ltd.
and its subsidiaries, and is protected under the laws of the US, Canada, Mexico
and international copyright and/or other intellectual property laws. Reproduction or
transmission of the materials, in whole or in part, in any manner, electronic, print, or
otherwise, without the prior written consent of the Hisense Company Ltd. is a violation
of the rights of Hisense Company Ltd. under the aforementioned laws.
No part of this publication may be stored, reproduced, transmitted or distributed, in
whole or in part, in any manner, electronic or otherwise, whether or not for a charge or
for other or no consideration, without the prior written permission of Hisense Company
Ltd. Requests for permission to store, reproduce, transmit or distribute materials may
be made to one of the following addresses:
USA:
Hisense USA Corporation
7310 McGinnis Ferry Road
Suwanee, GA 30024
CANADA:
Hisense Canada Co., Ltd
2283 Argentia Road, Unit 16
Mississauga, ON, Canada
L5N 5Z2
MEXICO
IMPORTER:
Hisense Mexico S. de R.L. de C.V.
Blvd. Miguel de Cervantes Saavedra No 301
Torre Norte Piso 2, Col. Ampliación Granada
Miguel Hidalgo, Ciudad de México, C.P. 11520
RFC: HME110512IY3
TEL: (52) (55) 5531-3515
Hisense, and any and all other Hisense product names, logos, slogans or marks
are registered trademarks of Hisense Company Ltd. and its subsidiaries. All other
trademarks are the property of their respective holders.
Disclaimer
Disclaimer: Subscriptions or other payments may be required to access content
through some applications. Some or all of the included or downloaded application
services in this Hisense device may not function depending on the Internet
connection, local limitations of included applications or other reasons outside of
Hisense’s control. HISENSE EXPRESSLY DISCLAIMS RESPONSIBILITY FOR ANY
APPLICATION SERVICE FROM FUNCTIONING AT ANY TIME, FOR CONTENT
IN ANY APPLICATION SERVICE, FOR DISRUPTIONS OF SERVICE, LOCAL OR
REGIONAL LIMITATIONS, WARRANTIES OF TITLE, NO INFRINGEMENT, AND FOR
IMPLIED WARRANTIES OF MERCHANTABILITY OR FITNESS FOR A PARTICULAR
PURPOSE. By purchasing this device, you accept such Disclaimer without any claim
on Hisense at any time.
Page 4

This Quick Setup Guide supports the following models:
32V5G / 32H5G / 32H55G / 32A40GMV / 40V5G / 40H5G / 40H55G / 40A40GMV
Table of Contents
What's in the box ............................................................................................................3
Getting started ................................................................................................................4
Step 1. Attach stand or mount ....................................................................................4
Step 2. Connect devices to your TV ..........................................................................6
Step 3. Get your remote ready ...................................................................................9
Step 4. Power on the TV ..........................................................................................12
Step 5. Complete the rst-time setup .......................................................................12
Step 6. Establish a network connection ...................................................................12
Step 7. Enjoy your TV! ............................................................................................13
Troubleshooting ...........................................................................................................14
Product Specications ..................................................................................................15
Certication and Compliance........................................................................................16
1
Page 5
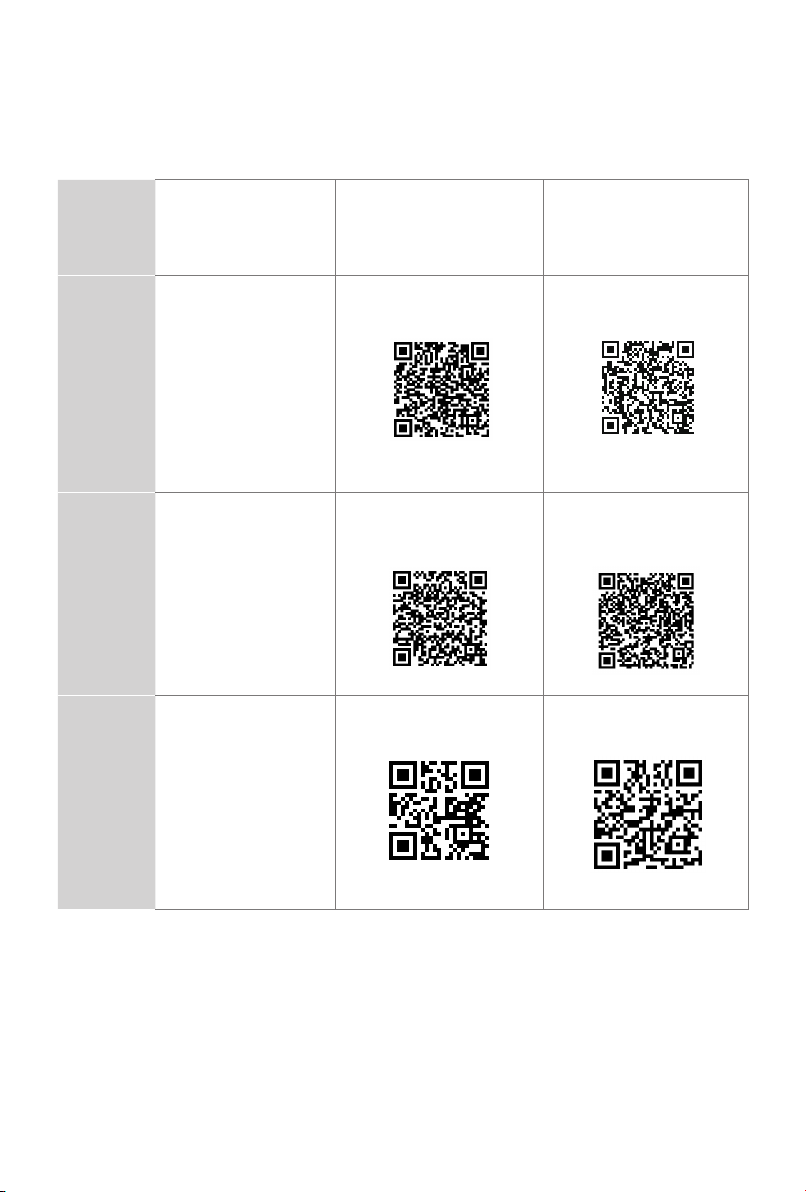
Congratulations on the purchase of your Hisense TV! If you would like to know 'all
things Hisense', contact us using the support info:
The model and serial number of the TV is located on the back and/or on one side of
the TV. We recommend that you record this if you ever need.
Country
U.S.A
CANADA
MEXICO
Customer Care
Center
• Phone: 1-888-935-
8880
• Hours of Operation:
Monday - Friday: 9 AM
to 9 PM EST
Saturday - Sunday: 9
AM to 6 PM EST
• Service Email:
Service@hisenseusa.com
• Phone: 1-855-344-
7367
• Hours of Operation:
Monday - Friday: 8 AM
to 8 PM EST
• Service Email:
canadasupport@
hisense.com
• Phone: 800-008-8880
• Hours of Operation:
Monday - Friday: 9:0021:00 hrs
Saturday: 9:00-15:00
hrs
• Service Email:
servicio@hisense.
com.mx
Hisense Support
Page
http://www.hisense-usa.
com/support/
http://www.hisensecanada.com/support/
https://hisense.com.mx/
support/
*Scan to download user manual
Register your TV
http://www.hisense-usa.
com/support/register
http://www.hisensecanada.com/support/
productReg.asp
https://hisense.com.mx/
support/register
Disclaimer:
This Quick Setup Guide is intended as a general guideline to
help you set up your TV. Images throughout this document are for illustrative
purposes only and may differ from the actual product.
2
Page 6
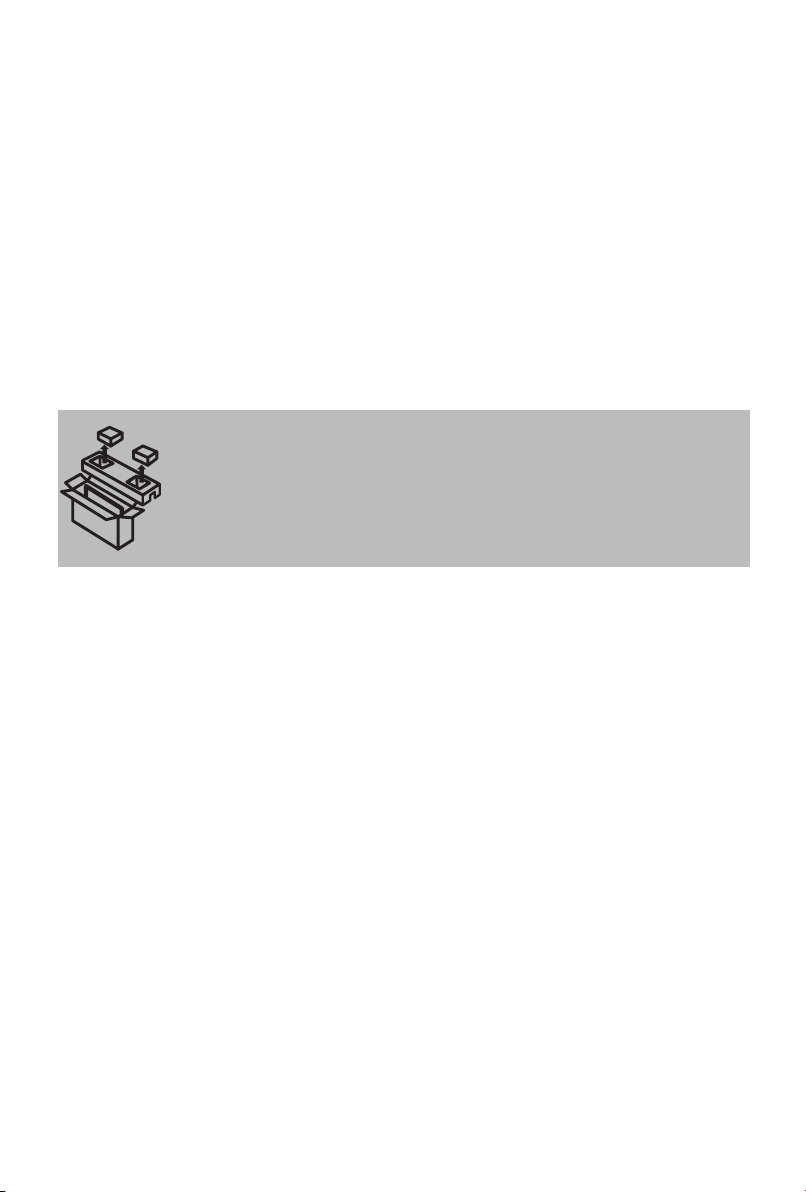
What's in the box
Your Hisense TV comes with the following items:
● TV ● Quick Setup Guide (this document)
● remote control ● 1 set of AAA(1.5Vcc) batteries
● 2 base stands ● Important Safety Information and Warranty Card
● 4 screws (ST4×14F for 32")(81.2 cm)
● 4 screws (ST4×20F for 40")(101.6 cm)
IMPORTANT:
To prevent accidentally discarding items that came with your TV, be sure to
of the foam
You will also need the following items (which are not included) to set up your TV:
● Wireless router (not included) for Internet connectivity
● Phillips screwdriver (not included) to secure the TV stand
● HDMI and other types of cables (not included) to connect external devices to the TV
● Wall mount bracket and screws (not included) if you prefer to mount the TV on the
wall
in the carton box.
Please check foam for accessories before discarding.
·
Veuillez vérifier la mousse pour qu'il n'y ait pas d'accessoires avant de la jeter.
·
Antes de desechar la espuma, asegúrese de retirar todos los accesorios.
·
check ALL
3
Page 7

Getting started
Step 1. Attach stand or mount
Before you start using your TV, attach your TV stand or mount it on the wall.
CAUTION:
• Disconnect the A/C power cord before installing a stand or a wall mount bracket.
• The LED display on your TV is fragile. Make sure the TV screen is not scratched or
damaged by hard objects or from pressure.
• After the installation is complete, make sure the TV is steady on a table or firmly
attached to a wall mount, before removing all protective film, if any.
Attach the TV stand
To attach the TV stand legs to your TV:
1. Carefully place your TV face down on a clean, soft and at surface.
2. Insert the TV base stands into the bottom slots on your TV.
3. Use the screws provided to secure each leg tightly.
Base Stand
Base Stand
Screws:
ST4×14F (32")(81.2 cm)
ST4×20F (40")(101.6 cm)
4
Page 8
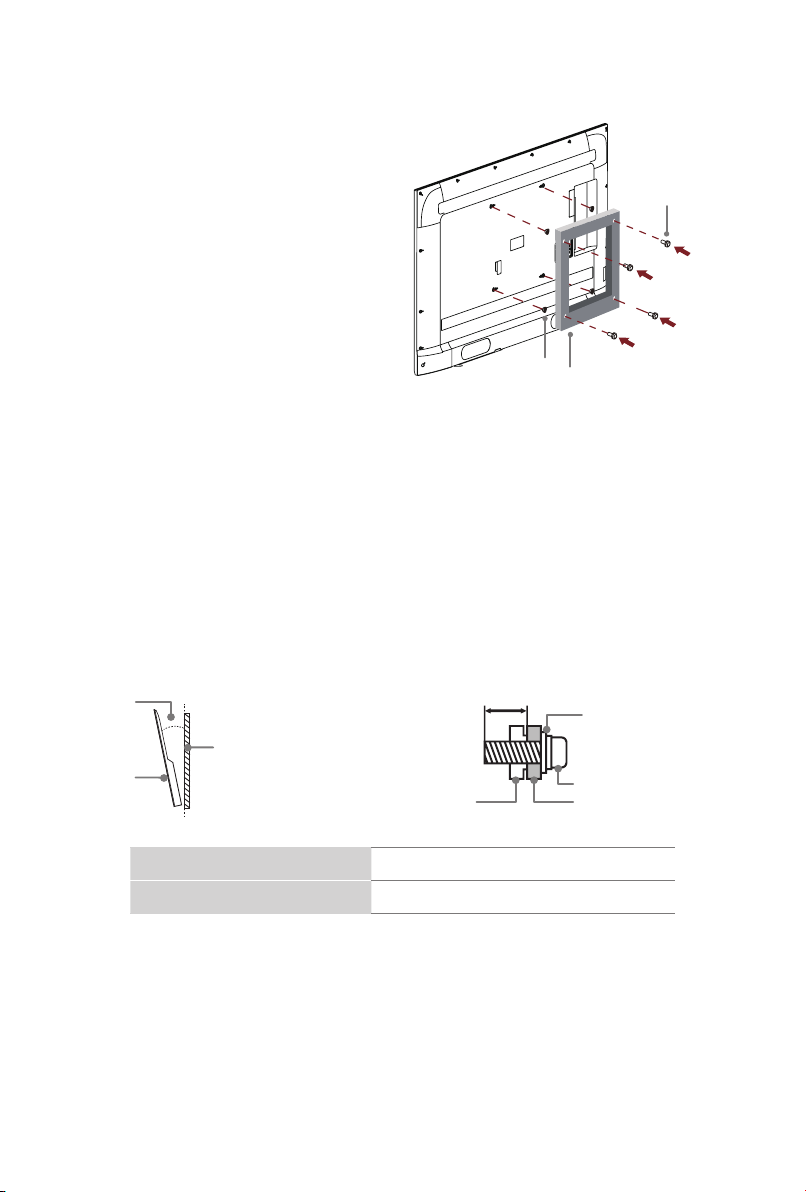
Attach the wall mount bracket (not included)
Before you begin the third-party
manufacturer instructions, be sure to do
the following things:
1. Place the TV face down on a clean,
safe and cushioned surface.
2. Remove the TV stand if you have
already attached it.
3.
Place spacers (not included) in the
corresponding bracket holes.
Screw
(not included)
Spacer
(not included)
Bracket
(not included)
CAUTION:
• Follow instructions provided with the wall mount bracket. If it is not correctly mounted,
the TV may fall and cause property damage or personal injury.
• When you attach the mount, be sure to use spacers (provided by the third-party
manufacturer) between the TV and the bracket.
• To prevent internal damage to the TV and to ensure it is mounted securely, be sure
to use fixing screws (not included) that are 9.5 - 11.5 mm in length when measured
from the attaching surface of the rear cover.
• Make sure the tilt angle between the TV screen and the vertical surface is no more
than 15 degrees.
≤15°
TV screen
Vertical
surface
Rear cover of the TV
Wall mount hole pattern (mm) 100 × 200 (32"/40")(81.2 cm/101.6 cm)
Wall mount screw size (mm) M6
9.5 -11.5 mm
Wall mount bracket
Screw
Spacer
NOTE:
• If you have additional questions, please contact the wall mount manufacturer or the
retailer from which you purchased the TV.
• The diameter and length of the screws differ depending on the wall mount bracket
model.
5
Page 9

Step 2. Connect devices to your TV
Check to ensure that you have connected right cables for right ports securely. Loose
connections can affect the quality of the picture image and color.
Back View
RESET
AV IN
VIDEO L R
Power cord
ANT / CABLE
ARC
HDMI 1
HDMI 2HDMI 3
USB
DC 5V 0.5A(MAX)
DIGITAL
AUDIO OUT
6
Page 10

TV label Port Cable External Equipment
Brief Description
ANT/CABLE
HDMI
VIDEO
AV IN
L
R
DIGITAL AUDIO
OUT
Yellow
White
Red
Antenna
Video
Camera
Audio Amplier
VHF/UHF Antenna
ANT OUT
VCR
DVD Player/Recorder
Set-top Box
Satellite Receiver
Speaker
Satellite
antenna
cable
Connect an
outdoor VHF/
UHF antenna.
Connect a
High Denition
Multimedia
Interface
(HDMI)
cable from
an external
device.
Connect a
composite
video cable
and left-right
audio cables
from an
external AV
device.
Connect an
optical cable
from an
external digital
audio system.
Connect
headphones
to hear audio
from the TV.
Headphones
with
microphones
are not
supported.
7
Page 11

TV label Port Cable External Equipment
Connect a USB device for browsing photos,
music and movies.
USB
Hard disks with a total current consumption
or impulse current consumption greater than
500mA are not supported.
Brief
Description
RESET
Power o / restart (quick press)
Reset your TV back to the factory setting (long press)
8
Page 12

Step 3. Get your remote ready
The following table shows the buttons on your remote control and describes what they
are for.
BUTTON
(Red/Green/Yellow/Blue)
INPUT Change TV input source
Number Enter Channels/input numbers
LIVE TV Enter Live TV source
CC Turn Closed Caption On/O and turn Closed Caption on when mute
MEDIA Quick access to Media
˄ / ˅ / ˂ / ˃ D-pad (up/down/left/right navigation buttons)
OK Conrmation button
VOL Volume (up/down)
DESCRIPTION
Power on/o
Special function buttons
The button for the Menu
Return to the previous place in the menu or app
Display the Home screen
CH Channel (up/down)
Mute and restore sound (quick press)
Press 3 times successively to call out system info (for service purpose)
MTS Set the audio language (MTS)
/ /
SPORTS Quick access to VIDAA SPORTS
FREE Quick access to VIDAA Free
ART Quick access to VIDAA ART
/
Media content control function buttons
9
Page 13

BUTTON DESCRIPTION
Select a digital sub-channel
Music Quick access to Youtube Music
App Quick access buttons to apps
EXIT Exit the menu or app
SLEEP Adjust sleep timer setting
NOTE:
vary.
Buttons listed here are for reference only. Actual remote control models may
Insert the batteries
1. Take off the back cover to open the battery compartment of the remote control.
2. Insert two AAA(1.5Vcc) size batteries. Make sure to match the (+) and (-) ends of
the batteries with the (+) and (-) ends indicated in the battery compartment.
3. Restore the battery compartment cover.
Important Information about the remote and batteries
• Discardbatteriesinadesignateddisposalarea.Donotthrowthemintoafire.
• Removeoldbatteriesimmediatelytopreventthemfromleakingintothebattery
compartment.
• Ifyoudonotintendtousetheremotecontrolforalongtime,thenremovethe
batteries.
• Batterychemicalscancausearash.Ifthebatteriesleak,cleanthebattery
compartment with a cloth. If chemicals touch your skin then wash it
immediately.
• Donotmixoldandnewbatteries.
• Donotmixalkaline,standard(carbon-zinc)orrechargeable(NiCd,NiMH,etc.)
batteries.
• Donotcontinueusingtheremoteifitgetswarmorhot.
• CallourSupportCenterimmediatelyonthesupportwebsite.
10
Page 14

Remote Control Range Information
● The remote control can work at a distance of up to 26 feet (792.5 cm) in front of the
TV set.
● It can work at a 30 degree horizontal or vertical angle.
Program Your Universal Cable or Satellite Remote Control to Operate
Your New Television (only for USA)
If you would like to program your other household remote controls to your new
television, please refer to the User Manual supplied by your Cable or Satellite provider.
It should include instructions on how to program their remote to your television.
A list of codes for the most common Cable and Satellite providers are listed below. Use
the code that is associated with your Cable or Satellite provider (if applicable).
DIRECTV
11204, 11326, 11517, 11564, 11641, 11963, 12002, 12183
Time Warner Cable
10463
Comcast
11517, 11641, 11780, 11785, 11892, 11963, 12002
Cox Communications
Dish Network
If the code associated with your Cable or Satellite provider is not listed, does not work
or you cannot locate the instructions to program your remote, call your local Cable or
Satellite provider’s customer service center.
If your Cable or Satellite provider does not have a code available, please contact us at
one of the phone numbers on Page 2.
......0178, 10178, 10019, 10748, 11314, 11660, 11710, 11780, 12049, 10171,
......386, 0178, 10178, 400, 450, 461, 456, 0748, 1463, 0463,
......0178, 10178, 10463, 11463, 10748, 11314, 11660, 10171, 11204, 11326,
......0178, 10178, 1326, 1463
......505, 627, 538, 720, 659
Using Your Cable Set-top Box or Satellite Receiver Remote as a
‘Universal’ Remote
If you prefer to use your Cable Set-top Box or Satellite Receiver Remote as a ‘Universal’
Remote, then visit the Support page to view a list of the codes.
11
Page 15

Step 4. Power on the TV
Wireless router with DHCP
Plug the power cord into a power outlet.
Your TV will display a launch screen showing the Hisense logo.
Step 5. Complete the first-time setup
The first time you turn on your TV, there is a guided setup to make it easy to connect
your TV to the Internet and complete the setup of your TV.
Step 6. Establish a network connection
1. Press the [
the Settings menu
2. Select
Home ]
button on the remote control, and select the icon to enter into
.
Network > Network Configuration
.
Establish a wireless network connection
The TV can directly receive network signals via wireless router. Before you establish a
wireless network connection, turn on your Wi-Fi.
Wireless LAN Adapter
built-in TV set
LAN Cable
1. Choose
Wireless
among
Connection Select
modes, and the list of networks will
display on screen automatically.
2. Select a wireless network from the list, and enter password.
3. If you couldn’t find your network, select
you can select
Add
to input a Wi-Fi name, select the type of security mode, and
Refresh
to get the latest list. Alternatively,
enter password.
Close the network connection
Turn off your Wi-Fi. The network connection will close.
12
Page 16

Step 7. Enjoy your TV!
Now that you’ve completed the first-time setup, your Home screen is your starting point
for using your TV. Your Hisense TV provides a variety of entertainment options, so
you’ll always find something new. Use your TV to watch live channels, access video on
demand to watch movies, and much more.
Press the Home button on your remote to get started.
Text-to-Speech (TTS) and Video Description functionalities on TV
Text-to-Speech (TTS) and Video Description can help you to navigate the menus on
the screen and hear an audio description of relevant programs.
Text-to-Speech can convert written text into voice text to help visually impaired people
listen to the information they are unable to read. In addition, the Video Description
has an audio narration added to certain programs that will describe the main visual
elements which visually impaired users may not be able to see.
Follow the steps below to enable the functions:
1. Press the menu button on your remote to access the Menu.
2. Next, select
3. Select
Guide ‘On’ or ‘Off’.
When Voice Guide is turned On, then the contents of each menu displayed can be
broadcasted out.
When Narration is turned On, then you can hear the introduction of relevant
programs.
https://www.hisense-usa.com/ttsforhisensetvswithvidaa/
Settings
Accessibility > Narration
to enter the Settings Menu.
Voice Guide
or
to turn the Narration or Voice
13
Page 17

Troubleshooting
If you are having trouble with your TV, first try turning it off and on again. If this does not fix the
problem, check the tips in the following table. If your problem is not listed in the following table,
then contact us at one of the phone numbers on Page 2.
Issues Possible solutions
• Check if the power cord is plugged into a powered AC
outlet.
No sound or picture
I have connected an external
source to my TV and I get no
picture and/or sound.
When I turn on my TV, there is a
delay for a few seconds before the
picture appears. Is this normal?
The picture is normal but there is
no sound
Sound but no picture or black and
white picture
The sound and/or picture is
distorted or appears wavy
The sound and picture is blurry or
cuts out
A horizontal or vertical stripe
appears on the picture and/or the
picture is shaking
The plastic cabinet makes a
"clicking" type of sound
The remote control does not work
• Press the Power button on the remote control to activate
the unit from 'Standby' mode.
• Check to see if the LED light is on or not. If it is, then the
TV is receiving power.
• Check for the correct output connection on the external
source and for the correct input connection on the TV.
• Make sure you have made the correct selection for the
input mode for the incoming signal.
• Yes, this is normal. The TV is initializing and searching
for previous setting information.
• Check the volume settings.
• Check if 'Mute' mode is set to On.
• If the picture is black and white, unplug the TV from the
AC outlet and replug it after 60 seconds.
• Check that the Color is set to 50 or higher.
• Try dierent TV channels.
• An electric appliance may be aecting the TV. Turn o
any appliances that are nearby and move it farther away
from the TV.
• Insert the power plug of the TV set into another power
outlet.
• If using an external antenna, check the direction, position
and connection of the antenna.
• Adjust the direction of your antenna or reset or ne tune
the channel.
• Check if there is an appliance or electric tool nearby that
is causing interference.
• The 'click' sound can occur when the temperature of the
television changes. This change causes the television
cabinet to expand or contract, which makes the sound.
This is normal and the TV is OK.
• Conrm that TV still has power and is operational.
• Change the batteries in the remote control.
• Check if the batteries are correctly installed.
14
Page 18

Product Specifications
32V5G
Model Name
Dimension
(W × H × D)
Weight Without Stand
TV Stand Width(W × D)
Class
Active Screen Size (Diagonal)
Screen Resolution
Audio Power
Power consumption
Power Supply 120 V ~ 60 Hz
Connectivity Built-in Wireless feature (2x2, 2.4GHz)
Ports 3 HDMI ports, 1 USB port, 1 Digital Audio Output, 1 RF Input,
Receiving Channels VHF: 2 - 13, UHF: 14 - 69, CATV: 1 - 125
Tuner Type Frequency synthesized
Receiving System Analog: NTSC
Operating Temperature 41°F - 95°F(5°C - 35°C)
Operating Humidity 20% to 80% non-condensing
Storage Temperature 5°F to 113°F(-15°C to 45°C)
Storage Humidity 10% to 70%, non-condensing
Without Stand
With Stand
With Stand
32H5G
32H55G
32A40GMV
28.2 × 16.9 × 3.4 inches
(717 × 428 × 86 mm)
28.2 × 18.5 × 6.3 inches
(717 × 469 × 160 mm)
8.4 lbs (3.8 kg) 11.9 lbs (5.4 kg)
8.6 lbs (3.9 kg) 12.1 lbs (5.5 kg)
26.4 × 6.3 inches
(671 × 160 mm)
32" (81.2 cm) 40" (101.6 cm)
31.5 inches (80.0 cm) 39.5 inches (100.3 cm)
1 366 × 768 1 920 × 1 080
6 W + 6 W 7 W + 7 W
50 W 60 W
1 Headphone Audio Output, 1 RCA Composite Video Input , 1
left/right Audio Input for Composite
Digital Terrestrial Broadcast (8VSB): 2 - 69
Digital cable (64/256 QAM): 1 - 135
Digital: ATSC/QAM
40V5G
40H5G
40H55G
40A40GMV
35.2 × 20.2 × 3.4 inches
(893 × 513 × 86 mm)
35.2 × 22.0 × 7.2 inches
(893 × 559 × 182 mm)
31.7 × 7.2 inches
(806 × 182 mm)
Disclaimer:
All products, product specifications, and data are subject to change
without notice to improve reliability, function, design or otherwise.
15
Page 19

Certification and Compliance
FCC Notice
This device has been tested and found to comply with the limits for a Class B digital
device pursuant to Part 15 of the FCC Rules. These limits are designed to provide
reasonable protection against harmful interference in a residential installation. This
device generates, uses, and can radiate radio frequency energy and, if not installed
and used in accordance with the instructions, may cause harmful interference to radio
communications.
However, there is no guarantee that interference will not occur in a particular
installation. If this device does cause harmful interference to radio or television
reception, which can be determined by turning the device off and on, the user is
encouraged to try to correct the interference by one or more of the following measures:
● Reorient or relocate the receiving antenna.
● Increase the separation between the device and receiver.
● Connect the device into an outlet on a circuit different from that to which the receiver
is connected.
● Consult the dealer or an experienced radio/TV technician for help.
NOTE:
unauthorized modifications to this equipment. Such modifications could void the user’s
authority to operate the equipment.
The Wi-Fi Module complies with FCC radiation exposure limits set forth for an
uncontrolled environment. This device should be installed and operated with a
minimum distance of 20 centimeters between the radiator and your body.
The manufacturer is not responsible for any radio or TV interference caused by
This device complies with Industry Canada’s licence-exempt RSSs. Operation is
subject to the following two conditions:
(1) This device may not cause interference; and
(2) This device must accept any interference, including interference that may cause
undesired operation of the device.
Declaration of Conformity
Trade Name: Hisense
Model: 32V5G / 32H5G / 32H55G / 32A40GMV / 40V5G / 40H5G / 40H55G /
40A40GMV
Responsible Party: Hisense USA Corporation
Address: 7310 McGinnis Ferry Road, Suwanee, GA 30024
Telephone Number: 678-318-9060
This device complies with Part 15 of the FCC Rules. Operation is subject to the
following two conditions: (1) this device may not cause harmful interference, and (2)
this device must accept any interference received, including interference that may
cause undesired operation.
16
Page 20
Manufactured under license from Dolby Laboratories.
Dolby, Dolby Audio, Pro Logic, and the double-D symbol are
trademarks of Dolby Laboratories. Confidential unpublished
works. Copyright 1992-2019 Dolby Laboratories. All rights
reserved.
For DTS patents, see http://patents.dts.com.
Manufactured under license from DTS Licensing Limited.
DTS, the Symbol, DTS and the Symbol together,
Virtual:X, and the DTS Virtual:X logo are registered
trademarks and/or trademarks of DTS, Inc. in the United
States and/or other countries. © DTS, Inc. All Rights
Reserved.
For DTS patents, see http://patents.dts.com. Manufactured under license from DTS
Licensing Limited. DTS, the Symbol, DTS and the Symbol together, DTS-HD, and the
DTS-HD logo are registered trademarks and/or trademarks of DTS, Inc. in the United
States and/or other countries. © DTS, Inc. All Rights Reserved.
The terms HDMI and HDMI High-Definition Multimedia Interface, and the HDMI Logo
are trademarks or registered trademarks of HDMI Licensing Administrator, Inc. in the
United States and other countries.
Environmental Protection
This mark indicates that this product should not be disposed together with other
domestic garbage, to avoid damage to the environment or human health due to the
disposal of uncontrolled waste. Recycle it responsibly for promoting the sustainable
reuse of material resources. To return your used device, please use the return systems
available in your location or contact the vendor where you purchased your product they
could take this product for recycling and protection of the environment.
©2020. All rights reserved. Hisense and the Hisense logo are registered trademarks of
Hisense. Other brand and product names are registered trademarks of their respective
owners.
17
 Loading...