

Page 1

USER GUIDE
Read the manual carefully and ensure you have fully understood
its contents before operating this device for the rst time.
English
Deutsch
Español
Italiano
Português
Français
Page 2

USER GUIDE
Read the manual carefully and ensure you have fully understood
its contents before operating this device for the first time.
English
Page 3

Contents
Welcome ....................................................................................................................2
Important Notice ....................................................................................................... 3
Safety Instructions ................................................................................................... 4
Getting Started ..........................................................................................................8
Shortcuts instructions ................................................................................................ 8
First Time Installatioon ............................................................................................... 9
Basic Features ........................................................................................................ 11
DTV .......................................................................................................................... 11
Picture Menu ...................................................................................................................... ..................11
Sound Menu
Channel Menu
Option Menu
Lock Menu
EPG Menu
VGA ...........................................................................................................................20
........................................................................................................................................12
.....................................................................................................................................14
.......................................................................................................................................16
...................................................................................................................... ....................18
....................................................................................................................... ...................19
EnglishFrançais Português Deutsch
Español
Screen ................................................................................................................................................. 20
MEDIA ......................................................................................................................20
Media Operation
Moive Menu
Music Menu
Photo Menu
File Menu
............................................................................................................... .................. 20
........................................................................................................................................ 21
...................................................................................................................................... 22
......................................................................................................................................... 23
......................................................................................................................................... 23
Other Information ................................................................................................... 25
Trouble Shooting ...................................................................................................... 25
Recycling/Licenses ...................................................................................................... 26
Italiano
1
Page 4
English FrançaisPortuguêsDeutsch
▐ Welcome
Thank you for purchasing a Hisense TV.
This device lives up to the highest standards, innovative technology and high user comfort.
Español
Player
T.Shift
Italiano
Digital
Home
Media
PVR/
Tuner
With this Hisense TV you can do it fast and simple, whilst in the comfort
of your living room.
Media player — access your music, pictures and videos from your
network or USB storage media and play them directly on your TV.
Connect a hard disk to your TV and use the PVR function to record your
favorite shows and movies. With the T.Shift function, you can watch a live
broadcast while recording it, enabling you to pause the viewing at any
time, skip commercials and replay important scenes.
Everything works with one remote control now. Connect your TV directly
to your terrestrial or cable and enjoy contents in high quality without
loss.
2
Page 5
Important Safety Instructions
▐ Important Notice
This guide only contains detailed information about the menus and the explanation of different settings,
how to use the functions of this TV, etc. For detailed instructions on how to install this TV, please refer
to the USER MANUAL.
Paragraphs beginning with the symbol
following settings.
For your own safety and the optimal performance of your TV, ensure to read the safety
instructions before performing any installation.
Hisense does not guarantee operation and performance of peripheral devices made by other
manufacturers. We disclaim any liability or damage that may arise from operation and/or performance
from usage of such other maker’s peripheral devices.
The recording and playback of content on this or any other device may require permission from the
owner of the copyright or other such rights in that content. It is your responsibility to ensure that your
use of this or any other device complies with applicable copyright legislation in your country. Please
refer to that legislation for more information on the relevant laws and regulations involved or contact the
owner of the rights of the content you wish to record or playback.
The Index/Glossary explains certain terms used in this user manual and in the TV menu.
Declaration of Conformity (DoC)
This TV is CE marked and complies with EU directives. The complete declaration of conformity is
included in this manual, and can also be downloaded from the Hisense homepage.
Hisense declares that this TV is in compliance with the essential requirements and other relevant
provisions of Directive 1999/5/EG. It may be operated in all countries in the EU and also Iceland,
Norway and Switzerland. In France and Italy it may only be used indoors.
indicate important instructions, tips or conditions for the
EnglishFrançais Português
Deutsch
Read these instructions
Follow all instructions
Heed all warnings
Keep these instructions
All rights reserved.
Italiano Español
3
Page 6
Important Safety Instructions
▌Safety Instructions
To ensure safe and correct use of this product, always comply with the following precautions to avoid
dangerous situations and damage to your unit:
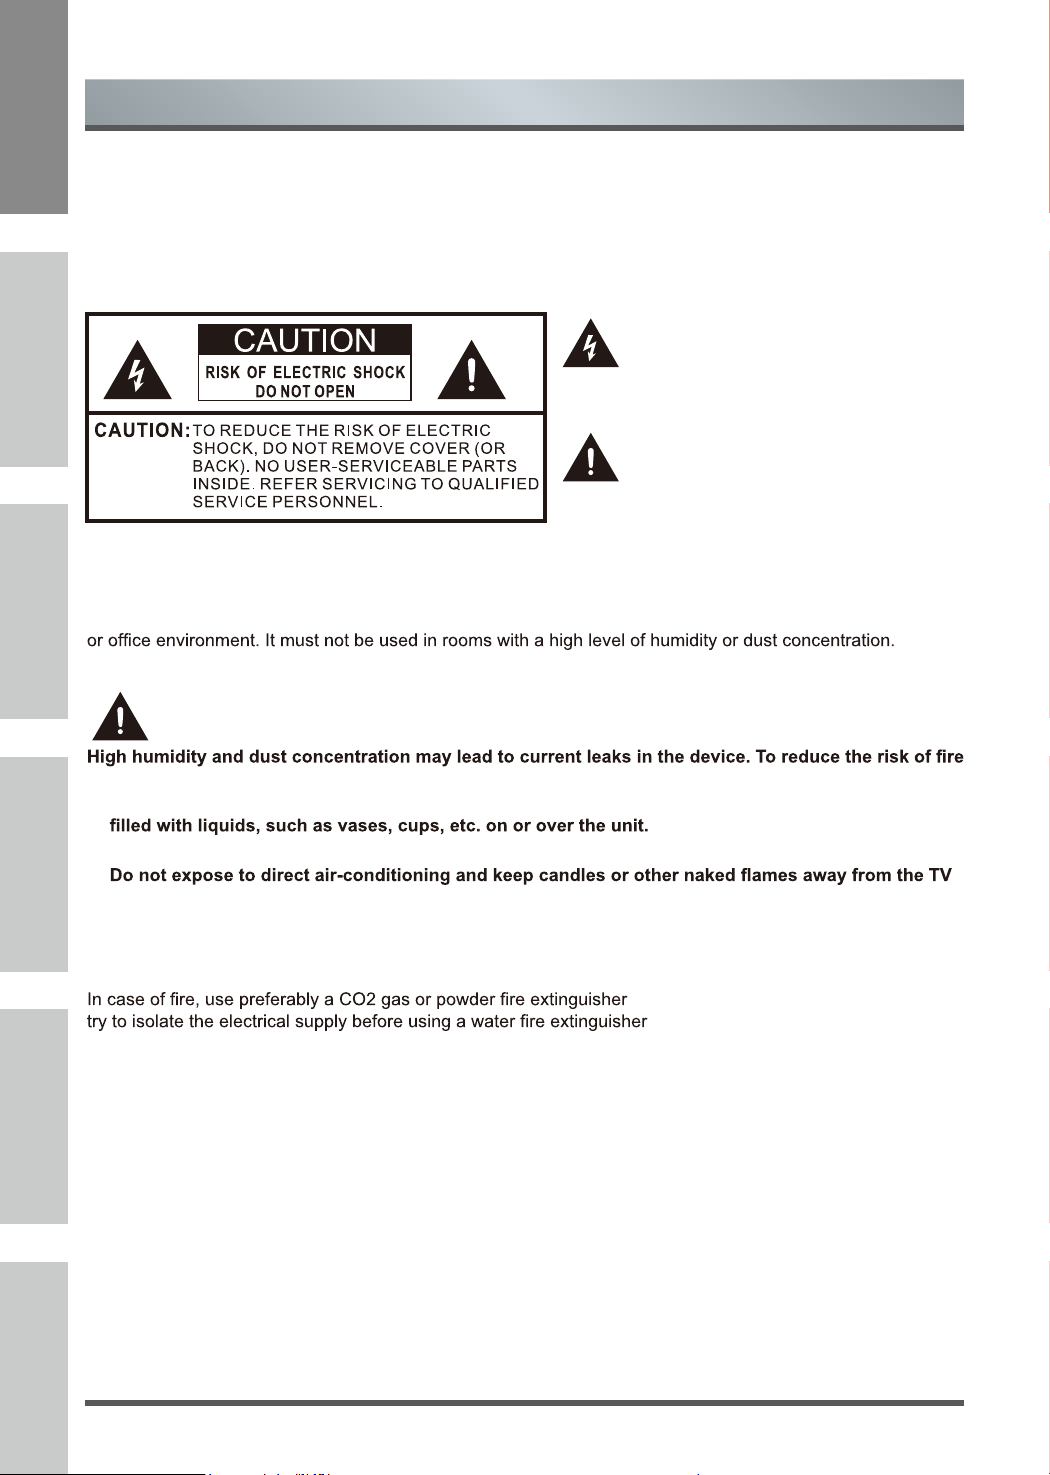
The lightning flash with arrowhead symbol,
within an equilateral triangle is intended to
alert the user to the presence of uninsulated
dangerous voltage within the product' s
enclosure that may be of sufficient magnitude
to constitute a risk of electric shock.
The exclamation point within an equilateral
triangle is intended to alert the user to
the presence of important operating and
maintenance (servicing) instructions in the
literature accompanying the appliance.
The intended use and ambient conditions for this TV
This TV is intended for the rendering of video and audio signals, on a table-top or wall-mounted, in a home
The
warranty is only valid if used as intended by the manufacturer.
WARNING
or electrical shock:
ItalianoEspañolEnglish FrançaisPortuguêsDeutsch
- Do not expose this unit to rain, moisture, dripping or splashing water, and do not place objects
- Do not touch the TV with wet hands.
at all times.
If the TV is moved from a cold environment to a hot environment, leave it switched of for at least an hour to
avoid condensation. If used outside, make sure it is protected from moisture.
If you notice anything unusual, immediately turn off the main power supply switch and remove the power plug.
The plastic cabinet, internal transformer insulating paint and rubber parts etc., of your new TV will emit a certain
level of odors, like newly purchased furniture, when the temperature rises, the odors will be more obvious. The
smell is determined by the nature of the material. The materials program which we use for our products can fully
meet the environmental requirements and regulations in the sales region, so consumers can be assured. With the
passage of time to watch TV, the odor will gradually decrease and eventually disappear, consumers are required
to pay attention to the environment ventilation.
. If such extinguishers are not accessible,
.
4
Page 7

Important Safety Instructions
Moving/Transportation
Before moving this TV, disconnect all cables and
move in the vertical position only. Grasp the device
on the upper and lower edges of the frame.
- Do not press or put stress on the front panel of
the TV. It may take two or more people to carry
larger
TVs.
If you have to briefly lay down the TV, place the unit
with its entire front surface lying flat on soft material.
The LED screen is made of glass and can break if
is not handled properly. Always wear rubber gloves
to carry the unit. If the LED screen is damaged,
liquid crystal might leak out. In case of skin contact,
immediately rinse thoroughly with water.
Power Supply
Incorrect voltages can damage the TV. Only connect
this unit to a power supply with the correct voltage
and frequency noted on the type plate, using the
supplied power cable.
The power plug must be easily accessible so that
the device can be disconnected at all time. The unit
is live, even if in standby mode, as long as the unit
is connected to a power outlet.
It is recommended that this unit is placed on a
dedicated circuit.
- Do not overload the power outlets by connect too
many appliances to the same outlet. Overloaded
wall outlets, extension cords, etc. are dangerous
and can result in electric shock and fire.
After power off, don't turn it on again in 5 seconds.
Frequent switching power supply in a short period of
time can cause abnormal TV.
Power plug and power cable
- Do not touch the power plug with wet hands.
- Do not place heavy objects on the power
cable. Route the cable so that it is not kinked or
laid over sharp edges, walked on or exposed
to chemicals. A power cable with damaged
insulation can cause electric shock and fire.
- Pull the power plug, NOT on the cable when
disconnecting. The cable can become damaged
and cause a short circuit if pulled on.
- Do not place the power cable near a high
temperature object.
- Do not move the TV with the power cable
plugged into a socket.
- Do not use a damaged or loose power cable, or
a damaged socket outlet.
- Do not use any power cords other then the one
supplied with this unit.
Set-up
Check that the location is suitable to bear the load
of the TV. Place on a level, sturdy and horizontal
base. Ensure that the unit does not hang over the
edge of the base when placed in or on furniture. If
placed on a cart, use caution when moving to avoid
the unit from tipping over.
- Place the unit in a normal upright horizontal
position. It must never be operated verticall
lying flat or hanging overhead from the ceiling.
- Place the unit where it is not exposed to direct
sunlight or other sources of heat
When mounting the TV on a wall, follow the
instructions supplied with the wall-mount, make
sure not to install the TV by hanging the power and
signal cables on the back of the TV.
y,
EnglishFrançais Português
Deutsch
Italiano Español
5
Page 8
English FrançaisPortuguêsDeutsch
Important Safety Instructions
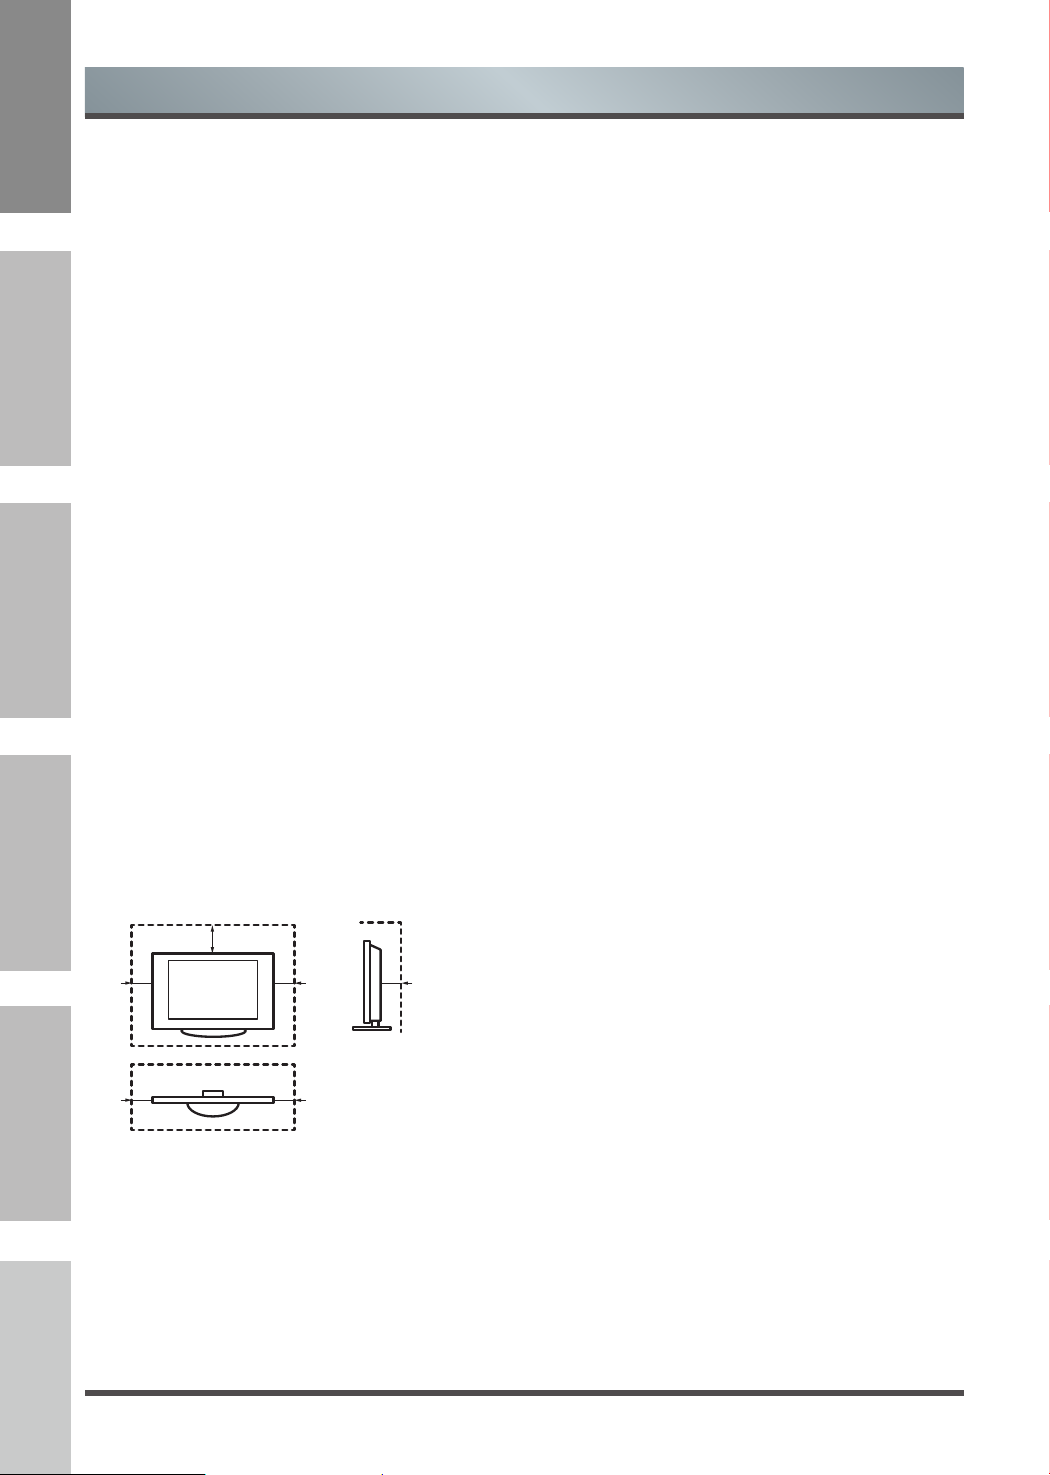
Air ventilation and high
temperatures
Install your TV only where there is proper
ventilation, and ensure that there is at least 10 cm
free space on the sides and 20 cm above the unit
for air circulation. Excessive heat and obstruction of
ventilation could lead to re or early failure of some
electric components.
- Do not block any ventilation openings with
newspapers, tablecloths, curtains, etc.
- Do not dry clothing etc. on top of the unit.
- Take care not to touch the ventilation openings
since they may become hot.
- Do not insert foreign objects into the TV through
the vents.
Español
The Stand
- Do not use any stand other than the one
supplied with this unit.
- Do not modify or use the stand if it becomes
warped of physically damaged.
- During setup, make sure that all the screws are
securely tightened.
- Ensure that the TV does not suffer any impact
during the attachment of the stand.
Italiano
- Ensure that children do not climb onto the stand.
- Attach or remove the stand with at least two
people.
- Install the TV following the specic procedure in
the Quick Setup Guide.
20cm
10cm 10cm 10cm
The LED screen
Despite thorough care when manufacturing this
display, it cannot be 100% guaranteed that no sub-
pixel defects will occur due to technical reasons.
These cannot be considered as a device defect
in terms of the guarantee. They will not affect the
performance and reliability of the TV.
To prevent “image burn”, avoid displaying still
images for long periods of time, there is a possibility
that a copy of the image may remain. If the aspect
ratio is set to 4:3 for a long period of time, image
burn may occur on the black areas. Image burn is
not covered by the warranty.
- Do not apply strong force or impact on the
display panel.
Avoid touching the LED screen or touching it for
long periods of time. Doing so may produce some
temporary distortion effects on the screen.
Radio waves
- Do not use the TV in any medical institutions or
locations with medical equipment. Radio waves
may interfere with medical equipment and cause
malfunction.
- Do not use the TV near any automatic
control equipment such as automatic doors
or re alarms. Radio waves may interfere
with automatic control equipment and cause
malfunction.
If you have a cardiac pacemaker, keep a distance
of at least 22 cm from the TV. Radio waves may
interfere with the operation of a pacemaker.
Supervision
- Do not let children play unsupervised close
to the TV. It could tip over, be pushed off or
pulled down from the stand surface and injure
someone.
- Do not allow a switched-on TV to run
unattended.
Prevent small items from getting into the interior
of the device through the ventilation slots. Such
objects may cause short circuits, which may cause
re.
If something should get inside the unit, immediately
unplug the power plug of the device and contact
service support.
6
Volume
Loud music and noises can lead to irreversible
damage to your ears. Avoid extreme volume,
especially over long periods and when using
headphones.
If you hear a drumming noise in your ears, turn
down the volume or temporarily stop using
headphones.
Page 9
Important Safety Instructions
Thunder Storms
Pull out the power plug and all connected antenna
cables from the TV during a thunderstorm.
Overvoltage caused by lightning strikes can damage
the TV via the antenna system, as well as the wall
socket.
Long periods of absence
As long as the power plug is connected to a live
socket outlet, the TV will consume power even in
“STANDBY” mode. The power plug and all connected
antenna cables should be disconnected during long
idle periods.
Cleaning and care
CAUTION:
Unplug the power cord prior to cleaning the TV.
Clean the TV, the screen, and the remote control
with a soft, moist, clean and color-natural cloth only.
Do not use any chemicals.
- Do not subject the surfaces to insect repellent,
solvent, thinner or other volatile substances.
This may degrade the surface quality.
- Do not spray water or other liquids directly
on the TV. Liquid inside the TV could lead to
product failure.
- The surface of the display panel is treated
and may be easily damaged. Take care not to
scratch it with fingernails or other hard objects.
- Also wipe the power plug with a dry cloth at
regular intervals
Modification
Do not attempt to modify this product in any way.
Unauthorized modification could void the warranty
of this unit, cause electric shock and fires.
Remote Control batteries
- Incorrect installation may cause battery leakage,
corrosion and explosion.
- Replace only with the same or equivalent type.
- Do not mix old and new batteries.
- Do not mix different battery types
- Do no use rechargeable batteries
- Do not burn or break up batteries.
- Do not expose batteries to excessive heat
- Be sure to dispose of batteries correctly
Outdoor Antenna Grounding
If an outdoor antenna used, be sure the antenna
system is protected against voltage surges and
built-up static charges.
Disposal
Refer to the recycling section of this manual.
EnglishFrançais Português Deutsch
Español
Italiano
Service/Repair
Never remove the cover/back of the TV; there are
no user serviceable parts inside. Refer all service to
qualified service personnel.
Packaging
Keep the anti-moisture materials and plastic bags
out of reach of children.
Plastic bags can cause suffocation and the antimoisture material is harmful if swallowed. If
swallowed by mistake, force the patient to vomit and
visit the nearest hospital.
7
Page 10

English FrançaisPortuguêsDeutsch
Shortcuts Instructions
Turning your TV on and off
1. To turn your TV on:Connect the TV to an AC power outlet and turn on the Power button. A few seconds
Turn the [Power ] button off when you do not intend to use the TV for long periods, for example overnight.
Remove the connection from the wall power outlet if you do not intend to use the unit for
for example, if you plan to be away for a few days. Wait at least 5 seconds after turning off if you want to
turn on the TV again.
Selecting the video source
Getting Started
later an image will appear on the screen.
NOTE
longer period,
1. Select the video source depending on the video device you have connected to the TV set. DTV, ATV, AV,VGA,
Español
2.
source, then press [OK] to enter.
Adjusting the volume
again to turn on the Audio.
Changing channels
Italiano
Selecting the sound mode
Movie,Sports, User (a mode that you set) mode can be selected.
Selecting the picture mode
SCART,Component,HDMI and Media can be chosen as the video source.
Press [Source] to select the video source . When the list of video source appears,
Press [VOL+/VOL- ] to increase or decrease the volume. Press [Mute] to turn off
Press [CH+/CH-] to go to the previous or next channel. Either, Press the number buttons to select a
channel. For example, to select channel 12, press 1, then 2 within 3 seconds.
Press [Sound] one or more times to select the sound mode which you want. Standard, Music,
Press [Picture] one or more times to select the picture mode which you want. You
Mild, Dynamic, and User (a mode that you defined) mode.
press [▼ / ▲ ] to select the
the Audio. Press [Mute]
can select Standard,
Selecting the aspect ratio
1. Press [Zoom] to display the aspect ratio. Press this key several times to switch this mode.
2. You can select 16:9, Zoom 1, Zoom 2, 4:3, Auto.
NOTE
The option of aspect is vary with different source.
8
Page 11

Getting Started
Setting the sleep timer
1. You can specify the time you want your TV to wait before it automatically turns off. Press [Sleep] one
or more times until the remaining time which you want appears.
2. You can sele ct Off, 10 minutes, 20 minutes, 30 minutes, 60 minute s, 90
240 minutes.
minutes,......
NOTE
If there are no input signal, the TV set will turn to standby mode automatically after
about 15 minutes.
First Time Installation
Connect an RF cable from the Tv’s input called “RF-In” and to your TV Aerial socket.
OSD Language
Press [◄ / ►] button to select the language to be used for menus and message.
EnglishFrançais Português Deutsch
Español
OK
OK
Country
Press [◄ / ►] button on the remote contr ol to select the c ountry you want to.
Tuning Type
Press [◄ / ►] button to select the Tuning
Type:DTV+ATV or DTV or ATV.
Digital Type
Press [◄ / ►] button to select the Digital Type:DVBC or DVBT.
Auto Tuning Status
First tuning DTV, press [Menu] and [◄ ] button on the remote control to skip
ATV, press [Menu] and [
TV : 0 Programme(s)
DTV : 0 Programme(s)
Radio : 0 Programme(s)
Data : 0 Programme(s)
0% ... VHF CH 6 DTV
Please Press MENU key to skip
◄ ] button on the remote control to skip
Channel Tuning
analogue tuning.
Do you want to skip DTV tuning?
◄
YES NO
digital tuning,
Italiano
Second tuning
◄
9
Page 12

English FrançaisPortuguêsDeutsch
Getting Started
Channel Tuning
TV : 0 Programme(s)
DTV : 0 Programme(s)
Radio : 0 Programme(s)
Data : 0 Programme(s)
4% ... 85.25% MHz TV
Do you want to skip ATV tuning?
SELECT INPUT SOURCE
Press [Source] button to display the input source list.
Español
Press [▼ / ▲] or [Source] button to select the input source you want to.
Press [OK] button to enter the input source.
Press [Exit] button to quit.
Italiano
Please Press MENU key to skip
DTV
OK
◄
YES NO
OK
OK
OK
◄
10
Page 13

Basic Features
DTV
Picture Menu
Press [MENU] button to display the main menu.
in the main menu.
1. Press [▼ / ▲] button to select the option that you want to adjust in the PICTURE menu.
2. Press [◄ / ►] button to adjust.
3. After finishing your adjustment, Press [MENU] button to save and return back to the previous
menu.
Picture Mode
Press [▼ / ▲] button to select Picture Mode. Press [◄ / ►] button to select. (Available Picture
mode: Dynamic, Standard, Mild, User ). You can change the value of contrast, brightness,
color,sharpness,tint and backlight when the picture is in user mode.
TIPS: You can press [Picture] button on the remote control to change
the Picture Mode directly.
Press [▼ / ▲]
Exit
▲
and [ ]
button to select PICTURE
EnglishFrançais Português Deutsch
Español
Contrast/ Brightness/ Tint/ Sharpness
Press [▼ / ▲] button to select option, then press [◄ / ►] button to adjust.
Contrast
Brightness
Adjust the highlight intensity of the picture, but the shadow of the
Adjust the optical fiber output of the entire picture, it will effect the dark region of the
picture.
Tint
Sharpness
Use in compensating color changed with the transmission in the
Aadjust the peaking in the detail of the picture.
Color Temperature
Press [▼ / ▲] button to select Color Temperature .
Press [◄ / ►] button to select.
Cool, Nature, Warm).
Cool
Nature
Warm
Increase the blue tone for the white.
Increase the sex-linked colors for
the white.
Increase the red color for the white.
(Available Picture mode:
picture is invariable.
Italiano
NTSC code.
11
Page 14

English FrançaisPortuguêsDeutsch
Noise Reduction
Press [▼ / ▲] button to select Noise Reduction .
Press [◄ / ►] button to set options to reduce video
noise.
Off
Low
Middle
High
Auto
MPEG Noise Reduction
Press [▼ / ▲] button to select MPEG Noise Reduction.
Español
Press [◄ / ►] button to set options to reduce MPEG
noise.
Off
Low
Middle
High
Basic Features
Select to turn off video noise detection.
Detect and reduce low video noise.
Detect and reduce moderate video noise.
Detect and reduce enhanced video noise.
Detect and reduce video noise automatically.
Select to turn off MPEG noise detection.
Detect and reduce low MPEG noise.
Detect and reduce moderate MPEG noise.
Detect and reduce enhanced MPEG noise.
Noise Reduction Middle
MPEG Noise Reduction Low
▲
▲
Italiano
Sound Menu
1. Press [▼ / ▲] button to select the option that you want
2. Press [◄ / ►] button to adjust.
3. After finishing your adjustment, Press [MENU] button to
Press [MENU] button to display the main menu.
Press
[▼ / ▲] and [ ► ] button to select SOUND
in the main menu.
to adjust in the SOUND menu.
save and return back to the previous menu.
12
Page 15

Basic Features
Sound Mode
Press [▼ / ▲] button to select Sound Mode.
Press [◄ / ►] button to select. (Available Sound mode:
Standard, Music, Movie,Sports, User).
TIPS: You can press [Sound] button to change the Sound Mode
directly.
Treble
Press [▼ / ▲] button to select Treble.
Press [◄ / ►] to adjust.
Bass
Press [▼ / ▲] button to select Bass .
Press [◄ / ►] to adjust.
Balance
Press [▼ / ▲] button to select Balance.
Press [◄ / ►] to adjust.
Auto Volume
Press [▼ / ▲] button to select Auto Volume, then press [◄ / ►] button to select On or Off.
Surround Sound
Press [▼ / ▲] button to select Surround Sound, then press [◄ / ►] button to select On or Off.
AD Switch
Press [▼ / ▲] button to select AD Switc,then press [◄ / ►] button to select On or Off..
AD Volunme
Press [▼ / ▲] button to select AD Volinme.
Press [◄ / ►] to adjust.
SPDIF Mode
Press [▼ / ▲] button to select SPDIF Mode, then press [◄ / ►] button to select off, Auto or PCM.
EnglishFrançais Português Deutsch
Español
Italiano
NOTES
Balance: This item can adjust the speaker’s output, it enables you to listen to best at your position.
Auto Volume: This item uses for reducing the difference between channel and program’s volume automatically.
It made the overall water to be even. This function will also reduce the fluctuation of the sound.
13
Page 16

English FrançaisPortuguêsDeutsch
Channel Menu
Basic Features
Press [MENU] button to display the main menu.
Press [▼ / ▲] and [ ] button to select
main menu.
1. Press [▼ / ▲] button to select the option that
to adjust in the CHANNEL menu.
2. Press [MENU] button to return back to the
menu.
The channel menu is available only at DTV
source.
Antenna Type
Press [▼/▲] button to select Type then Press Antenna
Español
[ / ] button to select AIR
menu.
NOTE
▼
▲
▲
CHANNEL in the
you want
previous
and ATV
or CABLE in the main
Italiano
Auto Tuning
DTV Manual Tuning
Press [▼/▲] button to select Auto Tuning,then
press [OK] to enter sub-menu.
Press [◄/►] button to select Channel Tuning
Country.(Available channel tuning type:
ATV.)
Press [▼/▲] button to select DTV Manual Tuning,then
press [OK] to enter sub-menu.
Press [OK] button to start searching.
and
DTV+ATV,DTV,
14
Page 17

Basic Features
ATV Manual Tuning
Press [▼/▲] button to select ATV Manual Tuning,then
press [OK] to enter sub-menu.
Press [▼/▲] button to select Search button to start
searching,and press Red button to save.
Program Edit
Press [▼ / ▲] button to select Program Edit, then press [OK] button to
enter sub-menu.
The four colored key is the shortcut key for
programming the channel.
First press [▼ / ▲] to highlight the channel you want to select then:
Press the Red button to delete the channel in the list.
Press the Yellow button to move the channel in the list.
Press the Blue button to skip the select channel.(Your TV set will skip the
channel automatically when using CH+/- to view the channels.)
Press the [FAV] button to add the channel to your
favorite list
OK
Delete
Rename Skip
OK
Exit
Fav
EnglishFrançais Português Deutsch
Español
Menu
Favorite List
Press [FAV] button to select Favorite List, then press [OK] button on to view.
Signal Information
Press [▼/▲] button to select Signal Information,then
[OK]
press
to view the Information.
Italiano
15
Page 18

English FrançaisPortuguêsDeutsch
CI Information
Software Update(OAD)
Basic Features
Press [▼ / ▲] button to select CI Information, then press
[OK]
button to view.
Press [▼ / ▲] button to select Software Update(OAD), then press[◄ / ►]
button to select On
or Off.
Option Menu
Press [MENU] button to display the main menu.
Español
Press [▼ / ▲] and [ ► ] button to select OPTION in the
main menu.
1. Press [▼ / ▲] button select the option that you want
to adjust in the OPTION menu.
2. Press [◄ / ►] button to adjust.
3. After finishing your adjustment, Press [MENU] button
to save and return back to the previous menu.
Home mode
Home mode
OSD Language
Press [▼ / ▲] button to select OSD Language, then press [OK] button to enter sub-menu.
Press [◄ / ►] button to select OSD Language, the default setting is English.
Italiano
Aspect Ratio
Press [▼ / ▲] button to select Aspect Ratio,
Press [◄ / ►] button to select.
Blue Screen
Press [▼ / ▲] button to select Blue Screen, then press [◄ / ►] button to select On or Off.
Sleep Timer
Press [▼ / ▲] button to select Sleep Timer.
Press [◄ / ►] button to select. (Available options are:Off,10min,20min,30min,60min,90min,120min ,
180min,240min, 360min,480min).
Tips: The remote control does not make any operation in the hypothesis time, it will close down automatically.If
you do any operation, it will reset the time.
16
Page 19

Basic Features
OSD Timer
Press [▼ / ▲] button to select OSD Timer.
Press [◄ / ►] button to select.
(Available options are:5s,15s,30s,60s).
Time Zone
Press [▼ / ▲] button to select Time Zone.
Press [◄ / ►] button to select time zone.
(Only available when Auto Sync is On.)
Auto Standby
Press [▼ / ▲] button to select Auto Sleep
.
Audio Language
Press [▼ / ▲] button to select Audio Language, then press [OK] button to enter sub-menu.
Press [◄ / ►] button to select Primary or Secondary,and Press [▼ / ▲ / ◄ / ►] button to select language.
Subtitle Language
Press [▼ / ▲] button to select Subtitle Language, then press [OK] button to enter sub-menu.
Press [◄ / ►] button to select Primary or Secondary,and Press [▼ / ▲ / ◄ / ►] button to select language.
Subtitle Hearing Impaired
Press [▼ / ▲] button to select Subtitle Hearing Impaired, then press [◄ / ►] button to select On or Off.
First Time Installation
Press [▼ / ▲] button to select First Time
Installation , then press [OK] button to start.
EnglishFrançais Português Deutsch
Español
PVR File System
Press [▼ / ▲] button to select PVR File System, then press [ ►] button to enter sub-menu.
HDMI_CEC
Press [▼ / ▲] button to select HDMI_CEC,then press [OK] button
to enter sub-menu.
Press [▼ / ▲] button to select.
Mode Choice
Press [▼ / ▲] button to select Mode Choice, then press [◄ / ►] button to select home mode or store
mode.
Italiano
17
Page 20

English FrançaisPortuguêsDeutsch
Reset
Press [▼ / ▲] button to select Reset, then press [OK] button to enter sub-menu.
Press [◄] to reset the setting to factory default, press [►] to exit.
Network Configuration
Press [▼ / ▲] button to select Network Configuration,
then press [OK] button to enter sub-menu.
Basic Features
Español
Network
Step 1 Use network cable to connect RJ45 on main board,
Step 2 Go to the main Menu and choose Option,
Step 3 Choose Network Configuration under OPTION menu,
Step 4 Choose Wired Network under Network menu,
Step 5 Choose Configuration under Wired Network menu,
Step 6 Choose Network Configuration DHCP
Italiano
Step 7 After confirming, it will be connecting internet and show Success.
Software Update(USB)
Press [▼ / ▲] button to select Software Update(USB),plug your USB device in the USB slot, then press
[OK] button to update the right software.
Lock Menu
Press [MENU] button to display the main menu.
Press [▼ / ▲] and [ ► ] button to select LOCK in the
main menu.
1. Press [▼ / ▲] button to select the option that you want
to adjust in the LOCK menu.
2. Press [◄ / ►] button to adjust.
3. After finishing your adjustment, Press [MENU] button
to save and return back to the previous menu.
and confirm it by choosing OK,
18
Page 21

Basic Features
Lock System
Press [▼ / ▲] button to select Lock System,then press [OK] button.
(Default password is ‘0000’).
Set Password
Press [▼ / ▲] button to select Set Password,then press [OK] button to
enter sub-menu to set new password.
Block Program
Press [▼ / ▲] button to select Block Program,then press [OK] button to
enter sub-menu to select.
EnglishFrançais Português Deutsch
Español
Parental Guidance
Press [▼ / ▲] button to select Parental Guidance.
Press [◄ / ►] button to select
EPG Menu
Press the button EPG to enter EPG menu.Press the Red button to switch to PVR mode.
You can choose the time of the appointment to record you want. Press the Green button to see the pre-day
EPG information. Press the Yellow button to see the next-day EPG information. Press the Blue button to set
the remind time.
Record
P
t
em
i
e
r
e
N
nd
X
R
Italiano
19
Page 22

English FrançaisPortuguêsDeutsch
VGA
Screen
Press [Source] button to select VGA.Press [MENU] button to display the main menu.Press [▼ / ▲] and [ ►]
button to select SCREEN in the main menu.
1. Press [▼ / ▲] button to select the option that you want to
adjust in the SCREEN menu.
2. Press
3. After finishing your adjustment, Press [MENU] button to
save and return back to the previous menu.
[◄ / ►]
Basic Features
button to adjust.
Español
Auto Adjust
Horizontal Pos.
Italiano
Vertical Pos.
Clock
Phase
1. Noise Reduction in PICTURE menu is invalid.
2. VGA mode has no CHANNEL menu.
3. TIME ,OPTION and APPLICAT menu and description are the same as that for TV mode.
Press [▼ / ▲] button to select Auto Adjust. Press [◄ / ►] button to select..
Press [▼ / ▲] button to select Horizontal Pos. Press [◄ / ►] button to select.
Press [▼ / ▲] button to select Vertical Pos. Press [◄ / ►] button to select.
Press [▼ / ▲] button to select Clock. Press [◄ / ►] button to select.
Press [▼ / ▲] button to select Phase . Press [◄ / ►] button to select.
NOTES
MEDIA
Media Operation
NOTES
Before operating Media menu,Plug in USB device,then press [Source] button to set the Input Source to Media .
Press [▲ / ▼] button to select Media in the Source menu, then press [OK] button to enter.
Press [◄ / ►] button to select the option in the main Media menu, then press [OK] button to enter.
20
Page 23

Basic Features
Movie Menu
Press [ / ] button to select MOVIE in the main menu, then press [OK] button to enter.
▲
▼
Press [Menu] button to control the Tool Bar and [Exit] button to return back to the previous menu.
EnglishFrançais Português Deutsch
Español
Press [◄ / ►] button to select drive disk you want to watch, then press [OK] button to enter.
Press [◄ / ►] button to select return option to back to the previous menu.
When highlighting the option you select, the file information will appear on the right and movie will
be previewed in the center.
Press [OK] button to play the selected movie.
Press [Menu] button to select menu in the bottom you want to run, then press [OK] button to operate.
Press [Exit] button to back to the previous menu and exit button to quit the entire menu.
Italiano
21
Page 24

English FrançaisPortuguêsDeutsch
Music Menu
Press [◄ / ►] button to select MUSIC in the main menu, then press [OK] button to enter.
Español
Press [Exit] button to return back to the previous menu and exit menu to quit.
Basic Features
Italiano
Press [◄ / ►] button to select drive disk you want to watch, then press [OK] button to enter.
Press [◄ / ►] button to select return option to back to the previous menu.
When highlighting the option you select, the file information will appear on the right and music will be
previewed in the center.
One -One T Cool T The Magic Key.mp3
×1
Repeat: SEQUENCE
Press “Menu” to Show/Hide Function Menu
22
Page 25

Basic Features
Photo Menu
Press [◄ / ►] button to select PHOTO in the main menu, then press [OK] button to enter.
Press [Exit] button to return back to the previous menu and exit menu to quit.
Press [◄ / ►] button to select drive disk you want to watch, then press [OK] button to enter.
Press [◄ / ►] button to select return option to back to the previous menu.
When highlighting the option you select, the file information will appear on the right and the picture will be
previewed in the center.
EnglishFrançais Português Deutsch
Español
File Menu
Press [◄ / ►] button to select the file you want to watch in the file selecting menu, then press [OK] button to
diaplay and operate file details.
Italiano
23
Page 26

English FrançaisPortuguêsDeutsch
Press [◄ / ►] button to select drive disk you want to watch, then press [OK] button to enter.
Press [◄ / ►] button to select return option to back to the previous menu.
When highlighting the option you select, the file information will appear on the right and
previewed in the center.
Basic Features
the file will be
One -One T Cool T The Magic Key.mp3
Español
Italiano
×1
Repeat: SEQUENCE
Press “Menu” to Show/Hide Function Menu
24
Page 27

Other Information
Trouble Shooting
When there is something wrong with your TV, you can try turning off the TV and then restart it.
You can also operate according to the following chart. If the problem still cannot be solved,please
contact the professional technicians.
SYMPTOMS POSSIBLE SOLUTIONS
Check if the power line is in the outlet and if it has electricit y.
No sound or picture.
The picture is normal
but there is no sound.
No picture and white
or black picture.
The sound and
picture are interfered.
Check if you have pressed Power button on the TV or
remote control.
Check the setting of picture brightness and contrast.
Check the volume.
Check if Mute mode is set.
Check the volume.
Check if Mute mode is set.
Adjust Picture Setting.
Check Color System.
Try to find the appliance affecting TV set, and move it far away from the TV set.
Try to insert the power plug of the TV set into another outlet.
Power button on the
EnglishFrançais Português Deutsch
Español
Unclear picture or
picture with snow.
The remote control
does not work.
H/V strip or the
picture shaking.
The cabinet of the TV
makes “Click” sound.
Check the direction, position and connection of your antenna.
Adjust the direction of your antenna or reset or fine tune the channel.
Change the batteries in the remote control.
Clean the upper side of the remote control.(radiating window)
Check the contacting points of the batteries.
Check if there is obstruction between the remote control and the monitor.
Check if the batteries are correctly installed.
Check if there is interferi ng sourc e nearby, such as
electric tools.
Sometimes the room temperature change can cause the television cabinet
to inflate or contra, which makes the sound. This does not mean the TV
breaks down.
appliance or
Italiano
25
Page 28

English FrançaisPortuguêsDeutsch
Other Information
Recycling/Licenses
WEEE (Waste Electronic Electric Equipment)
European Directive 2012/19/EU
Batteries
Español
RoHS (Restriction of Hazardous Substances)
European Directive 2011/65/EU
English
This symbol on the product or on its packaging indicates that this product must
not be disposed of with your household waste. Instead, it is your responsibility
to dispose of your waste equipment by handing it over to a designated
collection point for the recycling of waste electrical and electronic equipment.
The separate collection and recycling of your waste equipment at the time of
disposal will help to conserve natural resources and ensure that it is recycled
in a manner that protects human health and the environment. For more
information about where you can drop off your waste equipment for recycling,
the shop where you purchased the product.
In accordance with the Battery Directive, used batteries should not be disposed
of in the domestic waste. Dispose your batteries in the collection containers
Italiano
This European directive limits the use of dangerous and hazardous substances
This allows recycling easily the EEE and contributes to the safeguard of the
environment.
Substances included in this product match to the RoHS directive.
Logo are trademarks or registered trademarks of HDMI Licensing LLC in the
United States and other countries.
26
 Loading...