

Hisense 40EU3000 User Manual

USER MANUAL
Before using the TV, read this manual thoroughly. We
recommend that you keep the manual for future reference.
ENGLISH
ES-M182034

1
ENGLISH
Copyright Statement
© 2018 Hisense Company Ltd. All Rights Reserved.
All material in this User Manual is the property of Hisense Company Ltd. and its subsidiaries, and is protected under
US, CANADA, MEXICO and International copyright and/or other intellectual property laws. Reproduction or transmission
of the materials, in whole or in part, in any manner, electronic, print, or otherwise, without the prior written consent of
Hisense Company Ltd. is a violation of Hisense Company Ltd. rights under the aforementioned laws.
No part of this publication may be stored, reproduced, transmitted or distributed, in whole or in part, in any manner,
electronic or otherwise, whether or not for a charge or other or no consideration, without the prior written permission of
Hisense Company Ltd.
Requests for permission to store, reproduce, transmit or distribute materials may be made to one of the following
addresses:
USA: Hisense USA Corporation
7310 McGinnis Ferry Road
Suwanee, GA 30024
CANADA: Hisense Canada Co., Ltd
2283 Argentia Road, Unit 16
Mississauga, ON, Canada
L5N 5Z2
MEXICO: Hisense Mexico S. de R.L. de C.V.
Blvd. Miguel de Cervantes Saavedra No 301
Torre Norte Piso 2, Col. Am pliación Granada
Miguel Hidalgo, Ciudad de México, C.P. 11520
Hisense, and any and all other Hisense product names, logo’s, slogans or marks are registered trademarks of Hisense
Company Ltd. and its subsidiaries. All other trademarks are the property of their respective holders.
©2018. All rights reserved. Hisense and the Hisense logo are registered trademarks of Hisense. Other brand and
product names are registered trademarks of their respective owners.

2
ENGLISH
Disclaimer Page
**Notwithstanding anything to the contrary, including in any or all descriptions, representations, statements or other communications
related to this Hisense device (hereinafter “Device”) made in any form whatsoever and at any time, some or all of the pre-installed,
or subsequently installed Application Services may not be available or capable of functioning as intended by the provider of the
Application Services in any or all usage areas for reasons outside of Hisense’s control, including but not limited to, Internet access,
local service limitations, etc. Any purchase or use of the Device, including any Application Services, is purely at the user’s risk.
Application Services are provided on an as-available basis without warranties of any kind, either expressed or implied, that the
Application Service will be uninterrupted or error-free, including but not limited to vagaries of weather, disruption of Service, acts
of God, warranties of title, local or regional limitations, no infringement, NOR IMPLIED WARRANTIES OF MERCHANTABILITY OR
FITNESS FOR A PARTICULAR PURPOSE. No advice or information given by Hisense, providers, affiliates, or contractors or their
respective employees shall create such a warranty. Hisense specifically disclaims responsibility for any or all Application Services
from functioning at any time, and by purchasing the Device, you accept such disclaimer without any claim on Hisense. You are
solely responsible for providing an active and working connection to the Internet, along with any and all hardware and/or software
necessary to use the Hisense Device as intended.
Disclaimer:
Images throughout this document are for illustrative purposes only and may differ from the actual product.

3
ENGLISH
Content
Content ...............................................................................................................3
Connecting Devices to your TV ........................................................................4
Connecting an antenna, cable set-top box or satellite receiver ......................................................................... 4
Connecting a satellite receiver, DVD player or other audio visual (AV) devices with a
composite video cable (yellow/red/white) ............................................................................................................. 4
Connecting an AV device with a component video cable (red/blue/green) ............................................... 5
Connecting an AV device with an HDMI cable ...................................................................................................... 5
Connecting a headphone ..............................................................................................................................................6
Connecting speakers or other audio receivers ......................................................................................................6
Connecting a digital sound bar to use Audio Return Channel (ARC) ............................................................7
Using Your TV Remote Control ........................................................................8
Buttons on your TV remote ......................................................................................................................................... 8
Remote control range information ............................................................................................................................ 8
Begin using your remote .............................................................................................................................................. 9
Completing the Setup Wizard .........................................................................10
Shortcuts Instructions .....................................................................................12
Selecting the input source .........................................................................................................................................12
Changing Channels / Volume ..................................................................................................................................12
Shortcuts Instructions .................................................................................................................................................12
Basic Settings ..................................................................................................13
Using the Menu .............................................................................................................................................................13
Picture Menu .................................................................................................................................................................14
Audio Menu ...................................................................................................................................................................15
Channels Menu ............................................................................................................................................................16
Accessibility Menu ....................................................................................................................................................... 16
System Menu.................................................................................................................................................................17
About TV Menu .............................................................................................................................................................19
Media .................................................................................................................20
Digital Media player .....................................................................................................................................................20
Browse the Photos ......................................................................................................................................................21
Enjoy Music Files ..........................................................................................................................................................21
Enjoy Video Files ..........................................................................................................................................................22
Quick Problem-Solving Tips ...........................................................................23
4
ENGLISH
Connecting Devices to your TV
You have several options for connecting your TV to different devices. The method in which you connect will be based upon the
type of cables you have and the available outputs on your device.
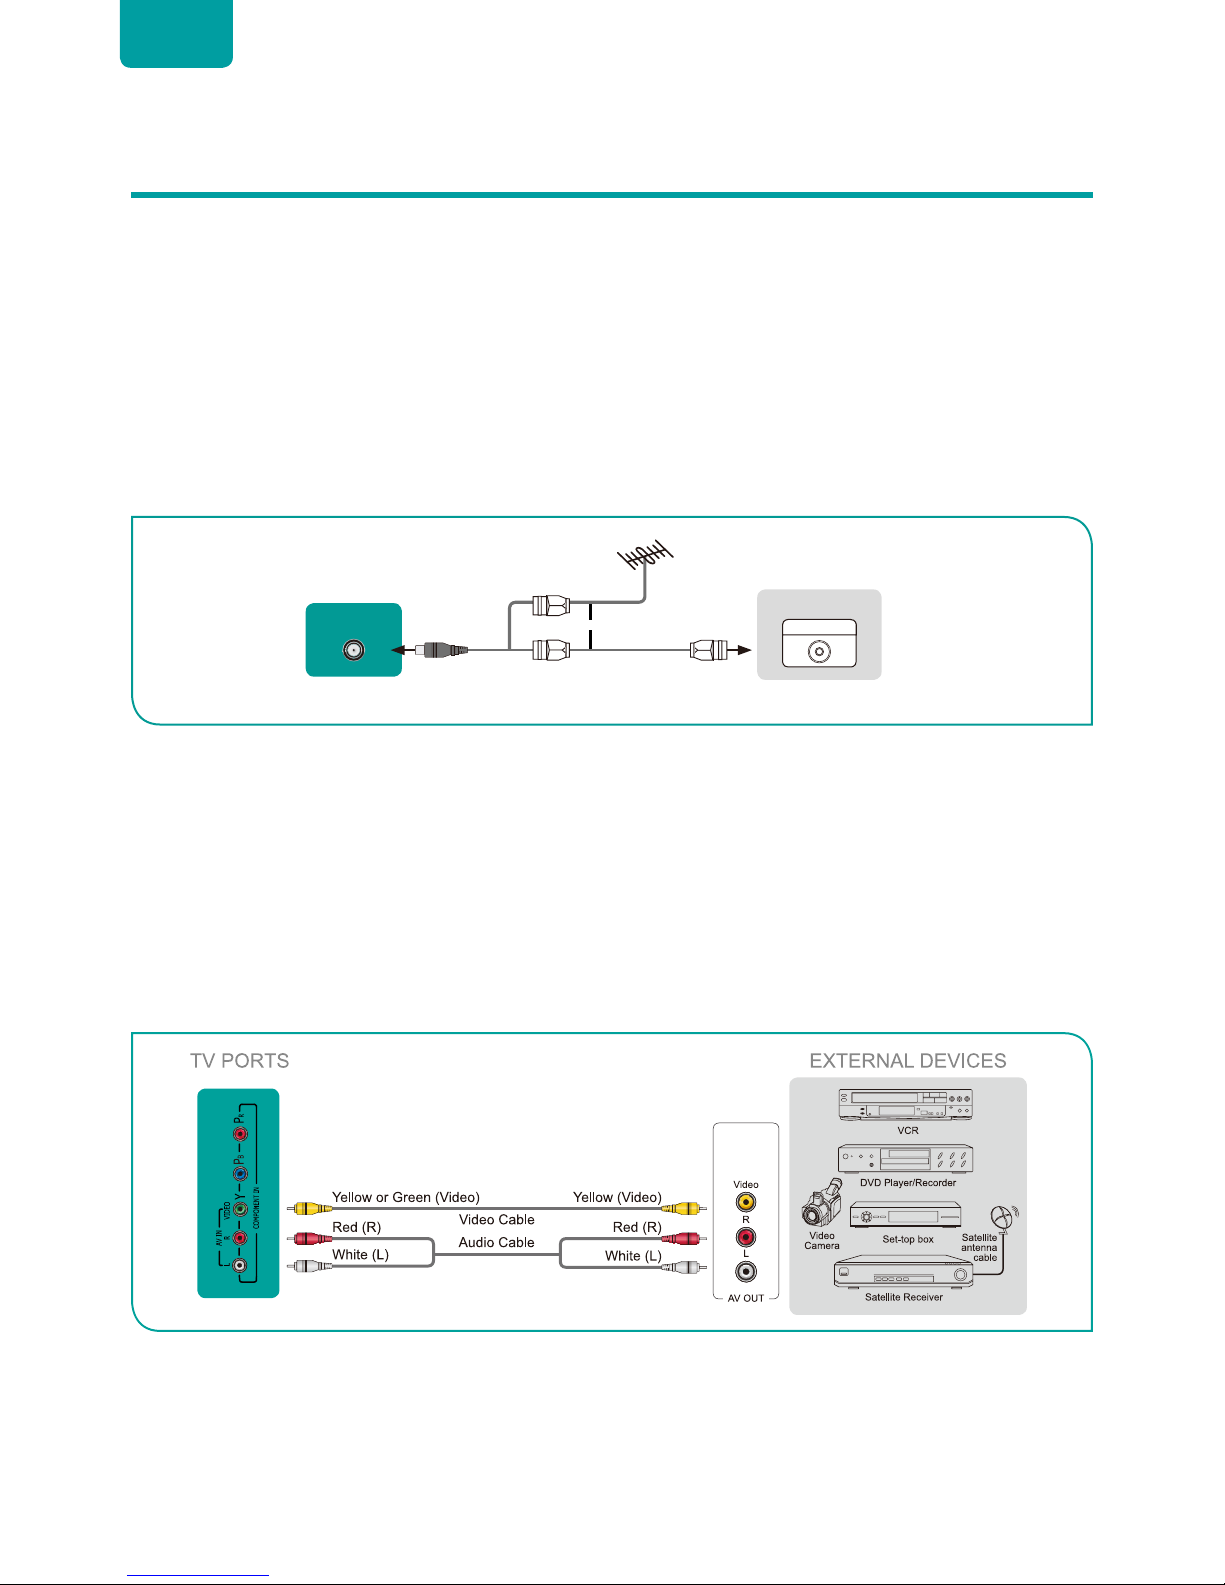
Connecting an antenna, cable set-top box or satellite receiver
To connect an antenna,cable set-top box or satellite receiver:
1. Connect one end of a coaxial cable (not included) to the
RF OUT
port on the antenna, cable or satellite box. If you are using
an antenna with twin-lead cable, you may need a 300-75 Ohm adapter (not provided) to connect it to the back of your TV.
Likewise, if you are using several antennas, you may need a combiner (not provided).
2. Connect the other end of the cable to the
ANT/CABLE IN
port on the side of TV.
3. Using your remote, press the
[INPUT]
button and select TV as the input source.
Connecting a satellite receiver, DVD player or other audio visual (AV) devices with a composite video
cable (yellow/red/white)
To connect an AV device with a composite video cable (not provided):
1. Use the audio and video cables to connect the composite video/audio ports of the external AV device to the
AV IN
ports of
the TV. (Video = yellow, Audio Left = white, and Audio Right = red)
2. Plug the connected devices into the AV connectors on the TV before switching it on.
3. Using your remote, press the
[INPUT]
button and select AV as the input source.
or
ANT OUT
Cable Set top box
RF Out
EXTERNAL DEVICE
TV PORT
ANT
CABLE IN
5
ENGLISH
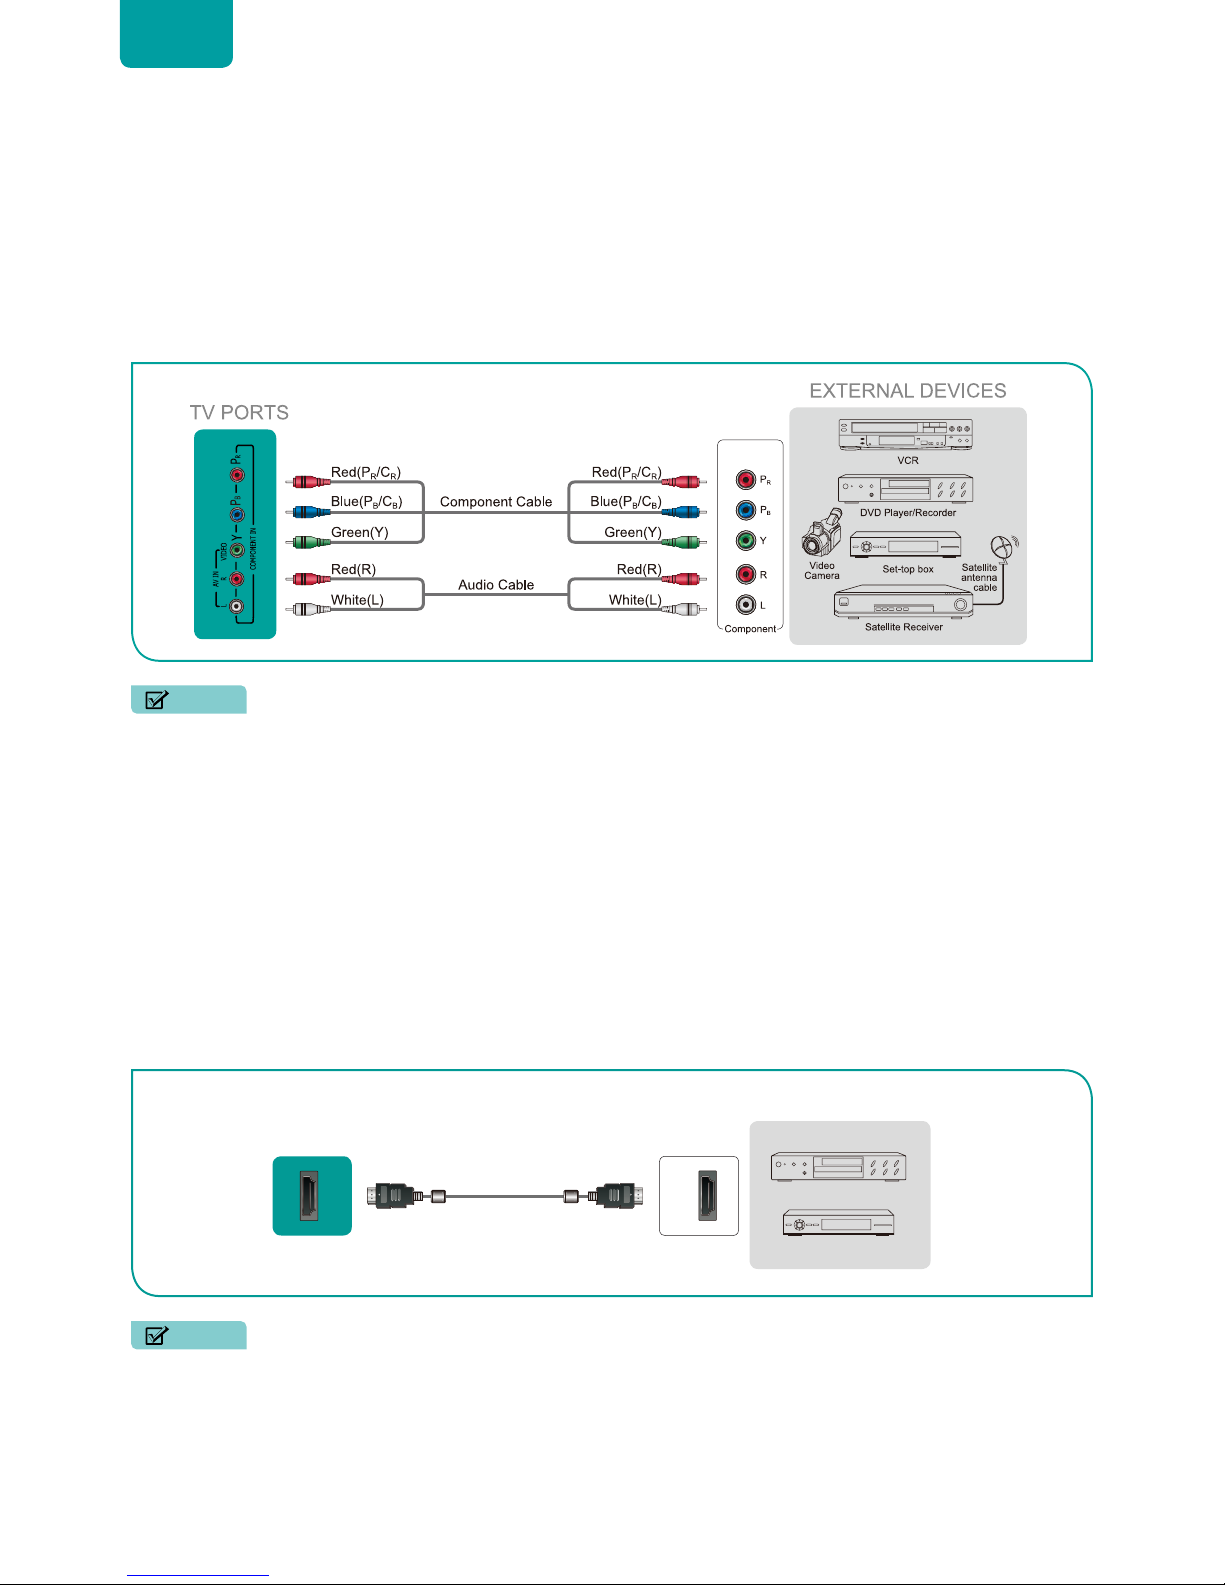
Connecting an AV device with a component video cable (red/blue/green)
To connect an AV device with a component cable (not provided):
1. Use a com ponent video cable to connect the com ponent output ports of the external device to the
YP
BPR
ports for the TV.
(Y = green, P
B
= blue, and PR = red). Use an audio cable to connect the component audio ports of the external device to the TV
AUDIO (L/R)
ports.
2. Plug the connected devices into the
YP
BPR
and
L/R
ports on the TV before switching it on.
3. Using your remote, press the
[INPUT]
button and select
COMPONENT
as the input source.
NOTE
• One AV device can be connected to the TV using a component video or composite video cable.
Connecting an AV device with an HDMI cable
This type of connection supports digital connections between HDMI-enabled AV devices such as a Personal Video Recorder (PVR),
DVD, Blu-Ray, AV receiver and digital devices. In addition, some devices (such as a PVR or DVD player) require an HDMI signal to
be set to Output in the settings of the device.
Please refer to the User Manual that came with your device for step-by-step instructions.
To connect an AV device with an HDMI cable (not provided):
1. Use an HDMI cable to connect the HDMI output port of the AV device to the
HDMI
port of the TV.
2. Plug the connected devices into the
HDMI
port on the TV before switching it on.
3. Using your remote, press the
[INPUT]
button and select the corresponding
HDMI
input.
NOTES
• Because the HDMI connector provides video and audio signals, it is not necessary to connect an audio cable.
• We strongly recommend to use HDMI Cable with 2 cores as shown in the figure.
HDMI
HDMI
EXTERNAL DEVICES
DVD
Set-top Box
TV PORT
HDMI Cable
6
ENGLISH
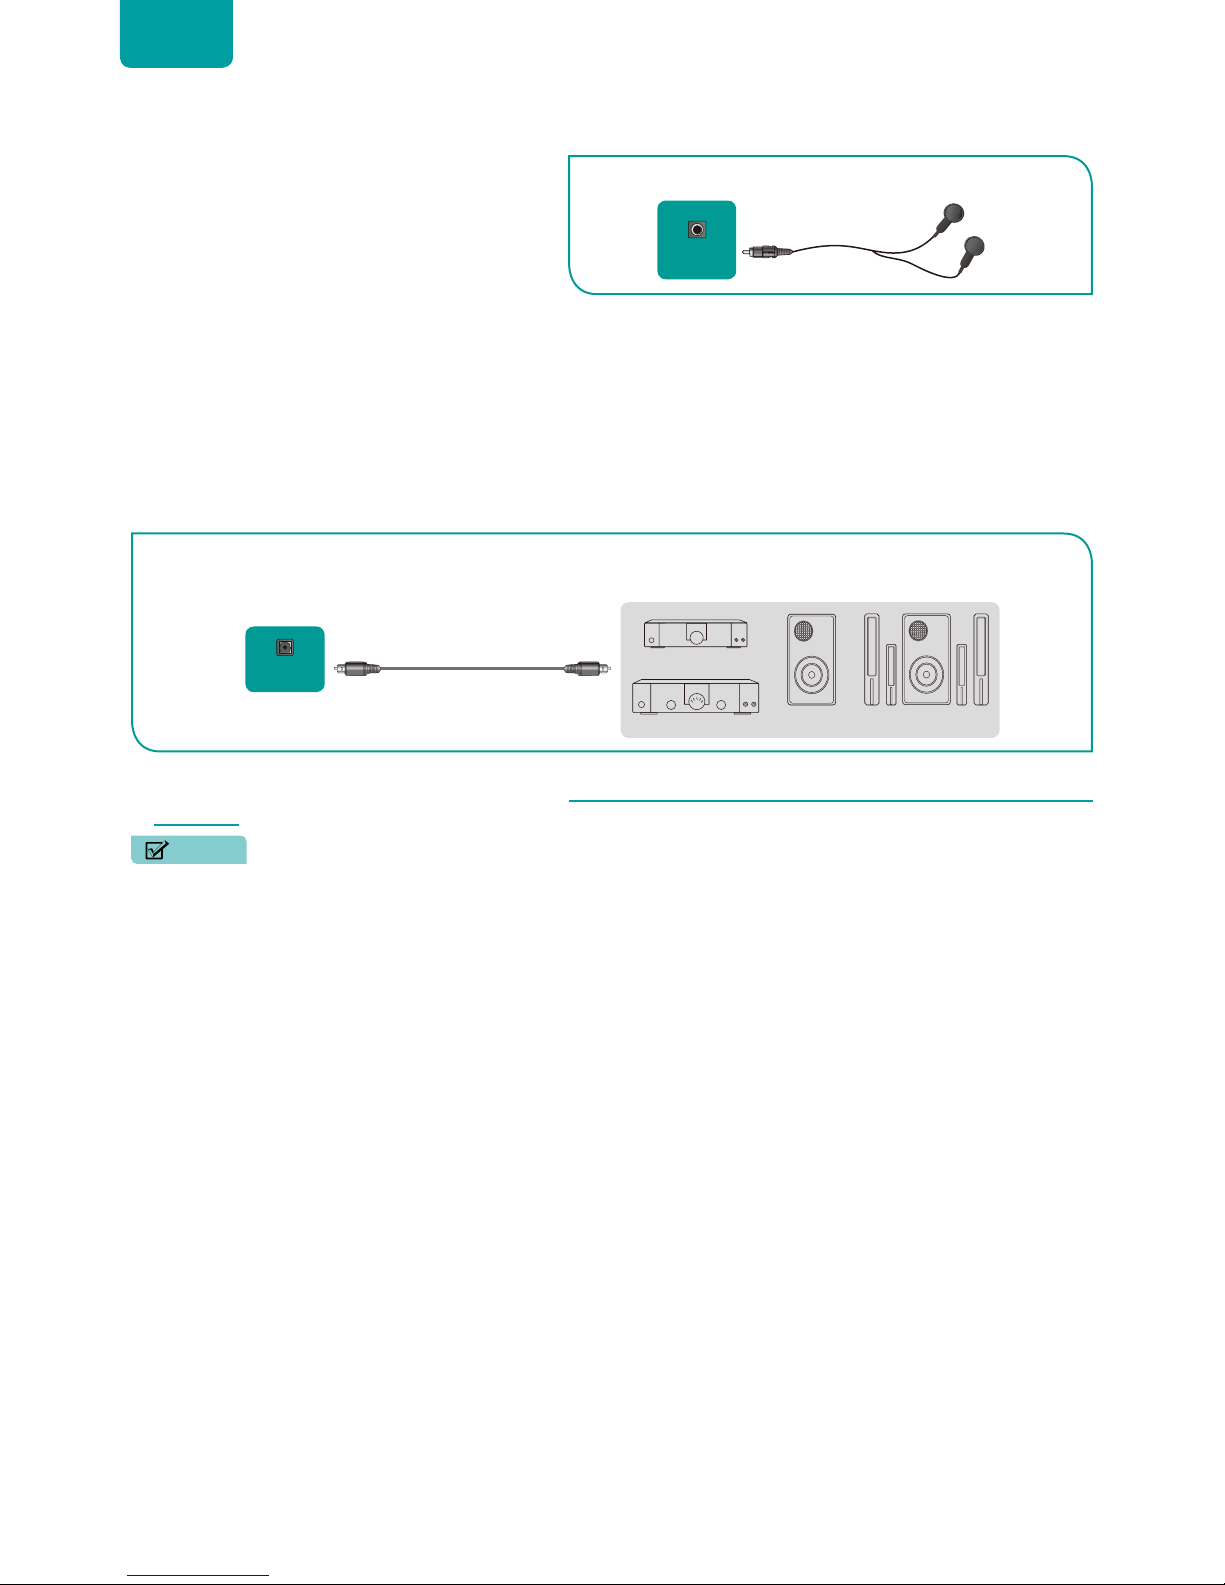
Connecting a headphone
You can connect headphone (not provided) to the
AUDIO OUT
port on your TV. While the headphone is
connected, the sound from the built-in speakers will be
disabled.
Connecting speakers or other audio receivers
To connect speakers or other audio receivers with an audio cable (not provided):
1. Use an audio cable to connect the digital audio in port of the audio receiver device to the
DIGITAL AUDIO OUT
port of
the TV. Another option is to use an RCA Y-cable (1/8”-stereo mini to L/R phono) to connect an analog sound system to the
AUDIO OUT
port of the TV.
2. Plug the connected devices into the main power socket before switching on the TV.
•
TIP:
If you prefer to use Audio Return Channel, then see
Connecting a digital sound bar to use Audio Return Channel (ARC)
on page 7.
NOTES
• When a digital audio system is connected to the
DIGITAL AUDIO OUT
port, decrease the TV and system volume.
• 5.1 CH (channel) audio is available when the TV is connected to an external device that supports a 5.1 channel surround
sound
• You can receive 5.1 channel audio in one of two ways. The first way is to connect the
DIGITAL AUDIO OUT
port from
the device to the Amplifier. The second way is to connect the
DIGITAL AUDIO OUT
port on the back of the TV to the
Optical port on the Amplifier. After you’ve completed one of the two methods then be sure to go into the
Advanced
Audio Settings
of the TV and select RAW to receive the 5.1 channel audio. You will need to also go into the sound or
audio settings of your device to ensure it is set to 5.1 Channel output. It may read ‘Bitstream’, ‘RAW’ or ‘Digital’.
TV PORT
EXTERNAL DEVICE
Headphone
HEADPHONE
EXTERNAL DEVICES
Powerless
Bass Speaker
Speaker
Digital Sound Bar
Audio Amplifier
DIGITAL
AUDIO OUT
TV PORTS
Audio Cable
7
ENGLISH
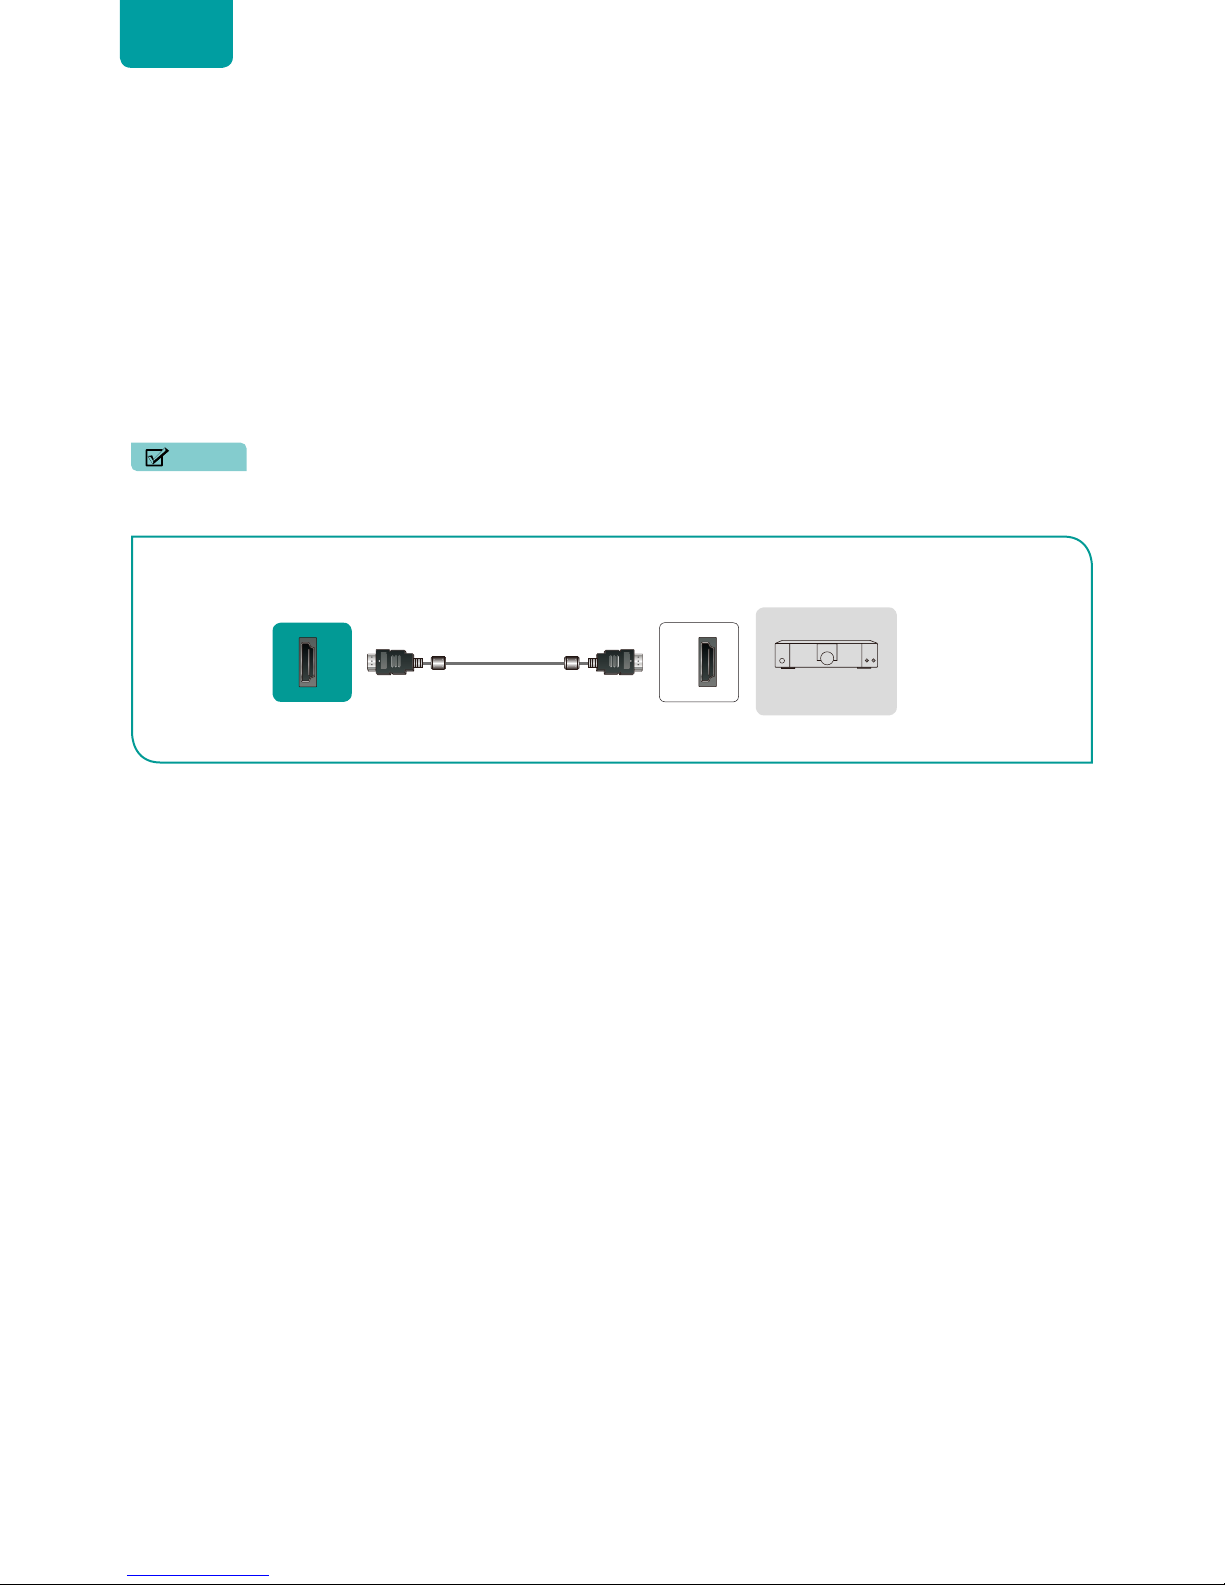
Connecting a digital sound bar to use Audio Return Channel (ARC)
If you’d like to use the Audio Return Channel (ARC) feature to have sound sent from the TV back down an HDMI cable to a
digital sound bar, then you will need to connect the cable to the
HDMI / ARC
port. By using this feature, you will also be able to
control the sound bar with your TV remote instead of having to use multi ple remotes for each device.
To connect a digital sound bar with an HDMI cable (not provided):
1. Connect the cable that’s attached to the sound bar to the
HDMI / ARC
port on the TV.
2. Turn on the sound bar by pressing the Power button.
3. Press the
[MENU]
button on your remote and go to
System
>
CEC Function
.
4. Turn on the
CEC Control
setting.
5. Turn on the
ARC
setting.
NOTES
• Only digital sound bars that require a wired connection are compatible with the TV.
• If the device has an Input Selector feature then make sure to change it to TV.
HDMI 1
HDMI
EXTERNAL DEVICE
TV PORT
HDMI Cable
Digital Sound Bar
ARC
 Loading...