

Page 1

LED Backlight TV
Read the manual carefully and ensure you have fully understood
its contents before operating this device for the first time.
RSAG2.025.6169SS-1 C
English
Page 2

Contents
Declaration ..........................................................................................................................A
Important Safety Precautions ..............................................................................................B
1. Shortcuts Instructions ..................................................................................................... 1
1.1. Turning your TV on or off ......................................................................................... 1
1.2. First Time Installation .............................................................................................. 1
1.3. Selecting the Input Source ...................................................................................... 1
1.4. Using the Live TV .................................................................................................... 2
1.5. EPG ......................................................................................................................... 3
1.6. PVR/T.Shift .............................................................................................................. 4
2. Menu ............................................................................................................................. 5
2.1. Using the Menu Function ........................................................................................ 5
2.2. Using the Channel Menu ......................................................................................... 5
2.3. Using the Picture Menu ........................................................................................... 7
2.4. Using the Sound Menu ............................................................................................ 8
2.5. Using the Time Menu .............................................................................................. 9
2.6. Using the Lock Menu ............................................................................................ 10
2.7. Using the Setup Menu ........................................................................................... 11
3. Media Operation ........................................................................................................... 13
3.1. Media Operation .................................................................................................... 13
4. Other Information ......................................................................................................... 14
4.1. TroubleShooting .................................................................................................... 14
Disclaimer:
Instructions and images through this manual are only for reference and may differ from
the actual product.
Page 3

Declaration
Declaration
Any content and service accessed through this device, while only intended for individual non-commercial
use, shall be the property of the applicable third party and subject to protection by regulations and laws on
copyright, patent, trademark and other intellectual property rights. No part of such content and service may be
modified, duplicated, published, uploaded, distributed, translated, marketed, or used to make and distribute
products derived from it without the prior permission of the content owner or service provider.
You acknowledge and agree explicitly that you will solely bear the risk associated with the use of this device,
and further you will solely bear any risk related to satisfactory quality, performance and accuracy for any
content and service accessed through this device. To the maximum extent permitted by applicable law, this
device and any third party’s content and service is provided as it is without any guarantee, express or implied.
Manufacturer hereby declare explicitly that Manufacturer shall not be held liable for any guarantee and
conditions, express or implied, related to this device and any content and service, including but not limited to
warranty on marketability, satisfactory quality, fitness for a particular purpose, accuracy, quiet use and nonviolation of any third party’s rights; to the maximum extent permitted by applicable law, Manufacturer gives
no guarantee on the accuracy, validity, timeliness, legitimacy and completeness of any content or service
provided through this device, or the fitness of such device, content or service for your particular requirement,
or the protection from interruption and error during operation of such device, content or service; to the
maximum extent permitted by applicable law, in any case, including fault or neglect, Manufacturer shall not be
held liable for legal actions or indemnity obligation arising from any consequence as a result of or related to
any information loaded in this device or use of such device, content or service by you or any third party.
Any content and service provided as it is together with this device shall be the property of the applicable third
party, therefore Manufacturer gives no declaration or warranty on modification, suspension, cancellation,
termination or abortion thereof, and shall not be held liable for legal actions or indemnity obligation arising
thereof.
Manufacturer reserves the rights to restrict the use or access of certain content or service. As the content and
service are transmitted through third party’s network and transmission facilities, Manufacturer undertakes no
customer service thereof or the obligation for such customer service.
A
Page 4
Important Safety Precautions
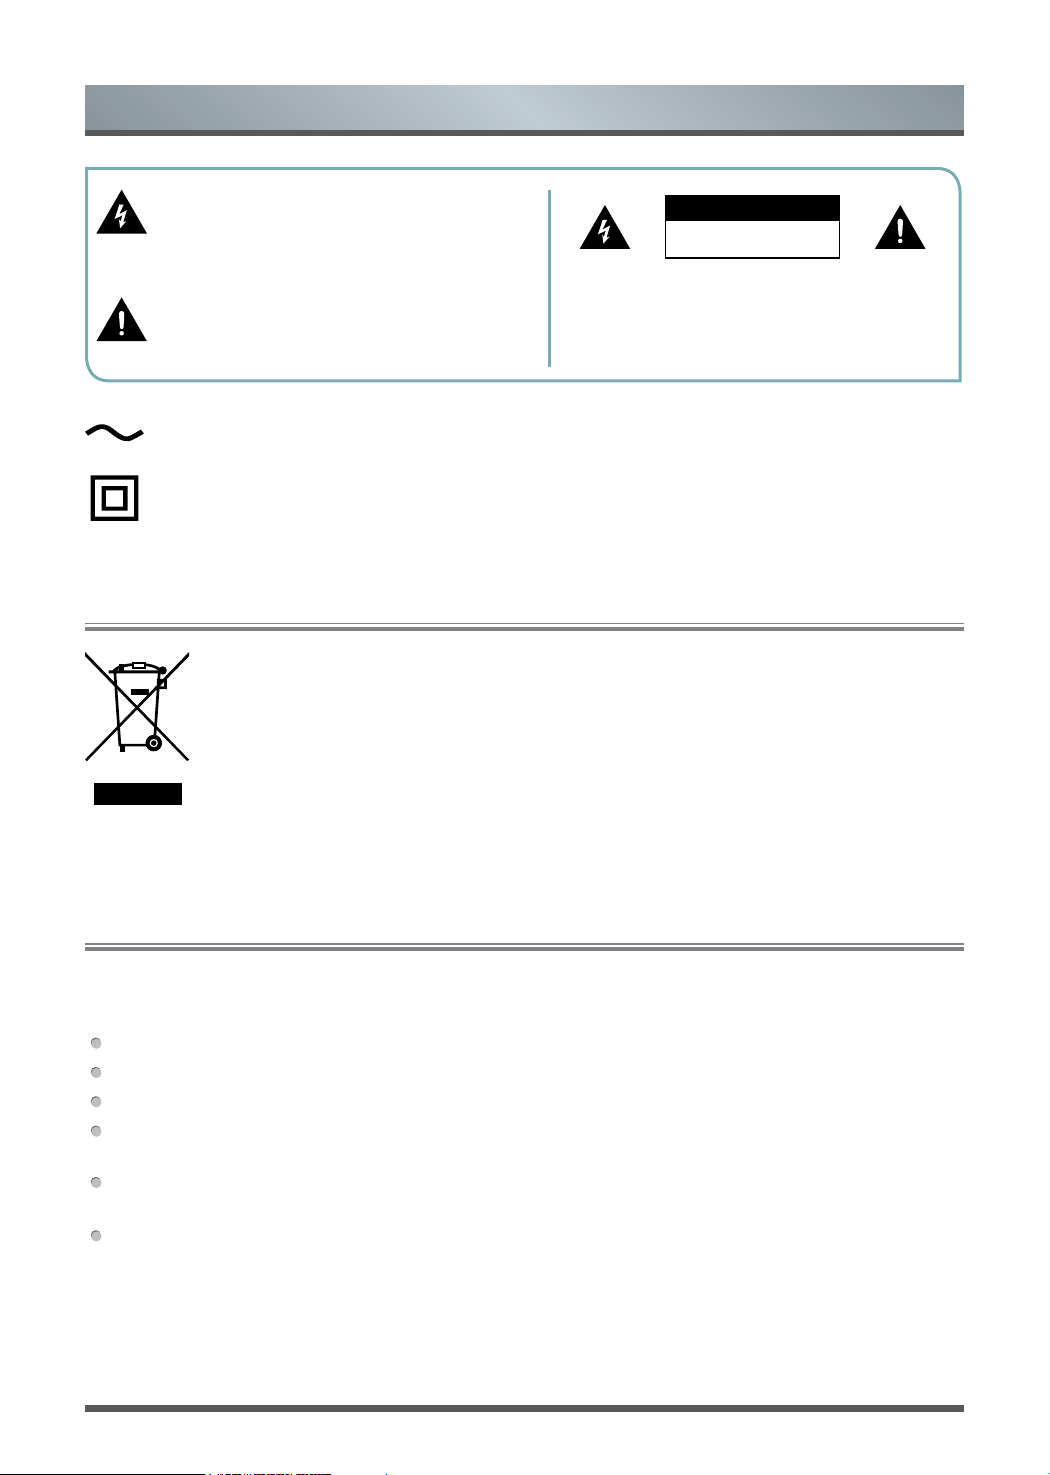
This symbol alerts user about the presence of a
dangerous voltage not isolated inside the product
which can be sufficiently powerful to constitute a
risk of electrocution.
This symbol alerts user about the presence of
important operating instructions and maintenance
in the document enclosed in the package.
AC voltage: This symbol indicates that the rated voltage marked with the symbol is AC voltage.
Class II product : This symbol indicates that it does not require a safety connection of protective
earthing (ground).
In no case the user is allowed to operate inside the TV set.
Only a qualified technician is entitled to operate.
Disposal of Used Electrical & Electronic Equipment
Packaging and electrical goods should be recycled appropriately, and not treated as household
waste. Please dispose of this equipment at your applicable collection point for the recycling of
electrical & electronic equipment waste. By ensuring the correct disposal of this product, you
will help prevent potentially hazardous to the environment and to human health, which could
otherwise be caused by unsuitable waste handling of this product. The recycling of materials
will help conserve natural resources. Please do not therefore dispose of your old electrical and
electronic equipment with your household waste. For more detailed information about recycling
of this product, please contact your local city office, your household waste disposal service or
the shop where you purchased the product.
ATTENTION
RISK OF SHOCK
ELECTRIC
Do not open the back cover.
Warning
Never place a television set in an unstable location. A television set may fall, causing serious personal injury
or death. Many injuries, particularly to children, can be avoided by taking simple precautions such as:
Using stands recommended by the manufacturer of the television set.
Only using furniture that can safely support the television set.
Ensuring the television set is not overhanging the edge of the supporting furniture.
Not placing the television set on tall furniture (for example, cupboards or bookcases) without anchoring
both the furniture and the television set to a suitable support.
Not placing the television set on cloth or other materials that may be located between the television set and
supporting furniture.
Educating children about the dangers of climbing on furniture to reach the television set or its controls.
If your existing television set is being retained and relocated, the same considerations as above should be
applied.
B
Page 5

Important Safety Precautions
Safeguards
Please read the following safeguards for your TV and retain for future reference.
Always follow all warnings and instructions marked on the television.
1. A note about safety and operating instructions
Read and follow all safety and operating instructions, and retain them safely for future reference.
2. Heed Warnings
Adhere to all warnings on the appliance and in the operating instructions.
3. Cleaning
Unplug the TV from the wall outlet before cleaning. Do not use liquid, abrasive, or aerosol cleaners. Cleaners
can permanently damage the cabinet and screen. Use a lightly dampened cloth for cleaning.
4. Wall Bracket
Wall brackets are not supplied with this product. After market brackets may be available to purchase locally.
Please refer to the specification page for dimensions.
5. Water and Moisture
Avoid dripping or splashing of liquids onto the product. Objects filled with liquids, such as vases, should not be
placed on the product.
6. Setting
Do not place this TV on an unstable cart, stand or table. Placing the TV on an unstable base can cause the
TV to fall, resulting in serious personal injuries as well as damage to the TV. Use only a cart, stand, bracket or
table recommended by the manufacturer or salesperson.
7. Ventilation
Slots and openings in the cabinet are provided for ventilation, to ensure reliable operation of the TV and to
protect it from overheating. Do not cover the ventilation openings in the cabinet and never place the set in a
confined space such as built-in cabinet unless proper ventilation is provided. Leave a minimum 10cm gap all
around the unit.
8. Power Source
This TV should be operated only from the type of power source indicated on the marking label. If you are not
sure of the type of power supplied to your home, consult your appliance dealer or local power company.
9. Power-Cord Protection
Power- supply cords should be routed so that they are not likely to be walked on or pinched by items placed
upon or against them, paying particular attention to cords at plug, wall outlets, and the point where they exit
from the TV. MAIN plug is used as the disconnect device, the disconnect device shall remain readily operable.
10. Lightning
For added protection for this TV during a lightning storm, or when it is left unattended and unused for long
periods of time, unplug it from the wall outlet and disconnect the antenna or cable system. This will prevent
damage to the TV due to lightning or power-line surge.
C
Page 6

Important Safety Precautions
11. Power Lines
An outside antenna system should not be located in the vicinity of overhead power lines or other electric light
or power circuits, or where it can fall into such power lines or circuits. Where installing an outside antenna
system, extreme care should be taken to keep from touching such power lines or circuits as contact with them
might be fatal.
12. Overloading
Do not overload wall outlets and extension cords as this can result in a risk of fire or electric shock.
13. Object and Liquid Entry
Never push objects of any kind into this TV through openings as they may touch dangerous voltage points or
short-out parts that could result in fire or electric shock. Never spill liquid of any kind on or into the TV.
14. Outdoor Antenna Grounding
If an outside antenna or cable system is connected to the TV, be sure the antenna or cable system is
grounded so as to provide some protection against voltage surges and built-up static charges.
15. Servicing
Do not attempt to service this TV yourself as opening or removing covers may expose you to dangerous
voltage or other hazards. Refer all servicing to qualified service personnel.
16. Damage Requiring Service
Unplug the TV from the wall outlet and refer servicing to qualified service personnel under the following
conditions:
(a) When the power - supply cord or plug is damaged.
(b) If liquid has been spilled, or objects have fallen into the TV.
(c) If the TV has been exposed to rain or water.
(d) If the TV does not operate normally by following the operating instructions. Adjust only those controls that
are covered by the operating instructions as an improper adjustment of other controls may result in damage
and will often require extensive work by a qualified technician to restore the TV to its normal operation.
(e) If the TV has been dropped or the cabinet has been damaged.
(f) When the TV exhibits a distinct change in performance - this indicates a need for service.
17. Replacement Parts
When replacement parts are required, be sure the service technician has used replacement parts specified by
the manufacturer or have the same characteristics as the original part. Unauthorized substitutions may result
in fire, electric shock or other hazards.
18. Safety Check
Upon completion of any service or repair to the TV, ask the service technician to perform safety checks to
determine that the TV is in safe operating condition.
19. Heat
The product should be situated away from heat sources such as radiators, heat registers, stoves, or other
products (including amplifiers) that produce heat.
20. Fire
The product should be situated away from naked flame sources such as lighted candle.
21. Off-gassing
The TV smells of plastic is normal and will dissipate over time.
D
Page 7

Shortcuts Instructions
You can use shortcuts on the remote control for fast operation. Refer to the “ Quick Setup Guide” for more
information.
Turning your TV on or off
1.1
To turn your TV on or off:
1. Plug the AC power cord into a socket outlet of AC power supply.
2. When the TV is powered on, press the [
NOTES
When your TV is in standby mode, it is still consuming power. To completely disconnect power, please
remove the mains plug from the mains socket.
If your TV does not receive an input signal for several minutes, it automatically goes into standby mode.
First Time Installation
1.2
Connect an outdoor VHF/UHF antenna or cable to your TV Aerial socket.
Select Language
1. Press the [
2. Press the [
/ / < / > ] and [ OK ] button to select the language to be used for menus and message.
/ / < / > ] and [ OK ] button to select country.
] button on the remote control, to turn TV on or off.
Press the [ < / > ] and [ OK ] button to set retail mode is on or off.
Press [ OK ] button to completed first time installation and enter tuning setup menu.
Selecting the Input Source
1.3
Select the Input Source depending on the video device you have connected to your TV.
To select the input source:
1. Turn on your TV, then press the [ Source ] button on the remote, the list of Source appears.
2. Press the [
3. Press the [ OK ] button to confirm your selection.
/ ] button to select the input source.
1
Page 8

Shortcuts Instructions
Using the Live TV
1.4
Channel search guide
1. Press the Source button to select DTV or ATV channel.
2. Press the Menu button to enter the channel search interface.
• Channel > Auto Tuning to search programme in TV source.
• Press the [
• Press [ Menu ] button key can skip the scan.
Viewing a channel list
• After you have done an automatic channel scan (if you’re using an antenna) or receiving your channels
through a cable provider, you can view your list of channels by pressing [ OK ] button on your remote. You
will see the channel list display on the right side of the screen.
Creating a Favourite List
To quickly access your most-watched channels, you can create a Favourite List.
To create your Favourite List:
1. Press the [ Menu ] button on your remote to enter the Settings menu.
2. Select Channel > Programme Edit
3. Using the [
can add or cancel favourite channel.
A heart-shaped indicator will appear beside the channel as confirmation that it has been successfully added.
/ / < / > ] and [ OK ] button to select Tune Type or Digital Type and scanning for channels.
v
] button on your remote, select a channel and press [
/ v
.
] button. Press [
FAV
FAV
] button
Viewing your Favourite List
To view channels that you’ve added to your Favourite List, press [
Favourite List Mode, then you can press [ OK ] button to view favourite channel list.
NOTE:
Press [ FAV ] button to switch between Programme Edit and Favourite List Mode.
] button on your remote to call out the
FAV
2
Page 9

Shortcuts Instructions
EPG
1.5
It provides convenience to check TV programmes that will be available in the next 7 days. The information displayed
by the EPG is made available by the commercial television networks for digital channels only. The EPG also
provides a simple way to programme the recording of your favorite programmes and a reminder function which can
switch channel automatically at scheduled time so that you do not miss programmes of interest. (The availability and
amount of programme information will vary, depending on the particular broadcaster.)
Press the [ EPG ] button on the remote control to display channel information on programme guide list.
Record or remind programme.
Recorder/
Reminder
Press [
schedule.
Record: Press [ Red ] button to record
Remind: Press [ Green ] button to remind programme which you selected
Pre Day: Press [ Yellow ] button to go backwards a day.
Next Day:
INFO: Press [ Info ] button to display detailed information of the selected programme.
View or edit Schedule List.
Press [
button to edit Schedule List.
• Press [
Type: You can select Reminder / Recorder.
Mode: You can select Once, Everyday and Weekly.
Select and set Start time / End Time:
Press [ < / > ] button to move the position you want to set, press [
set you want, and press [ OK ] button exit it. (Selecting and setting end time is only
available for Recorder.)
• Press [ Red ] button to delete programme which be selected on the Schedule List.
• When the Schedule List is empty, you can press [ Yellow ] button to edit Schedule
List.
/ / < / > ] button to select channel and programme based on the time
programme which you selected.
.
Press [ Blue ] button to move forwards a day.
] button on your remote, select Channel > Schedule List, press [ Blue ]
Menu
/ / < / > ] button to change and set different options.
/ ] button to
NOTES
Reminder is only available for programmes that haven’t been aired yet.
A storage device must be attached to the television for recording purposes.
The TV will record the programme even in standby mode.
3
Page 10

Shortcuts Instructions
PVR/T.Shift
1.6
PVR
The PVR enables the user to easily record the digital television content for later viewing. The function is to
be used in DTV source only. The format of storage disk is recommended to be FAT32. This option does not
commence if the data storage device has not been connected.
There are two options, one is to press [ EPG ] button on remote control and then select a
programme to record by pressing [ Red ] button, press the [ Green ] button to select
.
PVR Function
remind
Second one is to press [
Press the [ OK ] / [ ►II ] button to display the recording progress bar when there is no
progress bar appeared, press the [ ■ ] button to stop record, a *.PVR file will be saved.
The files can be played back in Media or by pressing [Pvr list] button that one-click
shortcut on your remote.
NOTES
A storage device must be attached to the television for recording purposes.
The TV will record the programme even in standby mode.
] button to record.
T.Shift
This option allows the user to watch a live broadcast (DTV only) with a delay. Since the function record the
programme temporarily onto a hard disk only. Please connect a hard disk and the storage capacity should be
no less than 2GB. Otherwise the recording will not commence.
Press the [ ►II ] button on your remote to pause the live broadcast and enter time shift function. If the
banner disappear after a few of seconds, press the [ OK ] button on the remote to display the banner again.
Press the [ ►] button to play. Press the [
Press the [ II ] button to pause the programme. Press the [ ■ ] button to exit the function and watch the
current broadcast.
] button to rewind and press the [ ] button to fast forward.
NOTES
When connecting a hard disk, always connect the mains adapter of the connected device to the power
supply.
If a USB 1.1 or USB2.0 device requires more than 500mA or 5V, the USB device may not be supported.
Max supported current for USB 3.0 device is 1A. Exceeding the max supported current may result in
damage or data loss.
The maximum supported storage space of the hard disk is 2T.
If you want to store the video streaming of a DTV programme, the transfer rate of the USB storage device
should be no less than 5MB/s.
The PVR and T.Shift functions doesn’t support analogue channels.
The T.Shift function is disabled for channels locked with Channel Lock.
4
Page 11

Menu
Using the Menu Function
2.1
To quickly access menu function, press the corresponding keys on your remote.
Source
Select the Input Source depending on the video device you have connected to your TV.
Audio Language
Pressing [ Lang. ] button to select a desired language from the list.
Subtitle
Select desired subtitles from the list if the selected channel supports multi-language subtitles.
Favourite List
Press [ FAV ] to enter or exit favourite list, press [ FAV- ] [ FAV+ ] to play your favourite programme.
Menu
The Menu consists of the following settings: Channel, Picture, Sound, Time, Lock, Setup.
Picture Mode
Select the optimal picture mode for your TV viewing conditions: Standard, Cinema Day, Cinema Night, PC,
Dynamic, User.
Sound Mode
Select a preset sound mode to suit the type of content you are listening to: Standard, Music, Movie, Sports,
User.
Info
Show the details of programme.
Sleep
Set the desired time period before the TV turns off automatically, To cancel the sleep time, press the [ Sleep ]
button repeatedly until the off option appears.
Using the Channel Menu
2.2
1.
Press the [ Menu ] button on your remote to enter the channel setting menu.
In each menu, you can:
Press the [
Press the [ OK ] button to enter the sub-menu or to set on or off.
Press the [ < / > ] button to adjust the value
Press the [ Exit ] button to exit the menu.
/ / < / > ] button to select an item.
5
Page 12

Menu
Auto Tuning
DTV Manual
Tuning
ATV Manual
Tuning
Programme
Edit
Automatically scan for channels to view programmes from your TV source.
• Tune Type: Perform channel scan for ATV and DTV.
Manual scan TV programme in digital signals.
Manual scan TV programme in analog signals.
• Current CH: Set the channel number.
• Colour System: Select the colour system.
• Sound System: Select the sound system.
• Fine-Tune: Adjust the channel frequency finely.
• Search: Start searching channel.
Manually edit the channel list order to your preference.
• Delete: Press [ Red ] button to delete the programme from channel list.
• Move: Press [ Yellow ] button to move the selected channel. (Only available when
Sorting by LCN is off.)
NOTES:
• You can select Menu > Channel > Auto Tuning to set Sorting by LCN is on
or off.
• [ Yellow ] button will lose efficacy and yellow button icon not shown on the
programme edit menu when Sorting by LCN is on.
• Skip: Press [ Blue ] button, the selected channel will be disabled. (Your TV set will
skip the channel automatically when using CH+/- to view the channels.)
• Rename: Press [ Green ] button to rename the channel. (Only available when there
is signal in ATV.)
• Quick jump: Press 0~9 numbers to quick jump channel. (Only available when there
is signal in DTV.)
NOTES:
• Press [ FAV ] button to add or cancel the channel to your favourite list.
• Press [ FAV ] button to switch between Programme Edit and Favourite List mode.
Schedule List View a list of scheduled reminds.
Signal
Information
Channel Edit
View the detail information about the signal.
(Only available when there is signal in DTV.)
• Auto Channel Update: Allow your TV auto-update the channel list from the content
provider.
• Channel Import: Import a set of data by USB device to finish setting quickly from
other television.
• Channel Export: Export a set of data by USB device to finish setting quickly for
other television.
6
Page 13

Menu
Using the Picture Menu
2.3
In each of picture menu, you can:
Press the [
Press the [ OK / > ] button to enter the sub-menu or to set on or off.
After finishing your adjustment, press [ Menu ] button to save and return back to the previous menu.
/ ] button to select an item.
Picture
Picture Mode
Picture Mode
Contrast
Brightness
Colour
Tint
Sharpness
Colour Temp
Noise Reduction
White Balance
OK Select EXIT ExitMENU ReturnMove
Standard
50
50
50
50
50
Standard
Middle
Select a preset picture mode to best suit the content you’re viewing:
Standard, Cinema Day, Cinema Night, PC, Dynamic, User.
NOTES:
• You can change the value of Contrast, Brightness, Colour, Tint, Sharpness when
the picture mode is User. (Adjust the value of Tint need in NTSC system.)
• You can press [ Picture ] button to change the picture mode directly.
Adjust display settings for each picture mode.
• Contrast: Adjust the Contrast level to increase or decrease how bright images
appear.
• Brightness: Adjust the Brightness level to generate lighter or darker images.
Picture Mode
Settings
• Colour: Adjust the colour intensity of the picture for a more vibrant image.
• Tint: Adjust the colours from a green to magenta tint to view the natural skin tones
of people on the screen.
• Sharpness: Adjust how sharp or soft edges of images appear.
• Colour Temp: Adjust how warm(red), standard or cool(blue) the white areas of an
image appears.
• Noise Reduction: Improve how clear the picture appears by reducing noise.
• White Balance: Adjust the intensity of red, green and blue GAIN to view the true
colour of all images in the picture.
7
Page 14

Menu
Using the Sound Menu
2.4
In each of sound menu, you can:
Press the [
Press the [ OK / > ] button to enter the sub-menu or to set on or off.
After finishing your adjustment, press [ Menu ] button to save and return back to the previous menu.
Sound
/ ] button to select an item.
Sound Mode Standard
Treble 50
Bass
Balance
Auto Volume Level
SPDIF Mode
AD Switch
SPDIF Audio Delay
Speaker Audio Delay
OK Select EXIT ExitMENU ReturnMove
50
0
Off
PCM
0
0
Sound Mode
Sound Mode
Settings
Select a preset sound mode to best suit the type of content you are listening to:
Standard, Music, Movie, Sports, User.
NOTE:
You can press [
The treble and bass are only available in User mode can be adjust.
] button to change the sound mode directly.
Sound
Customize and select sound mode to best suit the content you’re listen.
• Treble: The feature is sound-processing function to adjust the value of treble.
• Bass: The feature is sound-processing function to adjust the value of bass.
• Balance: Adjust the left and right speaker strength to optimize audio for a specific
location.
NOTE:
The treble and bass are only available in User mode.The feature is
adjust the speaker’s output, it enables you to listen to best at your position.
• Auto Volume Level: Used for reducing the difference between channel and
programme’s volume automatically.
• SPDIF Mode: The feature is select SPDIF Mode: PCM, Auto or Off.
• AD Switch: Adjust AD Switch function is turn on or off. You can press [ < / > ]
button to adjust the value of AD Volume.
NOTE:
Amblyopia function for the blind, the tracks will be mixed describe the
current screen. It need codestream to support.
• SPDIF Audio Delay: Adjust the audio output delay time to sync sound from an
external coaxial device with the images on the TV.
• Speaker Audio Delay: Adjust the audio output delay time to sync sound from
speaker with the images on the TV.
8
Page 15

Menu
Using the Time Menu
2.5
In each of time menu, you can:
Press the [
Press the [ OK / > ] button to enter the sub-menu or to set on or off.
After finishing your adjustment, press [ Menu ] button to save and return back to the previous menu.
/ ] button to select an item.
Time
Time Settings
Clock
On Time Off
Sleep Timer
Auto Standby
Time Zone
OSD Timer
OK Select EXIT ExitMENU ReturnMove
03.Jan.2019 02:03
Off
4H
GMT+1
Always
Adjust the time settings to suit your preference.
•
Set the current time based on your location, set the time to display in 24-
Clock:
hour format. (You can not set times by using manual setting when the TV be
connected DTV signal. And the time format will vary by country.)
• On Time : Enable the Power On Time to Off, Once or Every day, Mon to Fri, Mon
to Sat, Sat to Sun, Sunday.
•
Sleep Timer:
Set TV automatically turn off within a specified time: Off, 15Min...
120Min, 240Min.
• Auto Standby: Set the length of TV standby time: Off, 3H, 4H, 5H. (This feature is
open according to the country.)
NOTE:
The remote control does not make any operation in the hypothesis time,
if you have any operation, it will clear auto standby and reset the time.
• Time Zone: Select your location time zone.
• OSD Timer: Set the length of menu diaplay time: 5S, 15S, 30S, Always.
9
Page 16

Using the Lock Menu
OK Select EXIT ExitMENU ReturnMove
Lock
2.6
Press the [ < / > / OK ] button to turn on or off system lock.
• System Lock:
what you set, please call the service center.
• Set Password: After enter original password “0000” , then enter your new password.
Lock
If you want to change your lock password, first enter the new password then enter the
same password again.
Menu
Enable or disables all locks. Original password is “0000”, and if forget
•
Channel Lock:
button to lock or unlock the channel.
• Key Lock: Set key lock on or off, you will not use Key panel button when Key Lock is
turn on.
Parental
Guidance
Hotel Mode Press the [ < / > / OK ] button to turn on or off hotel mode.
Press [ < / > / OK ] button to select the TV programme rating which is suitable for your
children.
Select a progamme which you want to lock, and press [ Green ]
10
Page 17

Using the Setup Menu
2.7
Menu
Setup
Language
Hearing
Impaired
PVR File
System
Language
Teletext Language
Audio Language
Subtitle Language
Hearing Impaired
PVR File System
Aspect Ratio
Blue Screen
Setup Wizard
OK Select EXIT ExitMENU ReturnMove
English
West
English
English
Off
Wide
Off
Select the language used for this TV.
• Language: Set the default language for main menus.
• Teletext Language: Set the default language for teletext.
• Audio Language: Set the default language for audio.
• Subtitle Language: Set the default subtitle language for digital broadcast content.
Press the [ < / > / OK ] button to select hearing impaired turn on or off.
NOTE:
Excessive sound level from earphones and headphones can cause hearing
loss.
Press the [
drive where you want to store your database.
Press the [
options.
NOTES:
• Free Record Limit is 6 hour.
• A storage device must be attached to the television for
/ ] buttons to select a location on your hard
/ / < / > ] buttons to change and set different
Select Disk
Check PVR File System
USB Disk
Format
Time Shift Size
Speed
- Free Record Limit
OK Select MENU Back
recording purposes.
• PVR File system type just support FAT32.
C:
Start
1 Hr. +
Aspect Ratio Select aspect ratio to best suit the content you’re viewing.
Blue Screen Select display blue background or not.
Setup Wizard Use the Setup Wizard for instructions to help you set up your TV.
11
Page 18

Menu
Reset
Software Update(USB)
Retail Mode
HDMI CEC
Version ...
Setup
OK Select EXIT ExitMENU ReturnMove
Reset Restore your TV back to the factory default.
Off
Software
Update(USB)
Update the right software by USB device.
Retail Mode Set the retail mode turn on or off.
Configure how to control CEC-enabled devices with your TV remote:
• CEC Control: Allow HDMI devices to control each other.
• Audio Receiver: Send audio from the TV back to your home theater receiver so
you can listen to your TV’s audio through your home theater audio system when turn
on audio receiver function. (Use a single HDMI cable between this TV’s HDMI ARC
connector and your home theater system.)
• Device Auto Power Off: Automatically turn off HDMI CEC devices when the TV is
turned off.
HDMI & CEC
Functions
• TV Auto Power On: Allow the TV to be turned on with CEC-enabled devices.
• Device List: View the CEC devices which connected to TV.
• Device Menu: View the main menu list which connected to CEC device.
NOTES
HDMI cables must be used to connect HDMI CEC-compatible devices to your TV.
The HDMI CEC feature of the connected device must be turned on.
If you connect an HDMI device that is not HDMI CEC-compatible, all the HDMI-CEC
control features do not work.
Depending on the connected HDMI device, the HDMI-CEC Control feature may not work.
Version View system information.
12
Page 19

Media Operation
Media Operation
3.1
Media is a central location for you to upload and view or listen to different types of content (for example, your
Photo, Music, Movie and Text) through the following method:
• Plug in USB thumb drive or hard drive: You can stream Photo, Music, Movie and Text that are stored on
USB device and play or view the content on your TV.
NOTES:
• If the USB device requires more than 500mA or 5V, the USB device may not be supported. Exceeding the
max supported current of the TV may result in damage or data loss.
• If you want to store the video streaming of a DTV programme, the transfer rate of the USB storage device
must not be less than 5MB/s.
File formats that may be supported
NOTES:
• Due to differences in programming tools and other factors, some of the file formats that are listed may or
may not be supported.
• The format of the storage disk must be either FAT32 or NTFS.
• If the media codec is not supported by the player, a warning will be given.
Medium File Format
Video AVI, MP4, MKV, MPG
Picture JPG, JPEG, BMP, PNG
Music MP3
Text TXT
Browsing Content
To browse through content based on the type that you wish to access:
1. Press Source > DMP to select and enter sub-menu of Photo, Music, Movie and Text.
2. Press [
3. Press the [ OK ] button to play/enter content/the folder.
If you want to close out of the Media center, press the [ Exit ] button twice on your remote.
v
/ v / < / > ] buttons to select the name of the content/folder that contains your content.
13
Page 20

Other Information
TroubleShooting
4.1
NOTES
This TFT LED panel uses a panel consisting of sub pixels which require sophisticated technology to
produce. However, there may be a few bright or dark pixels on the screen. These pixels will have no impact
on the performance of the product.
Images throughout this document are for illustrative purposes only and may differ from the actual product.
SYMPTOMS POSSIBLE SOLUTIONS
No sound or picture.
I have connected an external
source to my TV and I get no
picture and/or sound.
When I turn on my television,
there is a few second delay
before the picture appears. Is
this normal?
Picture is normal, but no sound.
Sound but no picture or black
and white picture.
Sound and picture distorted or
appear wavy.
Sound and picture is blurry or
cuts out momentarily.
Check if the power cord is plugged into a powered AC outlet.
Check to see if LED light is red. If illuminated, power to TV is OK.
Check for the correct output connection on the external source and
for the correct input connection on the TV.
Make sure you have made the correct selection for the input mode
for the incoming signal.
Yes, this is normal. That is the TV searching for previous setting
information and initializing the TV.
Check the volume settings.
Check if Mute mode is set “on”.
If black and white picture first unplug TV from AC outlet and replug after 60 seconds.
Check that the Colour is set to 50 or higher.
Try different TV channels.
An electrical appliance may be affecting TV set. Turn off any
appliances, if interference goes away, move appliance farther
away from TV.
Insert the power plug of the TV set into another power outlet.
If using an external antenna, check the direction, position and
connection of the antenna.
Adjust the direction of your antenna or reset or fine tune the
channel.
Horizontal/vertical stripe on
picture or picture is shaking.
The plastic cabinet makes a
“clicking” type of sound.
Remote control does not work.
Check if there is interfering source nearby, such as appliance or
electric tool.
"Click" sound can be caused when the temperature of the television
changes. This change causes the television cabinet to expand or
contract, which makes the sound. This is normal and the TV is OK.
Confirm that TV still has power and is operational.
Change the batteries in the remote control.
Check if the batteries are correctly installed.
14
 Loading...