

Page 1

ES-A18A101-1
Page 2
USER MANUAL
Read the manual carefully and ensure you have fully understood its contents before operating this device for the first time.
English
Page 3
▌Important Notice
Paragraphs beginning with the symbol indicate important instructions, tips or conditions for the following settings.
For your own safety and the optimal performance of your device, ensure to read the safety instructions before performing any
installation.
It is not guarantee operation and performance of peripheral devices made by other manufacturers. We disclaim any liability or
damage that may arise from operation and/or performance from usage of such other maker’s peripheral devices.
The recording and playback of content on this or any other device may require permission from the owner of the copyright or other
such rights in that content. It is your responsibility to ensure that your use of this or any other device complies with applicable
copyright legislation in your country. Please refer to that legislation for more information on the relevant laws and regulations involved
or contact the owner of the rights of the content you wish to record or playback.
The Index/Glossary explains certain terms used in this user manual and in the device menu.
Read these instructions
Follow all instructions
Heed all warnings
Keep these instructions
All rights reserved.
A
Page 4
▌Safety Instructions
To ensure safe and correct use of this product, always comply with the following precautions to avoid dangerous situations and
damage to your unit:
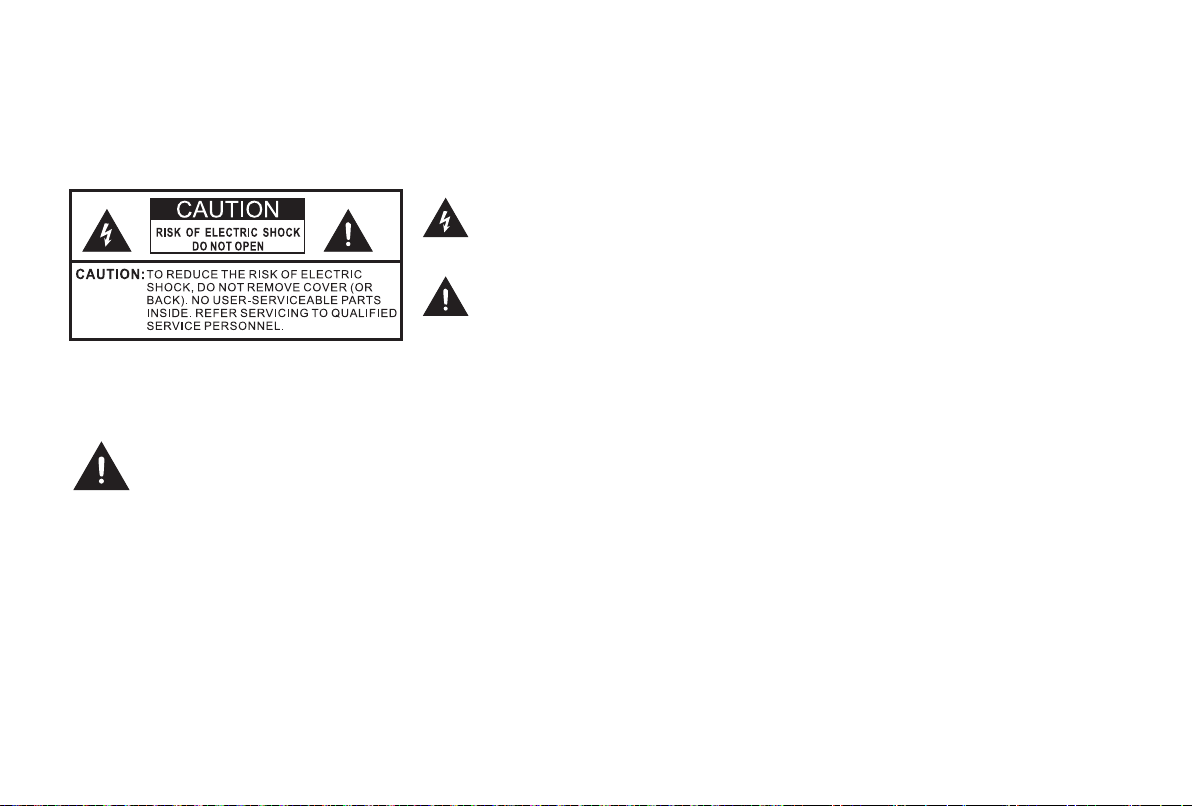
The lightning flash with arrowhead symbol, within an equilateral triangle is
intended to alert the user to the presence of uninsulated dangerous voltage
within the product's enclosure that may be of sufficient magnitude to constitute a
risk of electric shock.
The exclamation point within an equilateral triangle is intended to alert the user
to the presence of important operating and maintenance (servicing) instructions
in the literature accompanying the appliance.
The intended use and ambient conditions for this device
This device is intended for the rendering of video and audio signals, on a table-top, in a home or ofce environment. It must not be
used in rooms with a high level of humidity or dust concentration. The warranty is only valid if used as intended by the manufacturer.
WARNING
High humidity and dust concentration may lead to current leaks in the device. To reduce the risk of re or electrical shock:
- Do not expose this unit to rain, moisture, dripping or splashing water, and do not place objects lled with liquids, such as vases,
cups, etc. on or over the unit.
- Do not touch the device with wet hands.
- Do not expose to direct air-conditioning and keep candles or other naked ames away from the device at all times.
If the device is moved from a cold environment to a hot environment, leave it switched off for at least an hour to avoid condensation.
If used outside, make sure it is protected from moisture.
If you notice anything unusual, immediately remove the power plug.
In case of re, use preferably a CO2 gas or powder re extinguisher. If such extinguishers are not accessible, try to isolate the electrical
supply before using a water re extinguisher.
B
Page 5

Power Supply
Power plug and power cable
Incorrect voltages can damage the device. Only connect this unit
to a power supply with the correct voltage and frequency noted
on the type plate, using the supplied power cable.
The power plug must be easily accessible so that the device can
be disconnected at all time. The unit is live, even if in standby
mode, as long as the unit is connected to a power outlet.
It is recommended that this unit is placed on a dedicated circuit.
- Do not overload the power outlets by connect too many
appliances to the same outlet. Overloaded wall outlets,
extension cords, etc. are dangerous and can result in electric
shock and re.
After power off, don't turn it on again in 5 seconds. Frequent
switching power supply in a short period of time can cause
abnormal device.
The apparatus shall be connected to a MAINS socket outlet
with a protective earthing connection.
- Do not touch the power plug with wet hands.
- Do not place heavy objects on the power cable. Route the
cable so that it is not kinked or laid over sharp edges, walked
on or exposed to chemicals. A power cable with damaged
insulation can cause electric shock and re.
- Pull the power plug, NOT on the cable when disconnecting.
The cable can become damaged and cause a short circuit if
pulled on.
- Do not place the power cable near a high temperature object.
- Do not move the device with the power cable plugged into a
socket.
- Do not use a damaged or loose power cable, or a damaged
socket outlet.
- Do not use any power cords other than the one supplied with
this unit.
Air ventilation and high temperatures
Install your device only where there is proper ventilation, and ensure
that there is at least 20 cm free space on the sides and 12 cm
free space on the back unit for air circulation. Excessive heat and
obstruction of ventilation could lead to re or early failure of some
electric components.
- Do not block any ventilation openings with newspapers,
C
Page 6

tablecloths, curtains, etc.
- Do not dry clothing etc. on top of the unit.
- Take care not to touch the ventilation openings since they may
become hot.
- Do not insert foreign objects into the device through the vents.
Warning about off-gassing
New furniture, carpet, paint, building materials and electronics
can release chemicals into the air through evaporation. After
you set your device up and turn it on for the rst time, you may
notice a slight smell within a couple of hours. This is because
some components of device are heating up for the rst time. The
materials that we use fully meet the environmental requirements
and regulations. Your device is working just ne and the fumes
from the off-gassing will diminish eventually.
or temporarily stop using headphones.
Thunder Storms
Pull out the power plug and all connected antenna cables from
the device during a thunderstorm. Overvoltage caused by
lightning strikes can damage the device via the antenna system,
as well as the wall socket.
Long periods of absence
As long as the power plug is connected to a live socket outlet,
the device will consume power even in standby mode. The power
plug and all connected antenna cables should be disconnected
out during long periods of absence.
Cleaning and care
Supervision
- Do not let children play unsupervised close to the device. It
could tip over, be pushed off or pulled down from the stand
surface and injure someone.
- Do not allow a switched-on device to run unattended.
Volume
Loud music and noises can lead to irreversible damage to your
ears. Avoid extreme volume, especially over long periods and
when using headphones.
If you hear a drumming noise in your ears, turn down the volume
CAUTION:
Unplug the power cord prior to cleaning the device.
Clean the device, the screen, and the remote control with a
soft, moist, clean and color-natural cloth only. Do not use any
chemicals.
- Do not subject the surfaces to insect repellent, solvent,
thinner or other volatile substances. This may degrade the
surface quality.
- Do not spray water or other liquids directly on the device.
Liquid inside the device could lead to product failure.
- The surface of the display panel is treated and may be easily
D
Page 7

damaged. Take care not to scratch it with ngernails or other
hard objects.
- Also wipe the power plug with a dry cloth at regular intervals.
Service/Repair
Never remove the cover/back of the device; there are no user
serviceable parts inside. Refer all service to qualied service
personnel.
- Do not mix different battery types.
- Do no use rechargeable batteries.
- Do not burn or break up batteries.
- Be sure to dispose of batteries correctly.
- Do not expose batteries to excessive heat such as sunshine,
re or the like.
Outdoor Antenna Grounding
Packaging
Keep the anti-moisture materials and plastic bags out of reach of
children.
Plastic bags can cause suffocation and the anti-moisture material
is harmful if swallowed. If swallowed by mistake, force the patient
to vomit and visit the nearest hospital.
Modication
Do not attempt to modify this product in any way. Unauthorized
modication could void the warranty of this unit, cause electric
shock and res.
Remote Control batteries
- Incorrect installation may cause battery leakage, corrosion
and explosion.
- Replace only with the same or equivalent type.
- Do not mix old and new batteries.
If an outdoor antenna used, be sure the antenna system is
protected against voltage surges and built-up static charges.
Disposal
Refer to the recycling section of this manual.
Laser
Do not look directly at the lens when this device is on
because the laser light may damage your eyes!
- This product comes with a laser module. Do not tear or
modify this device in any manner; otherwise, it may result in
personal injury.
Peak Power < 66.7mW
Wavelength 450-460nm / 635-645nm
Angle of Divergence 49°
Class 2 Laser Product IEC/EN 60825-1: 2014
CAUTION:
E
Page 8

use of controls or adjustments or performance of procedures
other than those specied herein may result in hazardous
radiation exposure.
- If this device requires a repair, please wear laser eye
protection with an optical density OD that is 4 or higher and
has a wave length of 440-460 nm / 635-645nm.
- Do not place any water-containing vessel on this device,
such as cosmetics or liquid medicine.
- If any object or water enters this device, please unplug this
device and contact the service staff of Hisense.
- Do not place any exposed re source (e.g. burning candle)
on this device. Keep away from high temperature and heat.
- Do not expose the battery to direct sunlight or candle light.
- Keep air vents on both sides clear from any objects to
prevent the device from overheating inside.
- To avoid a short circuit, product damage or electric shock,
do not use any sharp object or metal to touch the ports or
other openings on the TV.
- If this device has been in a warm environment, allow any
built-up condensation to evaporate rst BEFORE you
switch the device on.
- Do not allow a child to stand on or climb up this device.
- Do NOT place any object above or in front of the lens
because the laser light could cause the object to become
ammable.
- Clean the lens periodically with a clean cloth and make
sure the TV is turned off before you start.
SIMPLIFIED EU DECLARATION OF CONFORMITY
Hereby, Hisense Electric Co.,Ltd. declares that the radio equipment type [H100LDAUK / H100LDA / 100LDA /
ERF6G60 / ERF6E60 / ERF6F60] is in compliance with Directive 2014/53/EU. The full text of the EU declaration of
conformity is available at the following internet address: http://global.hisense.com/cuse/cedoc.
AC voltage: This symbol indicates that the rated voltage marked with the symbol is AC voltage.
Class I product: This symbol indicates that it requires a safety connection of protective earthing (ground).
F
Page 9

Congratulations on the purchase of your new TV! This Manual will walk you through a few easy steps to set up your TV.
Please visit Hisense ofcial website for more details.
Product image is only for reference, actual product may vary in appearance.
Parts of the software function changes with the system upgrade.
Table of Contents
Accessories List 2
Laser TV Diagram 3
STEP 1. Mount the Screen 4
STEP 2. Install the Laser TV 4
STEP 3. Adjust the Display Image and the Screen 9
STEP 4. Use Your Remote 13
STEP 5. Proceeed through the Screen Setup Menu 15
STEP 6.TV Setup 15
Maintenance & Quick Problem-Solving Tips 16
Product Specications 18
Recycling / Licenses 20
1
Page 10

• Do not allow a child to stand on or climb up this device.
•
• Clean the lens periodically with a clean cloth and make sure the TV is turned off before you start.
Accessories List
• Laser TV × 1
• Remote control × 1
• AAA batteries × 2
• Gloves for handling the Laser TV × 2
• Power cord × 1
• Wrench to adjust the bottom of the TV × 1
ADDITIONAL ITEMS THAT COME WITH THE TV IN A SEPARATE PACKAGE
• Subwoofer × 1 (optional equipment)*
• Display Screen × 1 (optional equipment)*
• Wall Mount brackets × 1 (optional equipment)*
• USB extension cable × 1
• Laser TV User Manual × 1
• Laser TV European Guarantee × 1
• Cleaning kit for the lens × 1
* Note: Optional equipment depends upon your order.
2
Page 11

Laser TV Diagram
Power Indicator
Air vents
Remote control receiver
Eye
protection
sensor
laser
We strongly recommend that two people handle this device when moving it from one place to another. Be sure to
protect the lens when you handle this device.
Power buttonLens with
3
Page 12

STEP 1 Mount the Screen
Screen installation please refer to the specific screen installation guide!
STEP 2 Install the Laser TV
We strongly recommend that two people handle this device when moving it from one place to another. Be sure to
protect the lens when you handle this device.
We recommend to connect all cables to the ports on the back of the Laser TV before positioning the TV. (Audio, video, Ethernet
cables and external devices are not included.)
Check to ensure that you have selected the right cables for the ports and that they are connected securely. Loose connections can
affect the quality of the picture image and color.
4
Page 13

(not included)
or
Satellite antenna
Outdoor
Antenna
Cable
ANT OUT
Antenna Cable (75Ω)
VHF/UHF Antenna
NOTE:
ANT1 Jack supports power supply for satellite antenna (13/18V, 0.5A max.)
CAM CARD
SMART CARD
NOTE:
Before you insert/remove the CI+ module, ensure that the TV is switched off. Then
insert the CI card into the CI+ module in accordance with the Service Provider’s
instructions.
Do not repeatedly insert or remove the Common Access Module as this may damage
the interface and cause a malfunction.
You must obtain a CI+ module and card from the service provider of the channels you
want to watch.
Insert the CI+ module with the SmartCard in the direction marked on the module and
SmartCard.
CI+ is not supported in some countries and regions; check with your authorized dealer.
5
Page 14

AUDIO
OUT
AUDIO IN
Left-right audio adapter
External audio devices
Red
R
LAN
L
VGA
DIGITAL
AUDIO OUT
VGA
SERVICE 2
White
Digital audio adapter
Speakers
Audio Amplier
HDMI 3(4K@30Hz) HDMI 4(4K@30Hz)
HDMI 1(4K@60Hz) HDMI 2(4K@60Hz)
USB 1
0.5A(MAX)
DC 5V
ARC
USB 2
DC 5V 1A(MAX)
3.5mm stereo
Computer
Ethernet (you will need a router for Internet
connectivity)
HDMI
USB devices for browsing photos, music and movies.
External AV devices
VCR
Set-top Box
DVD Player
This unit only recognizes USB Memory Sticks.
Video Camera
Satellite Receiver
NOTE:
Use the USB extension cable (included) for easier connection and disconnection.
When connecting a hard disk or a USB hub, always connect the mains adapter of the
connected device to the power supply. Exceeding a total current consumption may result in
damage. The USB1.1 and USB2.0 devices maximum current consumption are 500mA. The
USB3.0 device maximum current consumption is 1A.
For individual non-standard high-capacity mobile hard disk, if its impulse current is greater
than or equal 1A, it may cause TV-rebooting or self-locking. So the TV does not support it.
The USB port supports a voltage of 5V.
6
Page 15

LAN (
Wired setup
)
Connect your TV to your network by connecting the LAN port on the back of your TV to an external modem or router using a LAN
(Ethernet/Cat 5) cable. See the illustration below.
TV PORT
LAN
IP Sharer (Router)
(with DHCP server)
External Modem
(ADSL / VDSL / Cable TV)
Modem CableLAN CableLAN Cable
Wireless setup
Connect your TV to your network wirelessly, you need a wireless router or modem. See the illustration below.
Wireless router with DHCP
Wireless LAN Adapter
built-in TV set
LAN Cable
NOTES
You must use the built-in Wireless LAN Adapter to use a wireless network because the set doesn’t support external USB network
adapter.
If the wireless router supports DHCP, your TV can connect more easily to the wireless network.
If you apply a security system other than the systems listed below, it will not work with the TV.
security system:WPA,WEP,WPA2.
In order to guarantee smooth network, the distance between router and TV should be less than 10 meters.
7
Page 16

1. Position the Laser TV so it is parallel with the screen
surface. We recommend the distance from the back panel of
the Laser TV to the wall to be 8 1/8 inches.
2. Plug the power cord into a wall outlet.
3. Remove the lens cover. Press the POWER button to turn on
the Laser TV
.
WARNING: Insufficient ventilation space will cause this
device to overheat or become damaged.
• Do not block the air vents or place any object on this device.
• Do not place this device in any narrow, enclosed or poorly
ventilated space.
Laser beam
At a minimum, leave the amount of space shown in the diagram
below for this device to have proper ventilation.
Power Cord
12 cm
20 cm
8
20 cm
Page 17

STEP 3 Adjust the Display Image and the Screen
Follow the steps in the order shown below, only if they apply to your situation.
Note: Before adjusting, fold the wall-mount bracket wands so that screen is vertically level.
PARALLEL THE BOTTOM OF THE IMAGE WITH THE SCREEN
If the bottom of the image is lower on the left and higher on the
right, rotate the device counterclockwise.
If the bottom of the image is lower on the right and higher on the
left, rotate the device clockwise.
FIT THE BOTTOM OF THE IMAGE TO THE SCREEN
• If the image shifts to the left side, then move the Laser TV to
the right.
If the image shifts to the right side, then move the Laser TV
to the left.
9
Page 18

• If the bottom of the image is wider than the screen, then
move the Laser TV closer to the screen.
ADJUST THE UPPER-RIGHT CORNER OF THE IMAGE
1. If the top of the image is lower on the left and higher on
the right, then use the wrench to rotate the back-right foot
clockwise so that the bottom of the image is also higher
on the right. The upper-right corner will expand further by
default. Make sure part of the image is displayed beyond the
upper-right corner of the screen.
If the bottom of the image is narrower than the screen, then
move the Laser TV farther from the screen.
NOTE: Make sure the bottom of the image always stays
parallel with the screen. If not, rotate the TV following previous
instructions.
back-right foot
2. Now, rotate the TV counterclockwise so that the bottom of
the image is parallel with the screen.
10
Page 19

3. Repeat the steps above until the top of the image is parallel
with the screen.
4. Rotate the back-left foot to the same height as the right one
and make sure the TV sits stably.
ADJUST THE UPPER-LEFT CORNER OF THE IMAGE
1. If the top of the image is higher on the left and lower on the
right, then use the wrench to rotate the back-left foot of the
TV clockwise so that the bottom of the image is also higher
on the left. The upper-left corner will expand further by
default. Make sure part of the image is displayed beyond the
upper-left corner of the screen.
back-left foot
2. Now, rotate the TV clockwise so that the bottom of the image
is parallel with the screen.
3. Repeat the steps above until the top of the image is parallel
with the screen.
4. Rotate the back-right foot clockwise to the same height as the
left one and make sure the TV sits stably.
FILL THE TOP OF THE IMAGE TO THE SCREEN
If the top of the image is wider than the screen, then use the
wrench to rotate the center-front foot of the Laser TV clockwise.
11
center-front foot
Page 20

If the top of the image is narrower than the screen, then use
the wrench to rotate the left- and right-back feet of the Laser
TV clockwise, until the left and right borders of the image are
parallel with the screen borders. Next, move the projector further
from the screen to ll the image to screen width. If the back feet
are already at their maximum height, rotate the the center-front
foot counterclockwise.
Rotate the back feet clockwise Rotate the center-front foot
counterclockwise
After you've completed adjusting the image position, rotate the
left and right front feet to the same height as the center one to
make sure the TV sits stable.
12
Page 21

STEP 4 Use Your Remote
BUTTONS ON YOUR TV REMOTE
NOTE: The button labels are provided as a reference. The actual appearance of the remote that is included with the TV, may differ from this diagram.
Receive the voice (This function is only
NOTE: The information here will vary
NOTE: The information here will vary
Enable voice function (This function is only
supported in some countries or regions.)
depending on the country.
Fast access to all applications
Enter the Freeview Play
depending on the country.
Select input sources
Power button
Press to launch NETFLIX
or
Display the Menu
or
UP/DOWN/LEFT/RIGHT
Display the Home screen
Return to the previous place in
Change volume (Up/Down)
navigation
the menu or app
supported in some countries or regions.)
Indicator
Enter the YouTube app
Display Colour keys
OK button
Refer to the diagram on screen to use UP/DOWN/LEFT/
RIGHT and Conrmation button to control content playback
Mute or restore sound
Change Channel (Up/Down)
Display numbers
NOTE: The information here will vary
depending on the country.
Enter the media mode
or
Enter the Amazon app
13
Page 22

1. Press and slide the back cover to open the battery
Press the button and slide Restore the compartment
compartment of the remote control.
2. Insert two AAA size batteries. Make sure to match the
(+) and (-) ends of the batteries with the (+) and (-) ends
indicated in the battery compartment.
3. Restore the battery compartment.
REMOTE CONTROL RANGE INFORMATION
• The remote control can work at a distance of up to 26 feet in
front of the TV set. (This distance is used by infrared means
in an unpaired state.)
• It can work at a 30 degree horizontal or vertical angle. ( This
angle is used by infrared means in an unpaired state.)
PAIRING THE REMOTE CONTROL
Insert the batteries
IMPORTANT INFORMATION ABOUT THE REMOTE AND
BATTERIES
• Discard batteries in a designated disposal area. Do not
throw them into a re.
• Remove old batteries immediately to prevent them from
leaking into the battery compartment.
• If you do not intend to use the remote control for a long time,
then remove the batteries.
• Battery chemicals can cause a rash. If the batteries leak,
clean the battery compartment with a cloth. If chemicals
touch your skin then wash it immediately.
• Do not mix old and new batteries.
• Do not mix alkaline, standard (carbon-zinc) or rechargeable
(NiCd, NiMH, etc.) batteries.
• Do not continue using the remote if it gets warm or hot.
• Call our Support Center immediately on the support website.
1.Pair the remote to the TV after you power it on. Keep the remote
control within 20 feet from the TV. Press and hold the [ ] button
at least 3 seconds to start pairing.
2.If the remote paired successfully then a conrmation will
display on the screen. If it did not pair successfully then an
'unsuccessful' message will display. Repeat step 1.
NOTE:
• If an unknown error occurred with the remote then it could
have been caused by interference. Try to remove what's
causing the interference and pair it again.
• If an unknown error occurred in the remote control while the
battery power is normal, you can take out the batteries and
press any key for 1~2 seconds, then the remote control can
work normally.
• The remote cannot be paired to the TV while the TV is in
standby mode.
14
Page 23

STEP 5 Proceed through the Screen Setup
Menu
PROJECTION MODE
If you need to ip the image over top-to-bottom and/or left-to-
right, select the Projection Mode and press the LEFT/RIGHT
buttons.
GEOMETRIC CORRECTION
1. Select a point for adjustment using the UP/DOWN/LEFT/
RIGHT button. Adjust eight main points at the corners and
midpoints rst, then adjust the six smaller points on the top
border.
Geometric Correction
Done Reset
UP/DOWN/LEFT/RIGHT/OK button: Select the point for
adjustment
2. Adjust the position of the point by pressing the UP/
DOWN/LEFT/RIGHT buttons, then press the Back button
to view and select other points. Your changes will apply
automatically.
NOTE: To return the picture position to the factory default,
select the Reset button on the screen.
STEP 6 TV Setup
Once you are satisfied with the projected image, select "TV
Setup" to configure additional settings, including Network
Connection.
Language
Location
Time Zone
Disclaimer
Network
Connection
Success
Select your desired language to be displayed
on the menu.
Select the location where you will operate the
TV.
Select the local time zone according to your
region.
Your use of this device and all related
services is governed by the End User
License Agreement and relative policies.
Please review these documents carefully
and make sure that you have read and agree
to the provisions of the End User License
Agreement.
If your TV does not automatically detect an
Ethernet connection, then use a wireless
network, select your network from the list that
displays, also you can add a hidden network.
When you’re done, move to the next screen.
Congratulations, you have finished the
Wizard setup.
Press "Finish" to use your TV, for retailers
press "Store Mode".
15
Page 24

Maintenance
• Do not touch this device when it is running or just turned off because it may be hot.
• Do not wipe this device with oil because it may deteriorate the exterior or damage the paint. Contact with rubber or ethylene
products for a long time may cause stains on this device.
• If the outside of the TV is dirty, turn off the TV and wipe with a damped soft cloth.
• Do not touch the lens with your hands.
• Do not touch or wipe the lens with ordinary cleaning cloth. Use a dust blower to remove the dust on the lens. Grease, dirt and
ngerprints should be cleaned carefully by the professional by using optical cleaning cloth, lens wiping paper or professional
cleaning solutions to avoid destroying the optical lming and affecting the image quality.
• To turn off this device, press the Power button on the remote control. Do not cut off the power directly when the device is working.
Quick Problem-Solving Tips
When you experience an issue with your TV, turn it off and on again. If this does not resolve the problem, then refer to the tips below.
When I turn on my TV, there is a delay for a few seconds before the picture appears. Is this normal?
Yes, this is normal. The TV is initializing and searching for previous setting information.
No sound or picture
1. Check if the power cord is plugged into a powered AC outlet.
2. Press the Power button on the remote control to activate the unit from 'Standby' mode.
3. Check to see if the LED light is on or not. If it is, then the TV is receiving power.
I have connected an external source to my TV and I get no picture and/or sound.
1. Check for the correct output connection on the external source and for the correct input connection on the TV.
2. Make sure you have made the correct selection for the input mode for the incoming signal.
16
Page 25

The picture is normal but there is no sound
1. Check the volume settings.
2. Check if 'Mute' mode is set to On.
Sound but no picture or black and white picture
1. If the picture is black and white, unplug the TV from the AC outlet and replug it after 60 seconds.
2. Check that the Color is set to 50 or higher.
3. Try different TV channels.
The sound and/or picture is distorted or appears wavy
1. An electric appliance may be affecting the TV. Turn off any appliances that are nearby and move it farther away from the TV.
2. Insert the power plug of the TV set into another power outlet.
The sound and picture is blurry or cuts out
1. If using an external antenna, check the direction, position and connection of the antenna.
2. Adjust the direction of your antenna or reset or ne tune the channel.
The plastic cabinet makes a "clicking" type of sound
The 'click' sound can occur when the temperature of the television changes. This change causes the television cabinet to expand or
contract, which makes the sound. This is normal and the TV is OK.
The remote control does not work
1. Conrm that TV still has power and is operational.
2. Change the batteries in the remote control.
3. Check if the batteries are correctly installed.
17
Page 26

Product Specifications
Model Name
Dimension
Weight
Active Screen Size (Diagonal)
Screen resolution
Audio power
Power consumption
Power supply
Receiving
systems
Wireless
LAN Module
specifications
(W × H × D)
Analog
Digital
Model
Frequency Range
Output Power (Max.)
100" Laser TV
27.1 × 8.1 × 16.4 inches
(689 × 206 × 416 mm)
50 lbs (22.7 kg)
100 inches
3840 × 2160
2 × 10 W
440W
100-240V ~ 50/60Hz
PAL-D/K, B/G, I, SECAM-D/K, B/G, L/L’
DVB-T/T2, DVB-C, DVB-S/S2
ZDGFMT7668AU
2.400~2.4835GHz
5.150~5.850GHz
2.400~2.4835GHz 18.5dBm
5.15~5.25GHz 14.5dBm
5.25~5.35GHz (DFS band) 14.5dBm
5.490~5.710GHz (DFS/TPC band) 14.5dBm
5.725~5.850GHz (for Non EU) 14.5dBm
18
Page 27

Bluetooth
Module
specifications
Model
Frequency Range
Output Power (Max.)
ZDGFMT7668AU
2.400~2.485GHz
2.400~2.485GHz, Class1, 7dBm
Remote
Control
specifications
Model
Frequency Range
Output Power (Max.)
ERF6G60 / ERF6E60 / ERF6F60
2.400~2.4835GHz
2.400~2.4835GHz 5dBm
Temperature: 41°F - 95°F (5°C - 35°C)
Environmental conditions
Humidity: 20% - 80% RH
Atmospheric pressure: 86 kPa - 106 kPa
RGB / 60 Hz (640×480, 800×600, 1024×768)
YUV / 60 Hz (480 I, 480 P, 720 P, 1080 I, 1080 P)
YUV / 50Hz (576 I, 720 P, 1080 I, 1080 P)
HDMI Input
3840×2160 / 24Hz
3840×2160 / 25Hz
3840×2160 / 30Hz
3840×2160 / 50Hz(only for HDMI1, HDMI2)
3840×2160 / 60Hz(only for HDMI1, HDMI2)
Disclaimer: All products, product specications, and data are subject to change without notice to improve reliability, function, design or otherwise.
19
Page 28

Recycling / Licenses
WEEE (Waste Electronic Electric Equipment)
European Directive 2012/19/EU
This symbol on the product or on its packaging indicates that
this product must not be disposed of with your household
waste. Instead, it is your responsibility to dispose of your
waste equipment by handing it over to a designated
collection point for the recycling of waste electrical and
electronic equipment. The separate collection and recycling
of your waste equipment at the time of disposal will help to
conserve natural resources and ensure that it is recycled in
a manner that protects human health and the environment.
For more information about where you can drop off your
waste equipment for recycling, please contact your local city
ofce, your household waste disposal service or the shop
where you purchased the product.
Batteries
In accordance with the Battery Directive, used batteries
should not be disposed of in the domestic waste. Dispose
your batteries in the collection containers specic for this
purpose in retail stores.
ROHS (Restriction of Hazardous Substance)
European Directive 2011/65/EU
This European directive limits the use of dangerous and
hazardous substances which are difcult to recycle.
This allows recycling easily the EEE and contributes to
the safeguard of the environment.
Substances included in this product match to the RoHS
directive.
The terms HDMI and HDMI High-Denition
Multimedia Interface, and the HDMI Logo are
trademarks or registered trademarks of HDMI
Licensing LLC in the United States and other
countries.
Manufactured under license from Dolby
Laboratories. Dolby, Dolby Audio, and the
double-D symbol are trademarks of Dolby
Laboratories.
Manufactured under license from THAT
Corporation. THAT Corporation, dbx-tv, Total
Sonics, Total Surround and Total Volume are
registered trademarks of THAT Corporation.
Total Technology is a trademark of THAT
Corporation.
20
 Loading...