

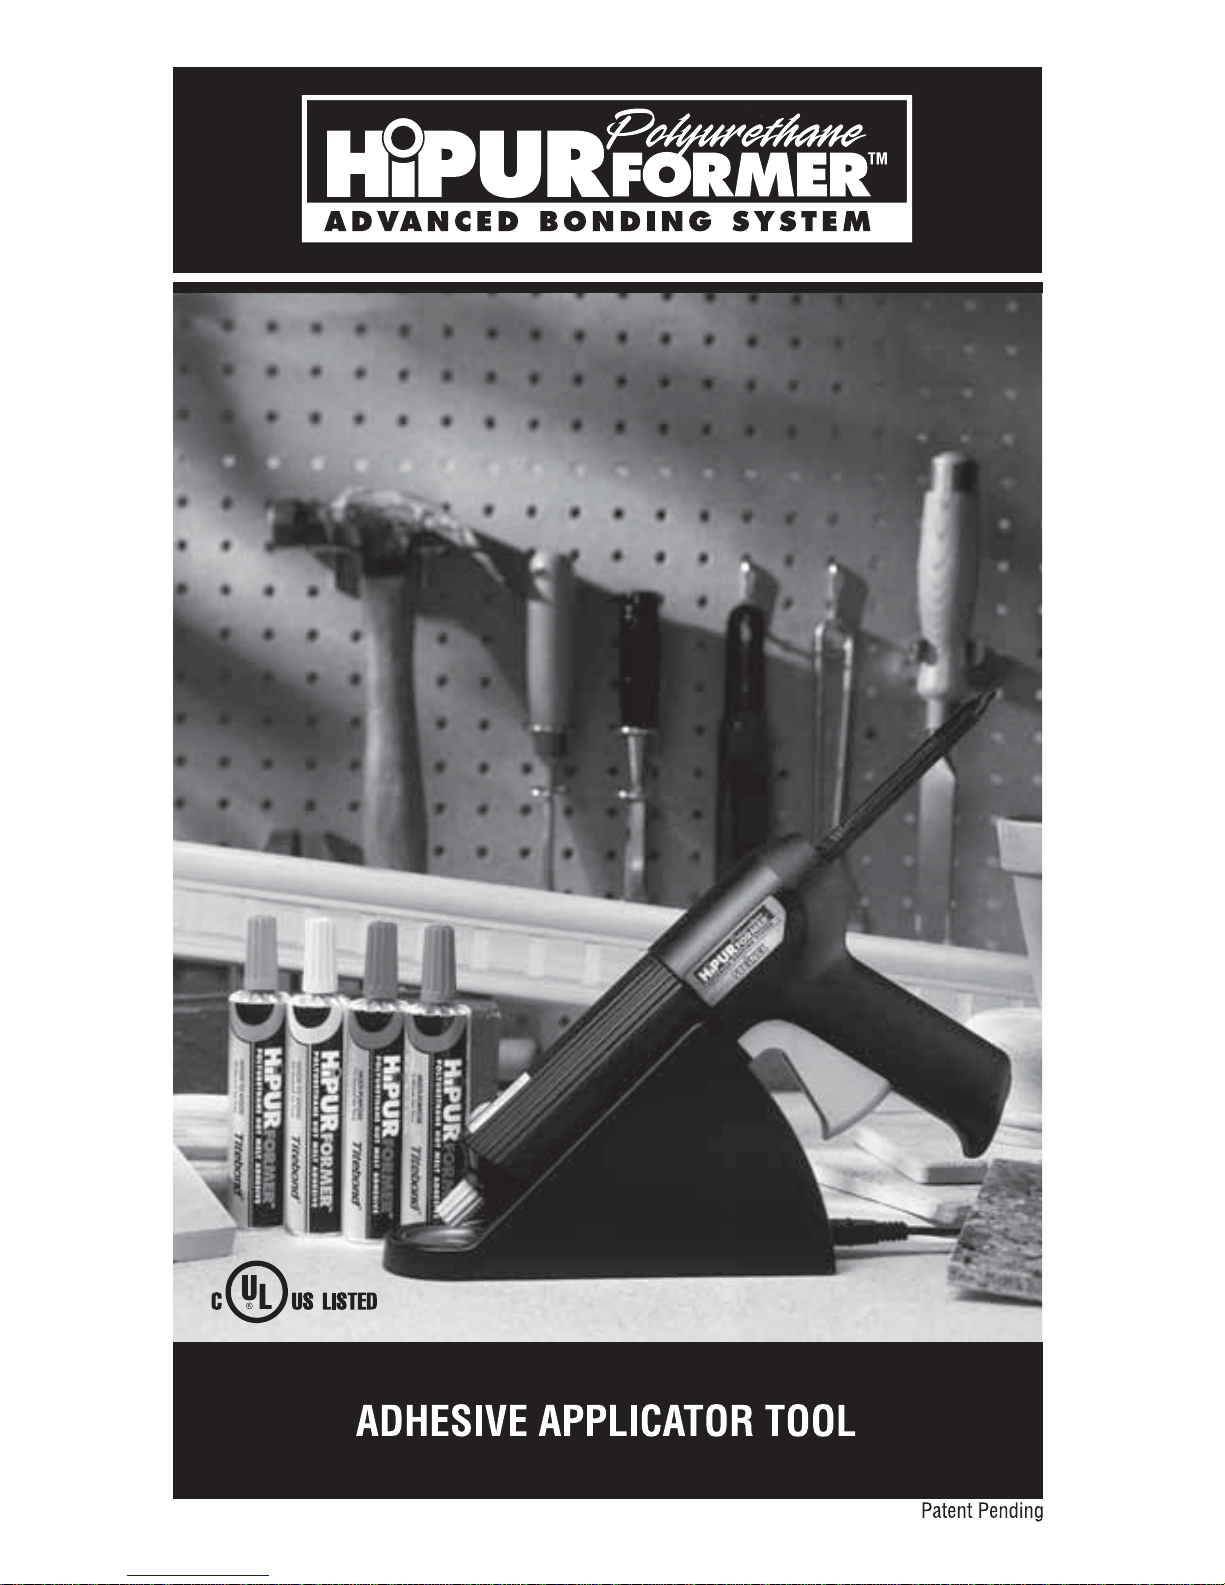
HiPURformer Adhesive Applicator Tool Instruction Manual

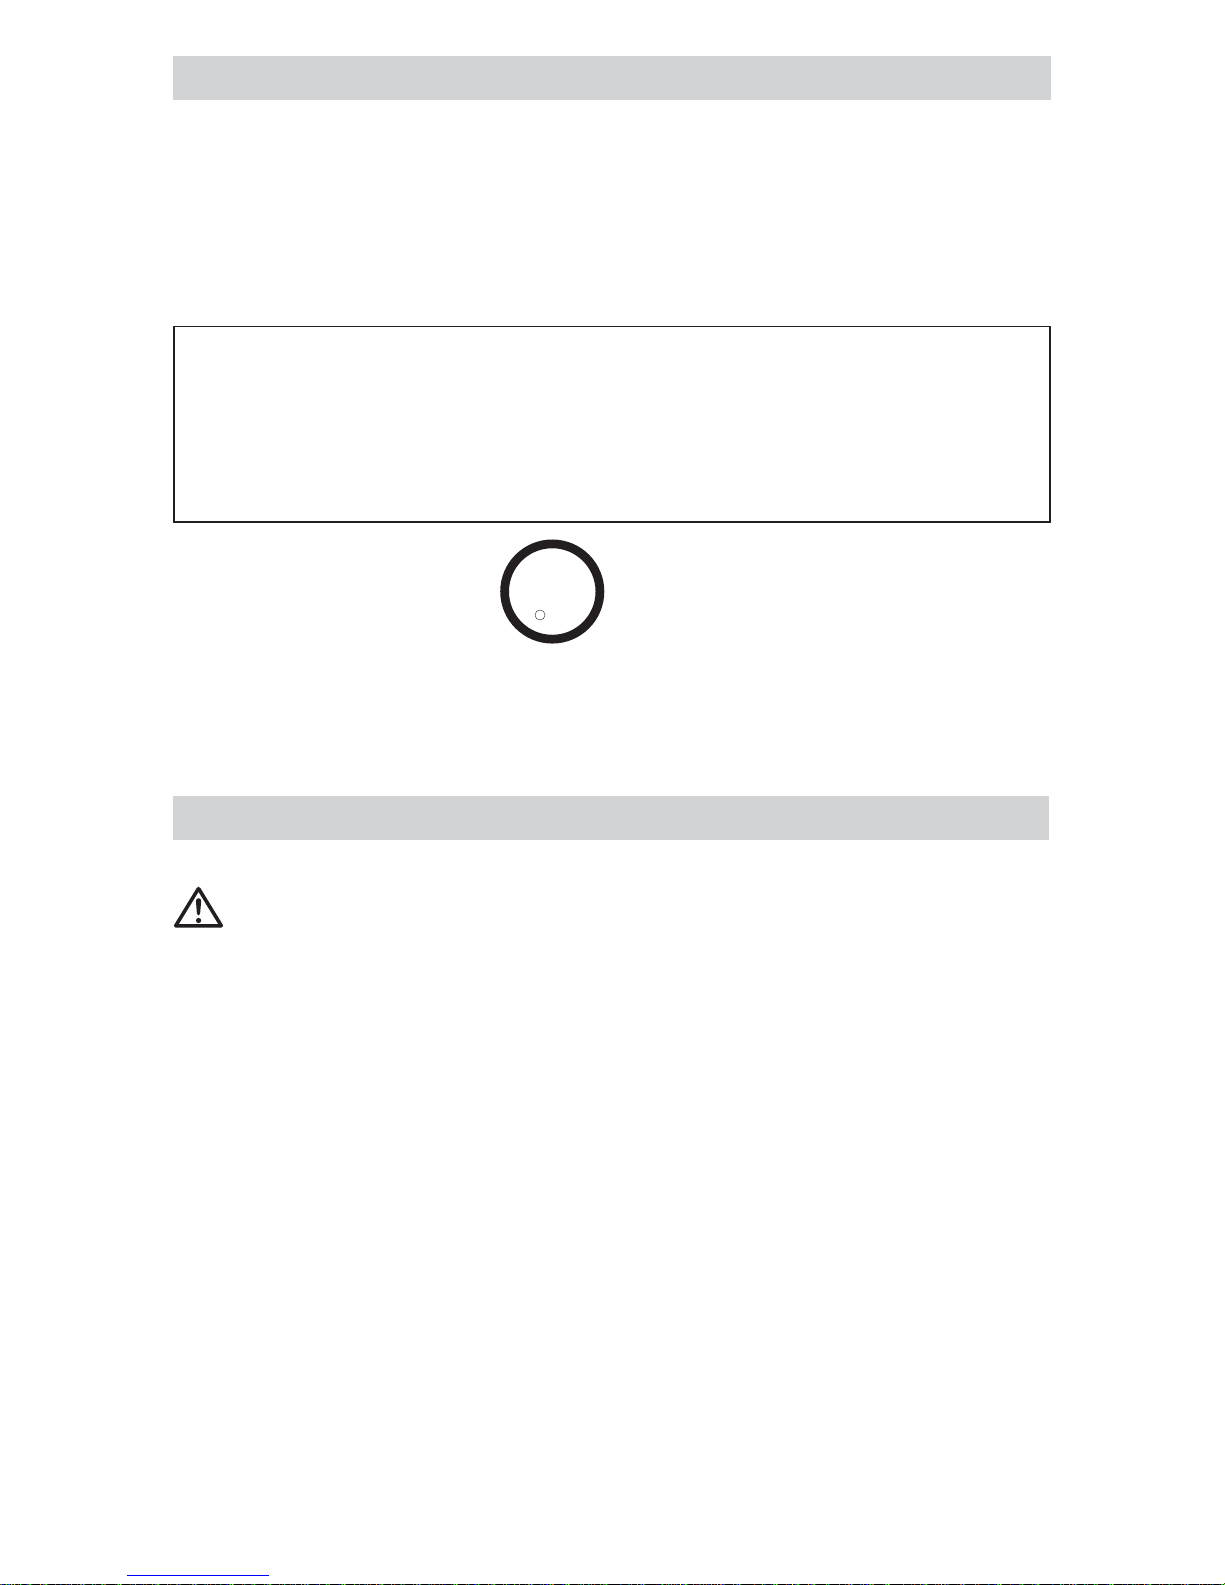
TECHNICAL SPECIFICATIONS
1 feed rod
2 cartridge cap holder
3 trigger
4 power cord
5 base station with status indicator
6 cartridge cap
7 heating cylinder
Voltage: 120v AC
Output: 12 watts in standby phase, 200 watts while heating
Heat-up Time: 10-13 minutes
Working Temperature: 212-284°F
Maximum Working Time: Approximately 20 minutes away from base unit
Cartridge: Works with all HiPURformer™ 50 gram cartridges
2
1
3
4
5
6
7
2
UL WARNING. Read this instruction booklet before using. To reduce risk of fire
or shock, do not expose to rain or moisture. Store indoors. When servicing, use
only identical replacement parts. When using electric tools, basic safety
precautions should always be followed to reduce the risk of fire, electric shock
and personal injury.
Congratulations on your purchase of a HiPURformer™ polyurethane reactive hot melt
adhesive applicator. You have chosen a high quality product that has been
manufactured, tested and packed with the greatest care.
Please read these operating instructions carefully before using your adhesive
applicator and retain them for future reference. With proper care and use, the
HiPURformer™ adhesive applicator will provide you with years of satisfaction.
DOUBLE INSULATED TOOLS, such as the HiPURformer™ adhesive applicator, are
equipped with a two-prong plug. These tools have a special insulation system that
complies with both UL and CSA requirements. They do not require grounding.
OPERATING INSTRUCTIONS
Read operating instructions thoroughly before using adhesive applicator.
WARNING: Eye and Skin Irritant. Potential Skin and Respiratory Sensitizer.
Caution: Contact with heated product may cause thermal burns. Always wear
gloves. Contains isocyanates. Avoid contact with skin and eyes. Avoid prolonged or
repeated contact with vapors. Do not swallow. May be harmful if swallowed. First Aid:
If swallowed, do not induce vomiting. Call physician immediately. If eye contact
occurs, flush eyes with water for 15 minutes and call physician. In case of skin
contact, wash skin with soap and water. Seek medical attention if sensitization or rash
occurs. If inhaled, move to fresh air and contact physician. For additional safety
information, refer to Material Safety Data Sheet or call 1-800-347-4583. KEEP OUT OF
THE REACH OF CHILDREN.
When using a hot air gun to remove adhesive, remain in a well-ventilated area. Do not
over-heat flammable materials or substrates susceptible to thermal damage.
The HiPURformer™ adhesive applicator is designed for use with HiPURformer™
polyurethane reactive hot melt adhesives only. Operation and performance are NOT
guaranteed with any other hot melt products.
IMPORTANT SAFETY INSTRUCTIONS
C US LISTED
U
L
R
3
The HiPURformer™ Adhesive Applicator has been specially designed for use with
HiPURformer™ polyurethane reactive hot melt adhesive cartridges. HiPURformer™
adhesives are extremely versatile and offer many advantages over traditional hot melts.
• High-strength, permanent bonds
• Fast set times: range from 30 seconds–5 minutes*
• Bonds a wide variety of materials: wood, ceramic, metal, leather, textiles, marble,
PVC, plastic and many other substrates
• Interior/Exterior use: resists temperatures from -20°F to +275°F
• Waterproof and weatherproof
• UV indicator for easy clean-up
• Solvent free and nonflammable
• Greatly reduces the need for mechanical fasteners
• Adhesive is removable by heating to 280°F. with a hot air gun. Bond will soften at
approximately 280°F., but adhesive will not flow or become liquid. DO NOT USE HEAT
GUNS WITH FLAMMABLE OBJECTS OR SUBSTRATES.
• Features and performance vary depending on the HiPURformer™ adhesive formula
selected. Please refer to the instructions accompanying the specific adhesive
cartridge purchased.
*Set times may vary with application temperature, ambient temperature, thermal
conductivity and temperature of the substrates.
LIMITATIONS:
• Not for continuous submersion or use below the waterline.
• Not for use on copper or metal alloys containing a high percentage of copper.
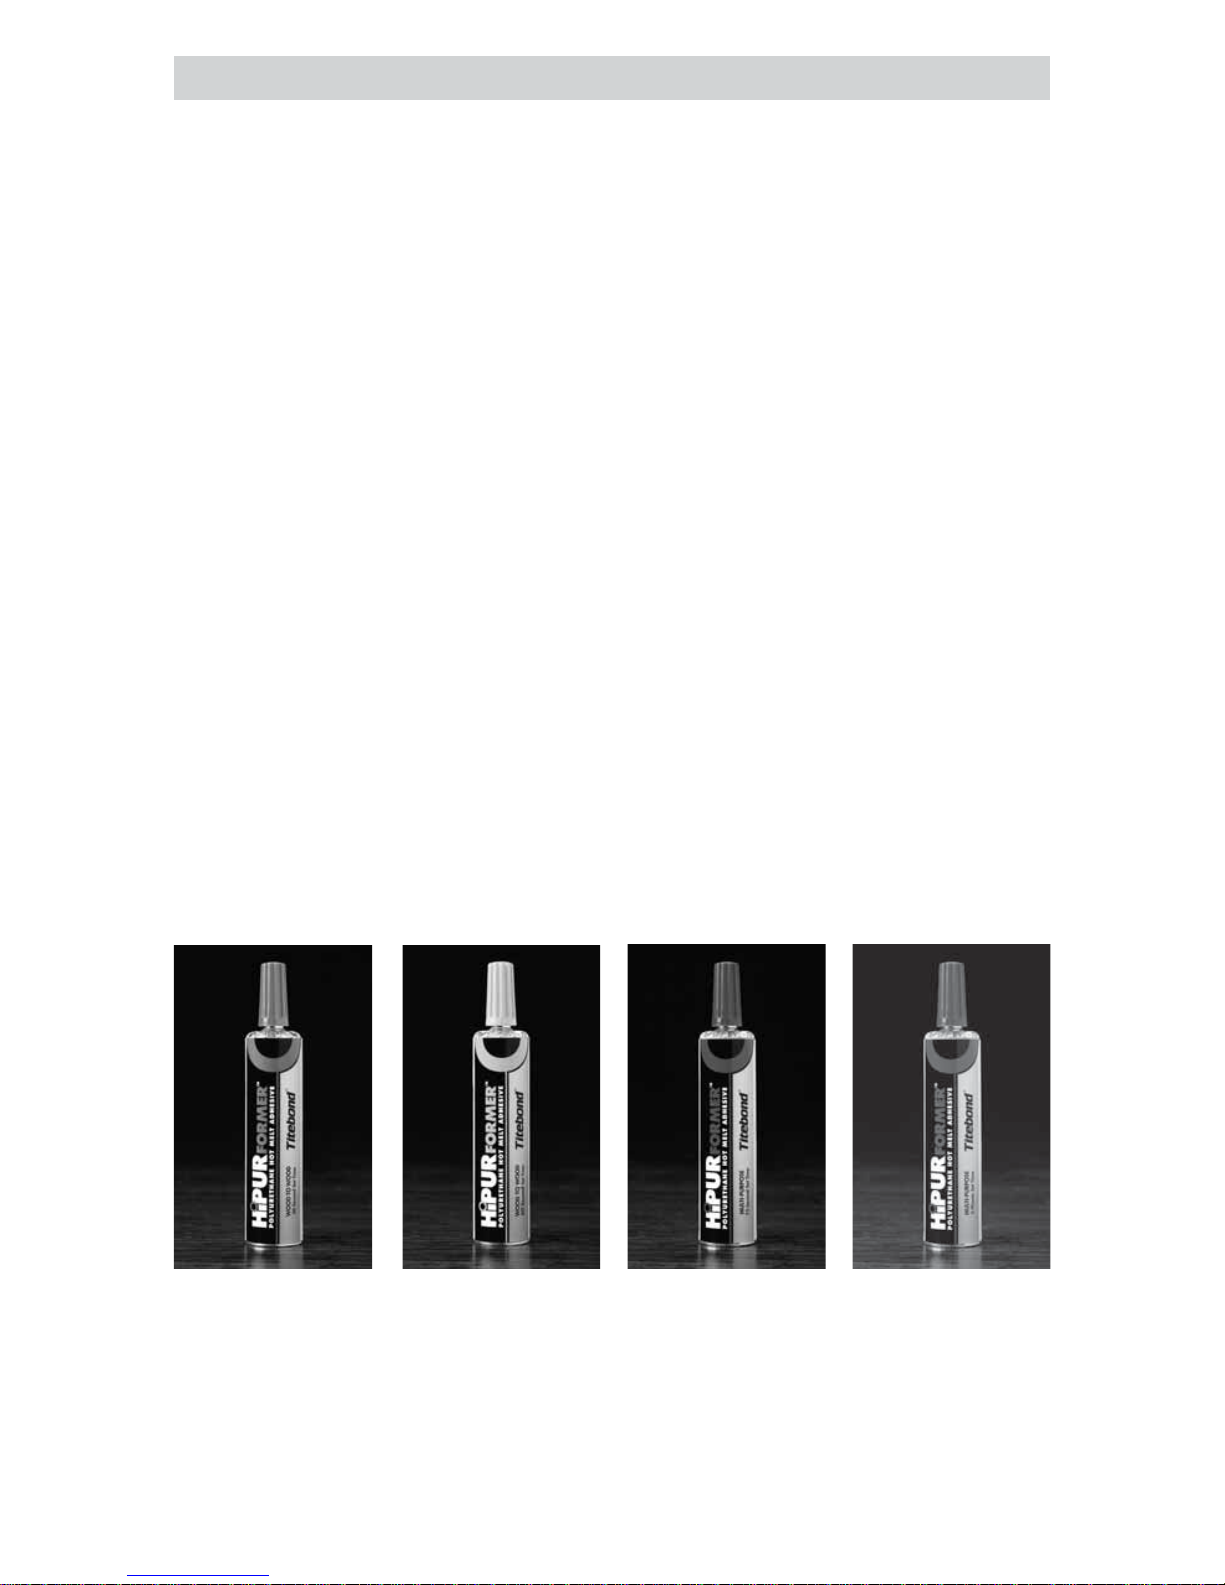
ABOUT HiPURformer™ POLYURETHANE REACTIVE HOT MELT ADHESIVES
Wood to Wood
30-Second Set Time
Multi-Purpose
75-Second Set Time
Multi-Purpose
5-Minute Set Time
Wood to Wood
60-Second Set Time
4
GETTING STARTED
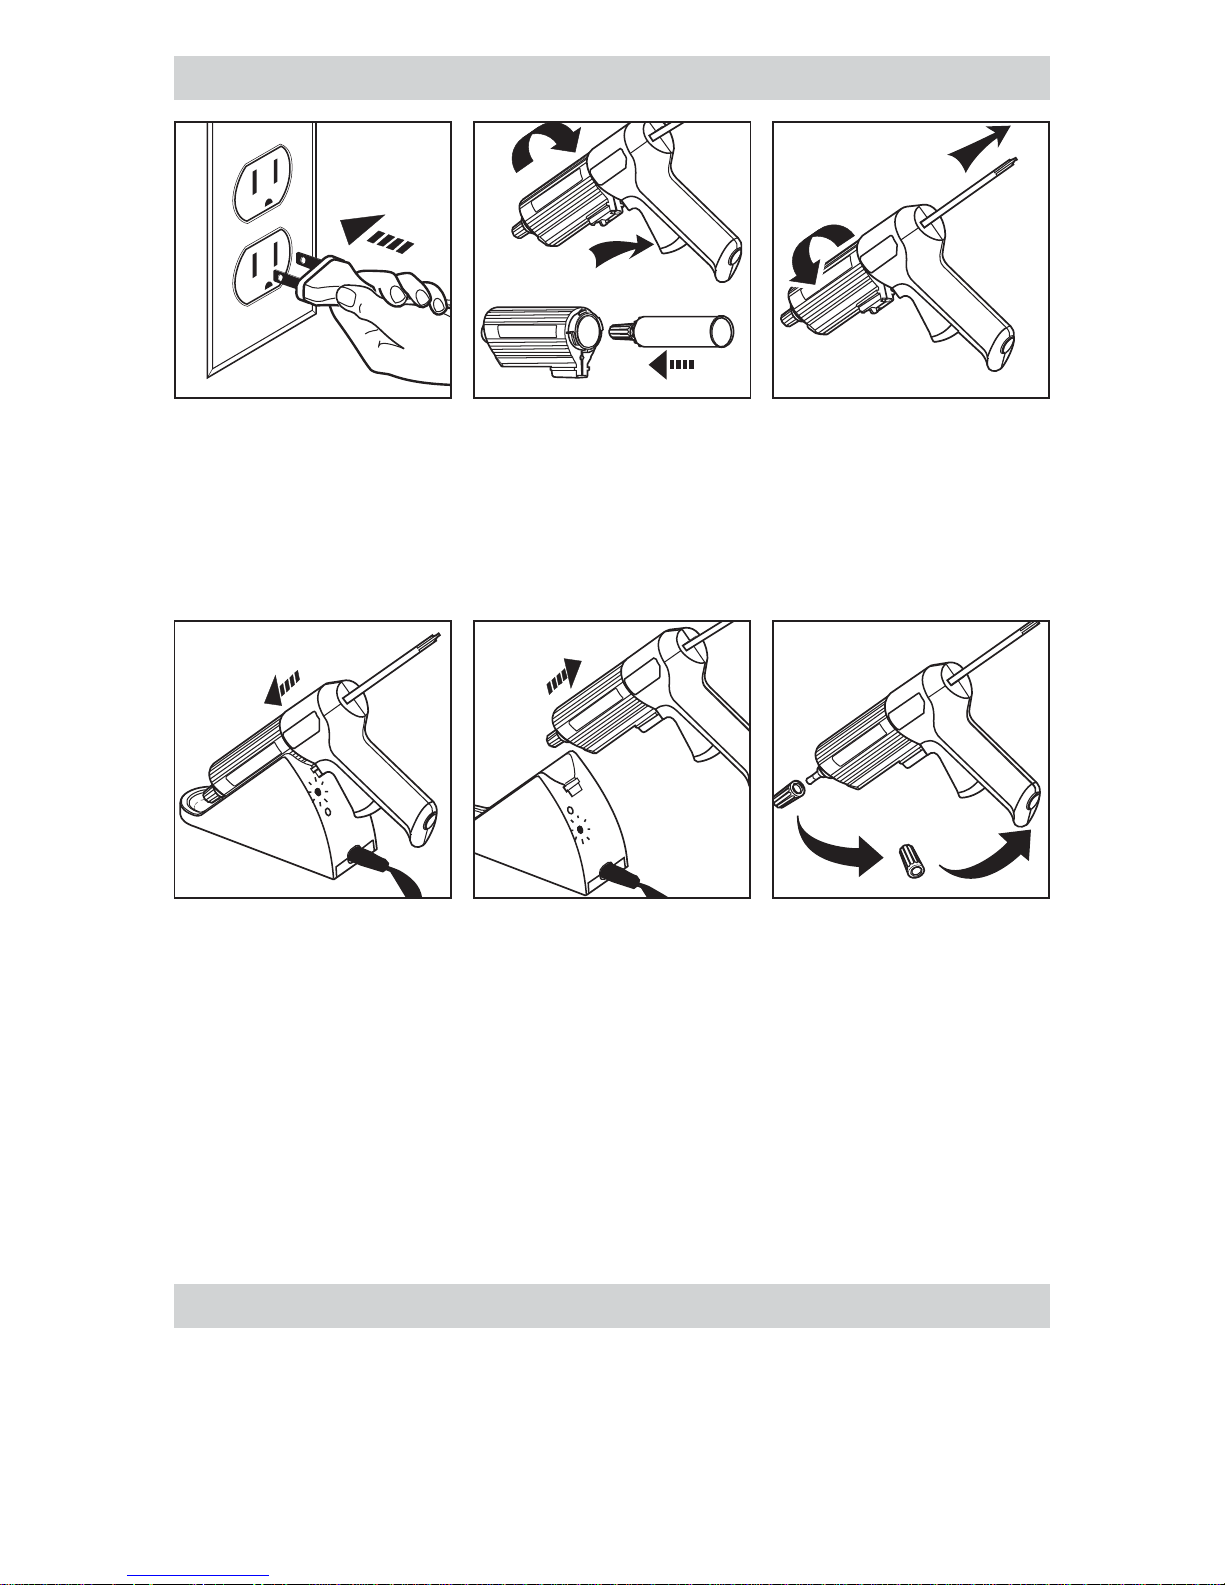
123
1. Plug base station into power source. Green diode will light up.
2. Depress trigger and turn heating cylinder counterclockwise to separate the two
applicator components. Remove adhesive cartridge from foil pouch and insert into
heating cylinder.
3. Reassemble the applicator by retracting the feed rod and twisting the cylinder until it
locks into place.
4. Insert tool into contact slots on base station to heat adhesive. Status indicator remains
RED during heat-up (approx. 10-13 minutes). When the status indicator turns GREEN,
the adhesive has reached bonding temperature and is ready to use.
5. Always wear gloves. Remove tool from base station.
6. Unscrew cap (store in handle). Depress trigger to extrude adhesive. Feed rod will
advance and press against cartridge plunger.
7. Apply the adhesive sparingly in either a spot or continuous bead. Do not spread.
8. Join the surfaces to be bonded together, ensure proper alignment of pieces and hold
firmly in place until the adhesive sets (working times vary).
9. Substrates may be machined or planed after 1 hour, however, do not subject the
bond to stress for 24-48 hours.
456
If desired, the base station may be mounted on a firm surface. Use 2.9mm (1/9")
diameter screws to secure, using the holes provided on the bottom of the unit.
MOUNTING BASE STATION
5

IMPORTANT INFORMATION ABOUT ADHESIVE CARTRIDGES
FOR BEST RESULTS
• Always seal cartridge tightly during heating and after use.
• Removing Cartridge Cap: Always wear gloves. Make
sure the cartridge is hot before attempting to remove
the cap. If the cap becomes stuck, it may be loosened
by using the similarly shaped receptacle in the base
station (see diagram).
• Allow heating cylinder to cool for approximately five
minutes down before inserting a new cartridge.
• Use only HiPURformer™ polyurethane reactive hot melt adhesives and Steinel
replacement parts.
• Make sure the surfaces to be bonded are perfectly clean. Prefinished surfaces should
be sanded or "roughed up" before applying adhesive.
• Make sure the adhesive is fresh. Shelf life is one year from the date of manufacture.
• The objects to be adhered should be at room temperature. If necessary, warm them
(with a hot air gun, for instance). Cold surfaces will cause the adhesive to set more
quickly and will shorten the working time.
• Heavy objects should be fixed in position (using tape, a vise etc.) until fully cured.
• Optimum bond strength is achieved by joining the two contact surfaces immediately
after applying adhesive.
• Hardened, excess adhesive can easily be removed with a scraper or putty knife soon
after it sets (the adhesive will change from clear to opaque).
• The adhesive bond may be softened and the glued surfaces separated by heating them
to 280°F with a hot air gun. DO NOT USE HEAT GUNS WITH FLAMMABLE OBJECTS
OR SUBSTRATES.
• During prolonged work breaks (over 60 minutes), replace the cartridge cap securely
while the adhesive is hot and unplug the unit.
• When finished using the HiPURformer™ Advanced Bonding System, extrude about one
inch of adhesive from the cartridge nozzle, then immediately replace the cartridge cap
tightly while the adhesive is hot.
• Tightly sealing the cartridge after use will prolong the life of the adhesive. For best
results, use product within four weeks after opening.
• The load-bearing capacity of the bond depends largely on the strength of the substrate
(e.g. do not glue heavy objects onto weak materials such as paint, wallpaper or drywall).
• If cartridge and heating cylinder accidentally become stuck together, simply heat-up
unit to release. Once separated, wipe adhesive residue off unit to prevent future problems.
6
This quality STEINEL product has been manufactured, tested and packed with the greatest
care. It complies with all applicable North American safety standards and regulations.
STEINEL warrants this product against defects in material and workmanship as follows:
• Normal household environment – 36 months from date of original purchase.
• Commercial or industrial use – 12 months from date of original purchase.
During this warranty period, STEINEL agrees to repair or replace, at STEINEL’s
discretion, any defective product without charge.
This warranty does not cover parts subject to wear or damage caused by accident,
misuse, abuse, alteration or lack of reasonable care. Consequential damage to external
items is also excluded from this warranty.
Use only HiPURformer™ polyurethane reactive hot melt adhesives and STEINEL
replacement parts. Use of other adhesives or parts will unconditionally and
permanently void this warranty.
To obtain warranty service, call STEINEL’s Customer Service Department in the USA at
1-800-852-4343 or in Canada at 1-604-299-3506. A Customer Service Representative
will attempt to diagnose the problem and correct it over the telephone. If the problem
cannot be solved over the telephone, you will be given a Returned Goods
Authorization Number and will be instructed to return the defective product to the
appropriate service center, freight prepaid. All returned products must be fully
assembled, well packed, and accompanied by the original invoice showing date of
purchase.
Repair Service: Units returned for repair outside the terms of the Limited Warranty
Statement are subject to standard repair charges.
LIMITED WARRANTY
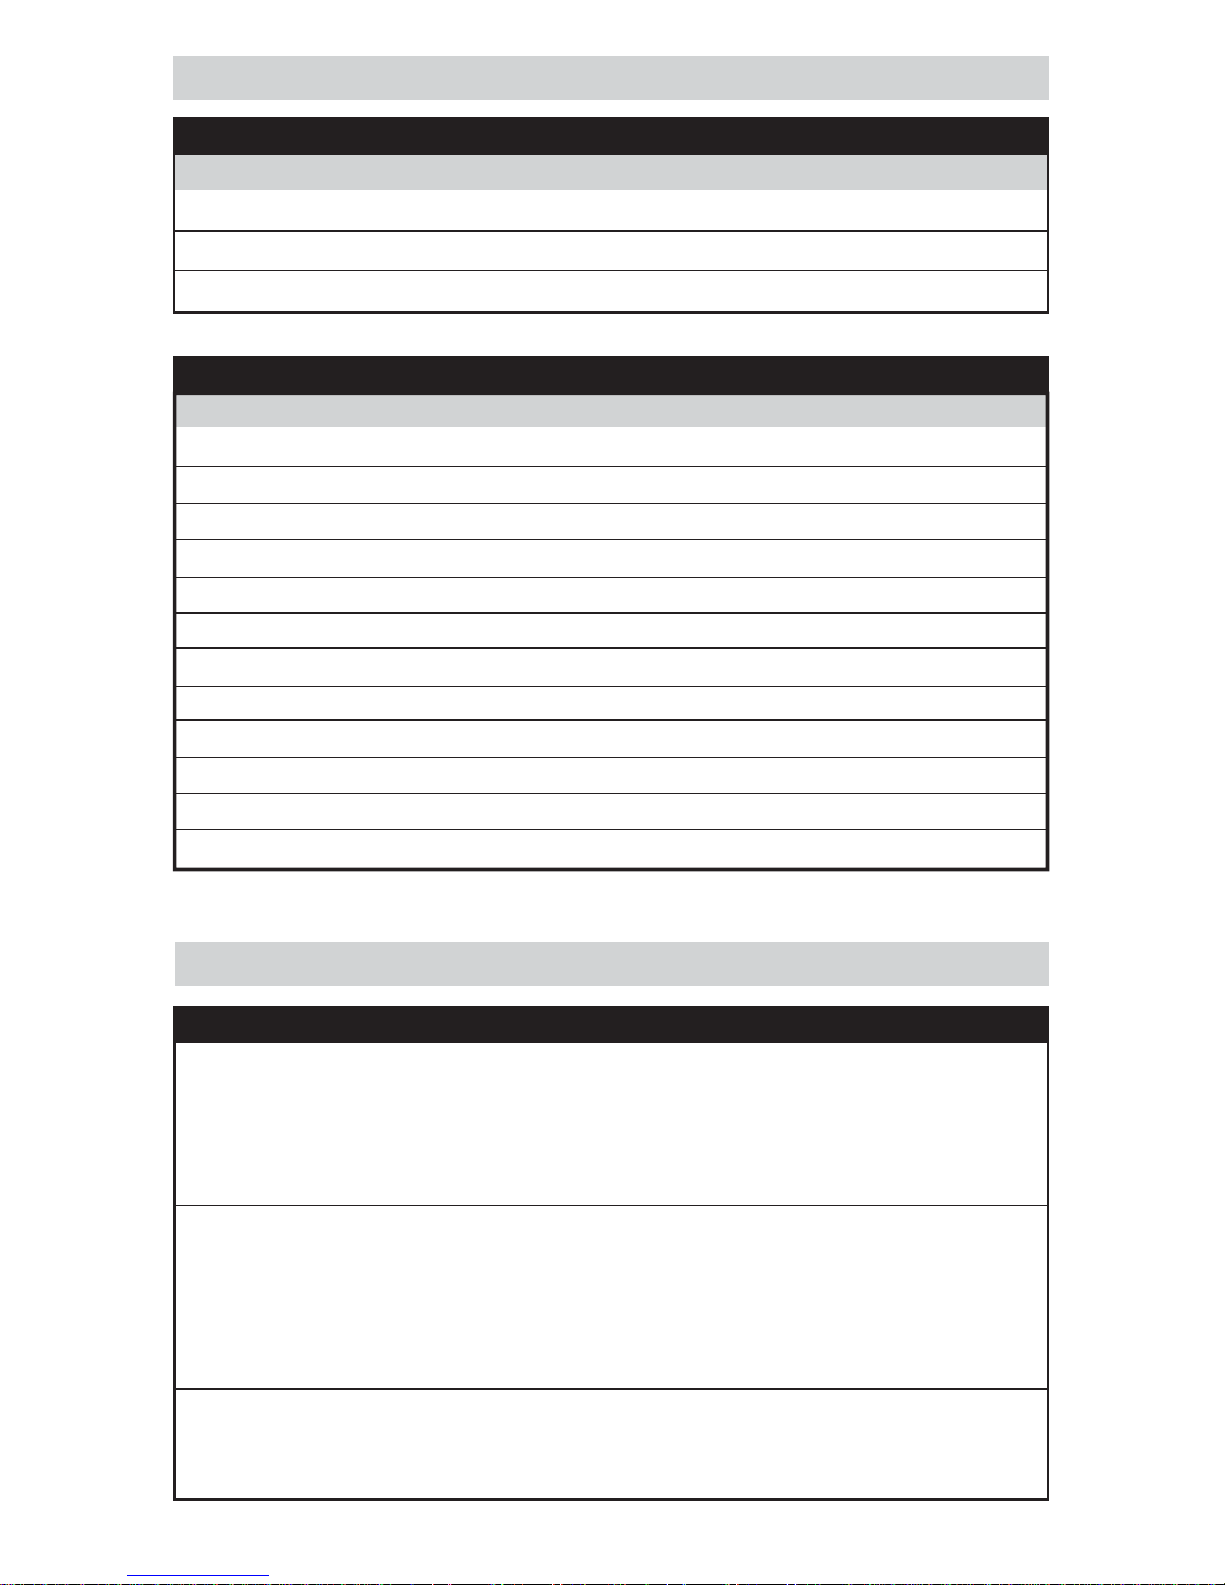
SPARE PARTS (refer to diagram on page 2)
Spare parts may be ordered by calling STEINEL at 1-800-852-4343 or visit our website at
www.steinel.net. Please have your Visa or Mastercard ready.
05011
05012
05013
05014
05015
Part #
Description
Feed Rod
Trigger Handle
Heating Cylinder
Base Station (does not include cord)
Power Cord
7
TROUBLESHOOTING
Unit not warming up • Not plugged in
• No electrical contact between
heating cylinder and base station
• Electrical contacts on heating
cylinder dirty or soiled with adhesive
• Check power cord
• Insert heating cylinder into
contact slot on base
• Clean electrical contacts on
heating cylinder
Problem
Cause Solution
Adhesive has stopped
extruding
• Adhesive temperature too low
• Adhesive past shelf life
• Cured adhesive in cartridge tip
• Tightly seal cartridge and
re-heat in base unit
• Allow gun to cool, then install
a new cartridge
• Attempt to clear cartridge tip
Green indicator light
appears immediately after
changing cartridge
• Heating cylinder still hot from
previous use
• Ensure that “cold” cartridge is
heated for at least 12 minutes
BOND STRENGTH OF HiPURformer™ ADHESIVES
Strength Development
10 minutes
1 hour
24 hours
650 psi
1090 psi
1360 psi
600 psi
1130 psi
1480 psi
270 psi
600 psi
900 psi
Maple to Maple
WW30 WW60 MP75
Recommended Applications
E = Excellent adhesion G = Good adhesion NR = Not recommended
E
NR
NR
NR
NR
NR
NR
NR
NR
NR
NR
NR
E
NR
NR
NR
NR
NR
NR
NR
NR
NR
NR
NR
G
E
E
E
E
E
E
E
E
E
E
E
SUBSTRATE
WW30 WW60 MP75
118 psi
478 psi
1016 psi
MP300
G
E
E
E
E
E
E
E
E
E
E
E
MP300
Wood
Steel
Ceramics
Aluminum
ABS
Concrete/Brick
Vinyl
Glass/Marble
Melamine
PVC
Lexan
FRP
8

NOTES
9
 Loading...