

Hip Shing Electronics WDFB16SOLO User Manual
Your Guide to Solo
Note: References to DAB/DAB+ apply only to models outside North America.
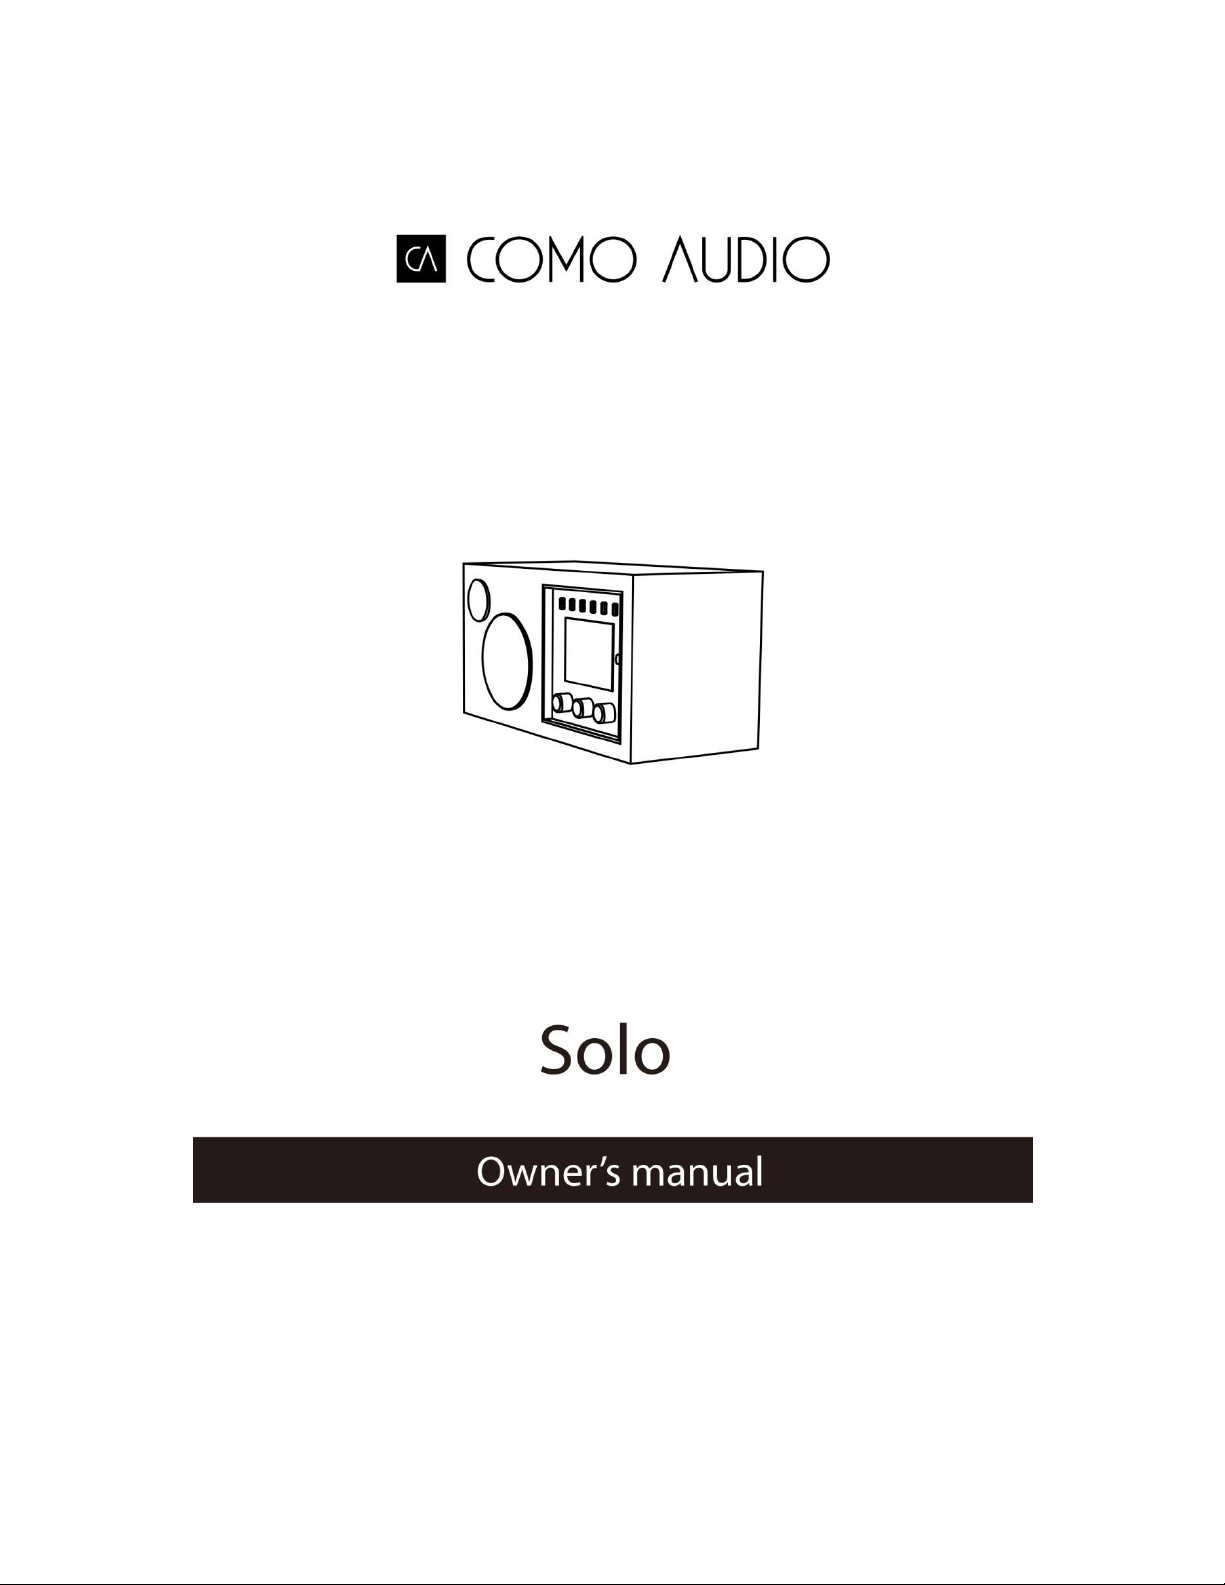
Front
1. Power/Volume: Push in briefly to turn Solo on or off. Rotate to adjust the volume.
2. Menu: Press and hold to call up the main Menu. Rotate to navigate the Menu and push in briefly to select.
In DAB mode, rotate to call up the DAB station list and push in briefly to select a station.
In FM mode, rotate to manually tune stations or push in briefly to auto seek to the next strongest FM station.
When artwork is displayed, such as an album cover or station logo, push in briefly to expand the image to fill
the display. Push in briefly again to return to the standard display.
When the alarm activates, push in briefly to snooze. Push in briefly again during snooze to reset the snooze
timer.
3. Source: Rotate to call up and navigate the source menu. Push in briefly to select the source. When in the
Menu, push in briefly to go back one page with each push.
4. Presets: Press and hold to save a tuned station or a source. Push in briefly to recall the saved station or
source. The presets are independent and are not restricted to whichever source is playing. The presets will
also turn Solo on from standby if a station or source has been saved to that preset.
5. NFC (Top of cabinet):
If your Android smartphone has NFC, make sure it is switched on in your device and be sure the display on
your device is unlocked. Change Solo’s source to Bluetooth. Touch the NFC area of your smartphone to the
NFC logo on the top of Solo’s cabinet. You may need to adjust your smartphone’s position around the
cabinet’s NFC logo until it locates the signal. If your smartphone is in a case, the case might reduce the NFC
signal. Once NFC is established, follow the instructions displayed on your smartphone to establish the
Bluetooth connection. Touch your smartphone to the cabinet’s NFC logo again to disconnect from Bluetooth.
If your device does not support NFC, see the section marked “Bluetooth”.
2
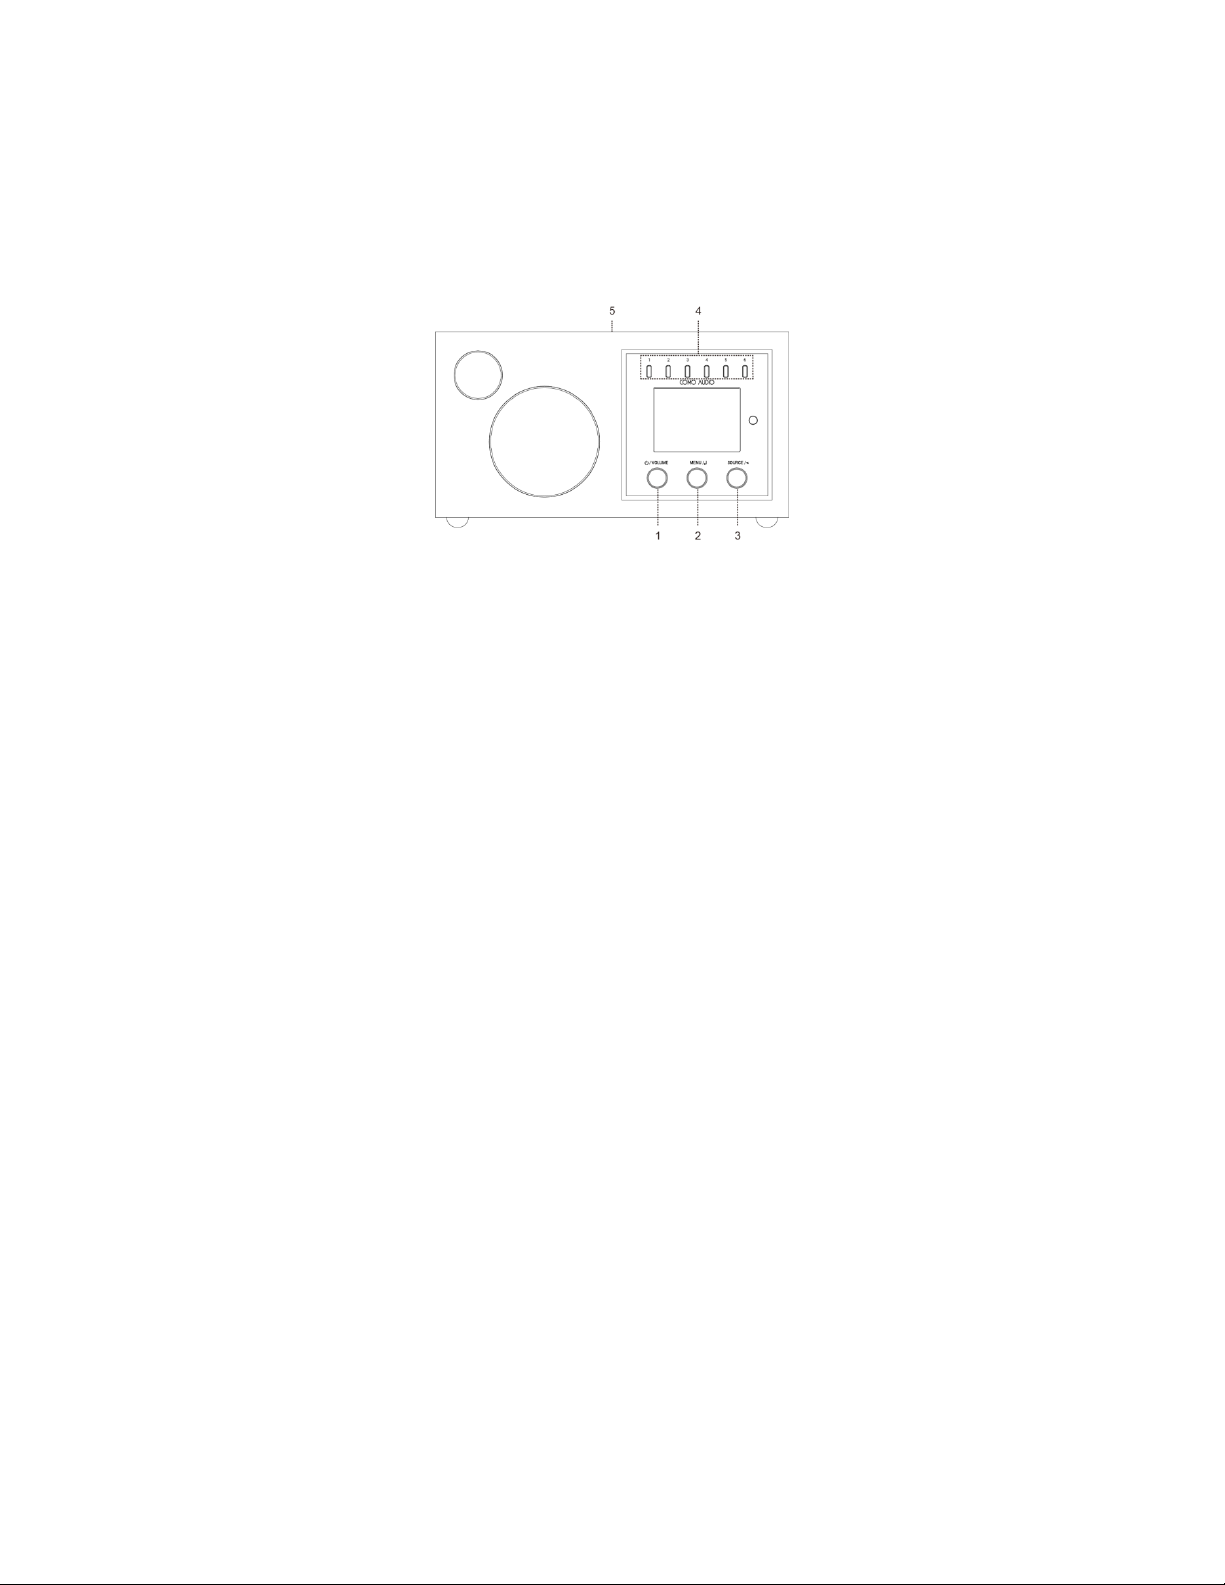
Back
1. Power inlet: Insert the included power cord. The internal switching power supply will automatically detect
the correct voltage.
2. DC: For use with an external 20VDC/3A adapter (not included). Never use an adapter and the power cord
simultaneously.
3. Headphones: Connect a set of stereo headphones.
4. Line out: Fixed level output to connect Solo’s audio to a home receiver or other device with an analog audio
input.
5. Auxiliary 1 (Hi-Res): Connect the analog audio out from another device.
6. Auxiliary 2 (Hi-Res): Connect the analog audio out from another device.
7. Optical in (Hi-Res): Connect the audio from your television’s optical output using a Toslink cable (not included)
to hear TV sound. You must access your television’s on-screen settings menu and turn ON the PCM output
and turn your TV speakers Off. Your TV may require several audio settings to be adjusted. When listening to
audio from your TV, you may prefer to change Solo’s EQ from “Flat” to “TV Sound”.
8. USB (Hi-Res): Insert a USB flash drive to playback music files, then rotate the source knob and push in briefly
to select ‘My Music’. This jack will also power Google’s Cast for Audio and Amazon’s Dot (a short USB cable is
included). This jack can also trickle charge many smartphones. Do not exceed the jack’s 5V/1A capacity.
9. Service: For use by authorized service representatives only. Do not connect anything into this input.
10. Speaker: For use only with Como Audio’s Ambiente Companion Speaker (included with the Ambiente set) for
stereo sound.
11. Audio switch: When using Solo independently, set to Mono. When the Ambiente Companion Speaker is
connected, set to ST (Stereo). When using two Solos together as a wireless stereo dedicated left and right pair,
set one Solo to L (Left) and the other to R (Right) when using the Como Connect app.
12. Antenna: Expand and adjust for best FM or DAB reception. This antenna has no effect on WiFi reception.
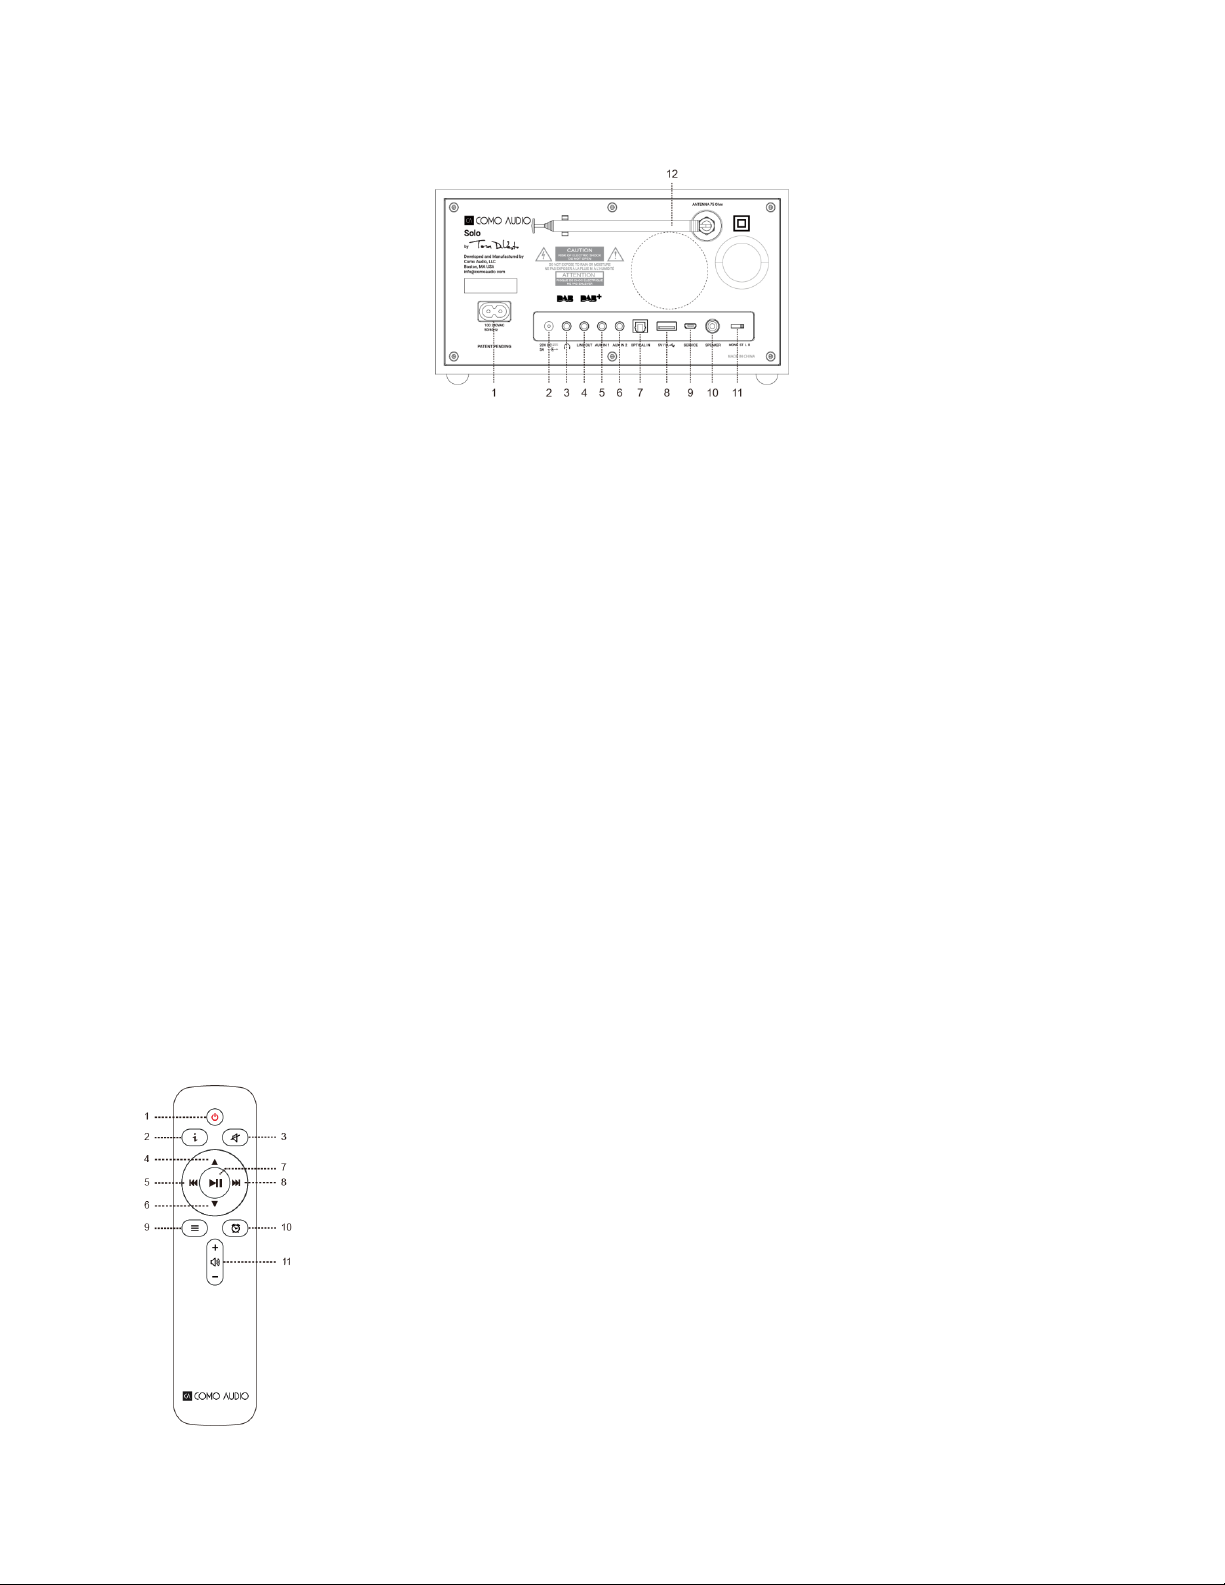
Remote Control (install the included AAA batteries):
1. Power = Power
2. “I” = Info
3. Speaker X = Mute and Snooze when alarm sounds.
4. Up = Navigate up when in menu. Also acts as seek up when in FM mode. Also
shows station list in DAB mode (use up/down/enter to navigate and select).
5. Left arrow = Track back.
6. Down = Navigate down when in menu. Also acts as seek down when in FM mode.
Also shows station list in DAB mode (use up/down/enter to navigate and select).
7. Play/Pause= Play/Pause. Long press brings up menu; brief press within menu acts
as Select; brief press in Internet radio mode saves tuned station to Favorites.
8. Right arrow = Track forward.
9. 3 Lines = Source icon menu (use up/down/enter to navigate/select source).
10. Clock = Alarm menu (use up/down/enter to navigate and select); Toggle alarms 1 &
2 on and off in standby.
11. Vol +/Vol- = Volume up/down
3
 Loading...