


PRESETS
SuperSignal
Owner’s Guide
v1.1
English
Français
Deutsch
Italiano
TECHNICAL SUPPORT
COPYRIGHTS AND
Should you encounter problems using this product, please refer to the
troubleshooting section on page 21 of this owner’s guide.
Alternatively, call Revo technical support on :
UK 01555 666161
From outside the UK + 44 1555 666161
Alternatively, e-mail support@revo.co.uk or visit the troubleshooting
section of our website at: www.revo.co.uk/support
ENVIRONMENTAL INFO
PRODUCT DISPOSAL INSTRUCTIONS (WEEE DIRECTIVE)
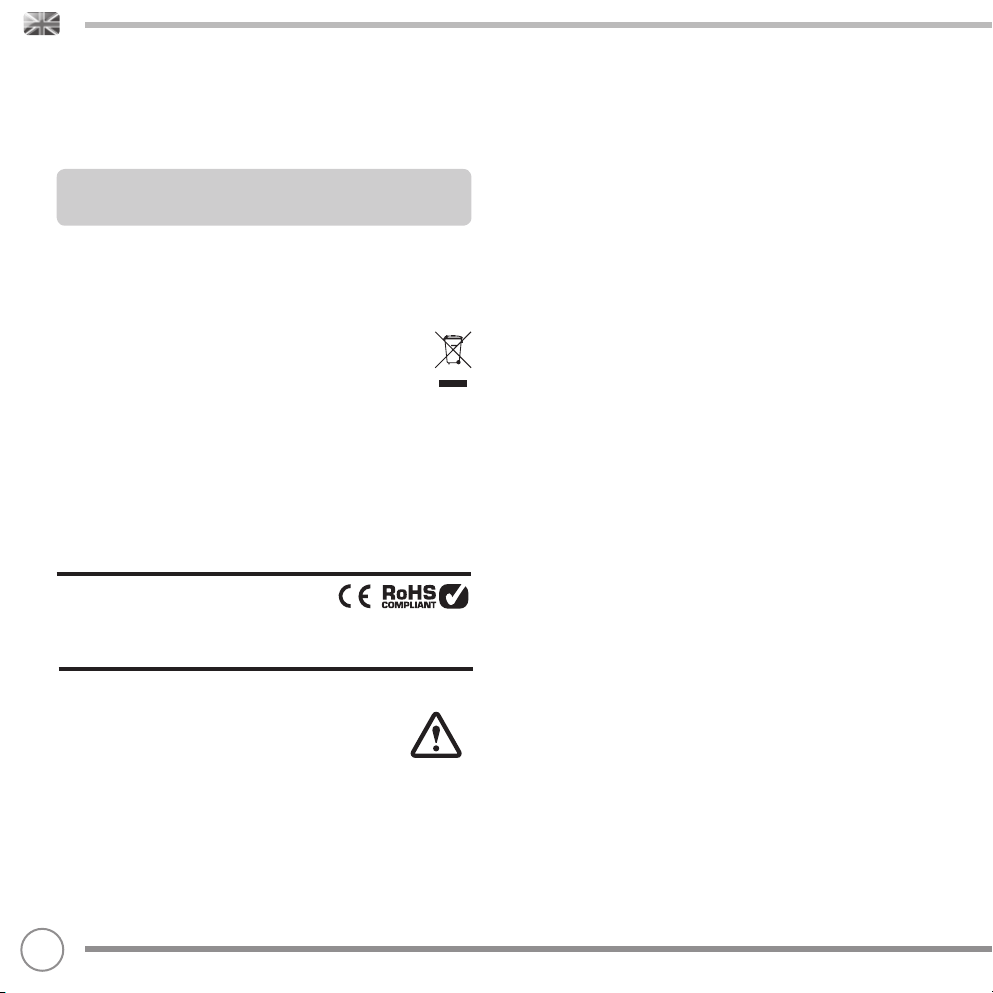
The symbol shown here and on the product means that it is classed as Electrical or
Electronic Equipment and should not be disposed with other household or
commercial waste at the end of its working life.
The Waste of Electrical and Electronic Equipment (WEEE) Directive (2002/96/EC) has
been put in place to recycle products using best available recovery and recycling
techniques to minimise the impact on the environment, treat any hazardous
substances and avoid the increasing landfi ll.
For more information please contact your local authority or the retailer where the
product was purchased.
RoHS COMPLIANT & CE MARK
This product has been designed to comply with international
directives on the Restriction of Hazardous Substances (RoHS) and has been designed
and type-tested to comply with EU requirements and carries a CE mark.
SAFETY WARNINGS
• Do not operate this radio near water
• Do not remove screws or casing parts
• Use only the power supply unit supplied
• Avoid small objects and liquids from entering the product
WARRANTY
Revo Technologies Ltd warrants to the end user that this product will be free from
defects in materials and workmanship in the course of normal use for a period of one
year from the date of purchase. This guarantee covers breakdowns due to
manufacturing faults and does not apply in cases such as accidental damage,
general wear and tear, user negligence, modifi cation or repair not authorised by
Revo Technologies Ltd. To register your purchase please visit www.revo.co.uk/register
ACKNOWLEDGEMENTS
Copyright 2015 Revo Technologies Ltd. All rights reserved.
No part of this publication may be copied, distributed, transmitted or transcribed
without the permission of Revo Technologies Limited.
REVO and SUPERSIGNAL and are trademarks or registered
trademarks of Revo Technologies Ltd.
The Bluetooth® word mark and logos are registered trademarks owned by Bluetooth
SIG, Inc. and any use of such marks is under license. aptX® is a trademark of CSR plc.
Revo Technologies Ltd, The Inox Building, Caldwellside, Lanark, Scotland, United
Kingdom, ML11 7SR
Tel: +44 (0) 1555 66 61 61 Email: enquiries@revo.co.uk
The Spotify software is subject to third party licenses found here: www.spotify.com/
connect/third-party-licenses
DISCLAIMER
Revo Technologies Limited makes no representation or warranties with respect to
the content of this publication, and specifi cally disclaims any implied warranties
of merchantability or fi tness for any particular purpose. Further, Revo Technologies
Limited reserves the right to make changes to this publication from time to time,
without notifi cation to any person or organisation.
Federal Communication Commission (FCC) Interference Statement
FCC Part 15: This equipment has been tested and found to comply with the limits
for a Class B digital device, pursuant to Part 15 of the FCC Rules. These limits are
designed to provide reasonable protection against harmful interference in a
residential installation. This equipment generates, uses and can radiate radio fre-
quency energy and, if not installed and used in accordance with the instructions,
may cause harmful interference to radio communications. However, there is no
guarantee that interference will not occur in a particular installation. If this equip-
ment does cause harmful interference to radio or television reception, which can
be determined by turning the equipment off and on, the user is encouraged to try
to correct the interference by one or more of the following measures:
· Reor
ient or relocate the receiving antenna.
· Increase the separation between the equipment and receiver.
· Connect the equipment into an outlet on a circuit different from that to which the
receiver is connected.
· Consult the dealer or an experienced radio/TV technician for help.
Caution: Any changes or modifi cations not expressly approved by the party
responsible for compliance could void the user’s authority to operate the equipment
Warning statement regarding §15.19 has to be as follow:
This device complies with part 15 of the FCC Rules. Operation is subject to the
following two conditions: (1) This device may not cause harmful interference, and
(2) this device must accept any interference received, including interference
that may cause undesired operation.
.
02
CONTENTS
02 Technical Support
02 Environmental Info
02 Warranty
02 Copyrights and Acknowledgements
02 Disclaimer
03 Welcome / Unpacking
04 Anatomy
05 Remote Control
06 Power Supply
06 Set-Up
07 Control
08 - 09 DAB Radio Mode
10 - 11 DAB Mode Menu Options
12 - 13 FM Radio Mode / AUX IN Mode
14 - 15 Bluetooth Mode
16 - 17 Alarm Clock
18 - 20 System Settings
21 Troubleshooting
WELCOME
Thank you for purchasing our SUPERSIGNAL radio.
SUPERSIGNAL is an expression of our design and engineering
philosophy, and the result of the experience gained through 10 years
of award-winning product design and development. Functionalism
meets craft and technology, a next-generation audio device that will
provide you with many years of enjoyment and reliable service.
This guide has been designed to quickly get you up-and-running
with your radio, offer guidance on the more complex features of
this product and provide information on safety, warranty details and
troubleshooting.
UNPACKING YOUR RADIO
The SUPERSIGNAL box should include the following items:
• SUPERSIGNAL radio
• Remote control
• Power supply with multi-country adaptors
• Screen cleaning cloth
• Warranty card
• Owner’s guide
Should any item be missing or damaged, please contact your point
of purchase or call Revo directly on +44 (0) 1555 66 61 61
NOTE: All packaging should be retained for possible future use, it is
the safest way to transport your radio should it be necessary.
03
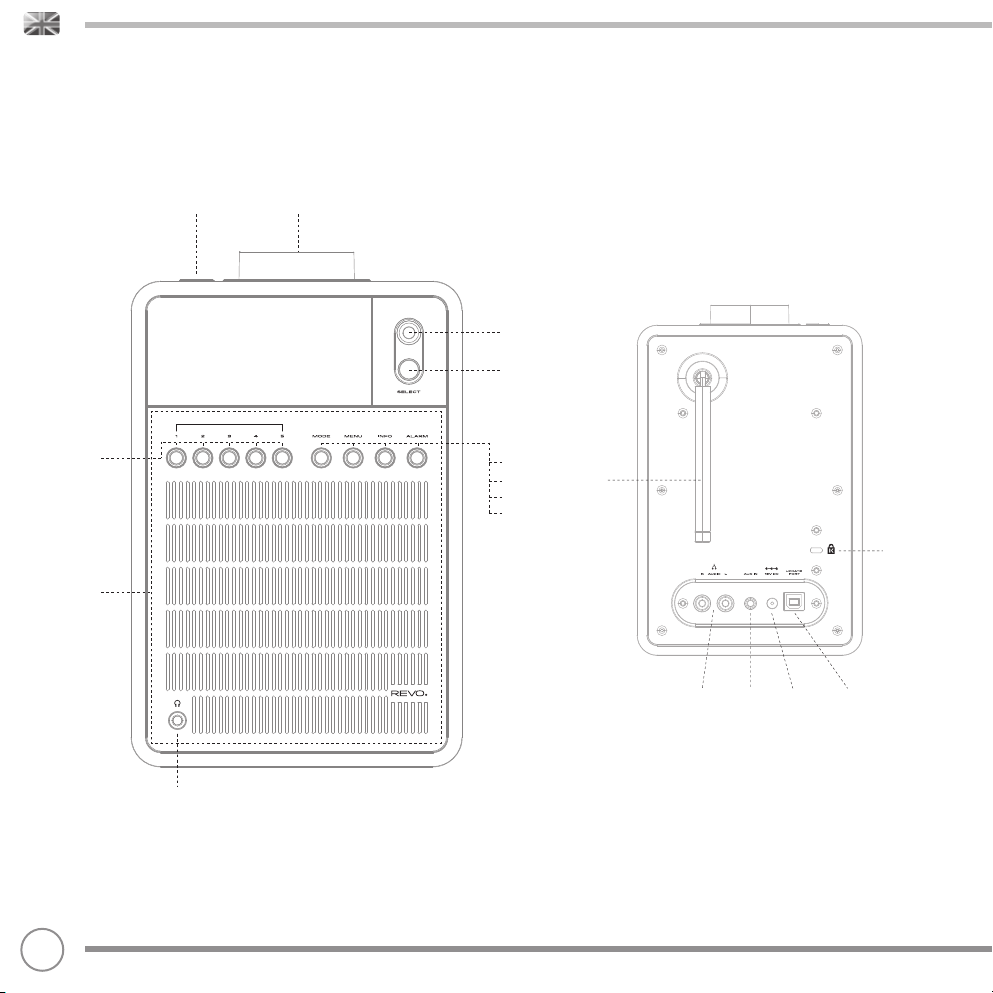
ANATOMY OF SUPERSIGNAL
Station Presets 1 - 5
Touch-Snooze Area
Power/Standby
PRESETS
Volume Dial
Super Signal
Joystick Controller
Select Button
Mode
Telescopic
Menu
Info
Alarm
Antenna
Stereo RCA Connectors Aux-In DC Power Socket Update Port
(For software updates by Revo only
during after sales service. Should you
have a software problem, please
contact your point of purchasing or
call Revo directly)
Kensington Lock Slot
(for security purpose to
prevent the product by
taking away in the shop
04
3.5mm Headphone Connector

REMOTE CONTROL
01 - Mode
02 - Skip Back (Fast Rewind)
03 - Select
04 - Info
05 - Scroll Down
06 - Presets 1-8
07 - Skip Back
08 - Play
09 - Future Development
10 - Sleep
11 - Scroll Up
12 - Power
13 - Menu
14 - Volume Increase
15 - Right (Forward)
16 - Volume Decrease
17 - Alarm
18 - Skip Forward (Fast Forward)
19 - Pause
20 - Future Development
21 - Snooze
BATTERY REPLACEMENT
11
1 12
2
3
4
5
6
7
8
9
10
MODE
INFO ALARM
1
5
MENU
SELECT
2
6
SNOOZESLEEPF1 F2
VOL +
VOL -
4
3
7
8
1
13
14
15
16
17
18
19
20
21
The SUPERSIGNAL remote control is powered by a single 3V lithium
battery. Depending on usage, the battery should happily run for
between 1 and 2 years.
Replace the battery when button presses seem sluggish, or when the
operating range appears to have reduced signifi cantly.
Replace the old battery with a new CR2025 lithium cell.
2
05
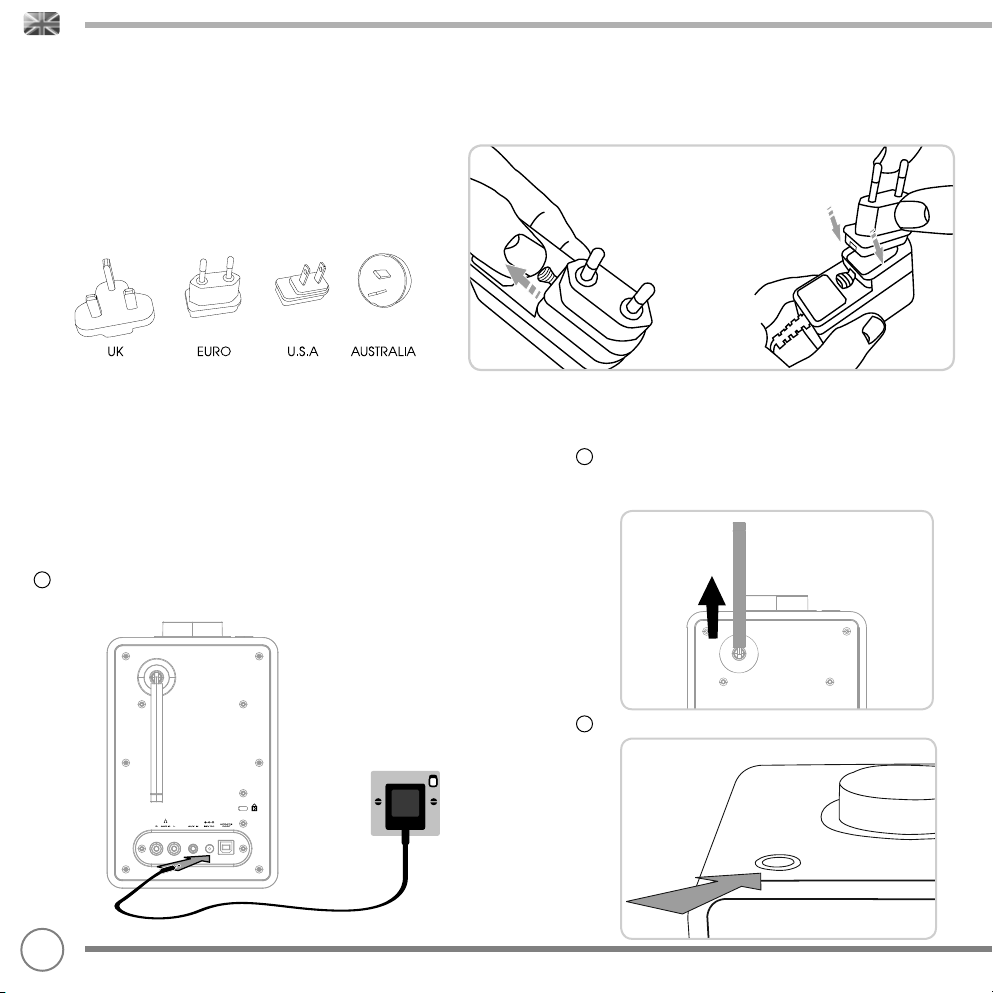
POWER SUPPLY (PSU)
!"#$
Your SUPERSIGNAL radio is supplied with a multi-region power supply,
meaning that it can be operated in a number of countries around
the world.
Simply choose the correct adaptor for your country from the
selection supplied, then follow the instructions below.
SET-UP
Using the PSU supplied, connect one end to the DC power socket found on the
1
rear of your radio, then plug the opposite end into the mains socket on the wall.
SUPERSIGNAL will automatically perform a scan to see
2
what DAB stations are being broadcast in your area.
Therefore please fully extend the antenna before
switching on.
06
3
Press the POWER button once to get started.
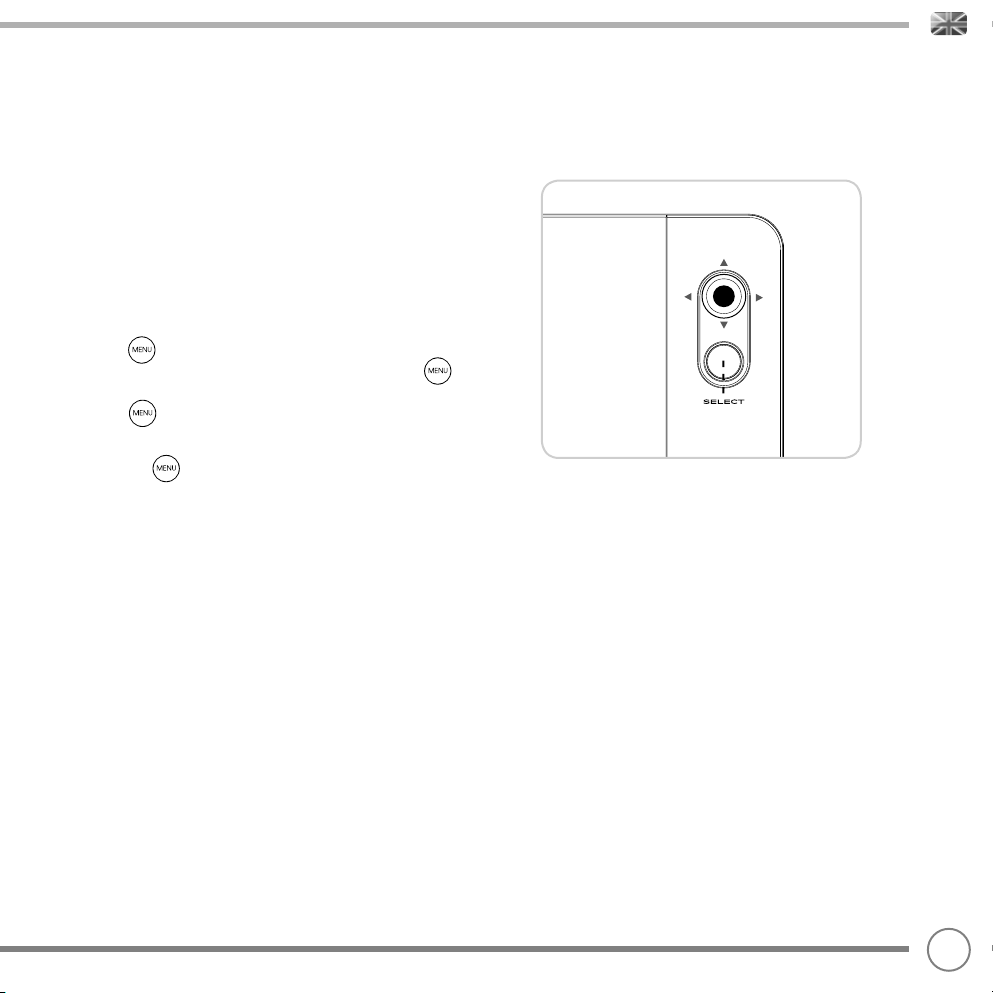
CONTROLLING SUPERSIGNAL
In order for you to get the most from your radio, it is important for you
to understand how its joystick and menu system operates.
JOYSTICK CONTROL
Your radio uses a joystick based control system for ease of use.
The joystick controller has four functions (UP, DOWN, LEFT and RIGHT)
and is used in conjunction with a separate SELECT button.
MENU BUTTON
Pressing the button will take you to the Mode Menu for the
particular mode of operation you are in. For example, pressing
when in DAB Mode will take you to the DAB MODE MENU.
Pressing the button for a second time will return you to the
‘playing screen’ that you just left.
You can use the button at any time to reverse out of any menu
that you’re navigating through.
The following system settings can be accessed from any of the mode
menus :
• Sleep
• Equaliser
• Time
• Contrast
• Language
• Factory Reset
• Software Upgrade
• Software Version
See SYSTEM SETTINGS on Page 18 for further details
MODE BUTTON
Pressing the MODE button will sequentially cycle through each of
SUPERSIGNAL’s modes of operation.
‘UP’
‘LEFT’ ‘RIGHT’
‘DOWN’
07

DAB RADIO MODE
GETTING READY FOR DAB OPERATION
Please ensure that the radio’s antenna is extended before operation
in DAB Mode.
When you switch on SUPERSIGNAL for the fi rst time, it will automati-
cally perform a scan to see what stations are being braodcast in your
area, before storing them alphabetically in the radio’s memory.
To enter DAB MODE, press the button until the DAB MODE intro
screen is displayed.
It may be necessary to perform a FULL SCAN from time to time,
in order to update your radio’s station list. This may be required for
any one of the following reasons:
1. Station availability can change from time to time as new stations
appear, or existing stations cease broadcasting.
2. Reception was poor during the initial automatic scan, if for
example the radio’s antenna was not completely extended,
it may be that the station list is incomplete or even empty.
3. You have poor reception on some of the stations (resulting in
broken or poor quality audio), you may wish to list only stations that
have a strong signal strength.
To start a manual scan, press the button then select FULL SCAN
from the menu list.
When the scan is complete, your radio will list all available stations.
To remove stations that are listed but unavailable, press then
choose PRUNE. When asked whether you wish to “PRUNE?”, select
YES.
00:00
Scanning... 0
00:00
Prune?
<No> Yes
00:00
DAB Mode
08

DAB RADIO MODE
SELECTING A STATION
To access your radio’s station list, press UP/DOWN or LEFT/RIGHT on
the joystick controller at any time, alternatively press then select
STATION LIST.
Scroll through the available stations using UP/DOWN or LEFT/RIGHT
on the joystick controller, then press the SELECT button to select your
station choice.
FAVOURITE STATION PRESETS
SUPERSIGNAL allows you to store your favourite stations as presets,
either via its 5 front panel mounted ‘hot-keys’, or the numbered
preset buttons located on the remote control.
To store the station you are currently listening to as a preset, simply
press and hold a preset button until “Preset Stored” is display on your
radio’s screen.
If you want to change a particular preset in the future, repeat the
process and the previously stored preset will be automatically
overwritten.
14:12
Station List
<BBC R6M >
14:12
BBC Radio 6Music
Playing
14:12
Preset Stored
09
DAB MODE MENU OPTIONS
STATION INFO
In DAB MODE, SUPERSIGNAL is capable of displaying various pieces of information
on its screen. By pressing the button, you can sequentially cycle through the
following types of information.
STANDARD DAB SCREEN Shows scrolling text info from broadcaster
PROGRAMME TYPE For example News, Rock Music, Classical etc.
MULTIPLEX AND FREQUENCY Multiplex owner and station frequency
SIGNAL STRENGTH Station’s current signal strength
BIT RATE AND CODEC Audio format, sample rate, mono or stereo
DATE Today’s date
14:12
BBC Radio 6Music
Playing
14:12
BBC Radio 6Music
Rock Music
14:12
BBC Radio 6Music
12B 225 648MHz
14:12
BBC Radio 6Music
Signal Level : 99
14:12
BBC Radio 6Music
128kbps / DAB
14:12
BBC Radio 6Music
6-11-2013
10

DAB MODE MENU OPTIONS
DYNAMIC RANGE COMPRESSION (DRC)
If you are listening to music with a high dynamic range in a noisy
environment (for example, classical music while cooking), you may
wish to compress the audio’s dynamic range. This has the effect of
making quiet sounds louder, and loud sounds quieter.
14:12
<DRC >
DAB
To change the DRC setting, press then choose the DRC option,
before selecting OFF, LOW or HIGH.
14:12
DRC *
<DRC off >
14:12
<DRC high >
DRC
11
FM RADIO MODE
FM OPERATION
Please ensure that the radio’s antenna is extended before operation
in FM MODE.
To enter FM MODE, press the button until the FM MODE intro
screen is displayed.
If this is the fi rst time that SUPERSIGNAL has been used in FM MODE,
it will start at the beginning of the frequency range (87.50MHz),
otherwise SUPERSIGNAL will default to the station that was being
listened to last.
Pressing the SELECT button will start the radio scanning for the next
available station. SUPERSIGNAL will automatically stop scanning
when a station is found.
To fi ne tune, use UP/DOWN or LEFT/RIGHT on the joystick controller to
incrementally change the frequency.
When on an FM station that has a strong signal and is broadcasting
RDS information, SUPERSIGNAL will display the station name and other
pieces of text information on-screen.
FAVOURITE STATION PRESETS
SUPERSIGNAL allows you to store your favourite stations as presets,
either via its 5 front panel mounted ‘hot-keys’, or the numbered
preset buttons located on the remote control.
To store the station you are currently listening to as a preset, simply
press and hold a preset button until “Preset Stored” is display on your
radio’s screen.
14:12
FM Mode
14:12
87.50MHz
14:12
BBC R2
Other Music
14:12
Preset Stored
If you want to change a particular preset in the future, repeat
the process and the previously stored preset will be automatically
overwritten.
12
FM RADIO MODE
FM SETTINGS
Press the button to access the FM MODE MENU. From here you
can set some FM preferences such as SCAN SETTING and AUDIO
SETTING.
SCAN SETTING allows you to decide whether the radio should stop
scanning only when it fi nds a station with a strong signal.
AUDIO SETTING gives you the option of listening to a station in mono,
should the signal strength not be suffi ciently strong to allow stereo
reception.
AUX IN MODE
AUX IN MODE allows you to play audio from an external source (such
as an MP3 player) through your radio.
To do so, connect your external audio source to the 3.5mm AUX IN
connector on the rear of SUPERSIGNAL.
Turn the volume down low on both SUPERSIGNAL and, if adjustable,
the external device.
Now press until the Auxiliary Input mode intro screen is displayed.
Adjust the volume of SUPERSIGNAL and, if necessary, the external
audio device as required.
14:12
Auxiliary Input
14:12
<Scan Setting >
FM
14:12
Auxiliary Input
6-11-2013
13

BLUETOOTH MODE
Wirelessly stream music from your Bluetooth smartphone, tablet, laptop or other
Bluetooth enabled device directly to SUPERSIGNAL, without the need for physical
docking or connection.
PAIRING WITH BLUETOOTH DEVICES
‘Pairing’ occurs when two Bluetooth devices talk to each other and establish a
connection. This connection is stored in the memory of both devices, meaning
that once you ‘pair’ a particular device with SUPERSIGNAL, you shouldn’t have to
go through the pairing process again.
HOW TO PAIR A BLUETOOTH DEVICE WITH SUPERSIGNAL
14:12
Bluetooth Mode
To enter Bluetooth mode, press the button until the Bluetooth mode intro
screen is displayed. SUPERSIGNAL will now enter pairing mode, and will state
‘Discoverable...’ on screen.
On your Bluetooth device, ensure that Bluetooth is enabled then initiate a ‘Search’
for a new device. When the search process has been completed, your device will
list all the available Bluetooth devices in your close proximity.
Select SUPERSIGNAL from the list.
Your Bluetooth device will confi rm when pairing has been completed, and
SUPERSIGNAL will now display “Device Connected” on screen.
PASSKEY
During the pairing process some Bluetooth devices may prompt you to enter a
Passkey. Should your device require a Passkey, enter 0000.
Should you experience problems when pairing your device with SUPERSIGNAL,
please see the Bluetooth Troubleshooting section on page 21.
14
14:12
Discoverable...
14:12
Device Connected

BLUETOOTH MODE
STREAMING MUSIC
Selecting and controlling music playback can be done in one of two ways: either
directly from the source device (smartphone, tablet or laptop etc.), or by using
the buttons on SUPERSIGNAL’s remote control.
Please note, the playback volume level can be independently controlled from
either SUPERSIGNAL or the source device.
MANAGEMENT OF MULTIPLE BLUETOOTH DEVICES
If you have paired only one Bluetooth device, on entering Bluetooth mode
SUPERSIGNAL will automatically seek to connect with this device.
Should you wish to pair another device, press then select ‘Disconnect’.
SUPERSIGNAL will now disconnect its current Bluetooth device and enter pairing
mode again. This will allow you to repeat the ‘Pairing with Bluetooth Devices’
procedure.
SUPERSIGNAL will remember up to 8 individual Bluetooth devices. When you
reach the point of having a 9th device you wish to pair, SUPERSIGNAL will pair with
the 9th device and automatically erase the oldest-paired device from its memory.
You can continue to pair new devices and your radio will always remember the
previous 8 devices it has paired with.
14:12
Bluetooth
<Disconnect >
aptX®
SUPERSIGNAL’s Bluetooth solution is equipped with CSR’s patented aptX®
technology, meaning that when it is used in conjunction with a device that also
supports aptX®, the streamed audio will be of CD quality rather than the MP3
quality of a standard Bluetooth stream.
15
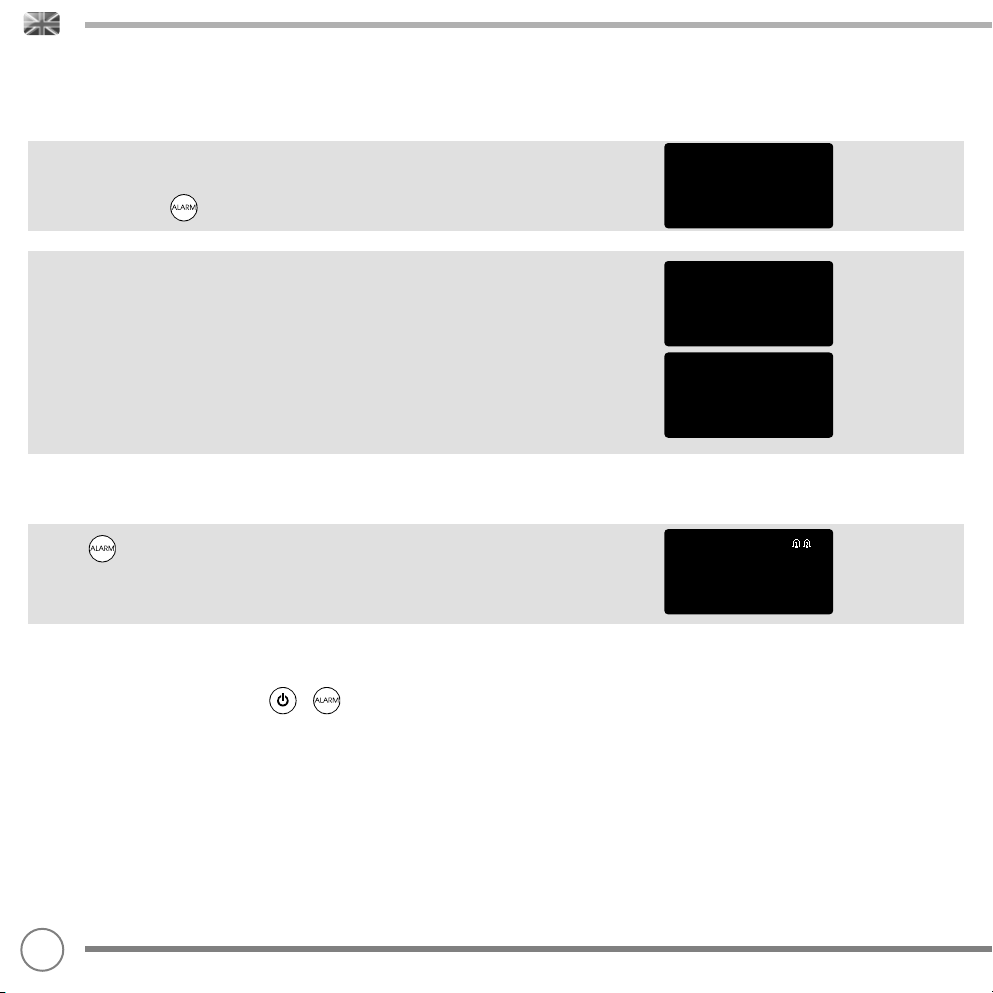
ALARM CLOCK
SETTING AN ALARM
SUPERSIGNAL is able to store two individual alarm settings. Select
which of the Alarms (Alarm 1 or Alarm 2) you would like to modify or
enable by pressing once or twice, then select.
Use the joystick controller to set each preference (listed below) for
your alarm, pressing select to move onto the next preference.
• Time
• Duration of Alarm
• Source: Buzz, DAB or FM
• Preset: Last listened or favourite station preset 1-8
• Frequency: Daily, Once, Weekends or Weekdays.
• Volume Level: (Use Joystick to select volume)
Alarm ON or Alarm OFF, (pressing select will now save your preferences)
•
Press to cycle through ALARM 1 and ALARM 2 settings, enabling
and disabling them, then press select to confi rm your option. If the
alarm icon is displayed, the alarm is enabled, if not, it is switched off.
STOPPING AN ALARM
When an alarm is sounding, pressing or will STOP the alarm.
14:12
Alarm 1 Setup
14:12
Alarm 1 Wizard
On time 06:00
14:12
Alarm 1 Wizard
Duration 15 Mins
14:12
PLEASE NOTE : To wake you gently, SUPERSIGNAL will slowly increase
the volume of the alarm from silent to your preset volume level over a
30 second period.
16
ALARM CLOCK
SNOOZE FUNCTION
SUPERSIGNAL includes a TOUCH-SNOOZE feature which is
incorporated into your radio’s aluminium front panel. SNOOZE is
activated by tapping anywhere on the metal area during an alarm.
SNOOZE allows you to temporarily silence the alarm for a period of
up to 30 minutes.
The SNOOZE duration can only be set when your radio is actually in
the process of alarming. At this point, simply tap the FRONT PANEL to
cycle through a range of pre-set SNOOZE durations, either 5, 10, 15 or
30 minutes.
When SNOOZE is activated, SUPERSIGNAL will return to standby for the
set period with the snoozed alarm time shown on-screen.
SLEEP FUNCTION
SUPERSIGNAL is equipped with a Sleep function which can be found
in the MAIN MENU under SYSTEM SETTINGS, see page 18 for further
information.
14:12
Snooze
5 minutes
17

SYSTEM SETTINGS
SLEEP
By using the SLEEP function, you can set SUPERSIGNAL to
automatically switch itself into STANDBY mode.
Press then select SLEEP. You can now set the SLEEP timer to any
one of the following; 15, 30, 45, 60 or 90 minutes.
When you have selected a sleep duration, SUPERSIGNAL will return to
the MODE MENU and will display a small clock icon on the top left of
the screen.
EQUALISER
SUPERSIGNAL provides the user with a signifi cant degree of control
over its standard (factory default) audio settings. This includes control
over BASS and TREBLE.
To adjust the audio settings, press then select EQUALISER from
the menu.
To confi gure your own EQ setting, select BASS or TREBLE, adjust as
desired and press select to save.
TIME
Found in the MAIN MENU, this menu offers you the option of changing
a number of time/date related settings. The TIME menu has four
listings as follows:
SET TIME / DATE : Allows you to manually set the time/date.
AUTO UPDATE : Choose from three different automatic setting options.
SET 12/24Hr : Choose whether you would like to use 12hr or 24hr
formats.
SET DATE FORMAT : Select how you want the date to be displayed
14:12
DAB
<Equaliser >
14:12
DAB
<Sleep >
14:12
Equaliser
<Treble >
14:12
Time
<Set Time/Date >
14:12
Set Time
14 : 13
14:12
Treble *
<+3 >
18

SYSTEM SETTINGS
AUTO UPDATE
Update from ANY : Automatically takes time/date from DAB or FM
signals. SUPERSIGNAL needs to have been operated in DAB or FM
MODE (and have received a signal) before this information can be
extracted.
UPDATE FROM DAB : Forces the radio to take the time/date from DAB
signal.
UPDATE FROM FM : Forces the radio to take the time/date from FM
signal.
CONTRAST
SUPERSIGNAL allows a degree of control over the contrast of its OLED
display, meaning that both its STANDBY and POWER ON contrast levels
can be independently set to HIGH, MEDIUM or LOW brightness levels.
To change the contrast settings, press then select CONTRAST
from the menu list. You will now be able to modify the default
brightness level settings for the two modes of operation - STANDBY
and POWER ON. Select the mode you’d like to change from these
two options, then choose your desired brightness level. Your chosen
setting will be held in memory indefi nitely, but can be changed at
any time.
LANGUAGE
The default language on your radio is English, though 3 other
languages are supported as follows:
14:12
Auto Update *
<Update from Any >
14:12
Contrast
<Power On >
French German Italian
To change the current language setting, select LANGUAGE from the
MAIN MENU, then select your choice.
14:12
Language
<English >
19

SYSTEM SETTINGS
FACTORY RESET
By selecting FACTORY RESET from the SYSTEM SETTINGS menu, you can
reset SUPERSIGNAL to its default factory values, erasing any personal
settings that may have been confi gured (time/date and presets will
be erased).
To perform a factory reset, press then select FACTORY RESET.
Now answer YES.
SOFTWARE UPGRADE
The SOFTWARE UPGRADE option should only be used when you are
asked to do so by Revo Technologies’ technical support department.
If you are required to do this, further instructions will be issue at that time.
SW VERSION
When dealing with a technical support issue, you may be asked for
the SOFTWARE VERSION of your radio. This information can be found
under the SW VERSION menu.
Press then select SW VERSION.
14:12
Factory Reset?
<No> Yes
14:12
Upgrade?
<No> Yes
14:12
SW Version
dab-mmi-FS2052-0000-0
20
TROUBLESHOOTING
PROBLEM CAUSE SOLUTIONS
FM: HISS
DAB: Burbling/Intermittent
DAB: Cut-Out
DAB: ‘No stations available’
Bluetooth Mode: Can’t connect to
a paired device
Bluetooth Mode: Poor audio
quality
Low signal strength. Check/move antenna.
Your Bluetooth device may be
out of range.
Electromagnetic interference.
Move radio to another location.
Rescan local (high-strength)
stations only.
For DAB, check local coverage at
www.ukdigitalradio.com/coverage
Select DISCONNECT from the
Bluetooth menu on the radio, and
delete SUPERSIGNAL’s profi le from
your Bluetooth device, then re-pair
the devices as normal.
Move your Bluetooth device closer
to SUPERSIGNAL
Move your Bluetooth device away
from other sources of interference
such as other Bluetooth devices,
wireless routers etc.
21

TECHNICAL SUPPORT
TEL - + 44 (0) 1555 666161
E-MAIL - support@revo.co.uk
WEB - www.revo.co.uk/support
 Loading...