

Page 1
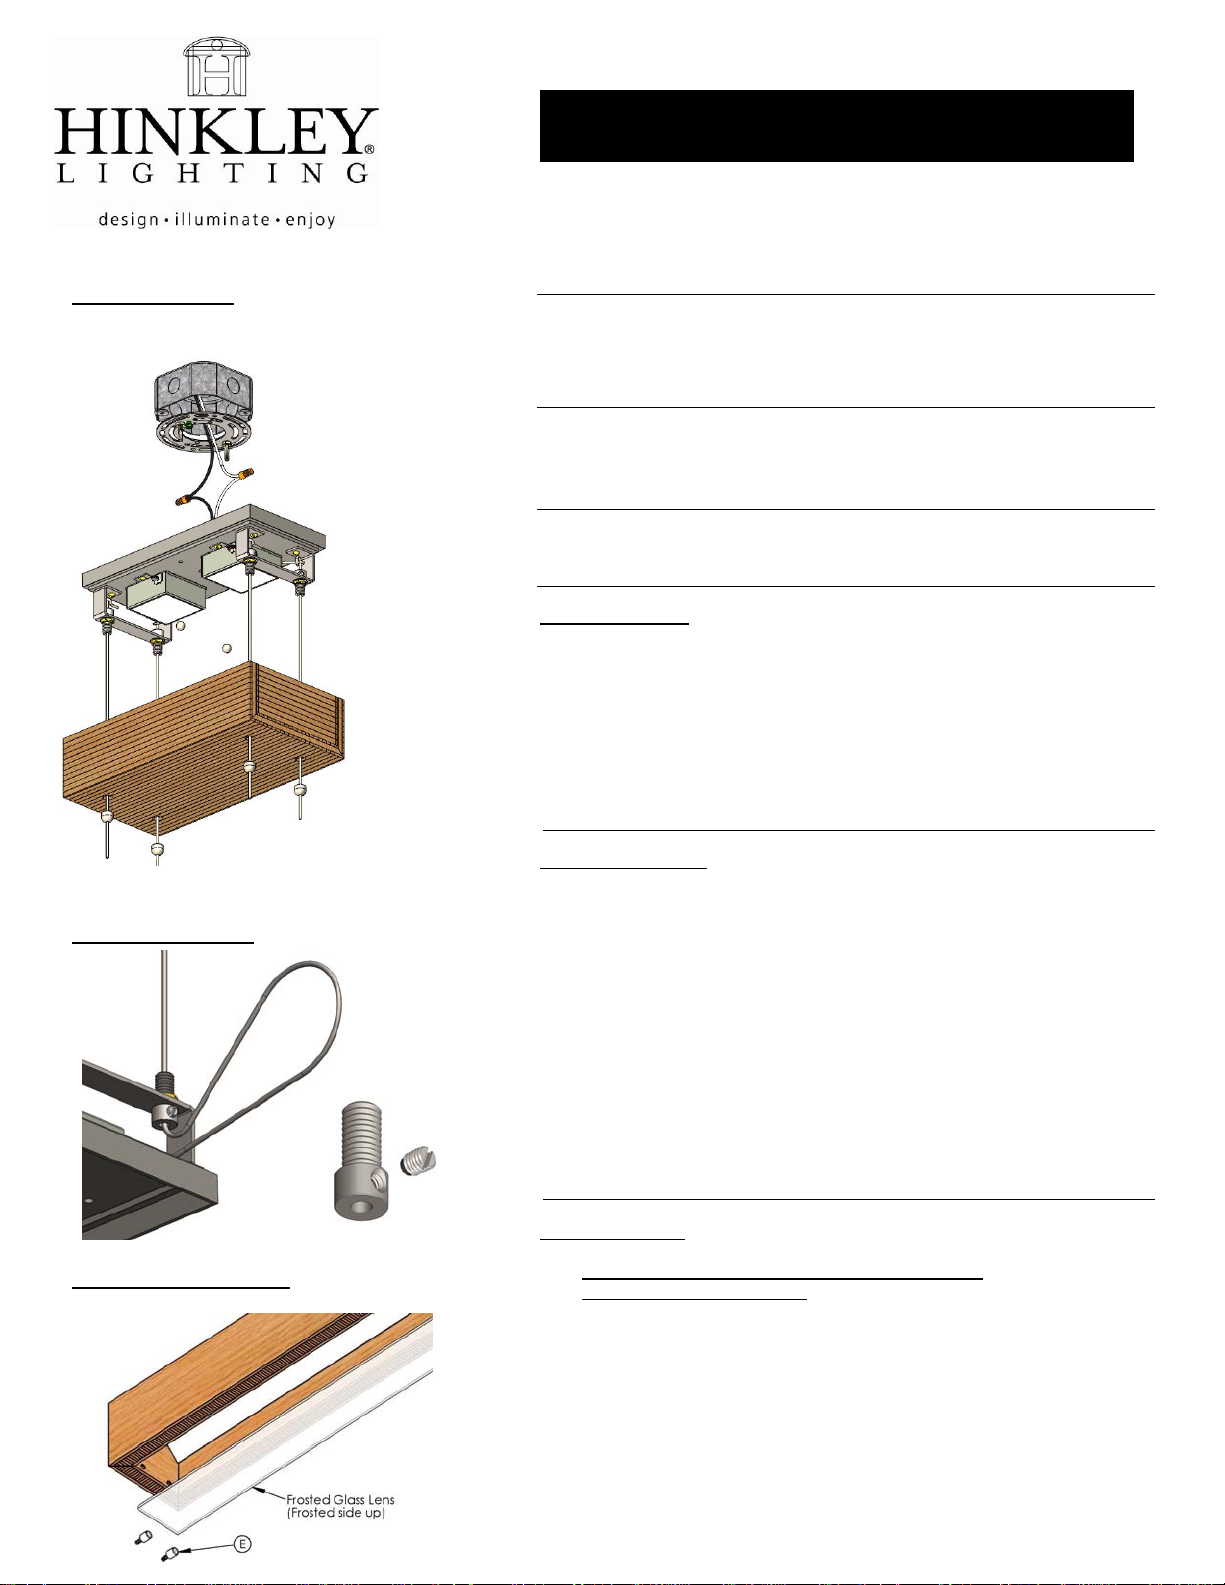
Fixture Mounting
(B) universal mounting
Plate
Fixture mounting
plate
(C) Ball Finials
(A) Canopy Finial
Fixture Adjustment
Braided wire
(D) Set
screw
Glass Lens Installation
I.S. 46204 Mounting Instructions
Family: ZEN Item No. FR46204BAM
start here
SAFETY WARNING: READ WIRING AND GROUNDING INSTRUCTIONS (IS18).
TURN POWER SUPPLY OFF DURING INSTALLATION. IF NEW WIRING IS
REQUIRED, CONSULT A QUALIFIED ELECTRICIAN OR LOCAL AUTHORITY
FOR CODE REQUIREMENTS.
1. Find a clear area to work.
2. Unpack fixture from carton.
3. Carefully review instructions prior to assembly.
This fixture is designed to be directly mounted to a ceiling junction box with a 3-1/2”
center to center mounting distance.
Fixture Mounting:
1. Make electrical connections according instructions on IS18.
2. Unthread Canopy Finial (A) and slide canopy down wire.
3. Slots in Universal Mounting Plate (B) should line up with mounting
ears on junction box. Using screws supplied with junction box attach
mounting plate. Tighten screws until snug.
4. Slide Fixture Backplate over threaded studs on Universal Mounting
Plate. Secure in place with Ball Finials (C).
5. Proceed to fixture adjustment instructions.
Fixture Adjustment:
6. Fixture is completely wired to the driver (do not disconnect the
braided wire from the driver).
7. Using a flat bladed screw driver turn the Set Screw (D) in a counter
clockwise direction until the braided wire moves freely.
8. Pull cable up and out until the desired fixture height is reached. Extra
wire can be placed inside the canopy. In a clockwise direction turn set
screw until it stops.
Important Note: DO NOT OVER TIGHTEN SET SCREW, doing so
may cause fixture to fail.
9. Slide canopy up the braided wire and lock in place using the canopy
finial.
10. Save these instructions.
Lens Installation:
11. Locate and carefully unpack Frosted Glass Lens.
12. The frosted glass lens rests on four Threaded Metal Pegs (E).
13. Gently Place lens (with frosted side up) on the top side of the two pegs
already installed in fixture.
14. Push lens upward until the glass is above threaded inserts for
remaining two pegs. Thread pegs into inserts in a clockwise direction
until finger tight. Release the lens, it should rest freely on top of the
pegs.
15. To remove glass lens follow steps 14 – 13 in reverse order.
Your fixture is now ready to energize.
 Loading...