

Hinkley Lighting FR43620PNI User Manual
ALEXANDRA
FR43620PNI
Crystals: R43620CRY-C, R43620CRY-F, R43620CRY-D, R43620CRY-G
SAFETY WARNING: Read wiring and grounding instructions [FRIS 18]
and any additional directions. Turn power supply off during installation. If new wiring
is required, consult a qualified electrician or local authorities for code requirements.
STEP 1
1 Shut off electrical current before starting. If the fixture you are replacing is
turned on and off by a wall switch, simply turn the switch off. If not, remove the
appropriate fuse (or open the circut breakers) until the fixture is dead.
• DO NOT restore current - either by fuse, breaker or switch - until the new
fixture is completely wired and in place.
STEP 2
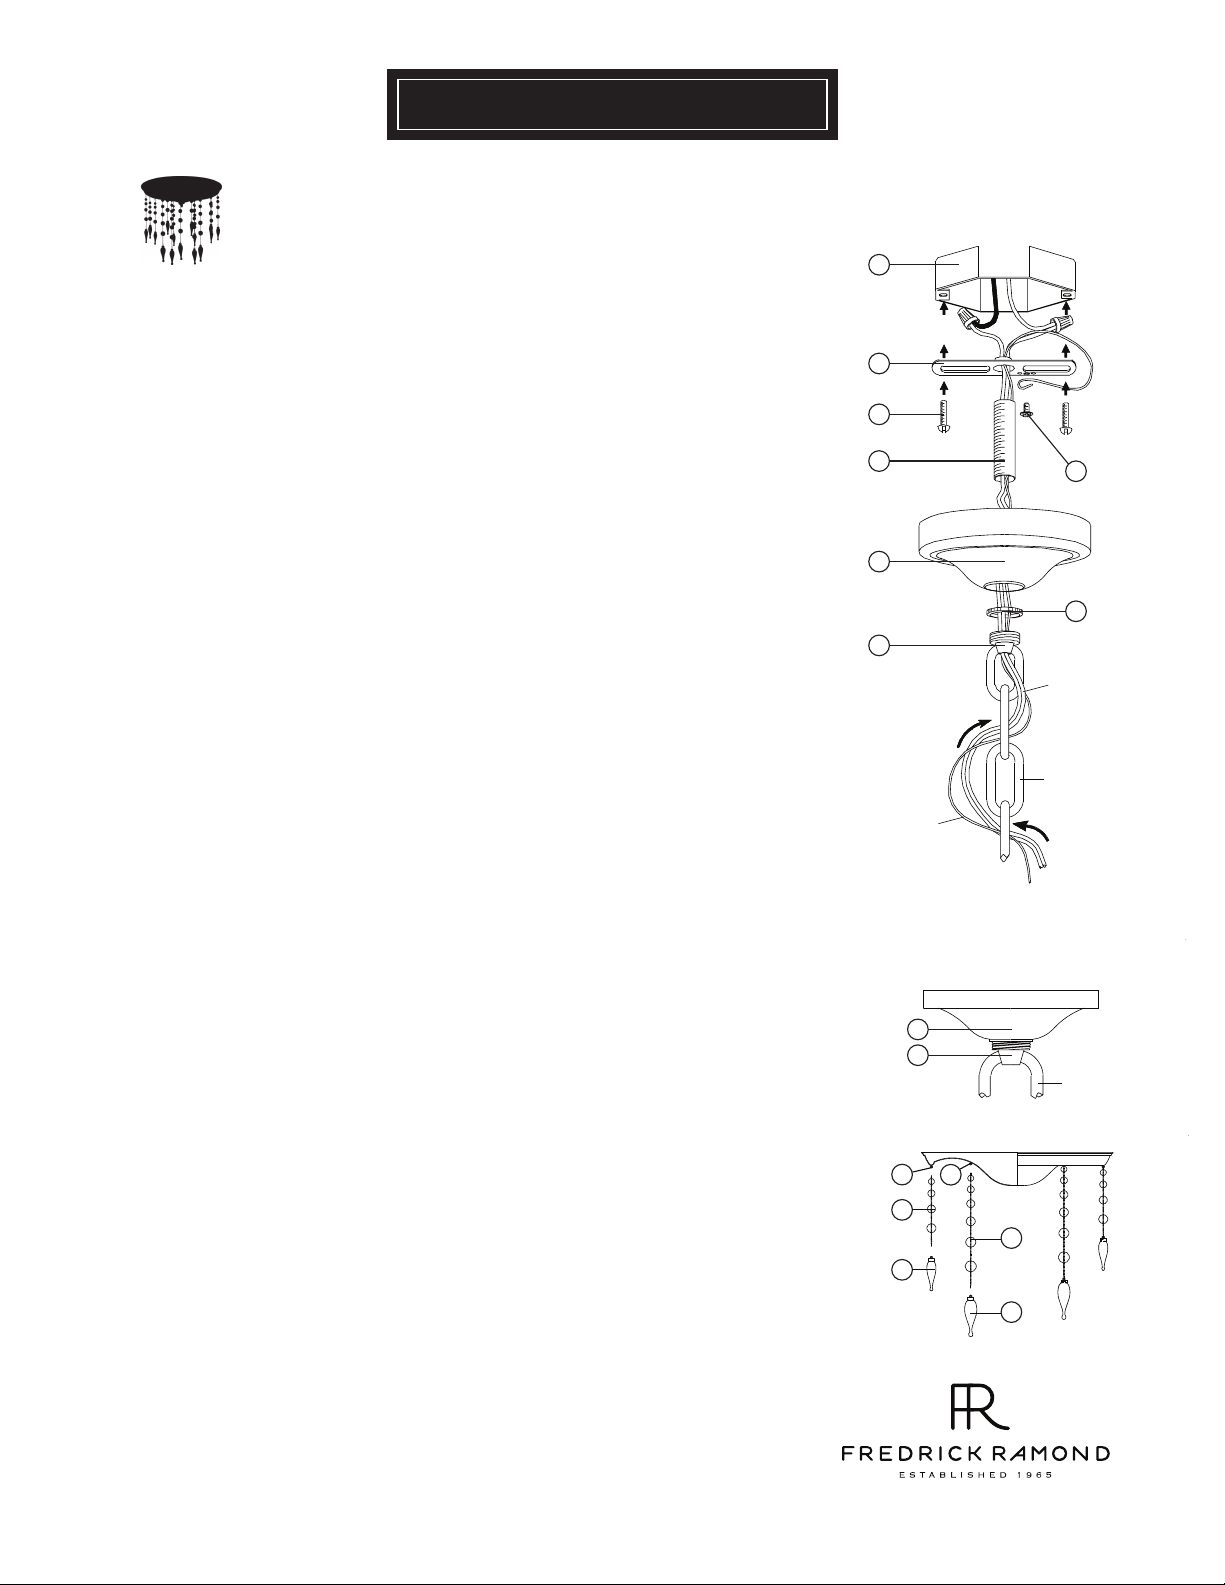
1 Fasten mounting strap (1) to outlet box (a) with the original outlet box screws (2)
- See Drawing 1.
2 Thread nipple (3) into mounting strap (1).
3 Thread loop (4) on to end of nipple (3).
4 Slip canopy (b) over loop (4) and adjust height of loop so half of thread area is
exposed.
STEP 3
1 Taking the chain, determine the length you require to hang the fixture.
2 Attach one end of the chain to the top loop of the fixture - See Drawing 2.
3 Now slip loop collar (5) and canopy (b) onto chain.
4 Attach other end of chain to loop (4). Get assistance for this step since fixture
may be heavy and difficult to hold while attaching the chain.
[DRAWING 1]
a
1
2
3
b
4
ground
wire
[DRAWING 2]
Half of thread area of loop (4) is to be exposed.
This will allow collar (5) to be threaded on later.
6
5
supply wire
chain
STEP 4
1 Unwrap supply wire and ground wire and weave them up through the chain.
2 Slip supply wire and ground wire through center of loop (4).
3 Connect ground wire to mounting strap (1) using green ground screw (6).
4 Make electrical connections from supply wire to fixture lead wires. Refer to
instruction sheet [FRIS18] and follow all instructions to make all necessary
wiring connections.
5 Slip canopy up firmly against the ceiling and secure by turning the threaded
collar (5) on loop (4) until tight.
STEP 5
1 Hang the long crystal strand (1) for the inner most loop(2) on the canopy- See
Drawing 3.
2 Hang the short crystal strand (3) from the outer loop (4) on the canopy.
3 Hang the large crystal drop (5) from the end of the long crystal strand (1).
4 Hang the small crystal drop (6) from the end of the short crystal strand (3).
b
4
chain
[DRAWING 3]
4
2
3
1
6
5
800. 421.35 17 WWW .F RED RI CKRAMOND .COM
5.25.10
 Loading...