

Page 1
PANDORA
FR42407BRC
Bulbs: 60W CAND. Replacement Parts: SHADE: R42400SH
ASSEMBLY INSTRUCTIONS
Assembly of this fixture will be accomplished by first determining the length of stem
required, attaching the mounting strap to the junction box, making all necessary electrical connections, hanging the fixture from the ceiling and then installing the fixture glass.
SAFETY WARNING: Read wiring and grounding instructions [FRIS 18]
and any additional directions. Turn power supply off during installation. If new wiring is
required, consult a qualified electrician or local authorities for code requirements.
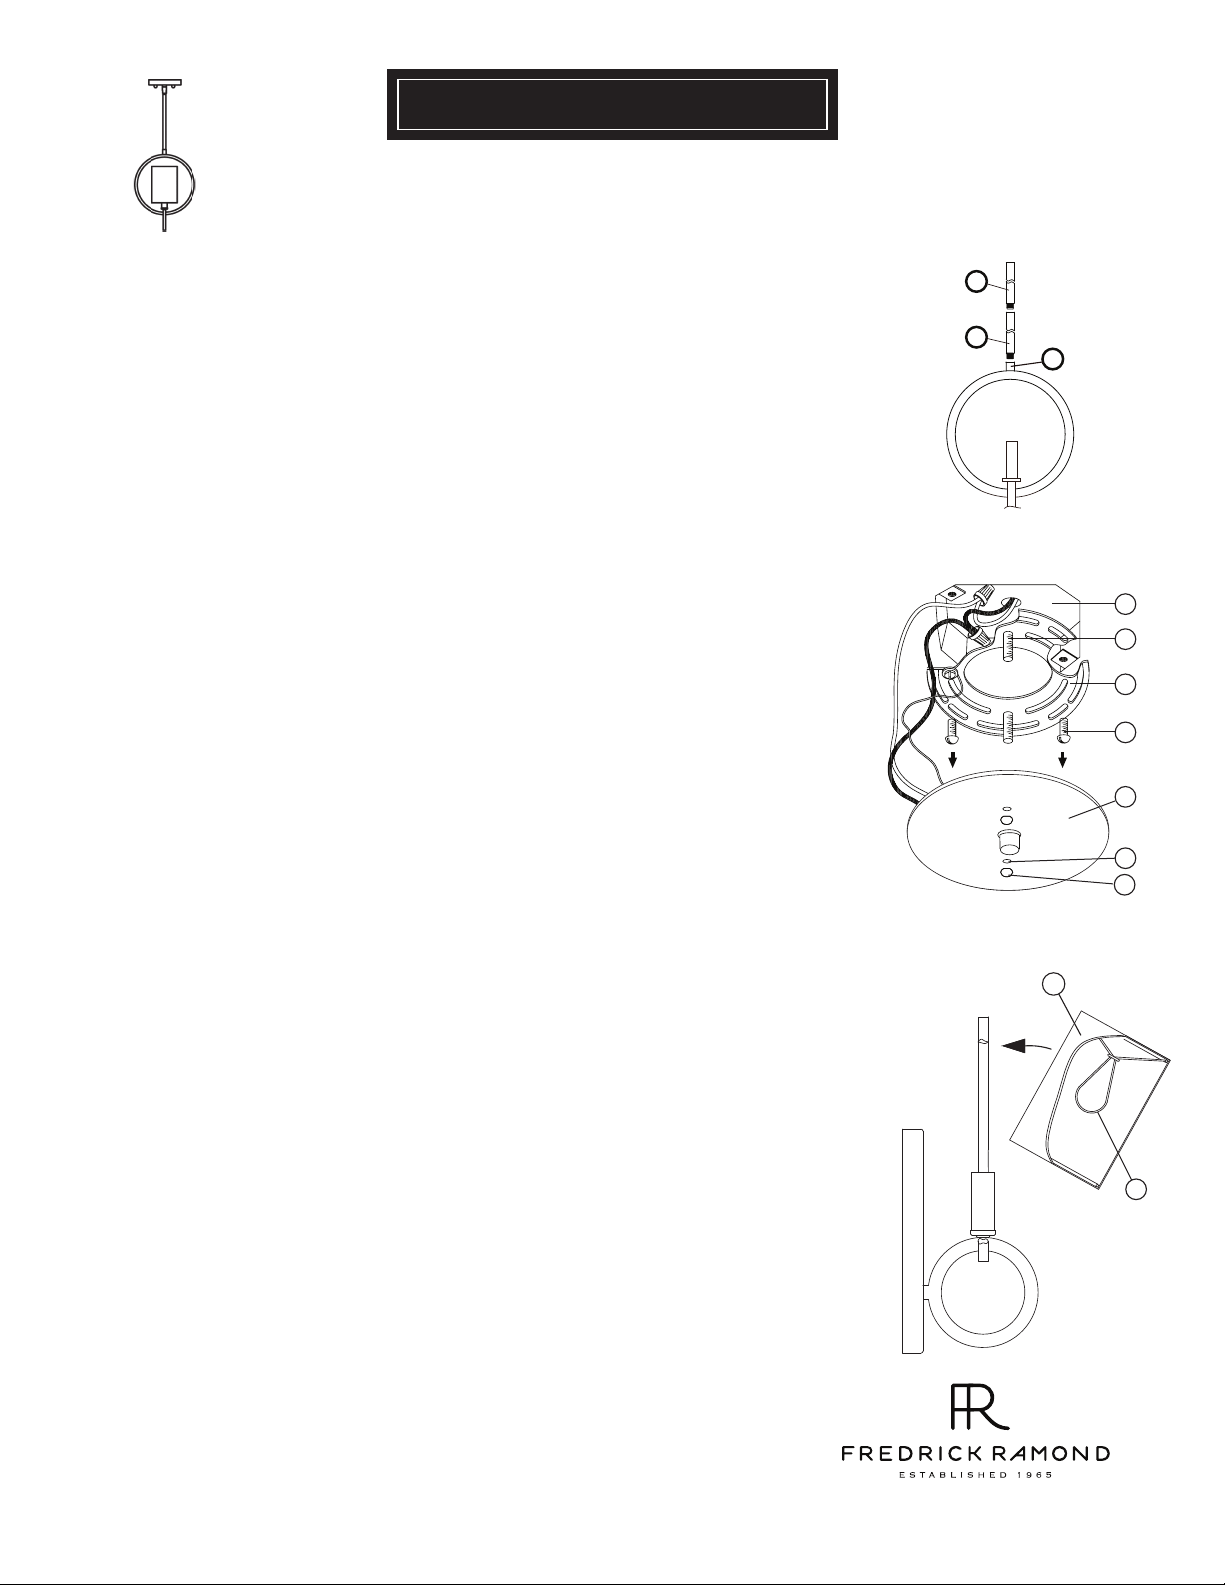
STEP 1
1 Determine the overall length you will need the assembled fixture to be.
2 Determine what stems will be needed to achieve the overall length you
require.(Additional stems are available and can be ordered. Ask your local
Fredrick Ramond representative or visit www.fredrickramond.com for
information.
3 Install stems (C) by slipping them onto the supply wire of the fixture,
threaded end down, and threading them together. the first stem is
threaded into coupler (A) at the top of the fixture. Continue adding stems
until determined length is achieved.
STEP 2
1 Prepare mounting strap (a) by threading the two longest screws (b) into the
back
of the mounting strap (a), making sure the holes into which the screws are
threaded match the spacing of holes (d) in the backplate (e) - See Drawing 2.
2 Attach mounting strap (a) to junction box (j) using two screws (c).
3 Make electrical connections from supply wire to fixture lead wires. Refer to
instruction sheet [FRIS18] and follow all instructions to make all necessary
wiring connections. Then refer back to this sheet to continue installation of
this fixture.
4 To mount fixture, slip the two mounting screws (b) through the two moun
ing holes (d) in the backplate (e).
5 While holding fixture in place, thread the two ball knobs (f) on to the end of
the mounting screws (b), and tighten.
STEP 3
1
Fixture can be lamped accordingly at this point. It is recommended that flame
tip candlelabria bulbs NOT be used, since the flame tip may interfer with the
shade setting properly on the fixture - see Drawing 2.
[DRAWING 1]
C
C
A
[DRAWING 2]
j
b
a
c
e
d
f
[DRAWING 3]
1
s
To attach shade (1) turn shade so inside bulb clip (s) is perepndicular to the
2
outside of the fixture. Spread bulb clip (s) and slip onto bulb. Shade can now
be adjusted.
800.421.3517 WWW.FREDRICKRAMOND.COM
11.18.09
 Loading...