

Page 1
BROADWAY
fR41436PAL
Bulbs: 60w g-9. Replacement Parts: GLASS : R 41430GL
A S S E M B LY INSTRU CTION S
Assembly of this fixture will be accomplished by first determining the length of stem
required, attaching the mounting strap to the junction box, making all necessary
electrical connections, hanging the fixture from the ceiling and then installing the
fixture glass.
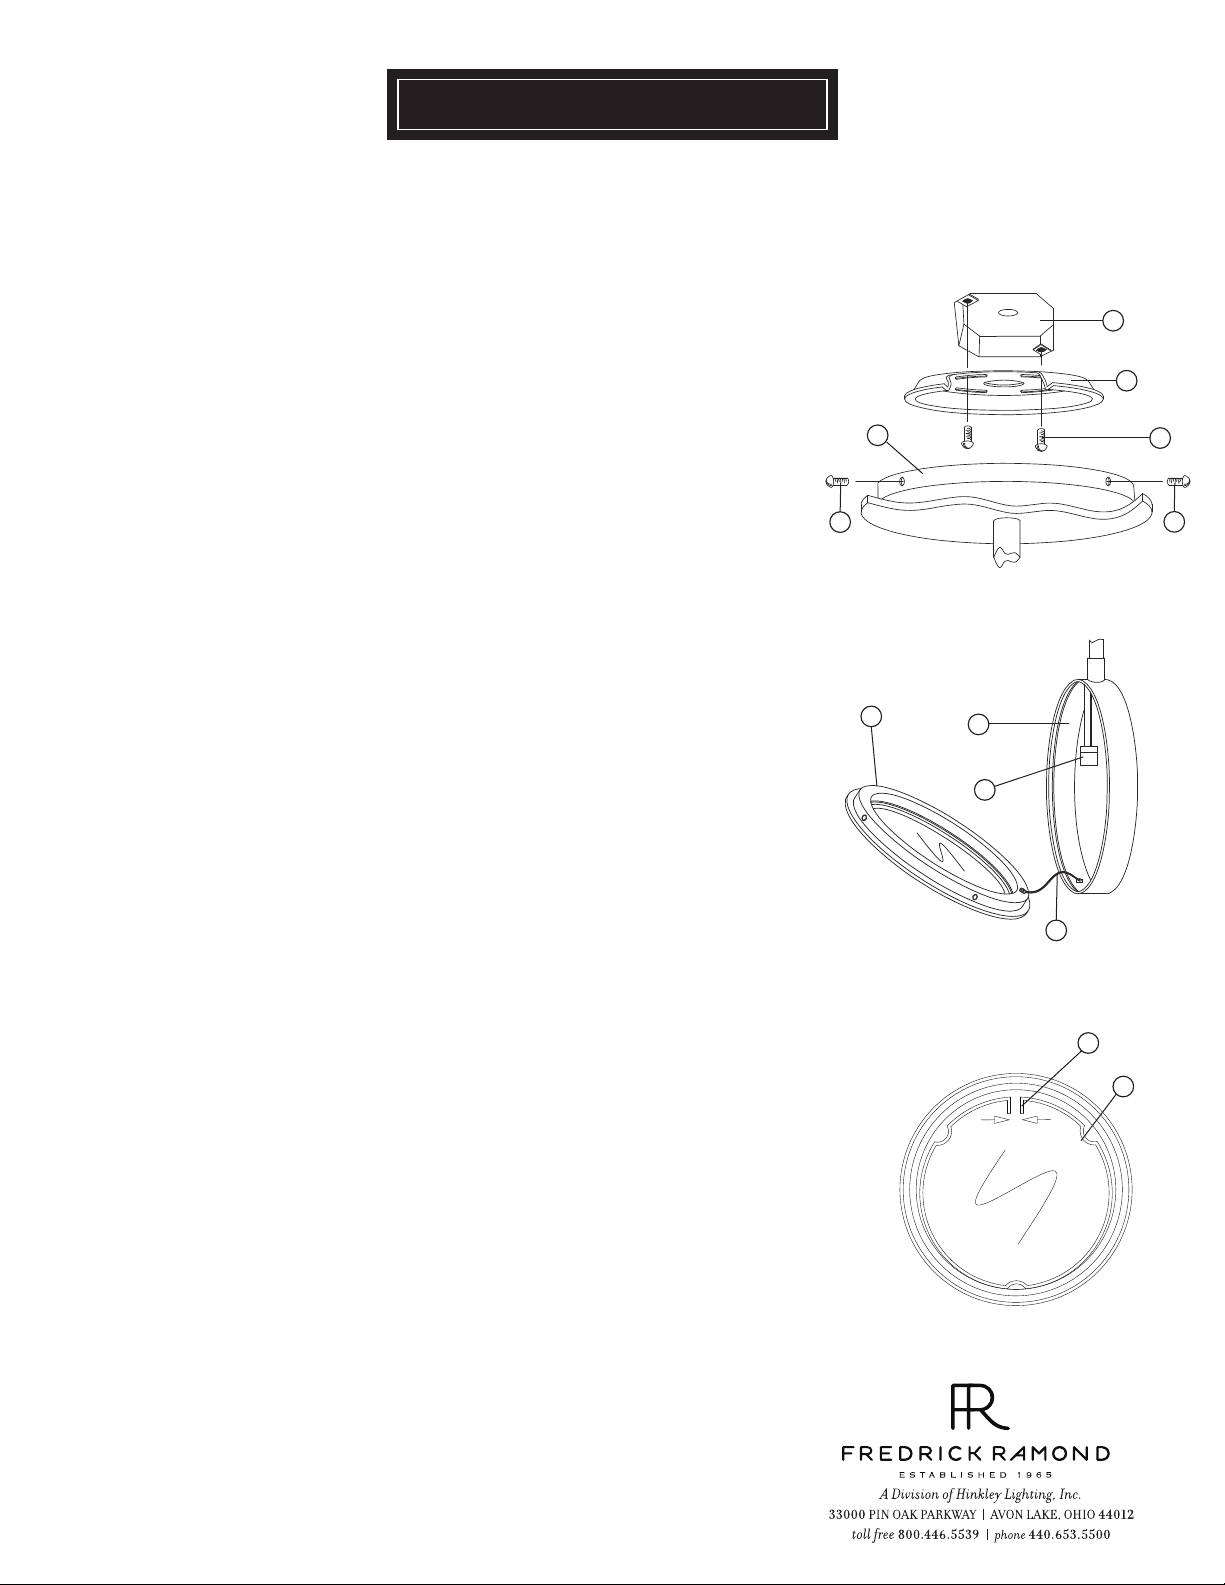
[DRAWING 1]
j
a
SAFETY WA RNING: Read wiring and grounding instructions [FRIS 18]
and any additional directions. Turn power supply off during installation. If new wiring
is required, consult a qualified electrician or local authorities for code requirements.
STEP 1
1 Determine the overall length you will need the assembled fixture to be.
2 Determine what stems will be needed to achieve the overall length you
require.(Additional stems are available and can be ordered. Ask your local
Fredrick Ramond representative or visit www.fredrickramond.com for
information.
3 Install stems by slipping them onto the supply wire of the fixture, threaded end up,
and threading them together.
4 After all stem lenghts required are assembled, slip wire through center of canopy swivel,
slip canopy assembly along wire and thread into top of last stem. Fixture is ready for
installation.
STEP 2
1 Attach mounting plate (a) to junstion box (j) with screws provided -See Drawing 1
2 Make all wiring connections following instruction sheet (FRIS 18) provided.
Please follow all necesary precautions.
3 After all connections are made, slip canopy (c) over mounting plate (a) and hold
in poistion while tightening screws (d). NOTE: As screws (d) are tighten canopy
will move upward and be flush against the ceiling.
4 Installation is complete and fixture can now be lamped.
STEP 3
1 To lamp fixture remove glass retainer ring (2) from main body (1). NOTE: the glass
retsiner ring is held in position by spring tension and can be easily removed by pulling
firmly on the edge at the split line. Retainer ring is attached to the fixture by a wire
cable and will not fall when released - See Drawing 2.
c
d
[DRAWING 2]
2
1
4
3
[DRAWING 3]
t
b
d
r
Lamp fixture with bulbs provided and replace retainer ring by snapping in back in place.
2
STEP 4
1 Glass is held in glass retainer ring by a “C” shape spring ring (r). To remove, replace, or install glass
it is necessary to pinch the two short tabs (t) of the ring together, after glass is installed ring
can be replaced in same manner -see Drawing 3.
06.01.11
 Loading...