

Page 1
Replacement Par ts: GLAS S:
01.01.12
R5960GL
FR40103, 40106, 40108
ASSEMBLY INSTRU C T IONS
The construction of this fixture will be accomplished by first assembling the main body
of the fixture, making all necessary electrical connections, hanging the fixture from the
ceiling and then installing the fixture shade.
SAFETY WARNING: Read wiring and grounding instructions [FRIS 18]
and any additional directions. Turn power supply off during installation. If new wiring
is required, consult a qualified electrician or local authorities for code requirements.
STEP 1
Note: It will be necessary to determine the length of rods you will require to hang your
fixture at the desired height. After this has been established, please follow the
instructions below.
1 Assemble the rods (R) by slipping them into the wire. Thread the first rod into
the coupler (1) located at the top of the fixture - See Drawing 1.
note: It is recommended that a 12” rod (R) be added first.
2 Continue adding rods (R) until desired length has been reached.
[DRAWING 1]
R
R
R
1
STEP 2
back to this sheet to continue fixture installation.
Refer to Hanging Instruction Sheet [FRIS19-81] to hang fixture.Then refer
STEP 3
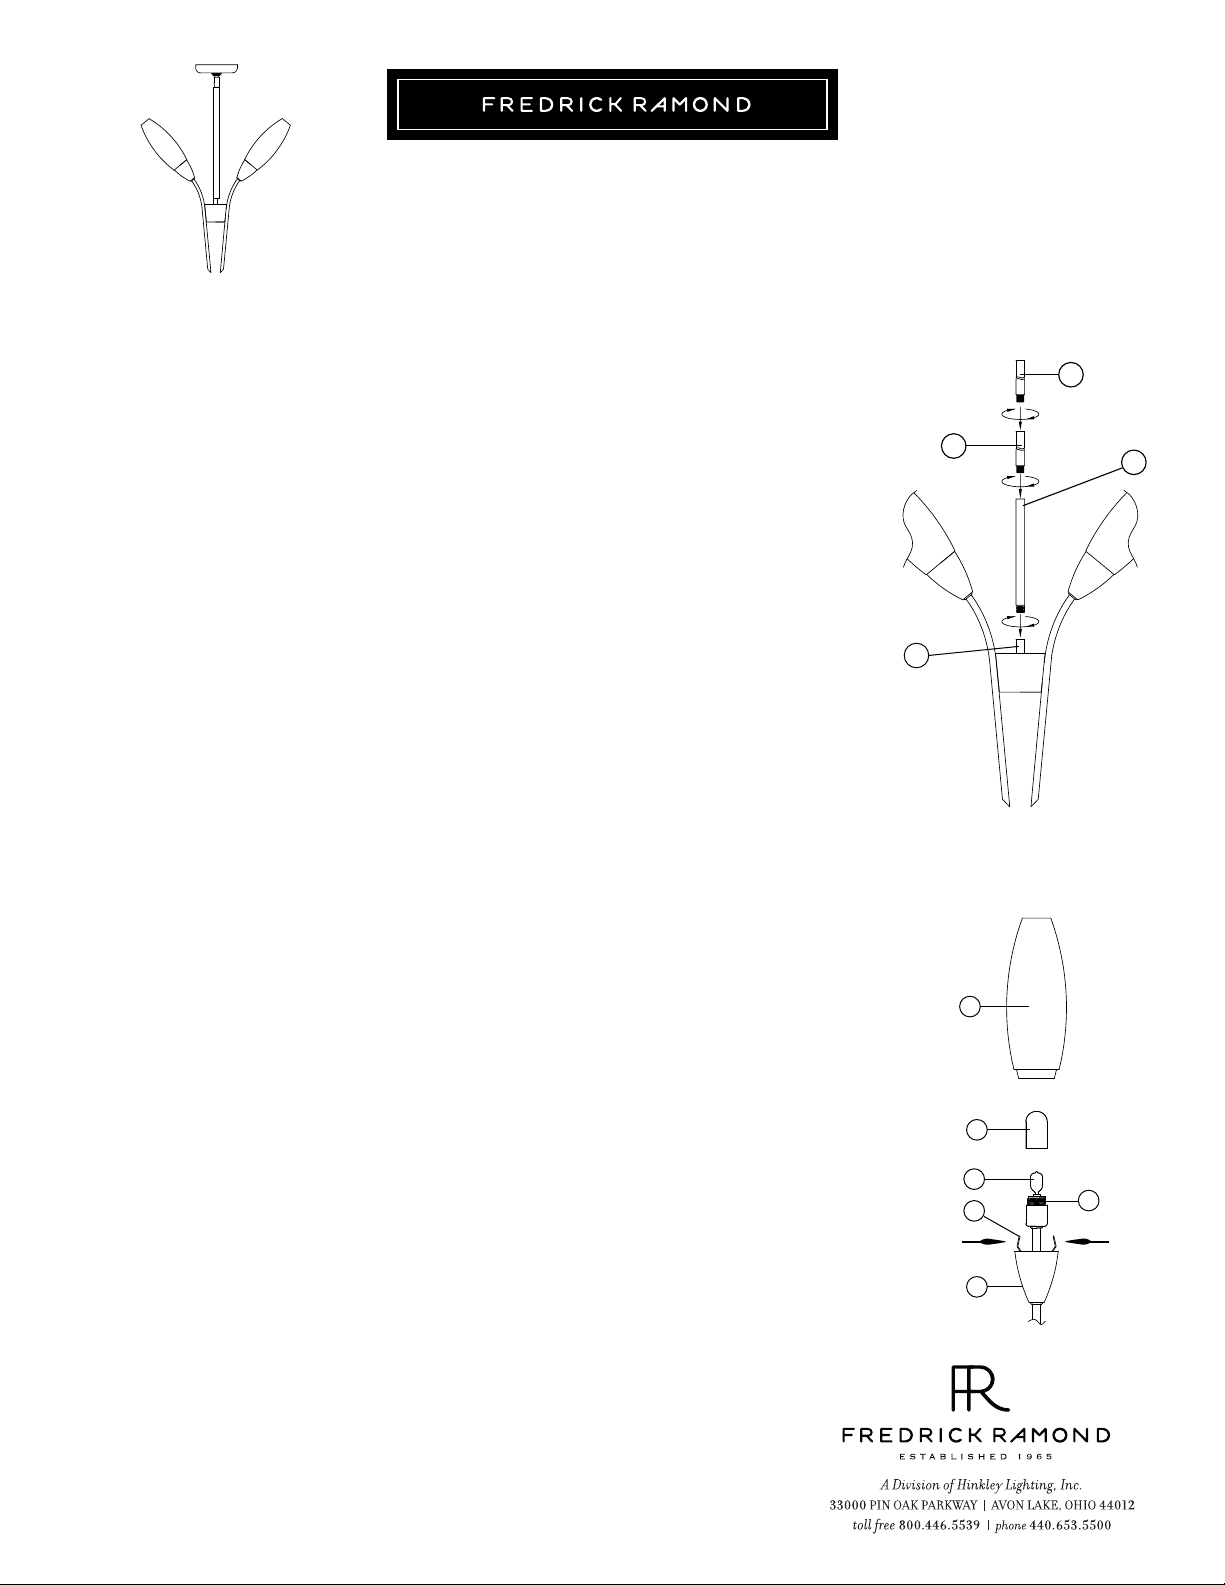
1 Prior to glass being installed, fixture can now be lamped accordingly with bulbs
provided (1) - See Drawing 2.
2 After lamping, thread bulb shield (2) onto socket (3). Finger tighten only.
3 To install glass (4), compress spring clip (5) and slip glass over spring clip and
down into glass cup (6). Repeat for remaining pieces of glass.
[DRAWING 2]
4
2
1
5
6
3
compress
spring
clip
 Loading...