

Page 1
installation instructions
Family: Sm/Lg Concrete Kit Item No. 51010CK/52010CK
start h ere
51010
52010
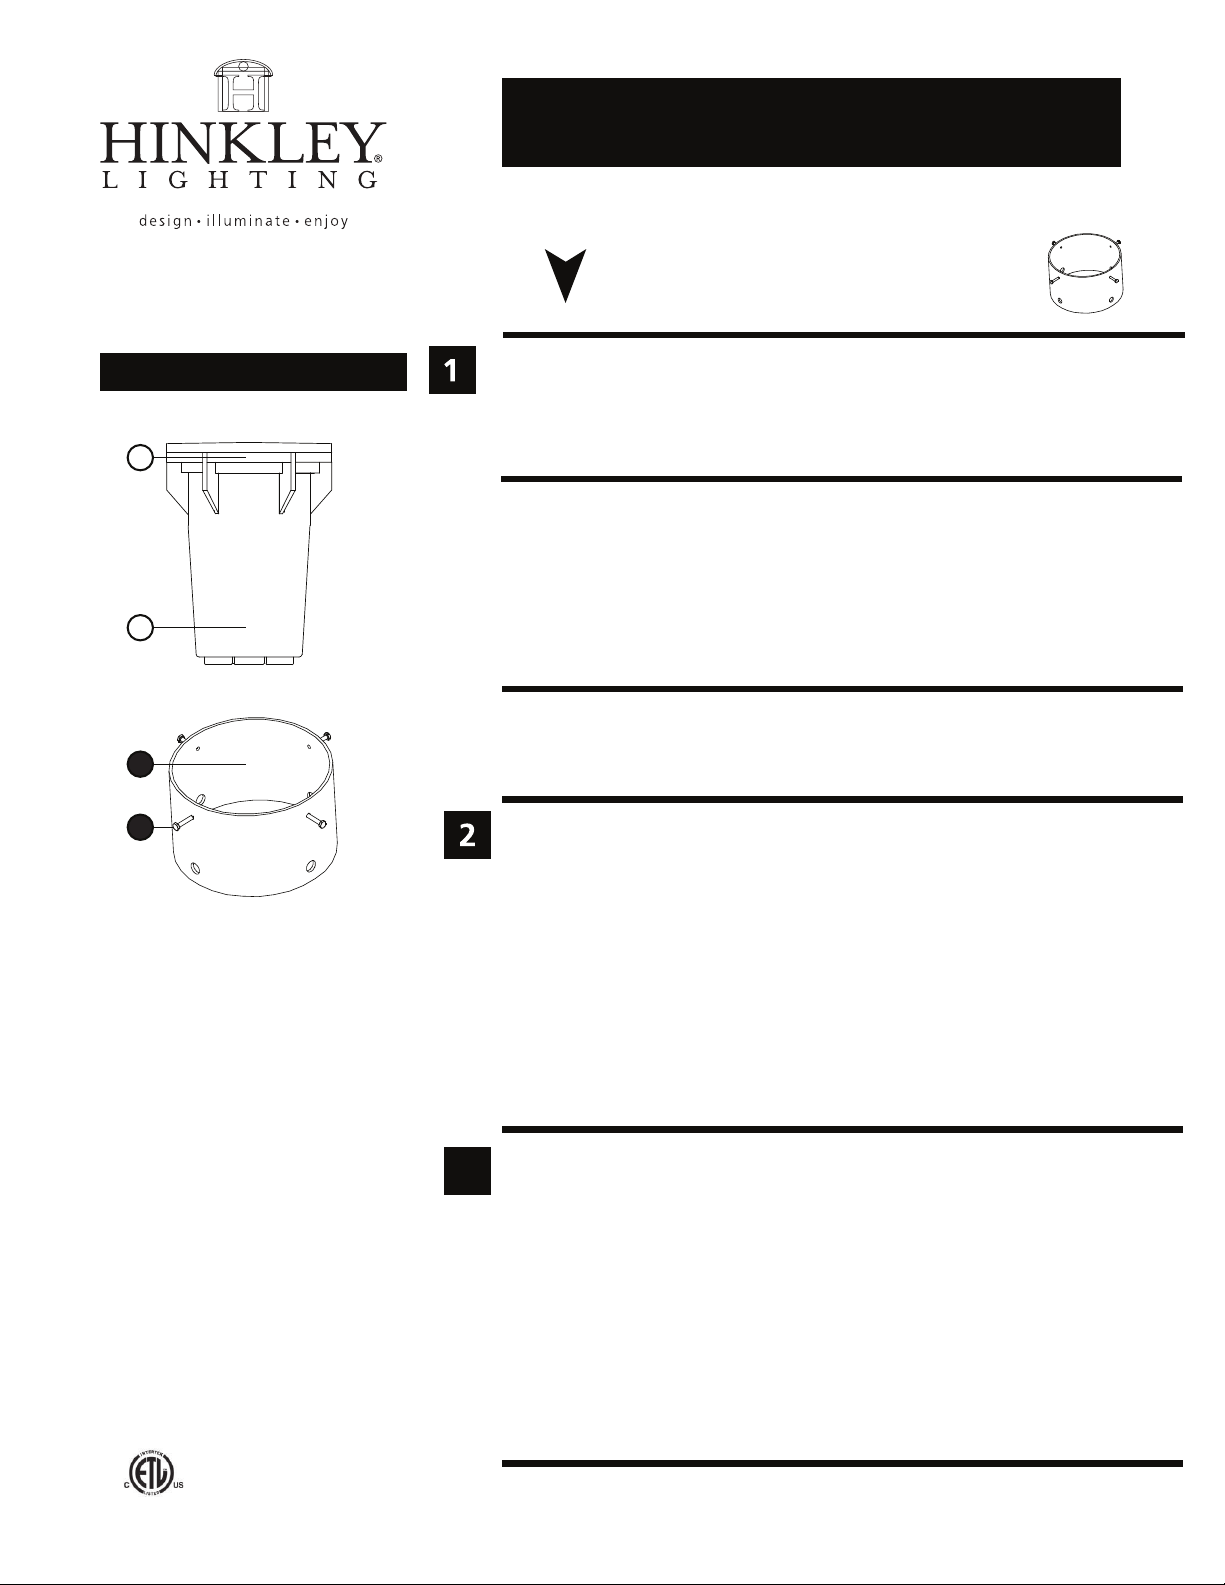
Drawing 1 - Kit Installation
B
A
1
2
1. Find a clear area in which you can work.
2. Carefully review instructions prior to assembly.
3. Gather tools required (refer to fixture instruction sheet for list).
• Save these instructions for future reference.
INSTALLATION OF INGROUND FIXTURES REQUIRES SPECIAL CONSIDERATION.
PROPER GRADING DRAINAGE MATERIAL AND POTTING OF THE INTERNAL WIRES
ARE PROCEDURES THAT ARE IMPORTANT TO A SUCCESSFUL INGROUND INSTALLATION. THE FOLLOWING INSTRUCTIONS ARE BASIC STEPS FOR INSTALLING
INGROUND FIXTURES IN CONCRETE (USING CONCRETE POUR KIT). FOR GREATER
DETAILED INSTRUCTIONS REFER TO THE INSTRUCTION SHEET ENCLOSED WITH
EACH FIXTURE.
NOTE: TO ENSURE PROPER DRAINAGE PREPARE GRAVEL FOUNDATION, MAKE
SURE THAT THE CONCRETE LEVEL WHEN POURED, WILL BE FLUSH WITH THE TOP
OF THE CONCRETE POUR ACCESSORY.
1. Remove trim ring and internal components from fixture housing.
2. Position the fixture housing (A) into the concrete pour kit (1), making sure that the
underside of the housing flange (B) rests on top of the set screws (2). Tighten set
screws (2) on the side of the concrete pour kit (1) to lock the housing in place (do not
over tighten screws). Secure assembly to the final location with re-bar or other
anchoring device (not provided).
3. Excavate soil where the fixture is to be installed. Dig a trench 18” deep for conduit
installation.
4. Place assembly into hole. Be sure there is a minimum 3” of drainage material (sand or
gravel only) covering the bottom of the hole.
5. Please refer to fixture instruction sheet for further fixture assembly and installation.
Then refer back to this instruction sheet to continue the concrete kit installation
process.
3
H I N K L E Y L I G H T I N G 1 2 600 B ere a Roa d Cle vela nd, OH 4 4111 8 00.4 46.5 539 / 21 6.67 1.33 00 w ww. h inkl e y lig htin g.co m
1. After the fixture has been properly installed according to its instruction sheet , place
a dirt cover on the fixture (not provided) to prevent gravel and concrete from falling
into the fixture housing (A).
2. Fill area with a minimum of 3” of drainage material. Be sure not to fill area flush with
top frame and assembly. This is to be filled with concrete.
3. Pour concrete. Remember that fixture position cannot be altered after concrete sets.
4. Once the concrete has set and is completely cured, remove dirt cover from the fixture
and install electrical components. Use silicone wire nuts (provided with fixture) to
connect supply wire to fixture wire within housing.
5. Install specified lamp, and then replace gasket lens, making certain there is no debris
between the gasket, and the housing. Install trim ring or rock guard per installation
instructions.
6. Connect fixture to power source and energize.
3.4.08
 Loading...