

Page 1
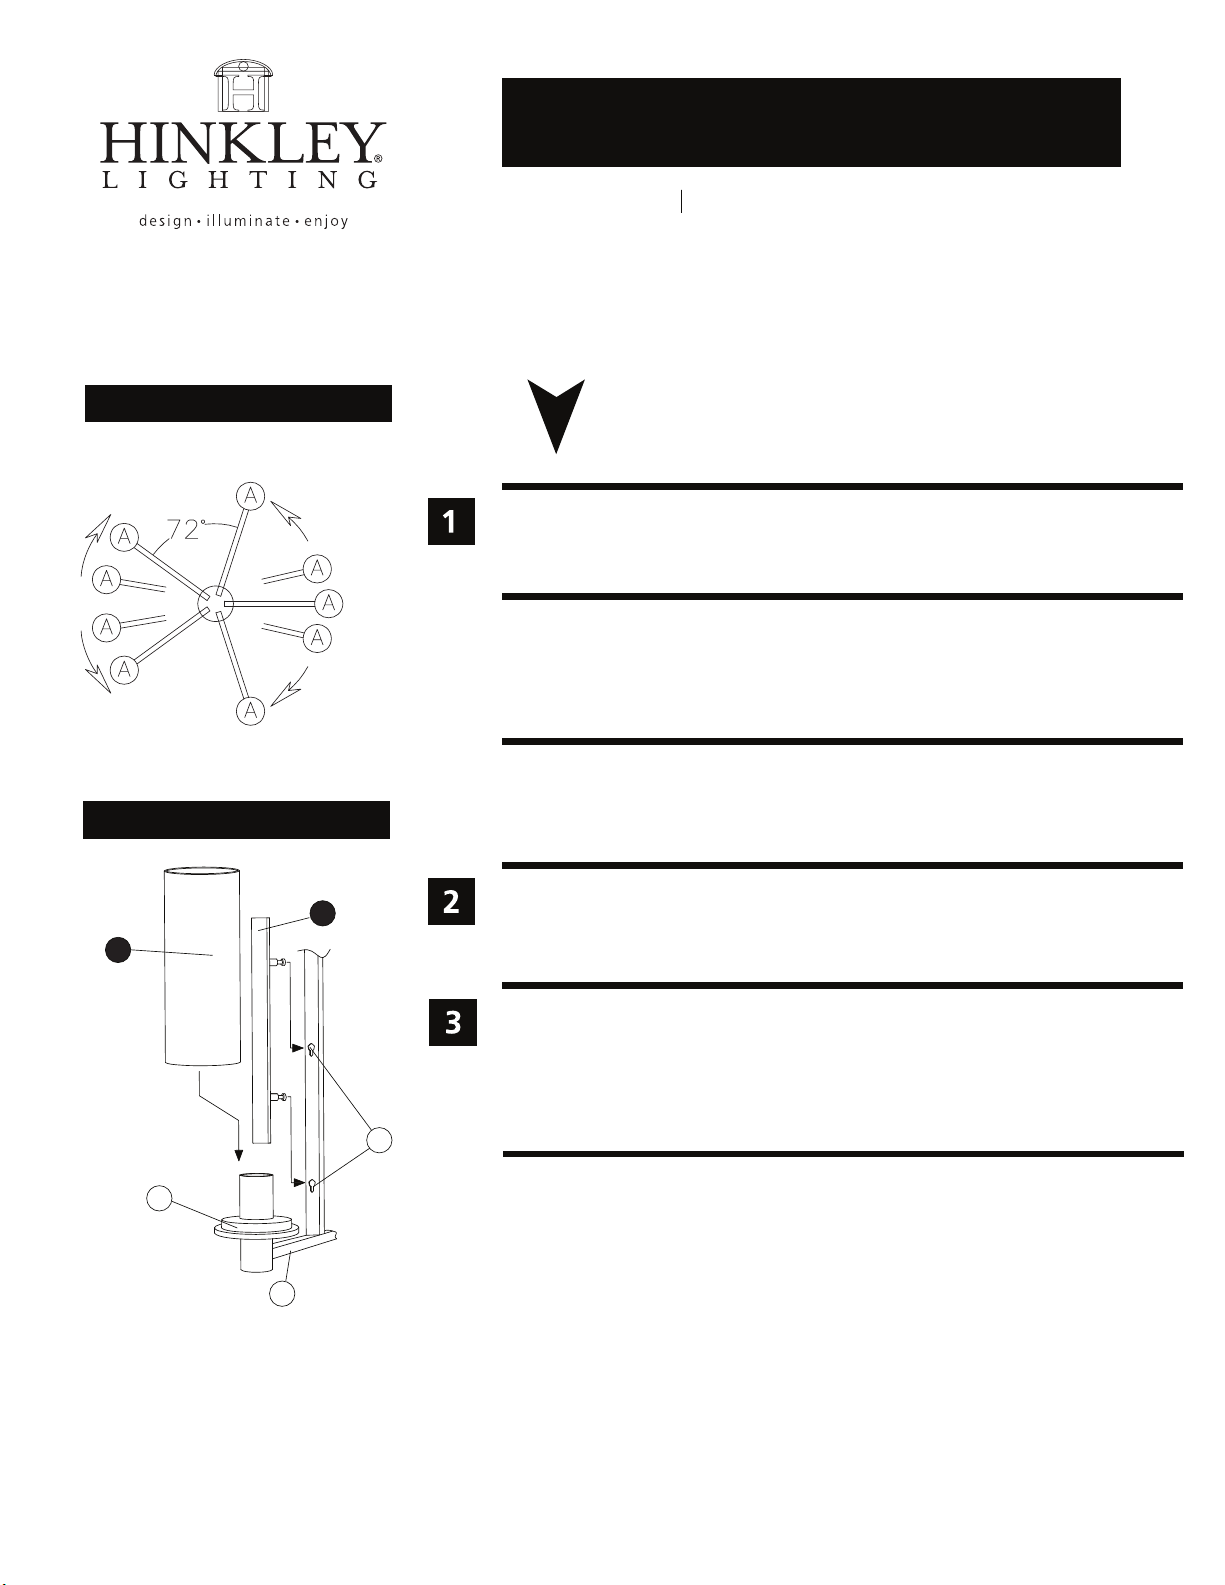
Drawing 1 - Arm Spacing
assembly instructions
4865
Family: Piper Item No. 4865
start here
1. Find a clear area in which you can work.
2. Unpack fixture and glass from carton.
3. Carefully review instructions prior to assembly.
*** The construction of this fixture will be accomplished by first assembling the
main body of the fixture, making all necessary electrical connections, hanging
the fixture from the ceiling, and then installing the glass.
Drawing 1 - Fixture Assembly
1
2
C
A
SAFETY WARNING: READ WIRING AND GROUNDING INSTRUCTIONS (I.S. 18)
AND ANY ADDITIONAL DIRECTIONS. TURN POWER SUPPLY OFF DURING
INSTALLATION. IF NEW WIRING IS REQUIRED, CONSULT A QUALIFIED
ELECTRICIAN OR LOCAL AUTHORITIES FOR CODE REQUIREMENTS.
1. Rotate arms (A) until they are approximately 72 degrees apart - see Drawing 1.
2. Please refer to hanging instruction sheet (I.S. 19) provided to hang this fixture.
Then refer back to this sheet to install reflector plate and glass.
1. To install reflector plate (1) slip stud into keyhole slot (B) and slide downward.
2. Fixture can now be lamped accordingly.
3. To install glass (2) slip bottom of glass over locator plate (C).
4. Fixture is complete.
B
Note: Maximum wattage for 4865 fixture is 100 watts per bulb.
06.01.11
H I N K L E Y L I G H T I N G 1 260 0 Be rea Roa d Cl eve la nd , OH 4 411 1 800. 44 6.5 53 9 / 2 16 .671 .3 300 www. hink le yli gh ti ng.c om
 Loading...