

Page 1
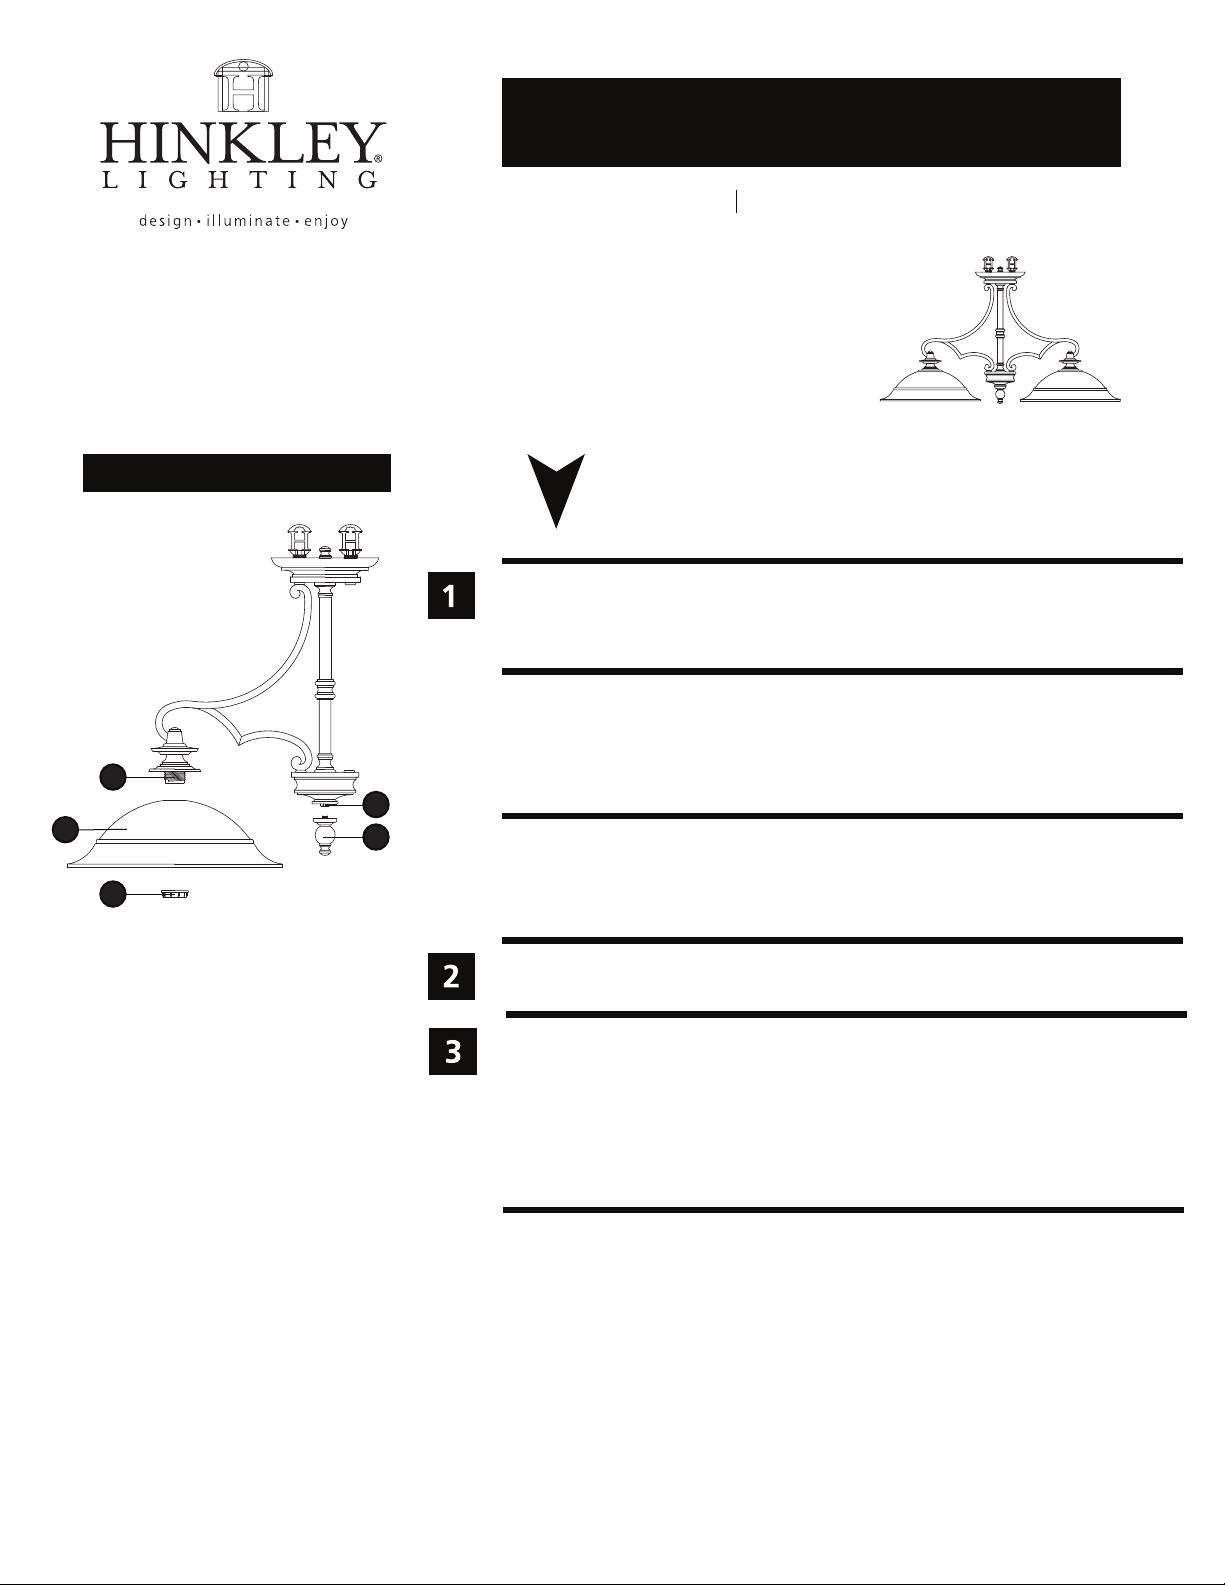
Drawing 1 - Glass Installation
H I N K L E Y L I G H T I N G 33000 Pin Oak Parkway Avon Lake, OH 44012 800.446.5539 / 440.653.5500 hinkleylighting.com
assembly instructions
4252
Family: Plymouth Item No. 4252 OB
start here
1. Find a clear area in which you can work.
2. Unpack fixture and glass from carton.
3. Carefully review instructions prior to assembly.
*** The construction of this fixture will be accomplished by first making all
necessary electrical connections, hanging the fixture from the ceiling, and
2
then installing the glass.
5
3
1
4
SAFETY WARNING: READ WIRING AND GROUNDING INSTRUCTIONS (I.S. 18)
AND ANY ADDITIONAL DIRECTIONS. TURN POWER SUPPLY OFF DURING
INSTALLATION. IF NEW WIRING IS REQUIRED, CONSULT A QUALIFIED
ELECTRICIAN OR LOCAL AUTHORITIES FOR CODE REQUIREMENTS.
1. Please refer to the hanging instruction sheet (I.S. 19-75) provided to hang fixture.
Then refer back to this sheet to install fixture glass.
1. Remove threaded socket ring (1) from socket (2) - see Drawing 1.
2. Place glass (3) over exposed section of socket (2) .
3. Thread socket ring (1) onto socket (2) to secure glass (3).
4. Repeat steps 1-3 for remaining glass.
5. Thread bottom finial (4) into coupler (5) and tighten.
6. Fixture can now be lamped accordingly.
2.7.08
 Loading...