

Page 1
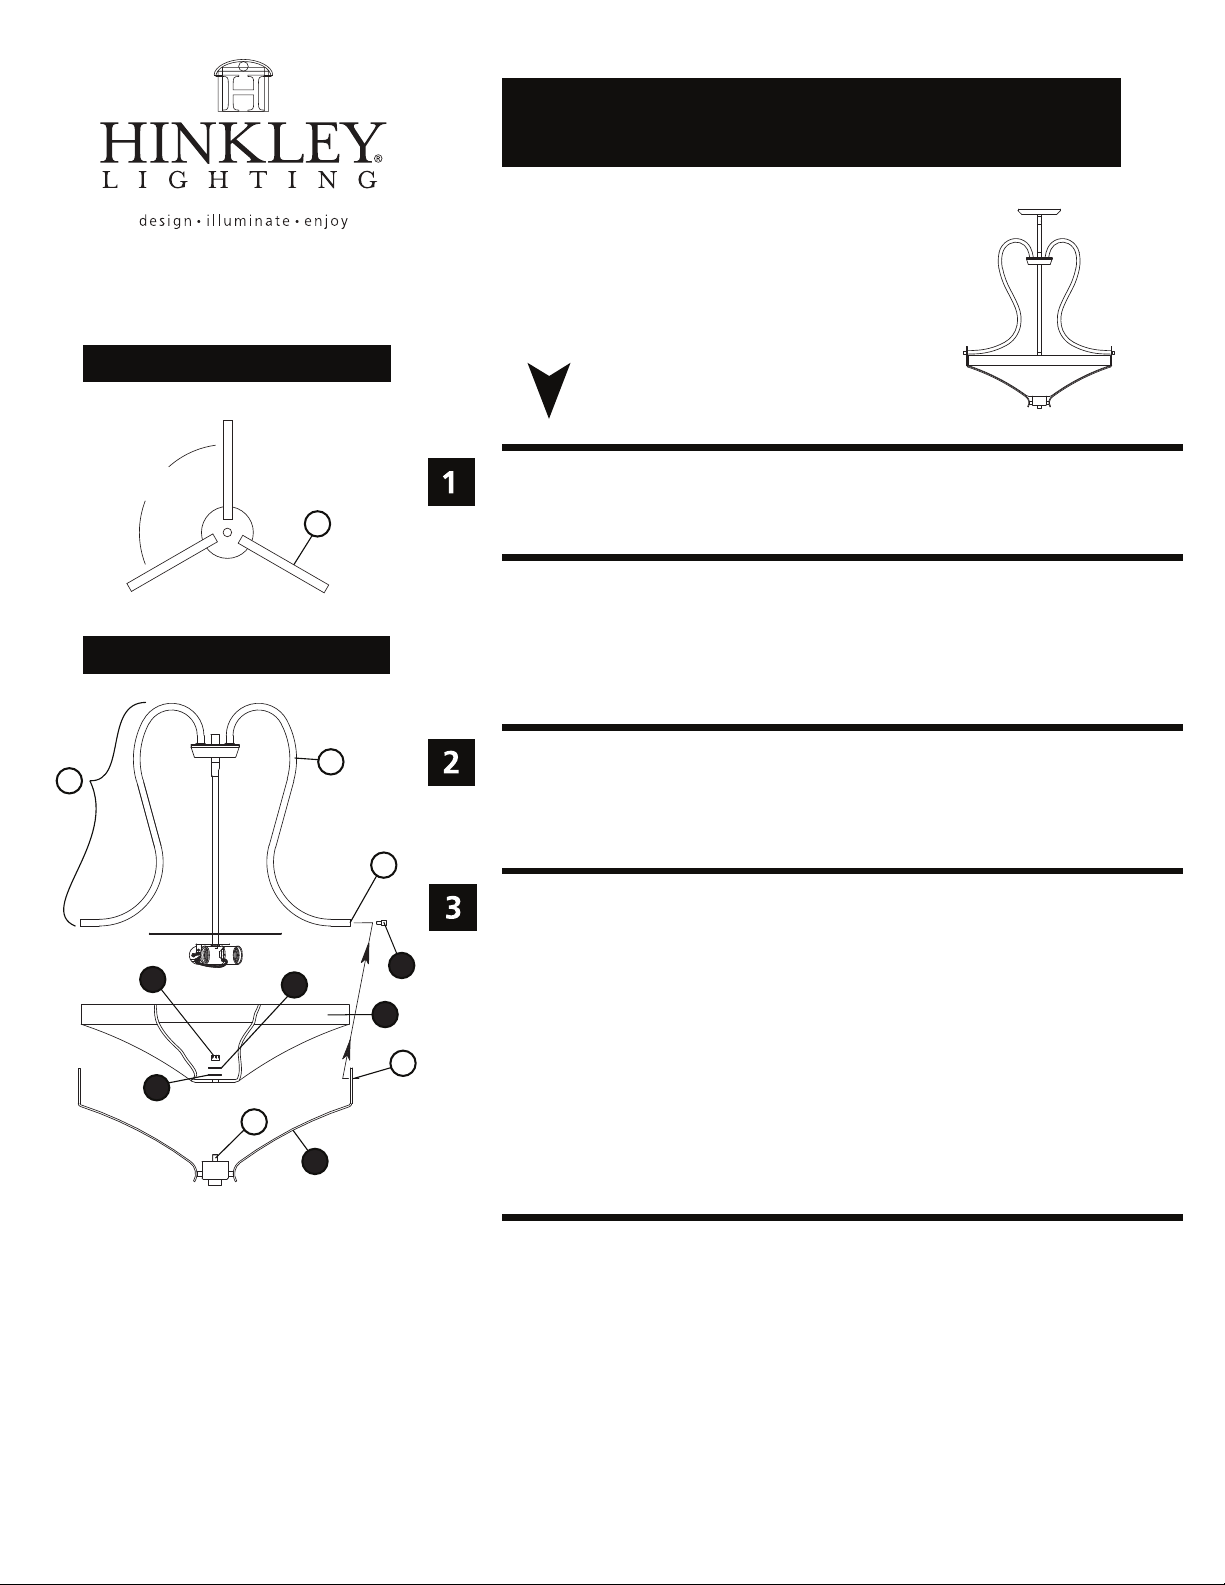
Drawing 1 - Arm Adjustment
assembly instructions
4224
Item No. 4224
start here
o
120
Drawing 1 - Fixture Assembly
A
5
1. Find a clear area in which you can work.
2. Unpack fixture and glass from carton.
B
B
3. Carefully review instructions prior to assembly.
*** The construction of this fixture will be accomplished by first assembling the
main body of the fixture, determining the length of stem required, mounting
the mounting strap to the junction box, making all necessary electrical connections, hanging the fixture from the ceiling, and then installing the glass.
* It is recommended that assistance be available when installing this fixture.
1. Take main body and socket assembly (A) and rotate arms (B) until they are equally
spaced 120 degrees apart - see Drawing 1 and 2.
2. Fixture can be installed at this point. Please follow instruction sheet (IS19-92)
provided. Upon completion of installation, return to this section of the instruction
sheet to complete fixture assembly.
E
1. To install glass first take lower arm assembly (1) and slip center hole of glass over
threaded tube (C) located on the top center body of arm assembly (1).
4
6
2
2. Slip rubber washer (3) followed by flat washer (4) over threaded tube (C).
3. Thread knob (5) onto end of threaded tube (C) and tighten to secure glass (2) to
lower arm assembly (1).
D
3
C
1
HINKLEY LIGHTING 33000 Pin Oak Parkway Avon Lake, OH 44012 800.446.5539 / 440.653.5500 hinkleylighting.com
4. Fixture can be lamped accordingly before proceeding.
5. Lift lower arm assembly (1) with glass (2) up to fixture and line holes (D) in arms of
lower asembly with holes (E) in ends of arms (B) of main body assembly (A).
6. Slip barrel knob screws (6) through holes (D) in arms of lower assembly (1) and
thread them into hole (E) in end of arms (B) of main body assembly (A), and tighten to
secure.
01.01.13
 Loading...