

Page 1
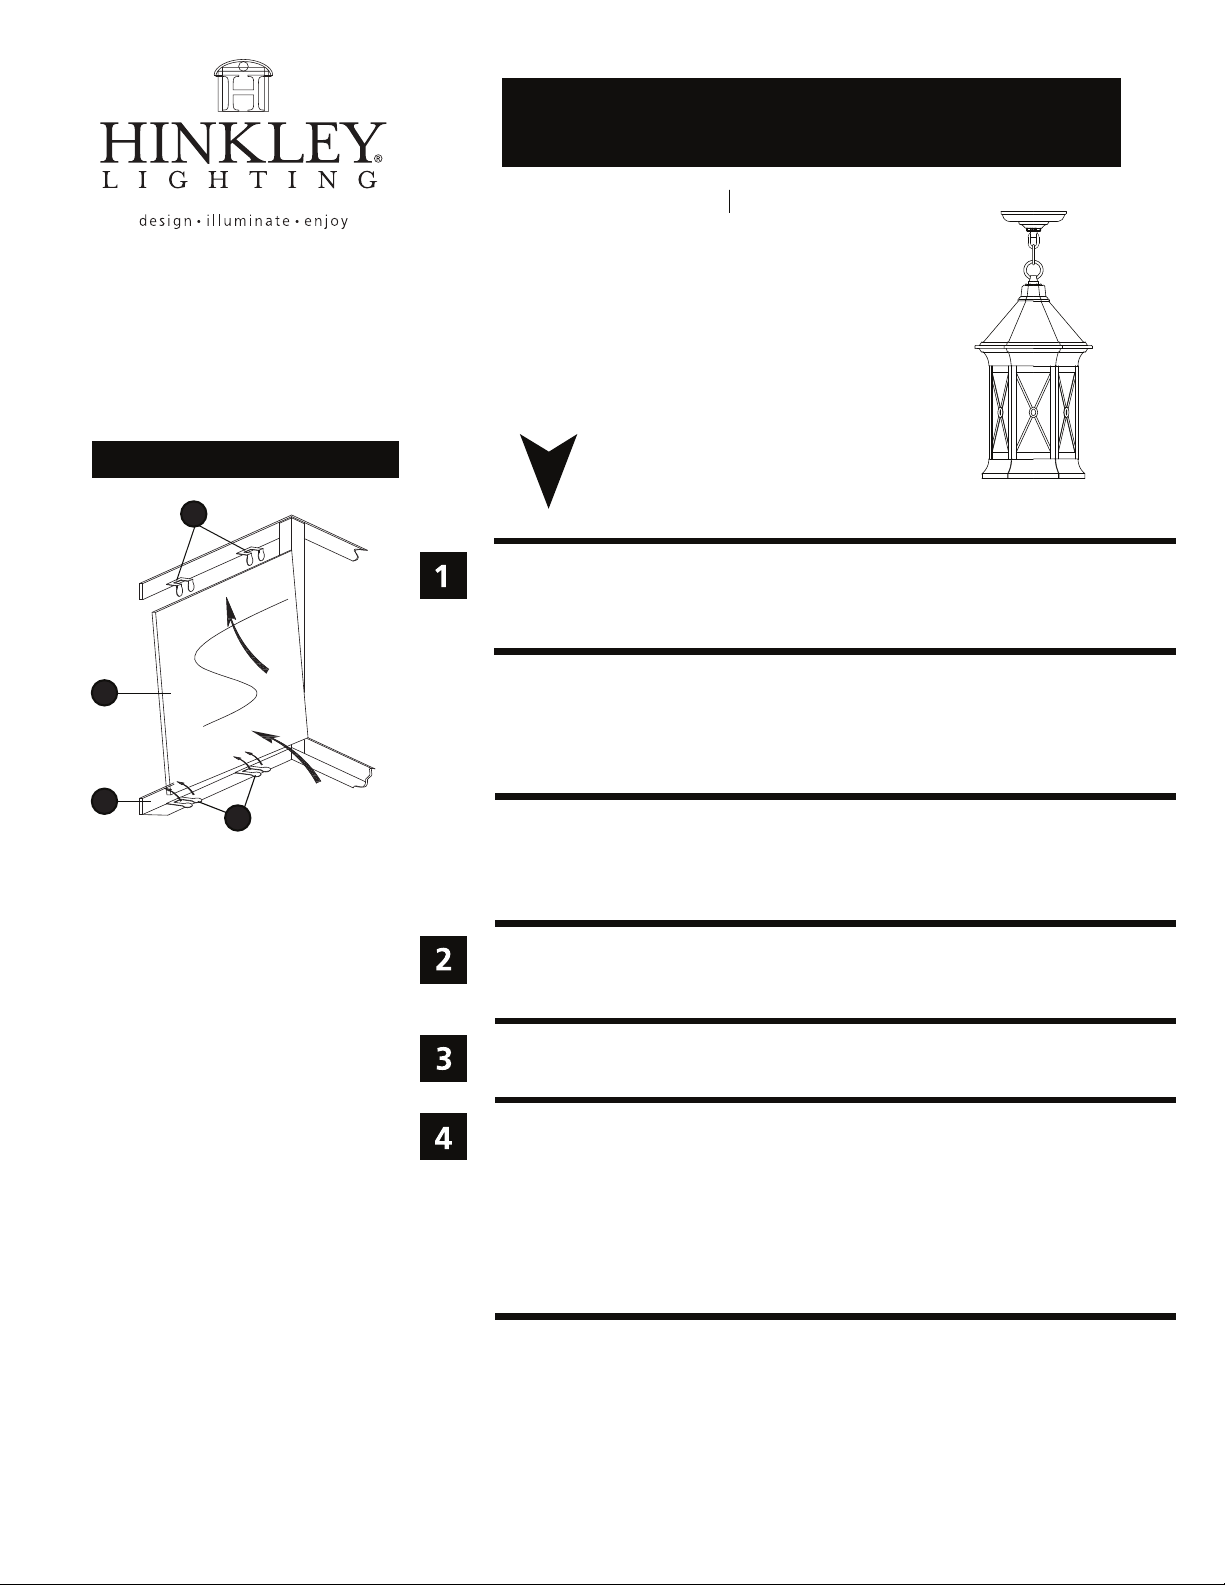
Drawing 1 - Glass Installation
H I N K L E Y L I G H T I N G 33000 Pin Oak Parkway Avon Lake, OH 44012 800.446.5539 / 440.653.5500 hinkleylighting.com
assembly instructions
2292
Family: Brighton Item No. 2292
3
1. Find a clear area in which you can work.
2. Unpack fixture and glass from carton.
3. Carefully review instructions prior to assembly.
1
*** The construction of this fixture will be accomplished by first making all
necessary electrical connections, hanging the fixture from the ceiling and then
installing the glass.
start here
2
4
SAFETY WARNING: READ WIRING AND GROUNDING INSTRUCTIONS (I.S. 18)
AND ANY ADDITIONAL DIRECTIONS. TURN POWER SUPPLY OFF DURING
INSTALLATION. IF NEW WIRING IS REQUIRED, CONSULT A QUALIFIED
ELECTRICIAN OR LOCAL AUTHORITIES FOR CODE REQUIREMENTS.
Make electrical connections from supply wire to fixture lead wires. Refer to instruction
sheet (I.S. 18) and follow all instructions to make all necessary wiring connections.
Then refer back to this sheet to continue installation of this fixture.
1. Please refer to the hanging instruction sheet (I.S. 19) provided to continue installation
of this fixture. Then refer back to this sheet to install glass.
1. To install glass, slip glass panel (1) through bottom of cage assembly (2) - see
Drawing 1.
2. Slip top of glass panel (1) under top glass clips (3).
3. Slip bottom of glass panel (1) into the bottom of the cage assembly (2).
4. Bend lower glass clips (4) up to retain glass panels (1).
5. Repeat steps 1-4 for remaining panels.
6. Fixture can now be lamped accordingly.
6.01.11
Page 2
I.S.19 hanging instructions
I.S. 19
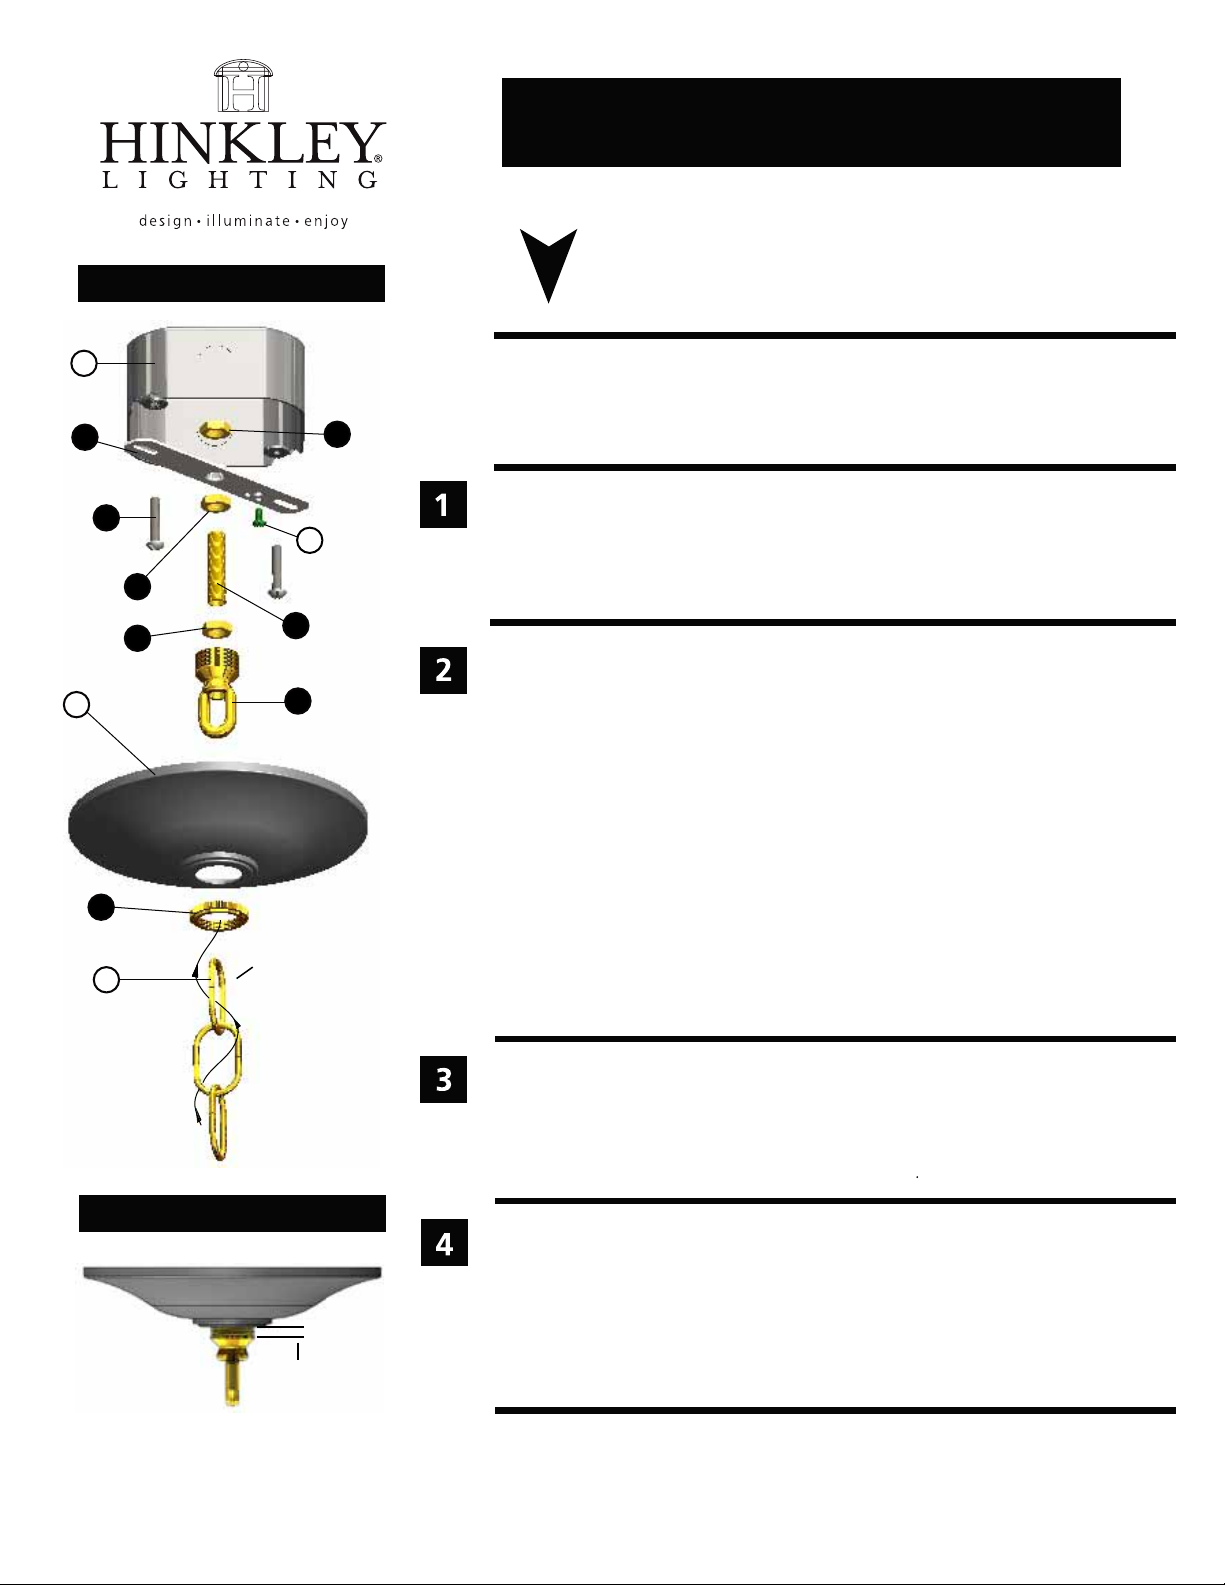
Drawing 1 - Hanging Assembly
A
1
2
3b
3a
B
6
C
3c
GS
4
5
weave supply wire and
ground wire through chain
star t here
SAFETY WARNING: READ WIRING AND GROUNDING INSTRUCTIONS (I.S. 18)
AND ANY ADDITIONAL DIRECTIONS. TURN POWER SUPPLY OFF DURING
INSTALLATION. IF NEW WIRING IS REQUIRED, CONSULT A QUALIFIED
ELECTRICIAN OR LOCAL AUTHORITIES FOR CODE REQUIREMENTS.
1. Shut off electrical current before starting. If the fixture you are replacing is
turned on and off by a wall switch, simply turn the switch off. If not, remove
the appropriate fuse (or open the circut breakers) until the fixture is dead.
• DO NOT restore current - either by fuse, breaker or switch - until the new
fixture is completely wired and in place.
1. fasten mounting strap (1) to outlet box (A) with the two 8-32 screws (2) -see
Drawing 1.
2. Thread 2 - hex nuts (3a) and (3b) onto threaded tubing (4).
3. Thread one end of threaded tubing (4) into loop (5) a minimum of 1/2” to 3/4”.
Thighten hexnut (3a) against loop (5) to lock loop in position.
4. Thread other end of threaded tube (4) into mounting strap (1) approximately 1/2”.
5. Slip canopy (B) over loop (5) and adjust height of loop so half of the threaded area
on the loop is exposed - see Drawing 2 below. After loop height is adjusted, thigten
hex nut (3b) up against mounting strap, tighten against mounting strap to lock loop
and threaded tube in position.
6. Remove mounting strap (1) from junction box (A), and thread third hex nut (3c) onto
end of threaded tube (4) above the mounting strap, tighten against mounting strap
to lock assembly in position.
7. Remount mounting strap to junction box.
1. Taking the chain, determine the length you require to hang the fixture.
2. Attach one end of the chain to the top loop of the fixture - see Drawing 2.
3. Now slip loop collar (5) and canopy (B) onto chain.
4. Attach other end of chain to loop (4). Get assistance for this step since fixture
may be heavy and difficult to hold while attaching the chain.
Drawing 2 - Canopy Adjustment
half of threaded area
exposed
HINKLEY LIGHTING 33000Pin Oak Parkway, Avon Lake, OH 44012 800.446.5539 / 440.653.5500 hinkleylighting.com
1. Unwrap supply wire and ground wire and weave them up through the chain.
2. Slip supply wire and ground wire through center of loop (4).
3. Connect ground wire to mounting strap (1) using green ground screw (6).
4. Make electrical connections from supply wire to fixture lead wires. Refer to
instruction sheet (I.S. 18) and follow all instructions to make all necessary
wiring connections.
5. Slip canopy up firmly against the ceiling and secure by turning the threaded
collar (5) on loop (4) until tight.
 Loading...