

Page 1
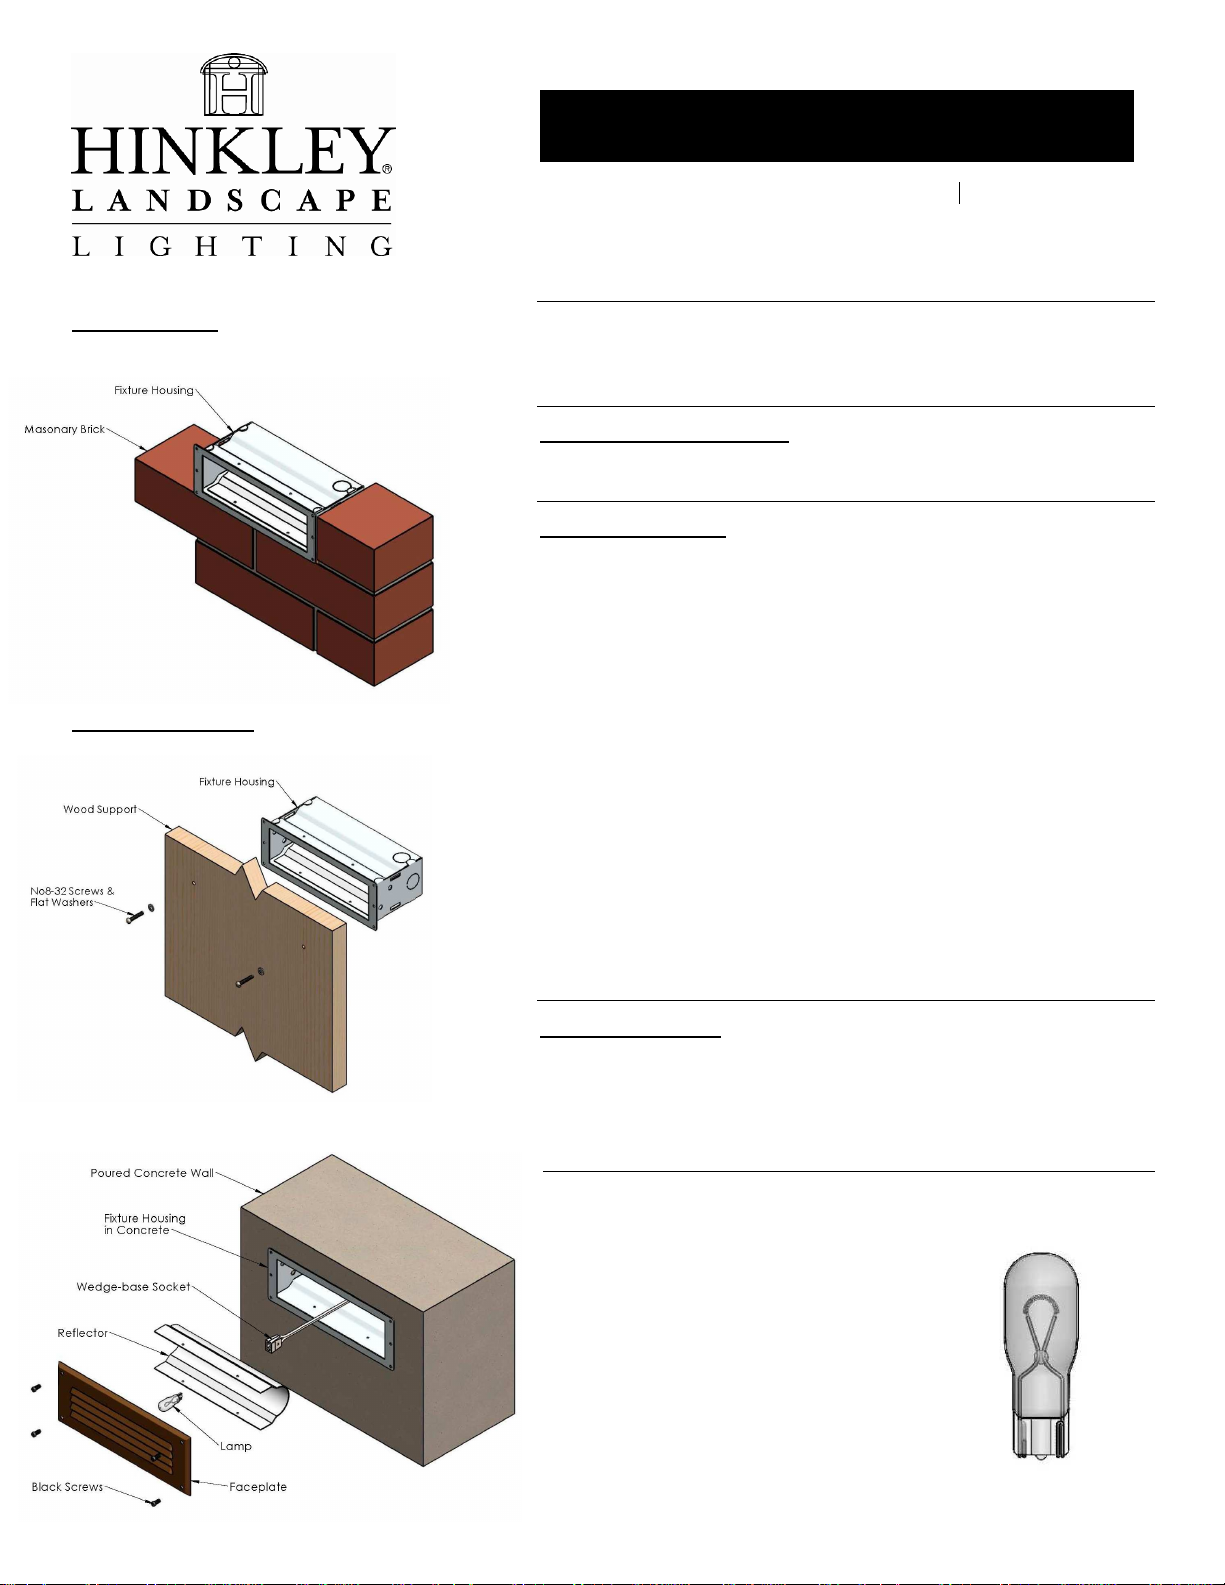
Brick Mounting
Concrete Mounting
IS1594
Low Voltage Bricklight / 12 watts Max (912) lamp , 12 volt AC input
Installation Instructions
start here
SAFETY WARNING: TURN POWER SUPPLY OFF DURING INSTALLATION. IF
NEW WIRING IS REQUIRED, CONSULT A QUALIFIED ELECTRICIAN OR LOCAL
AUTHORITY FOR CODE REQUIREMENTS.
IMPORTANT OPERATION NOTE: THIS LIMINAIRE IS DESIGNED TO BE
OPERATED WITH HINKLEY APPROVED 12 VOLT AC SYSTEMS.
SAVE THESE INSTRUCTIONS
LUMINAIRE MOUNTING:
1. To prevent electrical shock, disconnect transformer from electrical supply
before installation or service.
2. Run wire to Luminaire with use of conduit before installation. The Fixture is
provided with three ½” NPT conduit knockouts. Ensure that all non-used
open holes are closed or covered before beginning installation.
3. Strip the two wire leads from the Luminaire and connect to the main supply
For Masonry Installation:
For Poured Concrete Installation:
LAMP REPLACEMENT:
wire using the provided wirenuts and silicone fill.
4. Locate desired position of fixture and set in place with mortar. Fixture should
take the place of a standard masonry brick.
5. Level the supplied template on wood support frame and drill two 3/16”
diameter clearance holes. Attach fixture to wood support using two No8-32
screws and washers (not supplied) as shown in illustration.
6. Pour Concrete
7. Once concrete has set, remove the wood support frame and lamp
accordingly and then attach the fixture faceplate with the four Black screws
provided with fixture.
1. Remove the four Black oxide screws from the faceplate using a Philips
head screwdriver.
2. Set faceplate aside for reuse in assembly.
3. Remove burned out light bulb and replace with new bulb.
4. Reattached faceplate and energize fixture.
12 volt
12 watt max
Wedge Base
Lamp
Full size
912
Page 2

2 9/16"
Cutout
Area
7 5/8"
7 7/8"
Cutout
Area
No8-32unc
Threaded
Holes
1594 Fixture Drilling template
Full Scale
~Center holes for concrete mounting
~Corner holes for face plate attachment
2 3/8"
 Loading...