

Page 1
Hardscape Installation Instructions
Low Voltage Hardscape Series
Model: 15440BZ 4.5 watt LEDs / 6.74VA
15442BZ 8.5 watt LEDs / 12.4VA
12 volt AC or 15 volt DC input required.
Dimmable on primary side of the transformer with magnetic dimmer control.
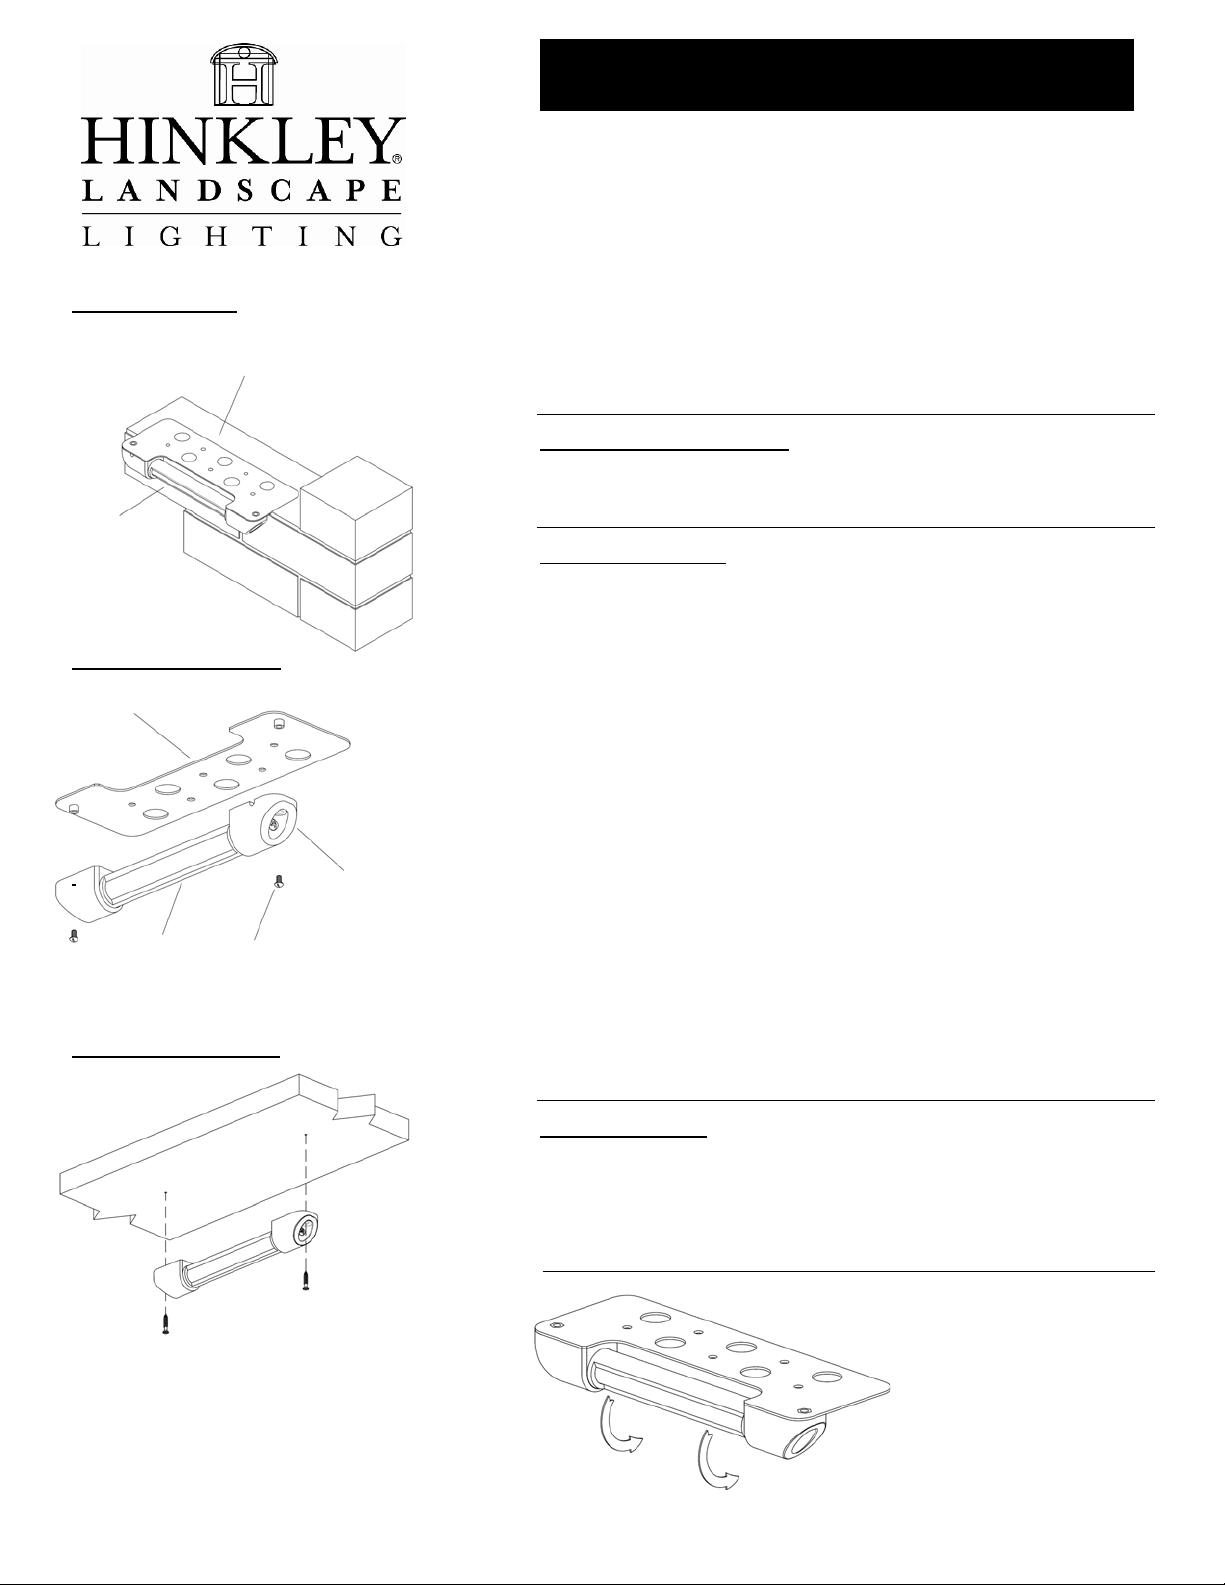
Masonry Mounting
Masonry plate
Hardscape
luminaire
Mounting Plate Removal
Mounting plate
End Cap
Hardscape
Luminaire mounting screws
Direct Surface Mounting
Mounting Surface
Wood screws or
appropriate fasteners
Hinkley Lighting 33000 Pin Oak Parkway Avon Lake, OH. 44102 800.446.5539 / 440.653.5500 hinkleylighting.com
start here
SAFETY WARNING: TURN POWER SUPPLY OFF DURING INSTALLATION. IF
NEW WIRING IS REQUIRED, CONSULT A QUALIFIED ELECTRICIAN OR LOCAL
AUTHORITY FOR CODE REQUIREMENTS.
IMPORTANT OPERATION NOTE: THIS LIMINAIRE IS DESIGNED TO BE
OPERATED WITH HINKLEY APPROVED 12 VOLT AC SYSTEMS OR
NEXUS 15 VOLT DC SYSTEMS.
SAVE THESE INSTRUCTIONS
LUMINAIRE MOUNTING:
1. To prevent electrical shock, disconnect transformer from electrical supply
before installation or service.
2. Run wire to Luminaire according to local building practices before
installation. The Fixture is provided with a mounting plate to ease
installation.
3. Strip the two wire leads from the Luminaire and connect to the main supply
wire using the wirenuts and silicone fill provided (reference wiring
instructions from transformer or power supply).
For Masonry Installation:
4. Locate desired position of luminaire and set in place with mortar. Luminaire
mounting plate should be set into mortar between bricks.
Design Suggestion: mounting the LED element farther from the surface
you wish to illuminate will provide better coverage.
For Direct Surface Mount:
5. Locate desired position of the luminaire. Remove and discard mounting
plate. Hold luminaire in position and drill two pilot holes into surface where
fixture will be attached.
6. Using the appropriate fasteners or screws (not supplied) for your surface,
secure fixture in place as shown in the illustration.
7. Your luminaire is ready to energize.
Adjust light following direction below.
LIGHT ADJUSTMENT:
1. Using a Philips head screwdriver loosen the screws inside both of the Endcaps one turn in a counter clockwise direction.
2. Rotate the fixture body until the desired lighting effect is achieved.
3. Tighten the end cap screws until snug using a Philips head screw driver.
----------- Adjustment screw
(be sure to adjust both sides)
Luminaire rotation
350 degrees
 Loading...