

Page 1
Quick Start Guide
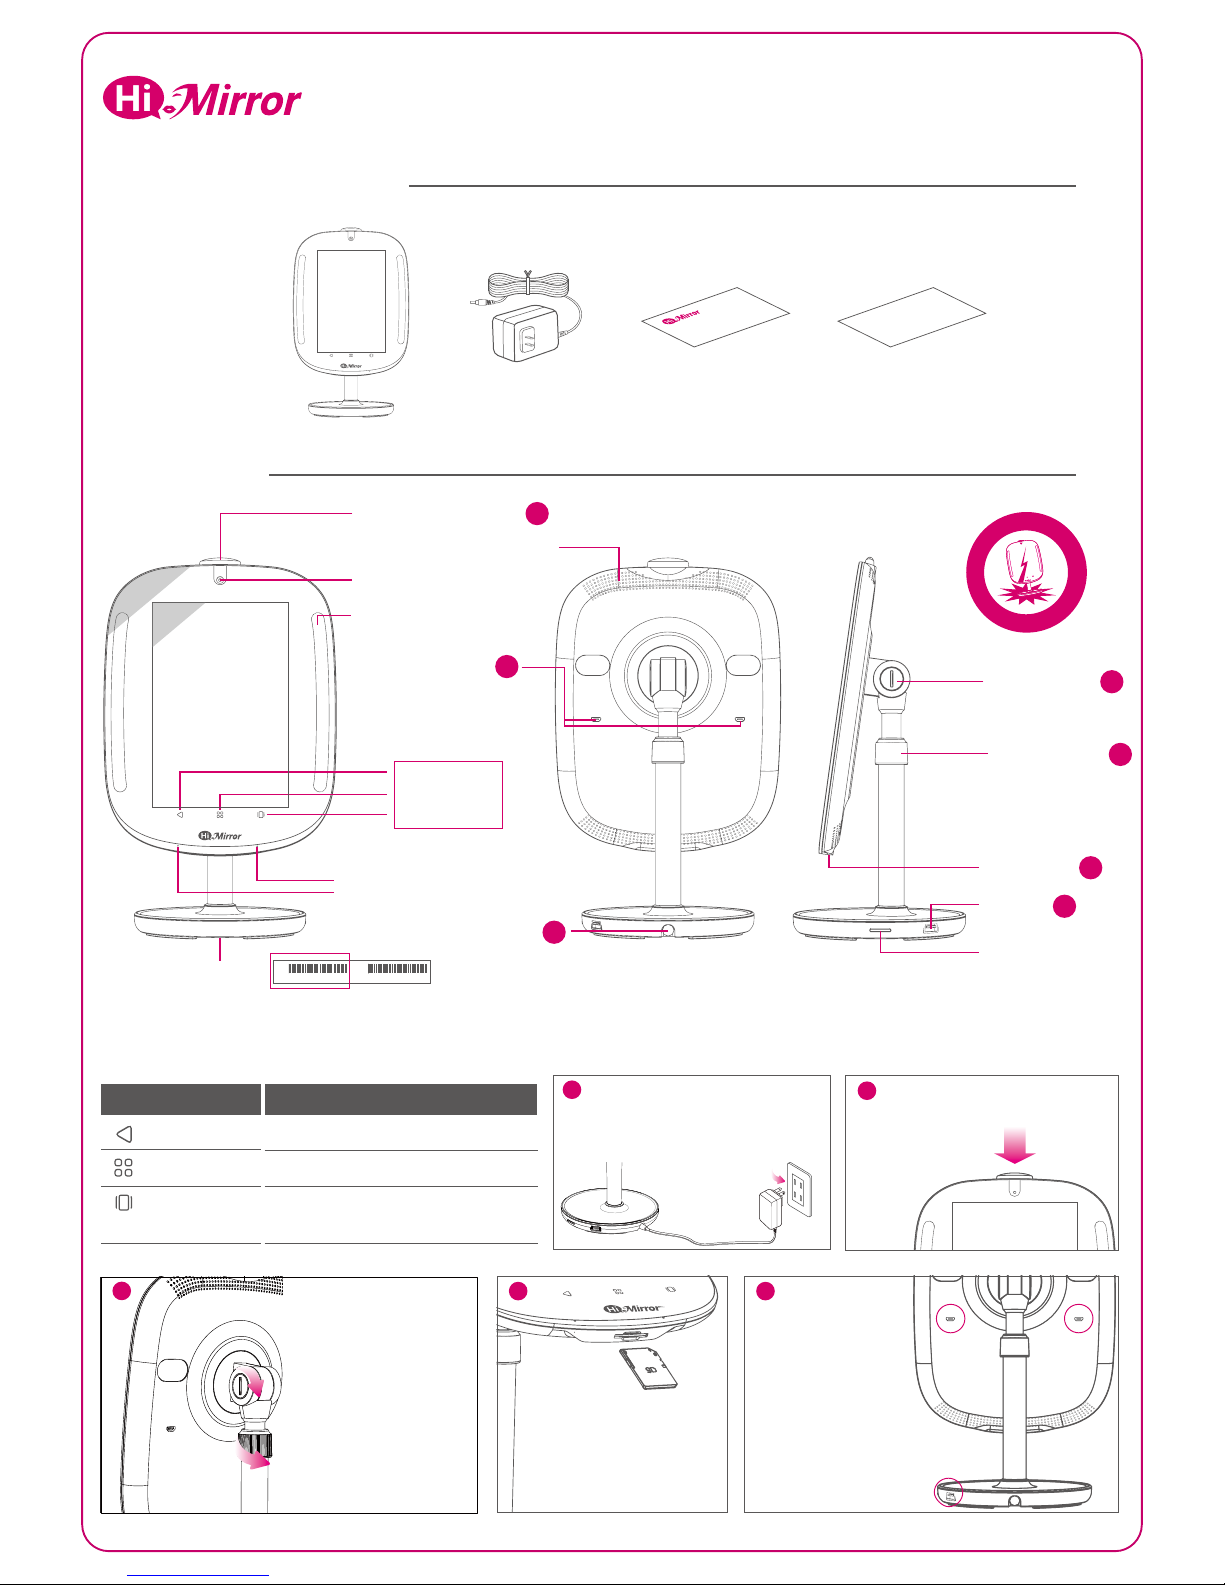
Power Adapter
Quick Start Guide
Warranty Card
HiMirror Mini
4
2
5
5
Power Jack
High Sensitivity Microphone
Micro USB Port x2
High Resolution Camera
Camera Cover Button
Ambient Makeup Light
Serial Number
MAC
SN
High Performance Speaker
Touch Key
Menu
Back
Mirror / Light
Power Button
USB Port
SD Card Slot
W
A
R
N
I
N
G
!
F
R
A
G
I
L
E
• 13" mirror size with 10.1" TFT LCD touch panel
13"
10.1"
Back to previous page
Bring up the menu
Back
Functions
Menu
Mirror / Light
Camera Cover Button –
Push to cover /
uncover the camera.
Touch Key
2
SD Card Slot –
Insert an SD card for
additional storage space.
USB Port –
Connect with HiMirror
Mini supported
peripheral devices.
Micro USB Port –
Connect with HiMirror
Mini supported
peripheral devices.
4 5
Switch between Mirror mode
and ambient makeup light
OVERVIEW
PACKAGE CONTENTS
Power Jack –
Connect HiMirror Mini to a power outlet
using the provided power adapter.
1
Slotted Screw –
Rotate the slotted screw
clockwise with a coin to fasten
the hinge when it gets loose.
Retaining Ring –
Rotate the retaining ring
counterclockwise to unlock
the rod and adjust the height
of the panel, and rotate it
clockwise to lock again.
3
1
3
Slotted Screw
Retaining Ring
3
Page 2
Note:
1. Children under the age of 13 are not permitted to create a HiMirror account.
2. Please ensure HiMirror Mini is placed on a flat and even surface.
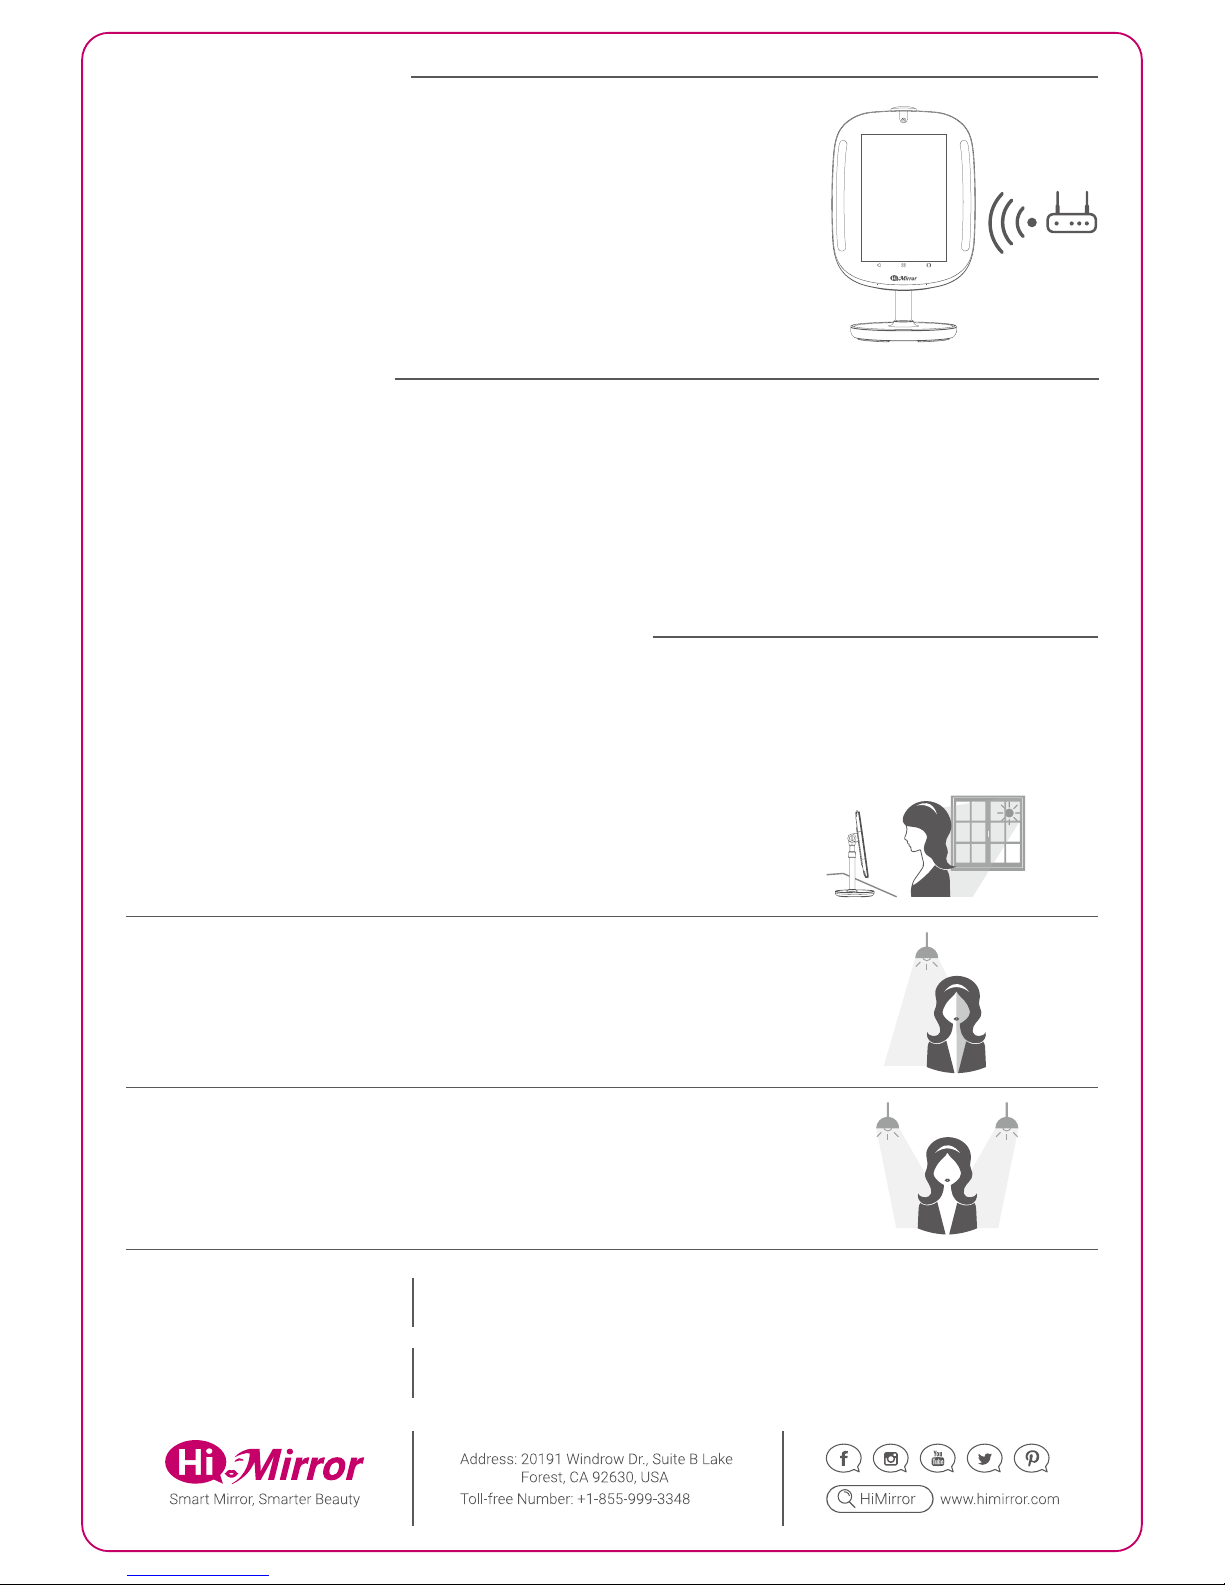
You must have a WiFi network available and have your HiMirror Mini installed
within its range.
HiMirror Mini must be within range of your WiFi network
BEFORE YOU START
For best results, make sure that the light sources around your HiMirror Mini are even and your face is not partially
shadowed. Please refer to the following instructions when the light source is not adequate for HiMirror Mini.
Light Source
A. Strong backlight, such as a large window.
Suggestion: Close the blinds or curtains.
C. Multiple light sources.
Suggestion: Leave only the light source in front of you and turn the other lights off.
B. Uneven indoor lighting, such as a light source shining on one side of your face.
Suggestion: Adjust the light's direction, or turn the light off.
Temperature / Humidity
Operation: 41°~95°F(5°~35°C); 30~80% RH
Storage & Transportation: -4°~140°F(-20°~60°C); 0~95% RH
OPTIMAL ENVIRONMENT CONDITIONS
1. Connect HiMirror Mini to a power outlet using the power adapter.*
2. Push and hold the power button for at least 3 sec. to turn on HiMirror Mini.
3. Push to open the camera cover.
4. Follow the on-screen instructions to complete setup.
GETTING STARTED
Note: HiMirror Mini must be plugged into a power outlet at all times.
*
Power Consumption
Power Input: 100-240V~50/60Hz, 1.0A
Power Adapter: 12V, 36W
HDBM6680X05
 Loading...