

Hills Supa Fold 230, Supa Fold 190, Supa Fold 210, Supa Fold 230 Advantage, Supa Fold 70 Owner's Manual
...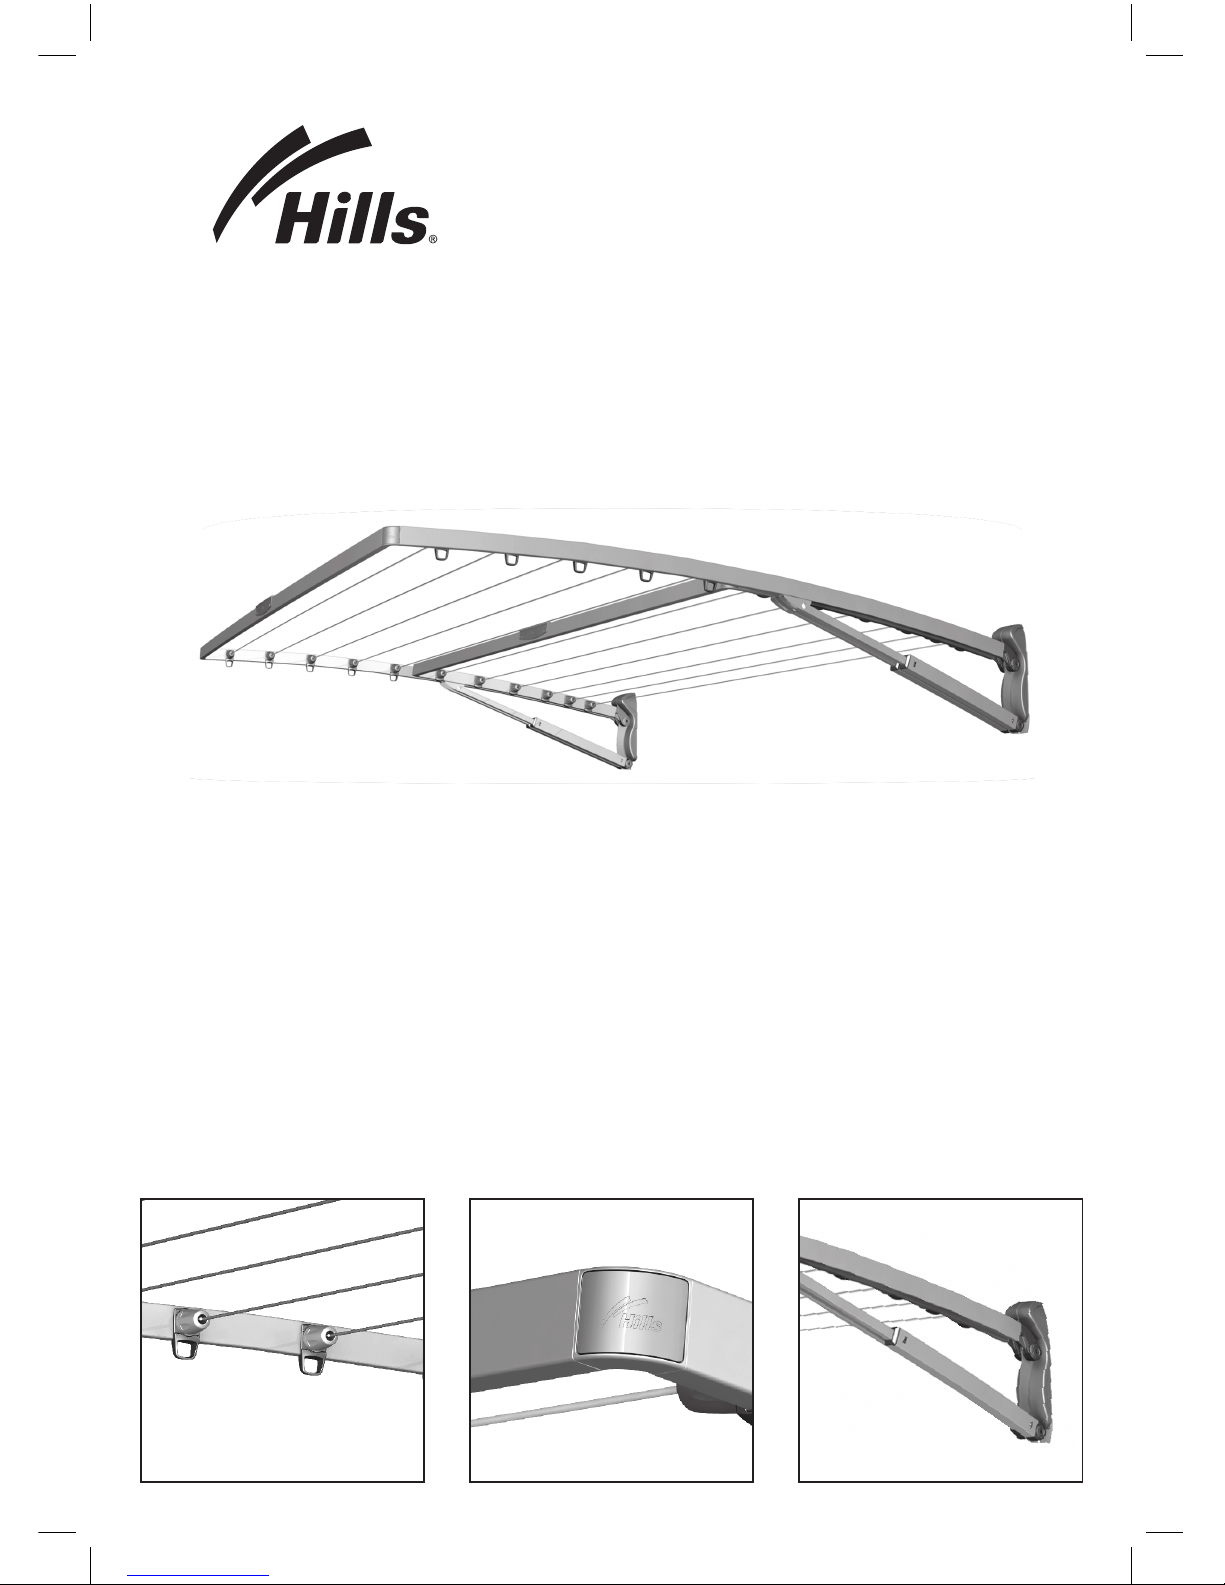
Supa® Fold
Folding Frame Clothesline
Owner’s Manual
TO SUIT MODELS:
Supa® Fold 230 Advantage
Supa® Fold 230
Supa® Fold 210
Supa® Fold 190
Supa® Fold 120
Supa® Fold 70

Congratulations
Congratulations on the purchase of your
Supa® Fold Folding Frame Clothesline,
which will bring you many years of trouble
free and efficient drying.
It is important that you read this Owner’s
Manual thoroughly before installation and
use. In this way you will benefit from all the
design features and enjoy safe use of the
product.
Thank you for choosing Hills.
Warning
• Do not allow children or pets to swing on
the Clothesline or items of laundry.
• Ensure when raising and lowering your
Clothesline that bystanders (in particular
children) are standing well clear.
• Do not use for any purpose other than to
hang and dry washing.
• Do not use your Clothesline if parts are
worn or damaged.
• Do not allow the frame to lower in an
uncontrolled manner as damage or injury
may result.
• Patents and Registered Designs apply to
this product.
For any assistance in Australia call
Hills Consumer Advice
on 1300 300 564 (cost of a local call)
during normal business hours
or visit www.hills.com.au
For any assistance in New Zealand call
09 262 3052 during normal business hours.
Consumer Advice
Please retain this Owner’s Manual. Record
the following information from the carton for
future reference.
Product Number: FD
Date of purchase:
Name and location of store:
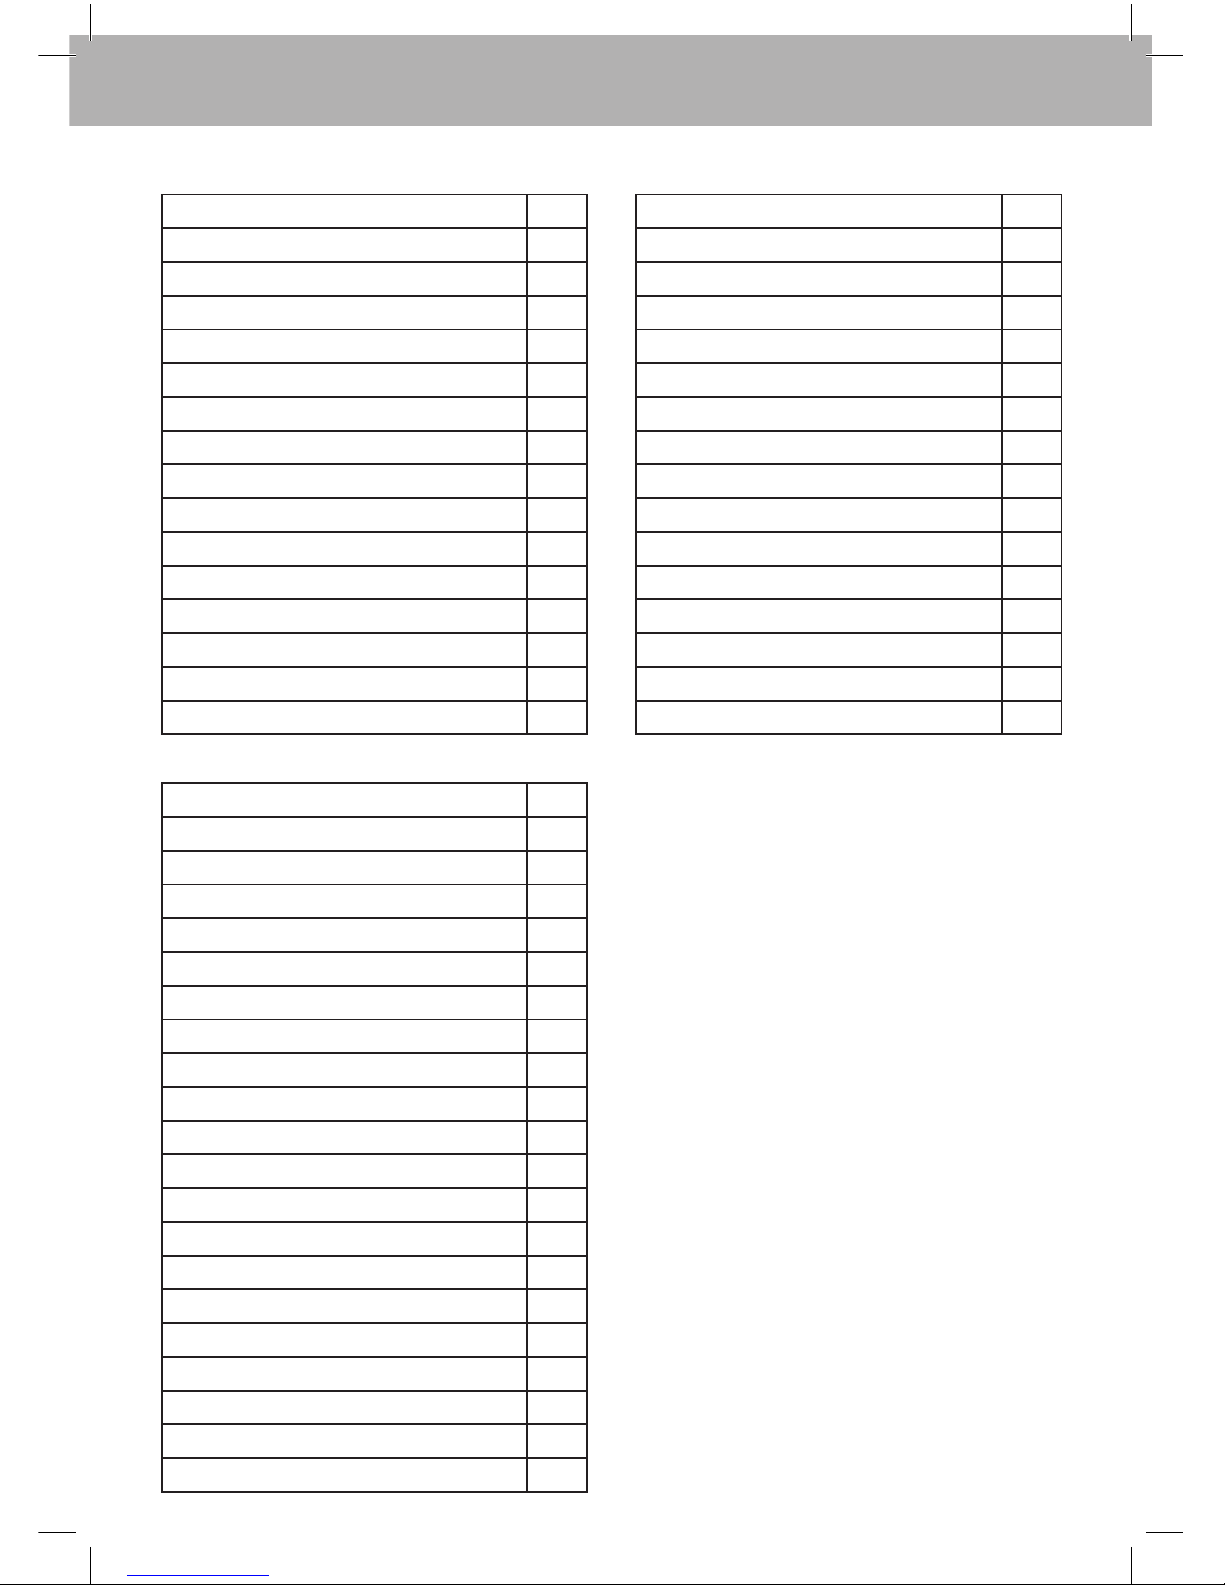
Supa® Fold 230 Advantage/
Supa® Fold 230
Part name Qty.
Mount Bracket Assembly - LH 1
Mount Bracket Assembly - RH 1
Arm Outer Assembly - LH 1
Arm Outer Assembly - RH 1
Arm Inner Assembly - LH 1
Arm Inner Assembly - RH 1
Spreader Bar Outer
1
Spreader Bar Inner 1
Corners
4
Line Assemblies 11
Packing Blocks 2
Hex Key - 6mm 1
Hex Key - 5mm 1
Supa® Fold 230 Accessory Bag: 1
Cover Caps 22
Large Bayonet Caps 4
Small Bayonet Caps 4
Owner’s Manual
1
Unpacking the Supa® Fold
Folding Frame Clothesline
1. Open the front face of the carton
(all carton materials can be recycled).
2. Unclip the plastic Packing Blocks that
secure the clothesline within the carton.
Note: the lid on one of these Packing
Blocks holds the Hex keys used for
assembly. You can remove and hang the
lid to keep your Hex keys in a safe place!
3. Check all components are in the carton
(refer to tables below for your model).
Introduction
3
Pack Contents
Supa® Fold 210
Part name Qty.
Mount Bracket Assembly - LH 1
Mount Bracket Assembly - RH 1
Arm Assembly - LH 1
Arm Assembly - RH 1
Spreader Bar 1
Corners
2
Line Assemblies 10
Packing Blocks 2
Hex Key - 6mm 1
Hex Key - 5mm 1
Supa® Fold 210 Accessory Bag: 1
Cover Caps 20
Large Bayonet Caps 2
Small Bayonet Caps 2
Owner’s Manual 1
Supa® Fold 190
Part name Qty.
Mount Bracket Assembly - LH 1
Mount Bracket Assembly - RH 1
Arm Assembly - LH 1
Arm Assembly - RH 1
Spreader Bar
2
Corners 2
Line Assemblies 6
Packing blocks 2
Hex Key - 6mm 1
Hex Key - 5mm 1
Supa® Fold Accessory Bag: 1
Cover Caps 12
Large Bayonet Caps 2
Small Bayonet Caps 2
Spreader Accessory Bag: 1
Spreader Handle 1
Spreader Joiner 1
Hex Key - 4mm 1
M6 x 16.0 Bolt 2
Owner’s Manual 1
Supa® Fold 120 / Supa® Fold 70
Part name Qty.
Mount Bracket Assembly - LH 1
Mount Bracket Assembly - RH 1
Arm Assembly - LH 1
Arm Assembly - RH 1
Spreader Bar 1
Corners
2
Line Assemblies 6
Packing Blocks 2
Hex Key - 6mm 1
Hex Key - 5mm 1
Supa® Fold Accessory Bag: 1
Cover Caps 12
Large Bayonet Caps 2
Small Bayonet Caps 2
Owner’s Manual 1
4
Installation
Select a suitable location
1. Select a suitable location for either wall
or post mounted installation.
If wall mounted - ensure area is free
from pipes and other obstructions.
If post mounted - you will need to
purchase the Hills Ground Mount Kit to
suit your Supa® Fold Clothesline.
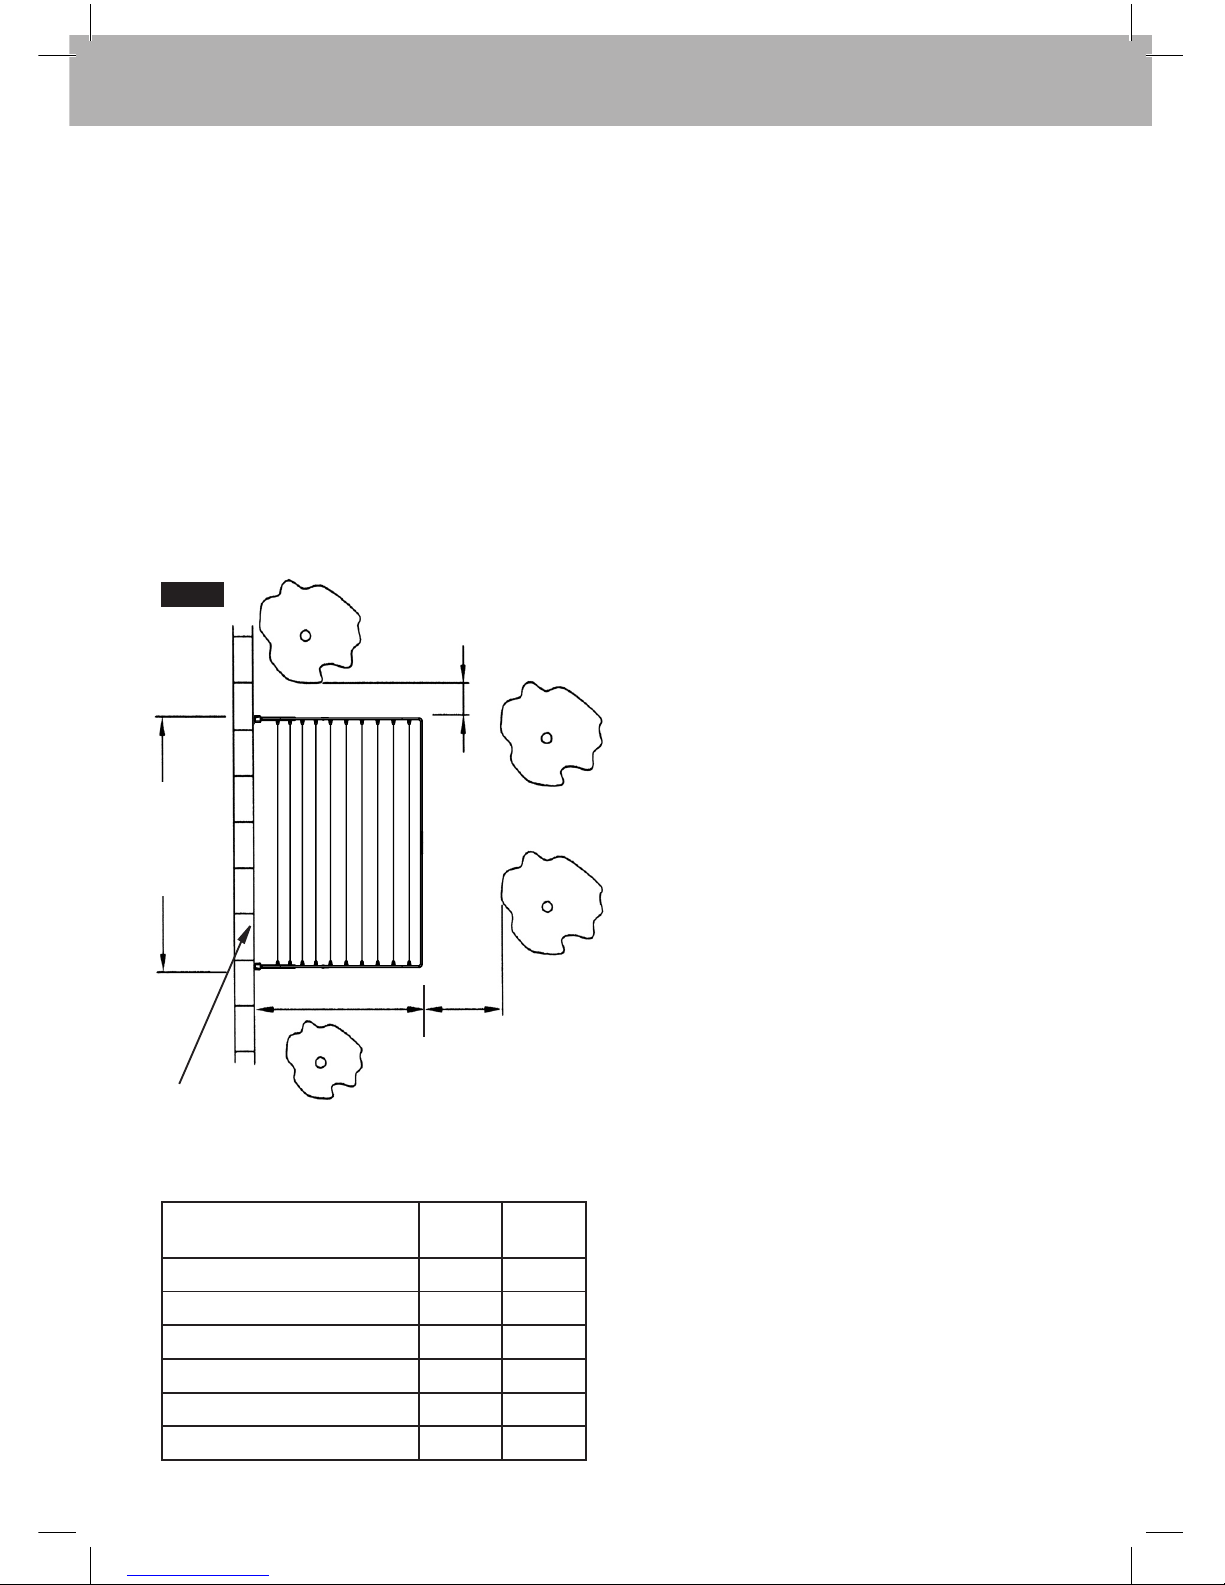
2. Ensure you have left sufficient space
surrounding the Clothesline (
Fig. 1). We
recommend 0.5m each side and 1m in
front, as well as sufficient space to clear
the eaves of the house (refer to pg.7)
Product Dimensions
Product
Width
(mm)
Depth
(mm)
Supa® Fold 230 Advantage 2270 1500
Supa® Fold 230 2270 1500
Supa® Fold 210 2270 1500
Supa® Fold 190 3420 780
Supa® Fold 120 2270 780
Supa® Fold 70 1270 780
Fig. 1
1.0m
0.5m
Depth
Width
Ensure area is
free from pipes or obstructions
5
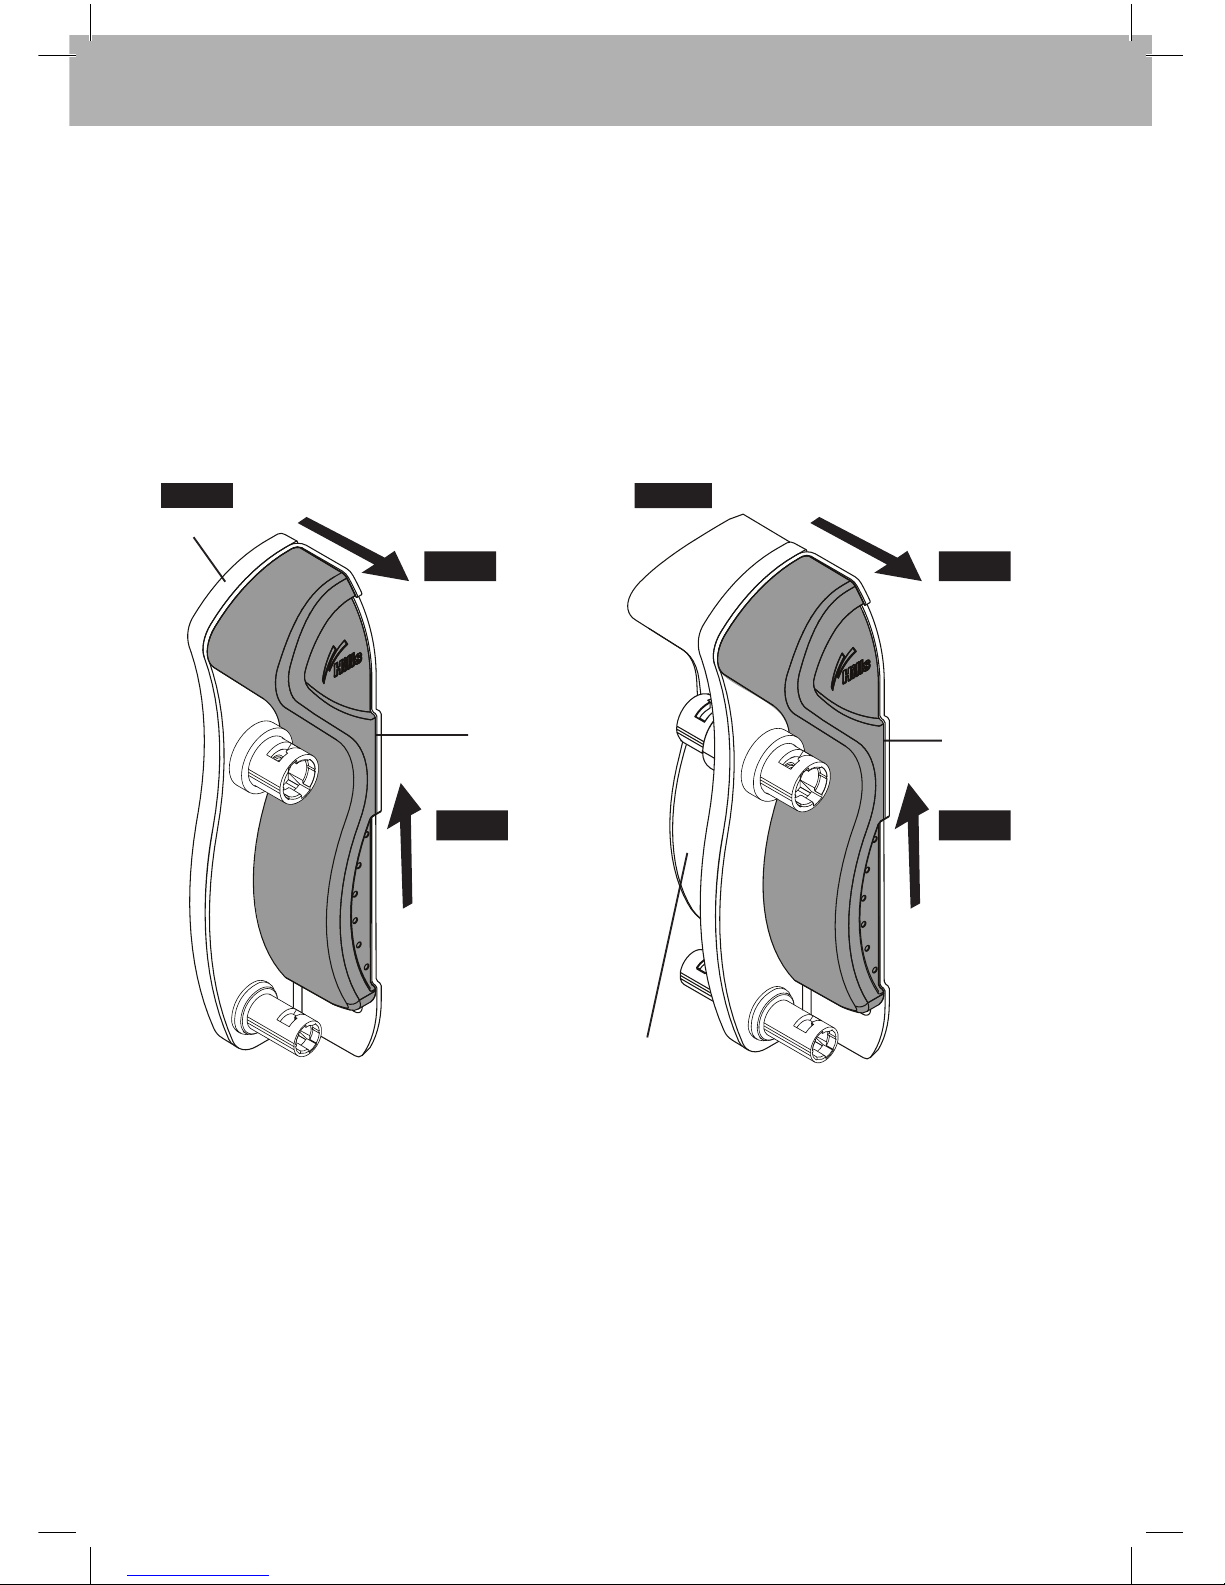
Installation
Fig. 2a
Slide Outer
Cover upwards.
Slide Outer Cover
away from bracket
to remove.
Right Hand Mount Bracket
Assembly shown.
This Assembly is used in models
Supa® Fold 210,190, 120 and 70.
Inner Cover
Outer Cover
Step 2
Fig. 2b
Slide Outer
Cover upwards.
Slide Outer Cover
away from bracket
to remove.
Right Hand Mount Bracket
Assembly shown.
This Assembly is used in models
Supa® Fold 230 Advantage and 230.
Outer Cover
Inner Cover
Remove Outer Covers from
Remove the plastic Outer Cover mouldings.
Removing the Outer Cover moulding allows
access to the mount holes in the mount
brackets (Fig. 2a and 2b).
Note: The Inner Cover mouldings are
secured using screws and do not need to
be removed.
Step 1
Step 2
Step 1
Mounting Brackets
6
Fixing to a wall
Mark position of Mount Bracket hole centres
on the wall. Refer to Fig.3 to install your
brackets.
Suggested method
• Ensure the selected area is free from
pipes and other obstructions.
• Mount one bracket assembly first and
use this to align the other bracket.
• Hold brackets against wall and use them
to mark the hole centres.
• Ensure brackets are vertical and align
horizontally, (a spirit level and a straight
edge will help) (Fig. 3).
• Ensure there is a minimum 400mm
clearance from the top of the brackets
to any overhead obstructions including
eaves, gutters etc. to allow for upward
movement of frame (Fig. 4).
Note: If you are replacing an existing
Hills Folding Frame product, the mount
hole centres may be the same. Therefore
your new Supa® Fold Folding Frame
Clothesline may be able to utilise the
existing fasteners provided they are
suitable and in good condition.
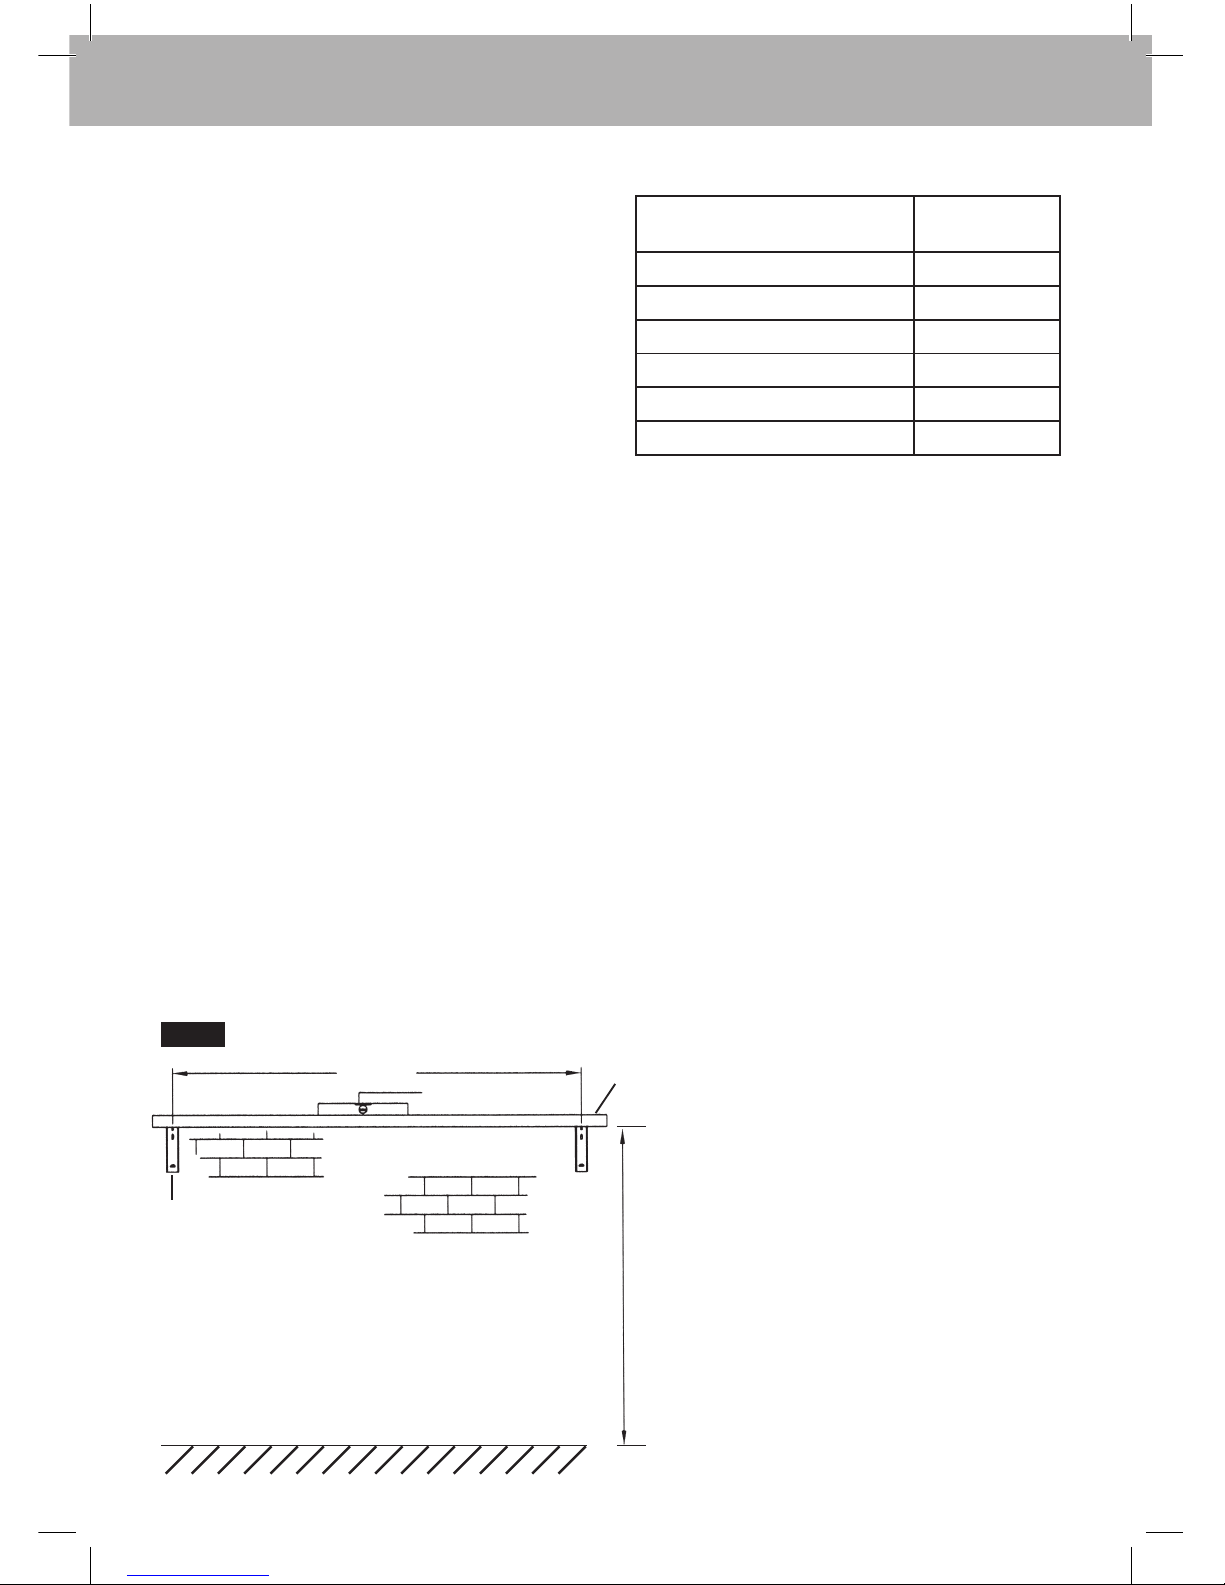
‘Mount Hole Centres’
Product
Centres
(mm)
Supa® Fold 230 Advantage 2200
Supa® Fold 230 2200
Supa® Fold 210 2200
Supa® Fold 190 3350
Supa® Fold 120 2200
Supa® Fold 70 1200
Mount Hole Centres
Spirit Level
Straight
Edge
Wall Bracket
Recommended Mounting Height
Users Head Height
Plus 50mm
Fig. 3
Installation
 Loading...