

Hills Series LED Code Pad, HILLS User Manual
HILLS® Series LED Code Pad
User Manual
Not all features may be available on your system
Check with your installer to find out which features are programmed
V2.02
Page 2

TABLE OF CONTENTS
• Code Pad Diagrams .......................................................................................2
• Glossary of Terms ..........................................................................................4
• Understanding the Code Pad Lights...............................................................5
• Code Pad Control Tones................................................................................6
• Fully arming the system – On Mode...............................................................7
• Fully arming the system – Quick Arm Mode...................................................7
• Partially arming the system – Partial Mode ....................................................8
• Disarming – from the On or Partial Mode.......................................................8
• Bypassing – Individual Zones.........................................................................9
• Group Bypass.................................................................................................10
• Changing & Adding User Codes.....................................................................11
• Deleting User Code ........................................................................................12
• Walk Test........................................................................................................12
• User Code Authorisation.................................................................................13
• Setting the Door Chime ..................................................................................13
• Exit Mode – Extend Exit Timer .......................................................................14
• Code Pad Emergency Keys............................................................................14
• Viewing Alarm Memory...................................................................................14
• Reset Latched Alarms ....................................................................................15
• Setting System Date.......................................................................................15
• Setting System Time.......................................................................................16
• Set Code Pad Tones ......................................................................................16
• Program Telephone Number ..........................................................................17
• Viewing Telephone Numbers..........................................................................18
• Cancelling Alarm Calls....................................................................................18
• Deleting Telephone Numbers.........................................................................19
• Communicator, Battery & Siren Test..............................................................19
• Service Light...................................................................................................20
• Emergency Evacuation Plans.........................................................................21
• Zone
List.........................................................................................................Back Page
V2.02
Page 3

GLOSSARY OF TERMS
Authority Level: The level of access an individual has when using an alarm panel.
Central Station: Location where alarm data is sent during an alarm report.
Chime Feature: An option that allows the code pad to sound a ding-dong whenever an
entry/exit door is opened.
Codes: Can be either User Codes (relating to a person) or Function Codes (a toggl e switch to
turn specific functions on/off). NOTE: A system may have either 99 four (4) digit codes or 66
six (6) digit codes, but not a mixture of the two.
Dialer Delay: An option that allows a delay in reporting to the central station.
Duress Code: An option that allows a special code to be sent to the central station that
indicates the alarm system is being operated under duress.
Forced Arming:
An option that allows the system to be turned on (ARMED) with one or more zones open. A
system that is ready to be “force armed” will flash the ready light. (Note: Those zones that are
not ready will not create an alarm.)
Function Code: A Function Code is either a four (4) or six (6) digit code that has been
programmed by the installer to operate a device.
Group Bypass: An option that allows the user to bypass multiple zones with a single
operation.
Master Code: A master PIN code that can arm & disarm the alarm system, and can add and
delete user PIN codes.
Partial Arm: A mode used to arm the perimeter and unused areas of an occupied premises.
Perimeter: The outer edge of the protected area , typically the windows and doors fitted with
alarm sensors.
Quick Arm: An option that allows you to turn on (ARM) the security system by pressing either
the [ON] or [PARTIAL] key on the code pad control (for ARMING only) as programmed by the
installing company.
Universal Arming (Uni Arm): When enabled, your alarm system can automatically determine
whether to arm in the Full mode or in the pre-set Partial mode by looking to see if you exit your
premises or stay inside after arming your system. NOTE: This feature can be used in
conjunction with “Quick Arm”.
User Code: A four (4) or six (6) digit entry used to arm or disarm the system.
V2.02
Page 4

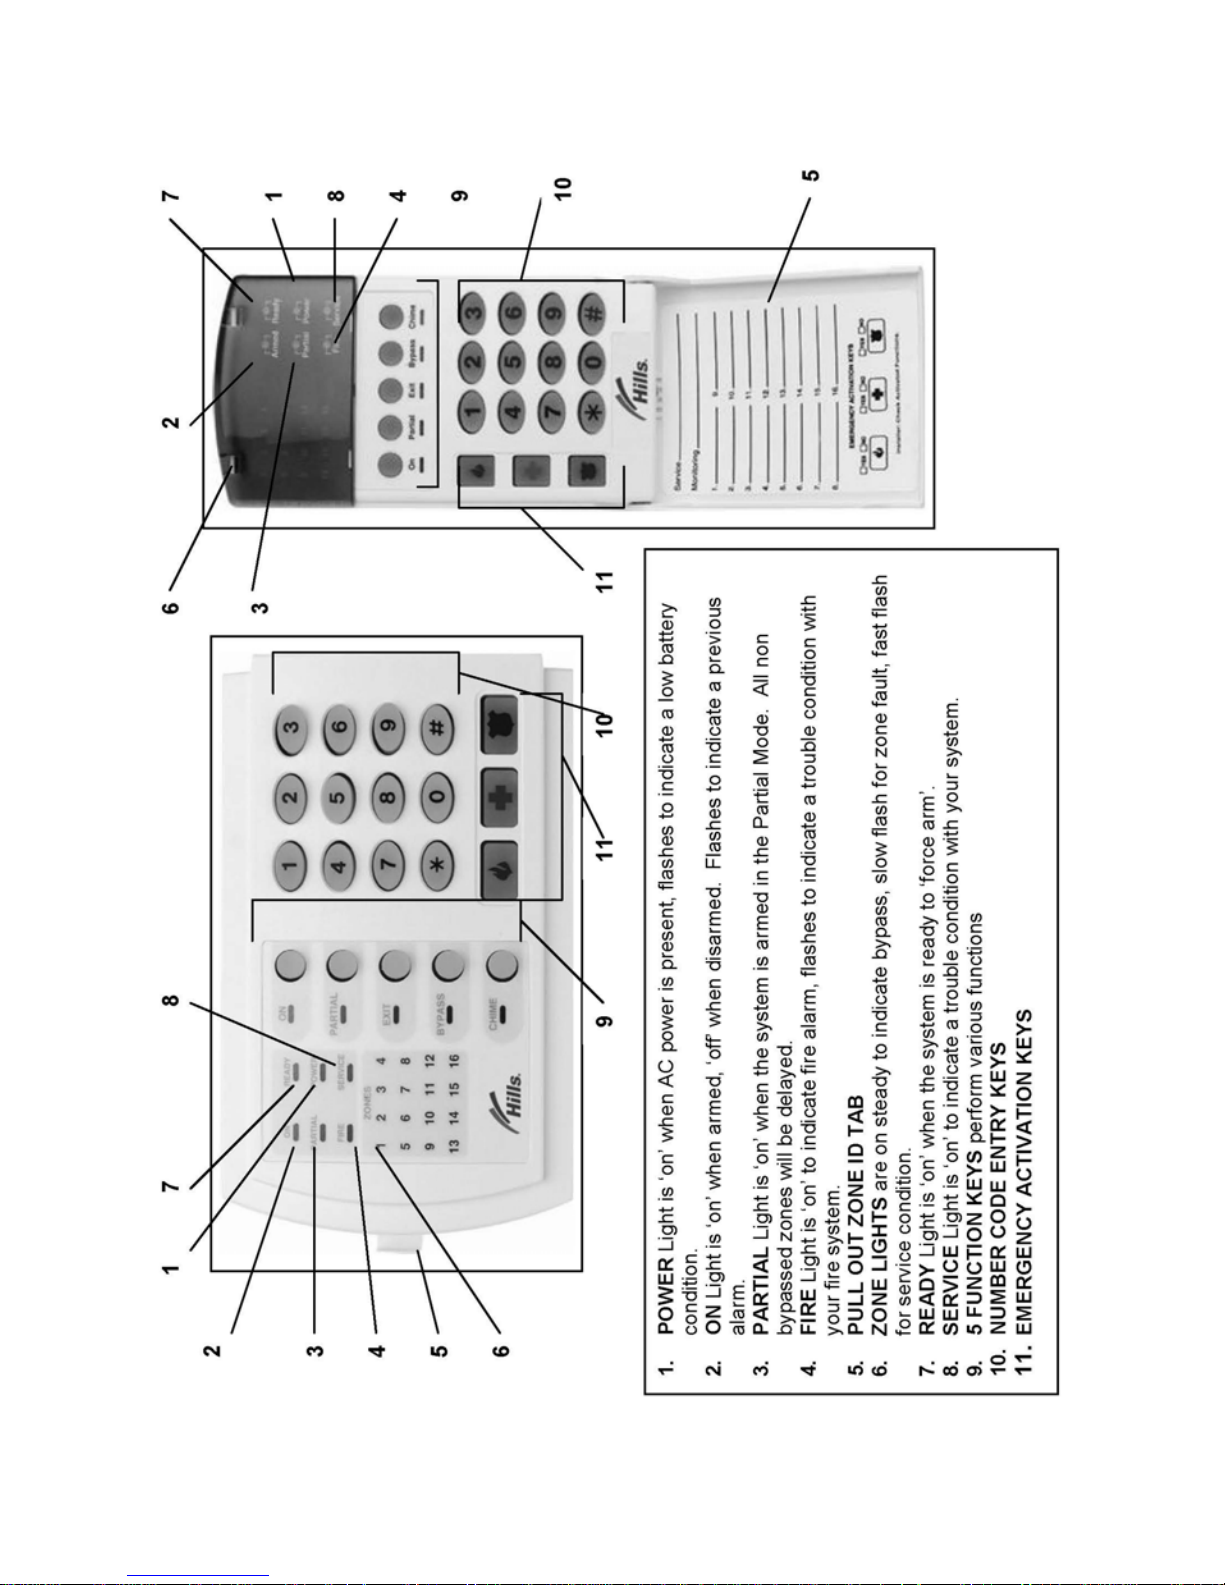
UNDERSTANDING THE LIGHTS
Armed Light
The armed light is “on” when the system is armed. The armed light is “off” when it is disarmed.
The armed light will flash when there has been an alarm during the previous arm cycle.
Bypass Light
The bypass light is “on” when any zone in this code pad’s area is bypassed. The zone(s) that is
bypassed will also be illuminated. If the bypass light is “off”, no zones are bypassed.
Chime Light
The chime light is “on” when the chime feature is “on”; “off” otherwise.
Exit Light
The exit light is “on” during the exit delay. Please note that the light will flash during the last 10
seconds of the exit delay as a warning that the time is running out. (The user may want to
restart the exit delay if the exit light is flashing in order to prevent an alarm. The user may then
press the [Exit] key to restart the exit delay before the delay expires.)
Fire Light
A steady fire light means a fire zone has been faulted. A rapidly flashing fire light means that a
fire zone is in a trouble condition.
On Light
The on light is “on” when the system is armed. The on light is “off” when it is disarmed.
Partial Light
The partial light is “lit” when the s ystem is armed in the Partial Mode. All non bypassed zones
will be delayed and follow the Partial delay time. When armed in Partial Mode, the Arm, On,
and Bypass lights will also be “lit”.
Power Light
The power light is lit if the primary power is on. The power light will flash if the system detects a
low battery condition.
Ready Light
The ready light is “lit” when the system is ready to arm and “flashes” if ready to force arm. The
ready light is off when the system is not ready to arm because of a zone(s) being faulted.
Zone Light
The zone lights are “off” when everything is normal. A zone light will be “lit” if the zone has
been bypassed. If a zone light is “flashing”, that zone is in alarm or has been faulted. If a zone
light is “flashing” rapidly, it means that the zone is in a trouble condition. Trouble conditions
are: Hardwire Zone Tamper; Wireless Zone Tamper, Sensor Low Battery and Sensor
Loss of Supervision
(A combination of Alarm/Fault and Tamper/Trouble will produce a rapid “flashing” light for a
short period of time, followed by a slow “flashing” light.)
V2.02
Page 5

CODE PAD CONTROL TONES
• Beeps for all key presses Sounds a continuous tone during the entry delay time.
• Pulses when a day zone is violated while the system is disarmed.
• Pulses when a fire zone has a trouble condition.
• Beeps 3 times for trying to arm with the “Ready” light off, if “Force Arming” has not been
selected.
• Beeps for 1 second or emits a “ding-dong” sound for the “Chime” feature.
• Beeps during an exit delay; beeps rapidly for the last 10 seconds of an exit delay; and
beeps 1 second at the end of the exit delay.
• Pulses when the armed status changes and the AC power is off.
• Pulses when the armed status changes and any zone(s) is bypassed.
• Pulses when the armed status changes and a low battery is detected.
• Pulses when the armed status changes and a tamper condition is detected. Beeps to
indicate telephone line cut, if selected.
• Pulses when one or more of the following conditions are detected: zone or box tamper,
low battery, AC power fail, or expander trouble.
Entering a valid code will silence the code pad sounder when it is pulsing. Please
contact your installer if a trouble condition exists.
V2.02
Page 6

FULLY ARMING THE SYSTEM – ON MODE
1.
2.
ON is used when the user is away from the premise and wants the interior protected. To arm
in the ON Mode:
Close all protected doors and windows. Ready light will light when all protected zones and
sensors are secure. NOTE: If any zones are bypassed, a sensor in that zone can be violated
without affecting the ready light. The security system will not arm if the ready light is not on. If
the power light is off, you have no AC power. Restore power if possible. If not, contact your
installation company.
Enter your 4 digit user code to arm the system. The armed and exit lights will illuminate. You
may now leave the building via the designated exit path.
Note: The exit light will flash rapidly for the last 10 seconds of the exit delay as a warning to
the user that the exit time is about to expire.
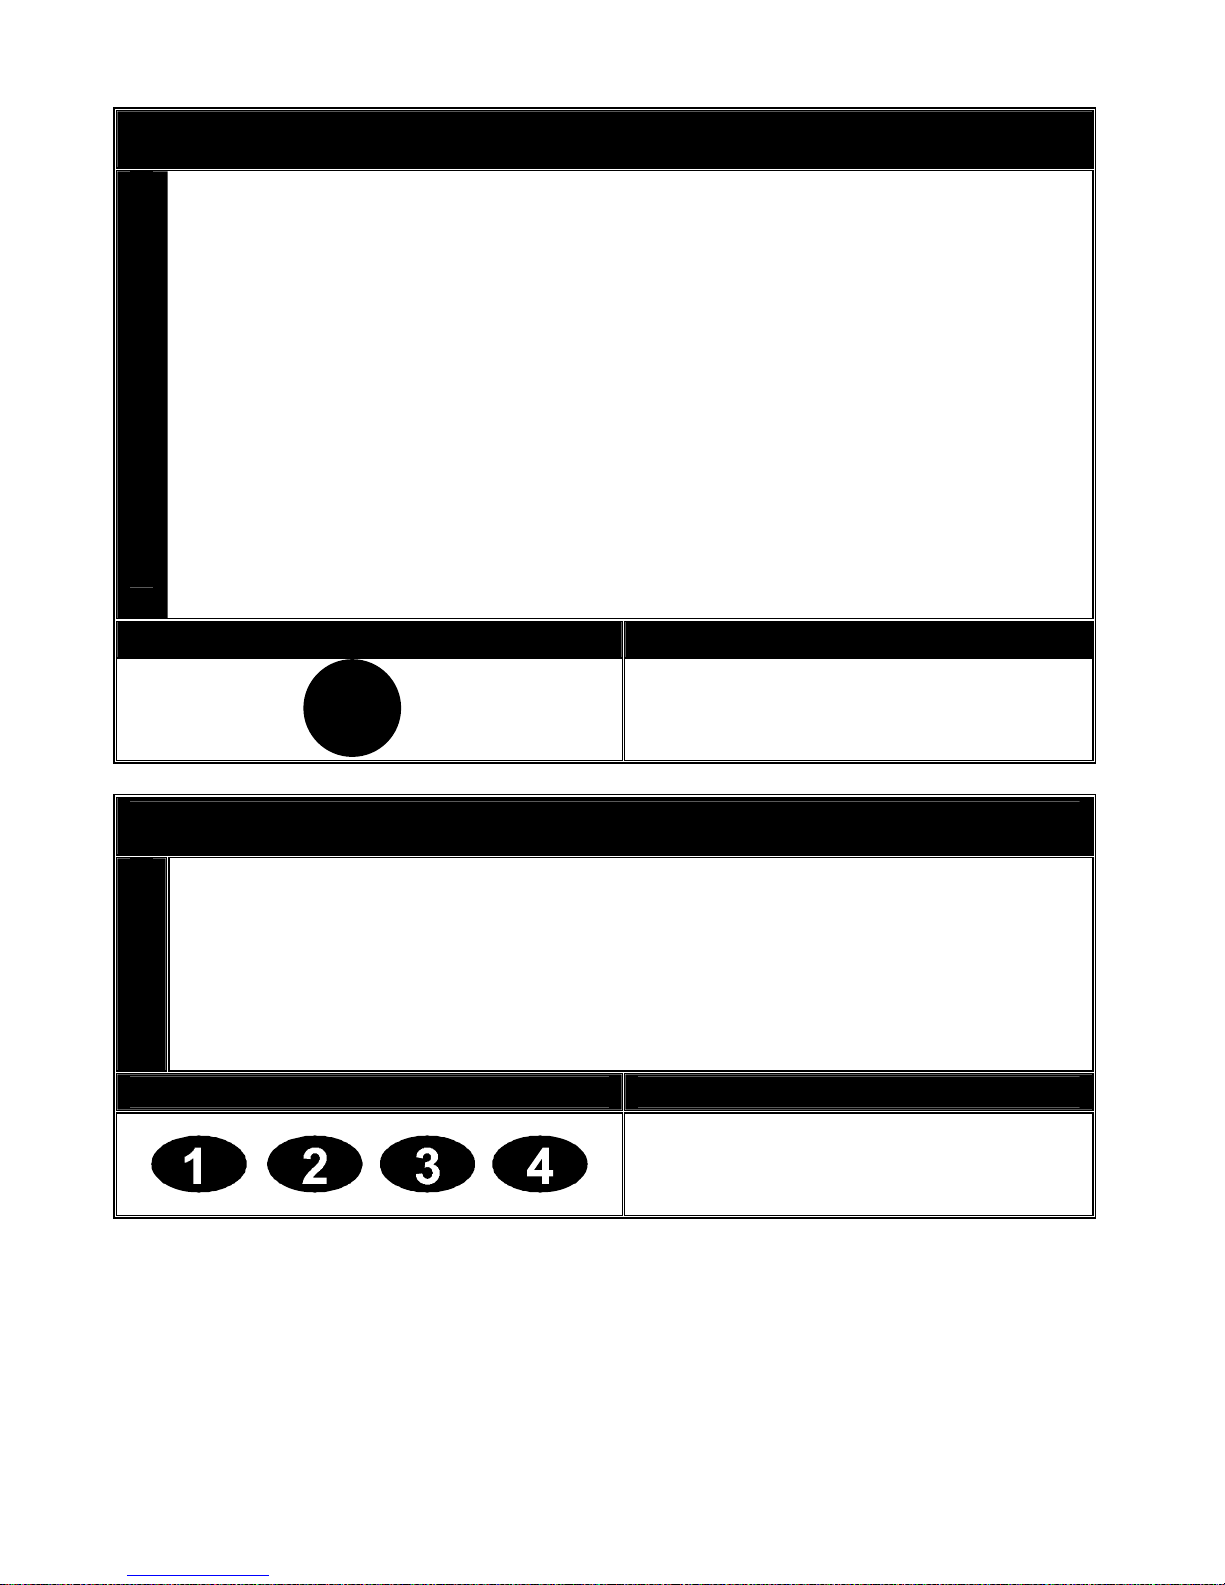
Key Sequence Operation
Example shows a User code of 1234
being used to set the system to the
ON Mode.
FULLY ARMING THE SYSTEM – QUICK ARM MODE
1.
2.
Quick Arm is used when the person arming the alarm system does not have a user code, is
leaving the premises and wants the interior protected. To arm in the Quick Arm Mode:
Close all protected doors and windows. Ready light will light when all protected zones and
sensors are secure. NOTE: If any zones are bypassed, a sensor in that zone can be violated
without affecting the ready light. The security system will not arm if the ready light is not on. If
the power light is off, you have no AC power. Restore power if possible. If not, contact your
installation company.
The [ON] key to arm the system. The armed and exit lights will illuminate. You may now
leave the building via the designated exit path.
Note: The exit light will flash rapidly for the last 10 seconds of the exit delay as a warning to
the user that the exit time is about to expire.
Key Sequence Operation
Example shows ON key being used
to set the system to the Quick Arm
Mode.
V2.02
Page 7
PARTIALLY ARMING THE SYSTEM – PARTIAL MODE
1.
2.
Partial arming allows you to temporarily exclude some rooms from security arming. For
example, you may wish to exclude bedrooms at night when they are in use. Partial mode is
also used for protecting exterior doors and windows (the home perimeter) when the user is
inside.
Partial is used when the user is inside the premise and wants protection around the
perimeter. Listed below are the steps to arm in the Partial mode:
Close all protected doors and windows. Ready light will light when all protected zones and
sensors are secure. NOTE: If any zones are bypassed, a sensor in that zone can be violated
without affecting the ready light. The security system will not arm if the ready light is not on. If
the power light is off, you have no AC power. Restore power if possible. If not, contact your
installation company.
Press the [PARTIAL] key. The bypass light will illuminate if any zone(s) is bypassed. The
light(s) corresponding to the bypassed zone(s) will illuminate, alerting the user that a zone(s)
may be unprotected and can be faulted without an alarm.
Key Sequence Operation
Press the Partial key to partially arm
your premises
PARTIAL
DISARMING – FROM THE ON OR Partial MODE
When you enter the protected area through one of the designated Entry/Exit doors, the code
pad control will sound a solid continuous tone for the duration of the entry delay time, or until
you enter a valid code. After entering a valid code the red armed light will go off and the tone
will stop. The security system is now DISARMED. If a valid code is not entered before the
end of the entry delay, an alarm will occur. (NOTE: If the red armed light is flashing durin g
the entry delay, the alarm system has been activated in your absence. Leave the building
immediately and call your alarm company and/or the police from a safe location.)
Key Sequence Operation
Enter your user code to disarm the
system from the On or Partial mode.
V2.02
Page 8
 Loading...