

Page 1
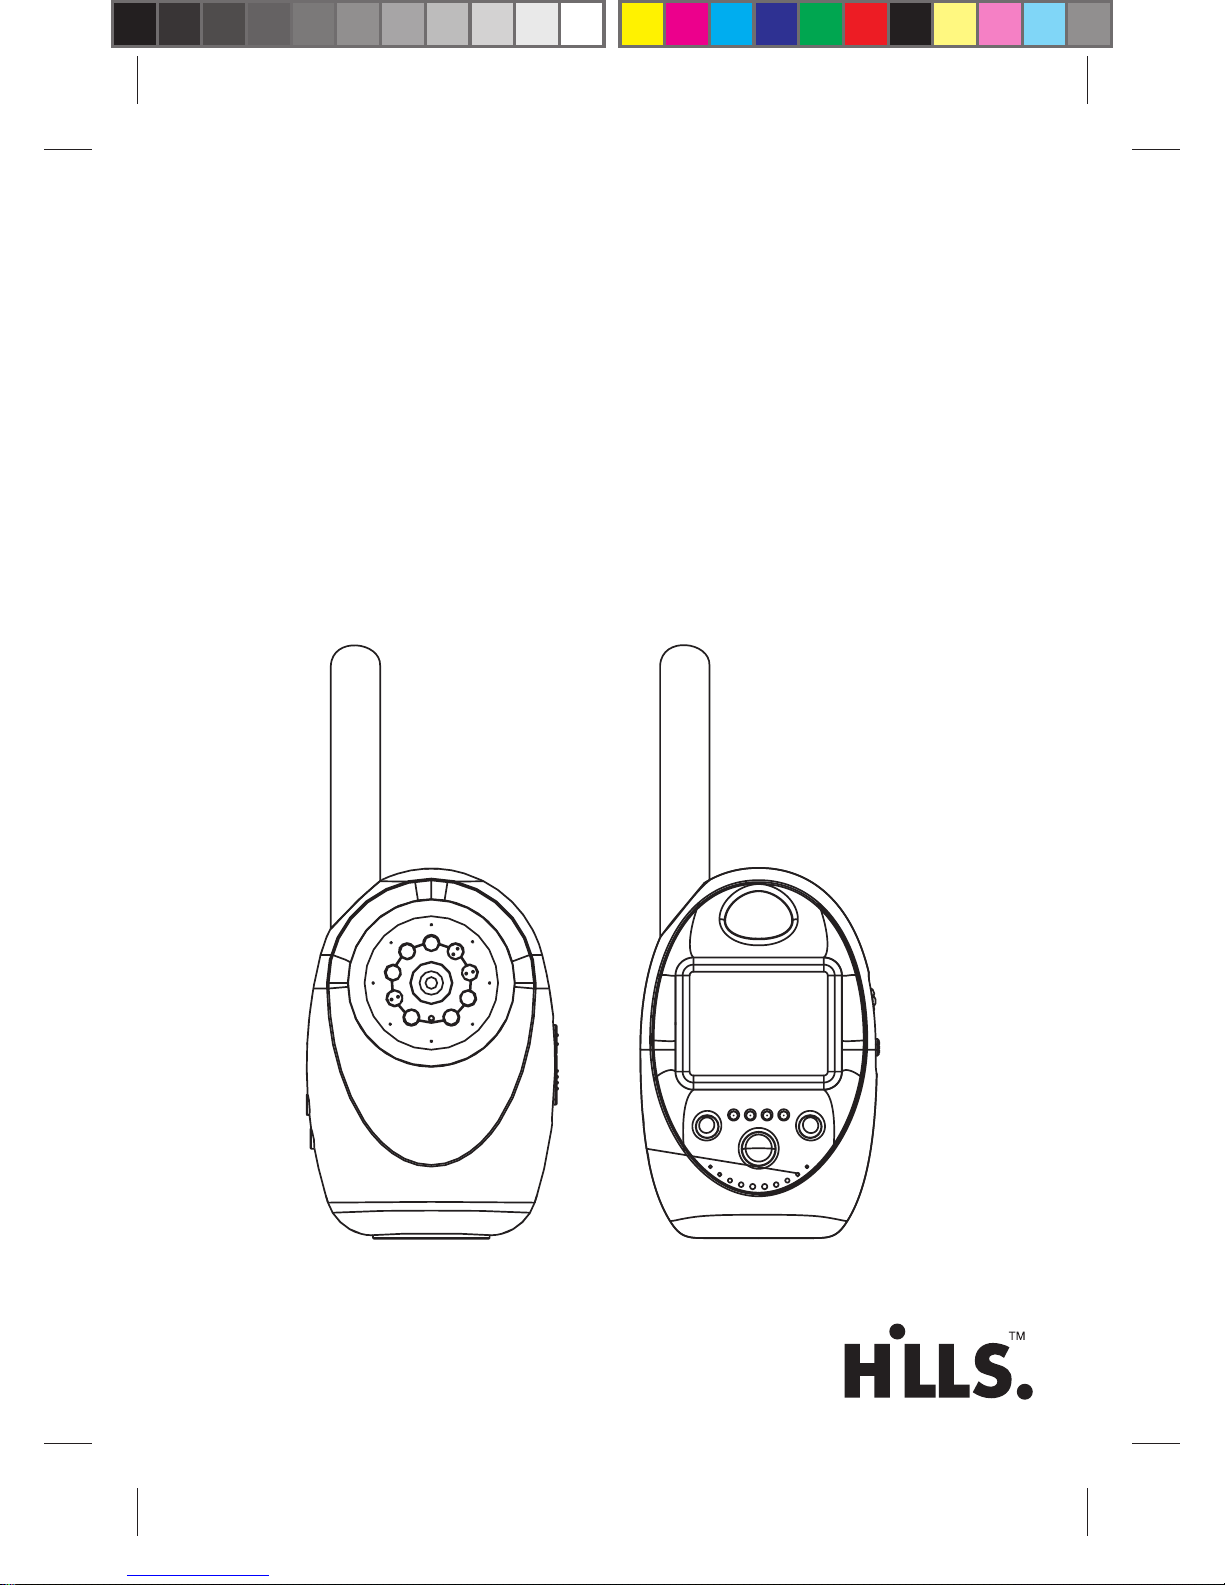
Wireless
baby video
monitor
with audio
User guide
Page 2

2
Unit overview
Unit overview 2
Package contents 2
Structure 3
Diagram 4
Installation 5
Specifications 9
Troubleshooting 10
Warnings 10
Warranty 11
Structure
A
D
B
C
Package contents
A 1 x 2.4GHz Wireless Camera
B 1 x 2.4GHz Wireless Receiver
C 1 x Earphone
D 2 x Power Adapter
Page 3

3
Unit overview
Structure
Antenna
Antenna
Infrared
LED’s
Lens
LCD
Earphone Jack
Power Jack
Sleep button
Volume
Indicator
Power
Jack
Power
on/off
Channel
Switch
Battery
Cover
Volume control
Alarm off button
Power on/off
Channel button
Speaker
Alarm
Switch
Learning
Switch
Page 4

4
Unit overview
Diagram
Camera
Receiver
Receiver adapter
Camera adapter
1
2
Notes:
*This camera/receiver can also
work on battery power. Please
load four (4) AA batteries into
their appropriate slots at the back
of the camera/receiver.
*If the camera/receiver is left unused
for an extended period of time, please
disconnect it from the power adaptor
and remove batteries if they have
been installed.
AA AA
AA AA
AA AA
AA AA
Page 5
5
Installation
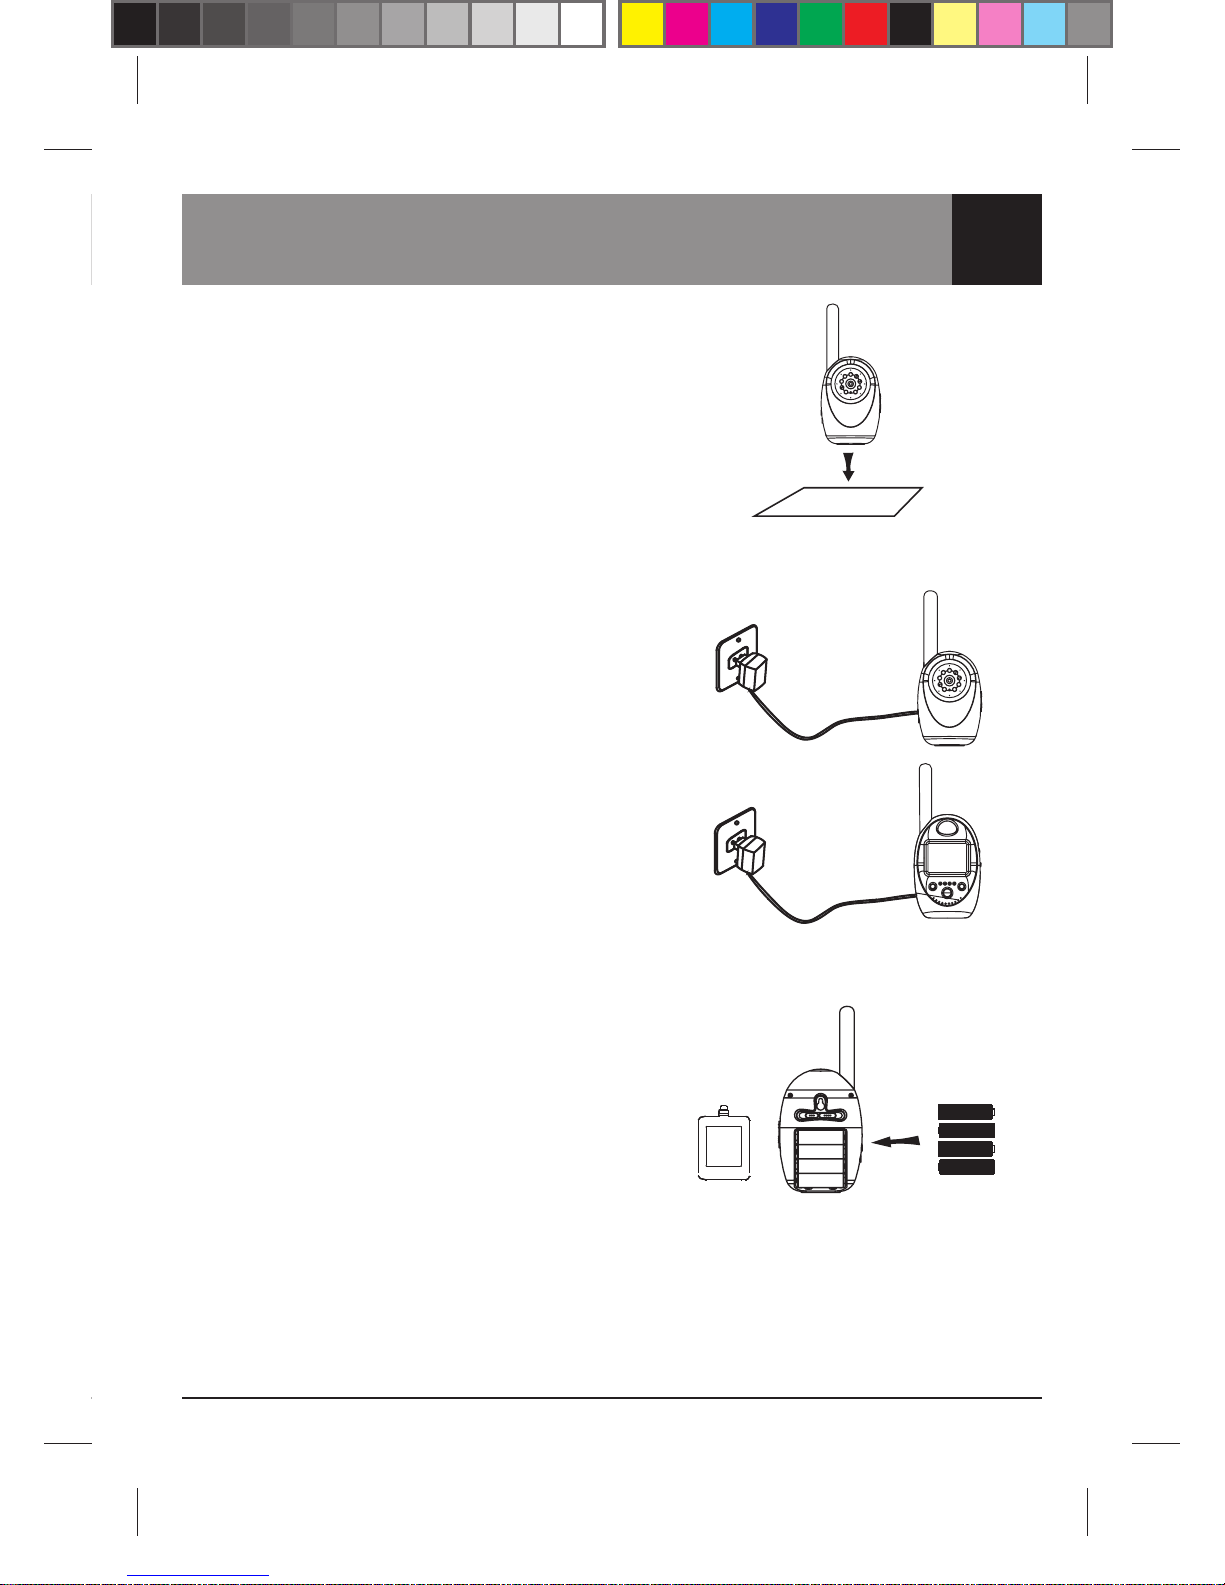
1 Place the camera on a firm,
stable surface.
2 Connect the provided power
adaptors to the camera and
receiver, then slide the power
switch on both the camera
and receiver to the ON position.
Notes:
*This camera/receiver can also
work on battery power. Please
load four (4) AA batteries into
their appropriate slots at the back
of the camera/receiver.
*If the camera/receiver is left unused
for an extended period of time, please
disconnect it from the power adaptor
and remove batteries if they have
been installed.
*Batteries of the camera may provide up
to 5 hours (IR off) of continuous operation.
Batteries of the receiver may provide up
to 5 hours of continuous operation.
AA
AA
AA
AA
Page 6
6
Installation
Channel synchronisation
Channel synchronisation will be preset
upon first time use. Please follow the
instructions below to change channels.
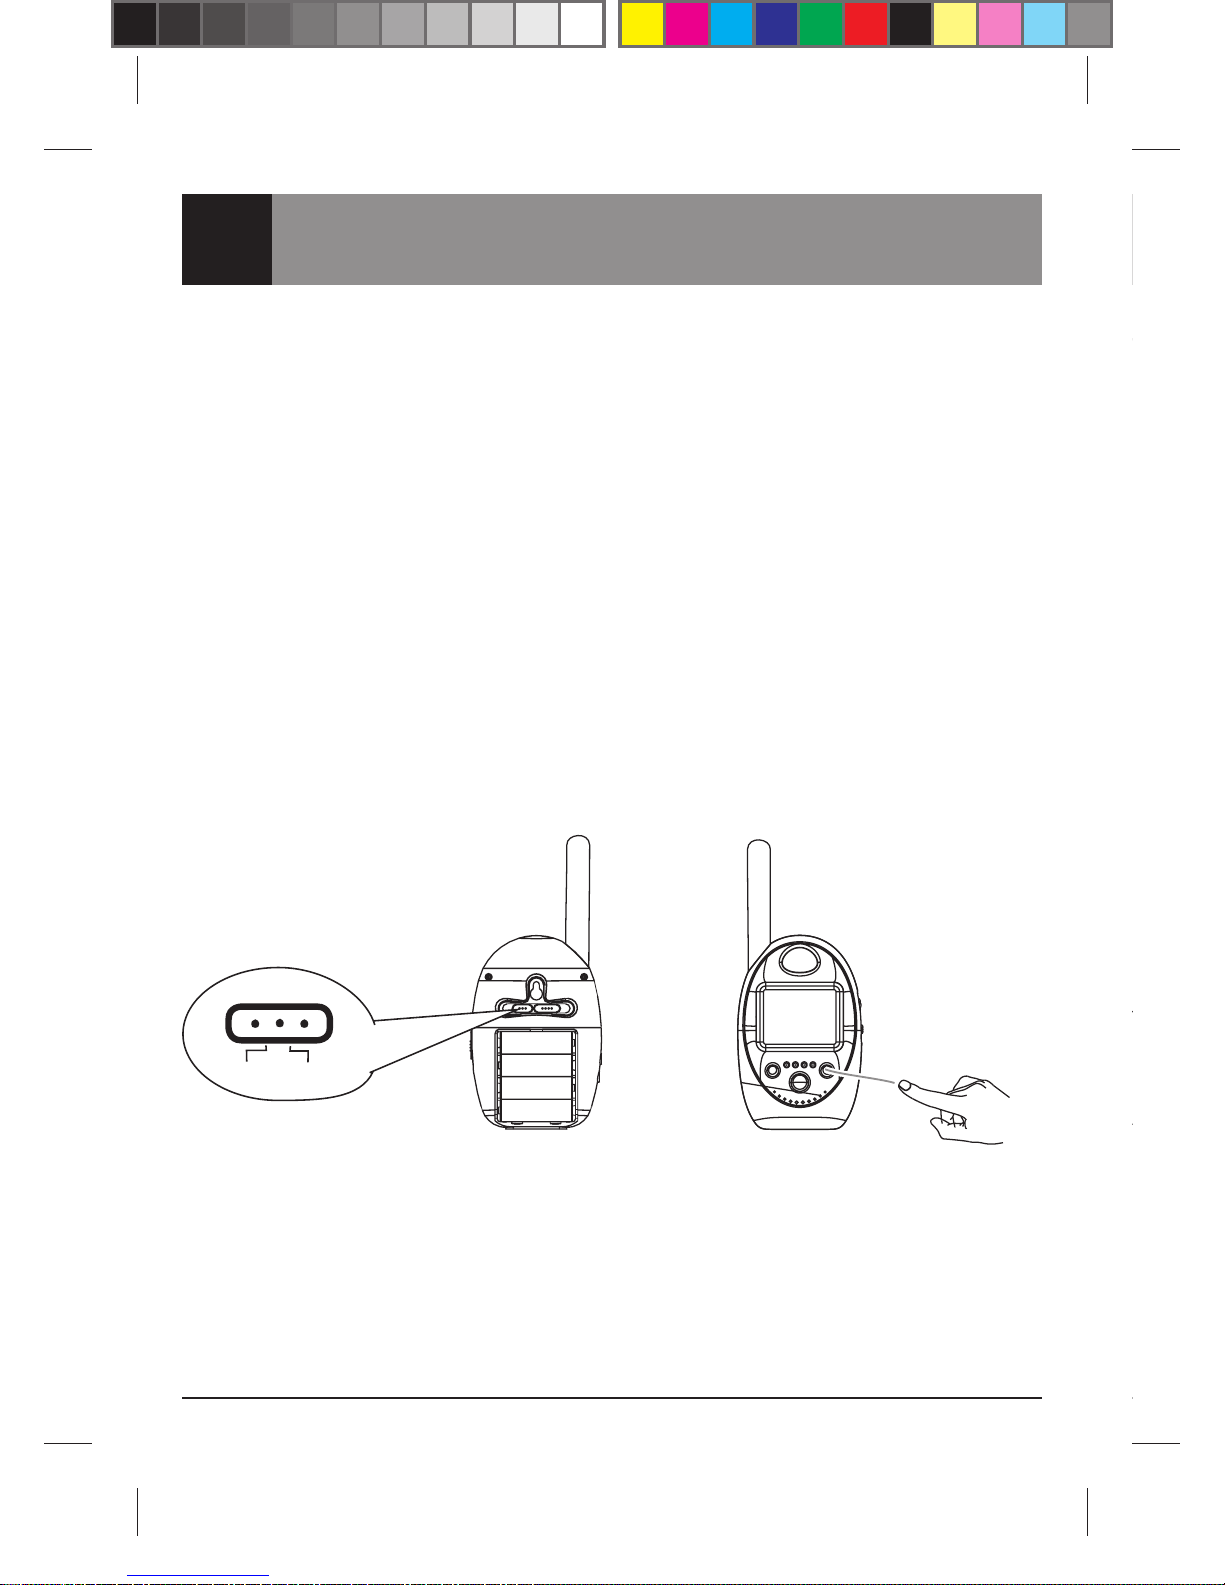
(i) Slide the channel button on the side
of the camera to a desired channel.
(ii) Press and hold the Alarm off button
on the receiver until the volume
indicator flashes. Slide the Learning
button to ON position on the back of
the camera unit and then slide it to
OFF position as the volume indicator
flashes on the receiver.
(iii) The channel number displayed
on the receiver should match the
channel selected on the back of
the camera.
4.
5.
Notes:
The receiver supports up to four
cameras simultaneously. Pressing
and holding the Channel button for
approximately three seconds will activate
the auto switch browser mode. In this
mode the receiver will automatically
switch channels in a set order, one by
one, in 6 second intervals
Learning
ON OFF
Page 7
7
Installation
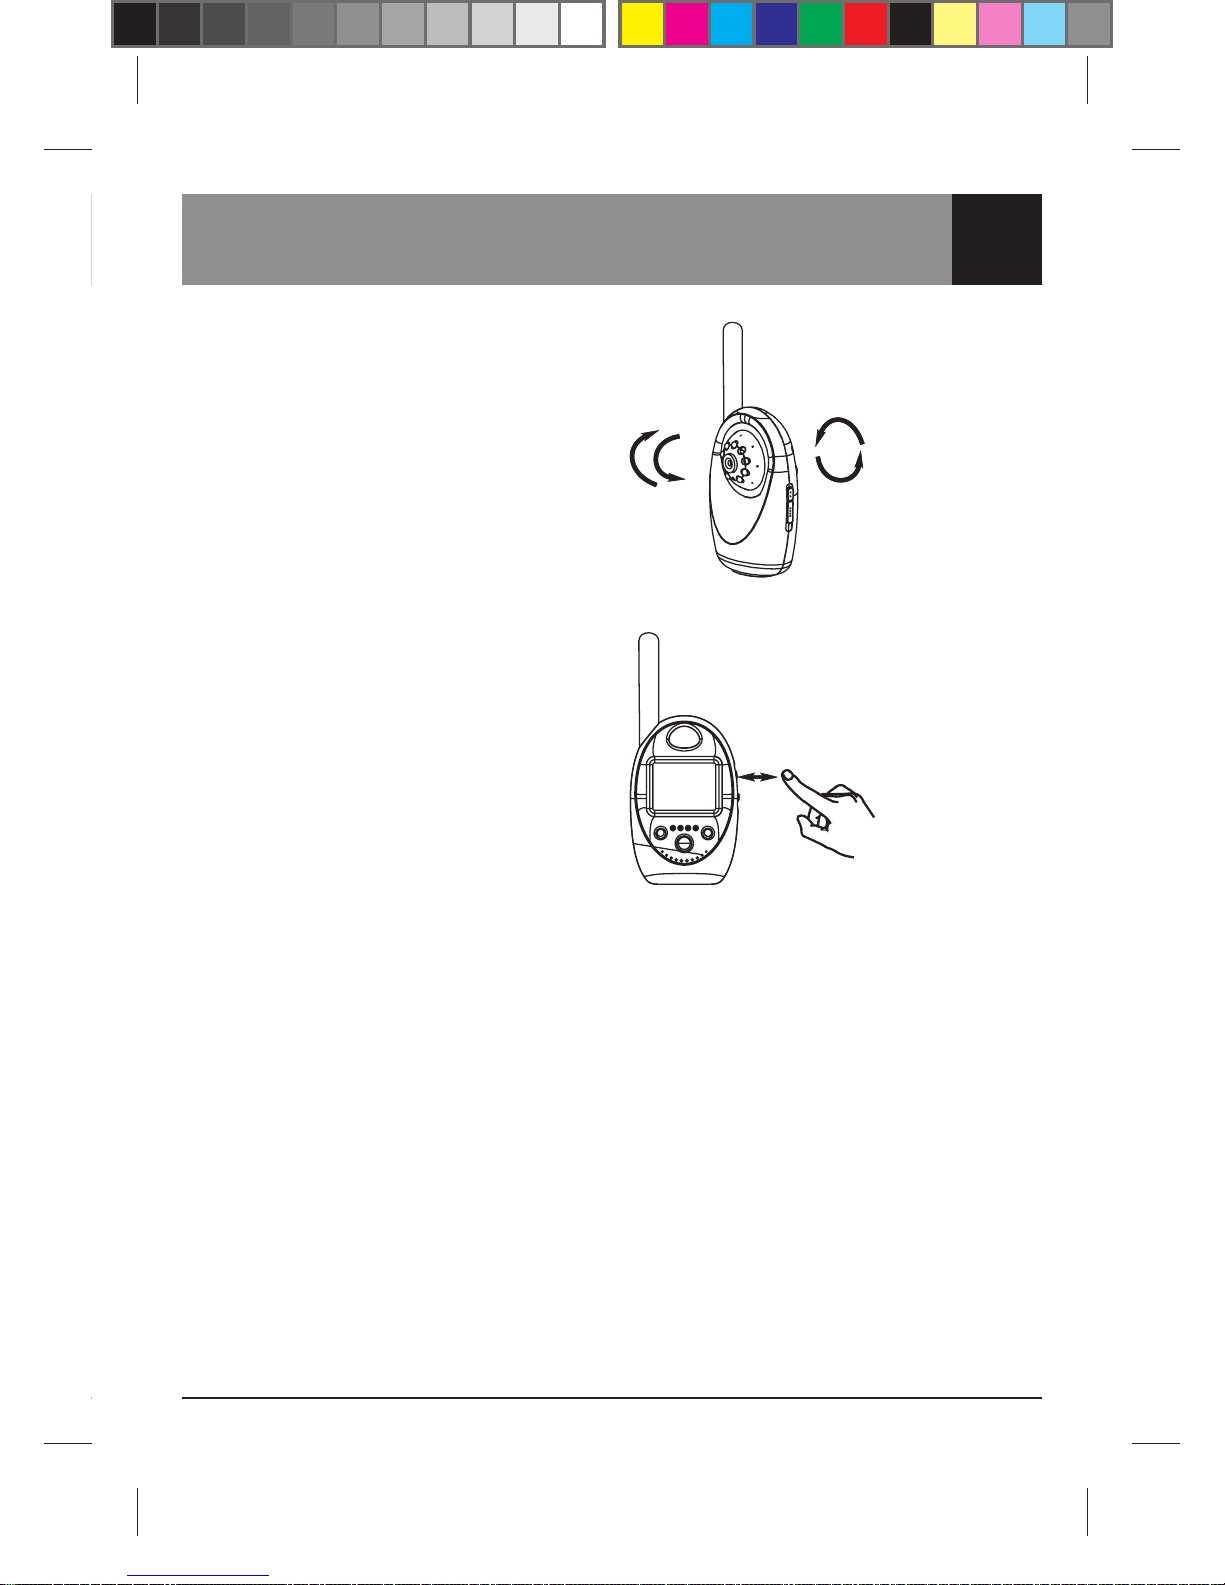
4. The rounded head of the camera
is rotatable by 30 degrees for
convenience. You may manually
adjust the viewing angle at any time.
5. You may adjust the volume to your
desired level by rotating the dial on
the side of the receiver.
Notes:
The receiver supports up to four
cameras simultaneously. Pressing
and holding the Channel button for
approximately three seconds will activate
the auto switch browser mode. In this
mode the receiver will automatically
switch channels in a set order, one by
one, in 6 second intervals
When there is interference or an
interruption in connection the LCD
screen will turn blue and will freeze
the last frame of picture on display.
A “No Signal!” message will appear.
30°
30°
Page 8

8
Installation
Camera alert setup and
sleep mode
Move the Alarm switch to the
VOX position:
Turn on the sound detection warning
function by moving the Alarm switch
at the back of the camera to the
VOX position.
When the three LED lights on the left
of the Volume indicator illuminate for
2 seconds, the camera is now setup
to detect sound with a warning alarm
to alert you. As soon as sound is
detected by the camera, an audio
alarm will be sent to the receiver
and will continue for 2 minutes or
until the Alarm off button is engaged.
The system enters into an automatic
35 seconds snooze mode. After 35
seconds, the camera will return back
to the original sound detection mode.
If the first LED light on the Volume
indicator does not turn on in 3 minutes,
the system will automatically enter
into sleep mode, and will not be active
until an alarm is triggered or the
Sleep Button on the receiver is
manually pressed.
•
•
Moving the Alarm switch to the
OFF position:
The sound detection alarm function
may be disabled at any time by moving
the alarm switch at the back of the
camera to the OFF position.
Note:
The alarm sound will automatically turn
off if the alarm off button is not pressed
within 2 minutes.
If the alarm fails to trigger, check
the volume to ensure it is turned up.
Page 9
9
Specifications
t Actual transmission range may vary according to weather, location, interference or building construction.
t All specications are subject to minor change without prior notice.
CAMERA
Items Specications
Transmission Frequency ISM 2,400~2,483 MHz
Transmission Power 16dBm
Unobstructed Effective Range 300m
Modulation Mode GFSK
Imaging Sensor Type CMOS
Effective Pixels 640×480
Minimum Illumination 0Lux (IR ON)
Night Vision Distance 5m
Battery working time 5h
Motion Alarm Distance 5m
View Angle 60 degree
MONITOR
Bandwidth 3MHz
Sound Detection Sensitivity <-38dB
Consumption Current (Max.) 300mA
Power Supply 5VDC
Dimensions (W x D x H) 220mm × 85mm × 55mm
Weight (Approx.) 142g
LCD Screen Type 2.4” TFT-LCD
Effective Pixels 480×234
Receiving Sensitivity ≤-80dBm
Consumption Current (Max.) 300mA
Battery Working Time 5h
Power Supply 5VDC
Dimensions (W x D x H) 220mm × 85mm × 55mm
Weight (Approx.) 130g
Operating Temperature -10°C~+45°C/+14°F~+122°F
Operating Humidity 85%RH
Page 10
10
Troubleshooting
Hills Limited (ACN 007 573 417)
gives a warranty of 12 months
on this product and is subject to
proof of purchase.
For the current warranty conditions
please visit our website at hills.com.au
or contact your place of purchase.
Hills provides consumers with the
following warranty in relation to
this Product, in addition to complying
with the requirements of any relevant
legislation, including the Competition
and Consumer Act 2010 (Cth)
in Australia and the Consumer
Guaran
(the Acts), except where a New
Zealand consumer acquires the
relevant Product for the purposes
of a business.
Problem Solution
No Image and sound
Check camera/receiver is connected
to the power supply and powered on
Distorted image
Check that the channel of the
receiver corresponds to that of
the camera
Ghosting around image Possible interference
No colour and normal sound
Ensure system settings on both the
camera and receiver are the same
Warnings
• The apparatus shall not be
exposed to dripping or splashing
and that no objects filled with
liquids, such as vases, shall be
placed on the apparatus.
• Turn off the camera/receiver if the
system is not in use.
• The camera/receiver can only be
completely disconnected from the
mains by unplugging the adapter.
• Do not cut the DC power cable
of the apparatus to fit with
another power source.
• Attention should be drawn to
the environmental aspects of
battery disposal.
Page 11

11
Warranty
Hills Limited (ACN 007 573 417)
gives a warranty of 12 months
on this product and is subject to
proof of purchase.
For the current warranty conditions
please visit our website at hills.com.au
or contact your place of purchase.
Hills provides consumers with the
following warranty in relation to
this Product, in addition to complying
with the requirements of any relevant
legislation, including the Competition
and Consumer Act 2010 (Cth)
in Australia and the Consumer
Guarantees Act 1993 in New Zealand
(the Acts), except where a New
Zealand consumer acquires the
relevant Product for the purposes
of a business.
Our goods come with guarantees
that cannot be excluded under the
Australian Consumer Law. You are
entitled to a replacement or refund for
a major failure and compensation for
any other reasonably foreseeable loss
or damage. You are also entitled to
have the goods repaired or replaced
if the goods fail to be of acceptable
quality and the failure does not amount
to a major failure.
All expenses of claiming the warranty
will be borne by the person making
the claim.
Page 12

12
Hills Limited
A.B.N. 35 007 573 417
Issue February 2015
PM1009a
 Loading...