

Hills HSMX-200 User Manual
- 0 -

- 1 -
Table of Contents
Safety Instruction 2
Trademark Information 3
Introduction 4
Package Contents 4
Features 5
Product Overview 6
Front Panel 6
Rear Panel 7
Remote Control 8
System Installation 11
Setting for Person with Impairments (Hearing & Visual) 12
Aspect Ratio Setting 16
Switching on for the First Time 17
Manual Scan / Retune 18
Viewing Channels 19
Freeview EPG: Electronic Progamme Guide 22
Record TV Programmes 23
Format the USB Storage Drive 23
Schedule Recording 24
Main Menu Map 28
Main Menu 29
Channels 29
Settings 30
Setup 34
System 35
Software Upgrade 37
USB Upgrade 37
OTA Software Upgrade 40
Troubleshooting 41
Glossary 43
Specification 44

- 2 -
Safety Instruction
Please review the following safety precautions. If this is your first time to use a satellite receiver,
then read this manual before installing or using this receiver. If the receiver is not functioning
properly, please contact your local distributor or system installer.
Please read the safety instructions carefully.
Please keep this instruction manual for future reference.
Please keep this Set-top Box away from humid conditions.
Place this Set-top Box on a reliable flat surface before setting it up.
Do not place it on soft furnishings.
If any of the following situations arises, contact your local distributor or system installer.
- If the Set-top Box has been exposed to any liquid or moisture.
- If the Set-top Box has been damaged in anyway.
- If the Set-top Box is not working as per the instructions in this instruction manual.
CAUTION
RISK OF ELECTRIC SHOCK
DO NOT OPEN
The lightning symbol in a triangle is used to alert you to the presence of dangerous
voltages inside the receiver that may be sufficient to constitute a risk of electric shock
to anyone opening the case. It is also used to indicate improper installation or handling
of the receiver that could damage the electrical system in the receiver or in other
equipment attached to the receiver.
The exclamation point in a triangle is used to alert you to important operating and
maintenance instructions. Failure to follow these instructions could result in injury to
you or damage to the receiver.
Be careful with electricity:
Power outle
t:
To p
revent electric shock, make sure the electrical plug used on the receiver’s
power cord matches the electrical outlet used to supply power to the receiver. Connect the
power cord only to a power source that operates at 100~240 Volts AC, 50/60 Hz.
Power plug: If a three-prong power plug is provided with the receiver, make sure it is used
with a properly grounded three-wire power socket.
Power cord: Make sure the power cord is routed so that it will not be stepped on or pinched
by heavy items.
Power overloading: Avoid overloading electrical outlets or extension cords, which otherwise
could result in electric shock or fire.
Lightning: For protection from lightning, or when the receiver is left unattended for a long
period, disconnect it from the power source.
Protect other equipment: Unplug the receiver before connecting any other equipment,
especially the antenna. Connect all equipment to the receiver before plugging any power
cords to the power source.

- 3 -
NOTICE---
Plastic Protective Film: Receivers when shipped have a protective thin plastic film over the
Front Panel; this plastic film should be removed and discarded.
DVB and the DVB logo are registered trademarks of the DVB project.
Also follow these precautions:
Ventilation
: Do
not block the ventilation slots on the receiver, or place any heavy object on
top of it. Blocking the airflow could damage the receiver. Arrange components so that air can
flow freely around the receiver. Ensure that there is adequate ventilation if the receiver is
placed in a stand. Put the receiver in a properly ventilated area, away from direct sunlight or
any source of heat.
Overheating: Avoid stacking the receiver on top of a hot component such as a power
amplifier.
Risk of Fire: Do not place the receiver on top of any easily combustible material, such as
carpet or fabric.
Proper Connections: Make sure all cables and equipment are connected to the receiver as
described in this manual.
Object Entry: To avoid electric shock, never stick anything in the slots on the case or remove
the cover.
Water Exposure: To reduce the risk of fire or electric shock, do not expose the receiver to
rain or moisture.
Remote Control: A warning that batteries (battery pack or batteries installed) shall not be
exposed to excessive heat such as sunshine, fire or the like.

- 4 -
Introduction
The Hills HSMX-200 Set-Top-Box is an MPEG-2 compliant Standard Definition (SD) receiver,
capable of receiving and recording standard definition (SD) TV programs from free-to-air
satellite broadcasts (DVB-S) in accordance with the FREEVIEW specification phase two.
The user friendly On-Screen-Display (OSD) allows you to setup your receiver to enjoy standard
definition channels with crystal clear picture and stereo sound quality.
Package Contents
Unpack the receiver and verify that all of the following items are included.
NOTICE:
If any items are missing or damaged, contact your place of purchase immediately.
HSMX-200 Standard Definition MPEG-2 Satellite Receiver
Remote Control Unit (with 2x AAA batteries)
Owner’s manual
AC adapter
Composite (RCA) Video/Audio Cable

- 5 -
Features
USB Record/Playback
Record or playback your favorite programs from an external USB Storage Drive (not
included)
On Screen Display (OSD)
Easy to use Menu system displays key information on screen
Remote Control
Fully functional Remote Control
MHEG5 Electronic Program Guide (EPG)
8 days Freeview Electronic Program Guide.
Record Scheduler
Schedule up to 6 hours of recording
Video and audio connection capabilities
Composite Video and Audio S/PDIF (digital audio out) connections
JPEG photo viewer
Plug in a USB flash drive to view your favourite jpeg (jpg) photos in continuous slide show
option.
DVB Compliant
Decodes MPEG-2 format
Standard Video Format Modes
576i
Multiple Aspect Ratio Modes
16:9, 4:3, Pan and Scan
Channel Locked Function
Parental Rating with PIN code access
USB 2.0 support for software upgrade
- 6 -
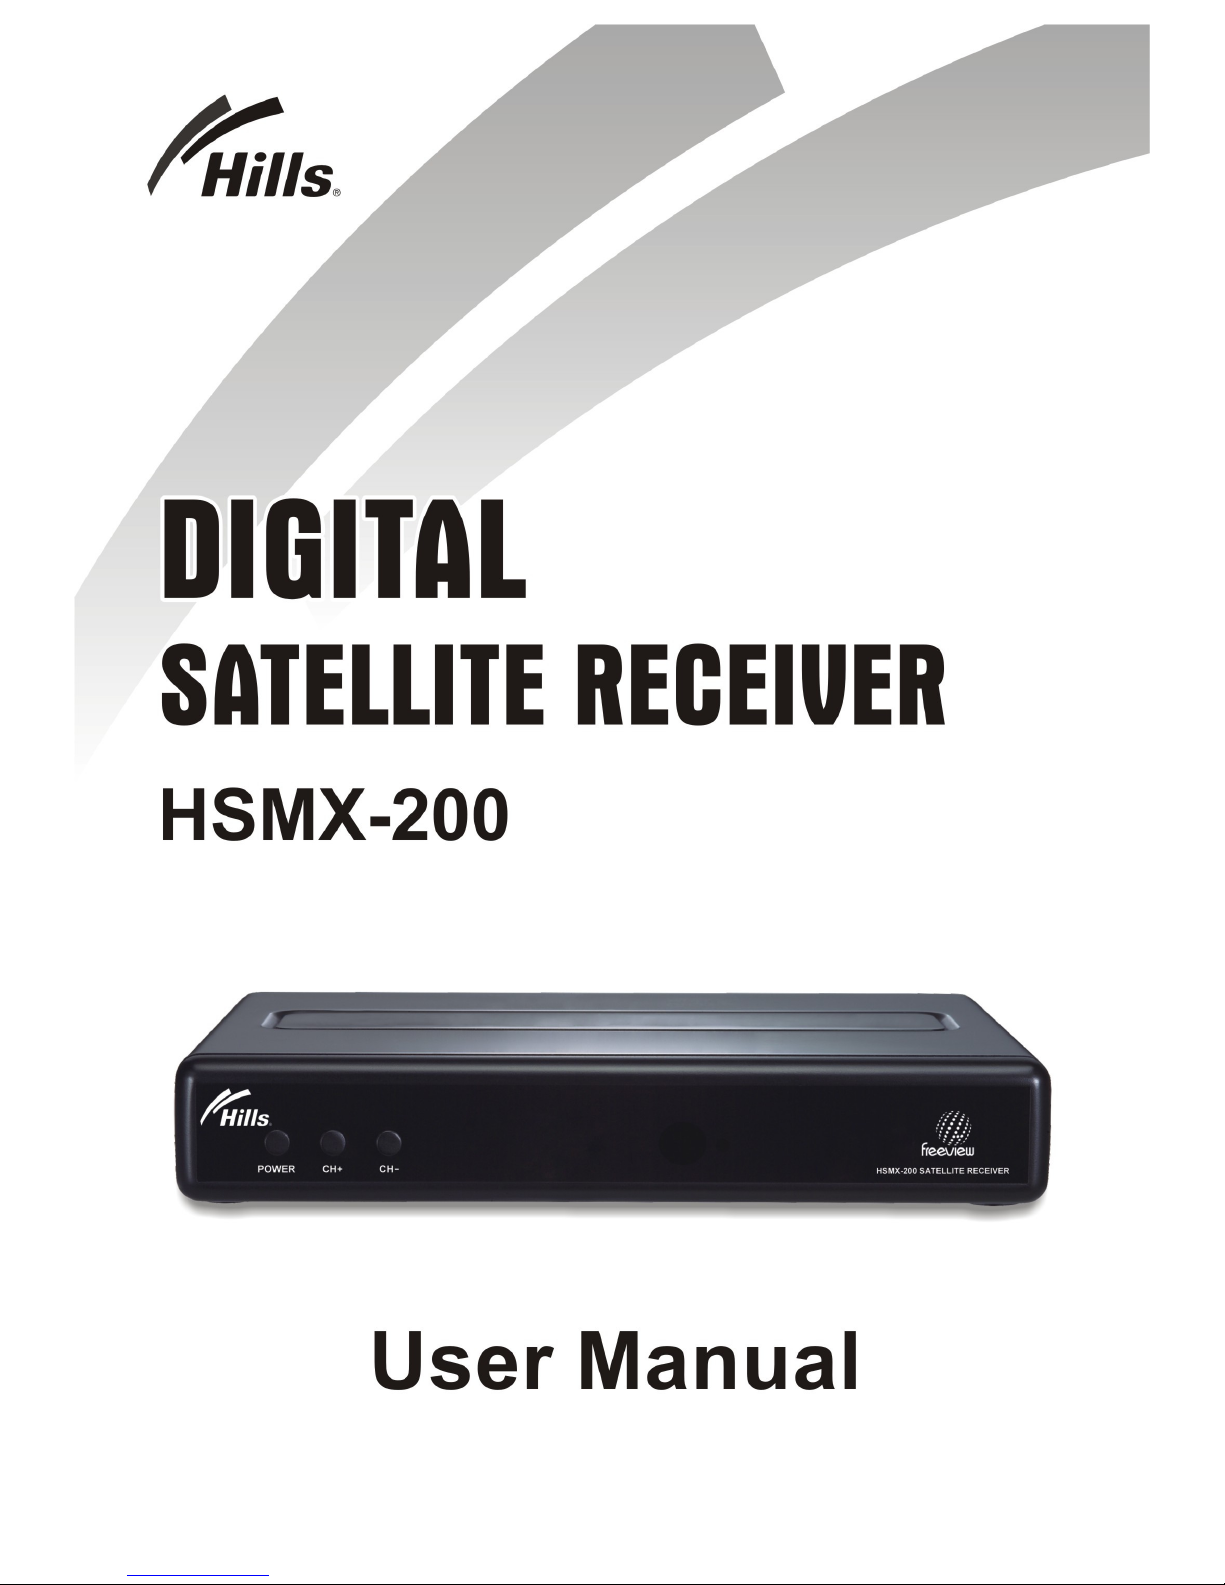
Product Overview
Front Panel
1. POWER button
Toggles the HSMX-200 between power-on (green LED) and standby (red LED) modes.
2. Channel +
++
+button
Switch to the next channel.
3. Channel -
--
-button
Switch to the previous channel.
4. LED Status Light
Red – In Standby

- 7 -
Rear Panel
1. RF In / RF Out:
RF Input for an external antenna/RF Out (loop through) for an external device.
2. Video Out: Composite Video (CVBS):
For Standard Definition Televisions - Connect the Composite Video cable to the yellow
coloured video jack.
3. Audio Out: L/R:
One pair is provided for use with the Composite Video outputs.
4. S/PDIF Optical:
For connection to an amplifier equipped with a Dolby Digital decoder.
5. USB Port:
For connection of a USB Storage Drive (USB Flash Drive, USB single SD card reader or
USB Hard Disk Drive).
6. Power Supply:
Power Adapter DC 12V 1.5A input (100~240 VAC, 50~60 Hz).
NOTE
For USB Hard Disk Storage Drive,
please use an external
power adaptor for
storage drive.
USB Storage Drive is not included.

- 8 -
Remote Control
The remote control provides easy access to all of the receiver’s functions, including selecting
channels and using the menus. It uses infrared signals, and must be operated within seven
meters of the receiver.
When using the remote control, make sure there is a direct line of sight to the receiver.
NOTE
Although the receiver can be operated from the buttons on the front panel, many of
the receiver’s functions can only be accessed using the remote control.
The batteries for the remote control are packaged separately; please install these batteries in
the remote control before using the receiver. Note the “+” and “-“signs on the batteries to ensure
that the batteries are inserted with the correct polarity into the remote control. To avoid damage
to the remote control, discard any depleted or old batteries.

- 9 -
Remote Control
1. STANDBY: Switch the Set-Top Box
OFF/ON.
2. MUTE: Disable and enable MUTE on
the current programme.
3. FAV: Open Favorite Channel List window.
4. AUDIO: Switch between different
languages or audio types if available
(MPEG / AC3).
5. SUBT: For DVB subtitle if available.
6. TTX: Switch Teletext ON.
7. NUMERIC: For entering channel number
or PIN code.
8. INFO: Open I-PLATE/Now/Next
Information.
9. RECALL: Toggle between current and
previous channel.
10. MENU: Open MAIN MENU window.
11. EPG: Display the EPG (Electronic Program
Guide).
12. ENTER: Selects the highlighted item.
13. DIRECTION BUTTONS: Move the cursor
or field in the ▲▼◄► direction.
14. LIST: Press to display channel list.
15. EXIT: To exit display mode (and watch TV).

- 10 -
16. CH
: Previous channel.
CH : Next channel.
17. VOL
++++: Volume up.
VOL ----: Volume down.
18. COLOUR BUTTONS:
Perform various functions which are
shown in the menu.
19. A. RATIO: Switch Aspect Ratio between
16:9 / 4:3 / Pan and Scan.
20. PICTURE: Adjust picture setup
(brightness, contrast, saturation,
Channel Change Mode).
21. TEXT: Enable MHEG5 function
(Optional).
22. TV/RADIO: Change between TV and
radio channels.
23. V.FORMAT: Not Used.
24. FILE: Open File menu window to review
on the USB storage drive.
25. PVR BUTTONS
RWD: Execute rewind in playback mode.
FWD: Execute forward in playback mode.
REC: Start program recording.
PAUSE: Pause the video in playback
mode.
PLAY: Display Recording Playlist, play the
video in playback mode.
STOP: Stop the video in playback mode.
Stop programme recording.
- 11 -
System Installation
Connecting to TV Monitor and Audio & Video Devices

- 12 -
Setting for Person with Impairments (Hearing & Visual)
Enter Menu – Press Menu on Remote
Move to Settings using right arrow
The following list should be visible on the left
Audio – Set the Defaults for what is Viewed (Visually Impaired)
OSD – Sets the Defaults for what is Heard (Hearing Impaired)
Use the down arrow to move to the option you want and press Enter

- 13 -
OSD – For those with Hearing Impairments
For People who need Captions
Setting the following ensures that Captions are present at all times.
(Note a Factory Reset will clear this)
In Menu Option Settings
Arrow down to OSD and Press Enter
Arrow down to Subtitle and Press Enter
Right Arrow to Change OFF to ON
Press Menu to Save and exit this option
Arrow down to Hearing Impaired
Right Arrow to change OFF to ON
Press Menu to save
Press Exit to exit menu or arrow to move to next option
 Loading...