

Page 1
Önevägen 34,
S – 832 51 Frösön, Sweden
Phone: +46 63 57 15 50 Fax: +46 63 57 15 65
E-mail: tentmaker@hilleberg.se
USA
Hilleberg the Tentmaker Inc.
14828 NE 95th Street,Redmond,
WA 98052, Phone: 425-883-0101,
Toll free: 866-848-8368
Fax: 425-869-6632
E-mail: tentmaker@hilleberg.com
Atlas Zubehör:
1. Einkoppelbares Innenzelt
2. Anzippbare Apside
3. Kopplungsteil
4. Boden
5. Zwei Atlas zusammengekoppelt
(ein mit montierter Apside)
Europe
Hilleberg the Tentmaker AB
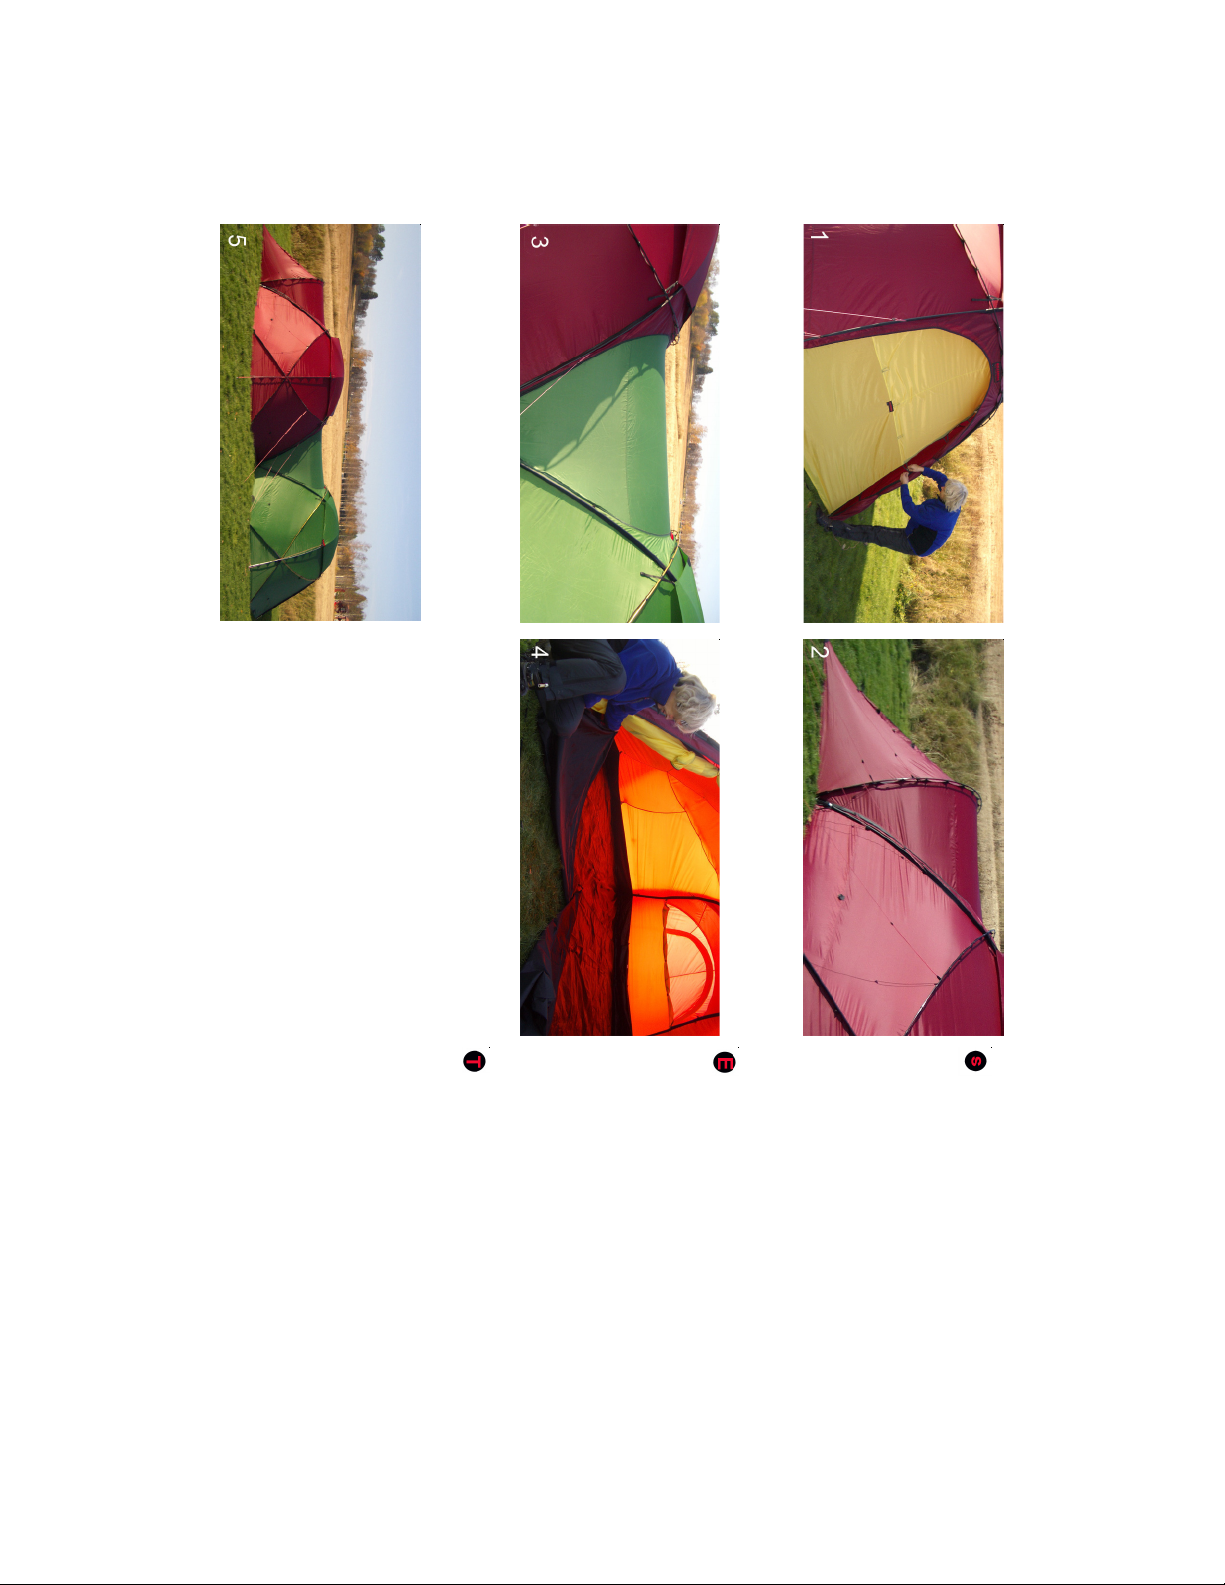
5. Two Atlas connected (one with
attached vestibule)
1. Mountable inner tent
2. Mountable venstibules
3. Connector
4. Groundsheet
Atlas
Atlas tillbehör:
1. Monteringsbart innertält
2. Monteringsbar absid
3 Kopplingsdel
4. Golv
5. Två Atlas sammankopplade (ett
med monterad absid)
Page 2
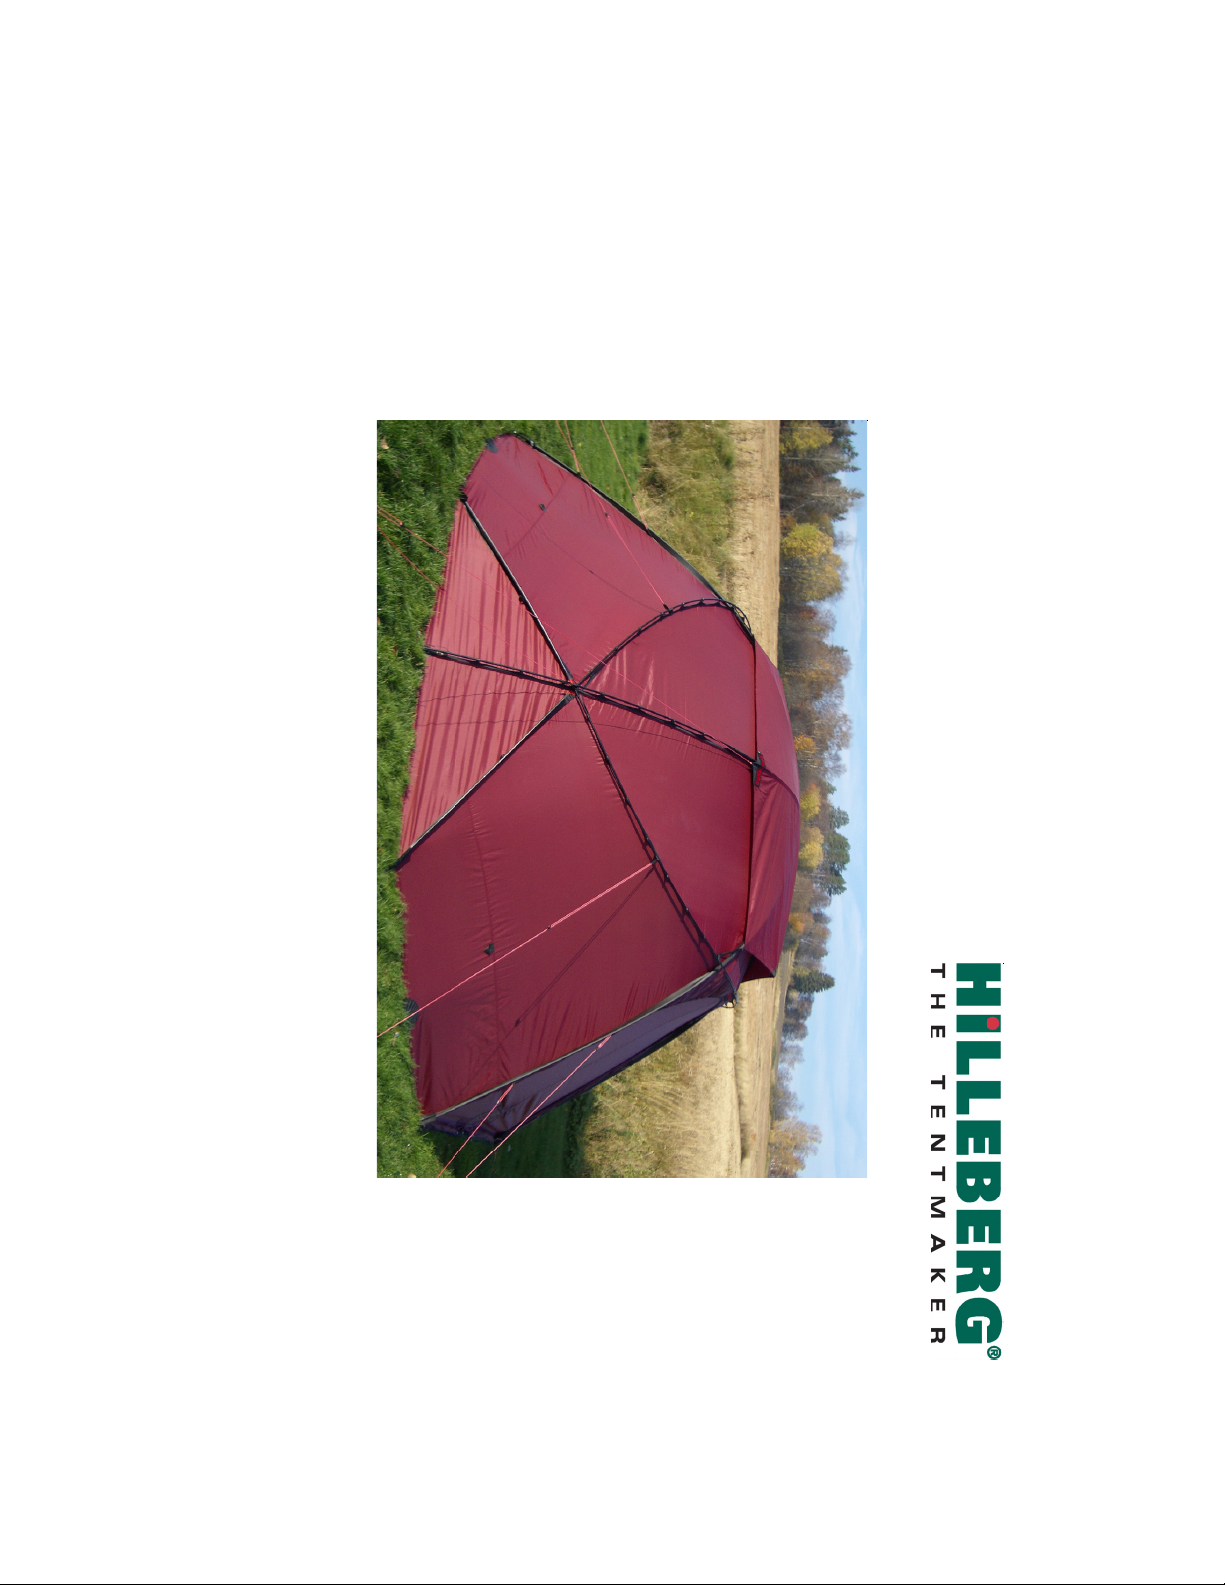
Atlas Basic
Instructions
Page 3
Widerstand den Gewebekanal über die Stange
ziehen.
6. Die Stangen in den Hülsen der Gestängespan-
ner platzieren.
Make sure the poles go all the
way down into the reinforced sleeve-ends. If you
feel resistance, pull on the sleeve material and
feed it up onto the pole.
6. Place the pole-ends into the poletensioner
cups.
Heringen am Boden verankern), bevor die
Stangen montiert werden.
2. Gestänge montieren. Darauf achten, dass alle
Gestängesegmente ordentlich ineinander sitzen!
3 - 5. Die weiß markierten Stangen in die langen,
weiß markierten Kanäle einführen (ganz bis zum
Ende der kräftigen Kanalverstärkungen). Bei
1. Zelt ausbreiten (bei starkem Wind mit
assembling the poles. In windy conditions, peg
the tent out first.
2. Assemble the poles. Make sure that all pole
sections are securely seated into each other
3 - 5. Push the poles marked with white into the
long polesleeves that are also marked with white.
.
stången.
1. Spread the tent out on the ground before
3 - 5. För in de vitmarkerade stängerna i de långa
vitmarkerade kanalerna, (helt i botten av den
kraftiga kanalförstärkningen). Vid motstånd, drag
på kanaltyget på stången!
6. Placera stången i stångåtstramarens hylsa, och
upprepa proceduren med den andra vitmarkerade
markpinnar om vinden är hård), innan stängerna
monteras.
2. Montera stängerna. Var noga med att alla
stångdelar bottnar ordentligt i hylsorna!
1. Bred ut tältet, ( förankra med ett par
Page 4

31. Das Atlas Basic ist komplett errichtet.
32. Der Eingang kann zum bequemen Ein- und
Ausstieg seitlich befestigt werden.
33 – 35. Der Dachlüfter wird mit Reißverschluss
geöffnet. Er ist mit Abdeckluke und Mückennetz
versehen. Diese können zur maximalen
Belüftung weggerollt werden.
36. Ventilationsluken befinden sich an jedem
Eingang. Diese können einfach mit einer
Ziehkordel aufgespannt werden.
31. Atlas Basic pitched.
32. The entrance can be secured for convenient
entry and exit.
33-35.
supplied with no-see-um mesh and a protective
cover. These can be rolled up fully for maximum
opening.
36. Vents are on each entrance door. They can
easily be fully opened and secured with a
fastener.
The roof vent is opened with zippers. It Is
31. Atlas Basic uppsatt komplett.
32. Ingången kan fästas upp för bekväm passage
in och ut.
33-35. Takventilen öppnas med blixtlås. Den är
försedd med täcklucka och myggnät. Dessa går
att rulla ihop helt för maximal öppning.
36. Ventilationsluckor finns på varje ingångsdörr.
De går att spänna upp enkelt med dragsnodd.
Page 5

20. Blau markierte Stange in den Mittelkanal
(blaumarkiert) einführen.
21. Stange in dem Stangenabspanner befestigen
und anspannen.
22. Haken an der Stange anklicken.
23. Zeltheringe verankern.
24. Zeltleinen befestigen (dabei die Befestigung
einmal um die Stangenkreuzungen wickeln).
attachments around the pole-crossings)
20. Push the pole marked with blue into the
middle-sleeve, which is also marked with blue.
21. Place the pole-ends into the pole tensioners
and tension them.
22. Hook the clip
23. Peg down the rest of the pegs.
24. Attach guy lines (wrap the guy line
s to the pole.
20. För in den blåmarkerade stången i mittkanalen
(blåmarkerad).
21. Fäst stången i stångåtstramaren och spänn
denna.
22. Knäpp fast krokarna på stången.
23. Förankra tältets återstående markpinnar.
24. Fäst staglinorna (linda fästet runt stång-
korsningen).
Page 6

13. Die Stange muss bis ganz am Ende des
kurzen Kanals sitzen.
14 – 15. Stange auf die andere Seite des Zeltes
hinüberbeugen und in den entsprechenden Kanal
der Seite platzieren. Genau darauf achten dass
die Stange bis ans Ende des Kanals geführt wird!
16 – 17 Das gleiche mit der nächsten sich quer
kreuzenden Stange wiederholen.
18 – 19. Haken des Zeltes an den sich
kreuzenden Stangen anklicken.
sleeve on the opposite side. Make sure this pole-
end is also fully seated into its short polesleeve.
16- 17. Repeat the process with the second red
pole and short pole sleeve.
18 - 19. Hook the clips on to these crossing
poles.
13. Make sure the pole-ends are fully seated into
the short polesleeves.
14 - 15. Bend the pole around the tent, following
the line of the clip
s and place it into the short
stängerna.
och placera den i motsvarande sidas kanal. Var
noga med att stången bottnar helt i kanalen!
16- 17. Upprepa samma sak med nästa ”tvär-
korsande” stång.
18 - 19. Knäpp fast tältets krokar på de korsande
13. Se till att stången bottnar helt i den korta
kanalen!
14 - 15. Böj över stången till andra sidan av tältet
Page 7

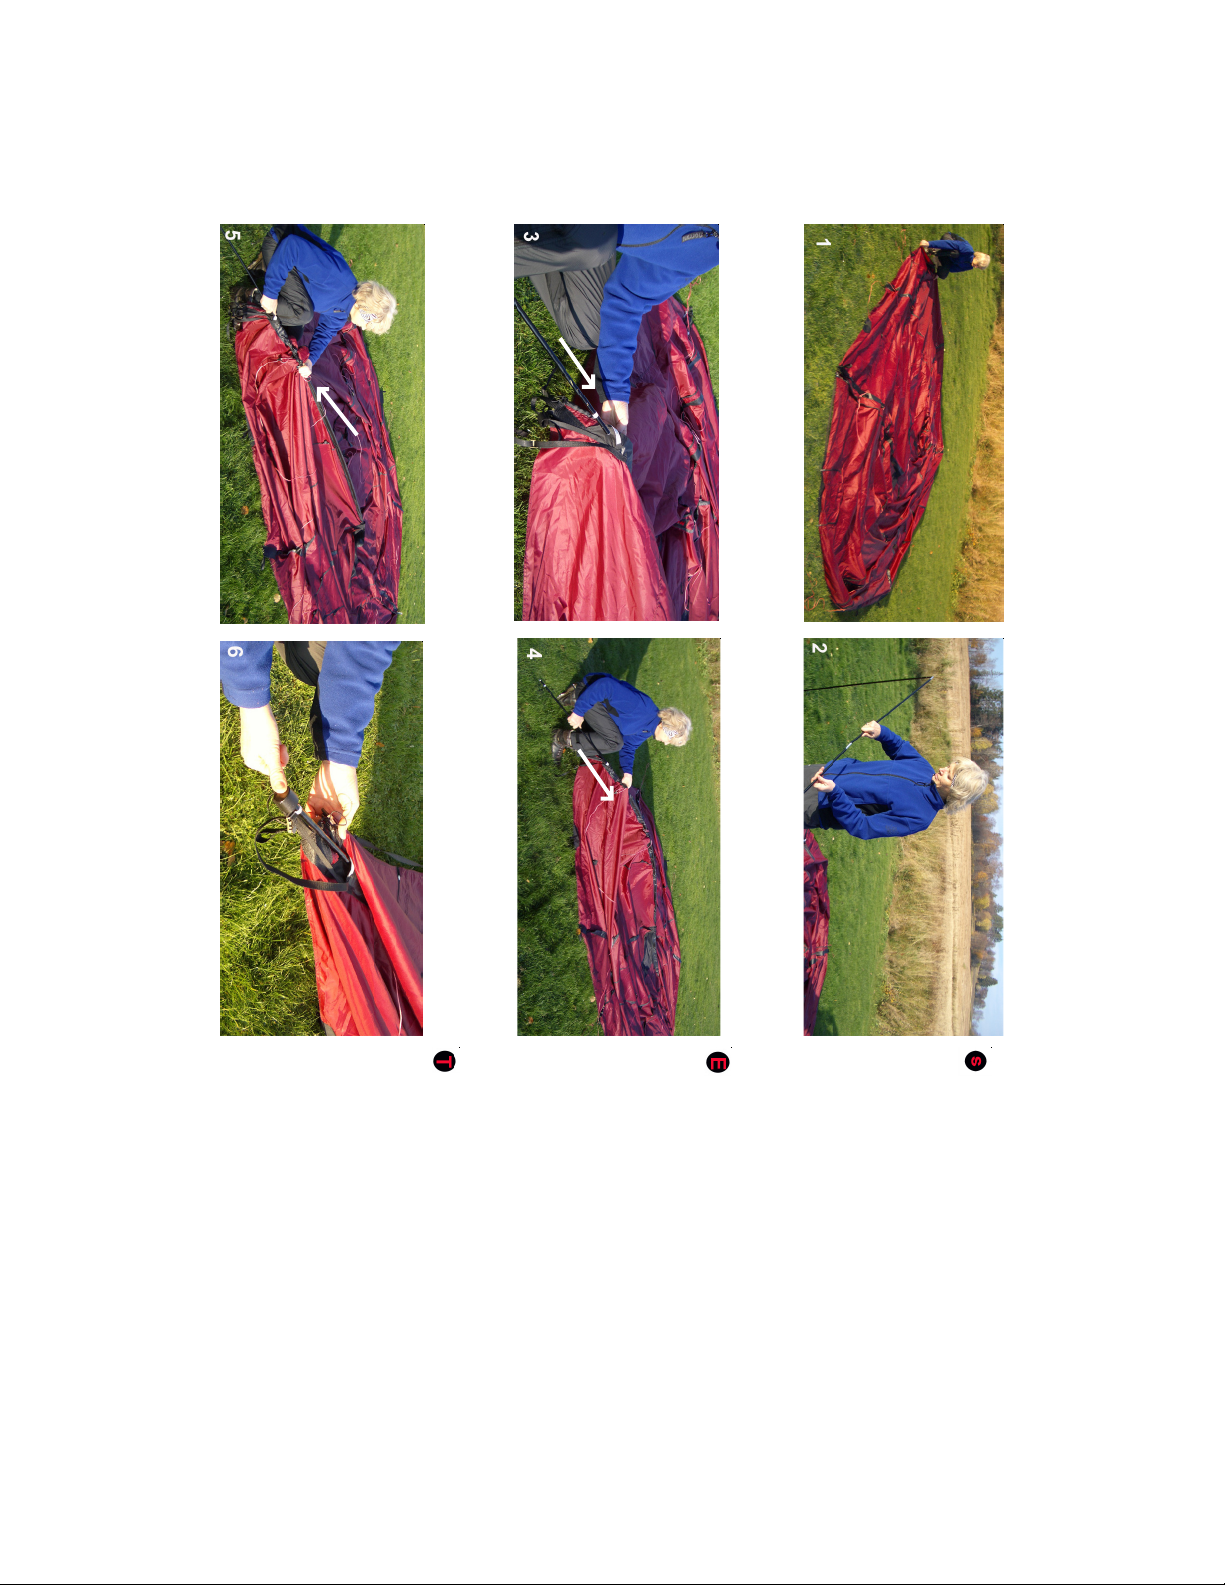
7. Spänn åtstamarna som på bild 7!
8. Fatta tag i tältet vid mittbågens fäste, och ”drag”
upp tältet.
9 - 10. Sträck ut tältet och förankra med mark-
pinnar.
11. Förankra även tältets hörn med markpinnar.
12. Placera de rödmarkerade stängerna i de korta
rödmarkerade kanlaerna. Var noga med att se till
att stängernas färgmarkeringar stämmer mot
kanalernas!
tretch the tent and peg out with the
7. Tension the poletensioners as shown in
picture 7.
8. Grab the tent by the middle-poles’ sleeve and
”pull up” the tent.
9 - 10. S
ground pegs if not already done.
11. Also peg down all corners with ground pegs.
12. Place one end of the poles marked with red
into the short pole sleeves also marked with red.
Make sure the color coding on the poles match
the color coding on the sleeves.
7. Abspanner strammziehen wie in Bild 7
gezeigt.
8. Das Zelt an der Befestigung des Mittelbogens
greifen und das Zelt hoch ”ziehen”.
9 – 10. Zelt ausstrecken und mit Heringen
verankern.
11. Auch die Zeltecken mit Heringen befestigen.
12. Rot markierte Gestänge in den kurzen, rot
markierten Kanälen platzieren. Genau darauf
achten, dass die Farbmarkierungen der Stangen
mit denen der Kanäle übereinstimmen.
Page 8

25. Fortsätt att linda staglinfästena runt tältstänge-
rna.
26. Förankra alla markpinnar stadigt i marken.
Staglinorna bör hållas maximalt långa!
27-28. Montera stången i ventilskyddet.
29-30. Montera ventilskyddet med krokarna på
stången vid pilen! Efterspänn ventilskyddet
ordentligt så inget fladder kan uppstå.
ability.
25. Continue wrapping guylines around the poles
as needed.
26. Peg out all guylines securely as needed. The
guylines should be kept as long as possible for
maximum st
27-28. Insert the pole into the vent cover.
29-30. Attach the vent cover with the hooks on
the pole by the arrow. Tension the vent cover as
much as possible so that it won’t be pushed
around in the wind.
25. Damit fortsetzen, die Leinenbefestigungen
um die Zeltstangen zu wickeln.
26. Alle Zeltheringe fest im Boden verankern. Die
Abspannleinen sollten so lang wie möglich
ausgestreckt werden!
27 – 28. Stange in der Lüfterabdeckung
montieren.
29 – 30. Lüfterabdeckung mit den Haken beim
Pfeil an der Stange montieren! Die Abdeckung
sorgfältig nachspannen, so dass sie nicht flattern
kann.
 Loading...