

Page 1

Jolanda Linschooten
Klaas de Jong
AKTO
Page 2

Hilleberg Akto
Välkommen till ditt nya Hilleberg Akto!
sv sv
Du har investerat i ett högkvalitetstält, så tag väl hand om det. Vi rekommenderar
att du läser instruktionshäftet noggrant innan du sätter upp ditt tält och att du
tränar ordentligt på att sätta upp och ta ner det innan du går ut på din första tur.
Trots sin låga vikt är Akto mycket starkt om det används korrekt, men det kräver
noggrann skötsel och handhavande för att fungera optimalt. Följ alla anvisningarna
i detta häfte så kommer Akto att fungera väl för dig under många år.
Welcome to your new Hilleberg Akto!
en
You have invested in a truly high-end, high quality tent, so take care of your investment. We strongly recommend that you read these instructions completely before
setting up your tent, and that you practice setting up your tent at home before
taking it on a backcountry trip.
Despite its light weight, the Akto is exceptionally strong if used correctly, but it
does require proper care and handling to function at its full potential. Follow ALL
directions in this booklet. Doing this will ensure the greatest longevity of your tent
and the maximum benefit to you.
Willkommen zu Deinem neuen Hilleberg Akto!
de de
Du hast mit diesem Zelt ein hoch qualitatives Produkt erworben und solltest es
auch dementsprechend handhaben. Wir empfehlen Dir, diese Anleitung vor dem
ersten Aufbau Deines Zeltes gründlich durchzulesen und den Aufbau zu üben,
bevor Du mit Deinem neuen Zelt die erste Tour unternimmst.
Trotz seines geringen Gewichts ist das Akto bei korrekter Anwendung extrem
belastbar. Um optimal zu funktionieren, bedarf es jedoch sorgfältiger Pflege und
Handhabung. Folge allen Anleitungen, so wirst Du an diesem Zelt lange Freude haben.
Akto innehåller följande
Yttertält i Kerlon 1200, hopkopplat med innertält. Monterade linor 6 st med
linsträckare. Tältstång 9 mm, 1 x 293 cm. Markpinnar 10 st. Packpåsar för tält,
stång och pinnar. Extra stångdel 1 st. Reparationshylsa 1 st. Instruktionsbok.
obs: Det finns 10 fästpunkter för markpinnar. Man kan resa tältet med endast 4
markpinnar men vi rekommenderar att du alltid använder alla markpinnar och linor
eftersom vädret kan växla snabbt.
What’s Included with the Akto
en
One outer tent in Kerlon 1200 connected to one inner tent; 6 attached guy lines
with line runners; 9 mm pole – 1 x 293 cm; 10 pegs; stuff bags for tent, pole and
pegs; one spare pole section; one pole repair sleeve; and an instruction booklet.
note: There are 10 possible peg points on the Akto. Basic pitching takes just four
pegs, but we recommend that you carry and use the others, and that you make
guy line use part of your normal routine, since weather in the backcountry is
always unpredictable!
Akto Inhalt
Außenzelt aus Kerlon 1200 mit eingebautem Innenzelt. 6 vormontierte Abspannleinen mit Leinenspannern. Zeltstangen 9 mm: 1 x 293 cm. 10 Heringe. Packsäcke
für Zelt, Stange und Heringe. 1 extra Stangensegment, 1 Reparaturhülse und
1 Aufbauanleitung.
achtung! Das Zelt besitzt 10 Ansatzpunkte für die Heringe; es werden davon
mindestens vier benötigt, damit das Zelt steht. Wir empfehlen jedoch, jederzeit
alle Punkte und Leinen zu verankern, da das Wetter schnell umschlagen kann.
2 |
| 3
Page 3

Hilleberg Akto
1
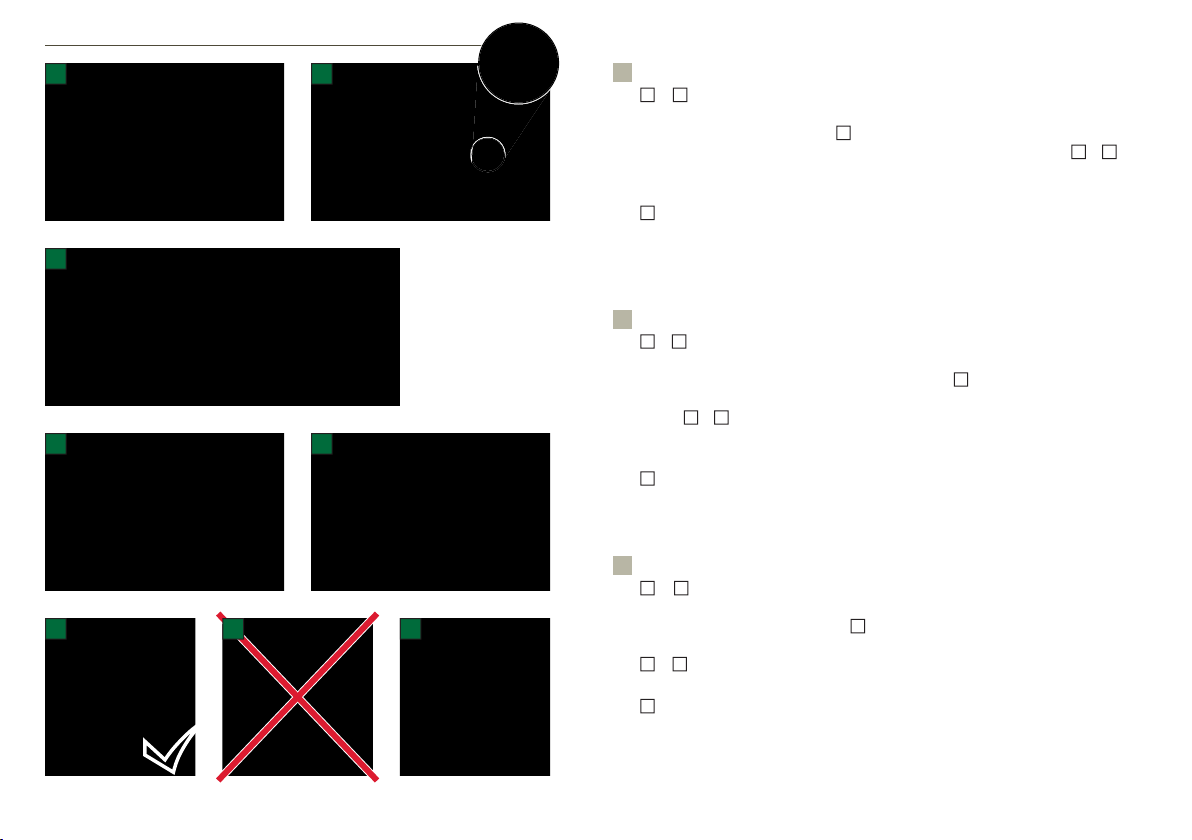
Att välja tältplats
sv
1
Välj en så vindskyddad och jämn plats som möjligt, och fri från sådant som kan
skada ditt tält. En konvex yta ger bättre spänning och minskar risken för vatten
under tältet.
Choosing a tent site
en
1
Find a spot that is as protected as possible from the wind, and that is even, level
and free of anything that might damage your tent. A slightly convex site will create
better stretch in the pitching and minimize moisture collecting under the tent.
Die Suche eines geeigneten Zeltplatzes
de
1
Wähle einen Platz, der möglichst windgeschützt, eben und frei von Gegenständen
ist, die Dein Zelt beschädigen könnten. Ein leicht konvexer Platz ergibt bessere
Spannung und minimiert Nässeansammlung unter dem Zelt.
4 |
| 5
Page 4

Hilleberg Akto
4
4
6 |
Viktigt om hantering av stänger och markpinnar
21
sv
1
– 3 Våra tältstänger är av högsta kvalitet, men de är en lättviktsprodukt som
kräver korrekt hantering annars kan stången knäckas och i värsta fall leda till
fara. Kasta aldrig ut en stång för ihopsättning eftersom stångdelarna kan få
sprickor eller andra skador när de slår ihop. Vik ut och sätt ihop en sektion i
taget. Se till att delarna går ihop ordentligt och att de inte glider isär eftersom en
3
glipa kan orsaka stångbrott.
4
Markpinnarna ska tryckas ner helt och hållet i 45° vinkel. Om det ej går att få
ner pinnen i rätt vinkel är det bättre att använda en flackare vinkel än att låta en
del av pinnen sticka upp ur marken.
5
– 7 Om det är svårt att få ner pinnen,
använd ett hårt föremål för att pressa eller slå ner pinnen.
Important note about pole and peg usage
en
1
– 3 Our tent poles are the best quality, but they are still lightweight aluminum.
Incorrectly handled, a pole can break, which could be potentially dangerous.
Never extend a pole by flinging it open, since the sections hitting each other
can cause damage. Unfold the pole carefully, seat each section into place, and
ensure that pole sections do not pull apart during pitching, as the resulting gaps
can lead to breakage.
4
Press in all pegs completely at about a 45° angle to the surface of the ground. It
is better to use a shallower angle (closer to parallel to the surface) than it is to leave
a peg sticking up from the ground.
5
– 7 If it is hard to get the pegs in, use a rock
or other hard object to press – or if necessary, to lightly hammer – them in fully.
Wichtig bei Benützung von Gestänge und Heringen
75 6
de
1
– 3 Unsere Gestänge sind von bester Qualität. Sie sind auf Leichtigkeit konzipiert
und müssen korrekt gehandhabt werden Bei unsachgemäßer Anwendung können
sie brechen und Deine Sicherheit gefährden. Wirf nie die Stange zum Zusammen-
bauen aus, es könnten dadurch Risse oder andere Schäden entstehen. Entfalte
die Stange und setze ein Segment nach dem anderen zusammen. Achte darauf,
dass die Teile beim Aufbau nicht auseinanderrutschen, die dadurch entstehende
Spalte könnte einen Stangenbruch verursachen.
4
Presse alle Heringe komplett in einem Winkel von ca 45° in den Boden. Sollte
dies nicht möglich sein, ist ein flacherer Winkel besser als dass ein Teil des Herings
nicht im Boden steckt.
5
– 7 Benütze einen harten Gegenstand wenn es schwierig
ist, den Hering ganz in den Boden zu schlagen.
| 7
Page 5

Hilleberg Akto
2
2
Lägg ut och fäst tältet
sv
1
Lägg ut tältet. Vid hård vind bind en tältlina i ett tungt föremål t ex en ryggsäck.
2
Fäst ena änden av tältet med markpinnarna.
obs: Markpinnarna ska tryckas ner helt och hållet i 45 graders vinkel (Se sid 7 för
detaljer).
Lay out and start pegging the tent
en
1
Lay out the tent. Especially in windy conditions, use a guy line to secure the tent
to a backpack or other heavy item so it cannot blow away.
2
Peg one end of the tent..
note: Press in all pegs completely at about a 45° angle to the surface of the ground
(see page 7 for more details on placing pegs).
Ausbreiten und Befestigen des Zeltes
de
1
Breite das Zelt aus. Bei starkem Wind ist es ratsam eine Abspannleine an einem
schweren Gegenstand (z. B. Rucksack) zu befestigen.
2
Verankere ein Ende des Zeltes.
achtung! Presse alle Heringe komplett in einem Winkel von ca 45 Grad in den
Boden (Siehe Seite 7).
8 |
| 9
Page 6
Hilleberg Akto
1
3
4 5
6
7 8
d
10 |
Montera stången
2
sv
1
& 2 Skjut stången ungefär halvvägs in i kanalen, håll sedan fast stången med
ena handen och dra på resten av kanalen. Det är mycket viktigt att stången bottnar
fullständigt i den slutna änden.
sin längsta position) och skjut in resterande del av stången i kanalen.
3
Fatta bandet till stånghållaren (som skall vara i
4
– 7 Sätt
stången i stånghållaren. Drag åt bandet till dess stånghållaren ligger intill tältduken
och med botten i nivå med dess nedre kant.
8
Stånghållare och kanal är gjorda så att du vid behov kan använda dubbla stän-
ger. Det ökar stabiliteten och styrkan på tältet under extrema vädersituationer.
Insert the pole
en
1
& 2 Push the pole about half-way into its sleeve, then hold onto the pole while
pushing the pole sleeve material onto the pole. Make sure the pole end is seated
completely into the closed end of the pole sleeve.
3
Adjust the pole tensioner to
its longest setting, hold the peg loop, and push on the pole so that it arches into
4
shape.
– 7 Place the pole end into the plastic pole tensioning cup. Tighten the
pole tensioner’s strap until the pole cup is fl at against the tent and fl ush with the
bottom of the tent wall.
8
The pole holder and sleeve will accommodate double poles, which increases
stability and strength for the most extreme conditions.
Einbau der Stange
de
1
& 2 Schiebe die Stange bis zur Hälfte in den Kanal. Halte sie fest und schiebe
den restlichen Kanal auf die Stange. Es ist wichtig, dass die Stange bis ganz ans
Ende des Kanals geschoben wird.
3
Halte das Zelt am Stangenhalter (der so weit
wie möglich eingestellt sein sollte) und schiebe die Stange komplett in den Kanal.
4
– 7 Setze die Stange in den Stangenhalter. Ziehe diesen zum Zelt hin fest. Er
sollte so nah wie möglich am Außenzelt und in der Höhe mit dem Zeltboden liegen.
8
Stangenhalter und Kanal sind so konstruiert, dass Du bei Bedarf auch doppeltes
Gestänge nutzen kannst. Dieses erhöht die Stabilität und Standfestigkeit des Zeltes
in extremen Wettersituationen.
| 11
Page 7

Hilleberg Akto
1
2
3
sv
Uppsättning
1
– 3 Tag den andra änden och drag ut tältet. Kontrollera att det är rakt. Sätt
fast markpinnarna i hörnen. Kontrollera att markpinnarna sitter ordentligt (se sid 7).
Finish pegging the ends
en
1
– 3 Grasp the corners of the unpegged end and pull the tent out, making sure
the tent body is straight. Peg down the corners. Press the pegs fully into the ground
(see page 7 for more details on placing pegs).
Aufstellen des Zeltes
de
1
– 3 Ziehe das Zelt lang. Achte darauf, dass das Zelt gerade ist und setzte dann
die Heringe. Kontrolliere, dass die Heringe gut sitzen (siehe Seite 7).
12 |
| 13
Page 8

Hilleberg Akto
1
2 3
4
6 7
Slutför uppsättningen med linorna
45°
sv
1
– 5 Drag ut linorna till sin längsta längdoch fäst dem med markpinnar i cirka
45 grader i förhållade till längsriktningen. Se skiss. Justera linsträckarna så att
tältet är väl spänt.
6
& 7 Drag ut och fäst sidolinorna.
obs: Linorna skall vara spända men ej så mycket att de ändrar tältets form.
Completing the set up and anchoring the tent
en
1
– 5 Make sure all the guy lines are set to their longest length. Pull out and
peg the end guy lines so that they are set at about a 45° angle to the line of the
bottom of the roof as shown in the drawing. Adjust the line runners so that the
roof is well-stretched.
6
& 7 Peg the two side guy lines straight out from the tent.
5
note: The side guy lines should be taut, but not so tight that they deform the tent.
Verankern des Zeltes mit Leinen
de
1
– 5 Stelle die Leinen so lang wie möglich und verankere sie in einem Winkel
von ca 45 Grad zur Längsrichtung. Siehe Skizze. Justiere die Leinenspanner damit
das Zelt gut gespannt ist.
6
& 7 Verankere die Seitenleinen.
achtung! Die Zeltleinen sollten nur so stark gespannt werden, dass sie nicht die
Form des Zeltes verändern.
14 |
| 15
Page 9

Hilleberg Akto
1 2
3
Användning av yttertältsingången
sv
1
3
–
Öppna ingången helt, rulla ihop tyget och fäst det åt sidan med respåband-
sögla och toggle..
4
Trampa aldrig på dörrfliken eller låt den ligga på marken eftersom risken då är stor
att det kommer jord, sand eller annat skräp i blixtlåsen, vilka då snart slutar fungera.
5
För att undvika att tyget fastnar i blixtlåsen är det bra att hålla ett finger framför
blixtlåslö-paren vid öppning och stängning.
Using the outer tent door
en
1
3
–
Unzip the door completely, and gather the fabric of the door and roll it
tightly towards the side. Secure the bundle of fabric with the elastic loop and toggle.
4
Make sure not to step on the door, or to let it lay on the ground; this will drag
the zipper in the dirt, and grit in the zipper will reduce its life span.
5
It is a good idea to keep your finger in the zipper as you open or close it. This
keeps the door fabric from catching, and will increase the life of your zippers.
Anwendung des Außenzelteinganges
54
de
1
3
–
Öffne den Eingang komplett, rolle ihn zusammen und befestige ihn an der
Seite mit Gummi Band und Knebel.
4
Vermeide es, auf die geöffnete Eingangstüre zu treten oder diese auf dem Boden
liegen zu lassen. Es besteht sonst die Gefahr, dass Erde, Sand oder Schmutz in den
Reißverschluss kommen und diesen dauerhaft schädigen.
5
Führe beim Öffnen und Schließen einen Finger vor dem Schieber entlang, um
zu verhindern, dass sich die Zeltplane im Reißverschluss verhakt.
16 |
| 17
Page 10

Hilleberg Akto
1
2
3 4
Användning av innertältsdörren
sv
1
& 2 Innertältsdörren öppnas utmed golvet och taket. Den kan rullas åt sidan
och fästes med resårbandsöglan och togglen.
3
& 4 Övre delen av dörren är av myggnät täckt, av en öppningsbar lucka.
obs: Låt aldrig dörrfliken ligga på marken eller trampa på den eftersom det kan
innebära att sand, jord eller annan smuts fastnar i blixtlåset och det slutar fungera
Using the inner tent door
en
1
& 2 The inner tent entrance opens along the top and bottom, and can be fully
rolled to the side and secured it with the toggle and loop fasteners.
3
& 4 The top third of the inner tent door is no-see-um mesh, covered by a
velcro-adjustable fabric panel, which can be rolled down and secured.
note: Make sure not to step on the door, or to let it lay on the ground; this will
drag the zipper in the dirt, and grit in the zipper will reduce its life span.
Anwendung des Innenzelteinganges
de
1
& 2 Der Innenzelteingng wird der Bodenwanne und dem Dach entlang geöffnet
und kann zur Seite gerollt und befestigt werden.
3
& 4 Der obere Teil des Einganges besteht aus Mückennetz und ist mit einer
Luke abgedeckt.
achtung! Achte darauf, dass der Eingang nicht auf der Erde liegt oder Du darauf
trittst. Es besteht dann die Gefahr, dass Erde, Sand oder Schmutz in den Reißverschluss kommen und diesen dauerhaft schädigen.
18 |
| 19
Page 11

Hilleberg Akto
1 2
3 4
5 6
Användning av ventilationen
sv
1
– 3 En ventil, skyddad av en huv, är integrerad med Aktos yttertältsdörr. Ventilen
är reglerbar och gjord i vattenavvisande och ventilerande väv. Den ventilerar även
då den är stängd. Även innertältsdörren har en ventil av myggnät, försedd med
en öppningsbar lucka. (se sid 19).
4
– 6 I huvud- och fotände finns blixtlåsförsedda justerbara ventiler. De är
gjorda i vattenavvisande och ventilerande väv och skyddas av det utdragna taket.
De ventilerar även då de är stängda.
Using the Ventilation System
en
1
– 3 A vent is integrated into the Akto’s outer tent door, and is protected from
rain and snow by a vent hood. The top portion of the door itself can be opened,
and is made of highly air permeable yet water repellent fabric, so air flows, even
when the door is fully closed. The inner tent door offers venting options, as well
(see page 19).
4
– 6 Zipper adjustable vents in the head and foot ends of the outer tent provide
increased air flow, and are protected from rain by the angled design of the end
itself. The end panels themselves are air permeable yet water repellent venting
fabric, so provide air flow even with the vents zipped closed.
Anwendung der Lüftung
de
1
– 3 Eine Ventil ist im Außenzelteingang integriert und schützt durch eine
Lüfterhaube vor Regen und Schnee. Der ventilierende Teil besteht aus luftdurchlässigem und wasserabweisendem Material. Auch der Innenzelteingang bietet
Ventilationsmöglichkeit (siehe Seite 19).
4
– 6 Mit Reißverschluss versehene, regulierbare Ventile im Kopf- und Fußende
des Außenzeltes sorgen für gute Durchlüftung. Sie sind aus luftdurchlässigem und
wasserabweisendem Material und durch die schräge Dachkonstruktion geschützt.
Die Ventilation funktionniert auch bei geschlossenen Ventilen.
20 |
| 21
Page 12

Hilleberg Akto
1 2 3
4 6
7 8 9
10 11 12
22 |
5
Nedtagning och packning av tältet.
sv
Sopa ur och gör ren tältet. Stäng alla blixtlås. På sandiga och smutsiga tältplatser –
borsta och rengör alla blixtlås med en liten borste.
av linorna i ett tungt föremål. Tag bort markpinnarna.
stånghållaren maximalt och tag ut stången ur hållaren.
1
& 2 Vid hård vind, fäst en
3
Lägg ner tältet, förläng
4
– 6 Håll i stångkanalen
och skjut ut stången från kanalens slutna ände. Drag aldrig ut stången. Vik ihop
stången och lägg den tillsammans med pinnpåsen, i stångpåsen.
7
– 9 Vik ihop
tältet och rulla ihop det med stångpåsen i mitten och lägg ner det i tältpåsen.
10
– 12 Alternativt, vik eller packa ner tältet i tältpåsen utan stångpåsen och
dem i ryggsäcken. Stoppa ej ner stångpåsen utanför tältet i tältpåsen eftersom
tältet då kan skadas.
Taking down and packing the tent
en
Brush out the tent and close all the zippers. In sandy or dusty conditions, brush
the zippers with a small brush.
a heavy object, such as a backpack, then remove the pegs.
1
& 2 In windy conditions attach one guy line to
3
Lay the tent down,
loosen the pole tensioners, and remove the pole end from the plastic cup.
Hold onto the pole sleeve itself while pushing the pole from the sleeve’s closed
end. Do not simply pull the pole out of its sleeve. Fold the pole and put it, along
with the pegs in their bag, into the pole bag.
the pole bag, and slide the bundle into the tent bag.
7
– 9 Fold the tent, roll it around
10
– 12 Alternatively, fold or
stuff the tent into the tent bag without the poles, and pack the pole bag separately
in your pack. Do not push the pole and peg bags down the side of the filled tent
bag, as this could damage your tent.
Zusammenbau und Verpacken des Zeltes
de
Reinige das Zelt und schließe alle Reißverschlüsse. Auf sandigen und schmutzigen
Zeltplätzen empfiehlt es sich, alle Reißverschlüsse mit einer Bürste zu reinigen.
1
& 2 Befestige ggf. das Zelt an einem schweren Gegenstand. 3 Lege das Zelt
auf den Boden, entspanne den Stangenhalter auf die größte Weite und nehme die
Stange aus dem Halter.
4
– 6 Schiebe die Stange vom geschlossenen Ende heraus.
Zieh niemals die Stange aus dem Kanal. Lege die Stange zusammen und stecke
sie in den Stangensack.
Stangensack.
10
7
– 9 Lege das Zelt zusammen und rolle es um den
– 12 Alternativ kannst Du das Zelt auch ohne den Stangensack
verpacken und diesen mit dem Heringsbeutel separat verstauen. Stecke unter
keinen Umständen den Stangensack neben das Zelt in den Zeltsack. Dieses
kann das Zelt beschädigen!
4
– 6
| 23
Page 13

Hilleberg Akto
1
3
5
Utnyttja fördelen med hopkopplade inner- och yttertält
2
sv
1
– 5 Genom att lossa hela eller delar av innertältet erhålls ökat utrymme, och
du kan utnyttja yttertältet separat genom att ta bort innertältet.
obs: Yttertältet är vattentätt men väven är ej ventilerande, vilket innebär att det är
mer känsligt för kondens. Med ett löst skyddsgolv (säljs separat) undviks markfukten
och det blir mer bekvämt men det tar ej bort all kondens.
obs: I mycket fuktiga förhållanden kan du ta loss innertältet innan tältet tas ner
och förvara innertältet separat. Nästa gång du sätter upp tältet, sätt först upp
ytter tältet och koppla sedan in det torra innertältet.
Taking advantage of the linked inner and outer tents
4
en
1
– 5 Partially or fully disconnecting the inner gives more room, and detaching
the outer from the inner tent allows you to pitch it as you would the complete tent.
note: The outer tent is waterproof but not breathable, so is more prone to condensa-
tion. Adding a Footprint (sold separately) protects from ground moist ndensation.
note: In extremely wet conditions, you can detach the inner tent completely before
taking down the tent and store it in a separate bag. At your next camp spot, set
up the outer tent, then reattach the still-dry inner tent.
Nutze den Vorteil des heraustrennbaren Innenzeltes
de
1
– 5 Indem Du das Innenzelt ganz oder teilweise vom Außenzelt trennst, erhällst
Du einen geräumigen Platz, und du kannst das Außenzelt separat benutzen, indem
Du das Innezelt heraus nimmst.
achtung! Das Außenzelt ist wasserdicht, jedoch nicht atmungsaktiv, dadurch kann
sich Kondenswasser bilden. Wird das Zelt mit einem Footprint ergänzt (Zubehör),
kann man die Kondenswasserbildung reduzieren, jedoch nicht komplett verhindern.
achtung! Bei sehr feuchten Witterungsverhältnissen kannst Du das Innenzelt vor
dem Abbauen herausnehmen und getrennt verpacken. Beim nächsten Aufbau, baust
Du zuerst das Außenzelt auf und befestigst dann darin das trockene Innenzelt.
24 |
| 25
Page 14

Hilleberg Akto
1 2
3 4
5
Uppsättning av innertältet separat
sv
Tag loss innertältet från yttertältet.
1
Montera stånghållarsetet (säljs separat) genom att koppla ringen på stånghållaren,
utan röd lina, till togglen på baksidan av innertältet. Den svarta linan skall löpa
under tältet.
3
& 4 Skjut stången genom resårerna och banden och sätt stångändarna i
stånghållarna.
2
Montera linorna i de fyra hörnen. Fäst golvhörnen med markpinnar.
5
Snurra den röda linan runt stången och fäst ringen i den översta
togglen. Drag ut och fäst hörnlinorna. Spänn dem så tältet står bra.
Pitching the inner tent separately
en
Detach the inner tent from the outer tent.
1
Attach the pole holder kit (sold separately): connect the pole holder without the
red attaching cord to the toggle on the back wall of the inner tent so that the black
cord runs underneath the tent.
2
Attach the guy lines to the four raised corners
of the inner tent as shown. Peg down the corners of the tent.
3
& 4 Slide the pole through the toggle loops used to connect the inner and
outer tent, and seat the pole ends into the pole holders.
5
Wrap the red attaching cord around the pole, and insert the toggle on the elastic loop above the door
into the ring on the end of the red cord. Peg the corner guy lines out and tighten
them so the tent is taut.
Aufbau des Innenzeltes ohne Außenzelt
de
Trenne das Innenzelt vom Außenzelt.
1
Montiere den Akto Stangenhalter-Set (als Zubehör erhältlich): Verbinde den
Ring des Stangenhalters ohne rote Leine im Knebel der elastischen Schlaufe an der
Rückseite, so dass die schwarze Leine unter dem Zelt liegt.
2
Knüpfe Abspannleinen
an die 4 Ecken. Verankere die Bodenecken.
3
& 4 Schiebe die Stange durch die Befestigungsschlaufen und setze die
Stangenenden in die Stangenhalter.
5
Wickle die rote Leine um die Stange und
befestige den Ring im obersten Knebel. Verankere die Stangenhalter und Leinen
und verspanne sie so, dass das Zelt gut gespannt steht.
26 |
| 27
Page 15

Hilleberg Akto
Skötsel av ditt Akto
SV
Förvara aldrig tältet längre tid utan att torka det först. Efter varje användning skall
det hängas upp för torkning, helst med stängerna isatta så att vävarna kommer
ifrån varandra.
Innan det torkas och packas städa ur tältet ordentligt. Om det behöver rengöras
använd en trasa med ljummet vatten. Granska hela tältet och laga vid behov.
Kontrollera alla blixtlås och borsta ur dem med en hård borste. Detta är extra viktigt
om du har använt tältet i sandiga eller smutsiga områden. Om blixtlåsen inte sköts
ordentligt, minskar deras livslängd.
Rengör markpinnarna och ersätt skadade eller borttappade. Kontrollera stången
så det inte finns några skador.
Då tältet är torrt, allt är kontrollerat och vid behov åtgärdat, packa det i packpåsen,
rullat runt stångpåsen med pinnpåsen istoppad. Finns det ett torrt, ljus skyddat och
svalt utrymme kan det vara bättre att hänga upp tältet istället för att packa ihop det .
Låt aldrig tältet stå uppställt längre tid än nödvändigt i direkt solljus. UV-ljuset
skadar alla vävar. Om det är svårt att finna skugga och tältet ska stå uppställt flera
dagar, framförallt på södra halvklotet, i varmare klimat eller på hög höjd, är det
bra att skydda tältet med en enkel tarp, ett tyg eller liknande.
Care & maintenance of your Akto
EN
Do not store your tent for any length of time without drying it first. After each use,
hang it in a dry and well-vented place, preferably with the poles in place so that
the inner and outer tent fabrics are kept apart.
Before drying and packing your tent, brush off any dirt and shake any dirt or debris
out of the inner tent. If the tent needs cleaning, use only lukewarm water and a
sponge. Check the entire tent for damage and make repairs if necessary.
Check the zippers and brush these with a small, stiff brush. This is especially
important if you have been using the tent in a sandy or dusty environment. If the
zippers are not kept clean their life expectancy will decrease!
Clean the pegs, and replace damaged or lost ones. Check the pole for potential
damage.
After your tent is dry and you have checked it completely, pack it into its stuff bag
with the tent rolled around the pole bag (put the peg bag into the pole bag first).
Provided you have the room, you can hang the tent in a dry, cool place away from
direct light instead of packing it into its bag.
Whenever possible, try and pitch your tent out of direct sunlight, since UV exposure
damages all fabrics. On trips where shade from the sun is scarce and where you
will leave your tent set up for several days – especially in the southern hemisphere,
desert conditions or at very high altitude – it is advisable to erect a tarp or something
similar over the tent to protect it from UV rays.
Pflegeanleitung Akto
de
Lagere Dein Zelt niemals, ohne es vorher zu trocknen. Nach jedem Gebrauch sollte
es zum Trocknen aufgehängt werden; am besten mit eingebautem Gestänge, damit
Innen- und Außenzelt nicht aufeinander liegen.
Vor dem Trocknen und Einpacken allen Schmutz aus dem Innenzelt herausschütteln. Eventuelle Schmutzflecken können mit lauwarmem Wasser entfernt werden.
Zelt auf Schäden kontrollieren und gegebenfalls reparieren.
Reißverschlüsse überprüfen und vor allem nach Gebrauch in sandigen und schmutzigen Verhältnissen sauberbürsten. Mangelnde Pflege der Reißverschlüsse
verkürzt deren Lebensdauer!
Heringe reinigen und verloren gegangene oder beschädigte ersetzen. Die Stange
auf Schäden überprüfen.
Nach dem Trocknen und der Kontrolle des Zeltes kann alles wieder in die Packbeutel
verstaut werden. Packe den Beutel mit den Heringen mit zum Gestänge und rolle
das Zelt um die Gestängetasche. Wenn genügend Platz an einem trockenen, lichtgeschützten und kühlen Ort vorhanden ist, kann dort das Zelt besser aufgehängt
werden, anstatt es im Beutel aufzubewahren.
Direkte, langfristige Sonneneinstrahlung – besonders auf der Südhalbkugel, unter
wüstenähnlichen Bedingungen oder auf großer Höhe – schädigt das Gewebe. Daher
ist es unter solchen Bedingungen ratsam, ein Tarp oder ähnliches über dem Zelt
zu errichten, um es vor UV-Strahlung zu schützen.
28 |
| 29
Page 16

Hilleberg Akto
www.hilleberg.com
sv sv
Välkommen till vår websida där du kan se hela Hillebergs kollektion inklusive
tillbehör, exempelvis stånghållare för innertält, skyddsgolv, snö- och sandpinnar
och reservdelar som tältlinor, stänger mm.
Dessutom kan du se mer om Hilleberg The Tentmaker, inklusive vår historia, var
du hittar våra återförsäljare och expeditioner som använder Hillebergs tält. Du
hittar dessutom information, utrustningslistor och praktiska råd som kan hjälpa
dig i planeringen av dina turer.
www.hilleberg.com
en
Please visit our website to see details of the entire Hilleberg collection as well as
available accessories, such as extra poles, pegs, Snow & Sand Pegs, and guy line
and line runners.
In addition, you can learn more about Hilleberg the Tentmaker, including our history, dealer locations, and expeditions that use Hilleberg tents. You will also find a
wealth of information to help you better enjoy your outdoor adventures, including
practical advice and equipment lists.
www.hilleberg.com
de de
Auf unserer Website kannst Du das gesamte Sortiment von Hilleberg sehen. Dort
findest Du u. a. Zubehör (z. B. Stangenhalter für das Innenzelt, Footprints, Schneeund Sandheringe etc.) sowie Ersatzteile wie Zeltleinen, Gestänge und vieles mehr.
Außerdem kannst Du hier mehr über Hilleberg erfahren: unsere Geschichte,
ein Verzeichnis der Bezugsquellen für unsere Produkte sowie Information über
Expeditionen, bei denen Hilleberg-Zelte verwendet wurden. Des weiteren gibt es
eine Menge Tipps, wie z. B. Packlisten und praktischer Rat von Fachleuten zur
Planung Deiner Touren. Herzlich Willkommen!
30 |
Garantier och Service
Hilleberg The Tentmaker gör produkter av högsta kvalitet i material och till verkning. I
våra produkter ingår garanti mot felaktigheter i tillverkning och material. För detaljer
kontakta din handlare eller Hilleberg The Tentmaker direkt då garantierna kan skilja
mellan olika länder beroende på lagar och bestämmelser.
observera: Garantin gäller ej för skador uppkomna på grund av oaktsamhet, olyckor,
felaktig hantering eller bristande utrustningsvård. Effekter av normalt slitage eller
exponering för UV-strålning och liknande täcks inte heller av garantin.
Reparationer som ej täcks av garantin utför vi till en rimlig kostnad. Kontakta den
butik där du köpt tältet eller Hilleberg direkt.
Warranty and Repair
en
Hilleberg the Tentmaker prides itself on making products with the highest quality
materials and workmanship. We offer a comprehensive warranty against material
and manufacturing defects. Since laws and regulations sometimes differ, warranty
coverage may vary from country to country. For the specific details of our warranty in
your region or country, please contact your dealer or the appropriate Hilleberg office.
please note: Our warranty does not cover damages from ordinary wear and tear,
the effects of UV exposure, accidents, inappropriate use or handling, or damages
resulting from the user’s failure to care properly for the product.
For any repairs not covered by the warranty, we will charge a reasonable rate. Please
contact your region or country’s appropriate Hilleberg office.
Garantie und Reparaturen
Hilleberg the Tentmaker stellt Produkte höchster Qualität her, sowohl im Material als
auch in der Verarbeitung. Alle unsere Produkte haben Garantie auf Produktions- und
Materialfehler. Für genaue Informationen setze Dich bitte mit Deinem Händler oder
Hilleberg the Tentmaker direkt in Verbindung, da die Garantie bedingungen sich wegen
verschiedener Gesetze von Land zu Land unterscheiden können.
achtung! Die Garantie deckt keine Schäden, die durch unsachgemäße Handhabung,
Unglücke, Unachtsamkeit, mangelnde Produktpflege, natürliche Abnutzung, UVStrahlung oder anders entstanden sind.
Reparaturen, die nicht unter die Garantie fallen, werden zum Selbstkostenpreis
durch ge führt. Wende Dich hierfür an Deinen Händler oder direkt an Hilleberg the
Tentmaker.
| 31
Page 17

AKTO
36
90cm
inch
cm
bruttovikt/packed weight/Bruttogewicht
EUROPE
Hilleberg the Tentmaker AB
Box 25
Önevägen 34
S-832 21 Frösön, Sweden
tel: +46 (0)63 57 15 50
fax: +46 (0)63 57 15 65
tentmaker@hilleberg.se
87
220
Akto – 1.6 kg/3 lbs 8 oz
OUTSIDE OF EUROPE
Hilleberg the Tentmaker, Inc.
14790 NE 95th Street
Redmond, WA 98052 USA
tel: +1 (425) 883 0101
fax: +1 (425) 869 6632
toll free: 1 (866) 848 8368
tentmaker@hilleberg.com
inch
3630
inch
cm 9075
(n. america only)
WWW.HILLEBERG.COM
 Loading...