

Page 1
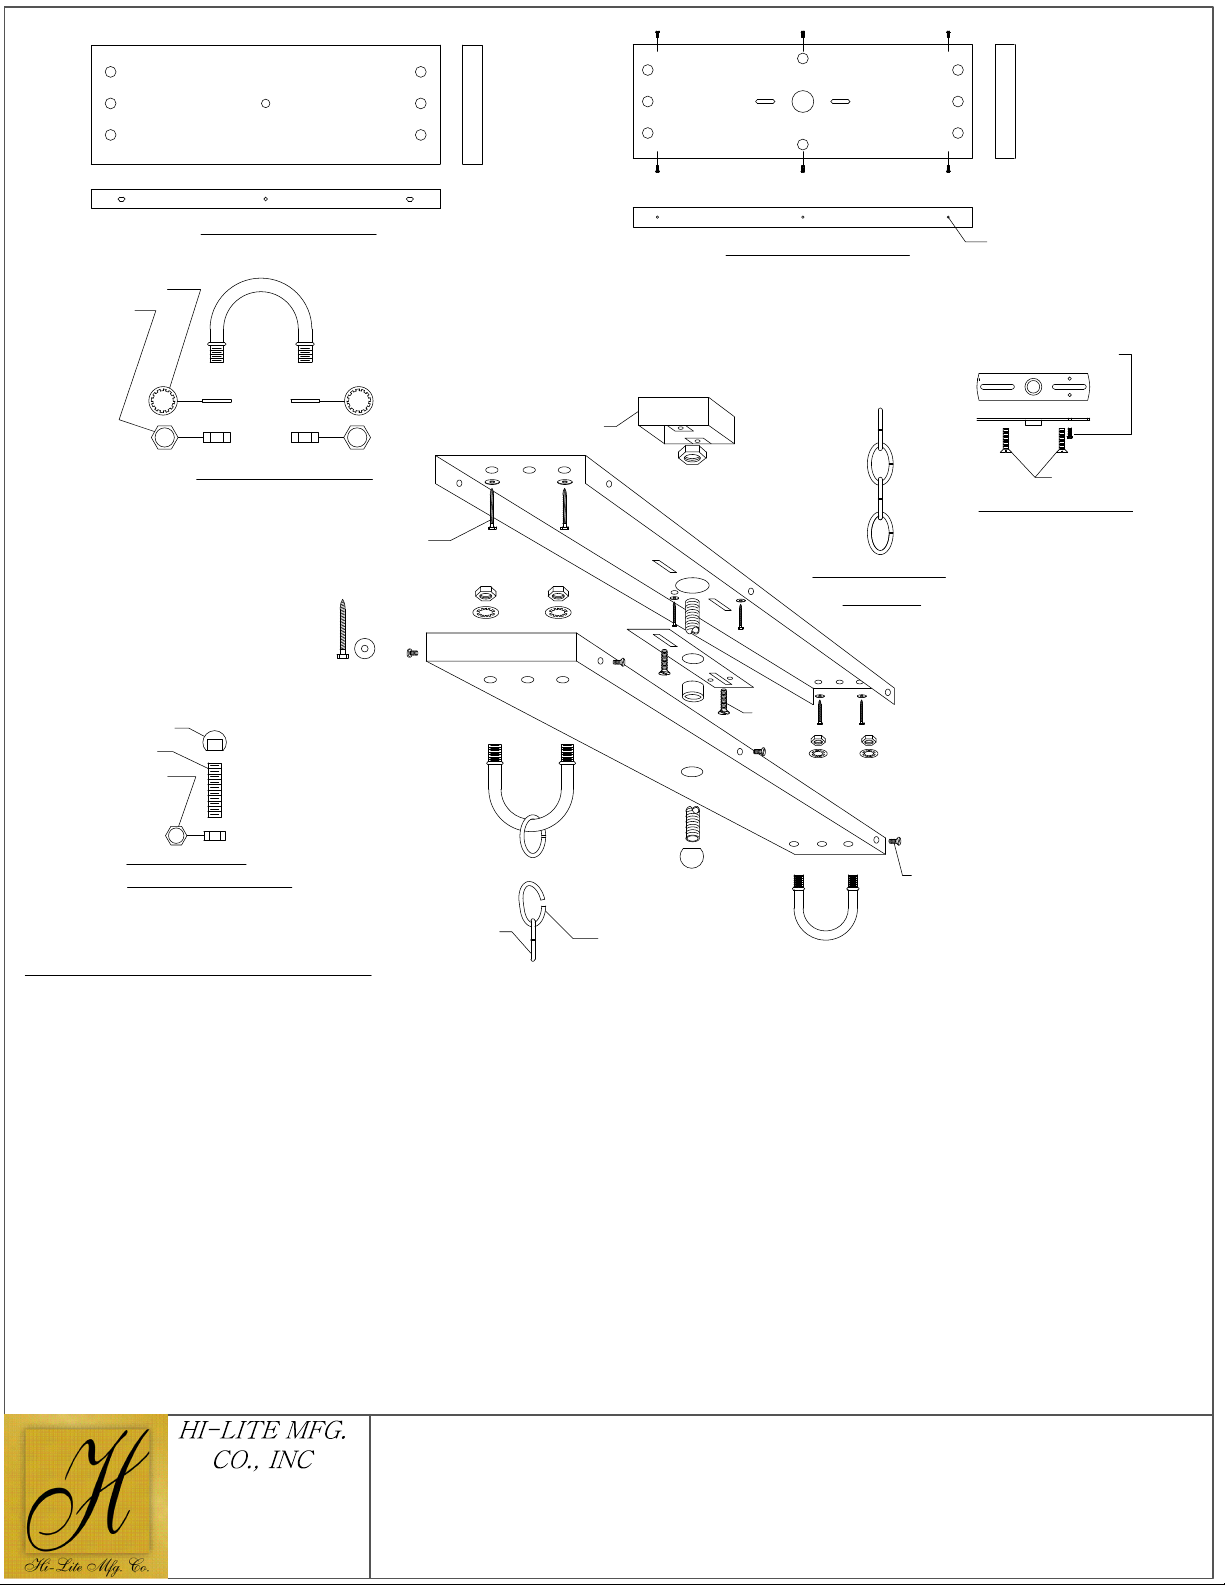
Assembly Diagram
H-89Y,H-87Y,H-66Y,H-73Y,H-83Y,H-86Y
Pot Rack Support (Large)
13450 Monte Vista Avenue
Chino, California 91710
Telephone: (909) 465-1999
Toll Free: (800) 465-0211
Fax: (909) 465-0907
www.hilitemfg.com
Variable Length
Chain (2)
Adjust chain length
to suit fixture height
U-Loop assembly (2)
1/4" Threaded
nipple assembly (1)
Mounting strap (1)
Decorative Canopy Cover (1)
Mounting Insert for Canopy (1)
10-24
Junction box
Heavy duty ball (1)
1/4" Hex nut (1)
Grounding screw (1)
1/4" Lock washer (4)
1/4" Hex nut (4)
1/4" Nipple (1)
10-24
(6)
1/4" x 2" Lag bolt (6)
and 3/4" Washer (6)
1/4" Lag bolt (6)
Chain from fixture
8-32 x 1" (2)
8-32 (2)
Mounting Instructions for Large Pot Racks:
1. Disconnect power at main electrical box before installing fixture.
2. Thread the 1/4" threaded nipple through the mounting strap and use the 1/4" hex nut to lock into place before you tighten the hex nut. Slide the
canopy over the nipple to make sure you have enough room to mount the heavy duty ball on the bottom of the canopy (about 1/2"). Place the
insert in line with were the junction box is.
3. Attach the mounting strap to the junction box with the (2) 8/32 screws or larger. The junction box and mounting strap must be reinforced.
4. Find the beam in your ceiling with a stud finder and mark it on the canopy insert. Use the (6) anchor bolts provided to reinforce the insert. You
must use at least 4 of the anchor bolts to reinforce the insert. You must also attach the mounting strap to the junction as well.
5. Break one chain from each chain length and put one chain link on each U-loop.
6. Mount both u-loop's to the decorative mounting canopy with the 1/4" hex nut and lock washers provided. Make sure there is one chain link on
each U-loop before mounting them.
7. Measure the height you want the fixtures to hang off your table and adjust chain accordingly.
8. Connect the black outlet wire (hot) to the smooth fixture wires with a wire nut. Connect the white outlet wire (neutral) to the ribbed fixture wires.
Connect the ground wire from the fixture to the green ground screw on the mounting strap or connect fixture ground to the junction box ground
wire. You must have a ground running to your junction box as well.
9. Connect Aircraft cable from fixture to adequate structural support. Do not attach to junction box.
10. Slide the decorative mounting canopy over nipple and outlet box and screw the heavy duty ball on the nipple to hold canopy and fixture in place.
11. Screw the (6) 10/24 screws provided in the side of the decorative canopy cover to help reinforce the canopy and fixture.
 Loading...