

MasterHandHeldTerminal
IGMA51433/916
UM4722
Rev: 1.2A
UserManual

Table of Content
Master Hand Held Terminal ................................................................................................... 1
1 Overview ........................................................................................................................ 4
2 Installation ...................................................................................................................... 6
3 Application Settings ..................................................................................................... 12
3.1 General description ............................................................................................... 12
3.2 Settings Schema.................................................................................................... 13
3.3 Predefined Seals ................................................................................................... 15
4 Application Operation .................................................................................................. 16
4.1 System Login ........................................................................................................ 16
4.2 Main Screen .......................................................................................................... 17
4.3 Select Seal Screen................................................................................................. 18
4.4 Read – reading DataSeal status, data and events .................................................. 19
4.5 Set – arming the DataSeal .................................................................................... 21
4.6 Read Data – reading the DataSeal Data ............................................................... 22
4.7 Write Data – writing data to the DataSeal ............................................................ 23
4.8 Verify – searching “neighboring” DataSeals ....................................................... 24
4.9 Addressed Verify – reading DataSeal status and data .......................................... 25
4.10 Menu –display previous read DataSeals .............................................................. 25
- 2 -

Attention
• Hi-G-Tek's MHHT RFID Reader, FCC ID: OB6-IGMA51916 is distributed to a commercial/industrial use
only, and should only be handled by personnel authorized by Hi-G-Tek representatives.
• Installation must be performed according to this User Guide.
• The use of any antenna other than those certified with the product is expressly forbidden in accordance
with FCC rules CFR47 part 15.204 and part 15.203.
The FCC Wants You to Know
This device complies with Part 15 of the FCC Rules. Operation is subject to the following two conditions:
(1) This device may not cause harmful interference and
(2) This device must accept any interference received, including interference that may cause undesired
operation."
----------------------------------------------------------------------------------------------------
Pursuant to Part 15 of the FCC rules, limits for a Class B digital device. These limits are designed to
provide reasonable protection against harmful interference in a residential installation. This equipment
generates uses and can radiate radio frequency energy and, if not installed and used in accordance with
the instructions, may cause harmful interference to radio communications. However, there is no
guarantee that interference will not occur in a particular installation.
If this equipment does cause harmful interference to radio or television reception, which can be
determined by turning the equipment off and on, the user is encouraged to try to correct the interference
by one or more of the following measures:
a) Reorient or relocate the receiving antenna.
b) Increase the separation between the equipment and receiver.
c) Connect the equipment to an outlet on a circuit different from that to which the
receiver is connected.
d) Consult the dealer or an experienced radio/TV technician.
FCC Warning
Modifications not expressly approved by the manufacturer could void the user
authority to operate the equipment under FCC Rules.
- 3 -

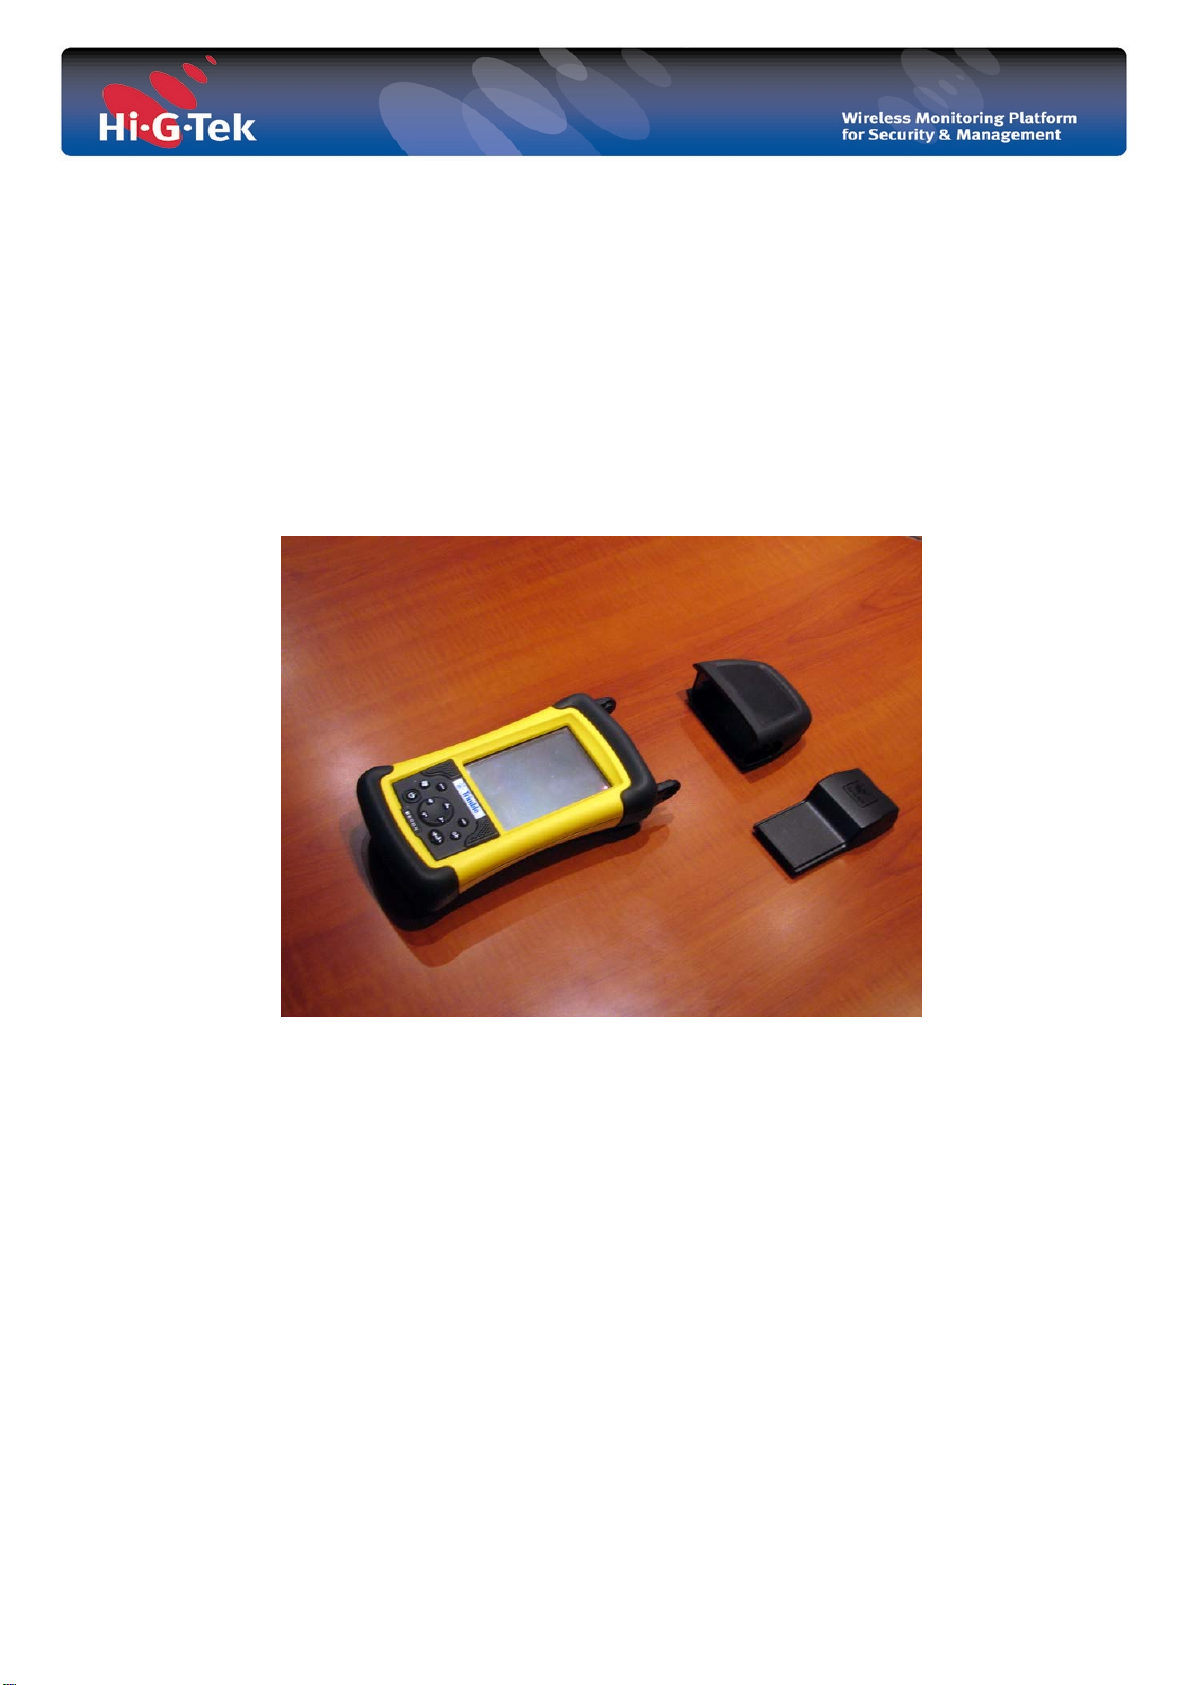
1 Overview
The Master Handheld Terminal is a compact RFID reader module for PDA / Pocket PC
with a compact flash (CF) card interface. The reader plugs into a standard CF connector, it
has been designed to allow pocket PC’s and mobile handhelds both short and long range
access to Hi-G-Tek’s electronic seal /tag for a various RFID applications
The module is powered from the PDA’s power, both LF & HF antennas are completely
integrated, the reader uses two RF channels (L.F, H.F) for communication with the
electronic seal / tag:
High Frequency channel: Transmit/Receive at 433.92 MHz or 916.5 MHz (different models,
where 433 MHz model used mainly in Europe, Africa and other designated countries as per
the local telecommunication regulations ) FSK modulated with 40 kHz deviation and
16 kHz data.
Low frequency channel: Transmit/Receive at 127 kHz, AM, 4 kHz data rate.
Hi-G-Tek HHT version 1.0.5 is a HandHeld Ternminal application running on a Pocket PC
device equipped with Hi-G-Tek CF Reader. The application enables the user to perform
several of Active RFID operations using publicly available High-Frequency Radio. These
operations include:
1. Arming a DataSeal (Set) - writing data to the DataSeal and setting its status to
“Set” (armed).
2. Updating Data (Write Data) – changing the data of an armed DataSeal.
3. Reading Data (Read Data) – reading data of an armed DataSeal.
4. Reading DataSeal (Read) – reading DataSeal status, events and data.
5. Searching DataSeals (Verify) – searching for neighboring DataSeals.
6. Reading DataSeal Data/Status (Address Verify) – reading DataSeal status and
data.
7. Menu – view recently read Data Seals.
1.1 System Requirements
Your device should meet these minimum requirements:
• Pocket PC running Windows Mobile 2003 or 2003SE with Compact Framework 2.0
• Available CompactFlash card slot
- 4 -
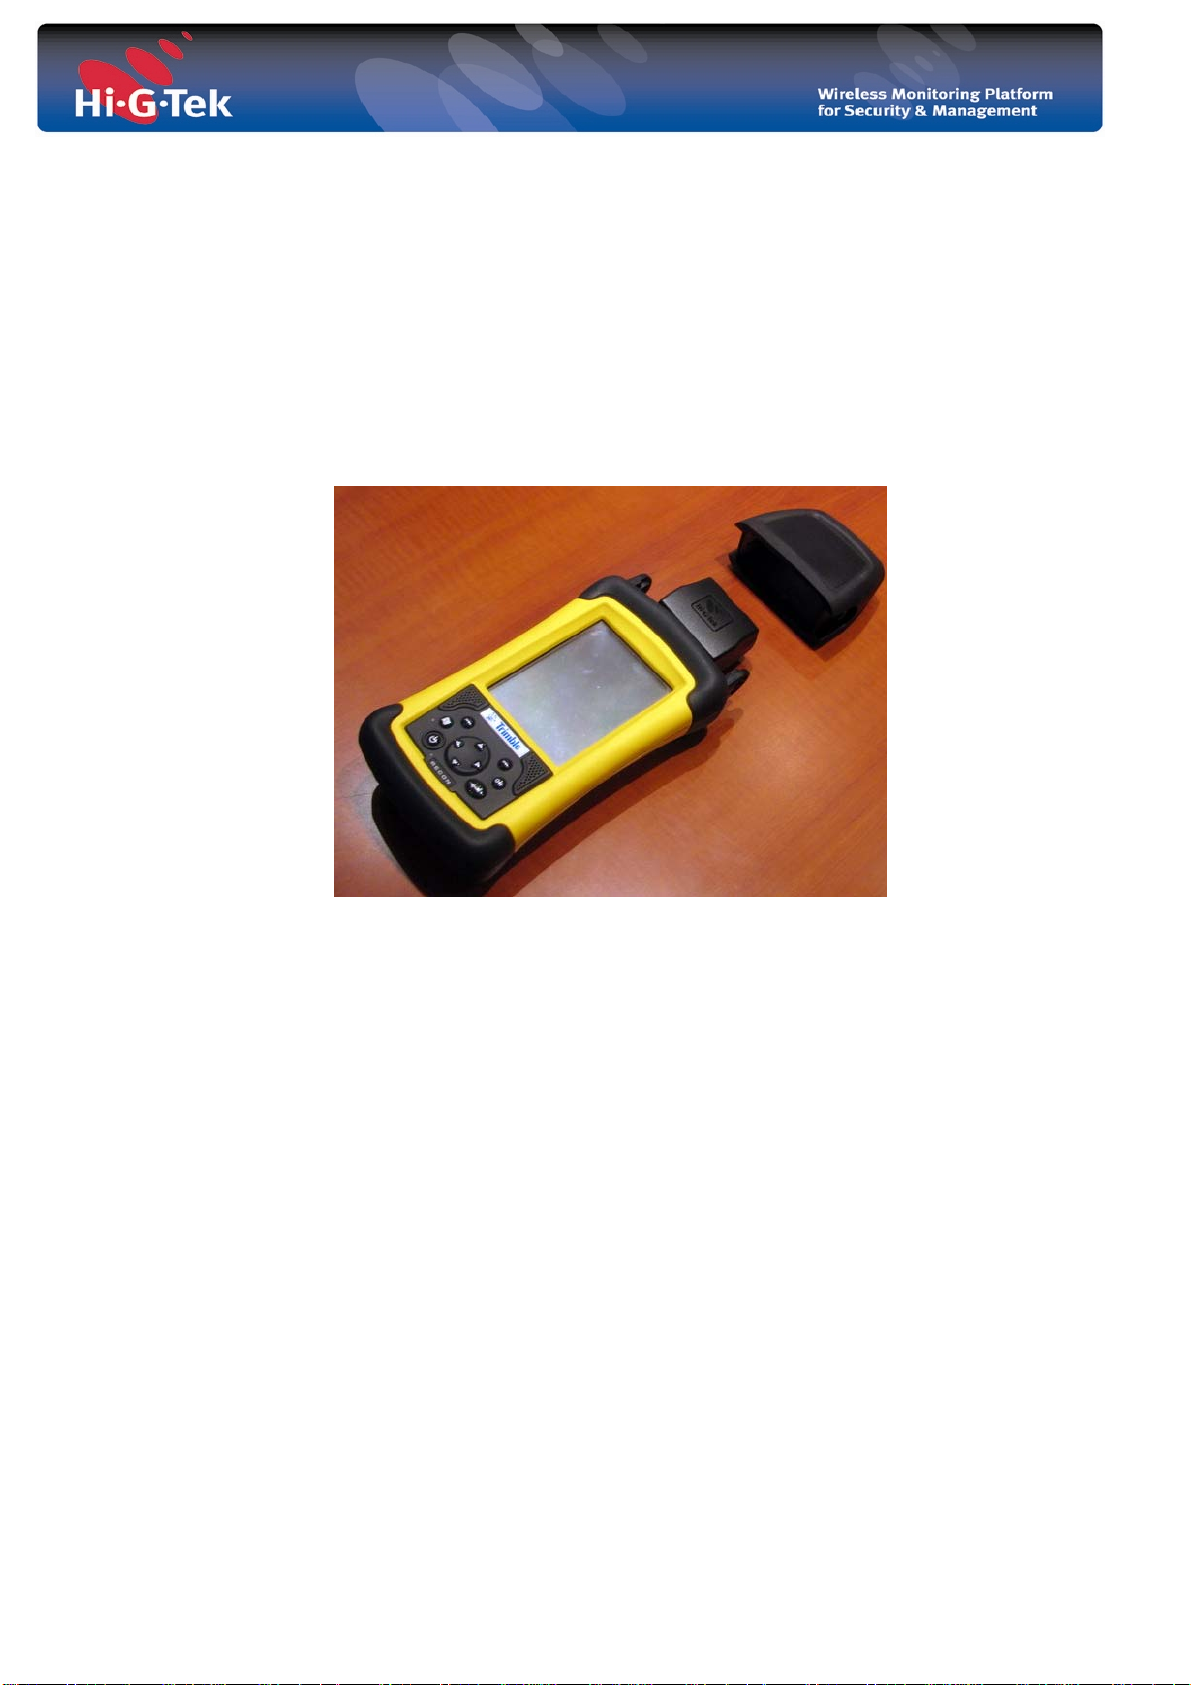
1.2 CF RFID Module installation
• Carefully insert the RFID module into the CompactFlash slot of your PDA.
• There is no need to install any drivers with this RFID card.
• Please not that only one card may be used at a time
- 5 -
2 Installation
This section describe how to set up the Pocket PC for the first time
1. Put the PPC on the cradle and plug in the USB connector to the PC.
2. Windows XP should identify it as the new hardware.
3. Install the ActiveSync 3.8.
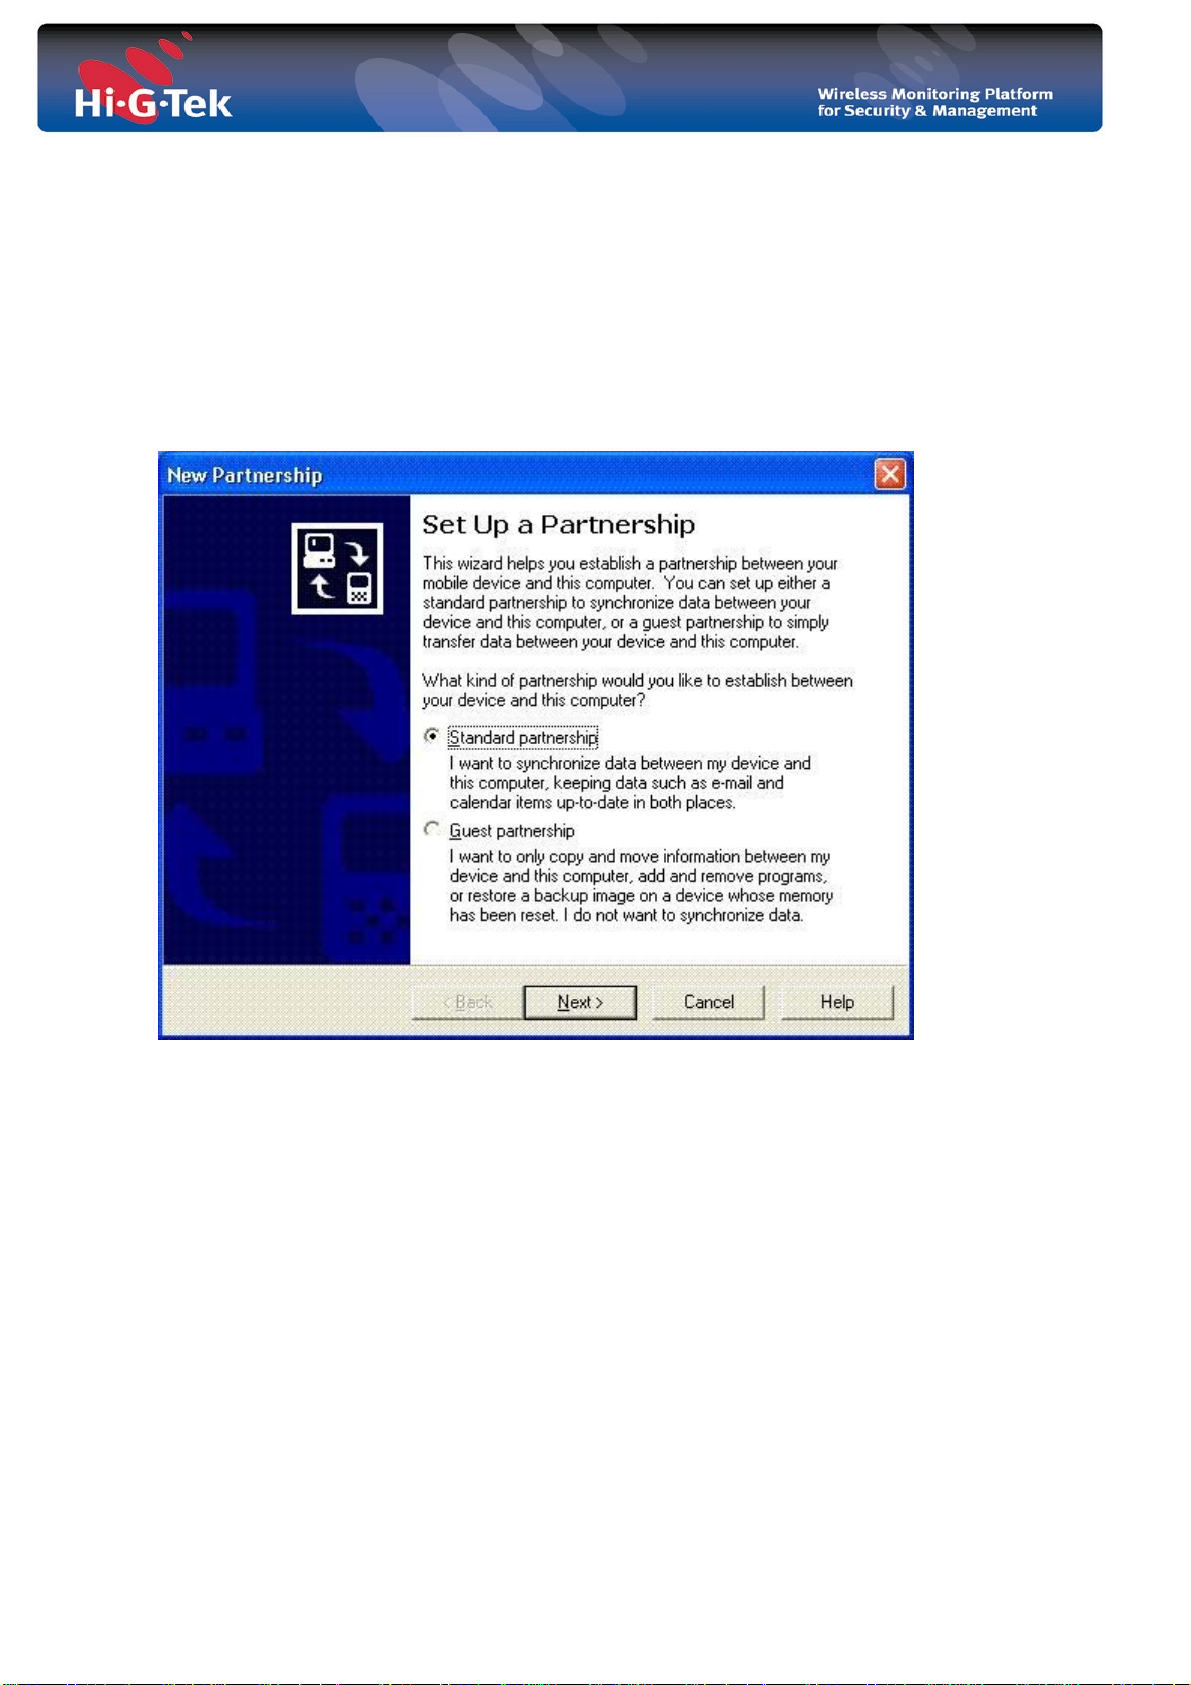
4. After installation ended you should get the following screen for creation of
“partnership”:
- 6 -
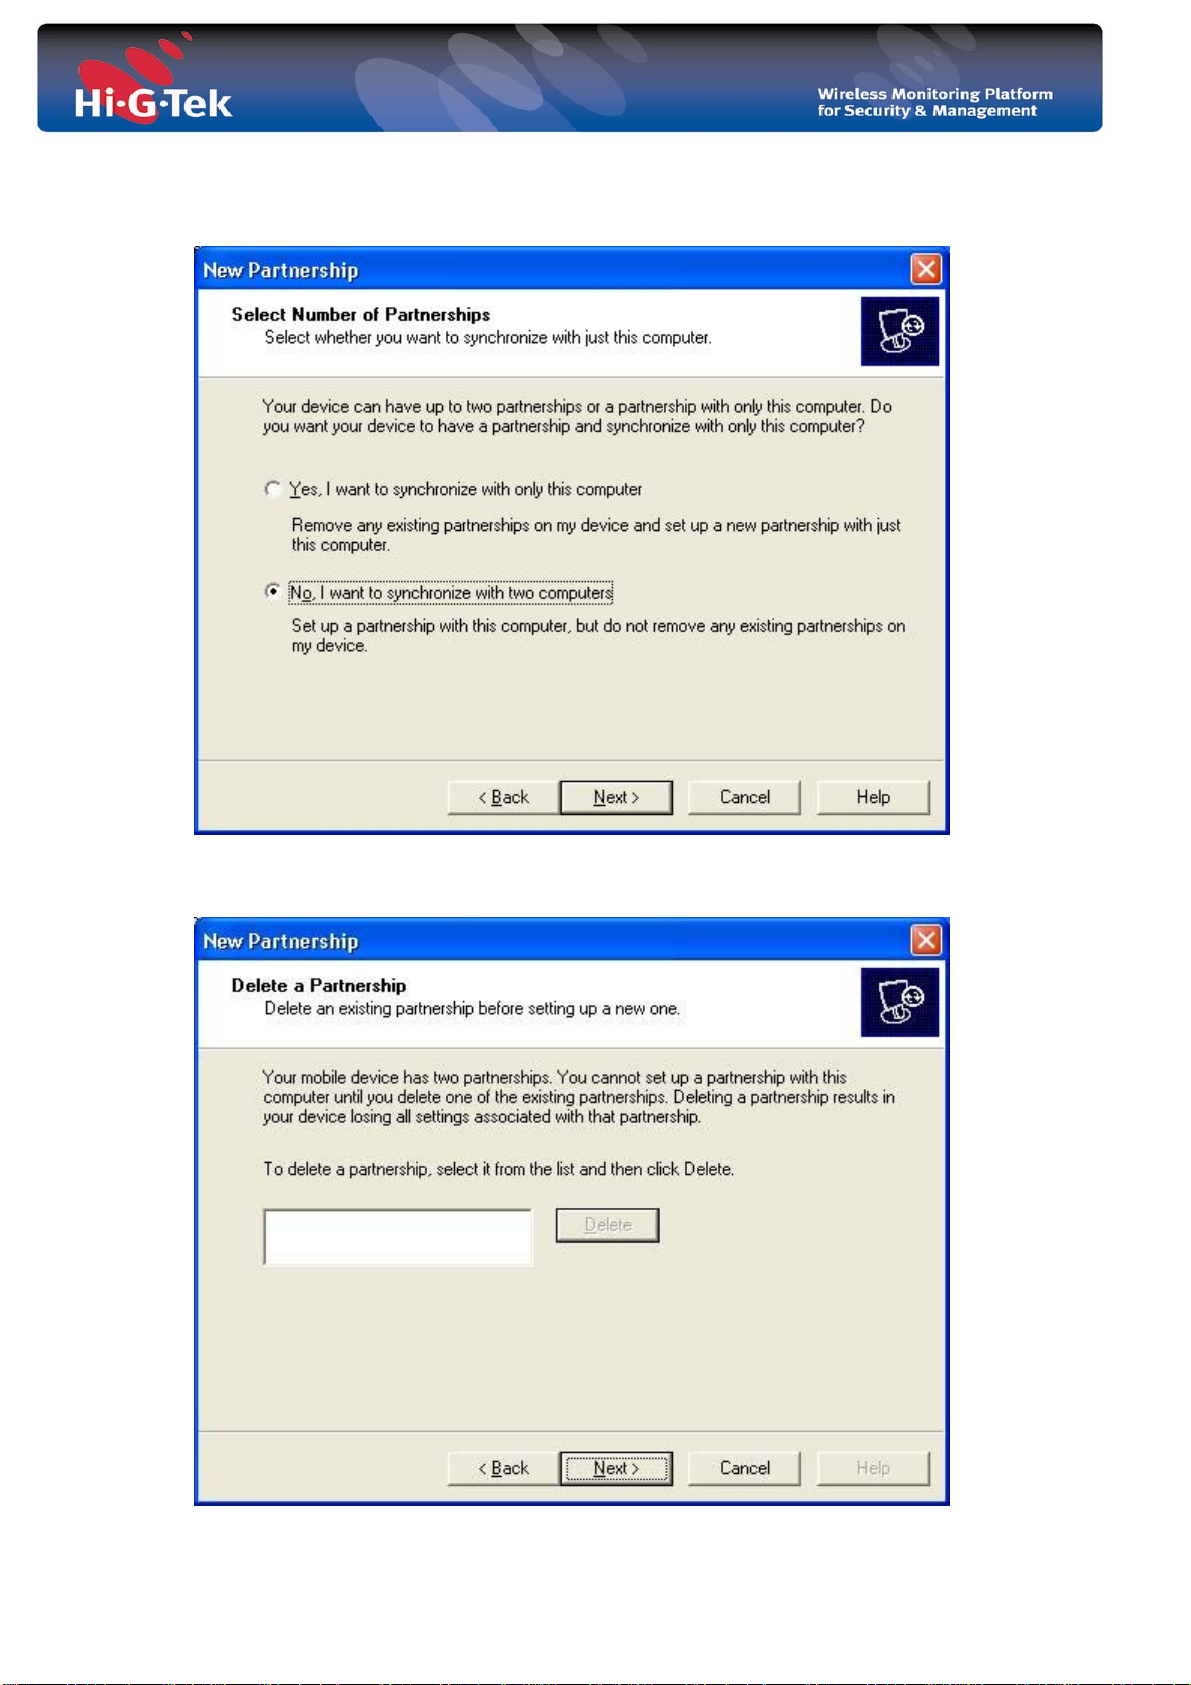
5. Make the above selections (standard partnership) and hit next. You should get the
following screen:
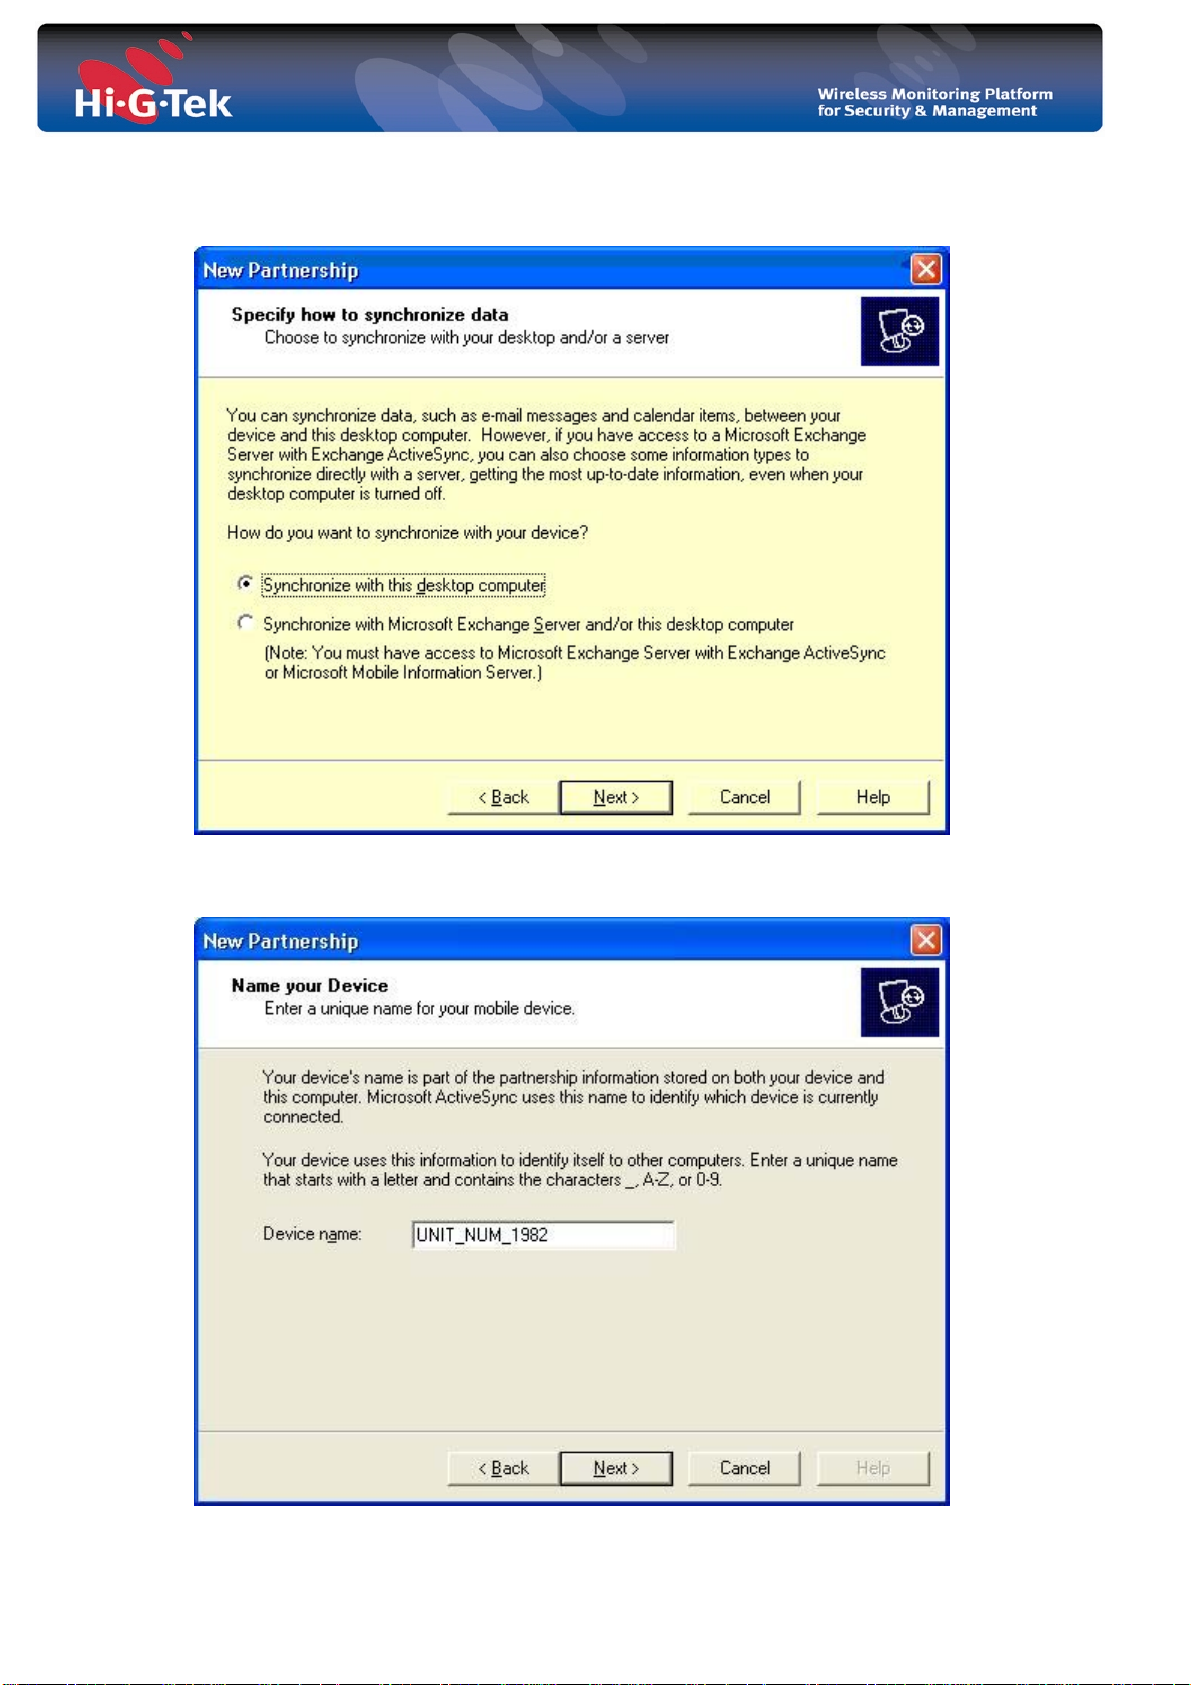
6. Make the above selection (w/desktop) and hit next. You should get the following
screen:
- 7 -
7. Give a unique device name for each PPC device and hit next. You should get the
following screen:
8. Make the above selection (two computers) and hit next. You should get the
following screen:
- 8 -
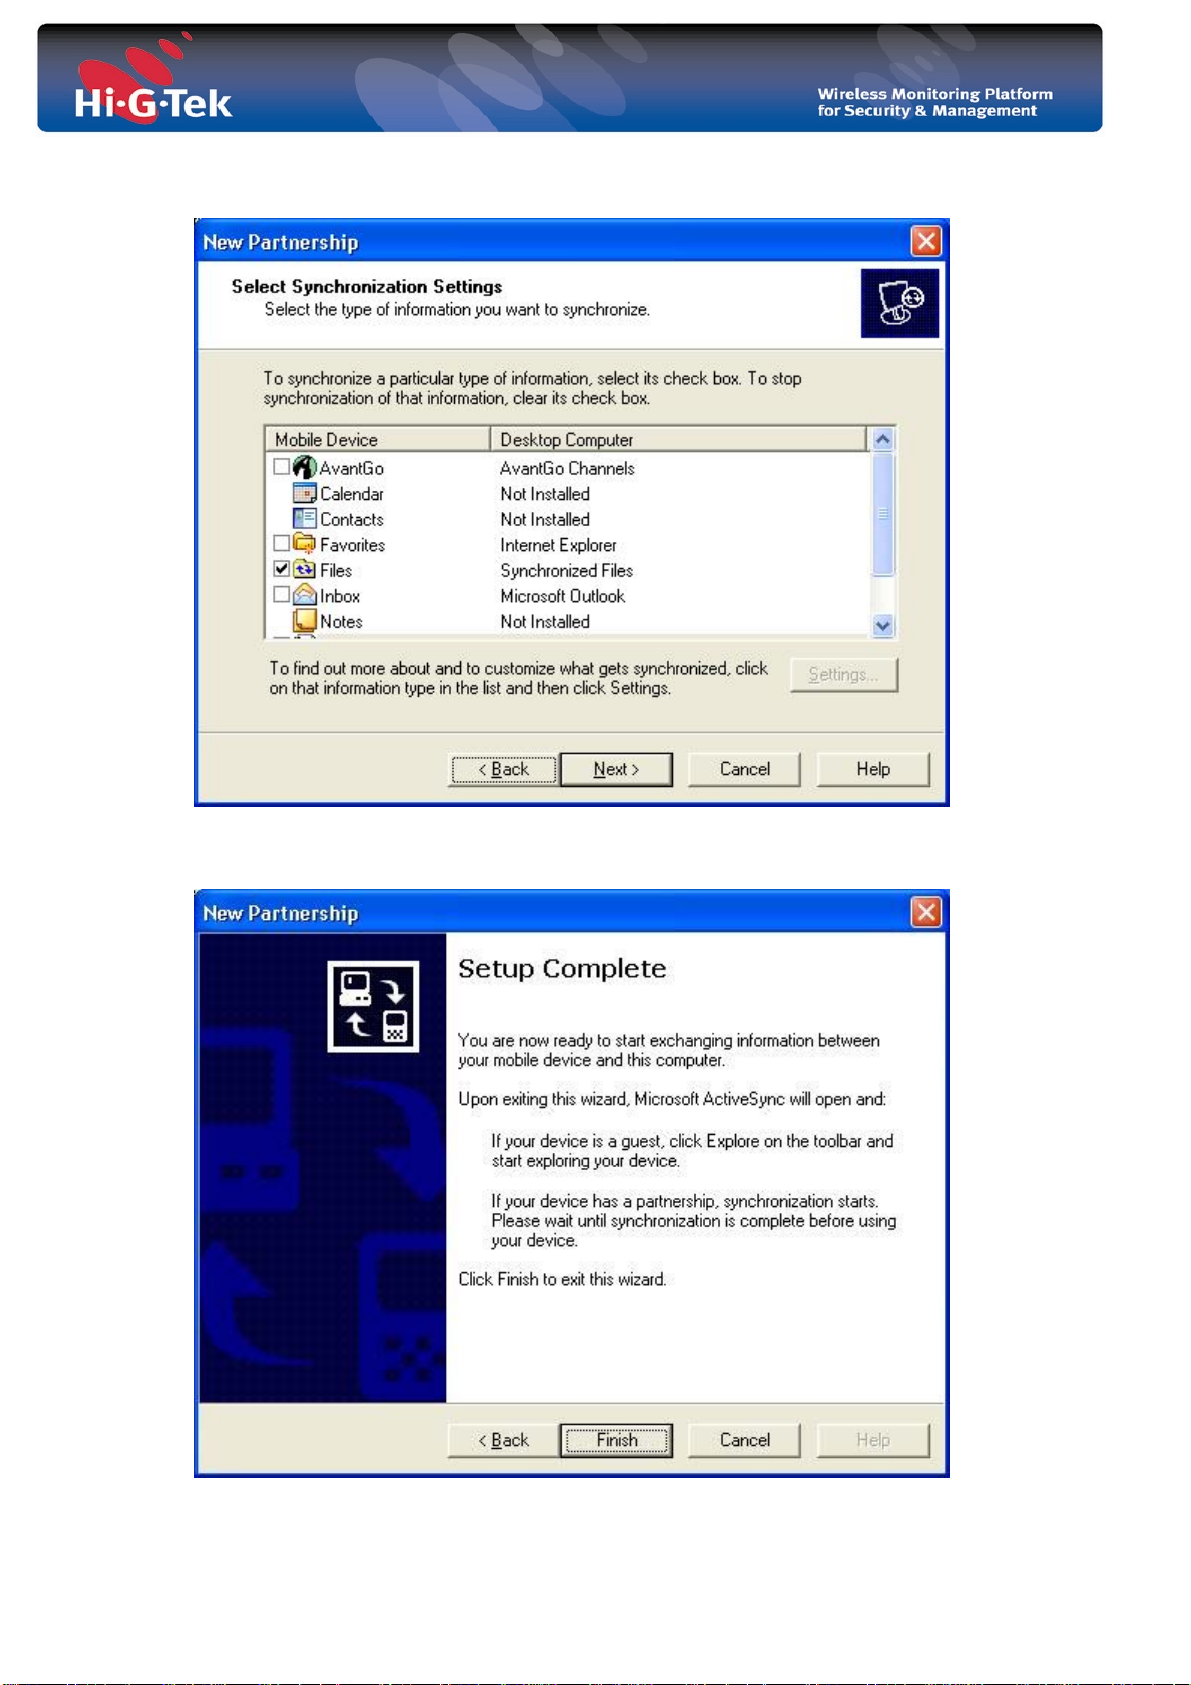
9. Hit next. You should get the following screen:
10. Select file check box only and hit next. You should get the following screen:
- 9 -

11. Hit Finish. The ActiveSync will be launched:
12. After ActiveSync finish synchronize you should get the following screen:
- 10 -

13. For each device ActiveSync a “new directory on the PC under “My documents”
with a name “<PPCNAME> My Documents. In our example “the folder (directory)
name is “”UNIT_NUM_1982 My documents”. It creates a shortcut for it on the PC
desktop as follows:
14. Close the ActiveSync window.
15. Double click on the above newly created shortcut.
16. Open the “Business” directory.
17. Create a new directory “HiGTek” and Open that directory.
18. Create new directory “Settings” and open that directory.
19. On that directory put the application settings file “settings.xml” (see description
later in this document).
20. When the HHT application is launched it reads the settings file which defines its
working mode.
- 11 -

3 Application Settings
3.1 General description
Hi-G-Tek HHT application enables the user to customize it’s setting using the setting.xml
file. This file has the following format:
<?xml version="1.0" encoding="utf-8" ?>
<settings xmlns="http://tempuri.org/settings.xsd">
<options settype="Normal" password="" />
<fields>
<udt-field name="UDT" length="6" value="1.0.0" desc="The verion of
the field list" regex-pattern=".{0,6}" valid-err-msg="Invalid
version" />
<container-field name="Container ID" length="11" value="" desc="The
container ID" regex-pattern="[0-9a-zA-Z]{11}" valid-err-
msg="Invalid container ID" />
<field name="Shipment No" length="4" value="" desc="Shipment
Number" regex-pattern="[0-9a-zA-Z]{4}" valid-err-msg="Invalid
shipment number. Must be 4 alphanumeric characters. For
example, A827" />
<field name="Mechanical Seal No" length="10" value=""
desc="Mechanical Seal Number" regex-pattern="[0-9a-zA-Z]{10}"
valid-err-msg="Invalid mechanical seal number. Must be 10
alphanumeric characters. For example, ABCD123456" />
<field name="Weight" length="6" value="" desc="Weight" regex-
pattern="\d{1,6}" valid-err-msg="Invalid weight. Must be upto
6 digits number. For example, 56233" />
</fields>
</settings>
Figure 1: settings.xml example
Where
settings – is the root element.
options – is a general settings options. It includes the following settings:
settype – the type of Set the CF Reader should perform when the user hit the
Set button. The options are: Normal, Soft and Suspended.
password – the password required in order to use the application.
fields – describes the data structure of fields stored in the DataSeal. This fields
hold the information about the container, shipment etc…. There can be three
types of fields:
udt-field – the data structure version. There should be one and
only one
field. This field is, of course, required.
container-field – the container number. There should be one
and only one
the second field. This field is, of course, required.
field – this could be any additional field of data we want to
store in the DataSeal. There can be no “field” field,
one
field is optional.
“udt-field” field and it should be the first
“container-field” field and it should be
“field” field or more that one “field” field. Thus, this
- 12 -

Each of the fields’ types must have the following attributes:
name – each field must have a unique name. “udt-field” and “container-
field” have a predefined names “UDT” and “Container ID” respectively.
length – the number of characters (ASCII characters) the field holds.
value – the field’s default value.
desc – the field’s description.
regex-pattern – regular expression pattern used to validate the value entered
by the user for that field. The application validates the user input by
matching the user input against the regex-pattern. If it matches then the
input is valid, otherwise an error message is displayed (see details
below). If an empty value is set (that is, regex-pattern=””) then the
application checks only that the value typed is no longer that the above
length attribute. The Application employs the .Net Framework
Nondeterministic Finite Automaton (NFA) engine for the value
matching.
valid-err – the message to be displayed to the user should the field value
typed is invalid. See regex-pattern above.
If there is a need to change the data structure of the fields in the DataSeal the user, or rather,
the system administrator should do the followings:
1. Create a new settings.xml file or update the xisting one.
2. Increment the UDT version (udt-field).
3. Store the new settings file (settings.xml) under “\My
Documents\Business\HiGTek\Settings” folder in the Pocket PC device.
3.2 Settings Schema
The previous section gave a description of the application settings using the “settings.xml”
file. This section brings the format XML Schema of the “settings.xml” file:
<?xml version="1.0" ?>
<xs:schema id="seal" targetNamespace="http://tempuri.org/seal.xsd"
xmlns:mstns="http://tempuri.org/seal.xsd"
xmlns="http://tempuri.org/seal.xsd"
xmlns:xs="http://www.w3.org/2001/XMLSchema"
xmlns:msdata="urn:schemas-microsoft-com:xml-msdata"
attributeFormDefault="unqualified"
elementFormDefault="unqualified">
<xs:element name="seal" msdata:IsDataSet="true"
msdata:EnforceConstraints="False">
<xs:complexType>
<xs:sequence>
<xs:element name="general" type="mstns:general-Type"
maxOccurs="1" minOccurs="1" />
<xs:element name="data" type="mstns:data-Type"
maxOccurs="1" minOccurs="1" />
<xs:element name="events" type="mstns:events-Type"
maxOccurs="1" minOccurs="1" />
</xs:sequence>
- 13 -

</xs:complexType>
</xs:element>
<xs:complexType name="data-Type">
<xs:sequence>
<xs:element name="field" type="mstns:field-Type" />
</xs:sequence>
</xs:complexType>
<xs:complexType name="field-Type">
<xs:sequence />
<xs:attribute name="name" type="xs:string" />
<xs:attribute name="value" type="xs:string" />
</xs:complexType>
<xs:complexType name="events-Type">
<xs:sequence>
<xs:sequence />
<xs:element name="event" type="mstns:event-Type" />
</xs:sequence>
</xs:complexType>
<xs:complexType name="event-Type">
<xs:sequence />
<xs:attribute name="number" type="xs:string" />
<xs:attribute name="code" type="xs:string" />
<xs:attribute name="name" type="xs:string" />
<xs:attribute name="time" type="xs:string" />
<xs:attribute name="stamp" type="xs:string" />
<xs:attribute name="checksum" type="xs:string" />
<xs:attribute name="reader-id" type="xs:string" />
<xs:attribute name="stamp-ex" type="xs:string" />
<xs:attribute name="checksum-ex" type="xs:string" />
</xs:complexType>
<xs:complexType name="general-Type">
<xs:sequence />
<xs:attribute name="seal-id" type="xs:string" />
<xs:attribute name="UDT" type="xs:string" />
<xs:attribute name="container-id" type="xs:string" />
<xs:attribute name="time" type="xs:dateTime" />
<xs:attribute name="status" type="xs:string" />
<xs:attribute name="stamp" type="xs:string" />
</xs:complexType>
</xs:schema>
Figure 2: XML Schema for settings.xml file
- 14 -

3.3 Predefined Seals
The Hi-G-Tek enables to user to perform various operation on a DataSeal using HF RF. But
in order to perform those operations the user need to supply the Seal ID of the DataSeal.
One way is to physically take the DataSeal, read it’s it from the label put on it and type that
ID manually. How ever there are times were there is a list of predefined seals the the user
should work with. In this case, the user can put a file, “seals.txt”, with the list of those
under the “\My Documents\Business\HiGTek\PredefinedSeals” folder. Each seal ID should
be put in a new line as in the following example:
IOBA08388686
IABA01053175
IFBA16777702
IFBA16777667
Figure 3: seals.txt example
- 15 -

4 Application Operation
4.1 System Login
Once Hi-G-Tek HHT is launched, the user is asked to provide the password for running the
application. This password is defined in the application settings (“settings.xml” file).
Figure 4: Login Screen
Upon entering the right password, the user gets the application main screen.
- 16 -

4.2 Main Screen
Figure 5: Main Screen
1. Read – reading DataSeal status, events and data.
2. Set - Arming a DataSeal. Writing data to the DataSeal and setting its status to “Set”
(armed).
3. Read Data – reading data of an armed DataSeal.
4. Write Data – changing the data of an armed DataSeal.
5. Verify – searching for neighboring DataSeals.
6. Addressed (Addr.) Verify – reading DataSeal status and data.
7. Menu – view recently read Data Seals.
- 17 -

4.3 Select Seal Screen
Figure 6: Select Seal Screen
When pressing on either one of Read, Set, Read Data, Write Data or Addressed Verify
buttons – the application displays first the “Select Seal Screen”. On this screen the user to
should select the target DataSeal, that is, for example, if the user hit the Set button the
target DataSeal id the seal which the user want to “arm”.
There are three options for selecting DataSeal:
1. Entering the Seal ID manually and hitting the respective select button. The select
button appears as disable as long as the user does not type a legal Seal ID. Once a
legal Seal ID in entered the button change it’s state to “enabled”.
2. Selecting from a predefined seal list and hitting the respective select button.
3. Selecting from “verify list” seals. If the “verify” list is empty or for any other reason
the user wants to update the verify list the user can hit the “Open Verify Window
…” button and execute Verify again.
- 18 -
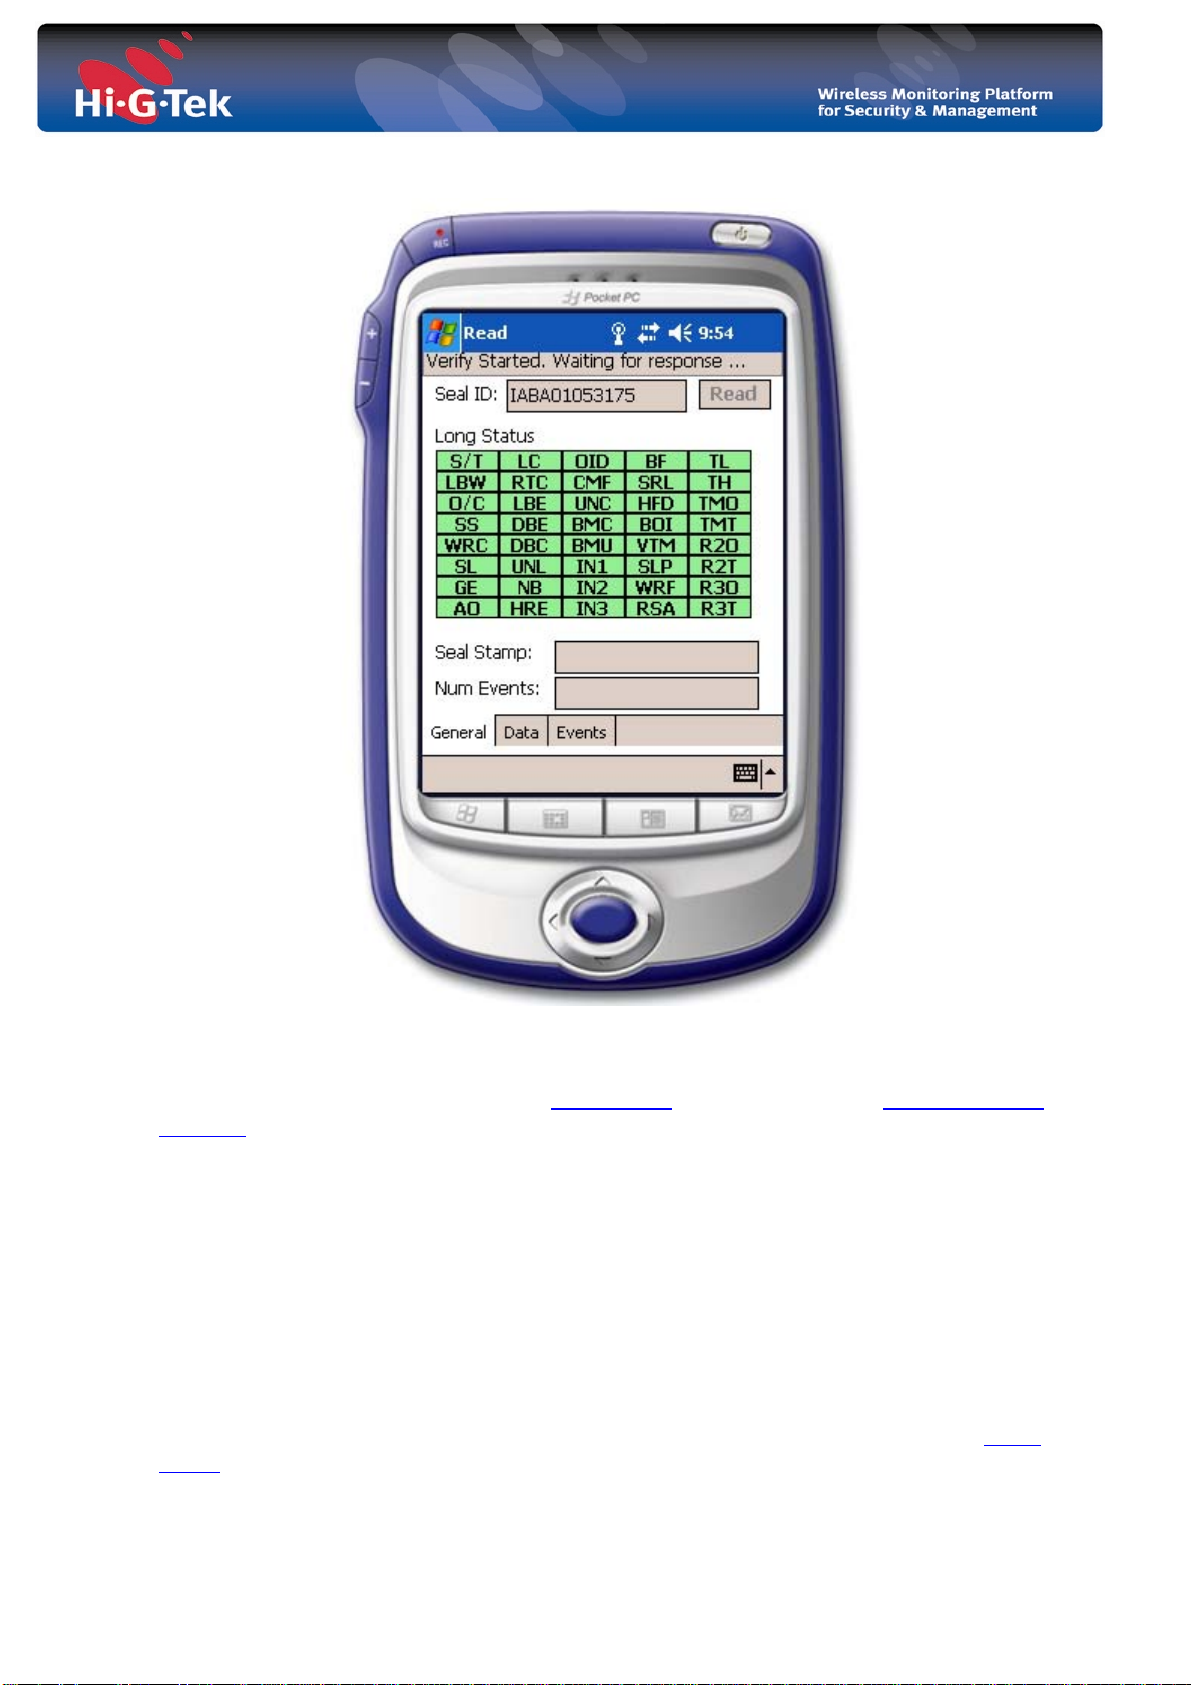
4.4 Read – reading DataSeal status, data and events
Figure 7 Read Screen –General Tab Page
When hitting the Read button on the main screen the user is prompt select the target
DataSeal, and the application starts the read process.
The Read screen displays the target DataSeal status, data and events.
The Application reads the status and data first and then the events. There are three tab pages
in this screen:
• General – displays the DataSeal status as well as the DataSeal stamp and number of
events.
• Data – displays the read data.
• Events – displays all DataSeal’s events.
All the data read is stored in a file named “<SealID>.txt” under “\My
Documents\Business\HiGTek\ReadSeals” folder. This data can be viewed later in the Menu
screen.
- 19 -

Figure 8 Read Screen –Data Tab Page
- 20 -

4.5 Set – arming the DataSeal
Figure 9 Set Screen
When hitting the Set button on the main screen
DataSeal, and then after the application displays the Set screen.
The Set screen enables the user to “arm” the DataSeal, that is, to write the data to the data
seal and “initialize” (Set) the DataSeal. The ““initialization” clears the DataSeal tamper
status and DataSeal events. The DataSeal must be in a “Closed” state in order to
successfully complete the Set process.
The user has to supply the data fields (container ID, Shipment Number, etc …) to be
written to the DataSeal and hit the EXEC button. The data the user enters is validated
against the validation rule in the application settings
The Options menu gives the user the following options:
1. Container ID Only – only the Container ID field will be written.
2. Set Only – make “initialization” (Set) only – no data will be written. Choosing Set
Only disables he Container ID Only as it has no meaning.
the user is prompt select the target
.
- 21 -

4.6 Read Data – reading the DataSeal Data
Figure 10 Read Data Screen
When hitting the Read Data button on the main screen
DataSeal, and then after the application displays the Read Data screen.
the user is prompt select the target
- 22 -
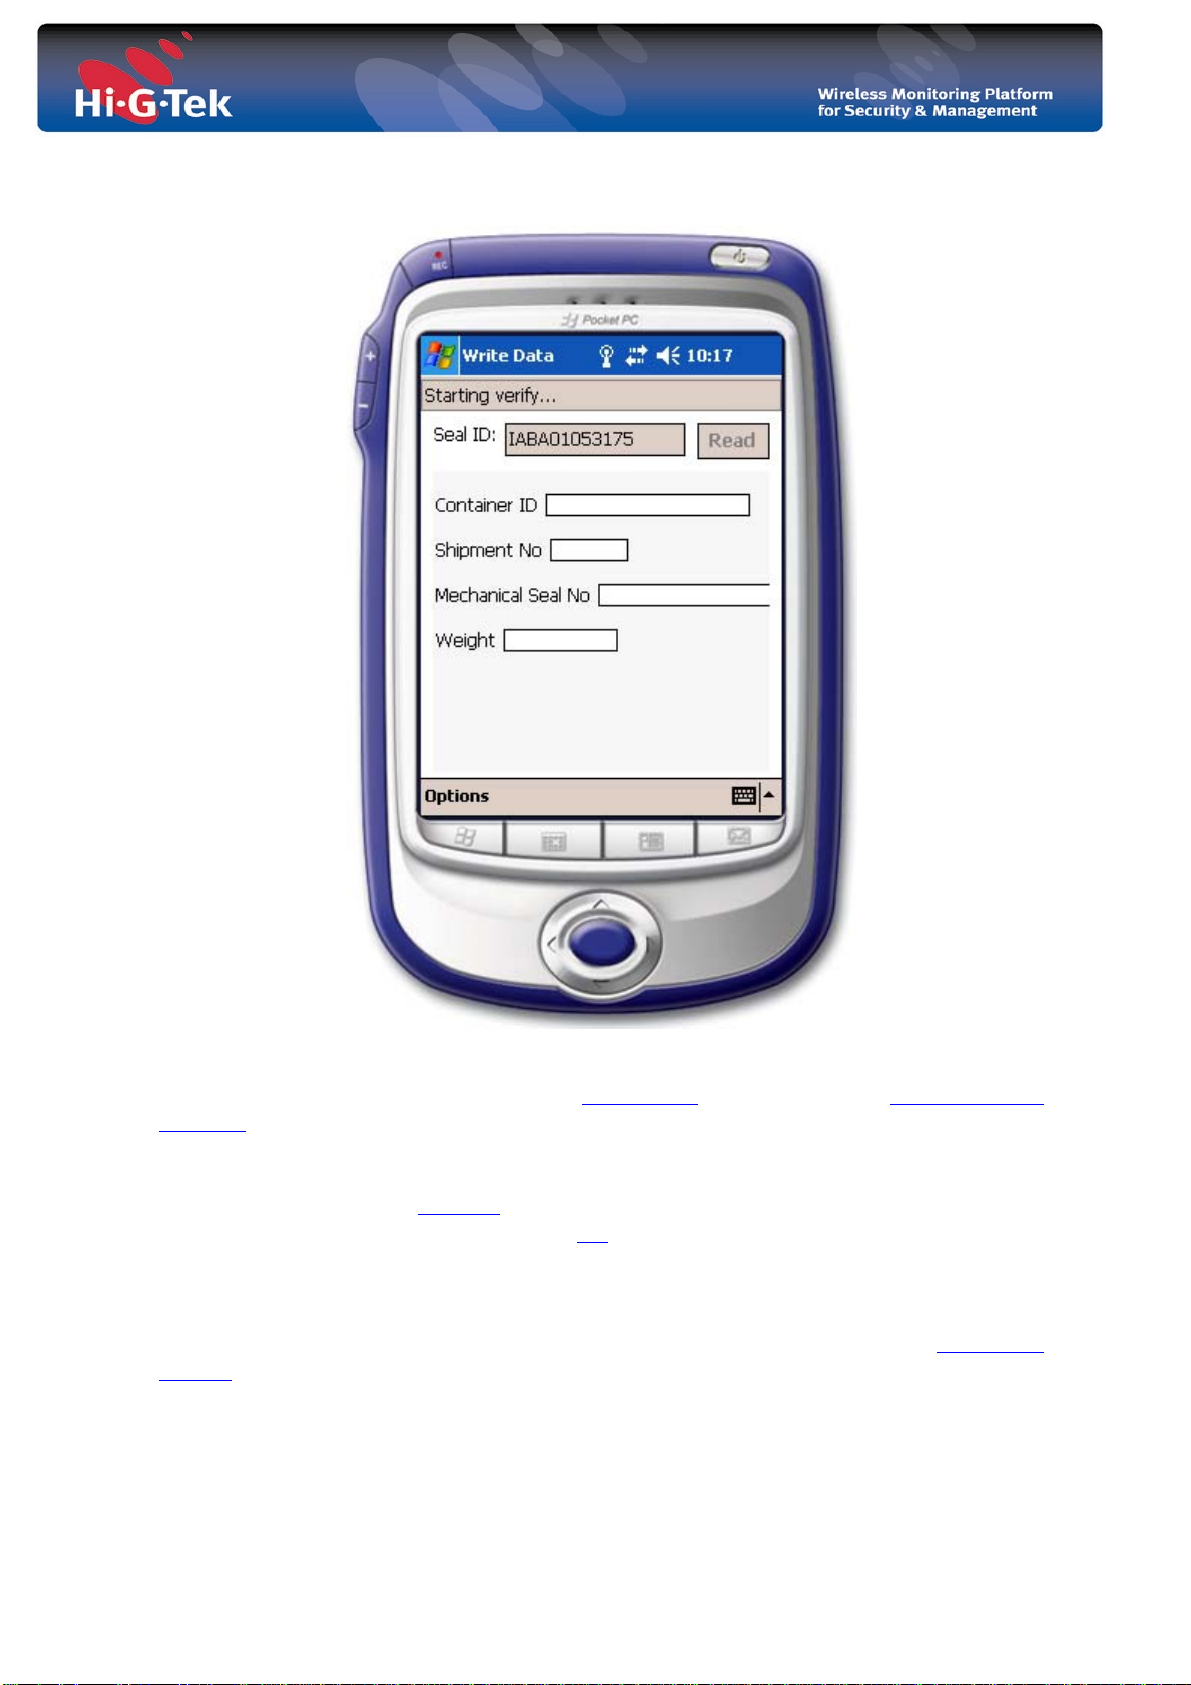
4.7 Write Data – writing data to the DataSeal
Figure 11 Write Data Screen
When hitting the Write Data button on the main screen the user is prompt select the target
DataSeal, and then after the application displays the Write Data screen.
The purpose of the Write Data screen is to enable the user to modify the data fields in the
DataSeal after it has been “armed” (Set). Typically, the user will perform this operation if
some mistake was made putting the data in Set
The application reads first the fields from the DataSeal and displays them the user. Then the
user can modify the data fields (container ID, Shipment Number, etc …) hit the EXEC
button. The data the user enters is validated against the validation rule in the application
settings.
The user can choose to write the container ID only using the Options menu.
screen.
- 23 -

4.8 Verify – searching “neighboring” DataSeals
Figure 12: Verify Screen
Upon hitting the Verify button on the main screen or on the
The Verify screen enables there user to detect “neighboring” seals using RFID Verify
broadcast message. Seals receiving this message reply and the application adds them to the
“verify list”. For each DataSeal the application displays the following information:
• Seal ID
• Container ID
• Seal Status
• Seal Stamp
- 24 -

4.9 Addressed Verify – reading DataSeal status and data
Figure 13 Addressed Verify Screen
When hitting the Addr. Verify button on the main screen
DataSeal, and the application starts the read process.
The Addressed Verify screen displays the target DataSeal status, seal stamp and container
ID.
the user is prompt select the target
4.10 Menu –display previous read DataSeals
This screen displays the information of previously read DataSeal in the Read screen
- 25 -
.
 Loading...