

HighSecLabs SX22D-3, SX82DU-3, SX42DU-3, SX22H-3, SX42HU-3 Quick Setup Manual
...
Models:
SX22x-3 – Secure 2P to 2P DVI-I / HDMI Video KVM Mini-Matrix, PP 3.0
SX42xU-3 – Secure 4P to 2P DVI-I / HDMI / DP Video KVM Mini-Matrix w/fUSB, PP 3.0
SX82DU-3 – Secure 8P DP to 2P DVI-I Video KVM Mini-Matrix w/fUSB
HDC12275 Rev. 1.2
SECURE MINIMATRIX SWITCHES | QUICK SETUP GUIDE

1
HSL Mini-Matrix Quick Setup Guide
TABLE OF CONTENTS
SECTIONS
Table of Contents
1 2 3
Introduction .......................................................... 2
HSL Secure Mini-Matrix........................................................2
Installation............................................................ 3
Installing the Mini-Matrix......................................................3
Operation ............................................................. 6
Operating the Mini-Matrix ....................................................6
Preset #1 (default) { L CTRL | L CTRL | F11 | F1 }.................................9
Preset #2 { L CTRL | L CTRL | F11 | F2 }.........................................10
Preset #3 { L CTRL | L CTRL | F11 | F3 }.........................................11
Preset #3 { L CTRL | L CTRL | F11 | F3 }.........................................12
Preset #4 { L CTRL | L CTRL | F11 | F4 }.........................................13
Preset #4 { L CTRL | L CTRL | F11 | F4 }.........................................14
Preset #5 { L CTRL | L CTRL | F11 | F5 }.........................................15
Preset #6 { L CTRL | L CTRL | F11 | F6 }.........................................16
Keyboard shortcut options...................................................17

2
HSL Mini-Matrix Quick Setup Guide
INTRODUCTION
SECTIONS
Table of Contents
2 3
1
HSL Secure Mini-Matrix
Optimize user experience when working with multiple computers.
View and control two out-of-four computers at the same time whilst
securely sharing keyboard, video, mouse, audio and USB devices.
The Mini-Matrix KVM switch offered by HSL provides increased
productivity in challenging multi-computer environments where
users are required to view and interact with several computers while
maintaining the highest isolation between computers and peripherals.
Obviate the need for purchasing and installing dedicated, per computer
peripheral sets.
This guide refers to the following models:
SX22D-3 – Secure 2P to 2P DVI-I Video KVM Mini-Matrix, PP 3.0
SX22H-3 – Secure 2P to 2P HDMI Video KVM Mini-Matrix, PP 3.0
SX42DU-3 – Secure 4P to 2P DVI-I Video KVM Mini-Matrix w/fUSB, PP 3.0
SX42HU-3 – Secure 4P to 2P HDMI Video KVM Mini-Matrix w/fUSB, PP 3.0
SX42PU-3 – Secure 4P to 2P DP Video KVM Mini-Matrix w/fUSB, PP 3.0
SX82DU-3 – Secure 8P DP to 2P DVI-I Video KVM Mini-Matrix w/fUSB
3
HSL Mini-Matrix Quick Setup Guide
INSTALLATION
SECTIONS
Table of Contents
1 3
2
Installing the Mini-Matrix
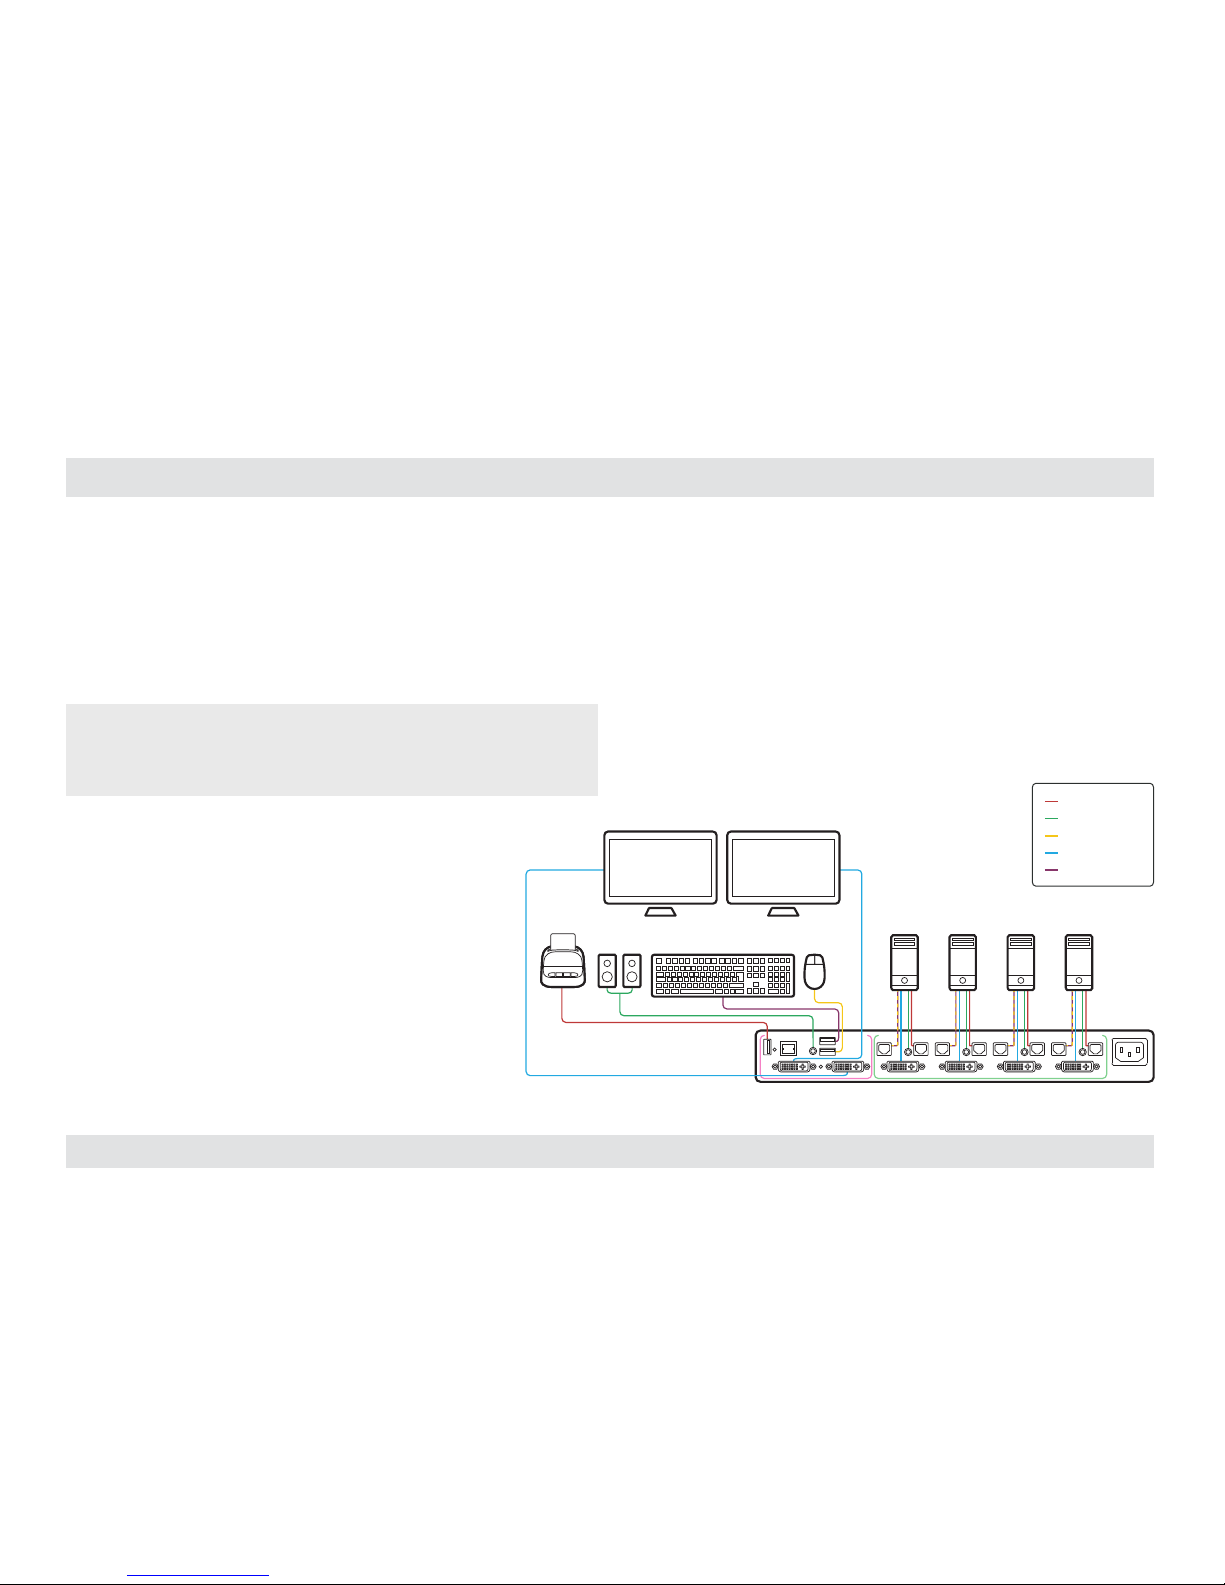
Step 1 – Cable Installation
1. Connect console port peripherals:
• Connect video displays to the Mini-Matrix primary and secondary
display ports.
Note: it is highly recommended to use identical primary and secondary
display models. EDID information is taken from the primary console display
port (#1) and sent to all connected computers. In case of using non-identical
displays, connect the smaller display to the primary console display port.
• Connect keyboard, mouse and audio peripherals
to the Mini-Matrix console ports. These will be
shared securely between all sources.
• Connect a smartcard/biometric reader to the
Mini-Matrix’s console fUSB secure port to
support user authentication across multiple
isolated sources.
2. Computer/Source channel ports:
• For each source, connect the video, keyboard,
mouse, fUSB and audio cables to the Mini-Matrix
source ports.
3. Dual screen support:
• Download and install HSL’s Multi Display Driver on source
computers that have multiple screens (currently available only for
Windows)( http://highseclabs.com/dl.php?fid=446).
Smart-Card
Reader
Computers
CONSOLE PORTS COMPUTER/SOURCE PORTS
fUSB Cable
Audio Cable
Mouse Cable
Display Cable
Keyboard Cable
Audio Keyboard Mouse
1 2 3 4
Secondary DisplayPrimary Display
4
HSL Mini-Matrix Quick Setup Guide
INSTALLATION
SECTIONS
Table of Contents
1 3
2
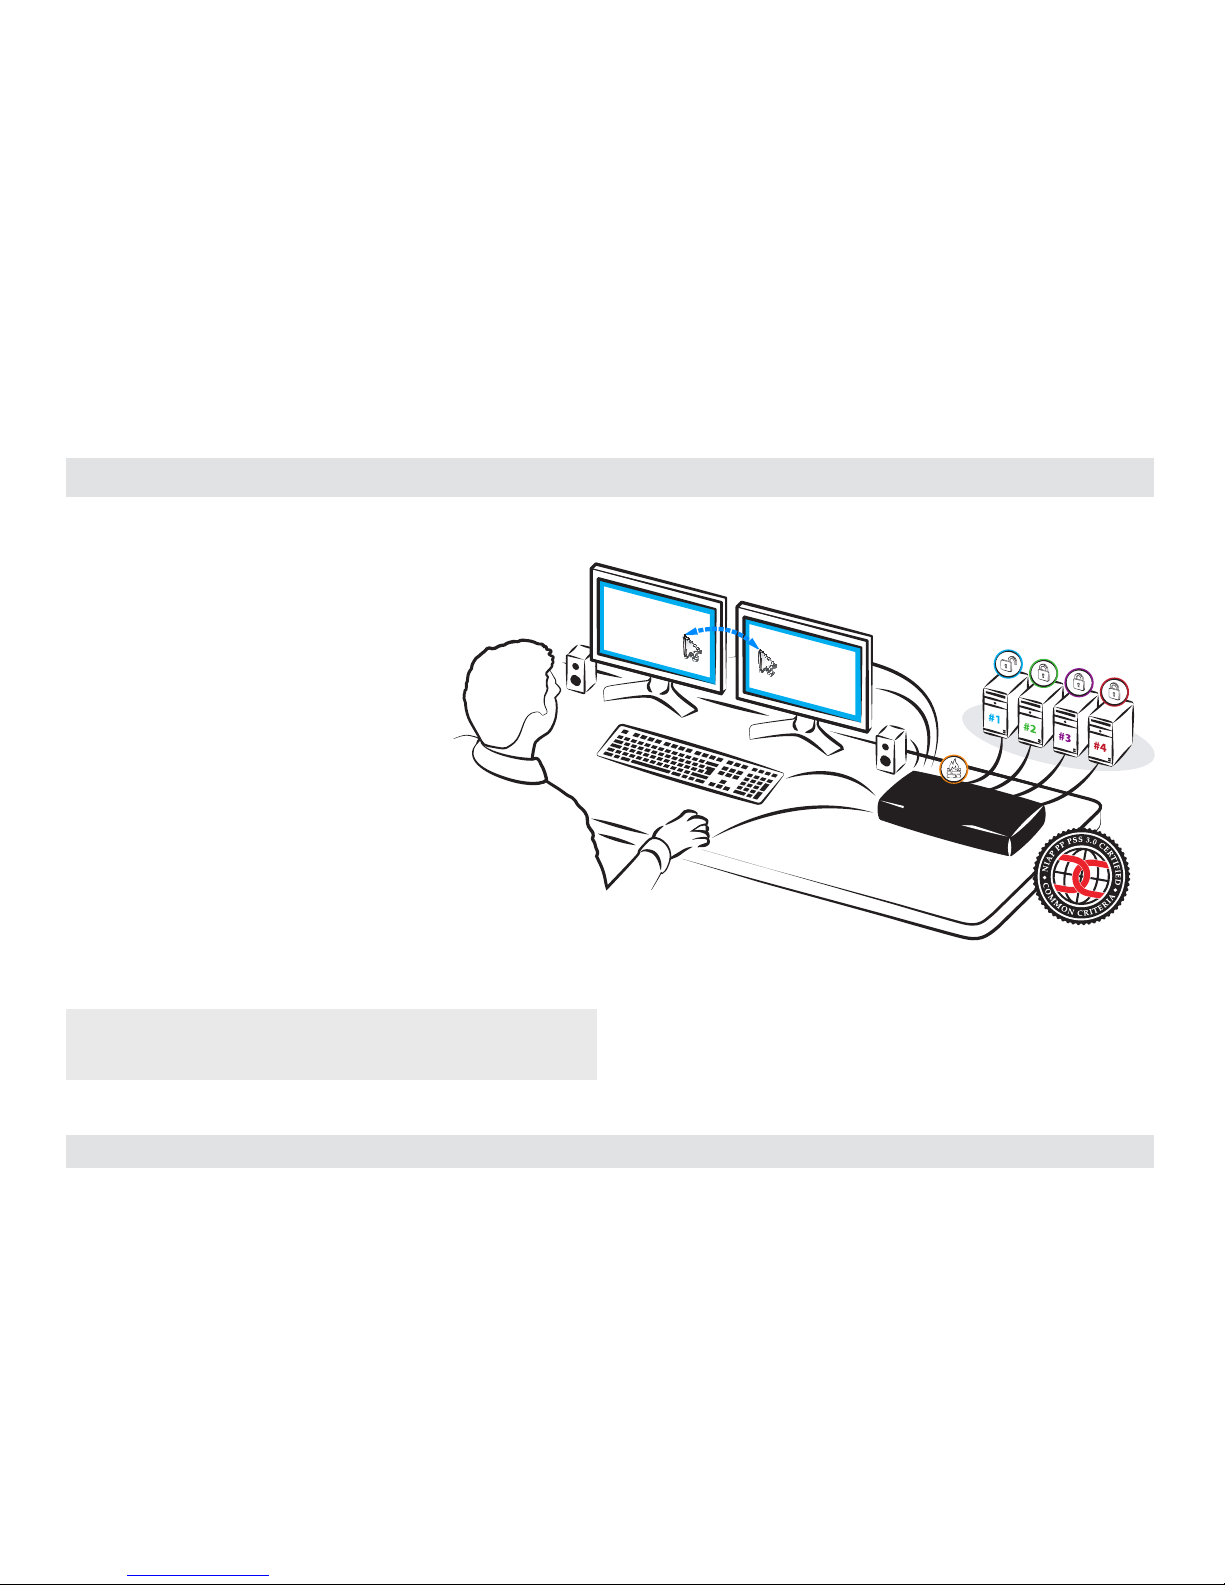
Step 2 – Power ON the Mini-Matrix
• Turn ON all the PCs.
• Connect the power supply and power ON
the Mini-Matrix (approximate boot time
is 10 seconds).
• The Mini-Matrix boots into duplicate-
mode, where source number 1 is
presented on both displays.
Note: In case no picture is presented after powering ON, switch between the
primary and secondary displays, or, connect an alternate display, or perform
a reset to factory default.
Move mouse to switch PCs
PC #1
Internet
PC #1
Internet
Multiple Sources
Speakers
Single
Keyboard & Mouse
SECURE
MINI-MATRIX
SECURE
MINI-MATRIX

5
HSL Mini-Matrix Quick Setup Guide
INSTALLATION
SECTIONS
Table of Contents
1 3
2
Step 3 – Reset to Factory Defaults
Reset to factory defaults clears the device settings and restores the
device to its original configuration.
• System reset, clears behavioral characteristics such as mouse
settings and display presets. Type { L CTRL | L CTRL | F11| r } key
combination.
• Complete reset: clears all device settings and resets to factory
defaults. From the Terminal menu select the “Reset to Factory
Defaults” option (refer to terminal mode guide).
Important Notes:
1. Always use the left control key (CTRL) unless otherwise specified.
2. Keyboard shortcut keys are to be pressed sequentially
3. Do not use the numeric keypad for toggling shortcuts unless otherwise
specified.
4. ALL KEYBOARD SHORTCUTS REFER TO QWERTY KEYBOARDS. In case a nonqwerty keyboard is in use, keep using the QWERT Y layout.
`~1!2@3#4$5%6^7&8*9(0)-_=
+
Tab
Q W E R T Y U I O P
[{]
}
Caps
A S D F G H J K L
:
;
‘
“
Shift
CtrlCtrl Alt Alt
Delete
Enter
\
|
Shift
Ctrl
é
ç ê è
0
1 2 3
4 5 6
7 8 9
-
+
Num
Lock
Enter
=
/
*
,
Insert
Delete
Home
End
Page
UP
Page
Down
Z X C V B N M
?/>.<
,
 Loading...