

HighPoint SSD7120 Service Manual

SSD7120
NVMe U.2 RAID Controller
User Guide
V1.00
1
System Requirements
System Requirements
System with an empty PCIe 3.0 x16 slot
SSF-8643 to U.2 Cable or SFF-8643 cable with NVMe backplane
Windows 10 or later
Linux Kernel 3.19 or later
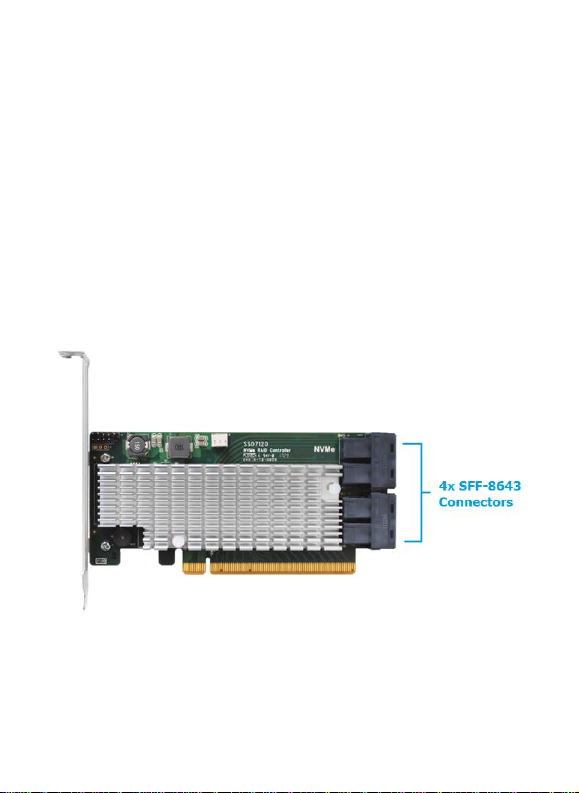
SSD7120 Hardware Overview
Front View
2
Hardware Installation:
1. Remove the system cover.
2. Insert the SSD7120 card into an open PCI-E 3.0 x16 slot on the
motherboard.
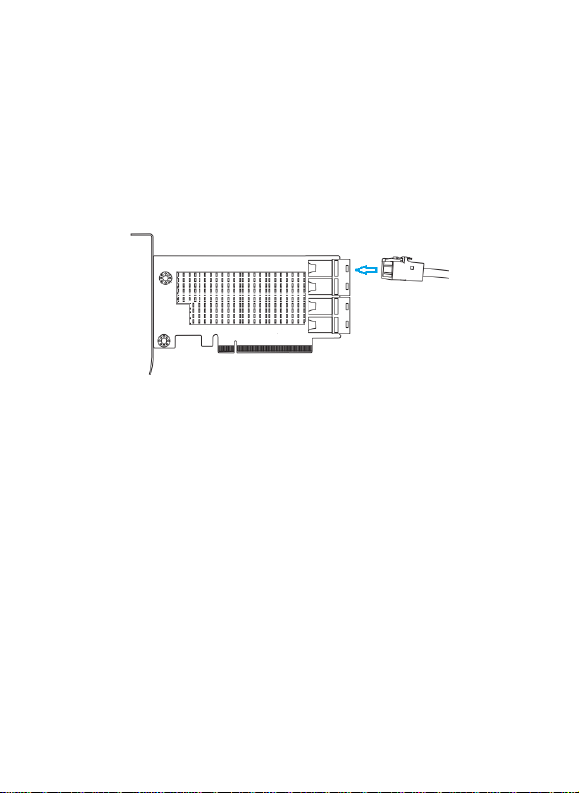
3. After you have inserted the SSD7120 card, you can connect the
SFF-8643 cables.
4. Connect the SSD7120 to the NVMe SSD’s using the appropriate
SFF-8643 cables.
5. Replace the system cover and power up the system.
3
Setting up the SSD7120 for a Windows operating system
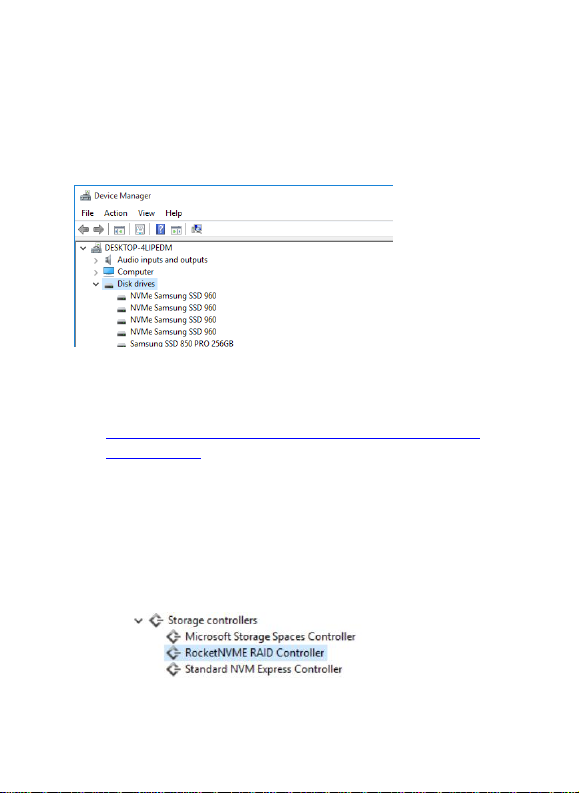
1. Verifying Installation
After booting Windows, open Device Manager, and expand Disk drives.
The installed NVMe Drive should be displayed:
6. Driver Installation
1) Download the Windows driver package from the HighPoint website:
http://www.highpoint-tech.com/USA_new/series-SSD7120
-download.htm
2) Once downloaded, locate the folder you downloaded the driver to.
Extract the driver package and double click the setup.exe file to start
the Driver Setup Wizard.
3) Follow the wizard and reboot system to complete the driver
installation.
4) Rebooting. A RocketNVME RAID Controller entry should be
displayed under Storage Controllers:
4
 Loading...