


1
Table of Contents
1. HighPoint RocketStor 6328L/6324L ...................... 2
2. RocketStor 6328L/6324L Hardware ..................... 3
3. System Requirements ......................................... 4
4. Setup Procedures ................................................ 6
4.1 What’s in box ............................................................. 6
4.2 Connecting the RocketStor 6328L/6324L .................. 6
4.3 Driver installation ...................................................... 8
5. Using the Storage with Mac OS X or Windows ... 12
5.1 Initializing new storage under Mac OS X. ................ 12
5.2 Initializing new storage under Windows ................. 13
6. Support information ......................................... 15

2
1. HighPoint RocketStor 6328L/6324L
The RocketStor 6238L/6324L delivers true, 20Gb/s transfer
bandwidth for Mac or Windows PC platforms with
Thunderbolt™ 2 capability. The external Mini-SAS connector
(SFF-8088) and direct connectivity 6Gb/s SATA device
channels enable Mini-SAS or eSATA enclosures to support
Thunderbolt™ 2 platforms.
Key features
Dual 20Gb/s Thunderbolt™ Ports
SATA 6Gb/s device ports
Industry Standard AHCI Compliant

3
2. RocketStor 6328L/6324L Hardware
Front side:
Back side: RocketStor 6328L

4
Back side: RocketStor 6324L
3. System Requirements
A. Apple Mac or PC System with Thunderbolt™ support
B. Operating System:
Mac OS X 10.9 or higher
Windows 7 or higher
C. Storage Enclosure with Mini-SAS / eSATA Interface
(Mini-SAS) (eSATA)

5
D. External Mini-SAS cable options:
HighPoint External Mini-SAS to External Mini-SAS
cable (P/N: Ext-MS-1MMS)
HighPoint External Mini-SAS to 4x eSATA cable
(P/N: Ext-MS-1MEJ)

6
4. Setup Procedures
4.1 What’s in box
RocketStor 6328L/6324L
Power Adapter
Power Cord
Quick Installation Guide
Software CD (include Windows Driver)
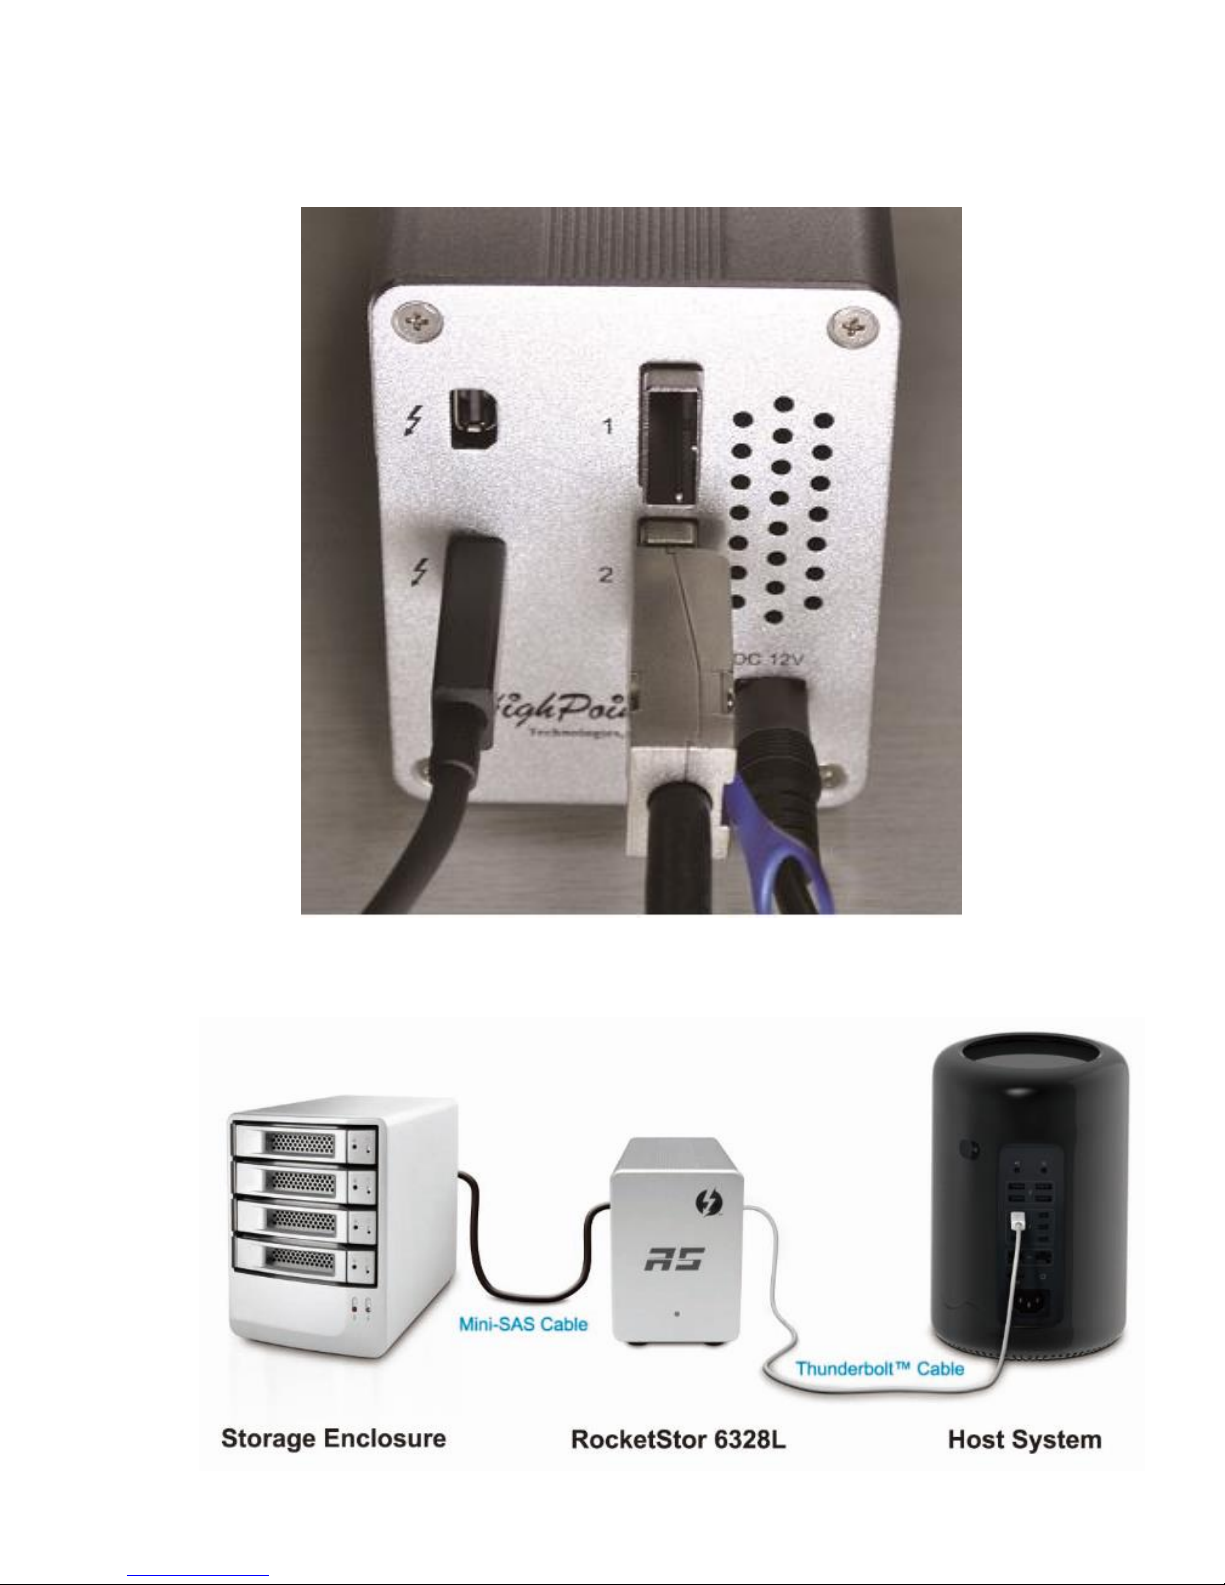
4.2 Connecting the RocketStor 6328L/6324L (RS6328L/6324L)
Steps:
1) Connect the RocketStor 6328L/6324L to the storage
enclosure using an industry standard Mini-SAS
cable. Power on the storage enclosure.
2) Connect the Power Adapter to the RocketStor
6328L/6324L.
7
3) Connect the RocketStor 6328L/6324L to the host
system using a Thunderbolt™ cable.
RocketStor 6328L/6324L connection diagram:

8
4.3 Driver installation
1) Driver Installation: Mac OS X
OS X includes driver support for the RocketStor
6328L/6324L and will automatically recognize the device
after booting up.
2) Verifying Driver Installation: Mac OS X
To verify the RS6328L/6324L driver status;
Click the Apple icon on top left of the screen, and select
About This Mac, and then select More Info. Next, select
System Report, and click PCI Cards on left side of the
System Information pane. The Driver Installed entry for
controller pci1b4b, 9235 should be “Yes”

9
3) Driver Installation: Windows
a. Boot up the Windows operating system.
b. Make sure the host system’s Thunderbolt™ driver has
been installed.
c. Open the Windows Device Manager and verify the
RS6328L/6324L has been detected. Device Manager
should display two AHCI devices with a Hardware ID of
1B4B 9235, as shown below:
10
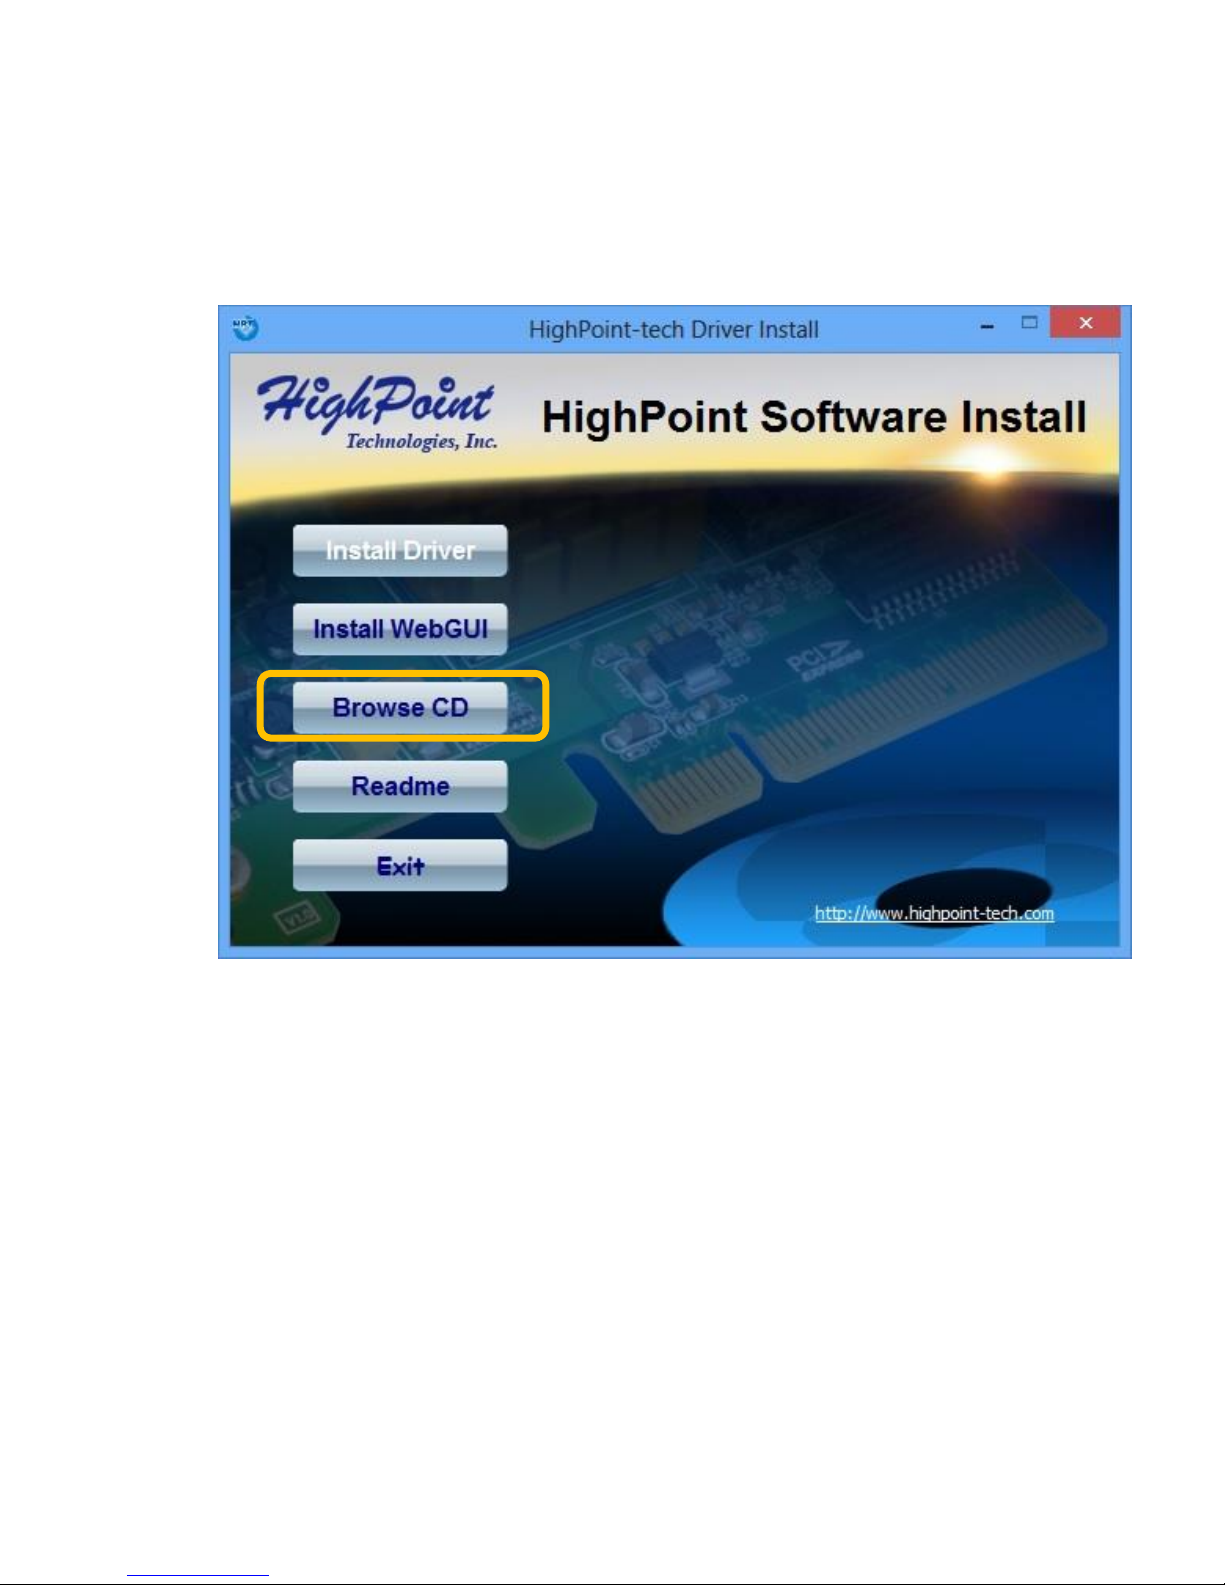
d. Insert the HighPoint software CD into a CD/DVD drive.
The program should start automatically. Click the
Setup.exe icon. The HighPoint Software Install window
should be displayed.
e. Click the “Browse CD” button. Brows to the folder:
CD:\Driver\RS632xL

11
f. Double click the setup program to install the Marvell
driver.
g. Verify the driver by checking for the following entries:

12
5. Using the Storage with Mac OS X or Windows
Any previously used single disk or preconfigured Apple RAID
drives attached to the RS6328L/6324L will be recognized
automatically.
5.1 Initializing new storage under Mac OS X.
1) After a new disk is installed, OS X will display a pop-up
window with options to initialize, Ignore or Eject. Click
Initialize to open Disk Utility.
2) Select the target volume and click the Erase tab. Enter a
name in the Name: field, and click the Erase button
towards the bottom right-hand corner, to format the disk.

13
3) After the new storage drive is erased, the new storage
volume icon will be found on the desktop and finder as a
new disk volume.
5.2 Initializing new storage under Windows
1) After a new disk is installed, open the Windows Disk
Management utility. Right click the new disk and select
Initialize Disk.
2) Create and format new partition on the new disk.

14
3) After the New partition is formatted, the new storage drive
can be found under My Computer.
Note: The RS6328L/6324L supports Thunderbolt™ power
management. While the RS6328L/6324L is connected to the host
system using the Thunderbolt™ cable, shutting down the host will
automatically power down the RS6328L/6324L.

15
6. Support information
If you encounter any problems while utilizing the HighPoint RocketStor
6328L/6324L, or have any questions about this or any other HighPoint
Technologies, Inc. product, feel free to contact our Customer Support
Department.
Web Support: http://www.highpoint-tech.com/websupport/
Thunderbolt Support:
Phone: (408)240-6108
Skype: HighPoint.Thunderbolt
Mar. 20, 2014
© Copyright 2014 HighPoint Technologies, Inc. All right reserved.
 Loading...